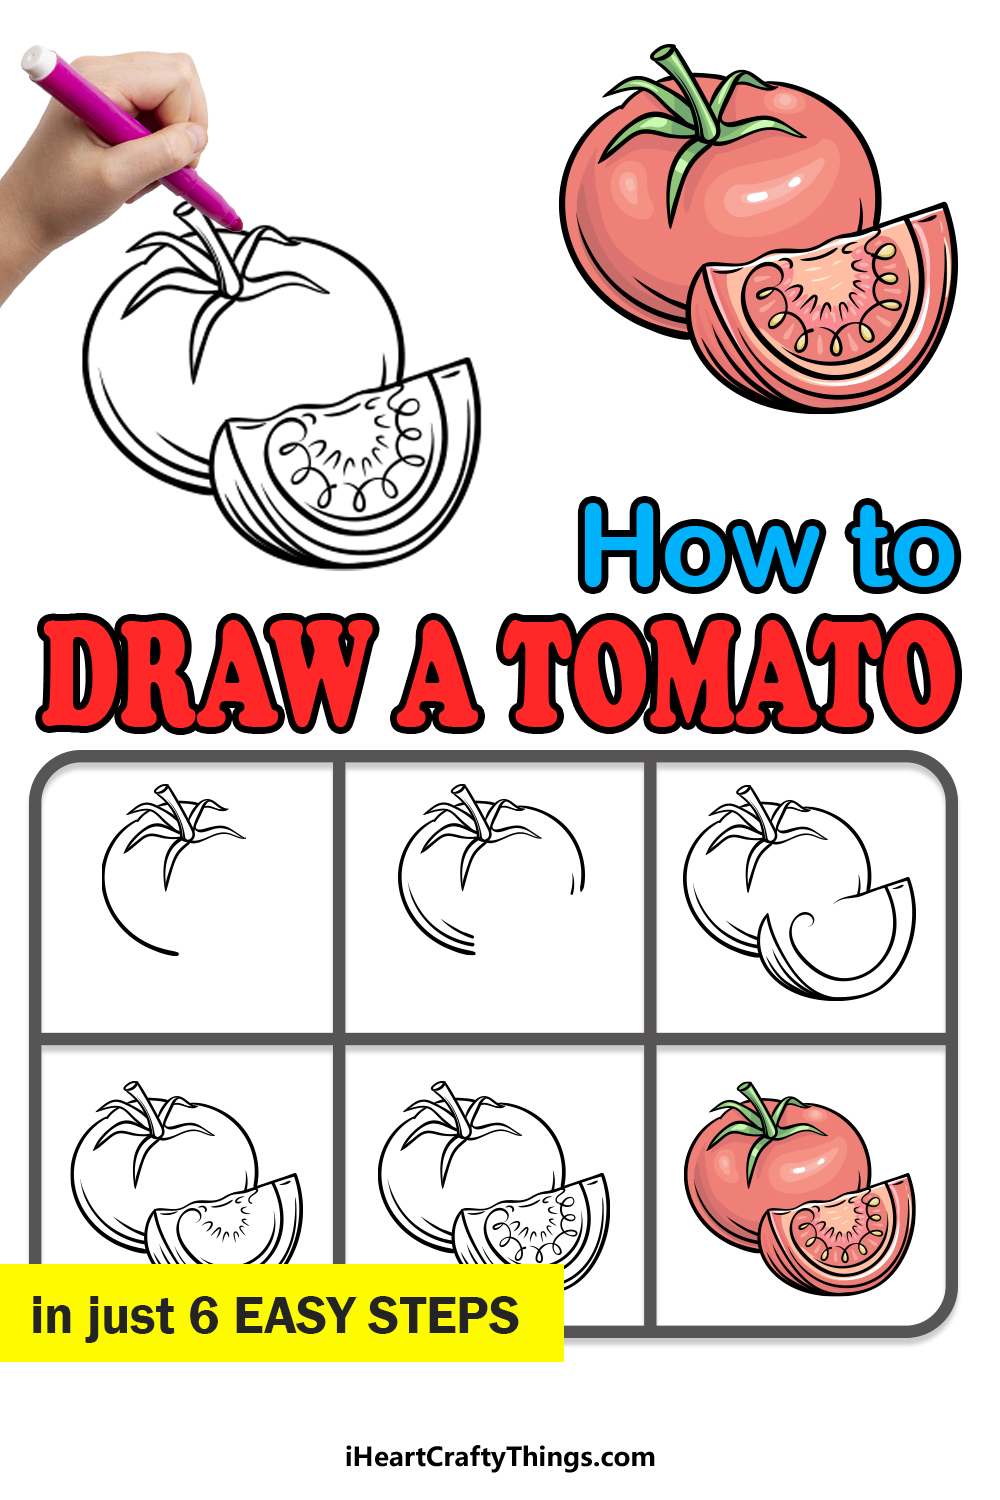
It’s time to learn how to draw a tomato with this simple guide for kids! There are so many great drawings you can make once you have the hang of it.
Tomatoes, which are technically regarded as fruits, are very common to eat around the world. You can put them in salads, on burgers or even turn them into a drink.
They are known for their sharp flavor and versatility, and they also look really pretty with their red color. You may think that the simple shape of a tomato would make it easy to draw, but it’s harder than you think.
This guide will show you that it doesn’t have to be tricky, though! I’ll show you how to draw a complete tomato and a slice of tomato so that you have everything you need to make any drawings you may have in mind.
Find Out How To Make Your Tomato Drawing
How to Draw A Tomato – Let’s Get Started!
Step 1
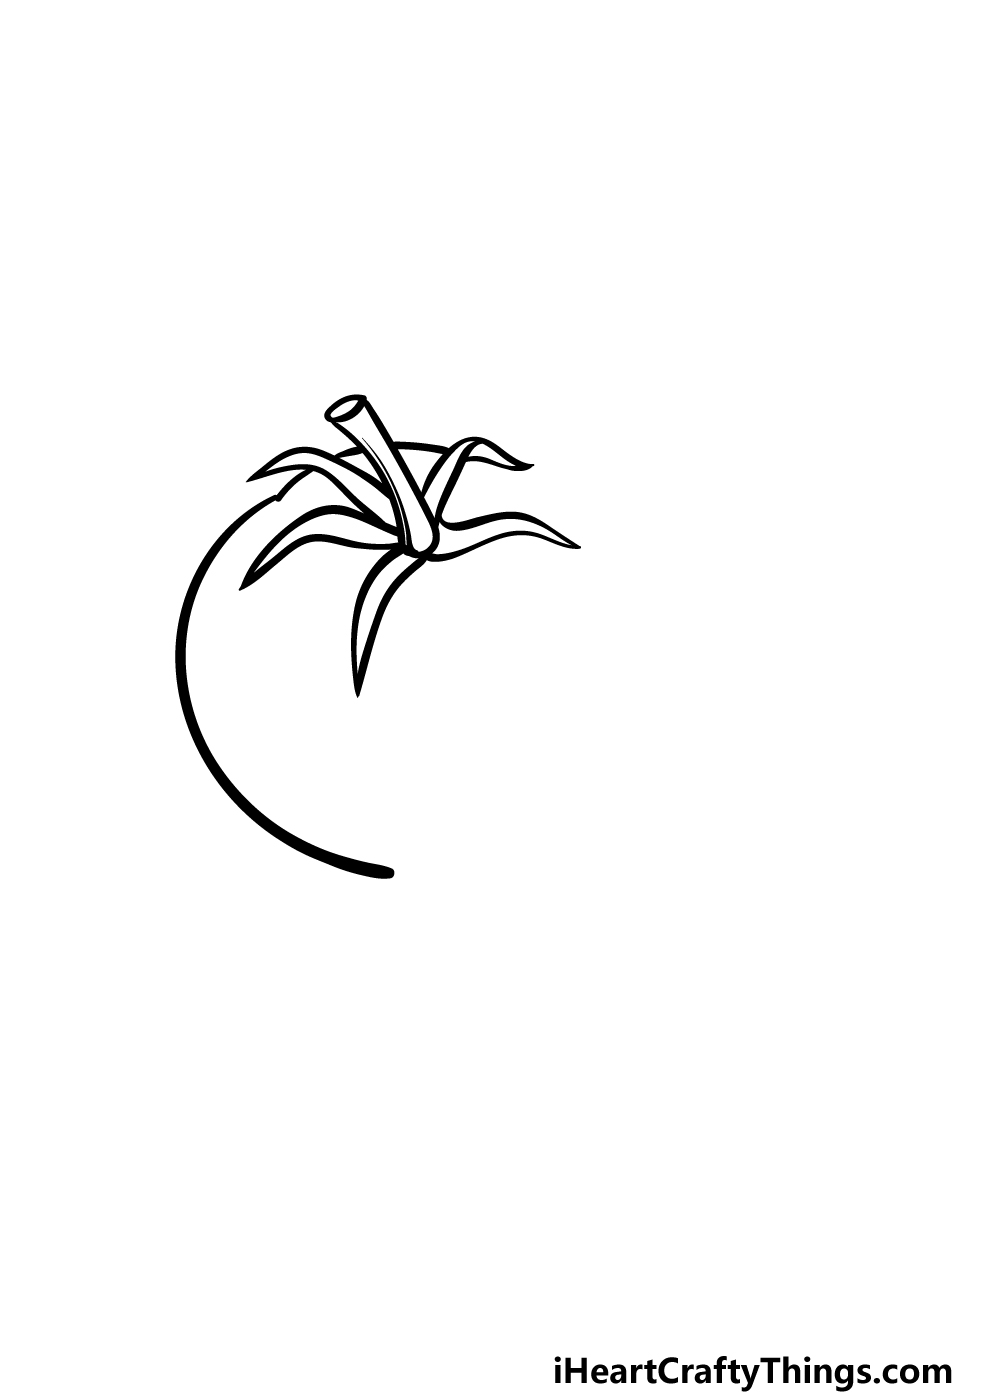
Let us begin this guide on how to draw a tomato with the stem and leaves of the fruit. You can draw the stem by using some curved lines close to one another.
Then, add a small circle to the top of these lines and then finish off the stem with a curved line at the base of it.
Then, we can draw the distinctive little leaves that can be found at the base of a tomato stem. You can draw these leaves with more curved lines that end in sharp little points.
We will be adding five of these little leaves onto the tomato, as shown in our reference image.
Once the stem and leaves are drawn, you can use larger rounded lines for the left-hand edge of the tomato.
We won’t be drawing the right-hand side for now, but we will work on that in the next few steps, so let’s move on when you’re ready!
Step 2 – Next, start drawing the right-hand side of the tomato
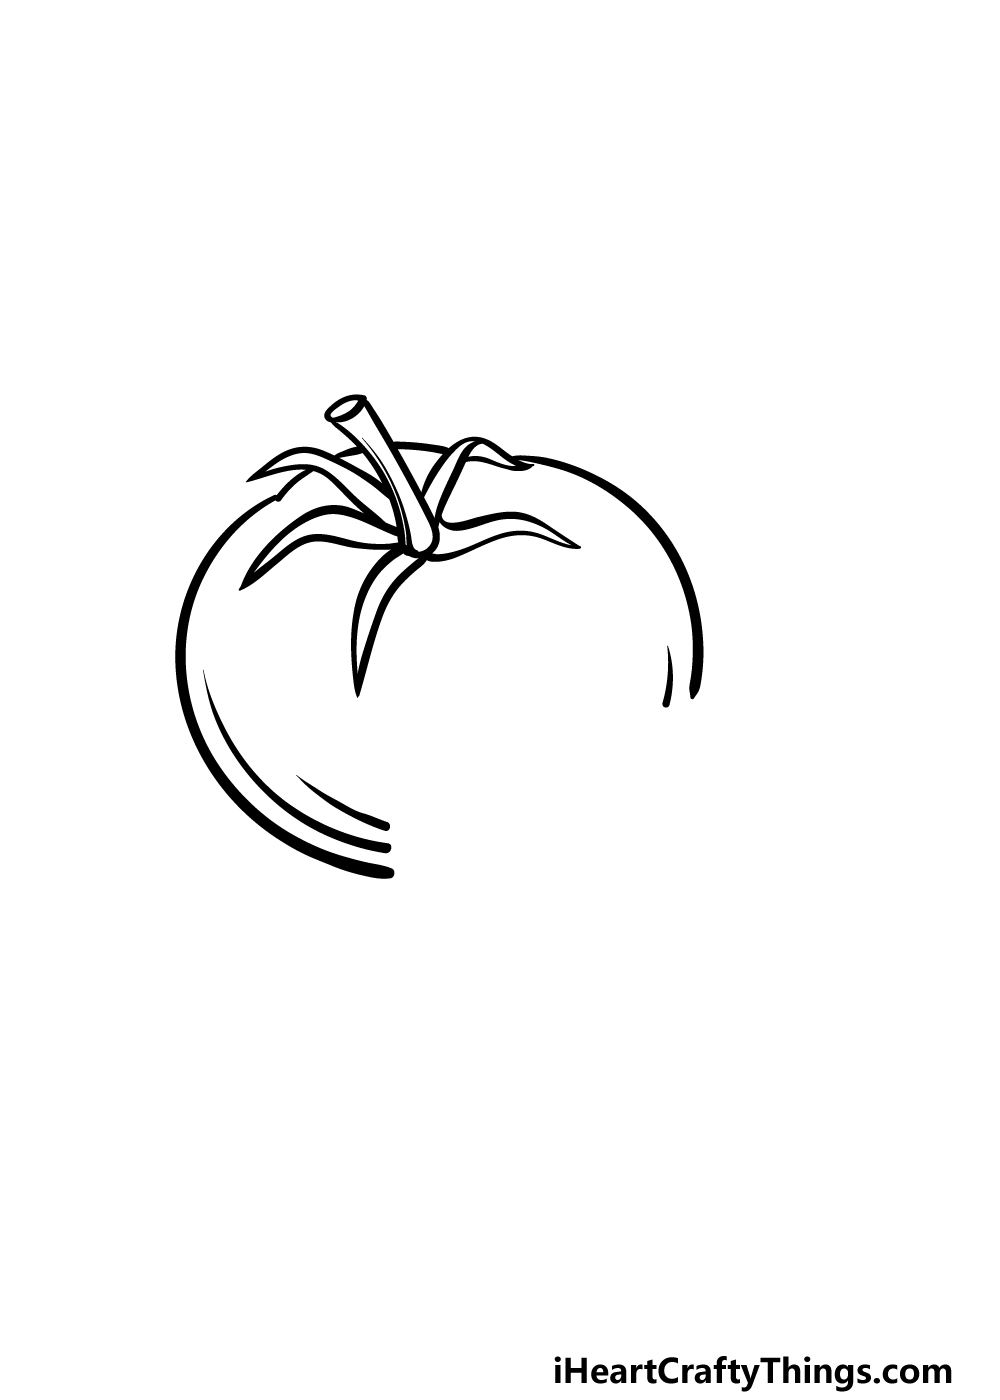
As promised, we will start adding the right side of the tomato drawing in this step. To do this, simply draw another curved line coming down from the leaves on top.
This side of the tomato won’t go all the way down, as we will be drawing a tomato segment into that space shortly.
You can also add some thick line details near the bottom edge of the tomato to give it some more texture and shine. Then it’s on to step 3!
Step 3 – Draw a segment of tomato next to the whole one

Now that you have finished drawing the whole tomato, we can start drawing the segment of cut tomato next to it in this step of our guide on how to draw a tomato.
This segment will have a rounded base and sides, but the top of it will be a straight line to make this segment look more like a wedge.
For now, we won’t finish the line on the top left-hand side of the segment, as we will be adding detail there later.
There will also be a line on the inside that curls up at the end, and you will see why we draw it like this when we add detail later.
This is definitely a step where you may want to closely refer to the reference image as you try to replicate what you see.
Step 4 – Now, finish the outline of the segment and add details
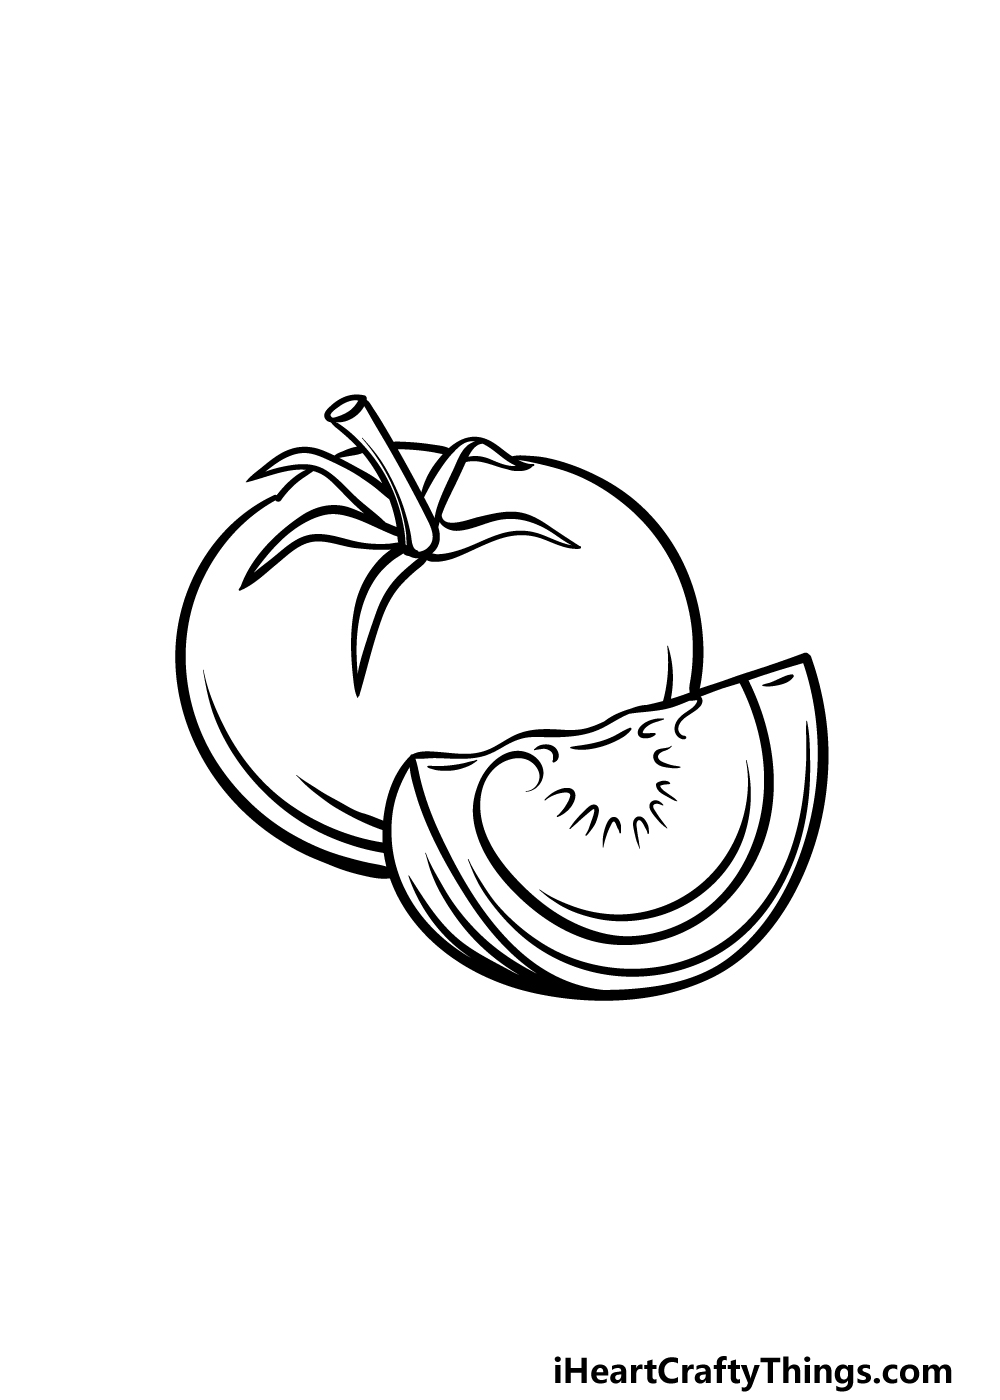
We shall continue your tomato drawing by adding some more to the cut segment. You can start this by drawing a wavy line for the top, sharp edge of the segment.
Then, we will be drawing some smaller details around this line. Draw a series of thin, horseshoe-shaped lines in a curved shape on the inside of the segment, as shown in the reference image.
Then you can finish off this step by adding a few smaller details inside the outline before we finish off with the final touches in the next step.
Step 5 – Finish off your tomato drawing
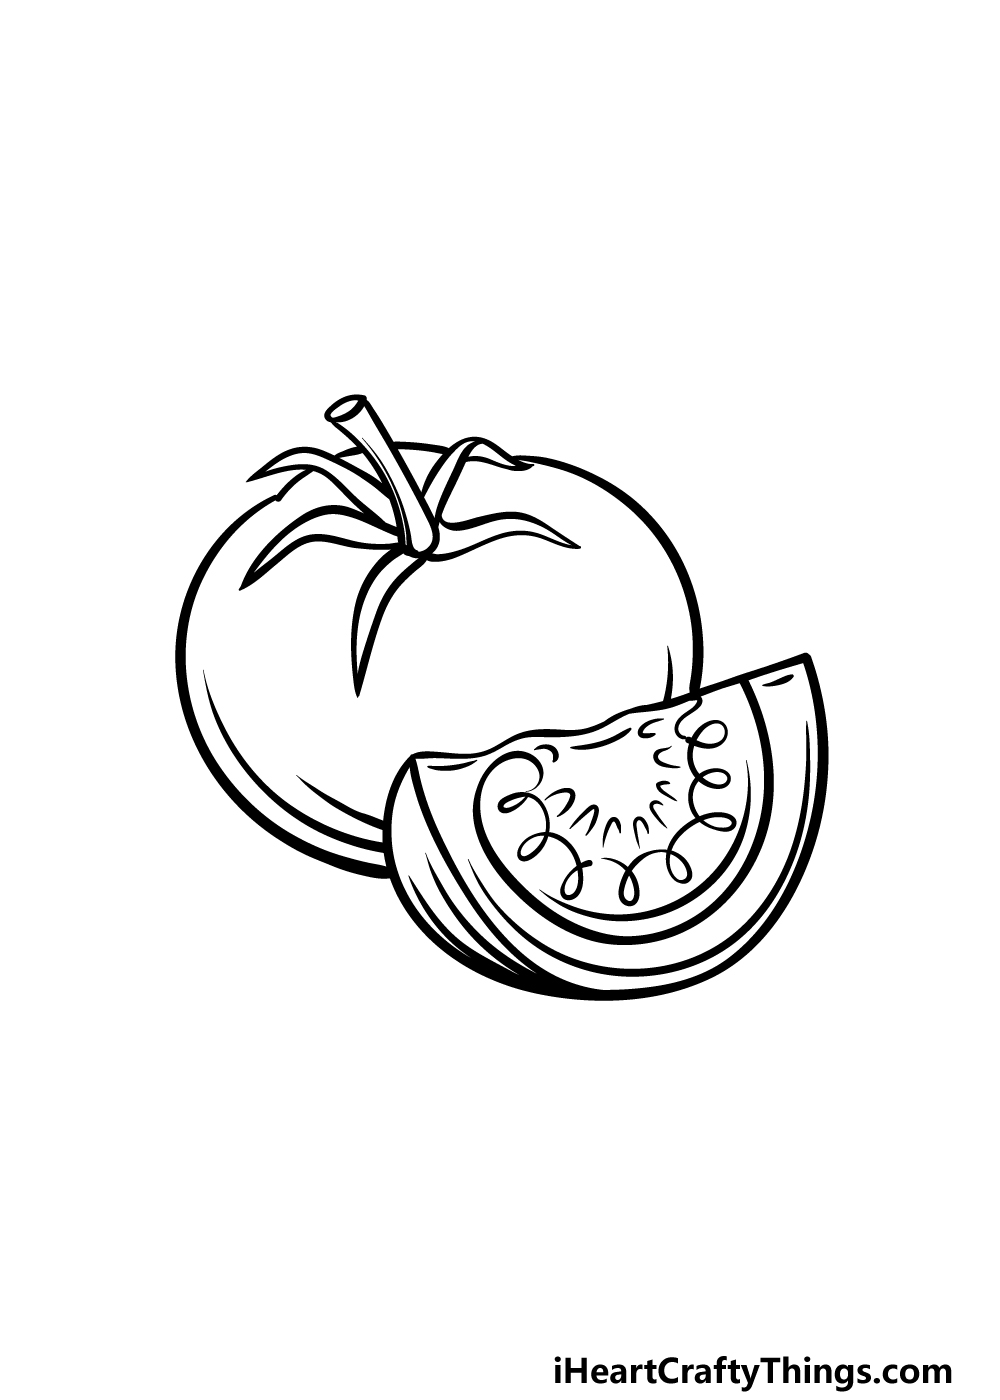
Tomatoes have lots of little seeds inside of them, and to draw these seeds for the segment we will be using a rather creative trick!
That line inside of the segment that you curled at the end earlier in the guide will come in handy here.
Using that curled end of the line, we will be drawing a new line that has little thin loops all along it. The reference picture will show you how these should look.
Each loop will represent one seed for the segment, and we will emphasize it even more when we add some color to the picture.
Once you have added these seeds, you’re ready to move one! Be sure to add any extra details you might like first, though.
You could draw a background showing what other fruits or vegetables you would enjoy with this tomato for one idea. How do you plan on finishing up this image?
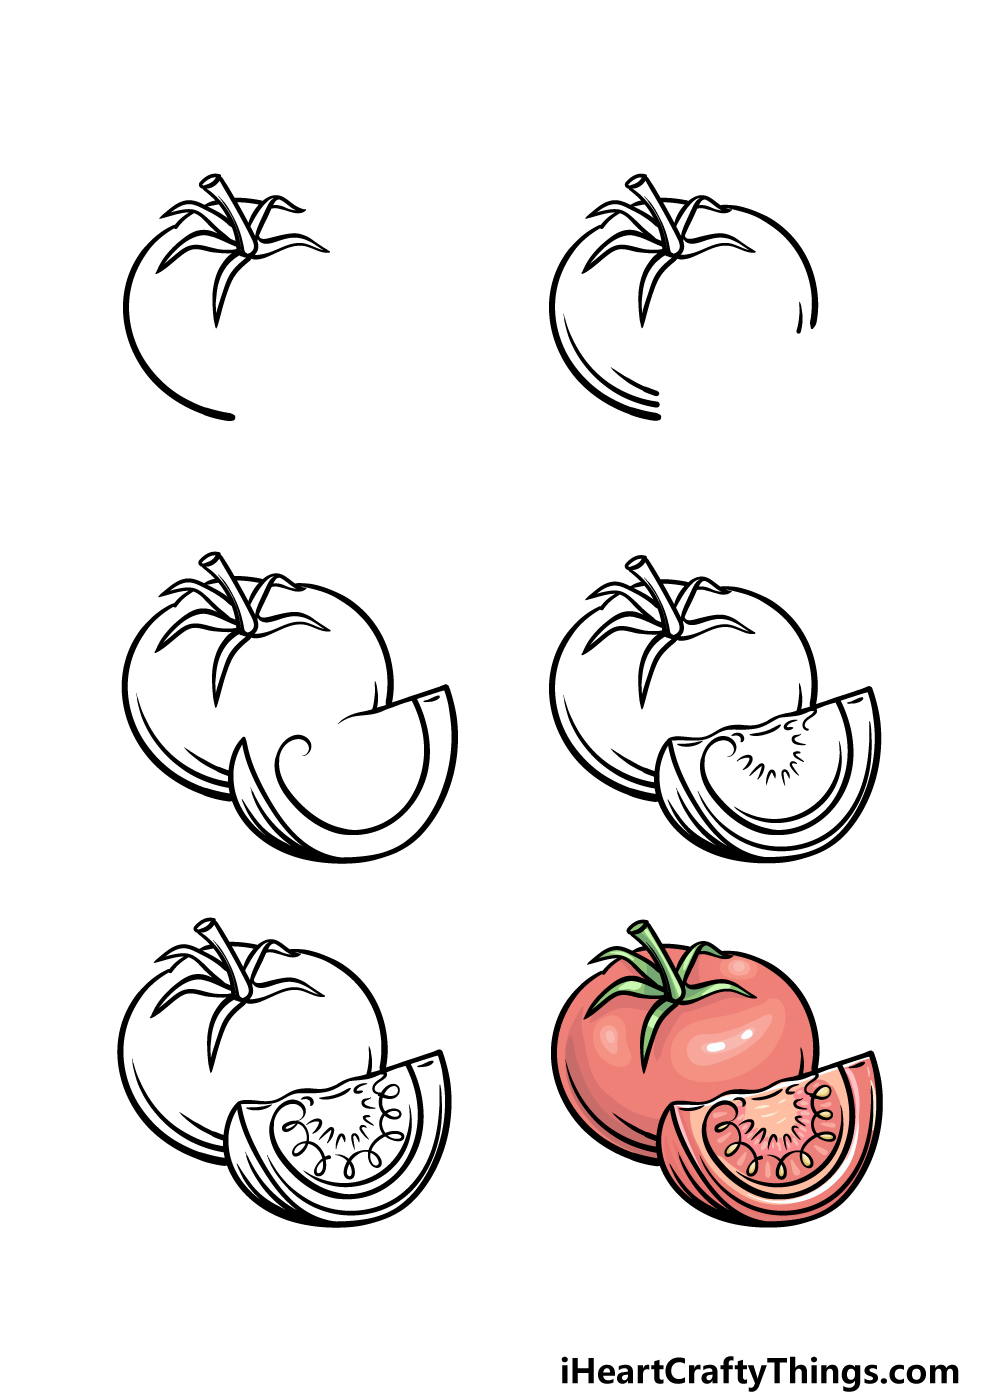
Step 6 – Finish off your tomato drawing with some color
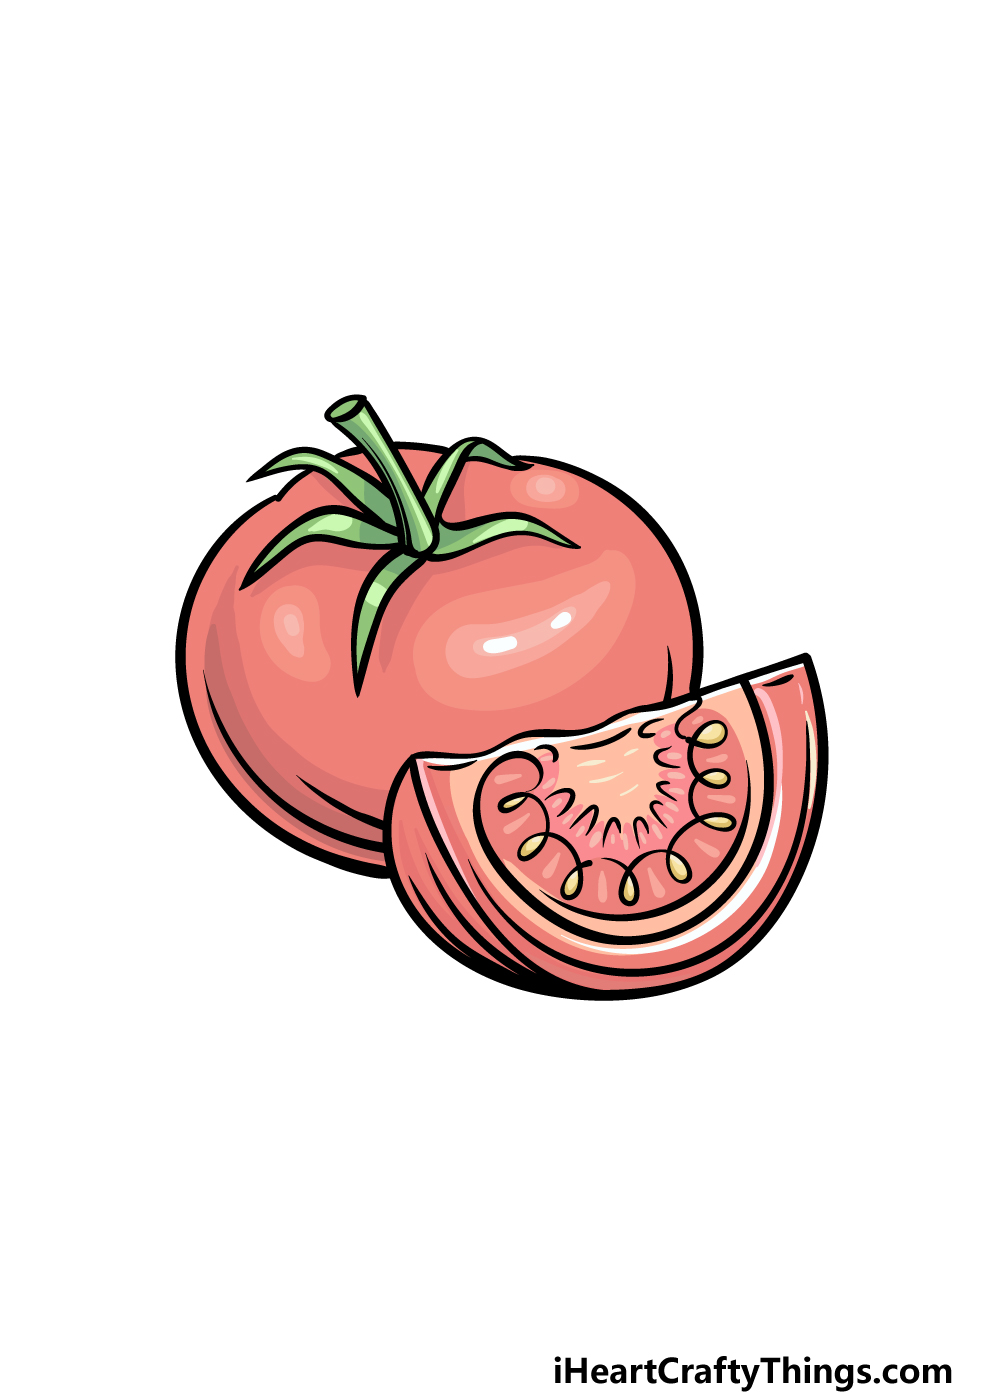
Now you have arrived at the final step of your tomato drawing. In our example image, we used various shades of reds and pinks for the outside and interior of the tomato.
By varying the shades, you can create texture and shininess for the surface. Then we used some green for the stem and leaves, and then finished off by using yellow for the small seeds.
These are the colors we chose, and you could alter them as you wish, perhaps by adding some shades of green! What colors and art mediums do you think would best suit this picture?
4 More Ways To Make Your Tomato Drawing Unique
Take a bite out of these 4 tips we have for your tomato sketch!
This drawing of a tomato shows a full example of a tomato along with a single slice. If this is not enough tomato for your liking, you could add some more!
You could add some more tomatoes to this image in a few ways. You may want to add in a few more full tomatoes to the scene.
Or, you could add some more small slices. You could also do a combination of both if you prefer! How else could you add some more tomatoes to this composition?
There are other ways to add to this picture. One way would be to add different fruits and vegetables that you would like to enjoy with this tomato.
This would depend on what you enjoy having with tomato, but you may want to focus on produce that would allow for some vibrant colors.
Some lettuce, beans or peppers would be great ones to use for this purpose. What other fruits and vegetables could you add to the scene?
There are other contexts that you could portray this tomato drawing in as well. For example, this tomato is currently sitting on a surface.
Instead of this arrangement, you could instead show the full tomato hanging from a plant. You would probably want to remove the tomato segment if this is a setting you would like to create.
That’s one alternative way of presenting this tomato, but how else could you show it?
Expanding from our previous tip, we think there are some really interesting background settings you could create for this tomato sketch.
For instance, if you added other fruits and vegetables then you could draw them all in a kitchen background. This would make it look like they are all being used in a recipe.
If you took our previous suggestion of drawing the tomato on the plant, then maybe you could make it a farm setting with other plants growing around it.
Your Tomato Drawing is Complete!
The tomato is one of the most popular and recognizable foods in the world, and we hope that you had a great time recreating one with us in this guide on how to draw a tomato!
Drawing such a famous food with a simple shape may seem like it should be easy, but there can actually be some challenges with getting it right.
We hope this guide made it fun and easy for you to do while also leaving you plenty of room to customize and add to it!
We also have more drawing guides on our website featuring more classic foods, famous characters and common objects to name a few. Be sure to visit us often, as we upload the list frequently!
Please also share your finished tomato drawing on our Facebook and Pinterest pages, as we would love to see your artwork!