When it comes to vases, their main purpose is to serve as a pleasing vessel with which to house some flowers.
While many people use them for this, some use them as decorative or collectible objects, and many are so visually distinct that they can be considered works of art!
It can also be fun to design your very own variations, and learning how to draw a vase is a perfect way to do that.
If you’ve always wanted to try your hand at creating your very own vase, then this will definitely be the guide for you!
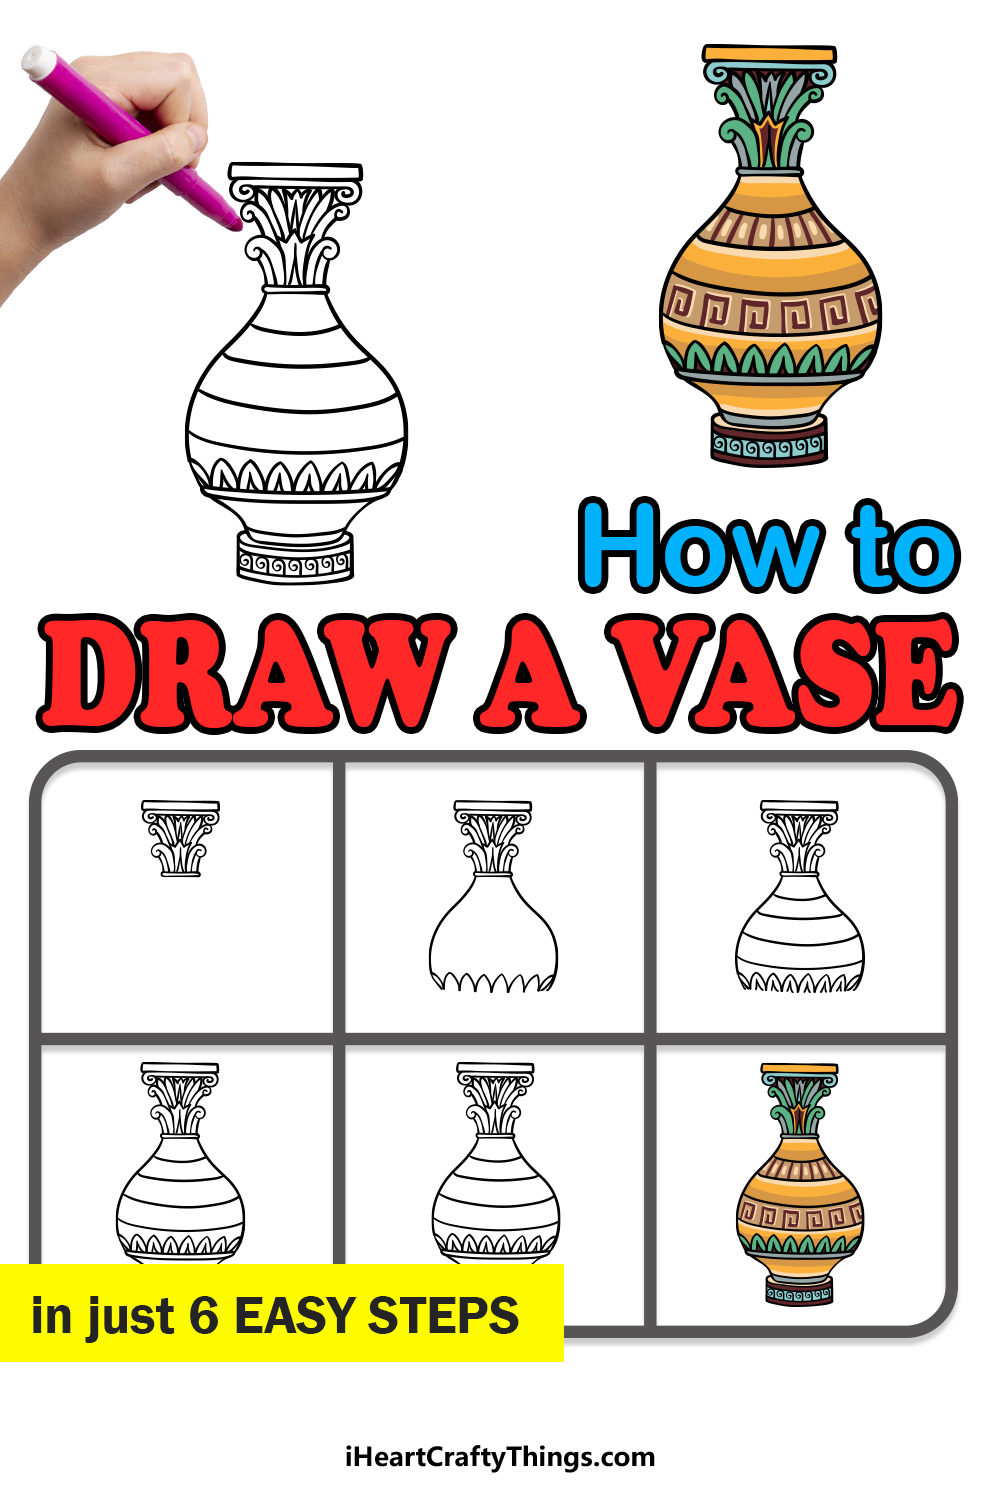
Our step-by-step guide on how to draw a vase in 6 steps will show you everything you need to know in creating your ideal vase.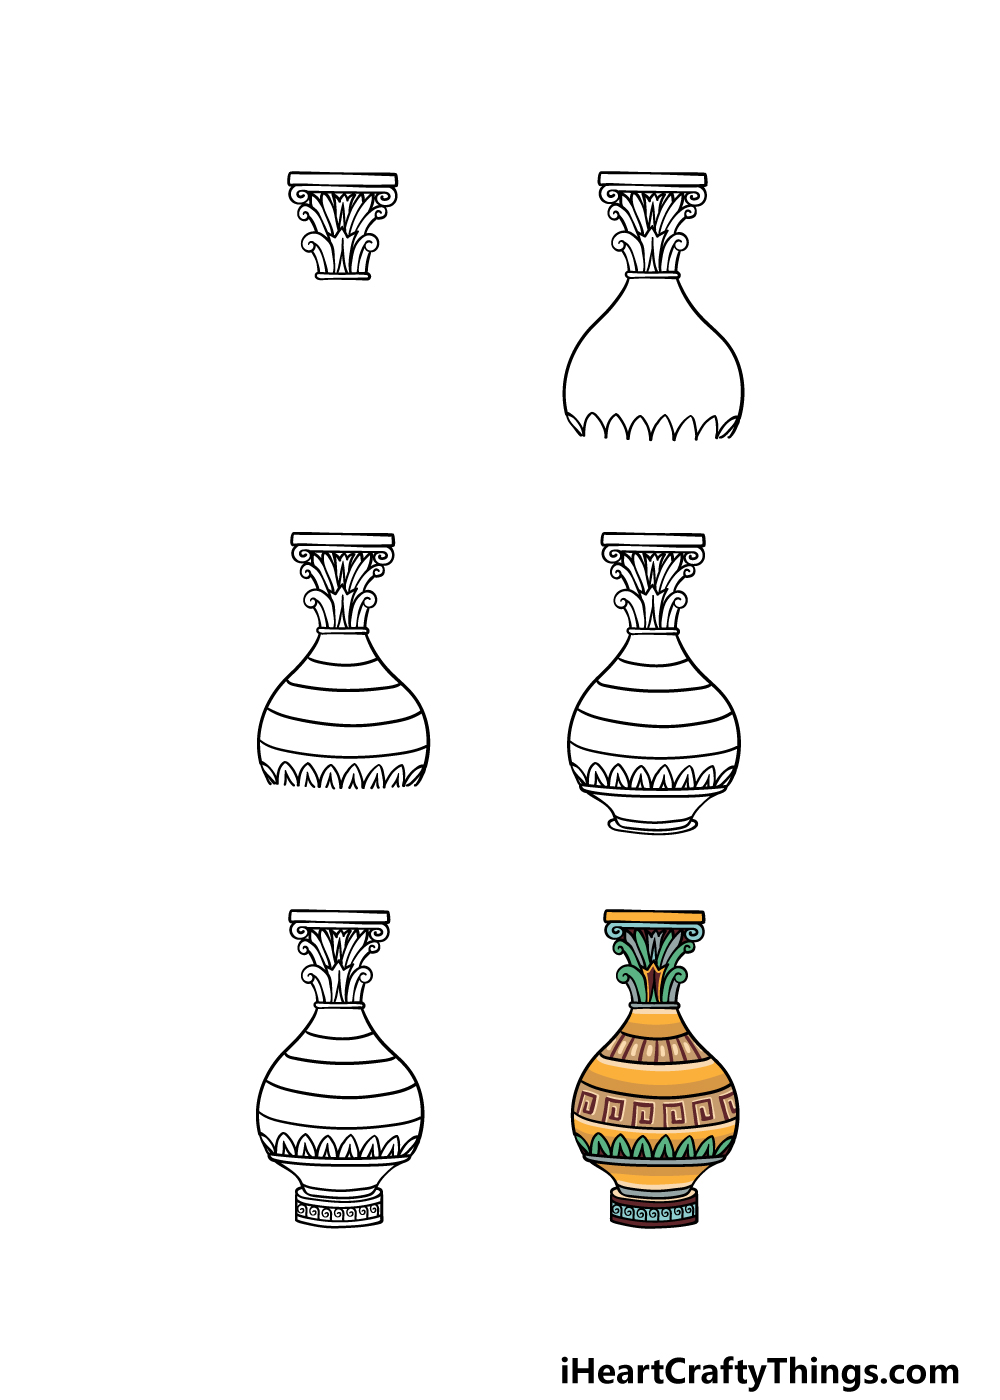
How to Draw A Vase – Let’s Get Started!
Step 1
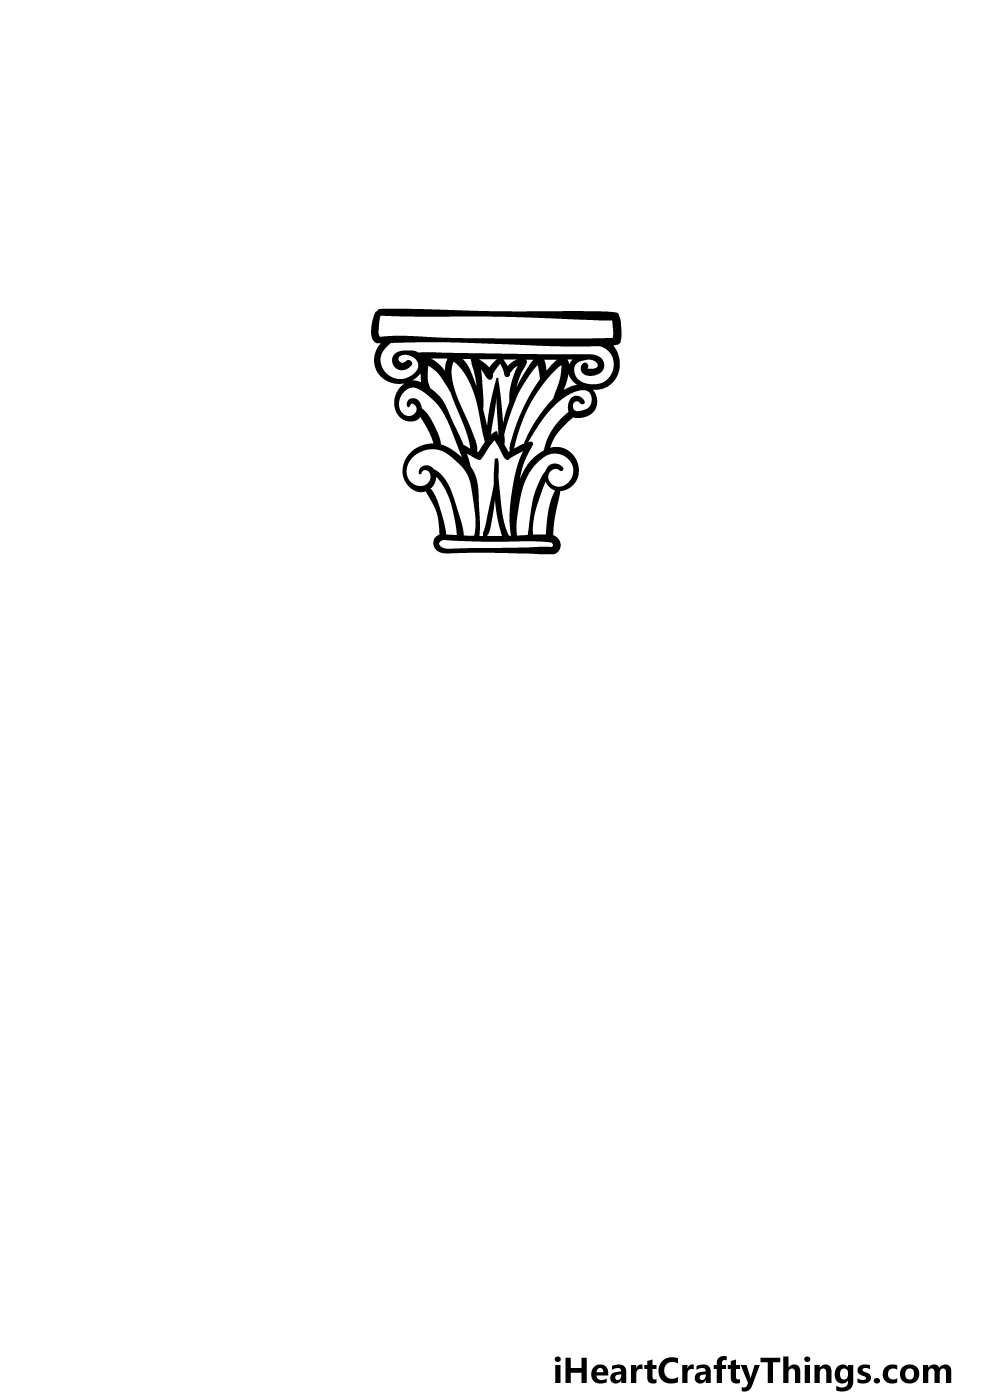
The piece that we will be drawing in this guide on how to draw a vase is really beautiful and detailed, with lots of great smaller touches to behold.
We will break down these decorative details into smaller chunks to make them easier to take on. To start this, we will begin with the beck of the vase.
The neck and rim of this vase has a lot of detail to it, but you can start by drawing a thin rectangular piece for the rim of the vase.
Then we will be using a combination of curled, spiraling shapes and then thin, sharp shapes between them to create an elaborate pattern.
You can copy the lines as they appear in our reference image to make sure you get the symmetry and sizing looking good!
Step 2 – Start drawing the outline for the body of the vase
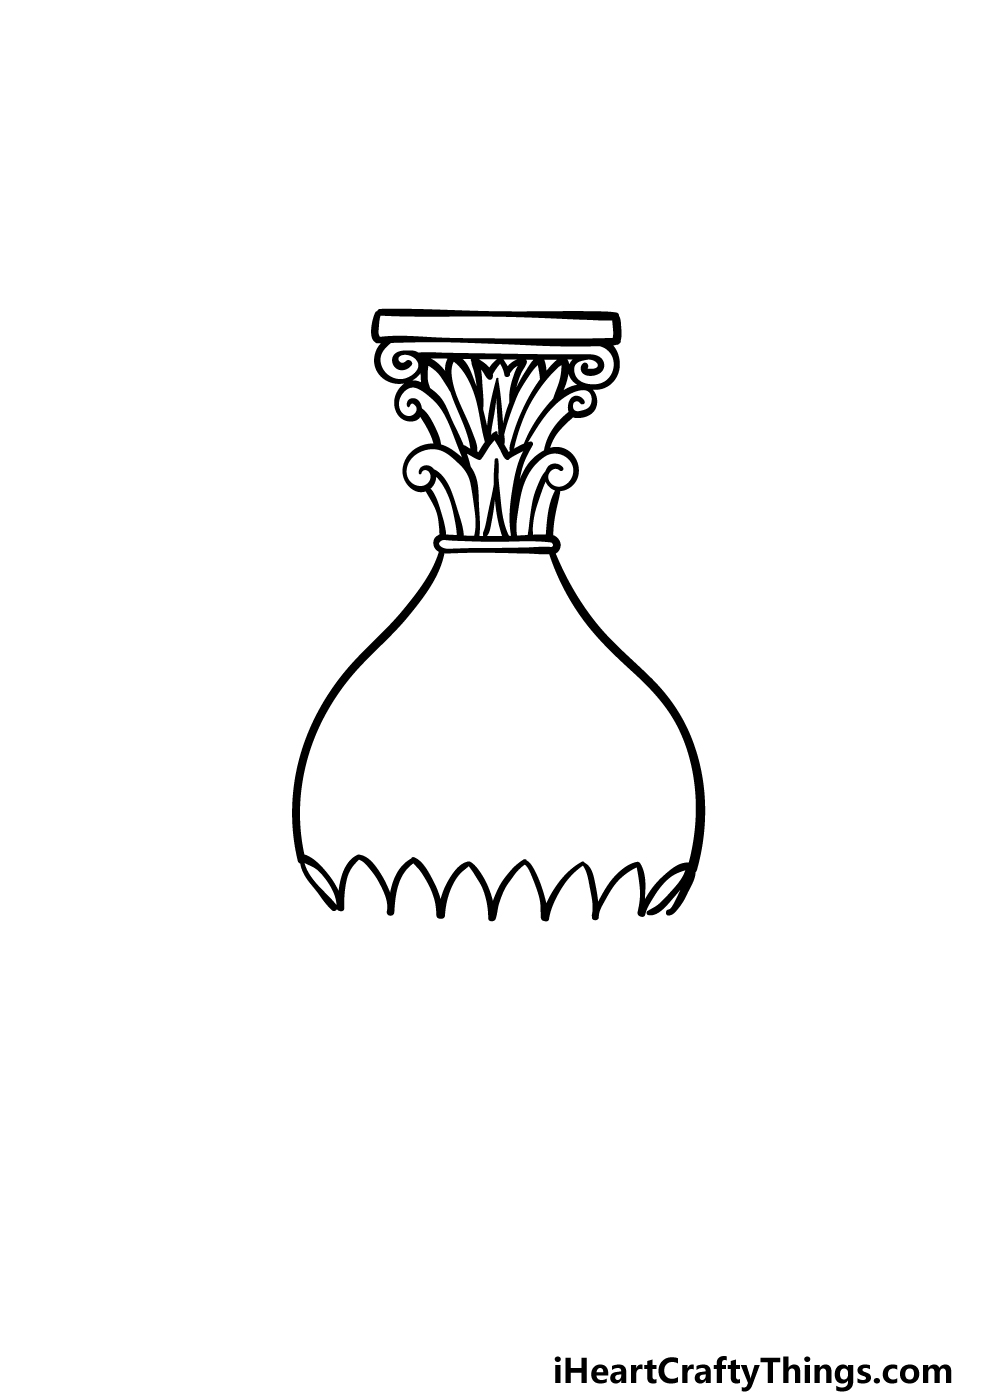
Now we shall start creating the outline for the central body of the vase drawing in this next step.
To do this, simply extend a curved line down from either side of the neck, having it curve outward a bit as you can see in the reference image.
Then, once you have drawn these lines for the outline, we will then add a line that is made up of lots of small curves with little points at the tops of each one.
This will contribute to the decoration, and we will add to it in subsequent steps.
Step 3 – Next, draw some more decorative elements
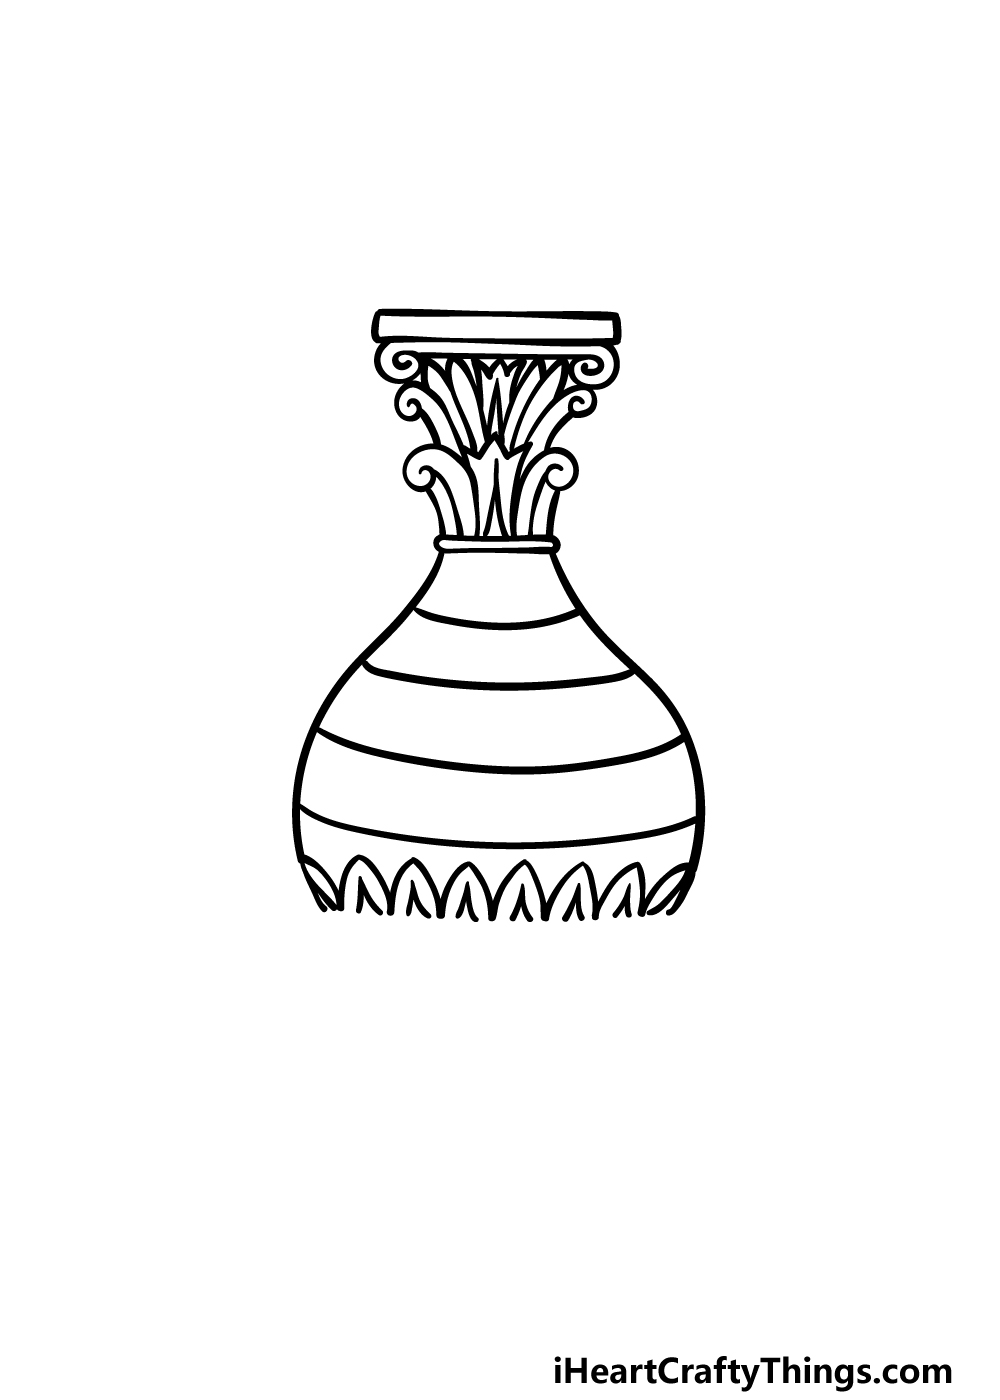
For this third step of our guide on how to draw a vase, we will be adding some more decorative details to it. These details will be quite simple for now, but we will add more to them later.
For now, you can start by drawing a series of curved lines across the body of the vase.
Then, you can add a small, pointy line inside each of the curved shapes you drew for the base of the vase in the previous step. Once these have been drawn, it will be on to step 4!
Step 4 – Now, start drawing the base for the vase

We will now be working on the base of the vase drawing in this and the next step. First, start by drawing a small, thin rim across the bottom of the vase that you have drawn so far.
Then, draw two curved lines from each end, and have them curve inward a bit.
You can then finish off this part of the vase by drawing another rim at the base, and then you can add a slightly wider rim around it.
Then you will be ready for the final touches for this vase in the next step!
Step 5 – Add some final details to your vase drawing
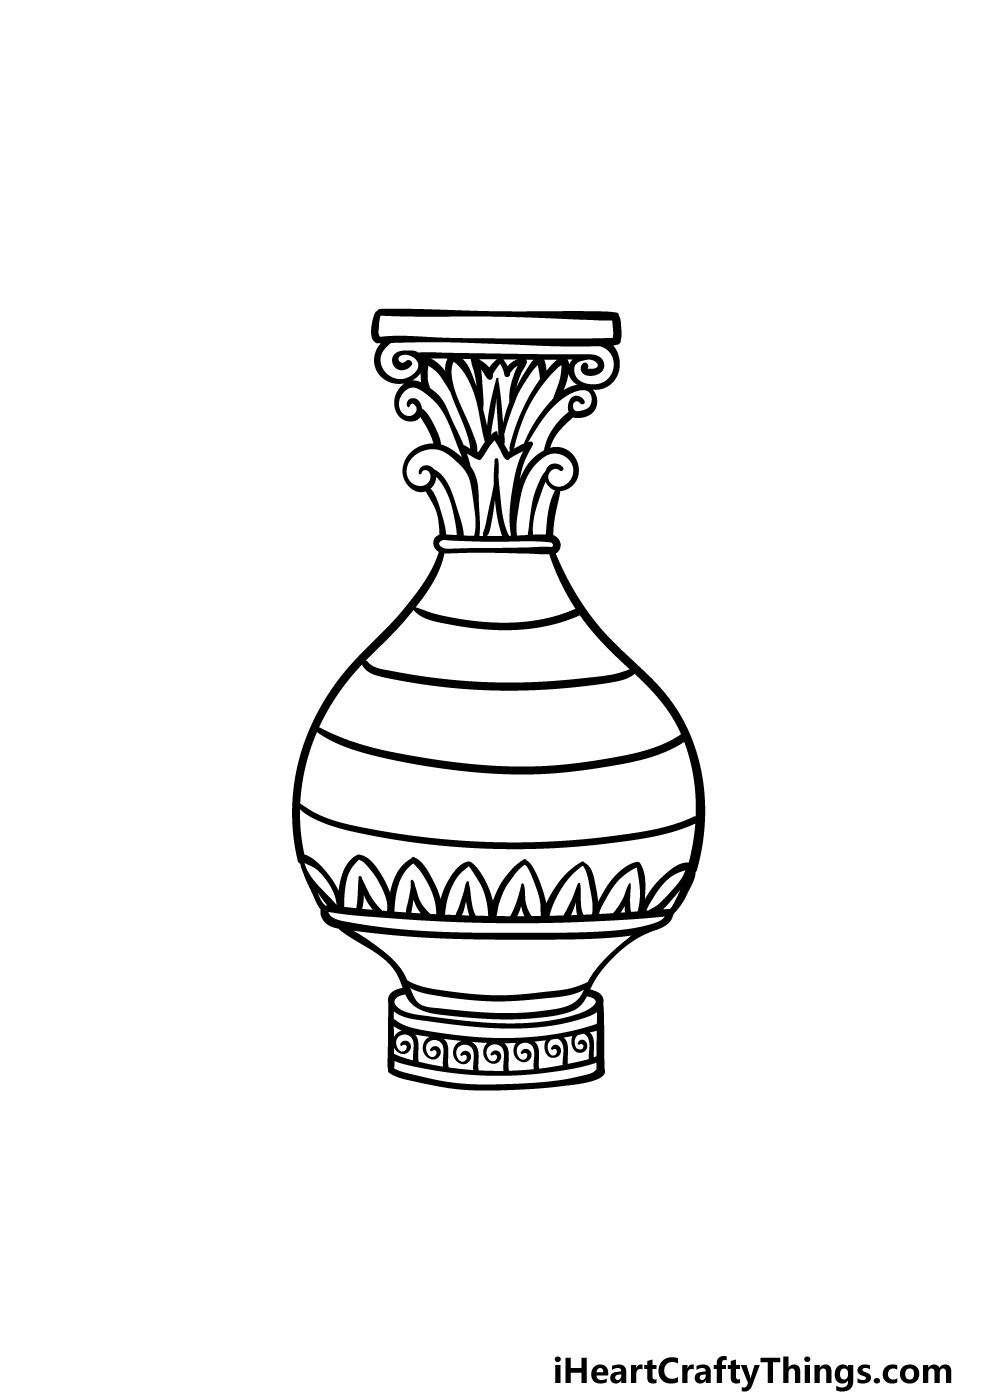
This fifth step of our guide on how to draw a vase will allow you to add some final elements and touches! The main element we will be focusing on is the base of the vase.
Draw some curved lines to create a flat shape for the base, and then you can add some swirly decorative lines inside of it. Then you are ready for the final step!
Before you move on, you could also take what you have learned and change up some of the details to create your own vase design. You could also draw a background for some extra fun!
Step 6 – Finish off your vase drawing with some color
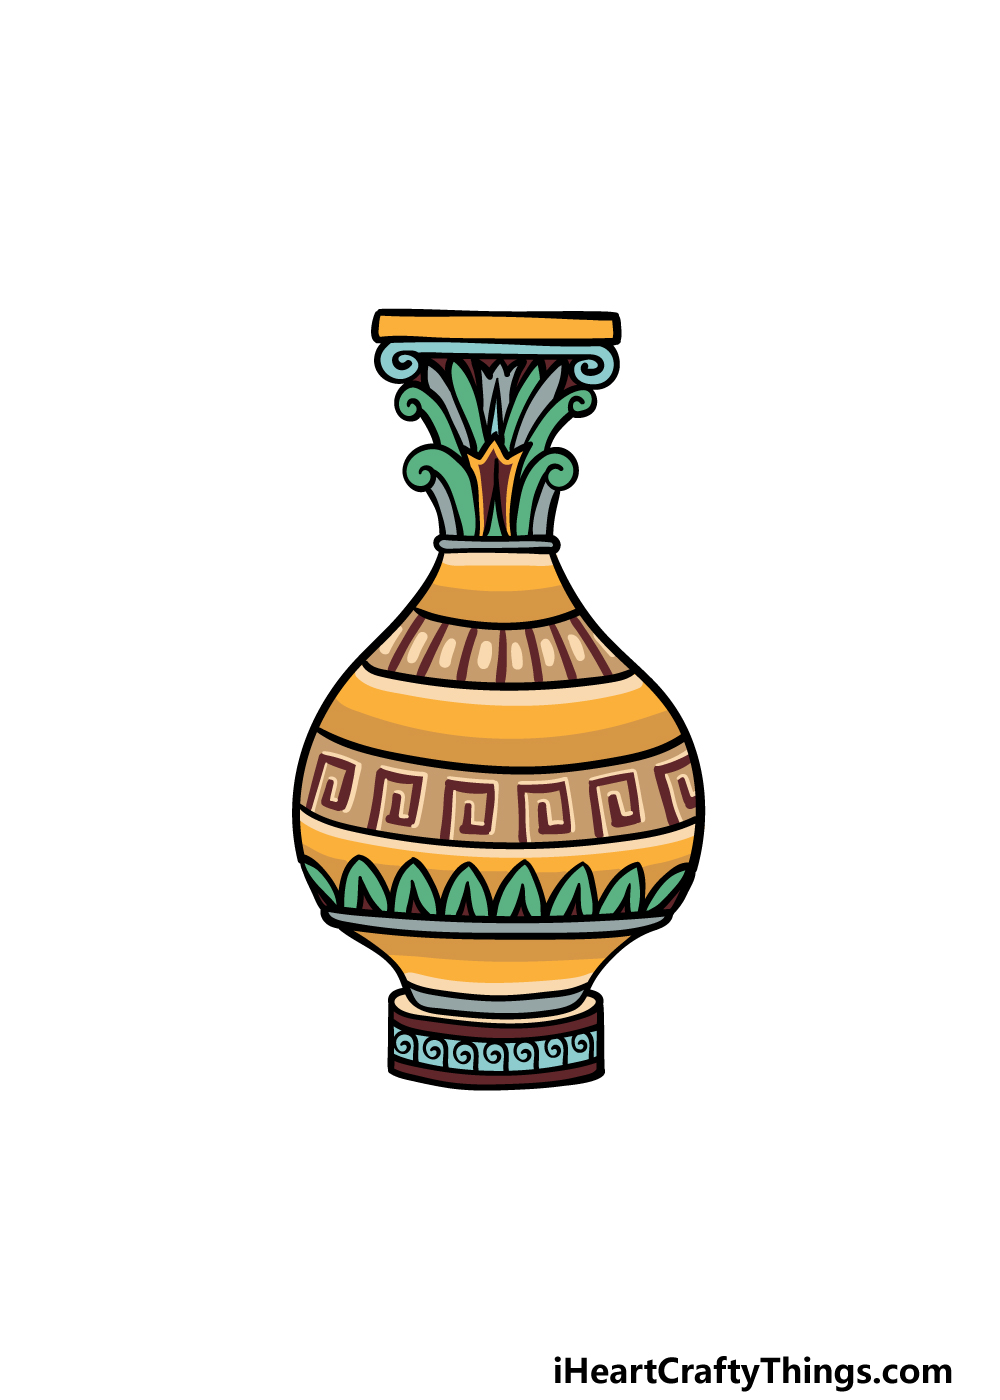
Now you’re ready for one of the most fun parts of creating this vase drawing; coloring it in! For our reference image, we showed you just one way that you could go about coloring it in.
We went for a bright and bold color scheme to really give this vase a classic look.
The main colors in this design are yellow, red and green, and we even used the colors to add more decorative line details to the design.
You could go for a similar color scheme if you wish, but this is your drawing so you should use any colors that you like! There are no wrong answers here, so you should really let your creativity flow.
Once you have chosen the colors you would like, which art mediums will you use for the colors?
You could get bright colors by using mediums such as colored markers or acrylics, but for softer shades you could use something like watercolors or colored pencils.
We can’t wait to see what you choose!
Here’s how you can make your vase drawing even better…
Make this beautiful vase sketch even better with some helpful and fun tips!
People who display vases will often have a collection of several arranged together. For that reason, it could be fun to add some more to this drawing of a vase!
Now that you know how to draw a vase, it would be easy to add as many vases as you like to this arrangement.
If you were to do this, do you think you would have them all in a similar style or make each one unique?
Speaking of drawing different vases, you could drastically change the design of this one if you wanted. You could do this by following the guide and then changing a few of the decorative details.
It would be a fun challenge to depict a brand new style, and then you could even draw a few different vase designs in one image as we suggested earlier.
Looking up pictures of vases online would be a great way to get some inspiration for different vases you could draw.
The style of this vase drawing looks quite old, and you could use that to make an interesting image. For example, maybe you could draw the vase in a few pieces that are partially submerged in sand.
That would make it look like this vase has recently been unearthed at an archeological dig site. What are some other ways you could make this vase look like it is from a bygone era of history?
Finally, you could really enhance this vase sketch by adding a background. This could be as simple as a living room setting, but there are more elaborate settings you could go for as well.
For instance, you could have this vase on display in a fancy museum. If you did this, you could surround it with all kinds of interesting artifacts and objects.
These are just two ideas for interesting settings you could portray in this artwork, but can you think of any others you could use instead?
Your Vase Drawing is Complete!
We hope that you had a great time working on this guide on how to draw a vase!
The vase design we prepared for you was quite intricate and detailed, so we also hope that on top of making the guide fun it was also made much easier than you may have expected.
By following the steps and trying your best, you will be able to master any drawing challenge thrown your way!
But finishing the guide is just a part of the fun. You can also add to it by changing up the details, adding a background or with some interesting color and medium choices.
What will you do to put your own spin on this vase?
Be sure to check out our website for more drawing fun, as we have plenty of guides just waiting for you to take them on! We upload new ones frequently as well, so keep checking in to never miss out.
We would be thrilled to behold your amazing vase drawing when it’s ready, so please share it on our Facebook and Pinterest pages for us to see!