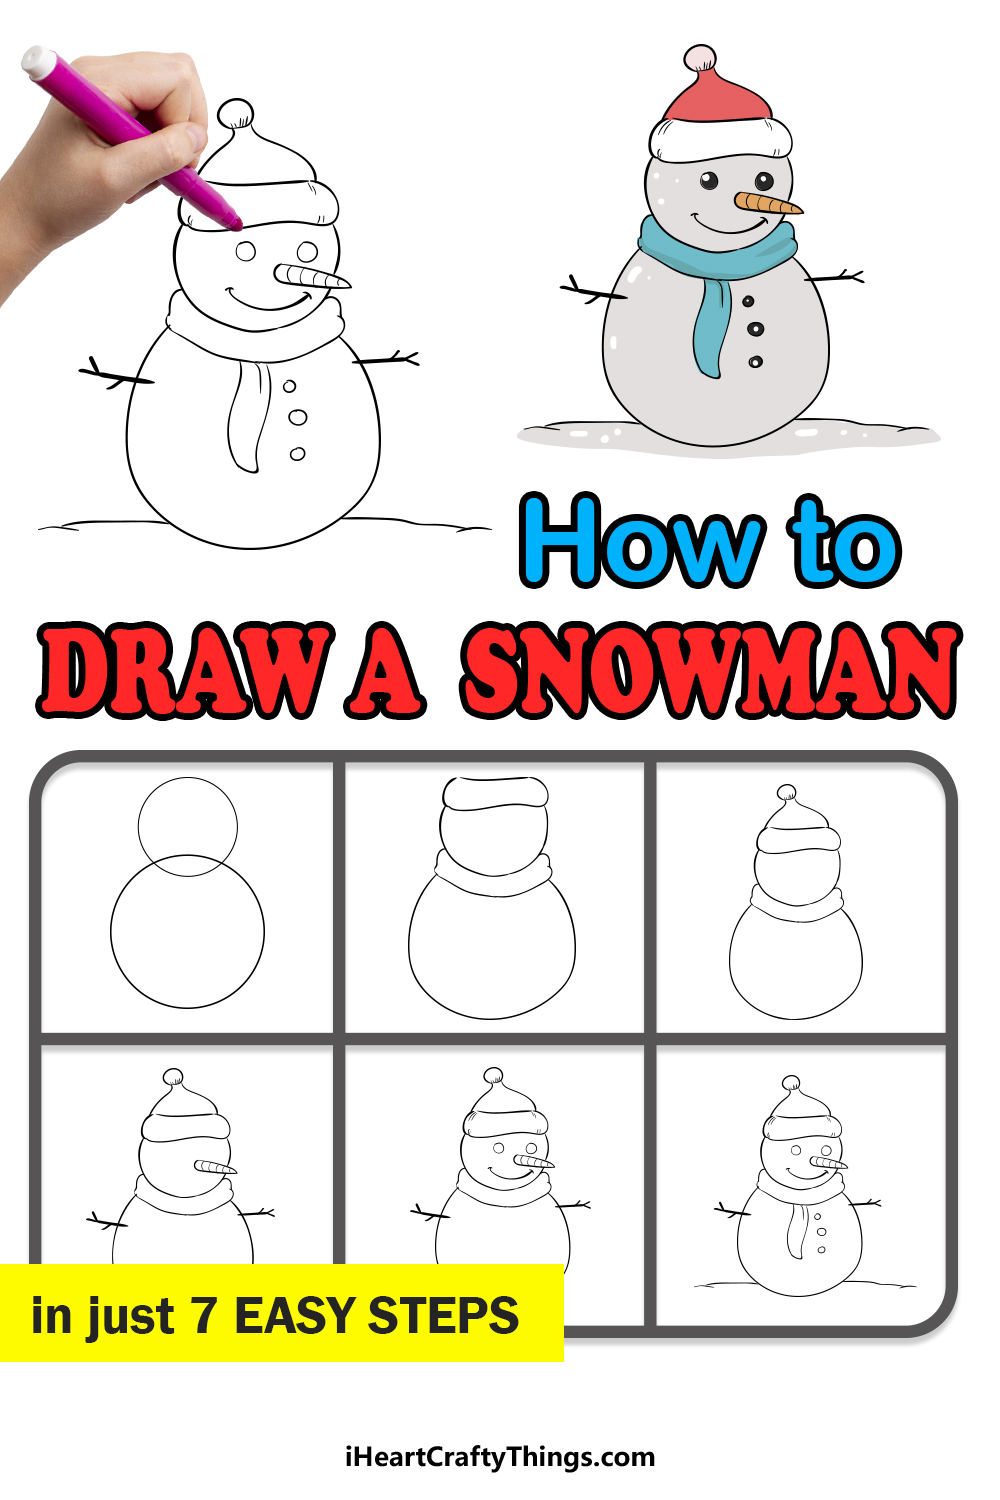
Get ready to discover the easiest way to learn how to draw a snowman with this fun and easy guide for kids! You can create Winter vibes no matter the time of year by following along.
A snowman is such a classic sign that Winter has arrived. Creating a snowman is a great way to bond with friends and family in a way that allows you to herald in the season.
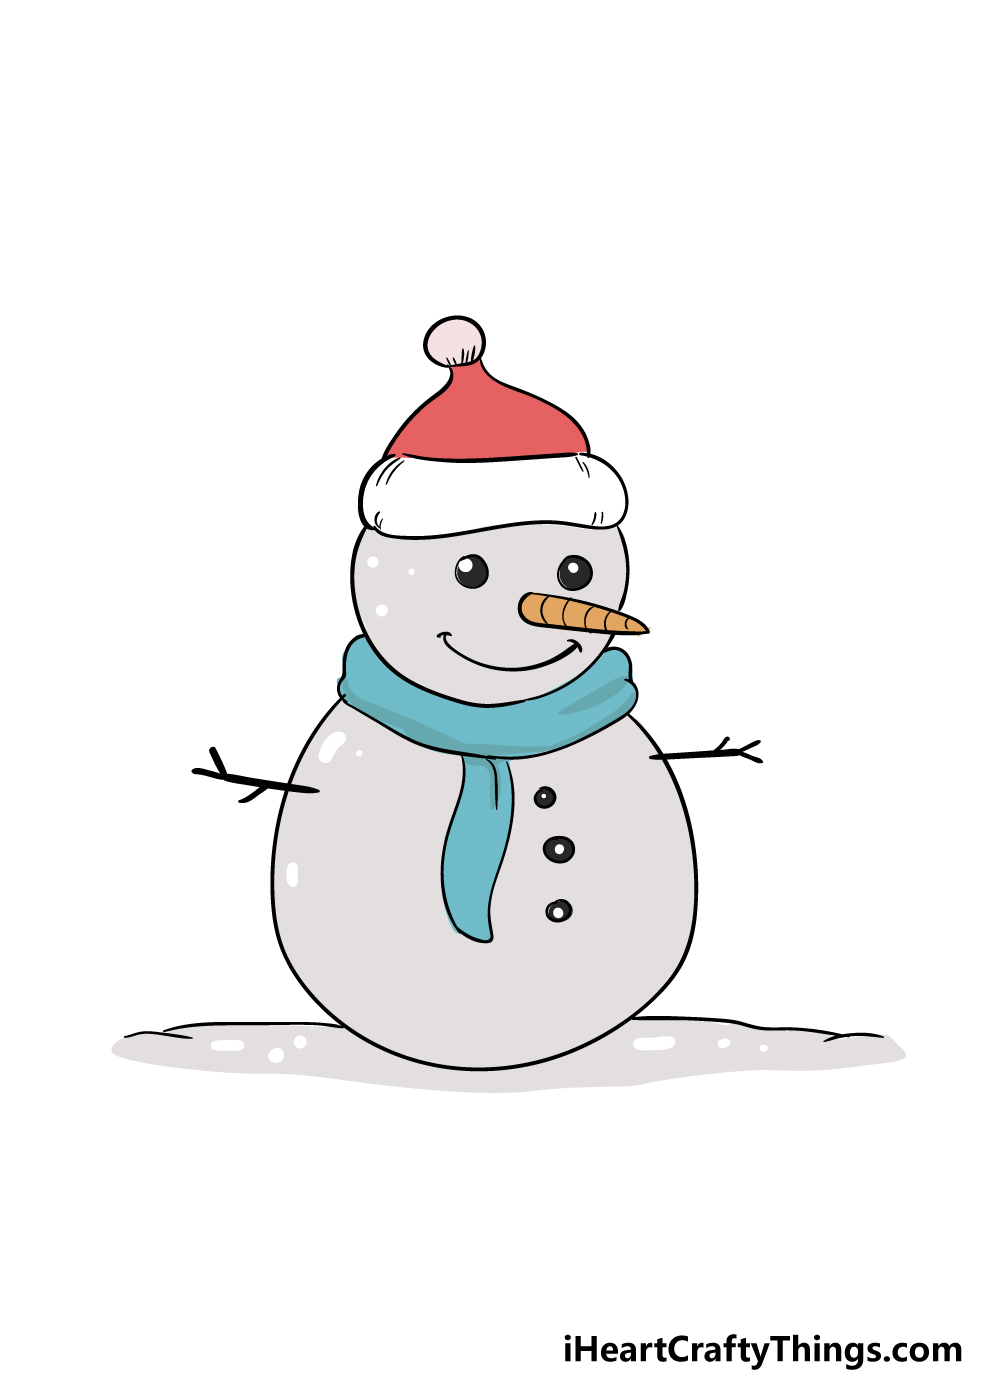
They come in all shapes and sizes, but the snowman drawing we will be creating is a really classic design. It has a carrot nose, scarf around its neck and even a Santa hat! Of course, once you have finished the guide you could change some of these details if you like.
That way, you can create your own snowman creation and even add a background to make it more unique. First, we can move through the guide together so I can show you just how simple and fun it is.
Join Me In Learning How To Create A Snowman Drawing!
How to Draw A Snowman – Let’s Get Started!
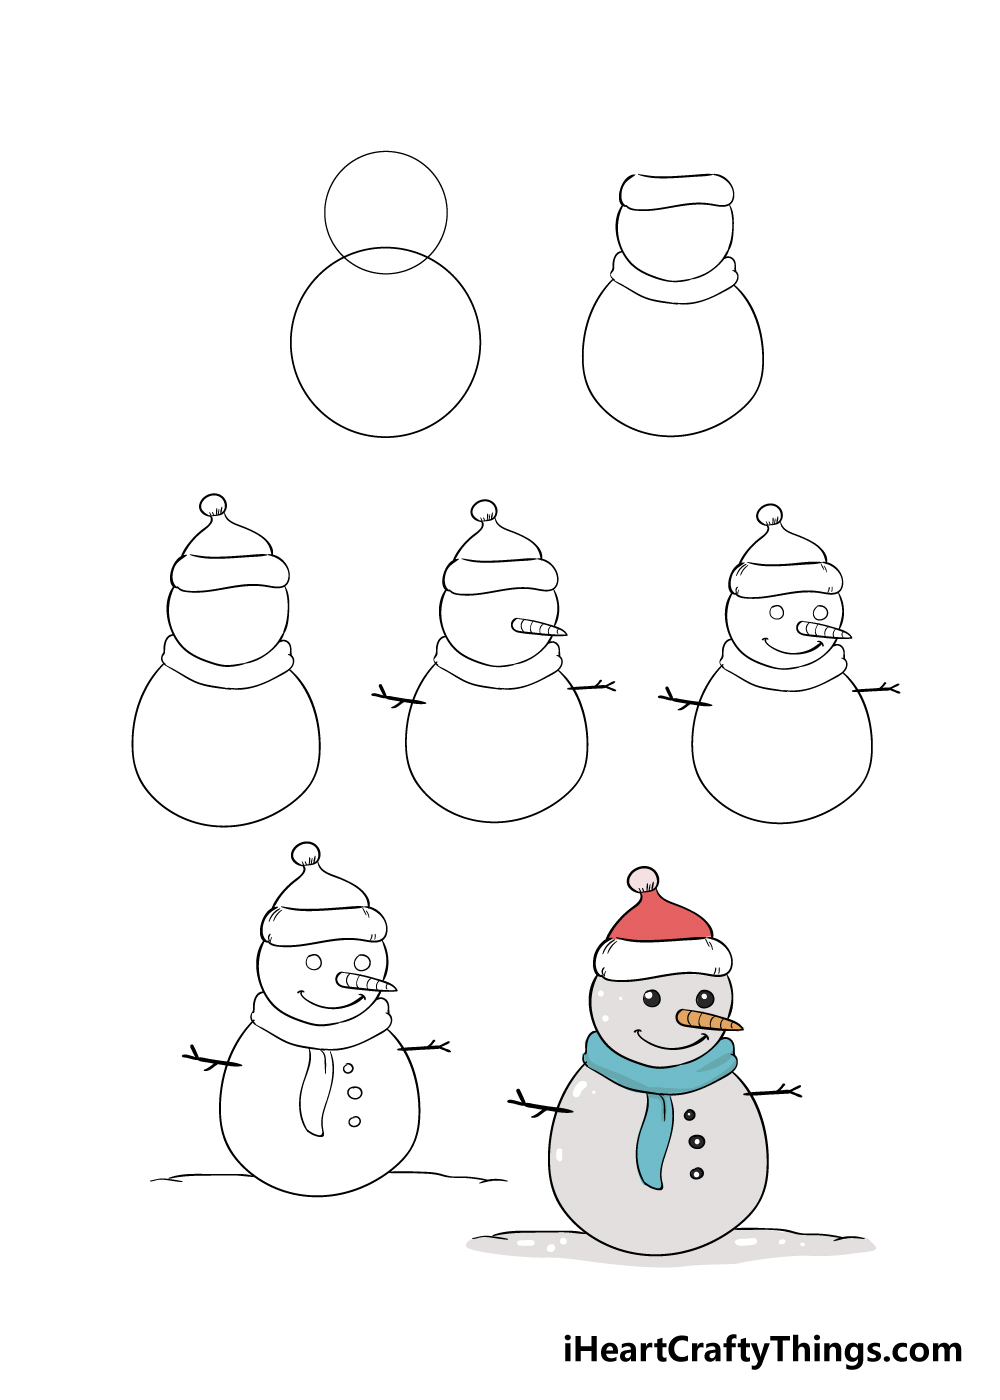
Step 1
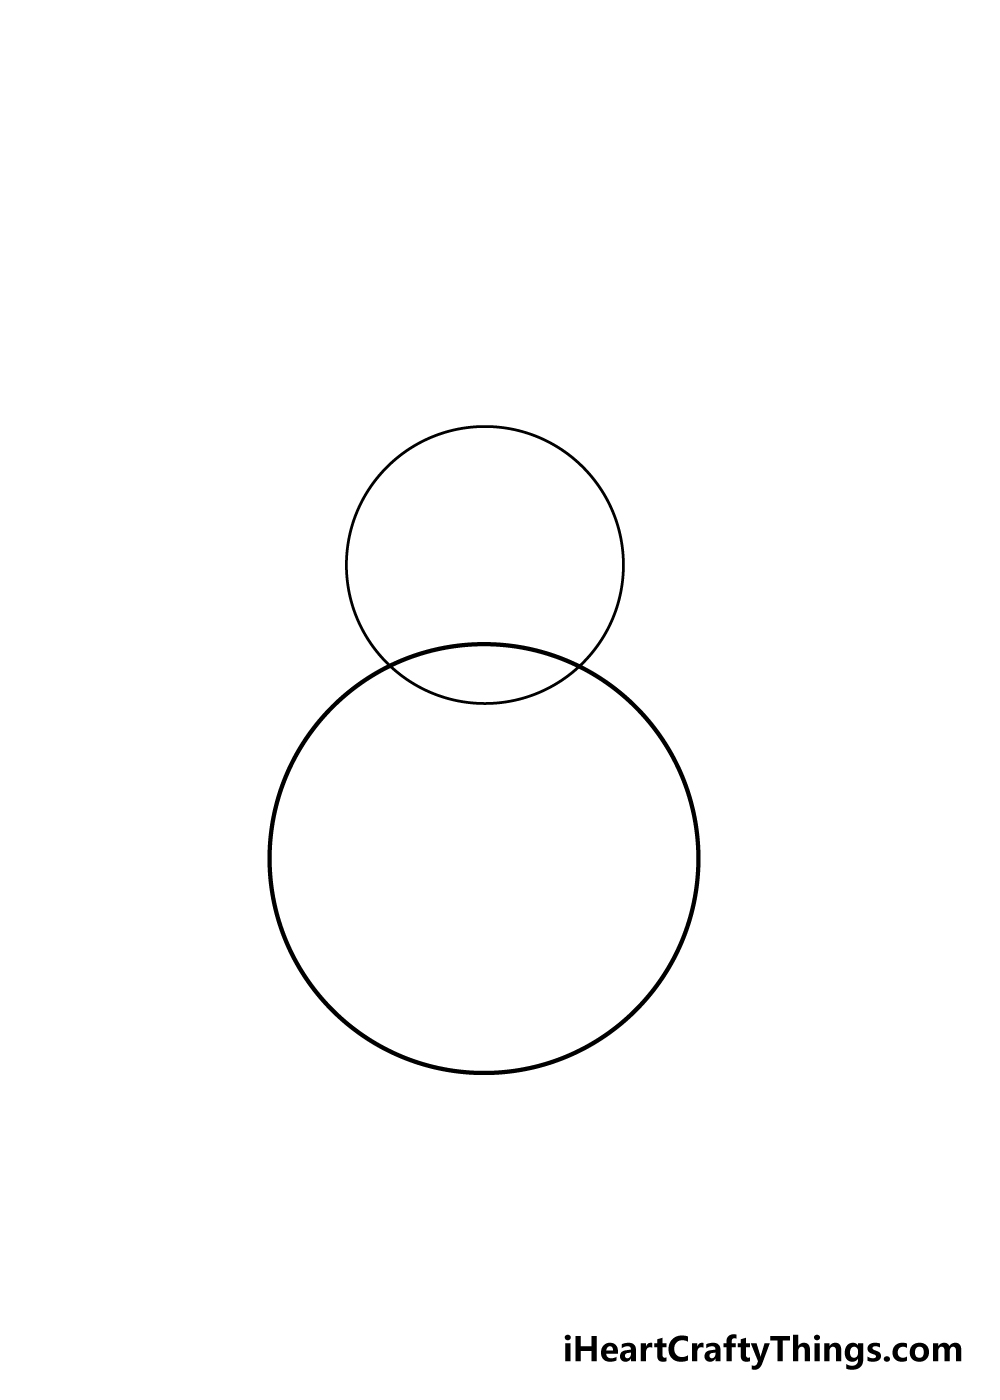
To kick off this guide on how to draw a snowman, we shall be starting with some guide shapes.
For this step, you will want to use a light pencil, as we will erase them later on as you draw the final lines.
All you have to do is draw a medium-size circle and then have it intersecting with a larger circle below it.
You could use a drawing compass if you want perfect circles, however having perfect circles for these guide shapes isn’t really necessary, as the final snowman will have some bumps and imperfections with it.
Step 2 – Start with the final lines of the snowman body
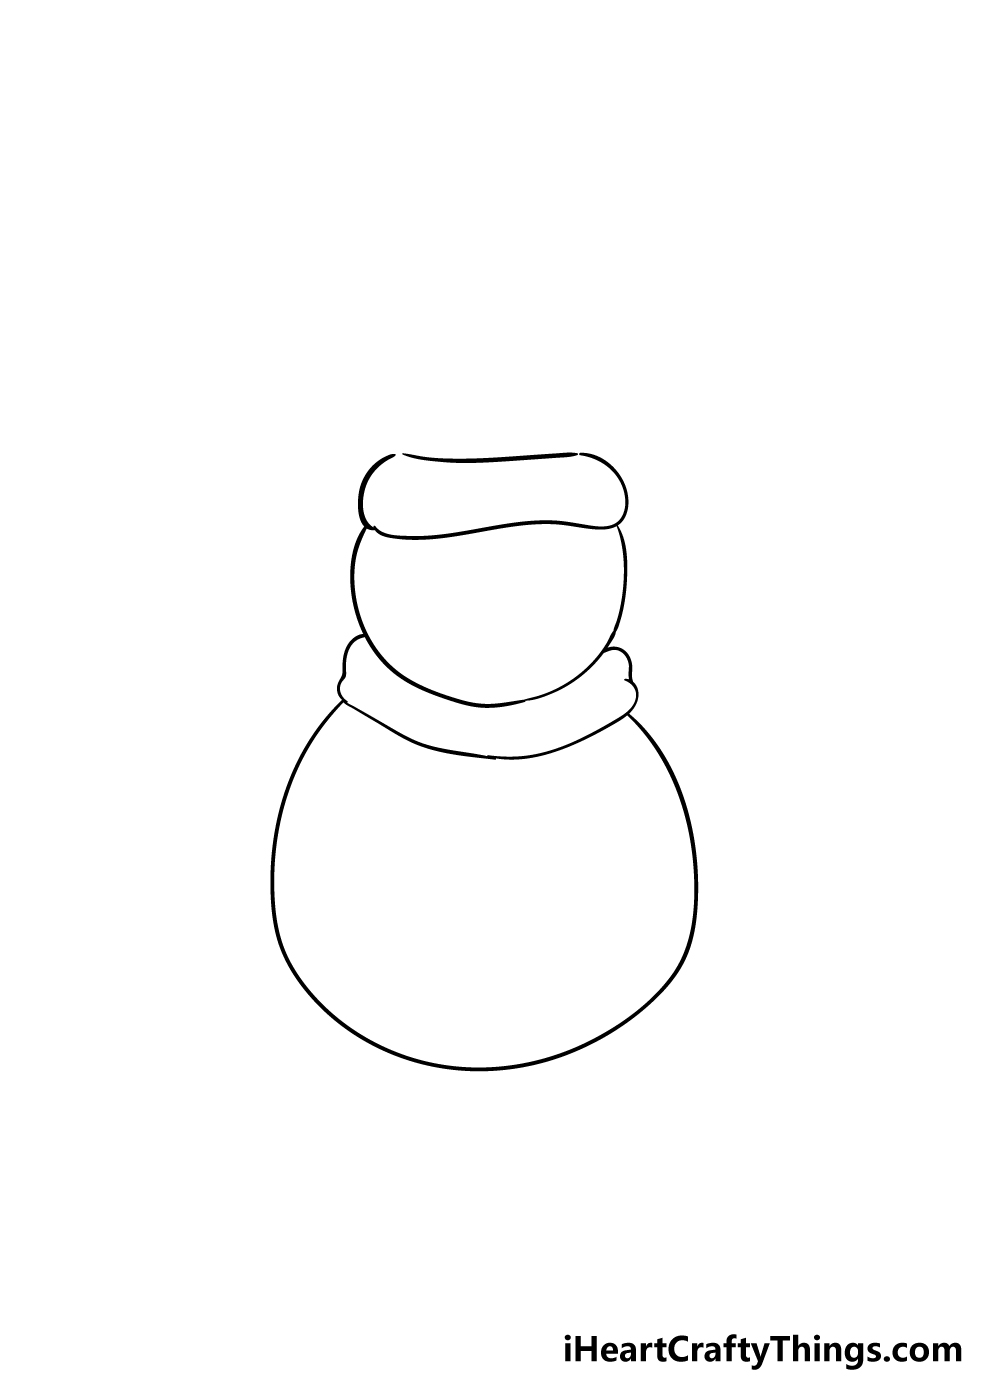
Using the shapes that you drew in the previous step, you can start using a pen or a darker pencil to draw the final lines.
You can draw the fluffy base of the hat about three-quarters of the way up the top circle. Then, you can draw the scarf between the two circles.
Then, you can draw the final circles around the guide ones.
As we mentioned in the previous step, you shouldn’t worry too much about keeping the outline of the body perfect.
Step 3 – Add the pointy hat
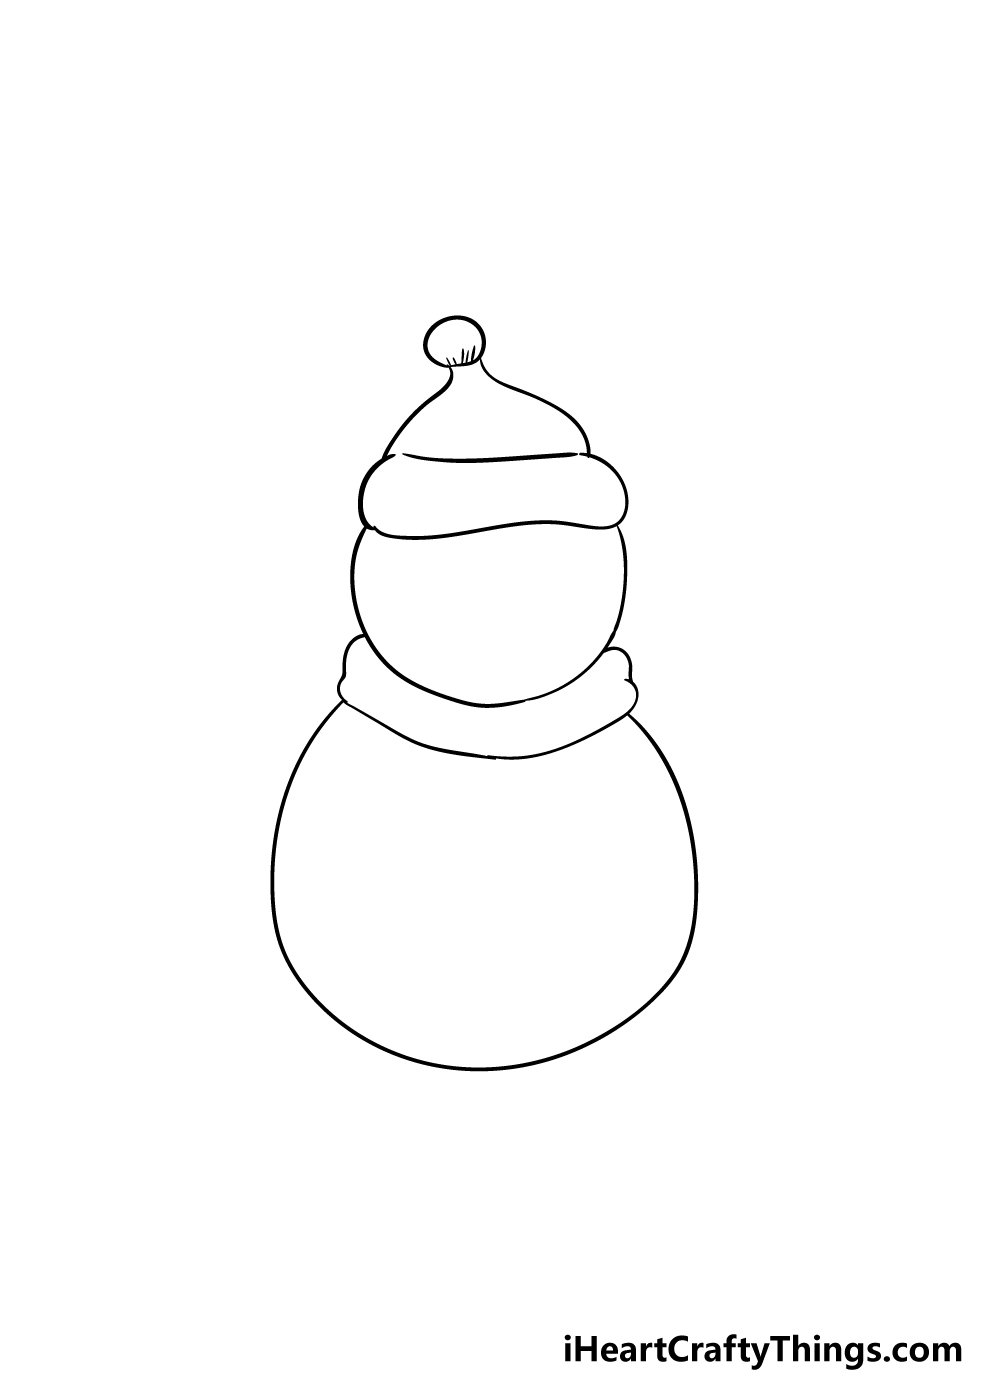
Now that you have the fluffy base of the hat, you can draw the pointy top of the hat in this third step of our guide on how to draw a snowman.
Simply use some curved lines up from the base of the hat, and then you can draw a small bobble on the tip of the hat. Once you have the hat drawn, you’re ready for the next step.
Step 4 – Now draw the nose and stick arms
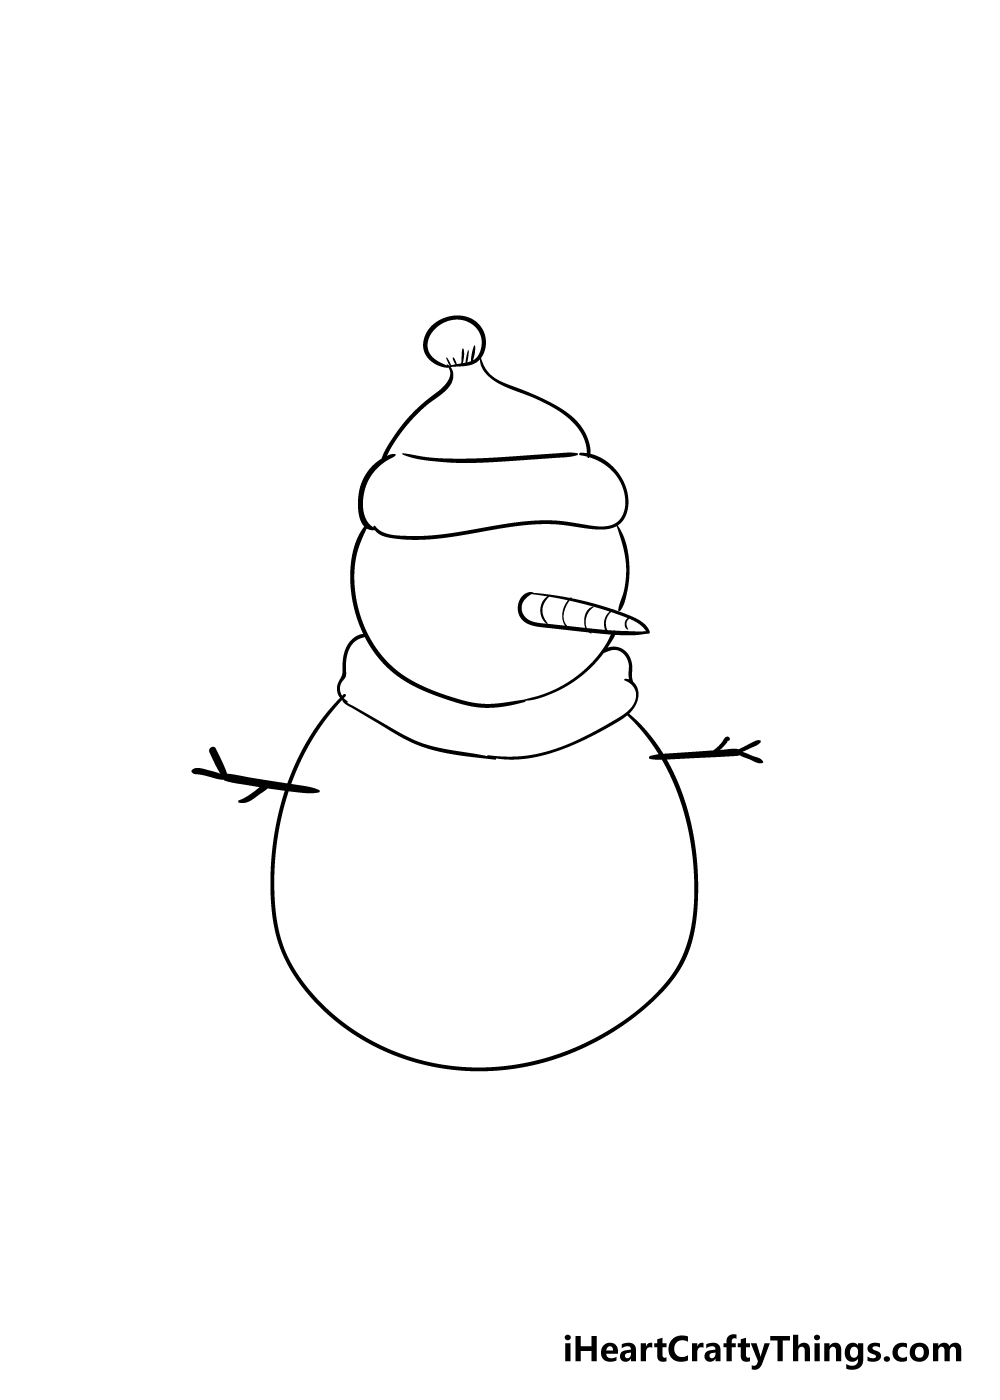
Every great snowman has a great carrot nose, so let’s add one in this step of your snowman drawing.
To draw this, simply use some straight lines coming off the face of the snowman.
Finally, you can use some thick lines coming off from the body of the snowman with more lines coming off of them for the hands.
Step 5 – Draw the face of the snowman
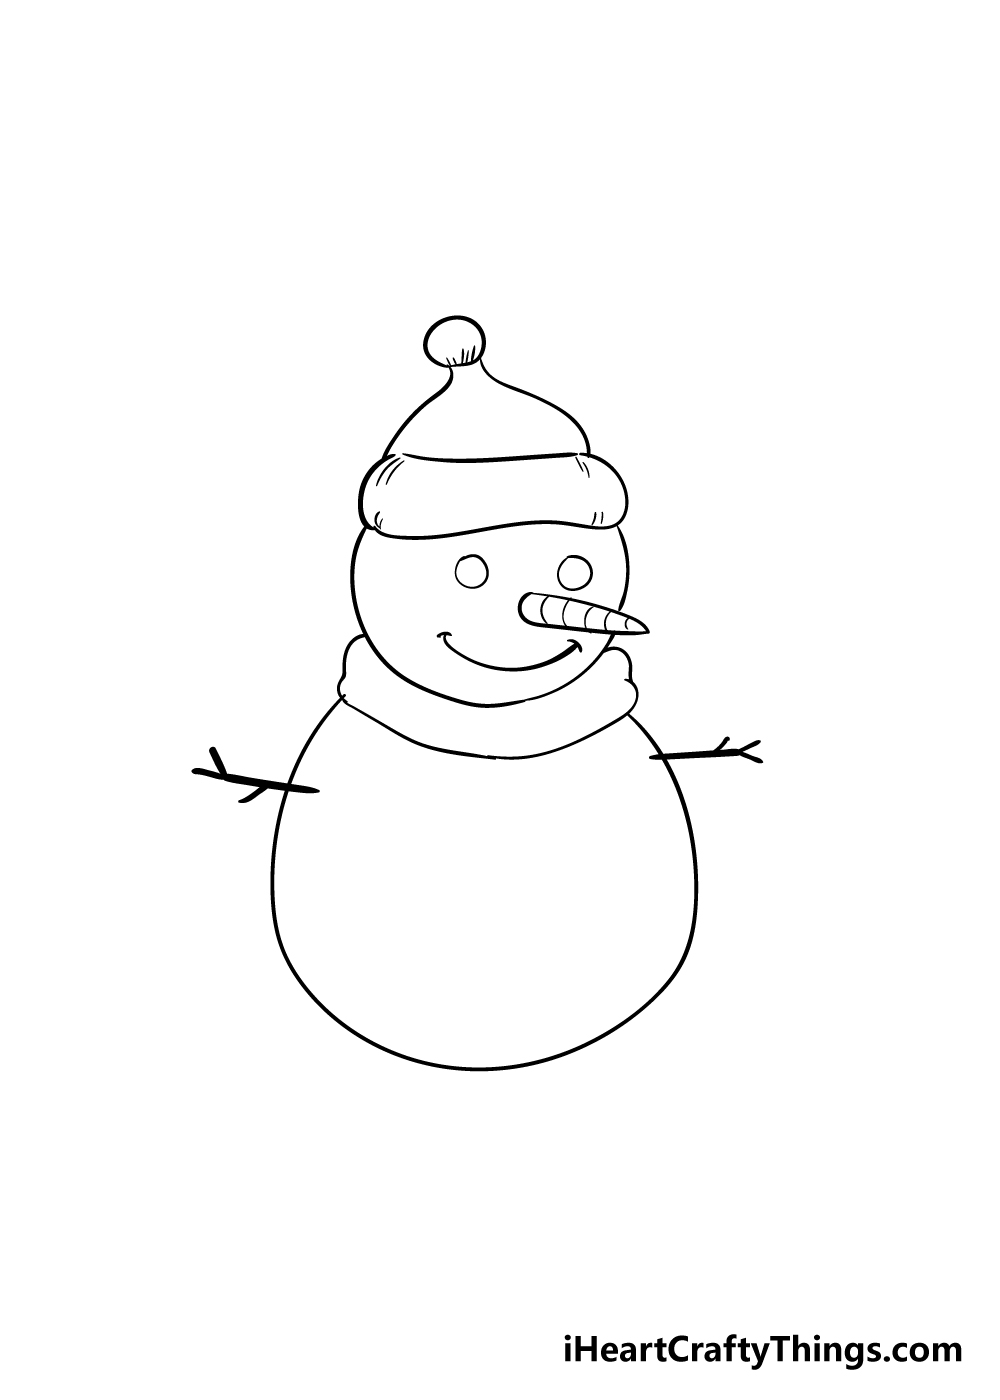
Your snowman drawing needs a nice happy face, so we shall add one in this step. The eyes of the snowman will be simple with two small circles that are made from something like two stones.
Then, use a nice curved line for a smiling mouth on the snowman. You could also make a mouth using several small circles for the mouth to make it look like it’s made of small stones or rocks.
Step 6 – Now, add some final details
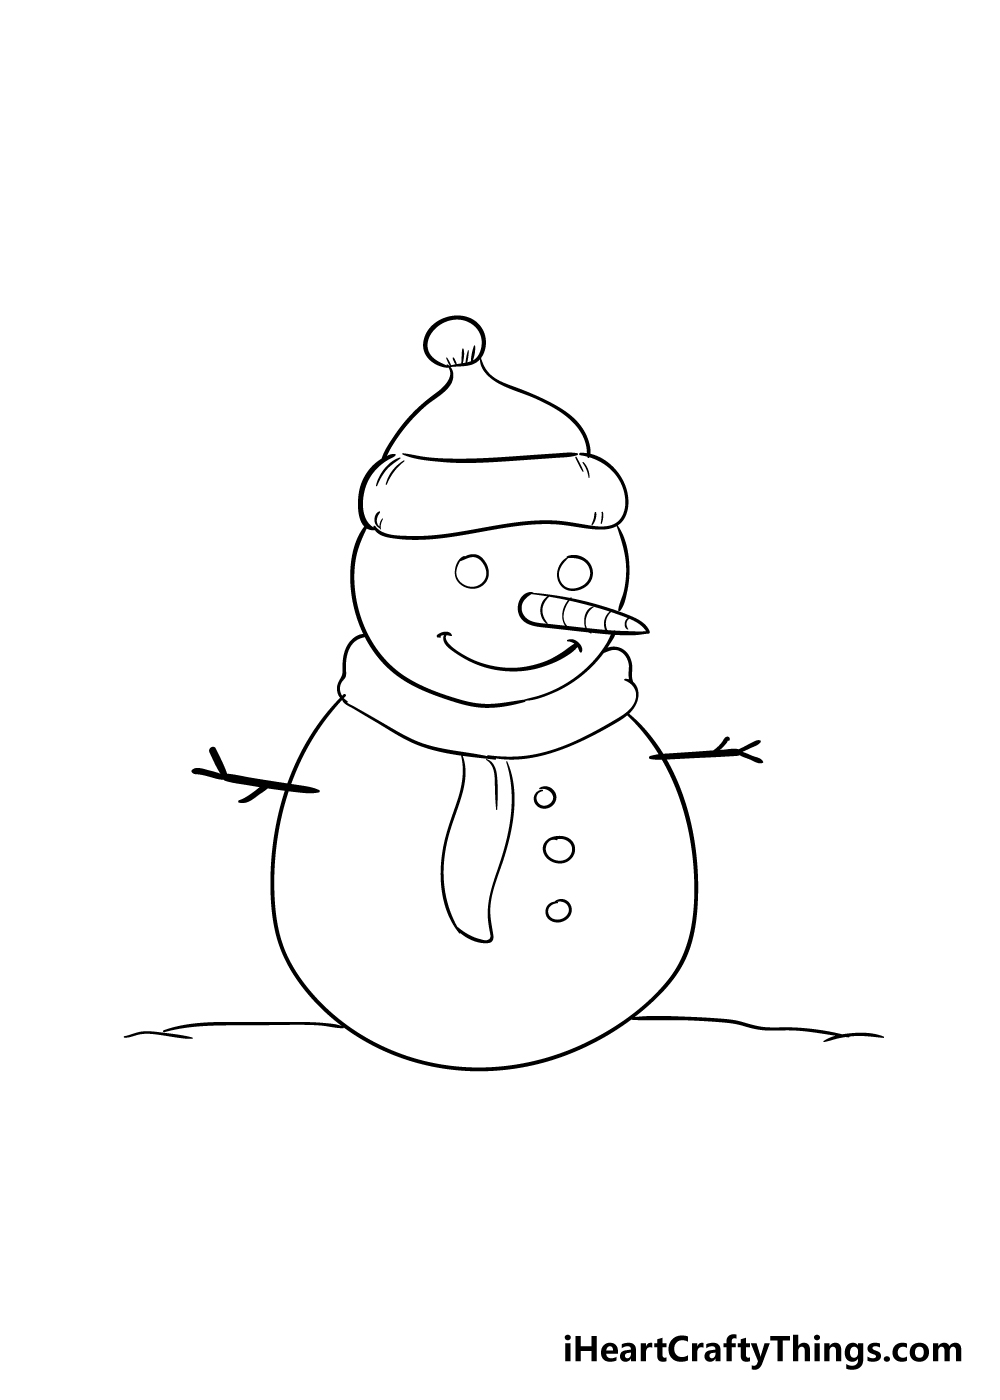
In this sixth step of this guide on how to draw a snowman, we shall be adding some final elements and details.
First, use some curved lines coming down from the scarf around the neck for the end of the scarf trailing down. Then, you can draw three small circles going down the belly of the snowman for some buttons.
Finally, you can draw a straight line at the base of the snowman to give him some ground to be standing on.
Those are the details that we would add, but you should also feel free to let your creativity shine and run wild!
You could add a cool background to give this image even more of a Winter atmosphere or draw some patterns on the clothing that he is wearing.
You could even draw another snowman or even a snowwoman to go along with this snowman!
How will you finish off this snowman before moving on to the final step?
Bonus: Experiment With Some Craft Supplies To Make This Even Better!
You’re about to bring some color to this drawing of a snowman, and we will have a whole step devoted to that. However, we first wanted to cover some fun and alternative methods for bringing color to the drawing.
Primarily, we wanted to go over some crafts you could use to make this drawing even more special. These craft ideas could be used for the entirety of the image, or you could focus on smaller parts.
For example, maybe you would like to use traditional coloring mediums for most of the image, but would prefer to use some crafts for the scarf and hat.
If you used some pieces of material, you could cut them out in the shapes of the clothing and then stick them to the image. That would help to give it some depth as well as some real texture.
Then, maybe you would like to add a glinting effect to the snowman, in which case you could use some light glitter sprinklings to give it that sparkly look.
If you wanted to make the entire drawing with crafts, then there are various kinds of thicker craft paper and cardboard that could be used for the entire drawing and then other crafts used for the finer details.
Using elements of Christmas decorations such as tinsel, baubles and other things you may hang around the house over Christmas could also be stuck on the image for a fun twist.
Once you’ve added enough crafts and decorations, it could make the picture perfect to make into a Christmas card! We have spoken about a few of the crafts you could use for this image.
Can you think of any more that would make this a wonderful Christmas picture?
Step 7 – Finish off your snowman drawing with some color
Now that you have finished the final details, elements and background of your snowman, you can finish off this final step of our guide on how to draw a snowman with some beautiful colors.
Because this is a snowman in a Winter setting, you might think that you are stuck with using cooler blues and greens, but while that can be a beautiful look for your image, there are many options!
You could use some cooler colors for the snowman while using some bright, warm colors for the clothing for one option.
You could also make the picture more stylistic by using your favorite vibrant colors for your snowman.
Once you know the color scheme you would like, you can also have some fun with the art mediums that you use.
For an image like this, I would use some watercolors or colored pencils for a softer, colder look to the image, but it would look equally great to use some acrylic paints and colored pens.
Whichever colors and mediums you use, I know that you will end up with an incredible image!
Do this to take your snowman drawing to the next level
Enjoy these super cool tips we have for making your snowman sketch even better!
This drawing of a snowman that we created in this guide is made of two sections; the body and the head. A snowman can be made of more sections than this, however!
In real life, they will often have three or more sections that will usually be smaller the higher you get on the snowman.
You could also add different sections on the snowman to create different poses and details. This is a great way to make your own unique snowman design!
This snowman has a hat and a scarf to give it some personality. You could use many other kinds of clothing, however!
For example, it could be wearing some glassed or maybe a jacket. It could also be fun to use different colors and patterns for the scarf and the hat to make them more distinct.
Using these different clothing elements can also be a fun and simple way to make your snowman look even more unique and personalized.
Once your snowman drawing looks exactly as you want it, you could then show who built the snowman. The characters you add could be based on you and your friends, for example!
Or, you could depict a family working on the snowman. These characters could be drawn in a realistic style or they could be more cartoony depending on your preferences.
Who do you think would have built this snowman?
Finally, it would really finish off your snowman sketch nicely if you were to add a background. Once again, this could depend on you!
There are so many great locations that you could use for the background. It could be based on a real place where you have built a snowman, or you could create a more general location.
When adding a background, try to think of elements such as trees, houses, plants and other elements such as these. Where do you think you would like to set this drawing?
Your Snowman Drawing is Complete
With the colors and details finished on your snowman finished, that means you have reached the end of this guide on how to draw a snowman!
We hope that you had a lot of fun going through this guide with us. We wanted to show you that you can draw your own amazing snowman easily once you know what to do, so we hope it was fun and helpful for you!
Now that your image is complete, you can show us how creative you can be with it in several different ways.
Whether it’s with extra details, a fun background or even another snowman to go with this one, we can’t wait to see what you do!
Be sure to check out our website for plenty of fun drawing guides like this one! We upload more all the time, so check in often to make sure you never miss out.
Lastly, we can’t wait to see your amazing snowman drawing, so please feel free to share it on our Facebook and Pinterest pages for us to admire!