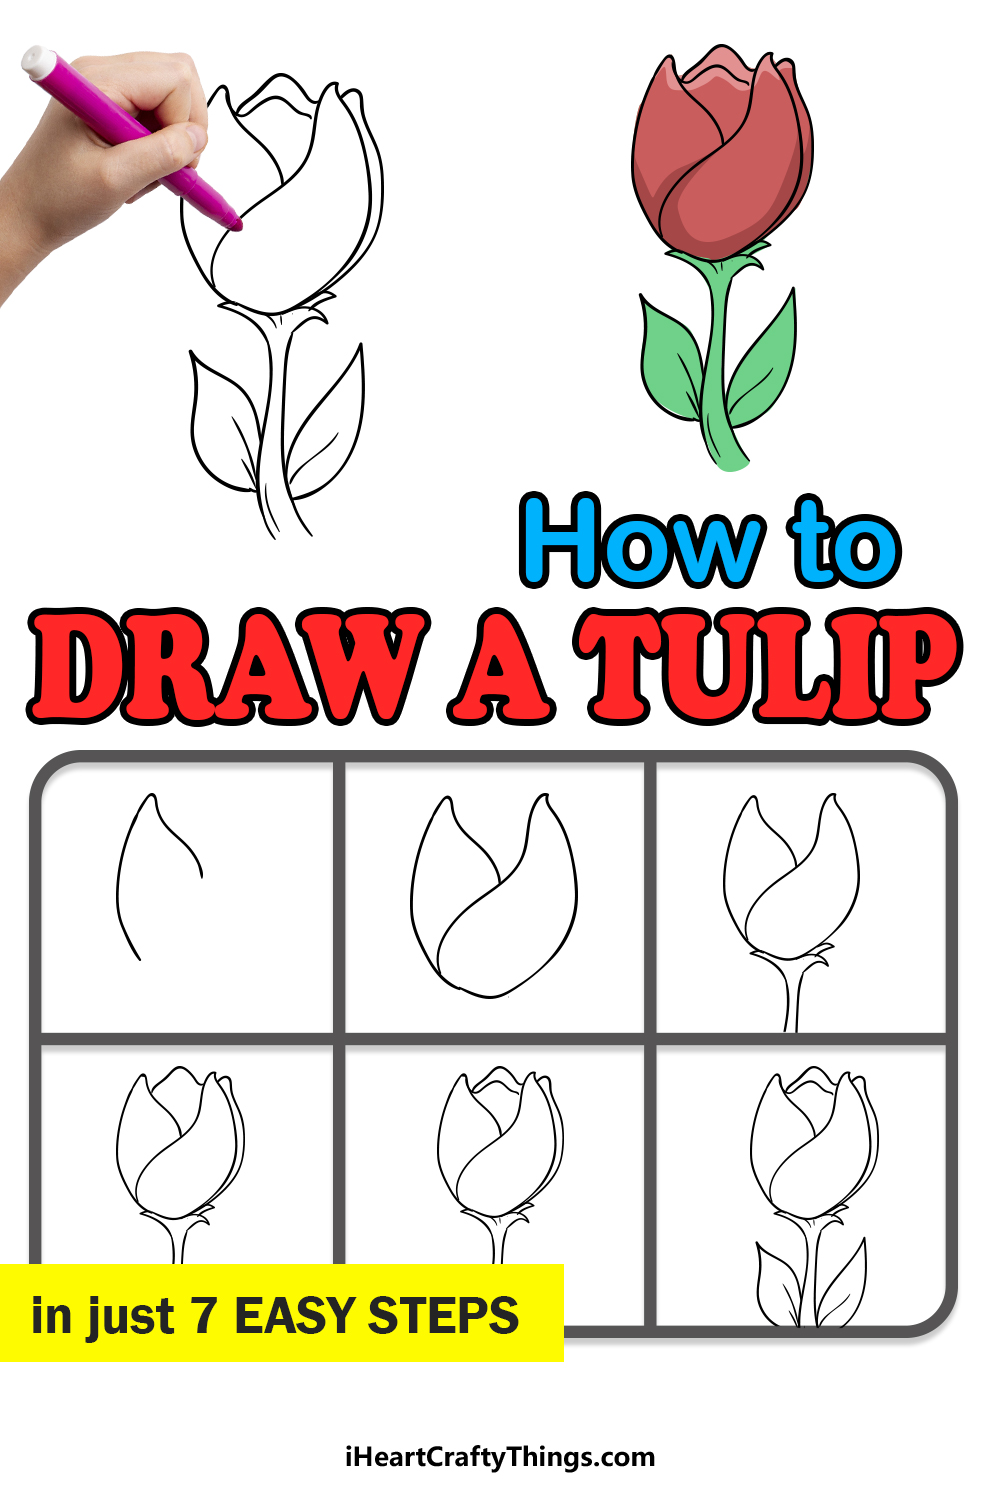
If you want to know how to draw a tulip, this guide for kids will make it easier than ever! Learn the simplest way to recreate this iconic flower by following through each step with me.
Tulips are flowers that have beauty in their simplicity. It’s part of what has made them so popular around the world and prompts many people to try and draw them.
Of course, even though they are simple flowers, it can be deceptive when you’re trying to learn to draw one. Getting the shape and little details of the tulip’s petals, leaves and stem can be a bit of a challenge when you go in blind.
I want to show you just how easy it can be when you break it down into smaller steps! Soon, you will be able to create a whole bouquet of tulips and add in some of your other favorite flowers as well.
Learn To Create A Tulip Drawing By Watching This Guide
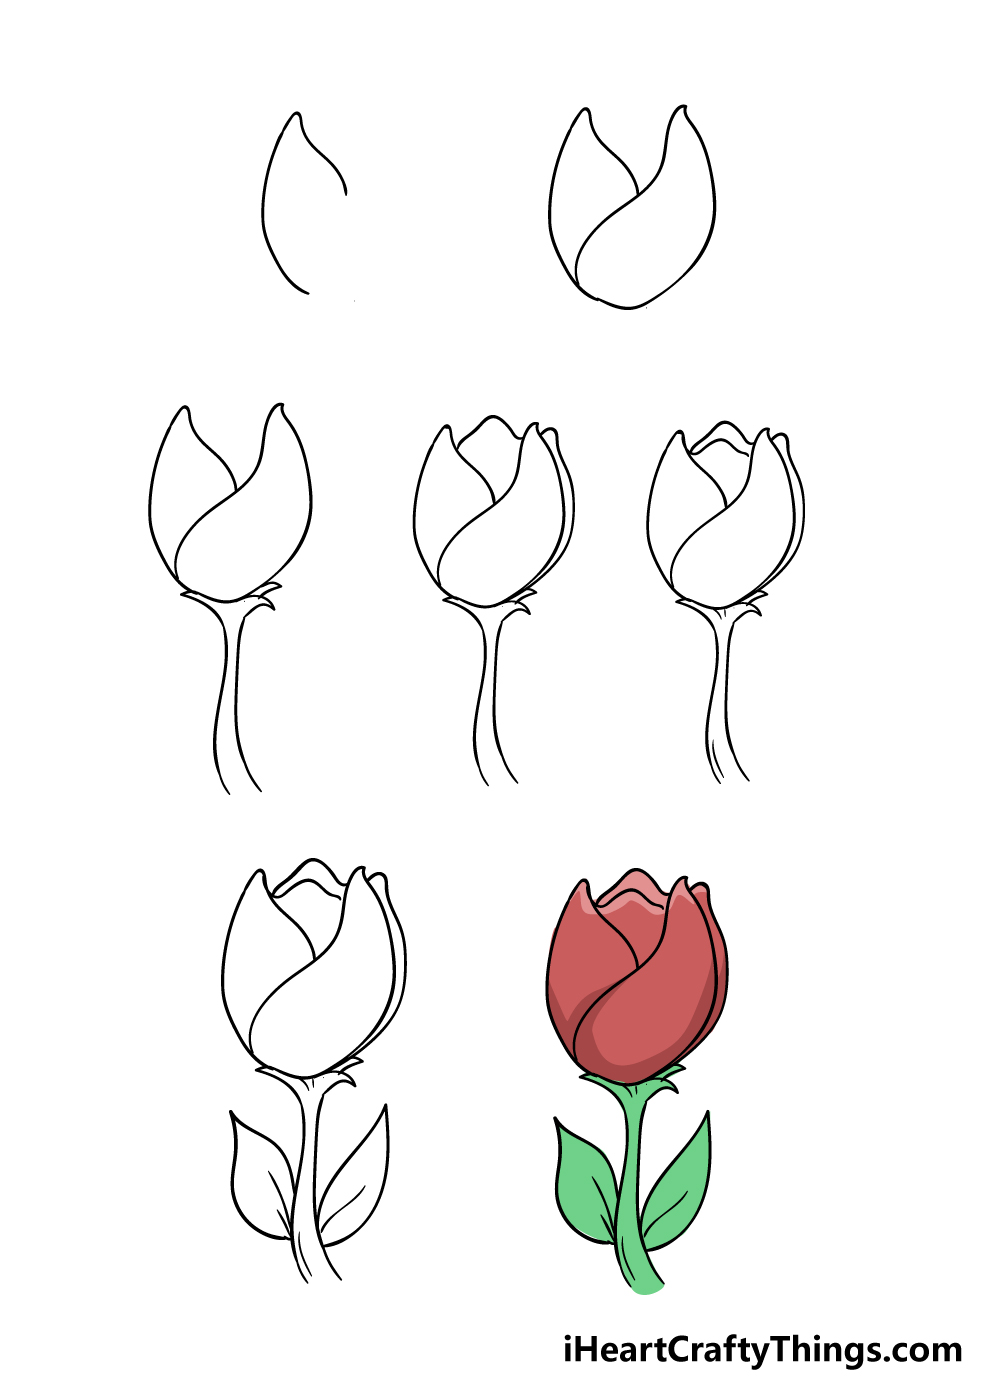
How to Draw A Tulip – Let’s get Started!
Step 1
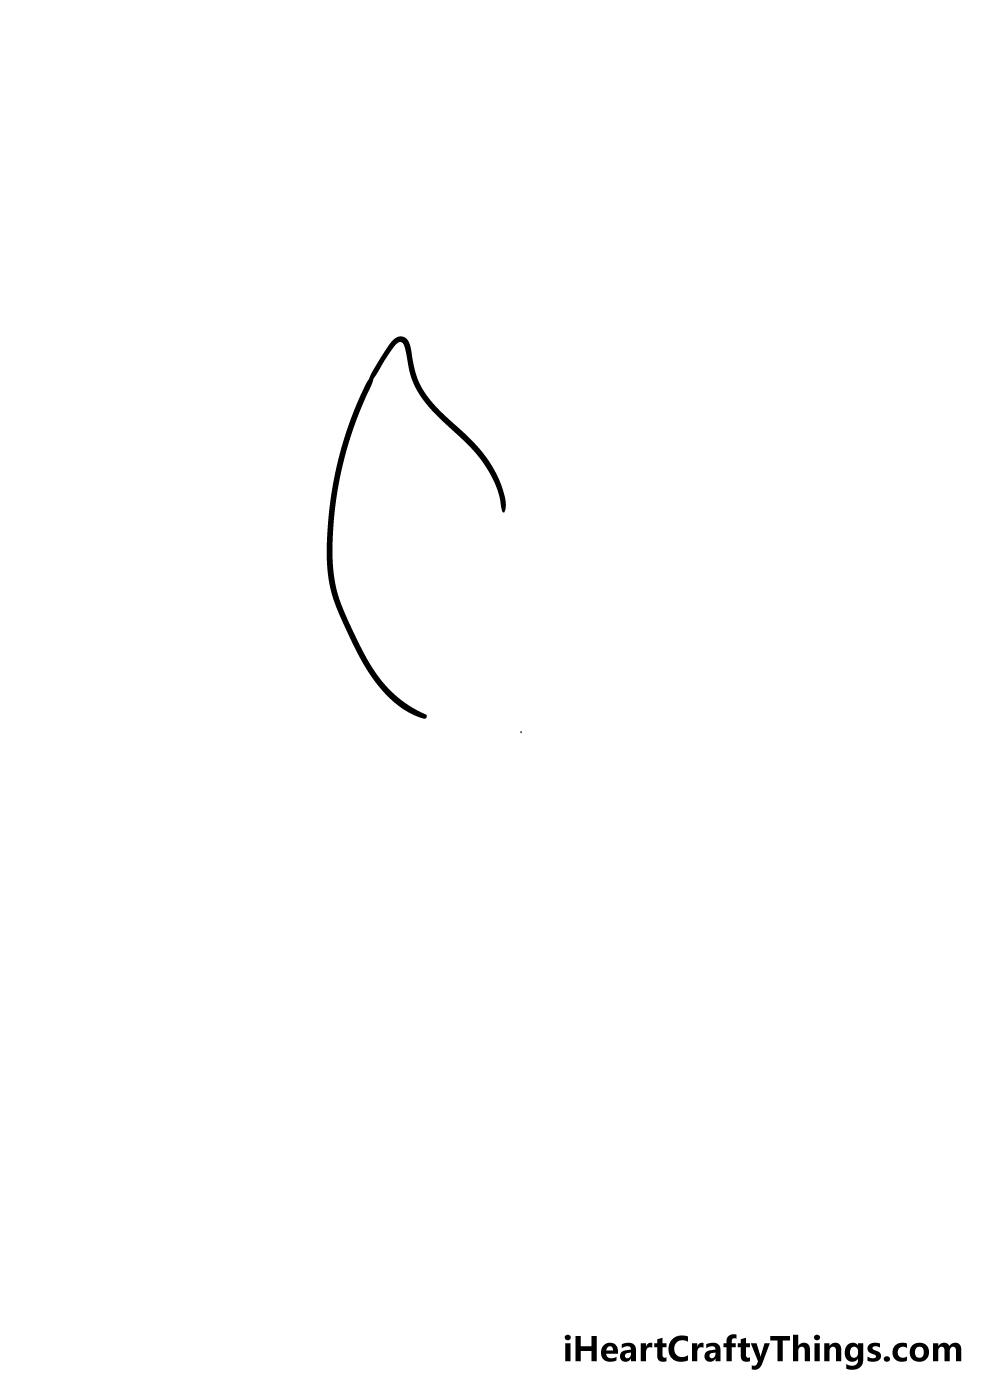
Tulips have a unique and specific structure to them, so we shall build them up using some simple lines and shapes. To start with, you can draw a curvy line with a point at the top.
The reference picture will guide you with how it should look. Getting the curvature of the petal can be a little bit tricky, so you could always draw with a pencil first before using your pen if you’re having a hard time with it.
Step 2 – Draw the next petal of the tulip drawing
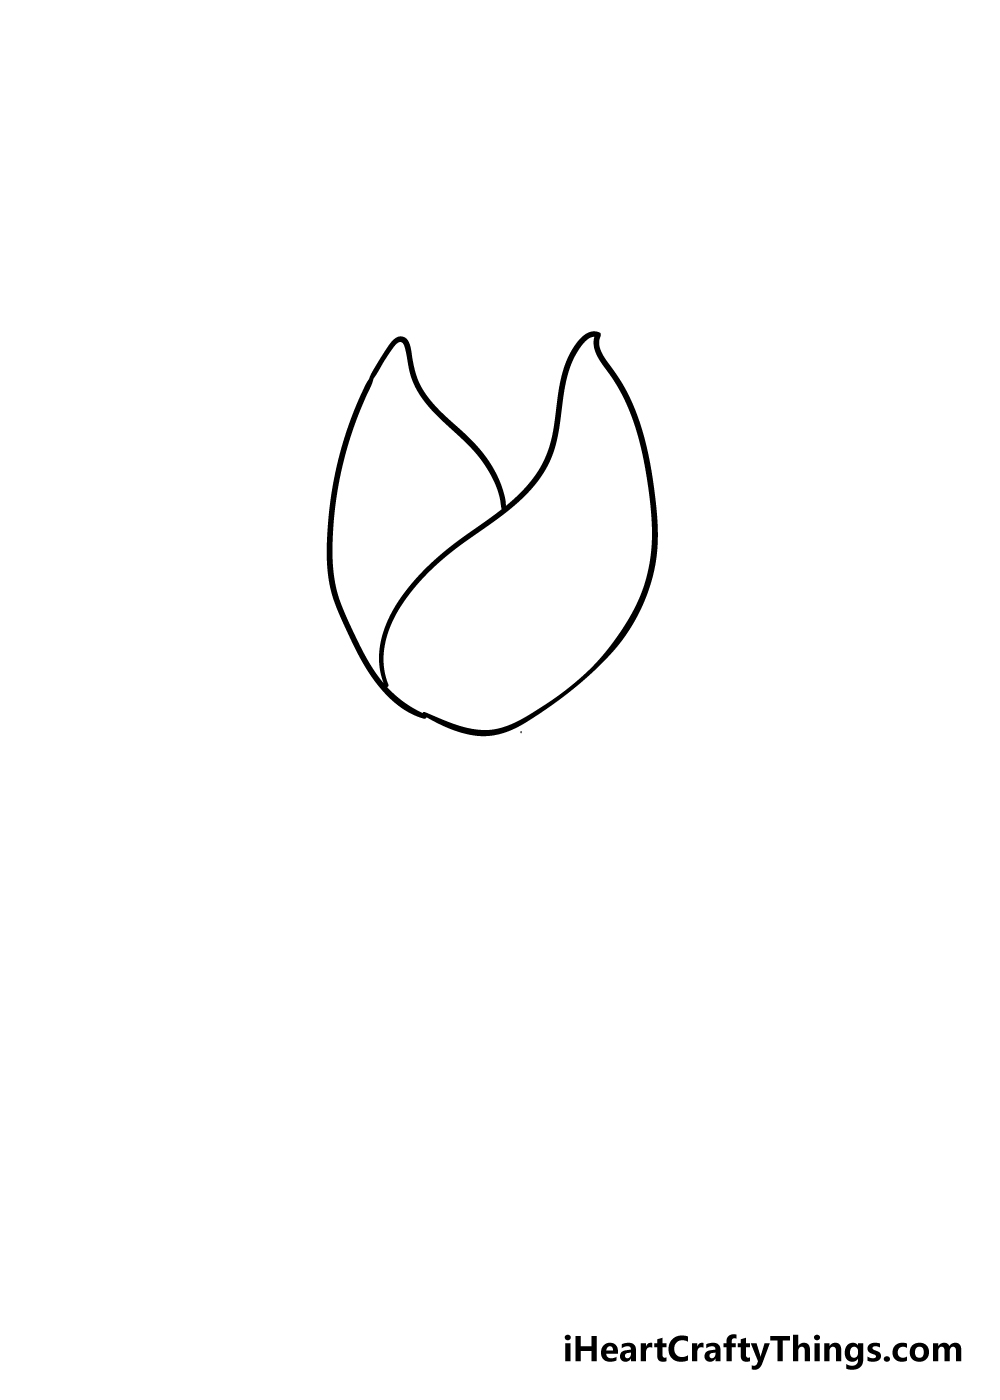
In this second step of our guide on how to draw a tulip, we shall start with the second petal. It should connect very organically to the first petal that you drew in the previous step.
It will have a similar structure to the first tulip, yet this one will be a bit bigger. Once you have that second petal, you’re ready for the next step.
Step 3 – Next, draw the stem of your flower
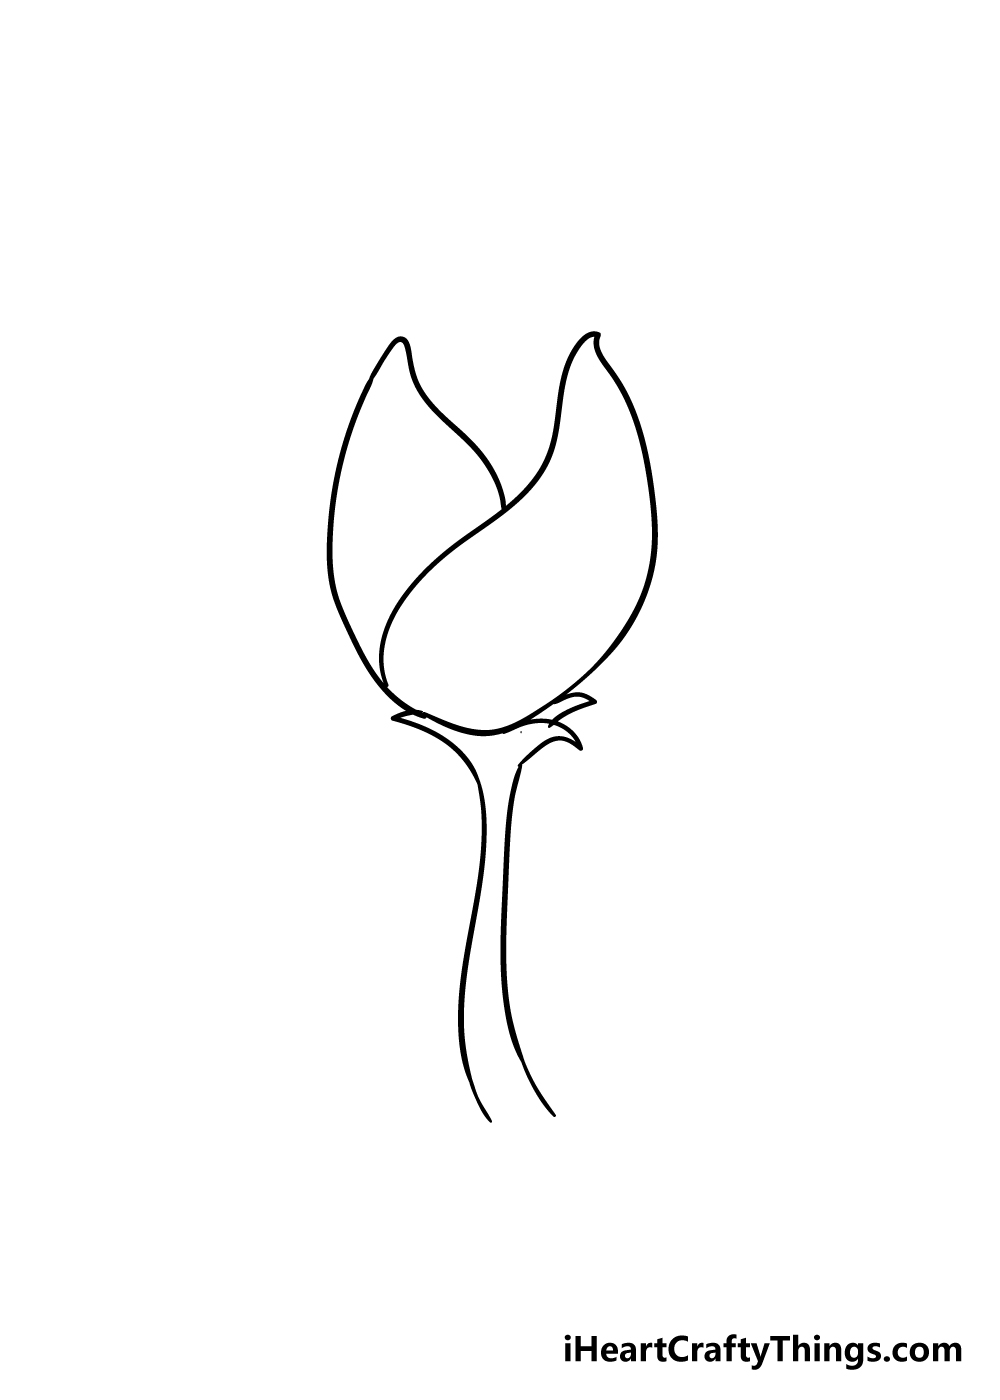
Every flower needs a stem, so let’s draw one for this part of your tulip drawing. The stem will start with some sharp lines near the top and will come down with some slightly curved, wavy lines.
You could also make the stem straighter or even more curved if you would prefer it like that!
Step 4 – Now, draw some more petals

Tulips have several layers of petals that make up their iconic design, so we shall add some more in this step of our guide on how to draw a tulip.
Carefully draw a line to the right-hand side of the flower as you can see in the reference image.
Then, draw a line with a sharp point near the top in the center of the flower to show a petal on the opposite side of the flower.
For these kinds of elements, you can also change the size and position of the petals to create a unique look. If you do decide to try this, then the reference image will help you position the petals correctly.
Step 5 – Next, draw some more details
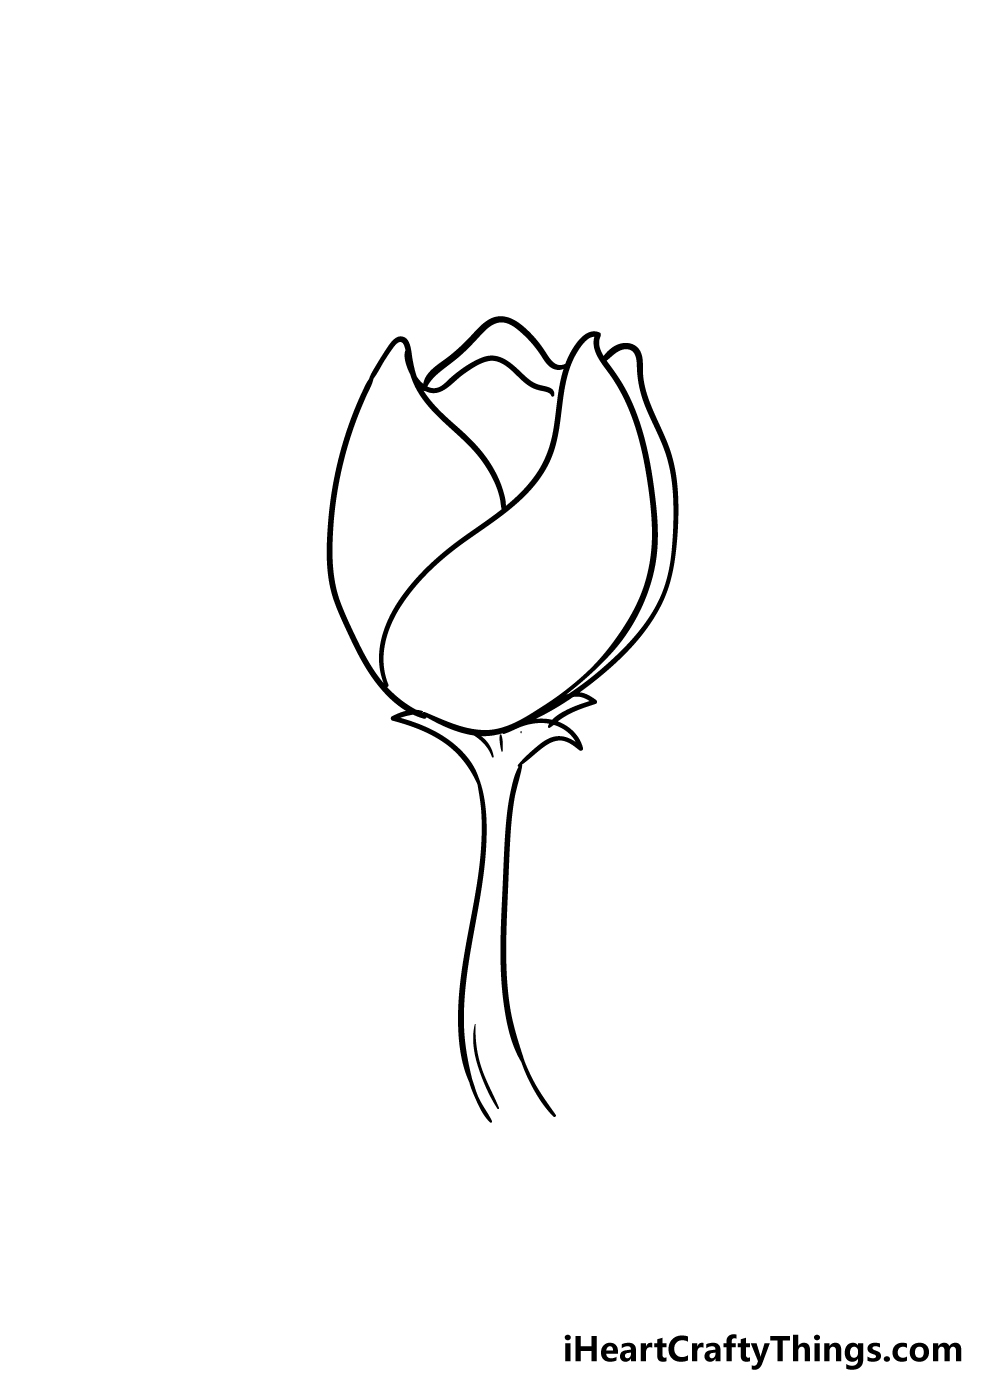
The next few steps of this guide on how to draw a tulip will be all about putting some final details and elements on your image.
For this part, the first thing you should do is draw a line in the center of the petal beneath the upper line. This will give a look of more petal layers to your image.
Finally, draw some lines on the stem for some extra detail to that area as well.
Step 6 – Close off the drawing with some leaves
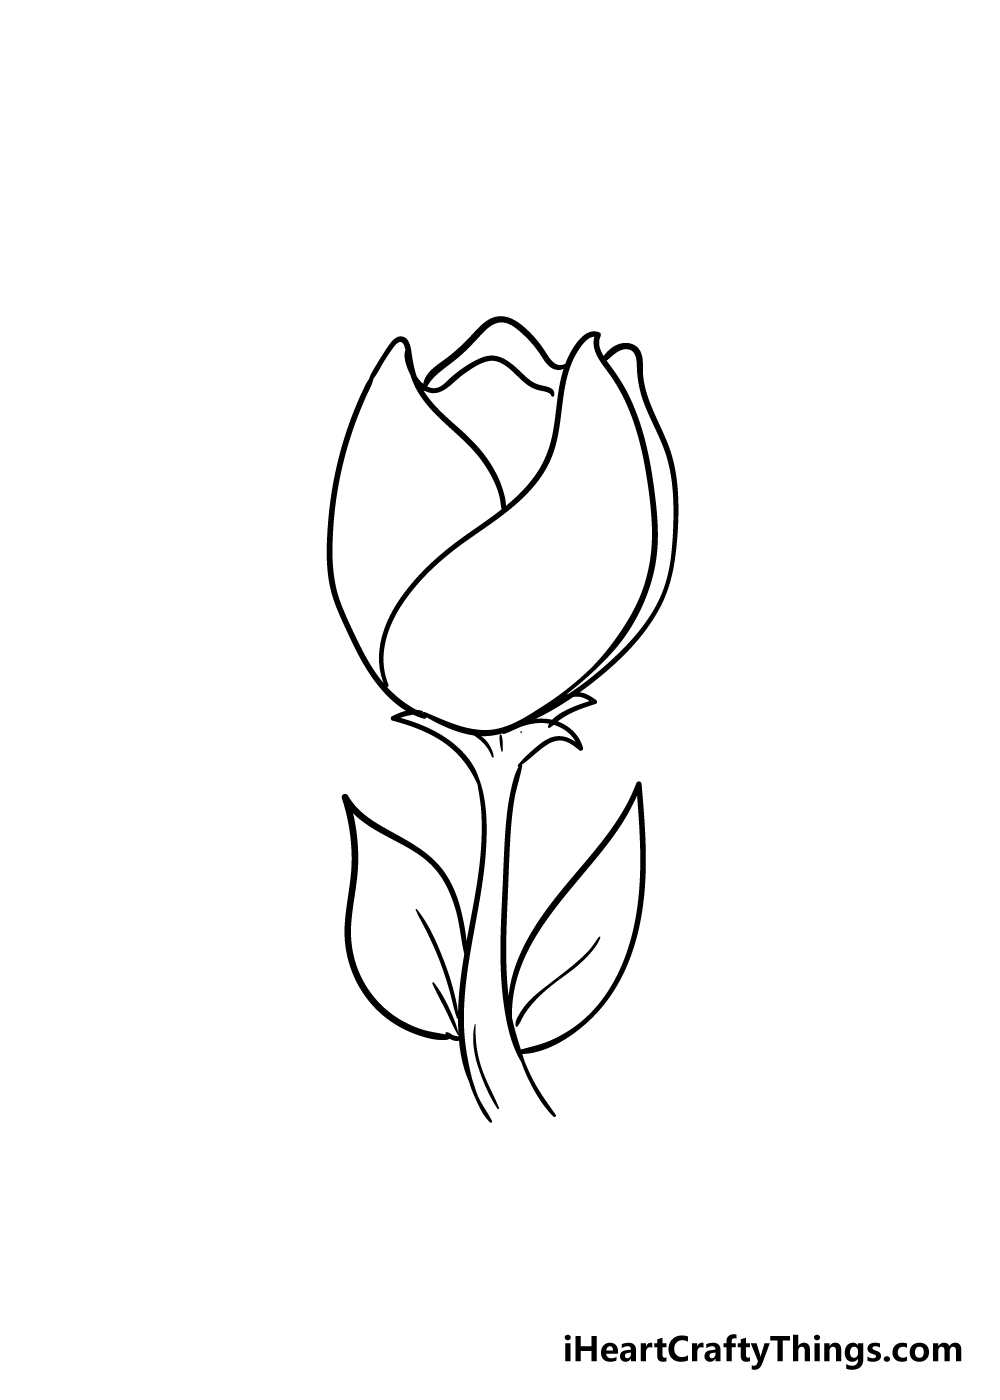
Before you bring some amazing colors to your tulip drawing, you can finish it off with the final elements.
The main element is the leaves of the tulip, which can be drawn using curved lines with a sharp point at the tip, like the ones in our reference picture.
Finish off these leaves by drawing some simple lines in the center of them, and with that detail, you have finished the drawing!
Before the final coloring step, now is your chance to add any additional elements that you would like to finish off your drawing nicely.
These could range from some details such as insects on the flowers to a detailed background. If you’re feeling ambitious, you could even draw multiple tulips on one page for a tulip extravaganza!
There’s no limit to the creativity you can display for your image, so we can’t wait to see what you come up with.
Bonus: Try Out These Creative Ideas For Your Tulip Drawing
Like all beautiful flowers, this tulip drawing will need color to reach its full potential. That is what we will focus on in the final step, but for now we had a few more tips for the drawing.
First off, we hope that learning how to draw a tulip has been easy and fun for you to do. If it has been challenging so far, we would encourage you to look up some photos and diagrams of tulips.
If you look at them in conjunction with the images in our guide then you might find it a bit easier to tackle. Using these additional elements may also give you some extra ideas on some details you could add to the design.
Another way you could really elevate this drawing and maybe even make it a bit easier would be to use some craft materials to create the tulip. For example, you can get colorful tissue paper from craft stores.
You could then use that paper and some glue to make the petals of the flower and stick it over the image. This way, you could craft the flower instead of drawing it traditionally.
Surrounding the tulip with more tulips would also take the focus off of the one flower and make it harder to see any imperfections or parts you’re not happy with.
Not only that, but it would also make for a wonderful celebration of this beautiful flower! These tips can be used to make the drawing a bit easier or simply to add to it to make it even better.
Now that we have covered these tips, we will now move to the final step of the guide and cover some of the colors you can use.
Step 7 – Finish off your tulip drawing with some color
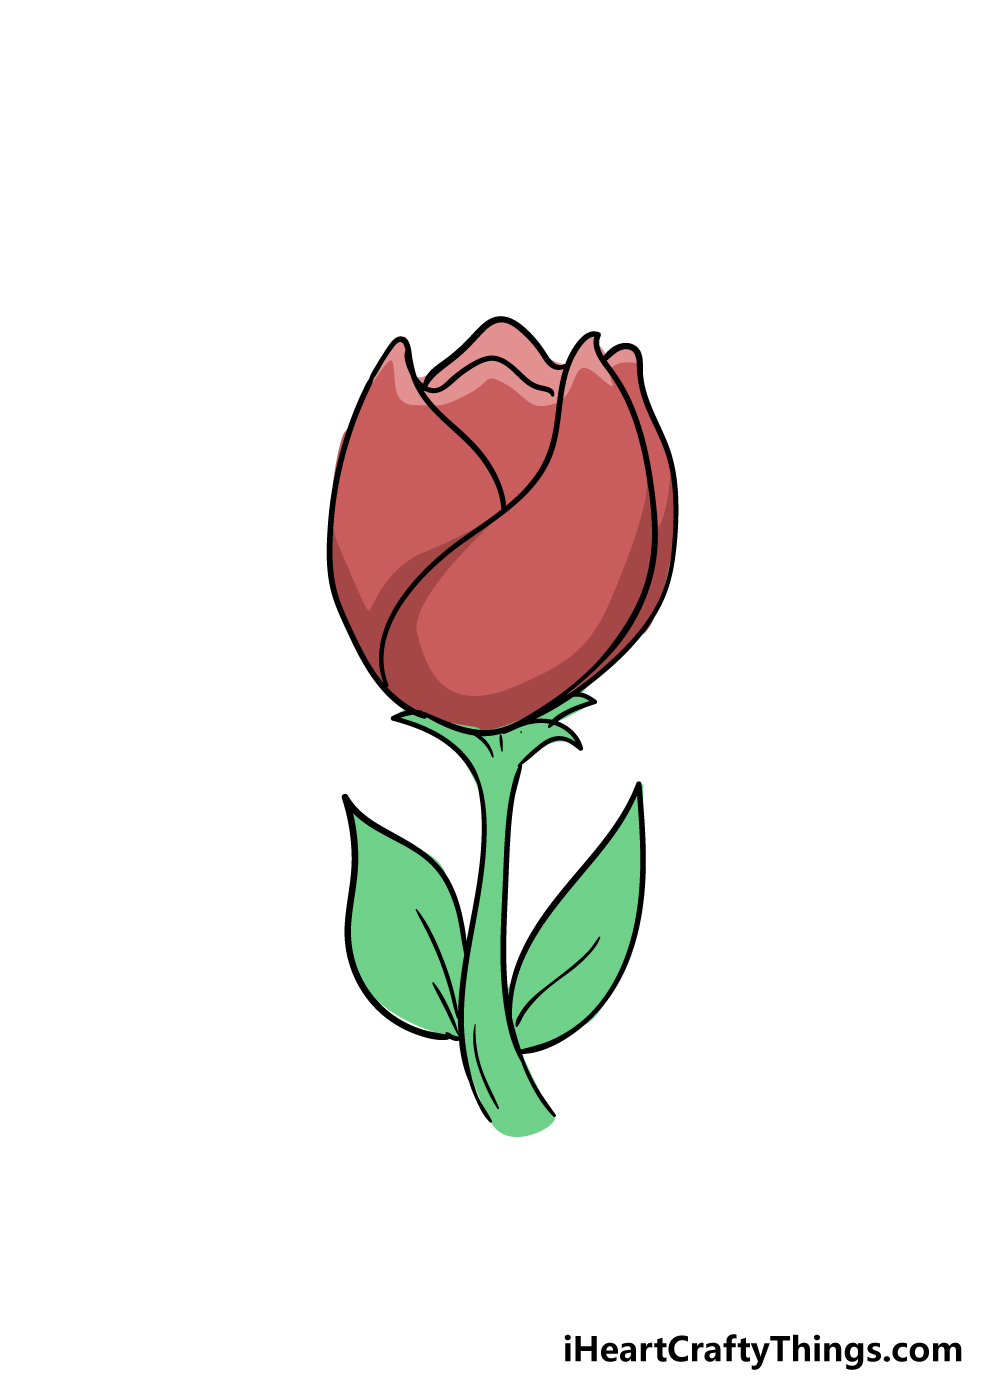
Now that you have completed drawing your tulip and any extra elements that you like, you can move on to the final part that you need to bring your drawing to life. It’s a fun step, as now you get to express yourself with some beautiful colors!
Tulips come in a wide variety of different colors, so you have a wide palette of different ones to choose from. While they can come in many colors, one thing is usually consistent: the brightness.
Tulips almost always come in wonderfully bright and vibrant colors, and there are some mediums that you could use to replicate this vibrancy.
The best ones for brightness would be some acrylic paints, colored pens or markers.
While these would be great for some brighter colors, you could also keep it a bit more muted by using something like watercolors.
This could help to give a more classic feeling to the picture, and could even help to give your tulip drawing a bit of a storybook feel.
There are so many options at your disposal, and any colors or mediums you choose will look incredible!
4 More Ways To Make Your Tulip Drawing Unique
Find out how to make your tulip sketch look even better with these tips!
This drawing of a tulip shows just one of these beautiful flowers. They are at their best when there are lots of tulips together, so you could add some more to the drawing to create that look.
To do this, simply follow through the steps of the guide again. Then, you can change some minor details or make each one a different color to differentiate them.
How many tulips would you like to add to the scene to create a wonderful floral view?
When you’ve had enough of drawing tulips, you could also look into adding some other flowers to the scene. There are no wrong answers when it comes to the flowers you add to the scene.
This would be a great chance for you to show off all of your favorite flowers, whether they’re big and bold or small and subtle.
Adding different flowers would also be great for incorporating more colors into the scene.
Which of your favorite flowers would you like to add to the picture?
Once you’re happy with the number of flowers in this tulip drawing, you could then add a background to take it to the next level. This is something you could get really creative with!
A few simple examples would be to show this tulip growing in a garden or maybe in a flower pot in a home. These are just a few simple ideas, but be sure to show us where you think this tulip could be!
Another way you could add some life to your tulip sketch would be by adding some characters to it. One fun idea would be to add a version of yourself to the picture.
If you’re not as used to drawing real people, you could use a simpler cartoon style in order to make it easier.
If you don’t add yourself, you could draw a more general cartoon character or even an animal character.
Your Tulip Drawing is Complete!
That brings us to the end of this guide on how to draw a tulip. We hope that you had an amazingly fun time working through this guide to land up with the incredible drawing in front of you!
Tulips have an intricate and specific structure to them, so we hope that the steps in this guide made it easy and fun for you to learn!
This step-by-step drawing guide is not the end of your drawing adventure, though! We have many more uploaded on our site for you to enjoy, and we will be bringing out many more frequently.
Please remember to check out our site frequently to never miss out!
We can’t wait to see your amazing tulip drawing, so please be sure to upload it on our Facebook and Pinterest pages for us to enjoy!