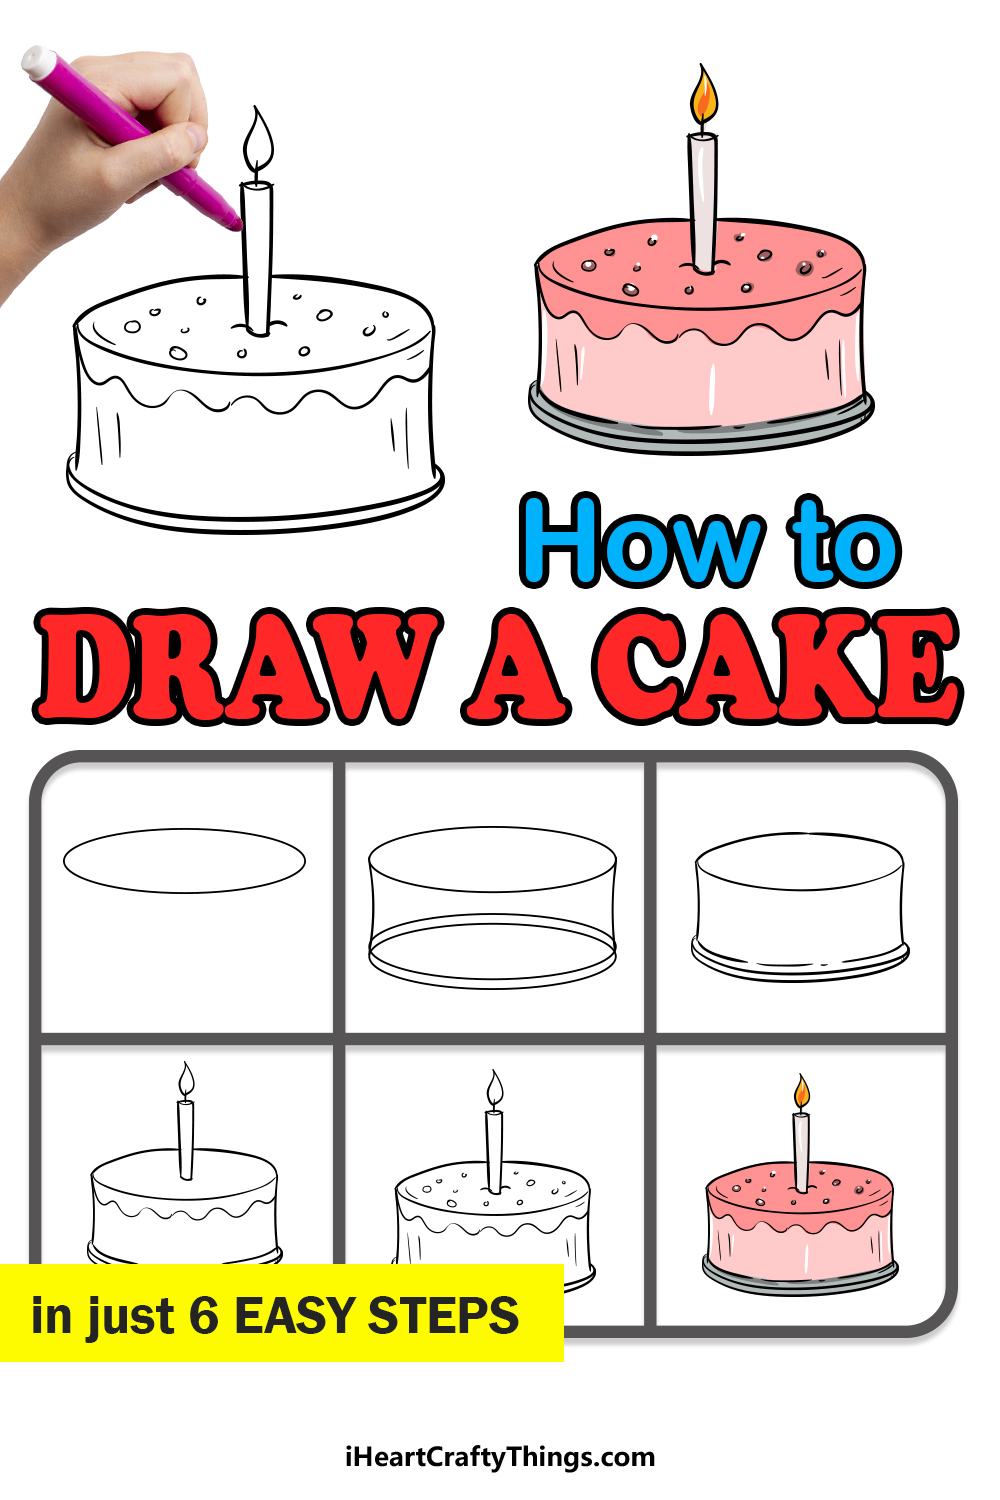
Learning how to draw a cake is trickier than you think, but this guide for kids is here to make it easy! You won’t believe how simple it is to draw your own delicious cake designs.
Cakes are used for so many of the biggest occasions in life: birthdays, celebrations, milestones and even just as a treat to name a few!
They not only come in many different flavors, but can vary a lot in their shape and structure as well. When you want to draw one, there are a lot of ways it can go wrong!
In this guide, I’ll be showing you how to build a rough version of the cake with your pencil that you can use to plan out the rest of the final drawing.
Then, you could use what you learn to create your very own cake designs and ideas. There is no limit to the fun you can have, so let’s begin!
Easily Create A Cake Drawing By Watching This Guide
How to Draw A Cake – Let’s get Started!
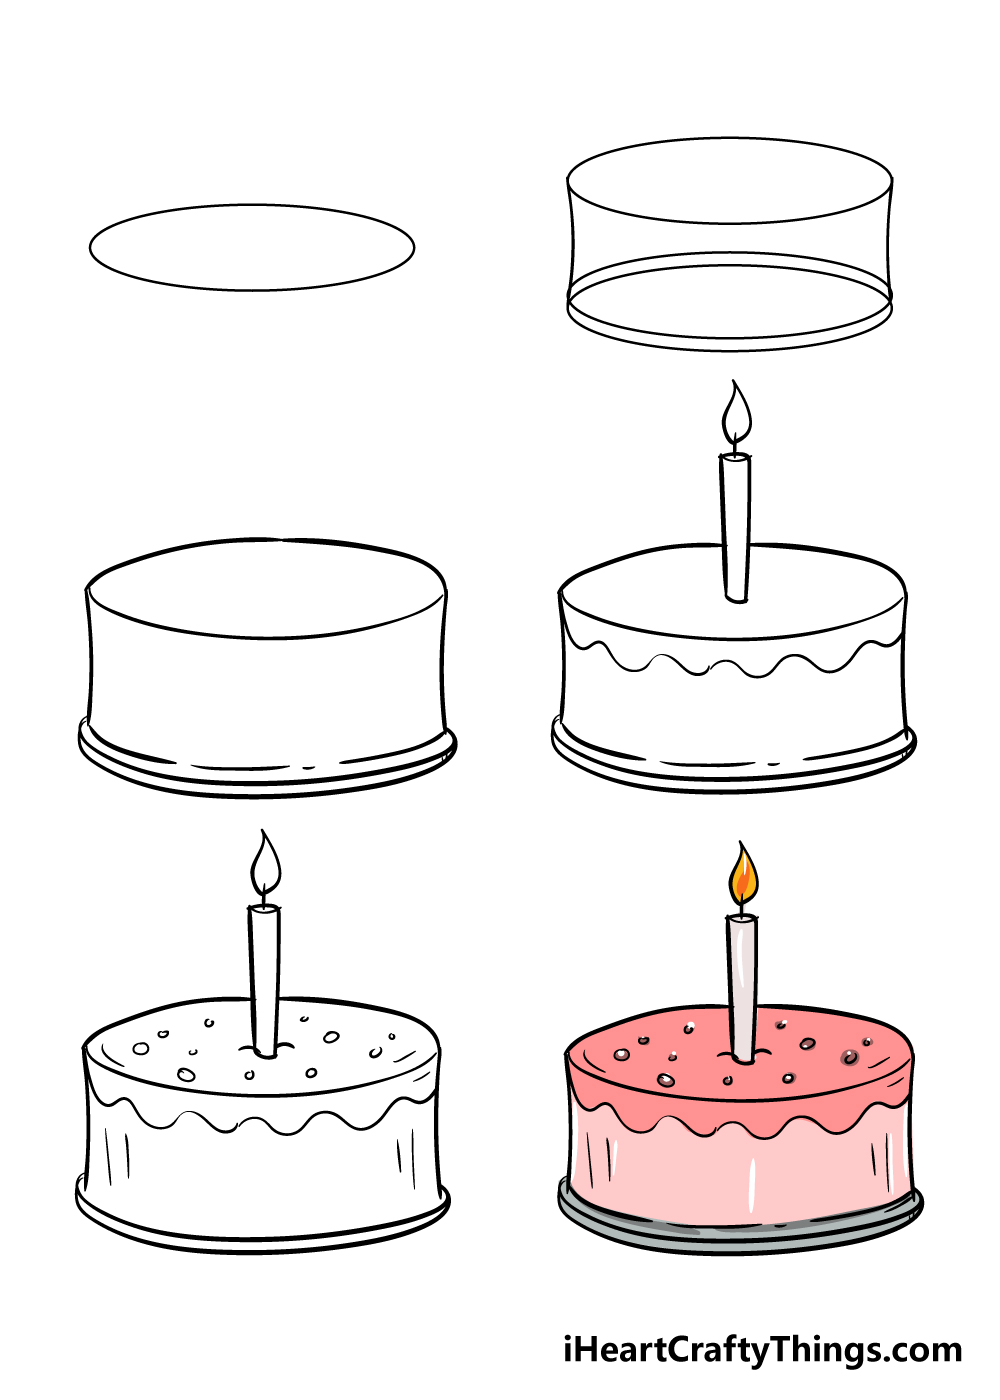
Step 1
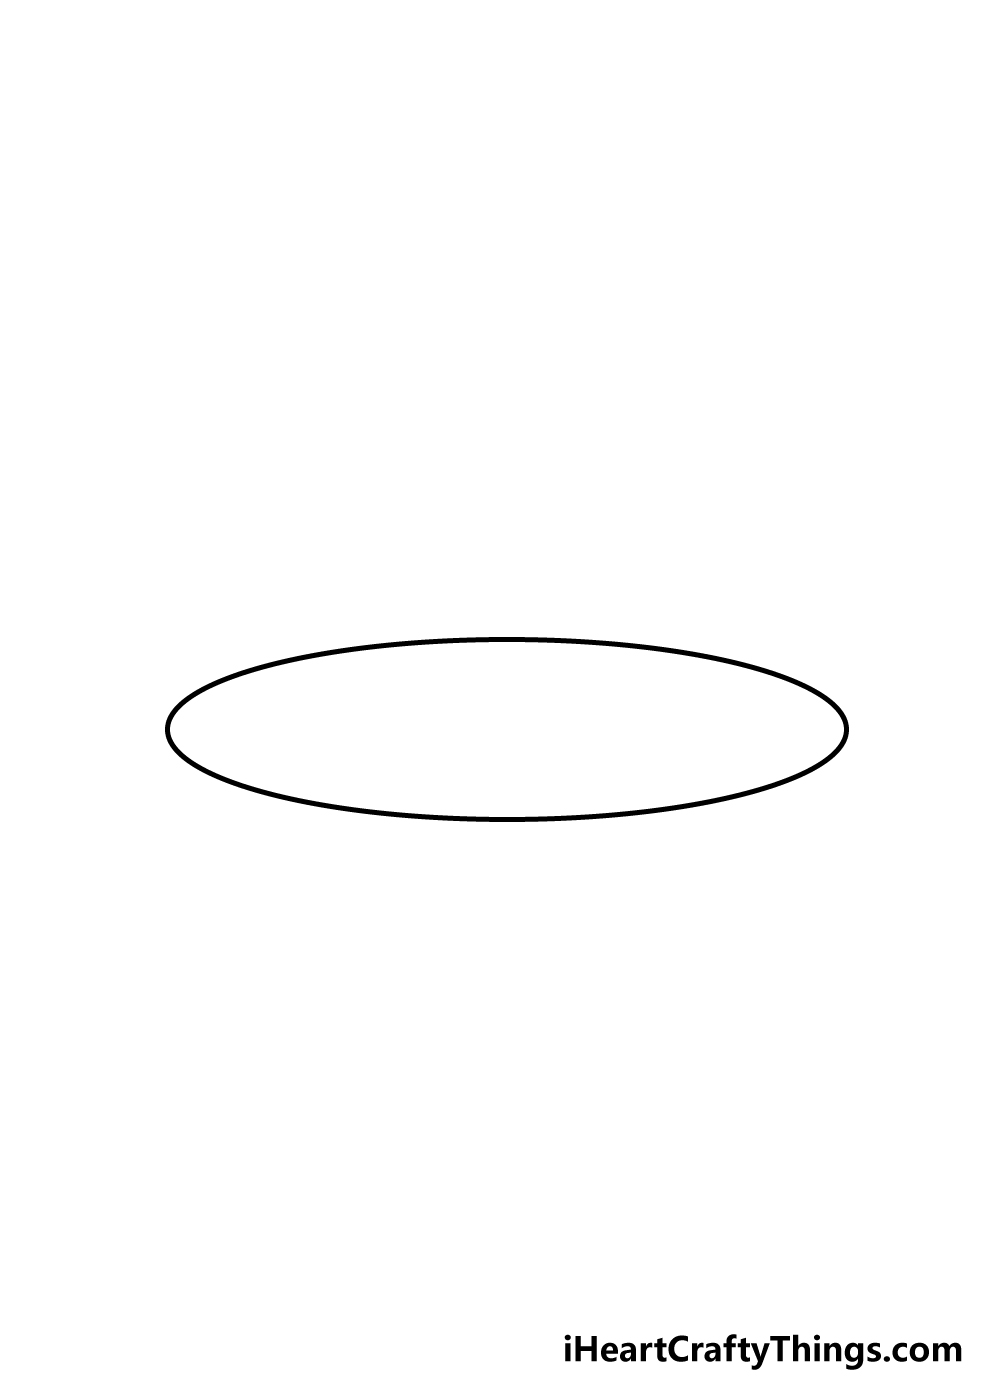
In this first step of our guide on how to draw a cake, we will be starting with a very simple guide shape. For the first few steps, I would recommend using a light pencil to draw.
This is because we will be having lots of overlapping lines in these steps, so it can help to draw in pencil and then go over it with a pen when you’re happy with it.
For now, simply draw a flat oval shape like the one you can see in the reference image.
Step 2 – Draw in more of the cake outline
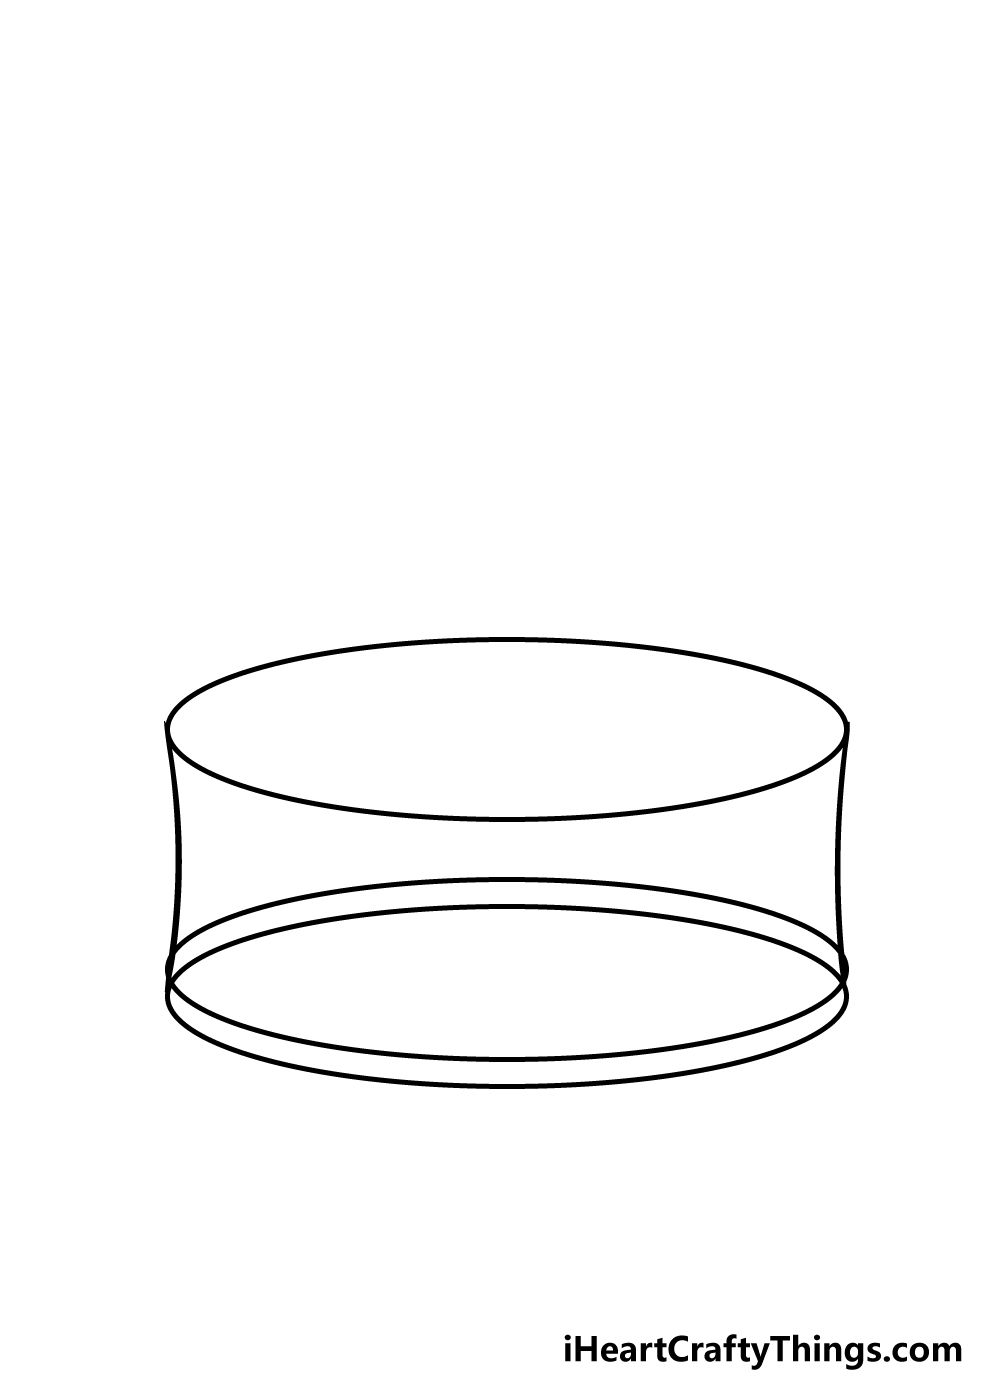
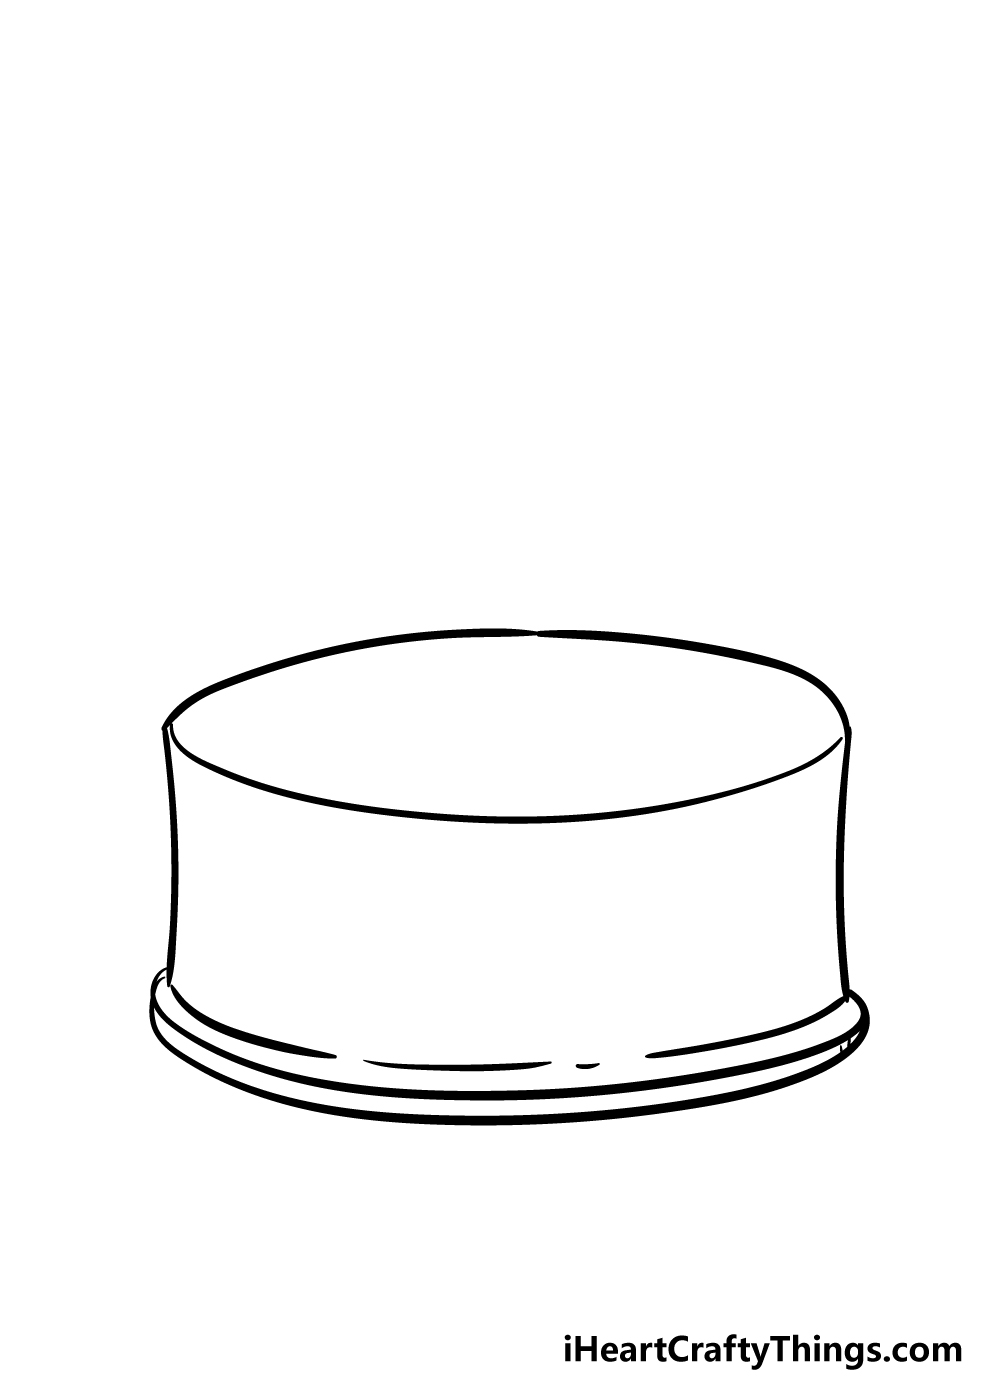
For part two of your cake drawing, we will be using the shape that you drew in step one to build upon. First, draw two slightly curved lines coming down from the oval that you drew.
Once you have those drawn, you can draw two more ovals very close to one another at the bottom of the lines until it looks like the reference picture does. These ovals will form the base of the cake.
Step 3 – Now, we will start adding details
The shapes that you have drawn in the previous steps of this guide on how to draw a cake will be your guide in this step where we will be drawing in some final details for the cake.
If you have been using a light pencil up until now, you can start using a pen for this stage.
Using both our reference image and the shapes you have drawn as a guide, you can carefully go over the lines and add a bit more definition to them.
When going over in pen ink, remember to leave a small space near the top line of the cake, as you will be drawing a candle into that space later.
Once you’re happy with how it looks, you can erase the pencil lines. Be careful to let the pen ink dry before erasing, however, as you can smudge the ink if you do it too soon.
Step 4 – Next, draw a candle and some icing
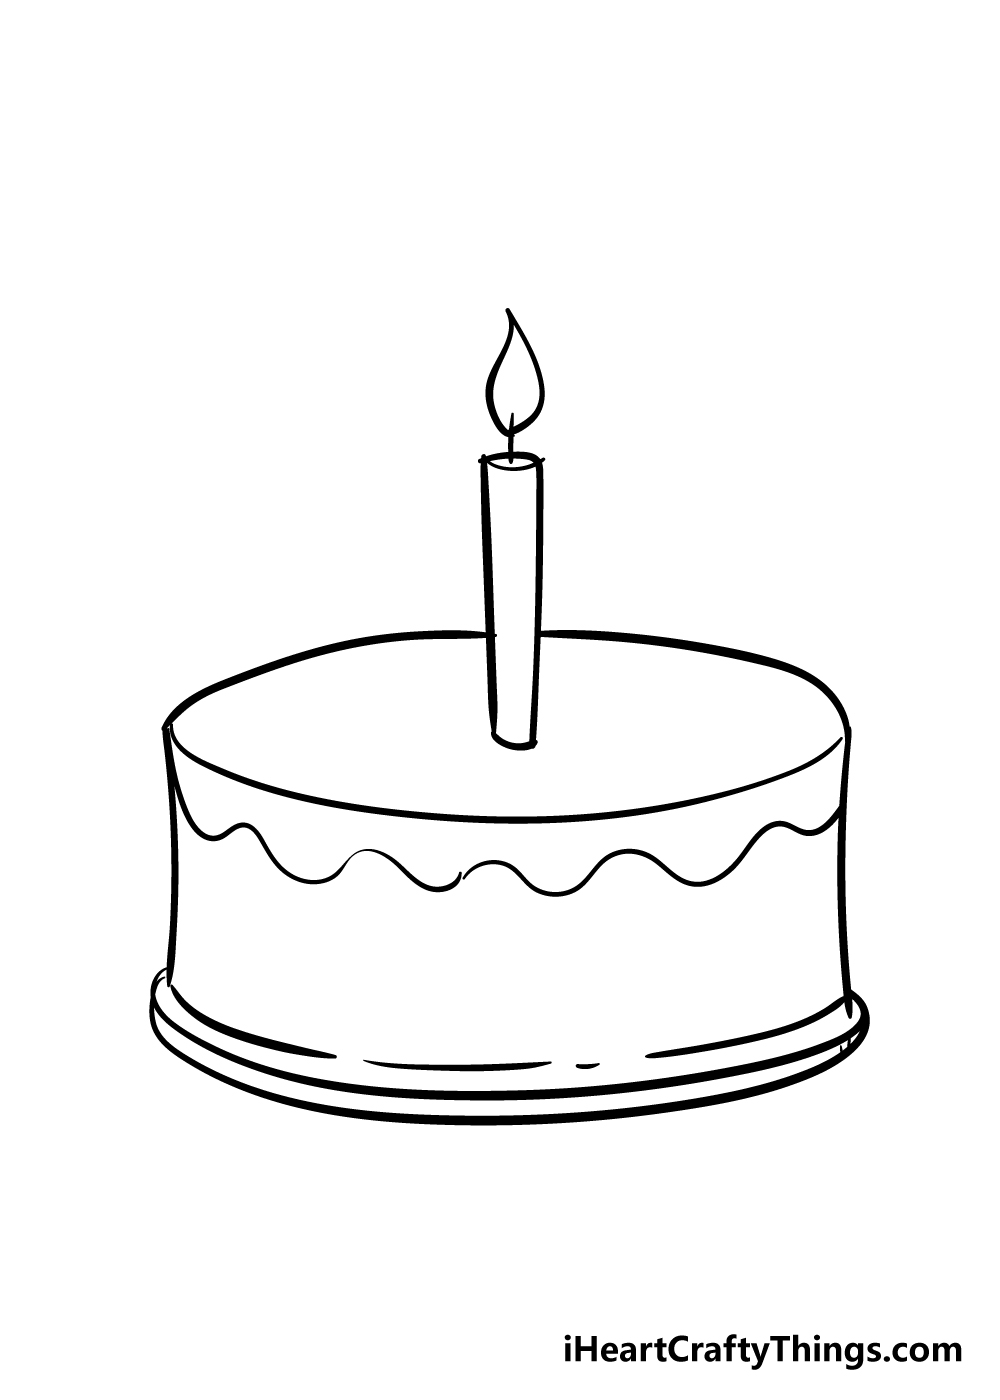
Nothing brings a cake to life like a bright candle, so let’s add one to your cake drawing in this step! You can draw a candle into the space you left in the top line earlier by using a cylindrical shape.
Then, draw in a wick and a flame on top to finish it off. The candle is a detail that you could change up as you wish, too. You could change the shape, draw a pattern on it or even draw in more.
Then, once you’ve drawn the candle, you can add a layer of icing using a wavy line along the rim of the cake as you see in the reference picture.
Step 5 – Now, you can draw in some details

This step of our guide on how to draw a cake is one where you can show off your creativity by decorating your cake!
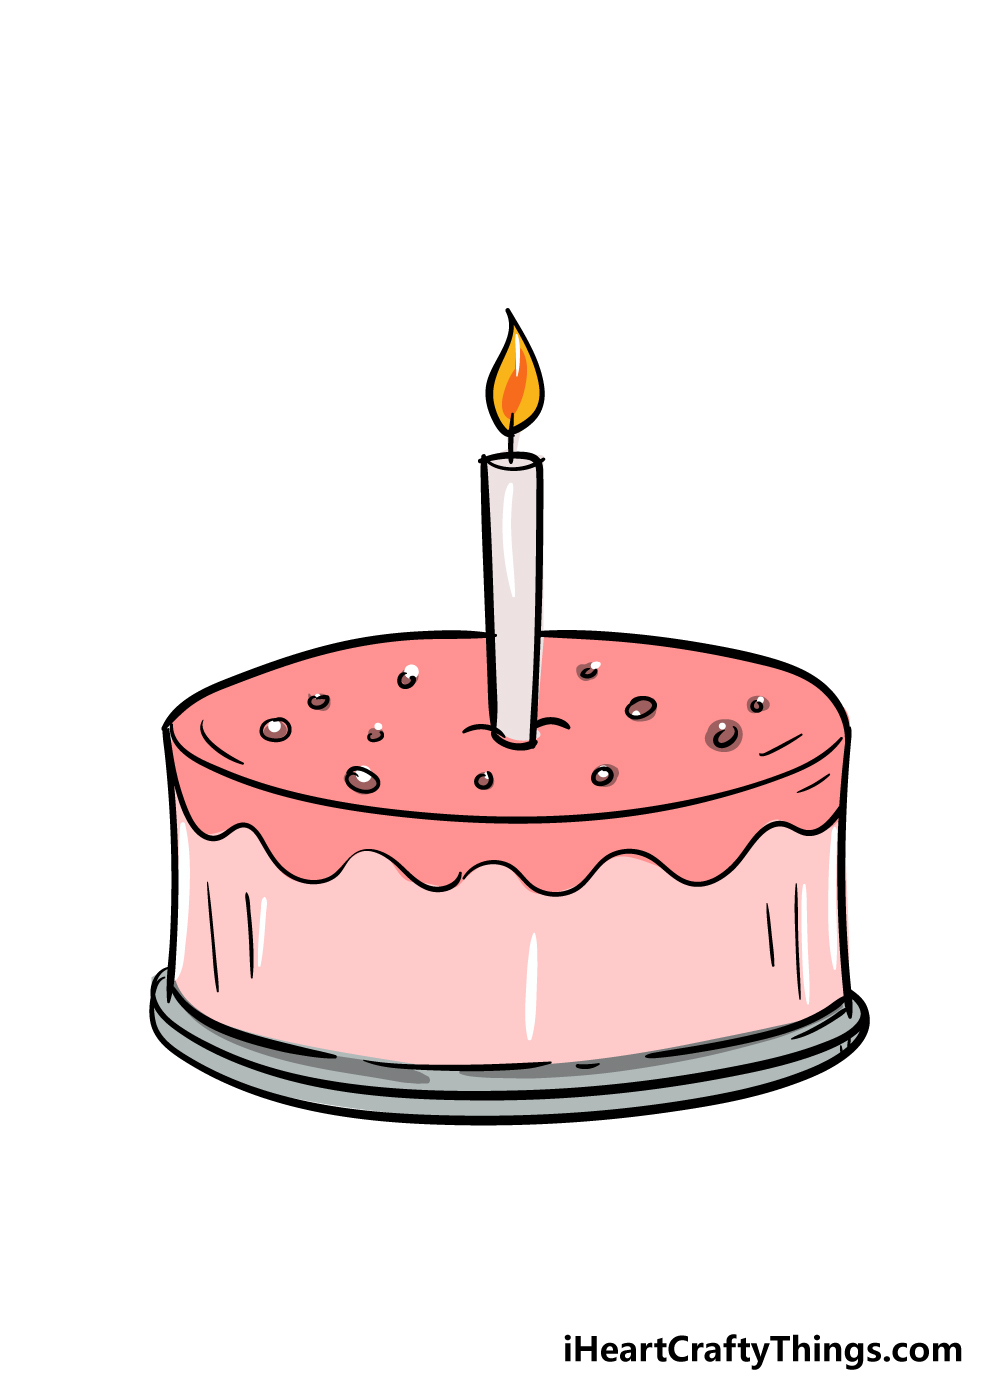
We decorated the one in our reference image with some simple shapes and lines to suggest sprinkles.
You could keep your cake drawing nice and simple like our one, but don’t be afraid to get extravagant with it!
This is your chance to become a cake designer and show what you think this cake should look like.
Will you add lots of sprinkles, some intricate icing or maybe some fancy candles? It will be very interesting to see what you come up with!
Step 6 – Finish off your cake with some color
Your cake decorating fun is not over with the final details drawn, however, as now you get to take it a step further with some amazing colors!
We used a pink color scheme for our cake, but you should use any of your favorite colors to finish off your own cake drawing.
This is the kind of drawing where you could use any colors you can dream of and have it work!
Will you use some bright and bold colors or keep your choices more pared-back and elegant? You can also express your colors by using your favorite art mediums and tools to really bring it to life!
Acrylic paints and colored pens would help to give your cake a bright, birthday party feeling while watercolors and colored pencils would perhaps be better suited to an elegant wedding cake.
Which color schemes and art mediums will you choose for your incredible cake drawing?
5 Tips To Make Your Cake Drawing Even Better!
Take a slice out of these tips we have for your cake sketch!
This drawing of a cake shows just one layer of this delicious treat. Of course, many cakes come in many layers, so you could add as many layers as you like!
Now that you know how to draw a cake, you could add many more layers to make a cake tower. How many layers do you think would be needed before this cake would be complete?
Whether you keep this cake to one layer or add some more, you could add some toppings as well. For instance, you could make it look like a wedding cake by adding flowers.
Or, there could be pieces of candy or small figures on top to make it fit a certain theme. What kind of theme would you choose for this cake?
When enjoying a cake, it is often best to have other treats alongside it. There are many that you could add to this cake drawing.
For example, you could have more kinds of cake to eat with it. Or, maybe you could draw some cups of juice or any other beverage you would like to have with it.
A cake can look as great as you like, but at the end of the day it will need to be eaten. That could be a fun detail to include in this image!
This would be as simple as drawing a few slices from the cake. Doing this would also allow you to show what the filling inside of the cake looks like!
What kind of filling would you choose for the cake?
Building on from the previous step, you could also add a background to the picture to finish it off. You could even take it a step further by adding a human character to the cake sketch!
It could be fun to draw yourself into this image to show you will be about to enjoy this cake. What sort of occasion would you like to portray here?
Your Cake Drawing is Complete!
You have reached the end of this step-by-step guide on how to draw a cake, and you have an awesome drawing to show for it!
We really hope that this guide was both fun and helpful for you as you set out on this drawing challenge.
By breaking things down into steps and using shapes to guide you, we hope you discovered that you can really make it look like drawing this picture was a piece of cake!
Drawings like this one are extra fun, as there is a lot of room to put your own spin on it. You can do this by adding your own design elements such as icing, candles and other decorative pieces.
You can also create a unique cake by using some of your favorite colors and by playing with some great art mediums. We can’t wait to see how creative you get with it!
This step-by-step guide is one of many that we have in store for you, so if you want some more drawing fun then please check out our site frequently to never miss out!
We would love to see your amazing cake drawing, so please do share it on our Facebook and Pinterest pages! We look forward to seeing your culinary creations.