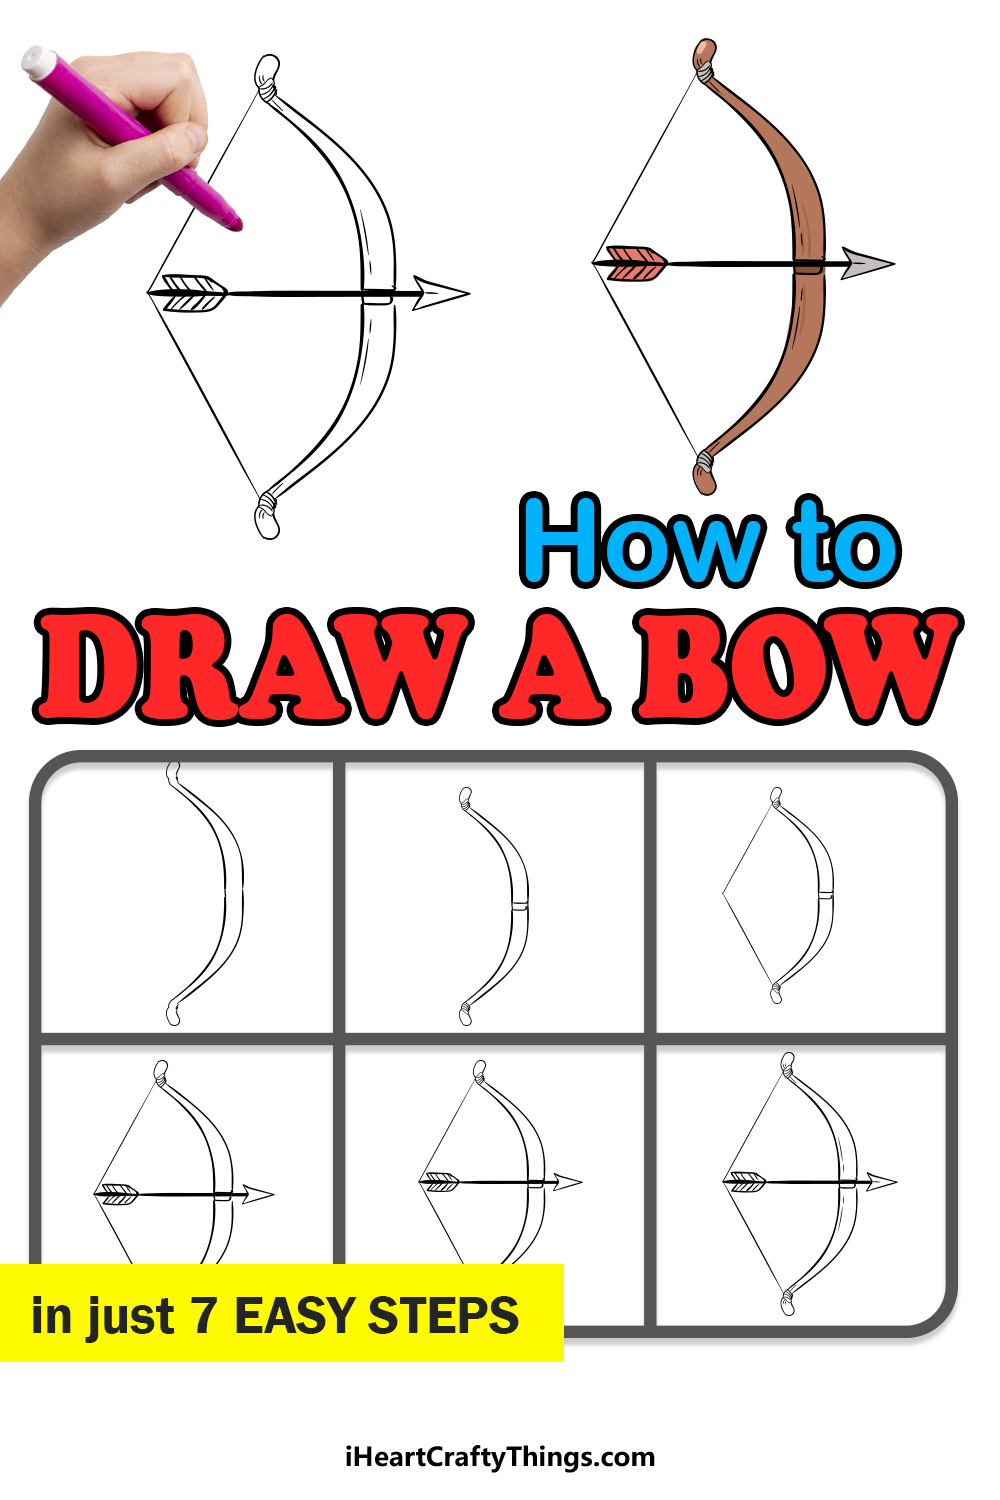
Learn how to draw a bow and arrow step by step! The bow and arrow has been an iconic weapon throughout history, from ancient warriors to legendary heroes.
This guide will show you how to draw a simple yet dynamic version of this classic weapon. Whether you’re looking to sketch a traditional bow or a cartoon-style archer’s tool, we’ve got you covered.
Drawing a bow with an arrow may seem tricky, but with these 7 easy steps, you’ll have it mastered in no time. Grab your tools and follow along to create a cool bow and arrow design that’s perfect for beginners!
Watch Me Draw a Bow and Arrow: Easy Step-by-Step Tutorial
How to Draw A Bow – Let’s get Started!
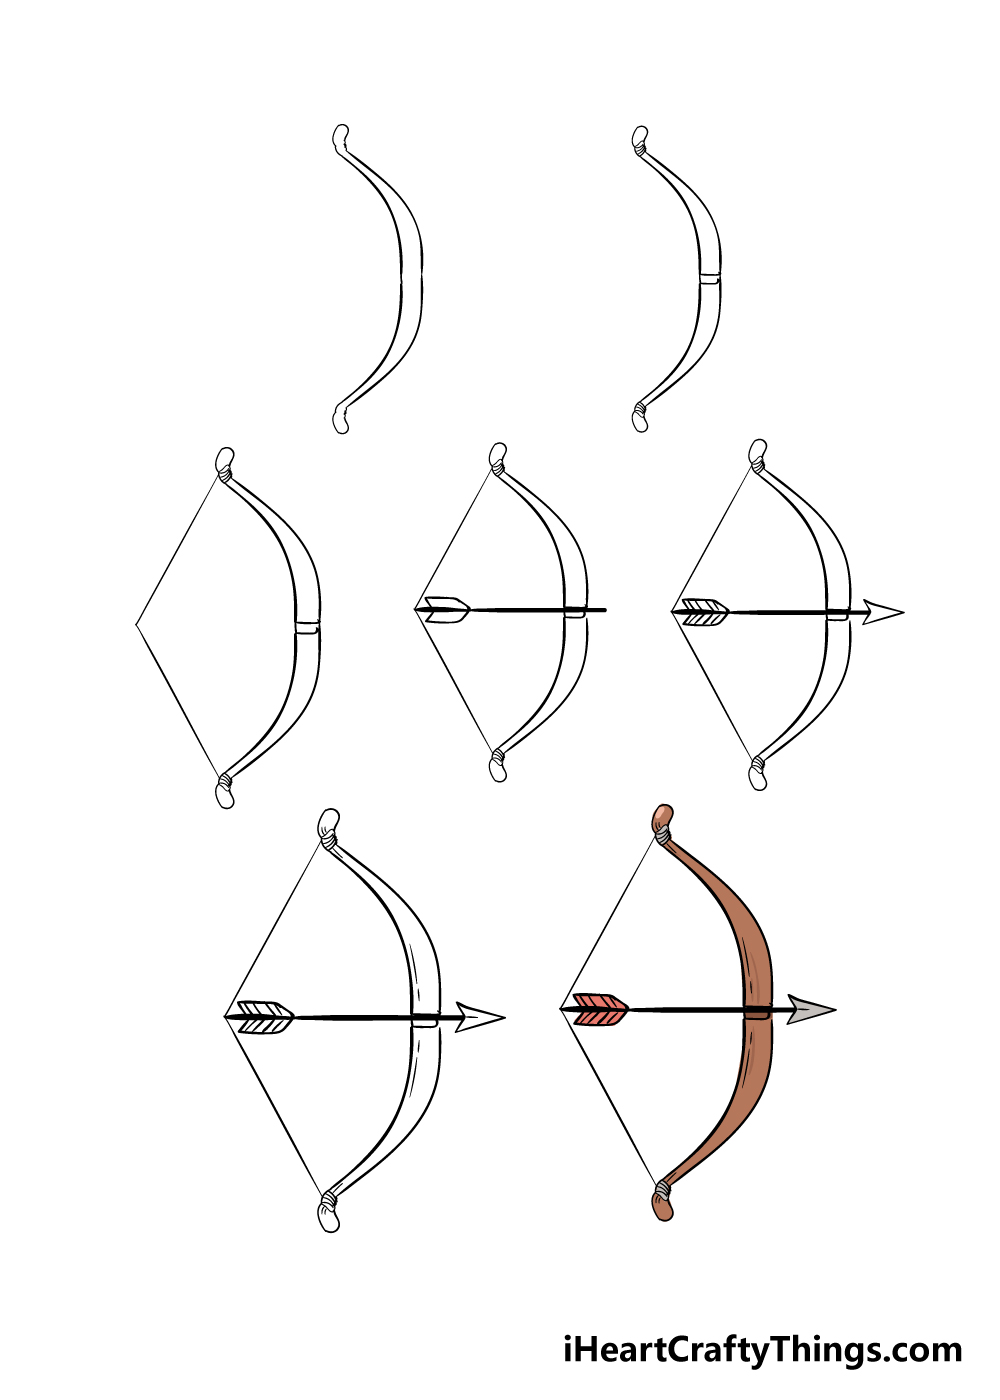
Step 1
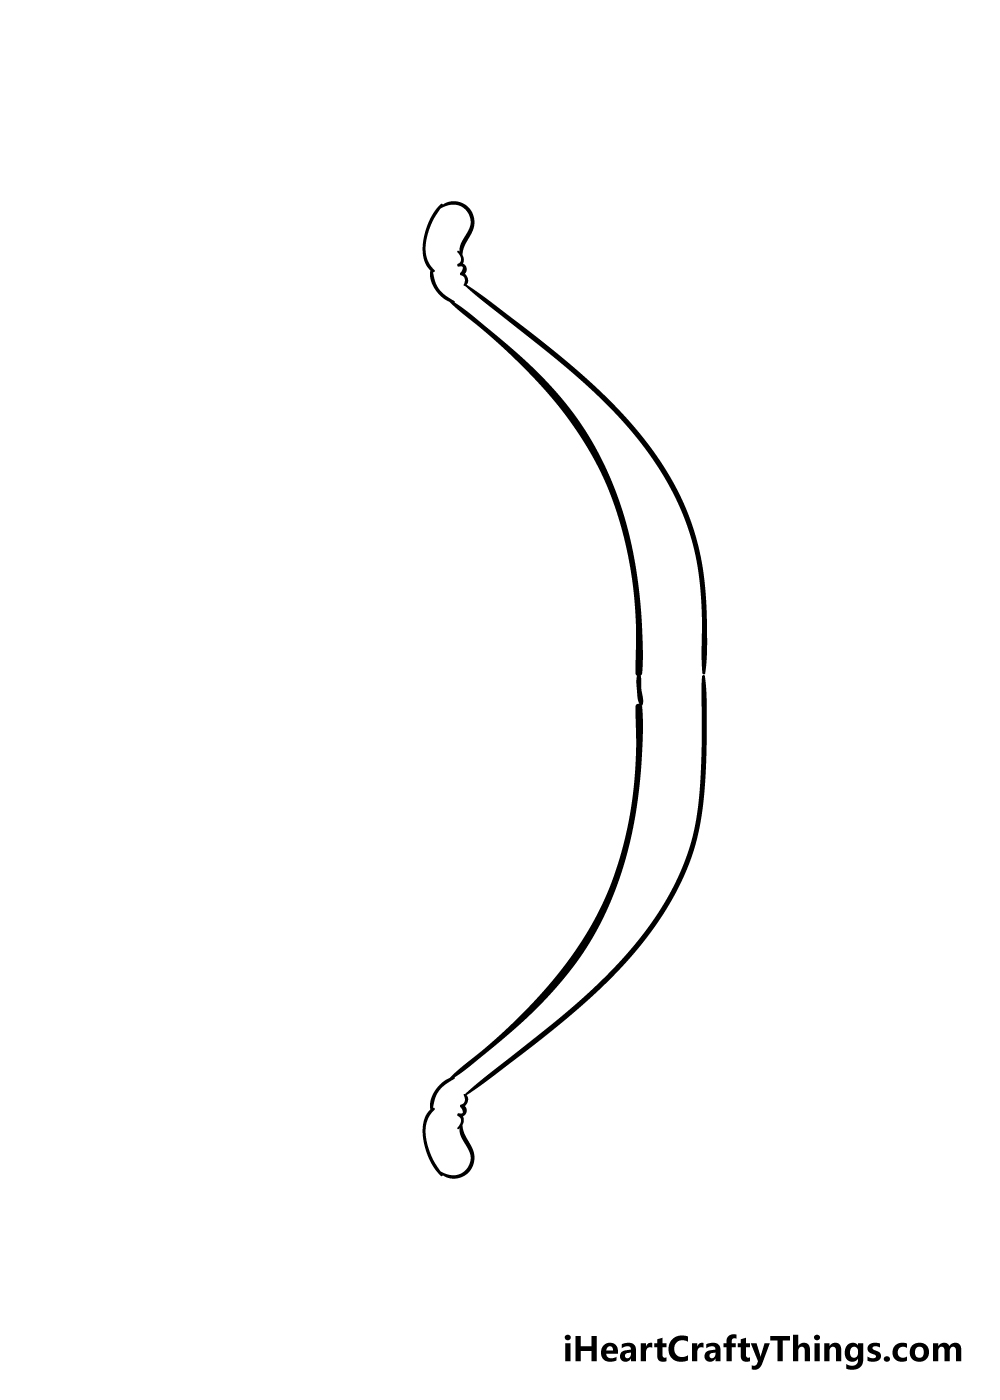
For this first step in our guide on how to draw a bow, we shall start with the frame of the bow.
The shape of the frame can be slightly tricky to draw, as it involves a lot of curved lines quite close together.
This is definitely a step that you should feel free to take slowly and carefully!
Be sure to try your best to have both halves of the bow at an equal length.
Step 2 – Next, draw some notch details for your bow
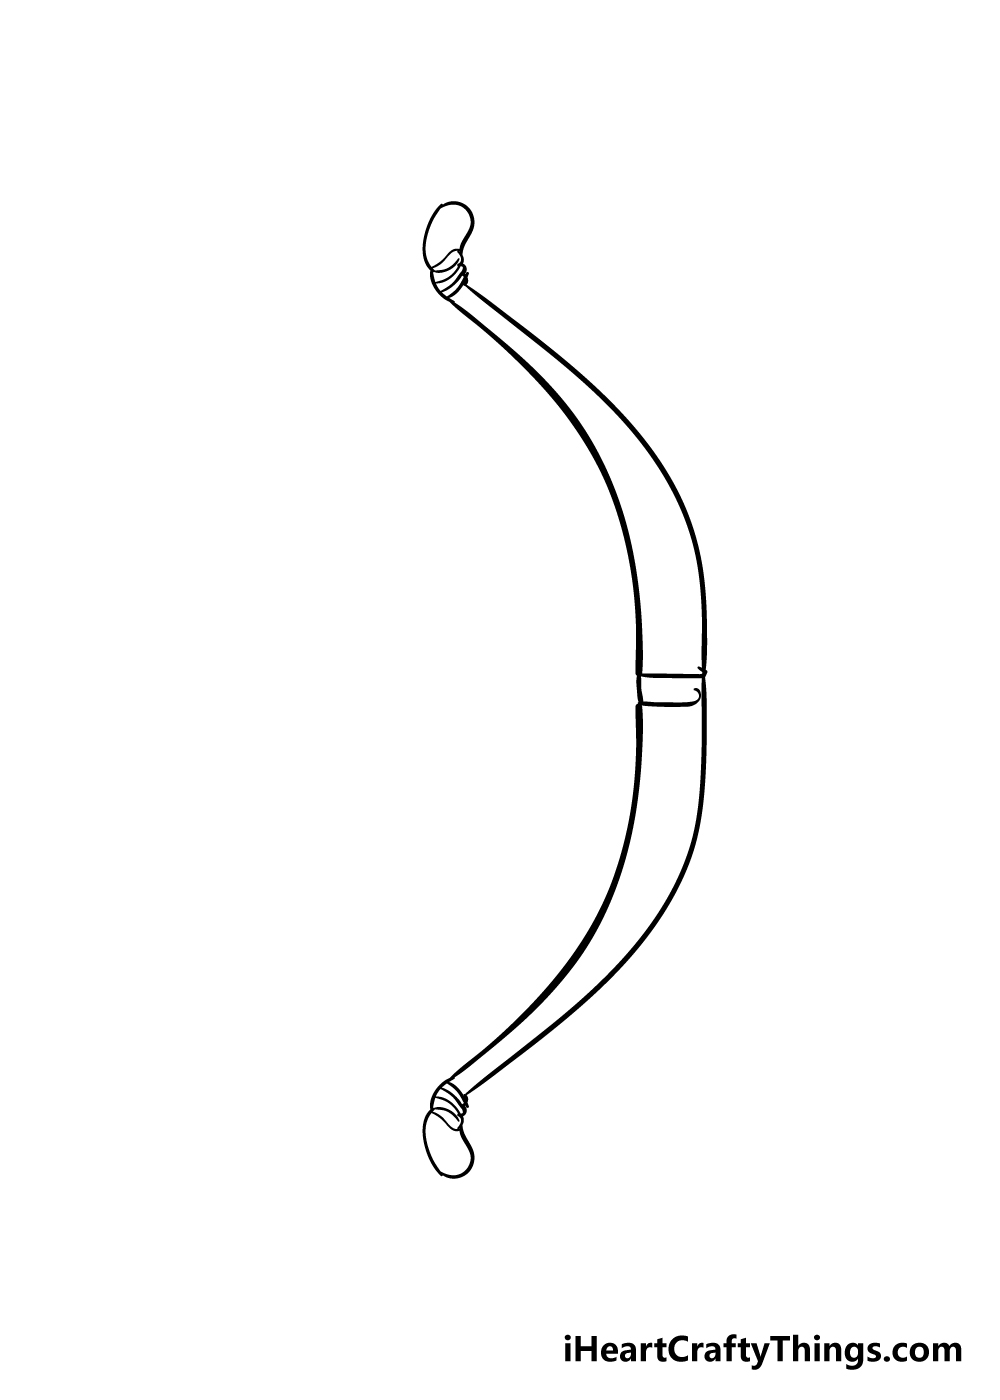
With the frame of your bow drawing done, we can start to add some details to it. Near the ends of the frames, you can draw in some details for the nocks.
The nock of the bow is where the string is attached to the frame, and the reference image will show you the shape it should take.
Then, once the notches are drawn you can use two simple lines at the center of the bow frame to have the groove that the arrow will sit in.
Step 3 – Now, draw the string for the bow
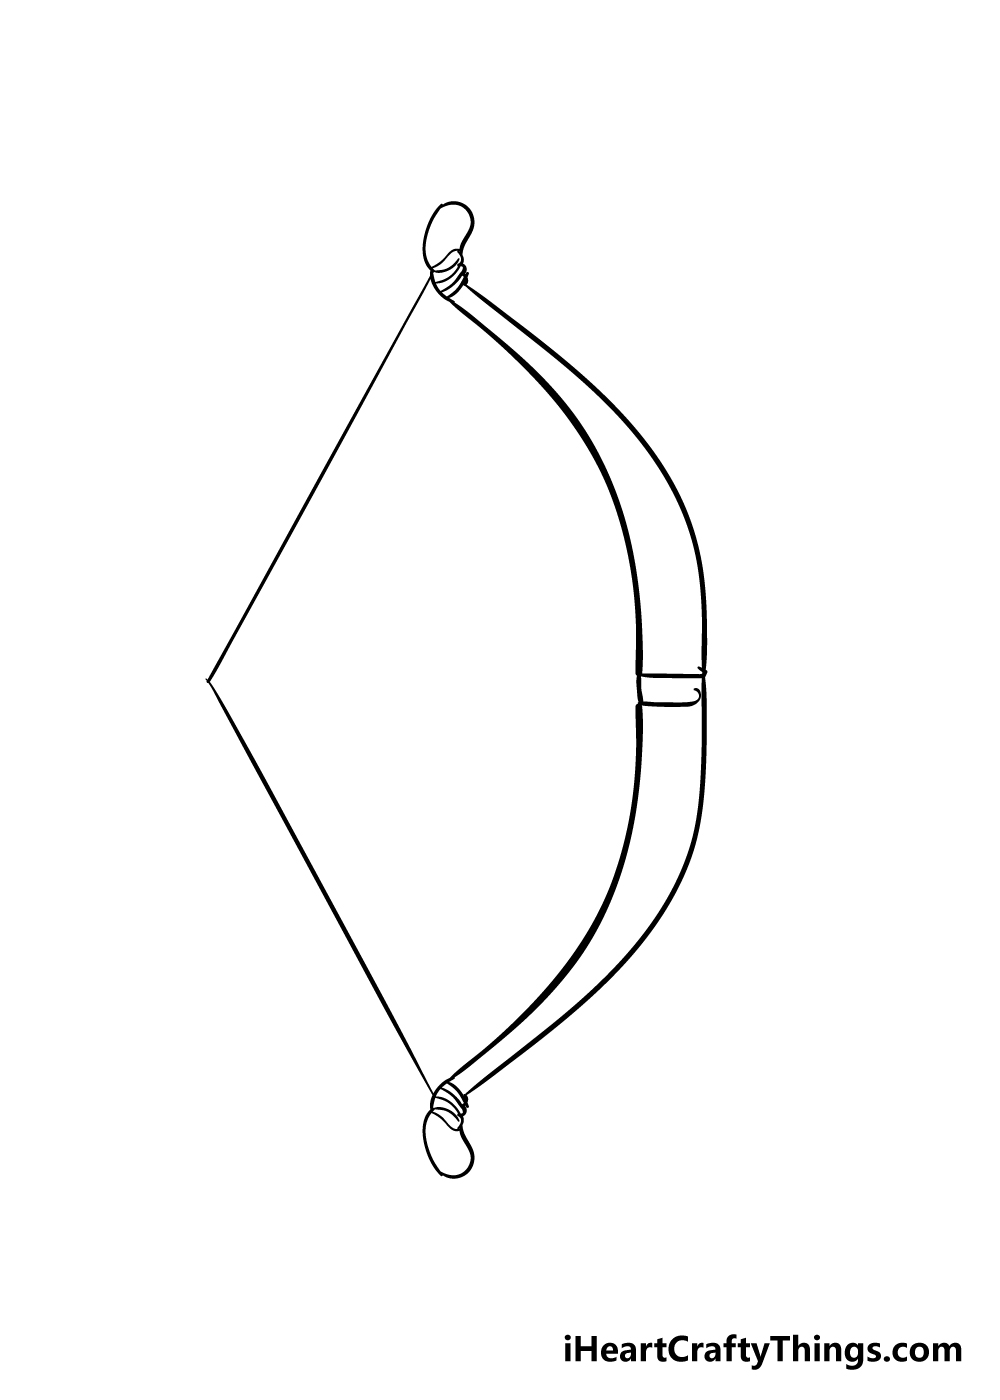
You would have a pretty useless bow without a string, so let’s add one in this step of our guide on how to draw a bow.
The string will come from the nocks that you drew in the previous step and will form a triangular shape going backward, as we will draw an arrow in later.
For this step, using a ruler to draw the two lines of the string would be very helpful!
Step 4 – Start to draw the arrow

In the same way that a bow is useless without a string, it also doesn’t serve much of a purpose without an arrow to shoot, so we shall draw one in now for your bow drawing.
To start the arrow, simply use a thick line coming from the center of the bow until it touches the point of the string.
Then, use some straight lines to form the little feathers near the back of the arrow. For a fun fact, those little feathers are called the fletching!
Step 5 – Now, draw some details for the arrow
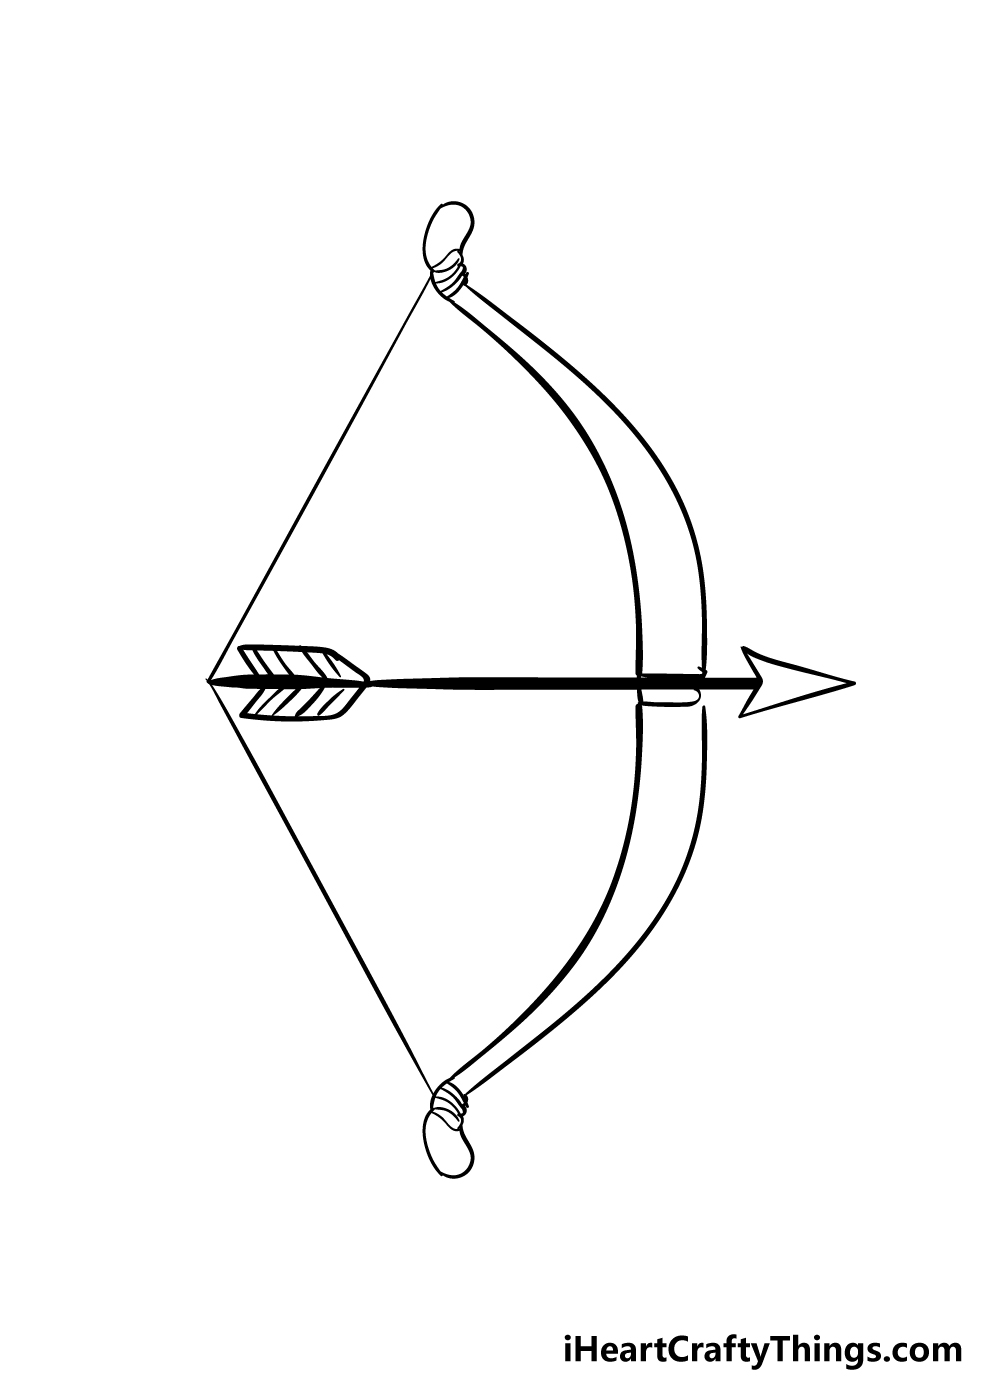
In this step of this guide on how to draw a bow, we shall add some elements to the arrow.
Firstly, the arrow needs a point to be effective, so you can draw in a triangular shape at the end of it that has an inverted base.
That may sound complicated, but the reference image will help you to get the shape right. Finally, draw some lines on the feathery fletching to give it a more textured look.
Step 6 – Next, draw in the final details of your bow

This is looking like an awesome bow drawing already! We will move on to the coloring of the bow in the next step, but before we do, let’s add some final details.
We shall add some thin lines to the frame of the bow as well as the tip of the arrow. These will help to add some texture to it and give it a more dynamic look.
These are the details that we added to our drawing, but you could also add some of your own details to personalize your bow drawing. You could also draw a fun background for your drawing!
For example, you could draw some targets at the end of a range to give your drawing a theme to it.
How will you finish off your bow drawing before moving on to the final step?
Step 7 – Finish off your bow with some color
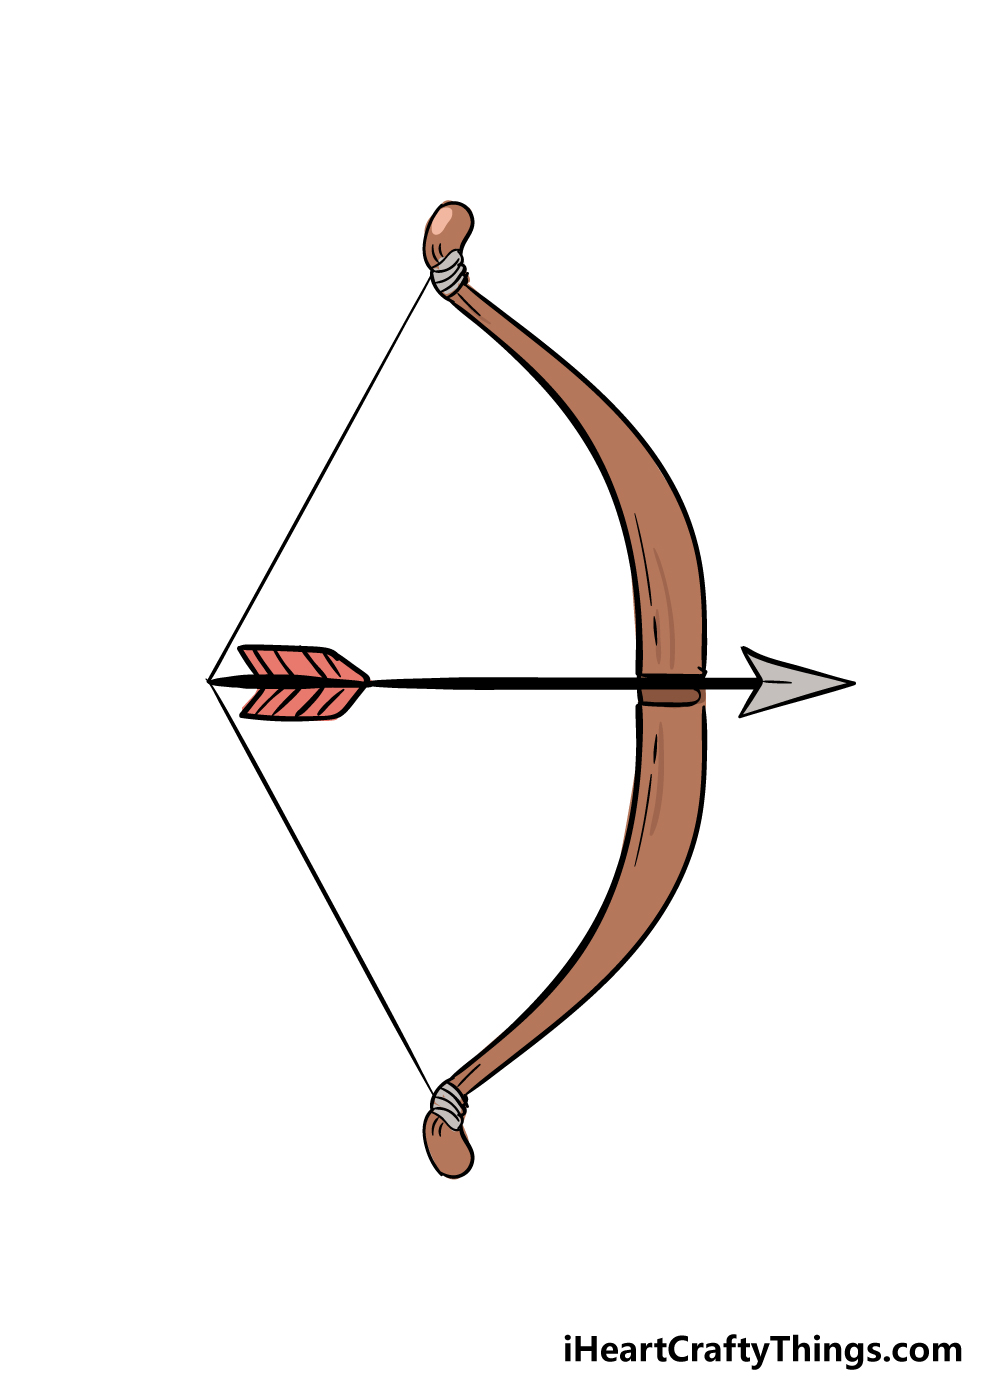
Now that your drawing is finished, you have reached the final step of this guide on how to draw a bow! Now comes the fun part, as you can have a great time choosing some colors for your drawing.
We chose a brown color scheme for our image, as it helps to give the bow a nice wooden look to it.
You could use any colors you love for this drawing, though! Bows come in many different colors, and modern bows will often have bright colors and even branding on them.
For a more intricate picture like this, you could use colored pens and pencils to really get in there with some great details and make the colors pop!
Do you think you will use these to color in your bow drawing, or will you use another art medium to bring your image to life?
5 Tips To Make Your Bow Drawing Even Better!
These tips we have for your bow sketch are sure to hit their target!
- Add Some Texture. This drawing of a bow shows a simple wooden bow that would be used for archery. Bows can come in many shapes and forms, so you could change the structure of it a bit. For example, you could add some more wood texture on the bow to highlight this part of the bow’s makeup.
- Modernize The Bow. You may want to give it a more modern look by making it look like it is made of composite fiberglass. This second tip leads on nicely from the previous one, as you could take it even further by making it a completely different kind of bow.
- Explore Variants Like Crossbows. The kind of bow you see in this image would later evolve into the crossbow. That could be a cool variant for this bow if you want some variety!
- Add Extra Weapons. People who would take a bow into battle would also often have other weapons and equipment on hand. You could show what you would use with this bow by adding them to the image. Some examples would include swords, daggers, and maybe a shield. A quiver of arrows would also be essential! What else could you add to the arsenal?
- Include An Archer. A bow is only as good as the person wielding it. For that reason, we think it would be great to add a human character to this bow drawing. The archer in question could be holding the bow as if about to shoot it, or you could have them hold it in a more relaxed pose. Who would you base this character on?
Bonus Tip: Add A Background Whether you go with the other tips for this bow sketch or not, you could show where it is being used by adding a background. This could be as simple or as complex as you want it to be. It could be as simple as adding a small wooden target for the bow to shoot at, or you could make a full-on battle scene with tons of detail!
Your Bow Drawing is Complete!
That brings us to the end of this guide on how to draw a bow! You’ve done an amazing job, and you have an awesome bow drawing to show for it!
We really hope that you had a fun time with this guide, as we created it to help show you that drawing a bow can not only be easy but that you can have a great time doing it.
Now that your bow drawing is finished, the fun doesn’t have to end, as you have plenty of ways to add some personal touches to it.
Some ways you could do this would be with extra elements like a background, but if you’re feeling extra artistic you could also draw some arms holding the bow!
You could look up some photos of people holding bows for an idea on how you could draw this.
Whatever you decide to do, we know that it will look great!
There is plenty more drawing fun to be had, as we will be bringing out fun new drawing guides constantly. Be sure to check out our site often to never miss out!
We also can’t wait to see your finished bow drawing, so please go ahead and share it on our Facebook and Pinterest pages for us to enjoy!