Musical instruments come in many different forms and variations to create a vast array of sounds and tones.
The trumpet is one of the most well-known of all instruments, and it is also quite versatile.
Trumpets are used in many genres of music from jazz to rock and everything in between, and their distinctive design has become very recognizable to people around the world.
This design can also make it equally fun and challenging to learn how to draw a trumpet.
This is the guide to be on if you would like to focus on the fun part instead of the frustrating one!
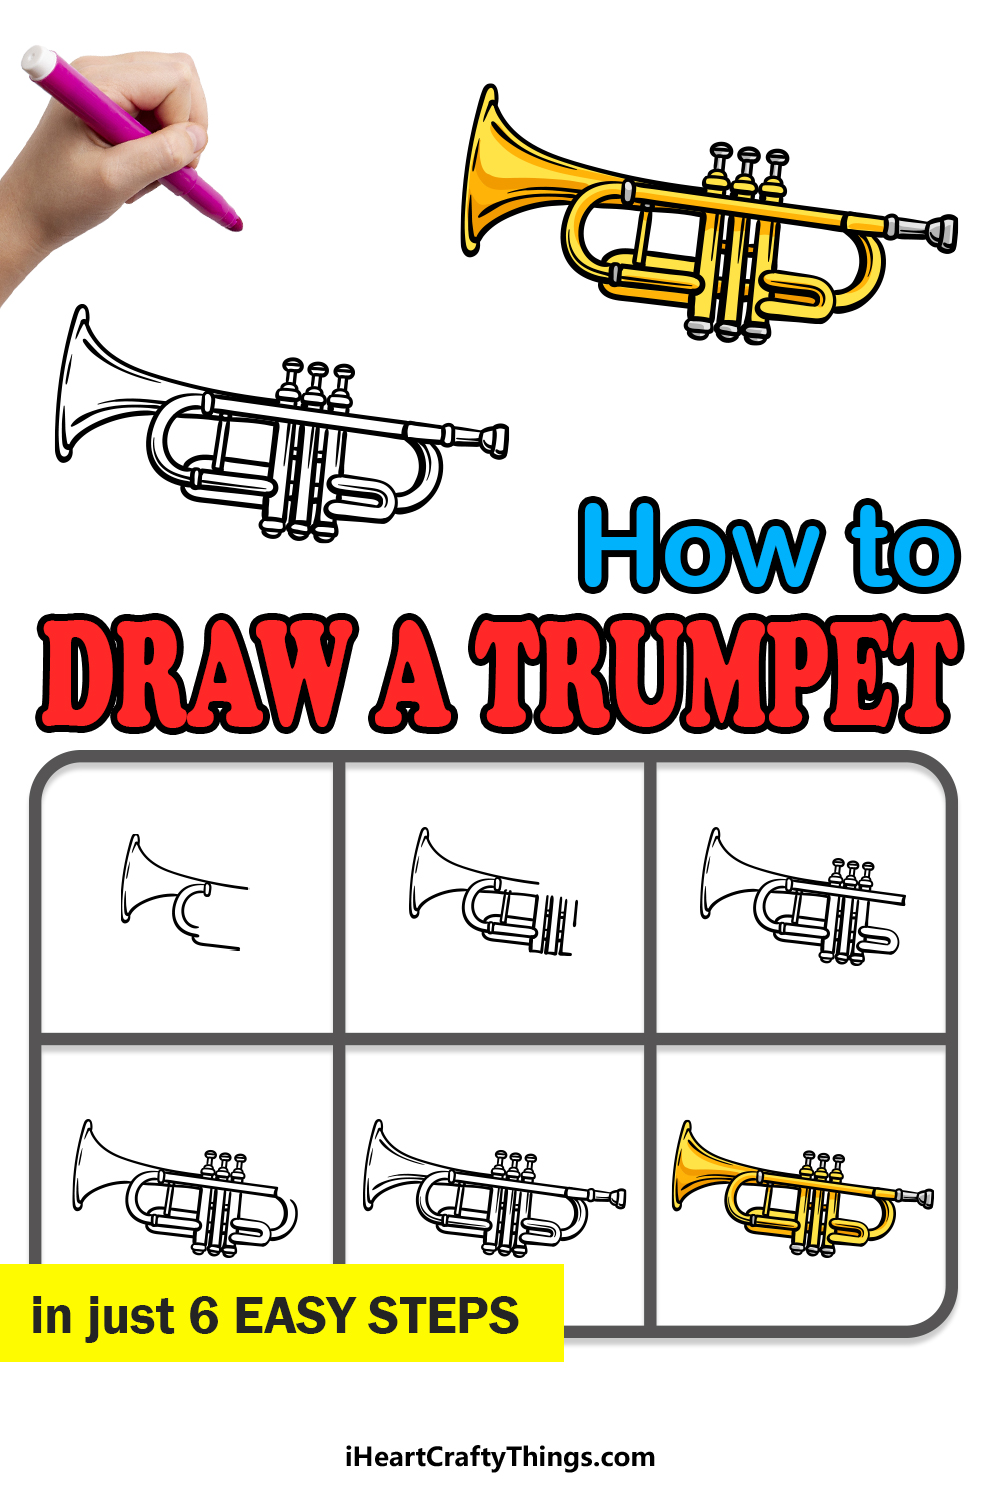
We hope that you enjoy this step-by-step guide on how to draw a trumpet in just 6 easy steps.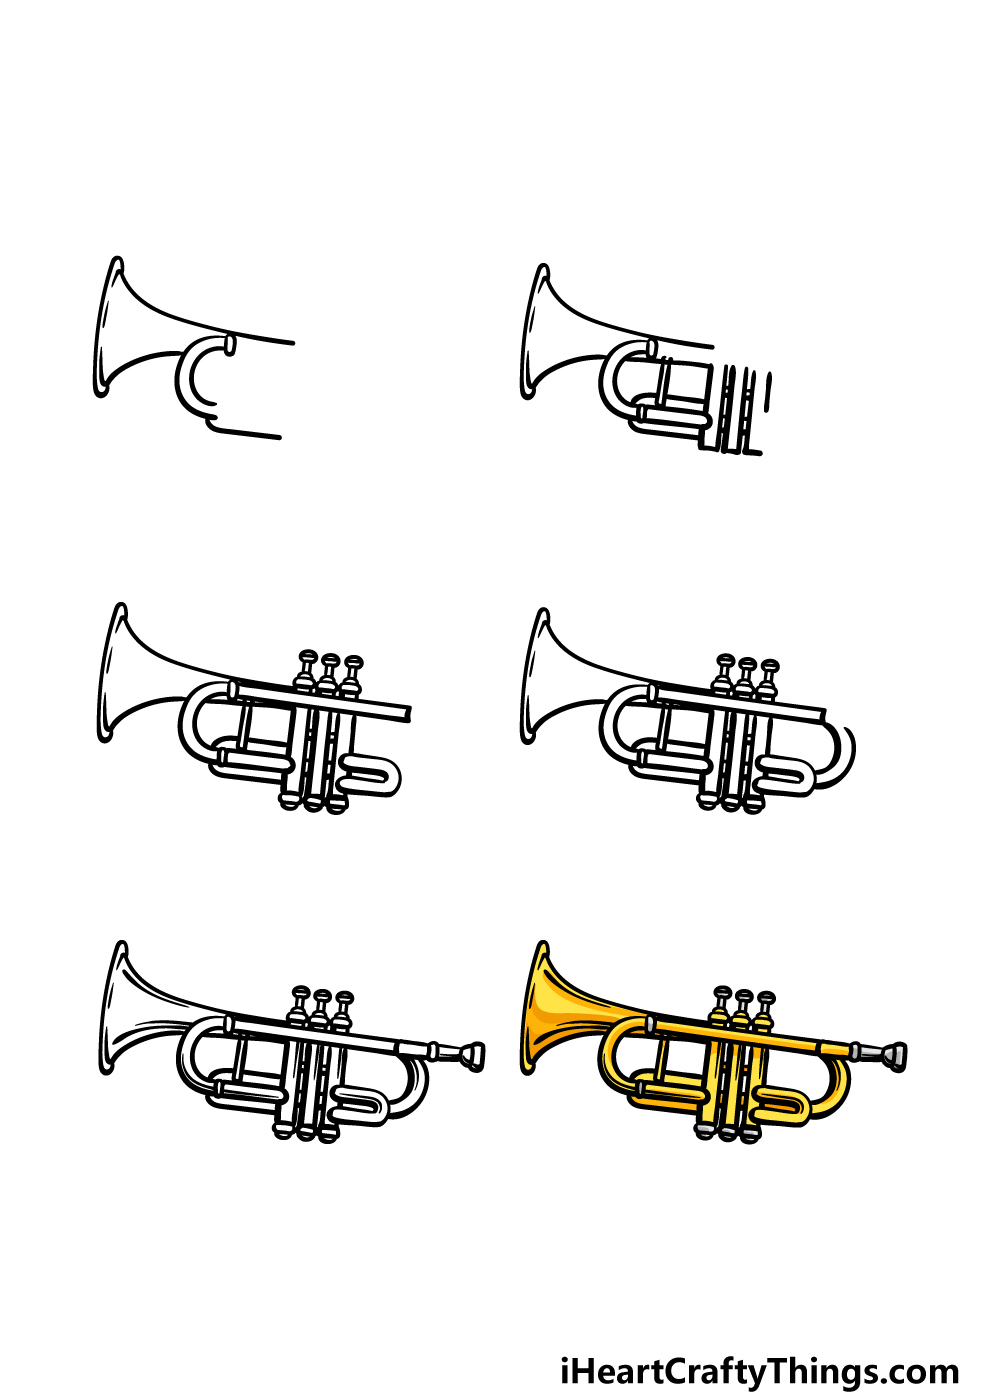
How to Draw A Trumpet – Let’s Get Started!
Step 1
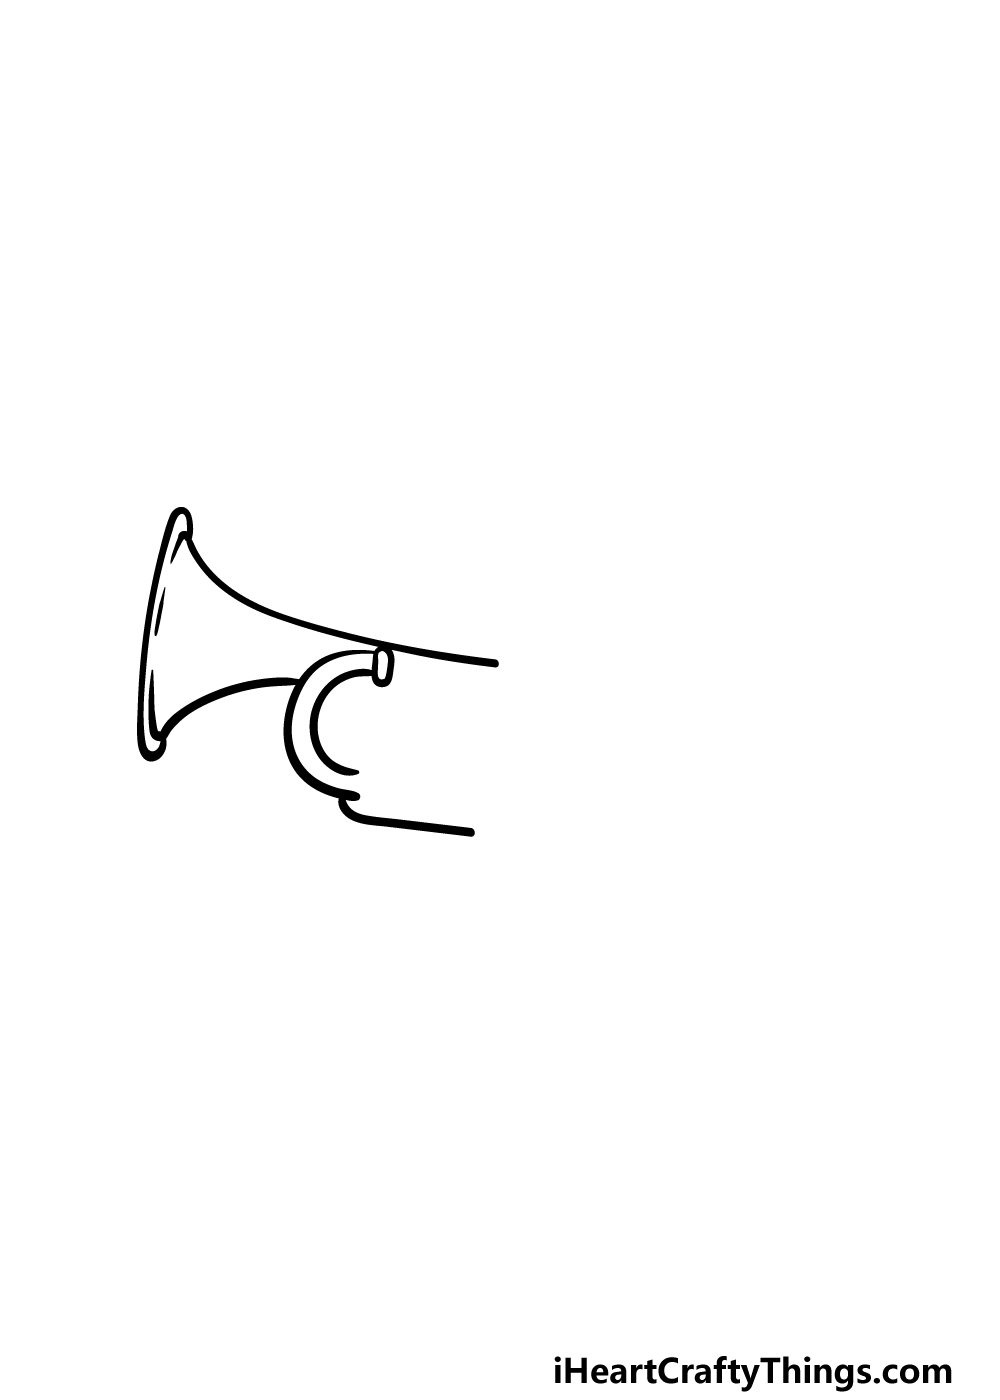
As we begin this guide on how to draw a trumpet, we will first be focusing on the front of the instrument. We will be starting with what is known as the bell of the trumpet.
This is the wide opening at the very front of the trumpet, and the rim will be drawn with a slightly curved vertical line.
Then, two more curved lines will extend inward from the edges of the mouth of the bell opening.
Once the bell is drawn, we’ll draw what is known as the sliding tube. You can add this by drawing a thin, curved shape near where the bell ends.
When you have the image looking as it does in the reference image, we will be ready for step 2!
Step 2 – Next, start drawing more of the trumpet components
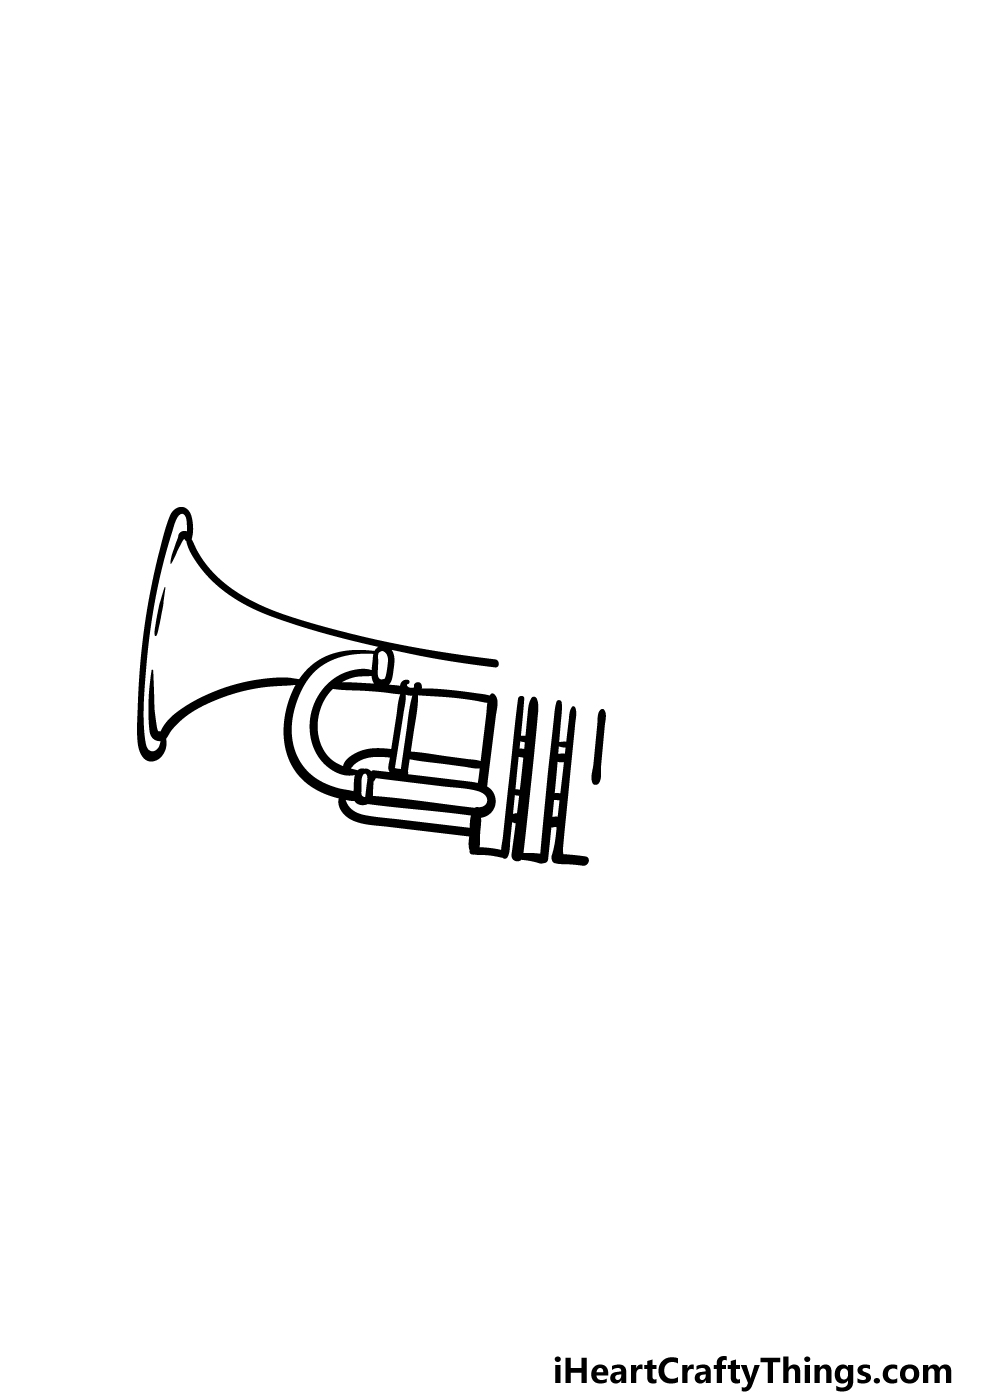
Next, we will be adding some more of the components to your trumpet drawing in this second part. First, draw an extension to the lower portion of the sliding tube that you started in the previous step.
Then, we shall be drawing what is known as the valves of the trumpet. To draw these, simply add three thin rectangle shapes very close to one another near the center of the trumpet.
That’s all there is to it for now, and in the next few steps we shall keep adding some detail to the image.
Step 3 – Draw some more of the details in this step
This third part of our guide on how to draw a trumpet will see you adding some more details onto the components that you started in prior steps.
First, use some straight lines to extend the top of the sliding tube. You can then add a small, curved shape for the bottom of the sliding tube, as shown in the reference image.
Once those details for the sliding tube are complete, we will then add some details to the three valves. You can add some small round shapes on top of them that have a little stalk extending up from them.
Then, draw another small shape on top of each of these stalks. Finally, add some small shapes to the bottoms of the valves before you move on to step 4.
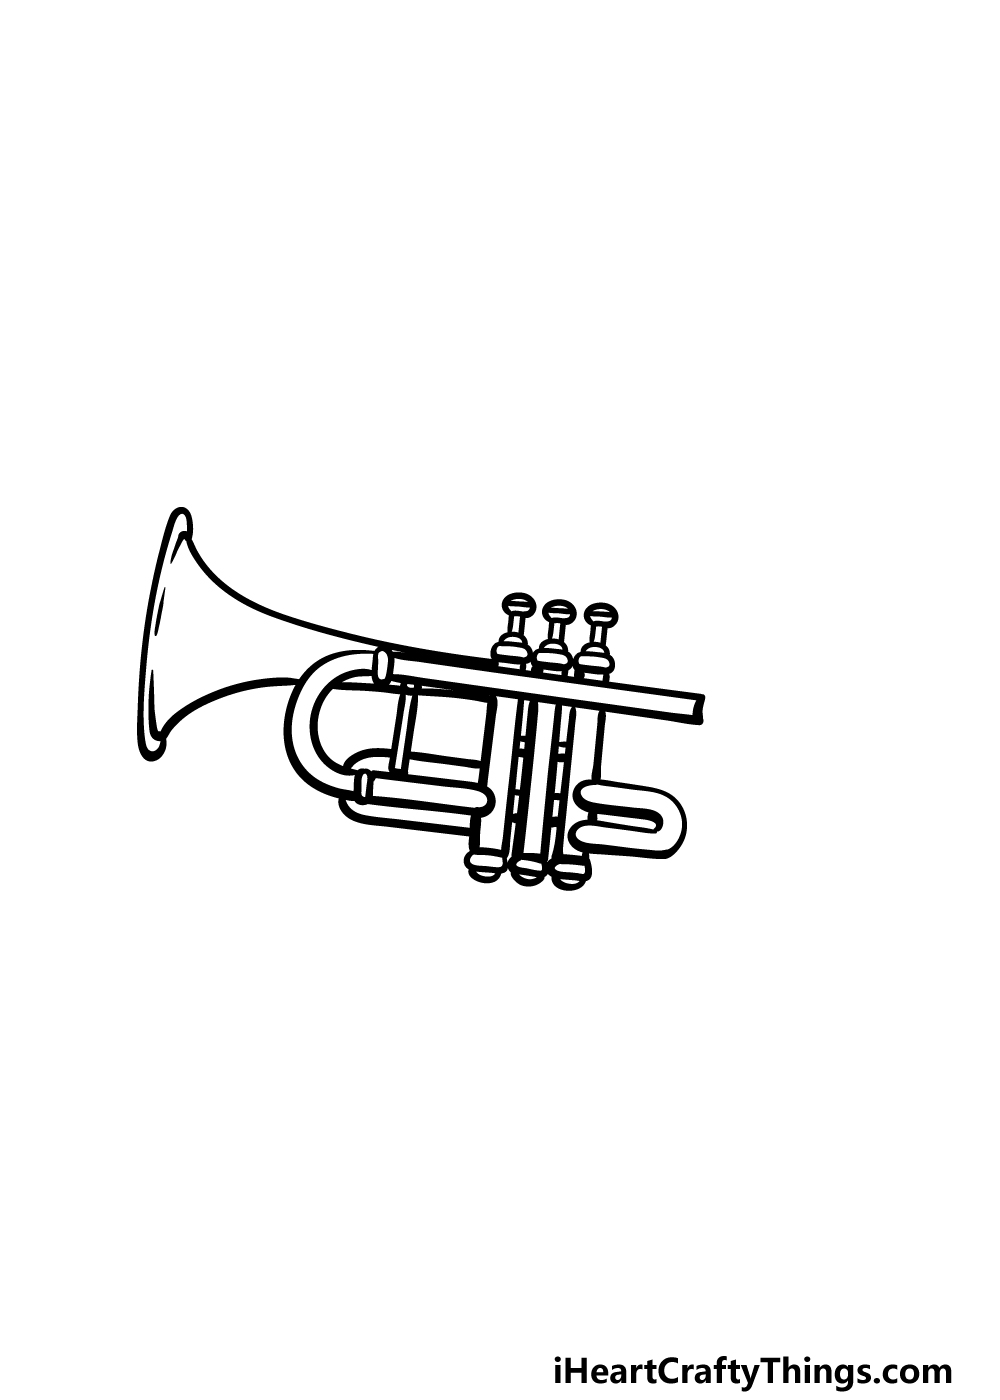
Step 4 – Now, finish off the sliding tube

For the fourth part of your trumpet drawing, we will be finishing off the sliding tube that you have been working on.
To finish off this part, simply draw another curved shape at the back of this part of the trumpet. Once that is drawn, we shall move on to some final details and elements in the next step!
Step 5 – Draw the final details of your pistol drawing
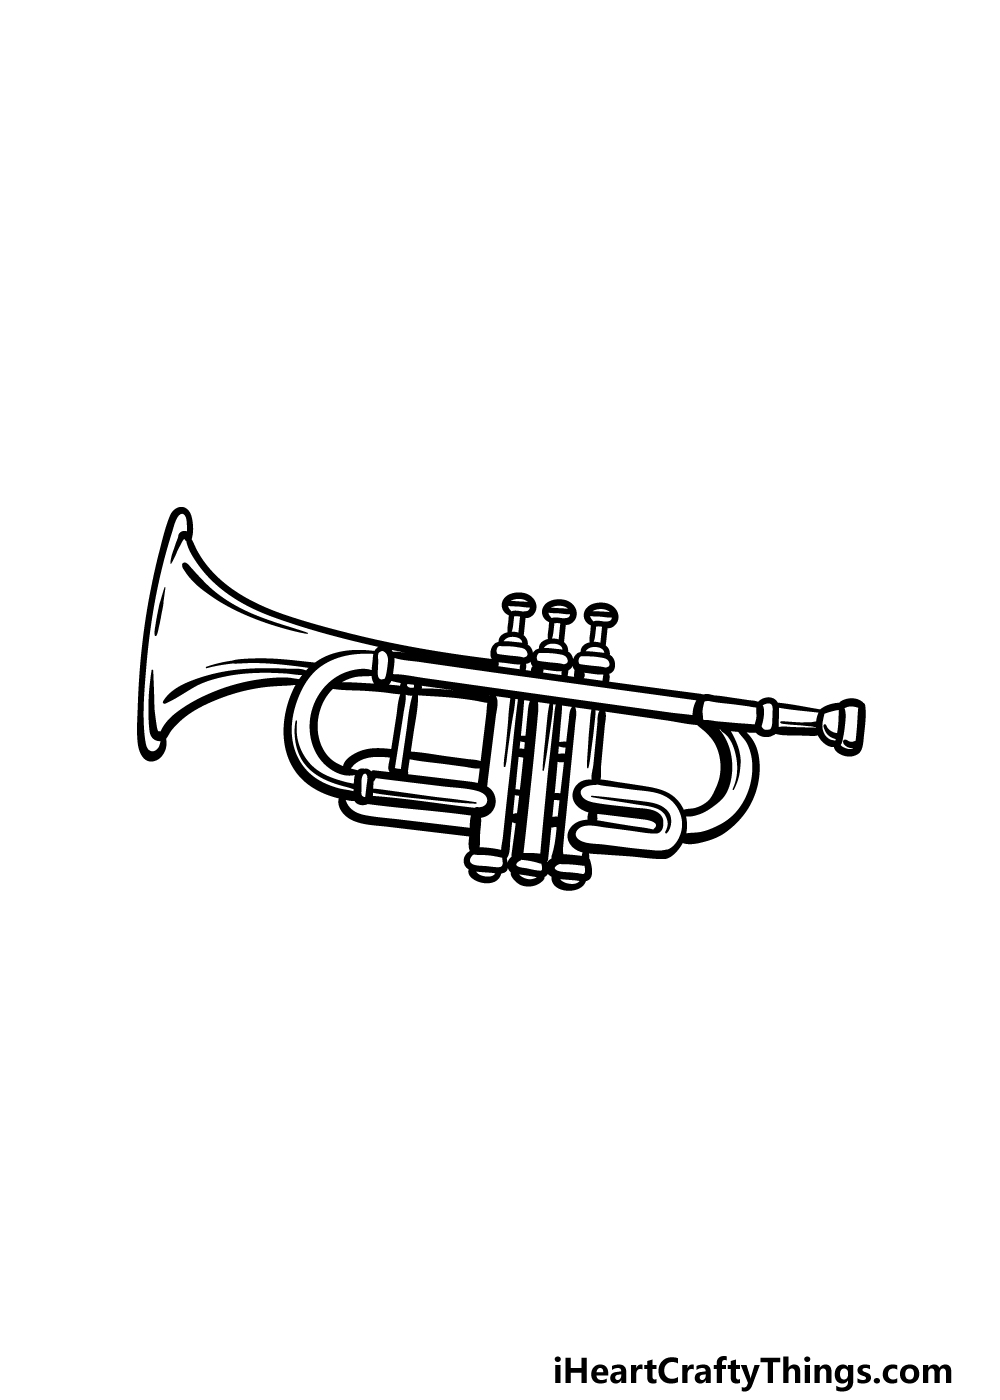
It’s time to finish off the final details and elements of your picture in this step of our guide on how to draw a trumpet.
First, we will be drawing the mouthpiece of the trumpet to finish off the outline. We will be drawing some thin shapes onto the right-hand edge of the trumpet to begin this mouthpiece.
Finally, you can finish off the mouthpiece with a small rounded shape at the end of it.
Before you move on to the final step, we will also add some curved line details throughout the various parts of the trumpet for an even more dynamic look. Then it’s up to you to finish off with your own final details and elements.
There is a lot that you could add to this image to really finish it off. From backgrounds to additional instruments, there are no wrong answers with what you can add, so be sure to have fun with it!
Step 6 – Finish off your trumpet drawing with some color
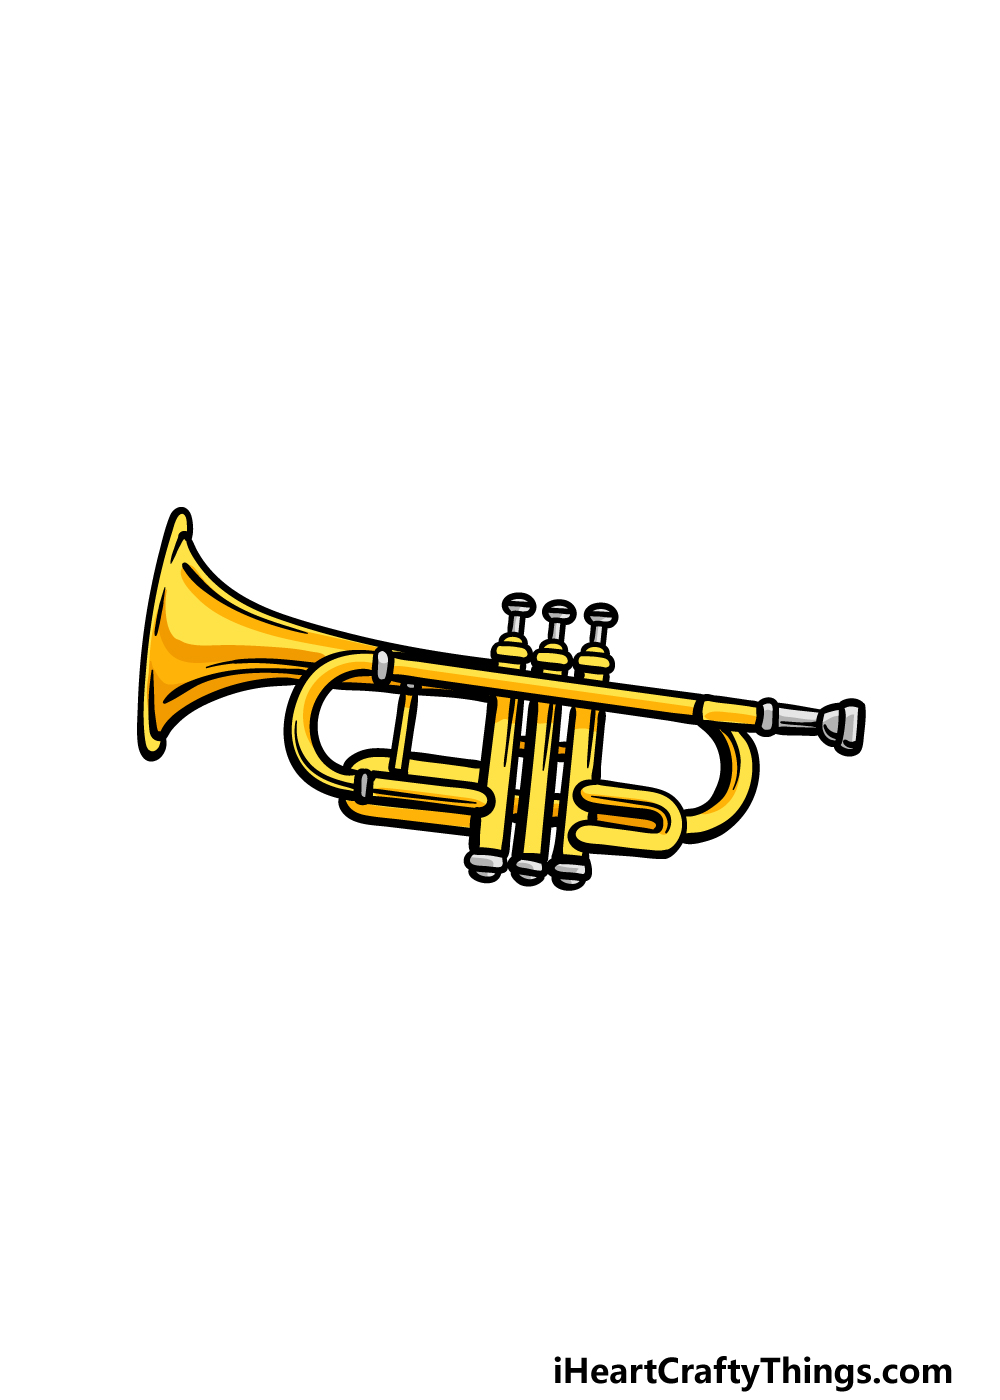
You’ve worked hard on this trumpet drawing of yours, and now it’s time to finish it off with some great colors!
In our reference image, we went with some lovely bright yellows for most of the instrument with some highlights of greys for some of the smaller aspects.
Even if you stick to this kind of color scheme, you’ll notice how we used various tones of the colors in order to give the trumpet a more dynamic, shiny look.
Another way to achieve this kind of variation is by playing around with the art mediums that you use.
Acrylic paints and colored markers can be great for brighter, more vibrant colors, whereas some watercolors and colored pencils work best with more subtle tones.
These are just some of the mediums and colors you could go for, but be sure to experiment with your favorites!
4 More Ways To Make Your Trumpet Drawing Unique
Create some artistic music with these tips for your trumpet drawing!
Trumpets can be used to make many different kinds of music. You could show what kind of music is being played in this trumpet drawing in a few subtle ways.
One would be by adding some lyrics surrounding the trumpet to show off some of your favorite songs. You could also add music notes or maybe images associated with what is being played.
These are a few ways to show the different kinds of music being played, but how else could you do it?
Without someone to play it, a trumpet is not very useful! For that reason, you may want to add a player to this drawing of a trumpet.
If you were to do this, you would be able to portray the character in any style you like. They could be drawn in a simple cartoon style or they could be more realistic.
Maybe you could draw one of your favorite musicians playing, or you could even use yourself! Who do you think could be playing this trumpet?
When it comes to coloring this trumpet sketch, we showed you just one way you could do it. There are mediums like colored pens and pencils that we can all get easily, but you can also be more creative with it.
For example, you can get special art pens that create a metallic texture. You could use a gold version of these to create the bronze look of the trumpet.
What other mediums could you potentially use?
Trumpets can sound amazing on their own, but they are at their best when being used with other instruments in an orchestra. If you love some of these instruments, they could be great to add to this trumpet drawing!
There are so many that you could use in order to create a visual symphony. There are different wind instruments like saxophones and tubas, or you could go for some violins or a cello.
These are just a few ideas, but you could use any instruments you like!
Your Trumpet Drawing is Complete!
Now you have completed this guide on how to draw a trumpet, and you should be very proud of the finished product sitting in front of you!
Trumpets have lots of small details and parts on them, so that can be tricky to portray in a drawing.
This guide was made to walk you through all of these smaller details, so we hope that it made it much easier for you to tackle these parts!
We would love to see what ideas you have for finishing off this picture with your own additions, colors and art mediums! This is your chance to take over and let your creativity flow.
Once you’re done having fun with this guide, there’s another drawing guide waiting for you on our website!
Be sure to visit often to check out our selection and enjoy the new guides we will be uploading soon.
Please also remember to share your finished trumpet drawing on our Facebook and Pinterest pages so we can see how you finished it off.