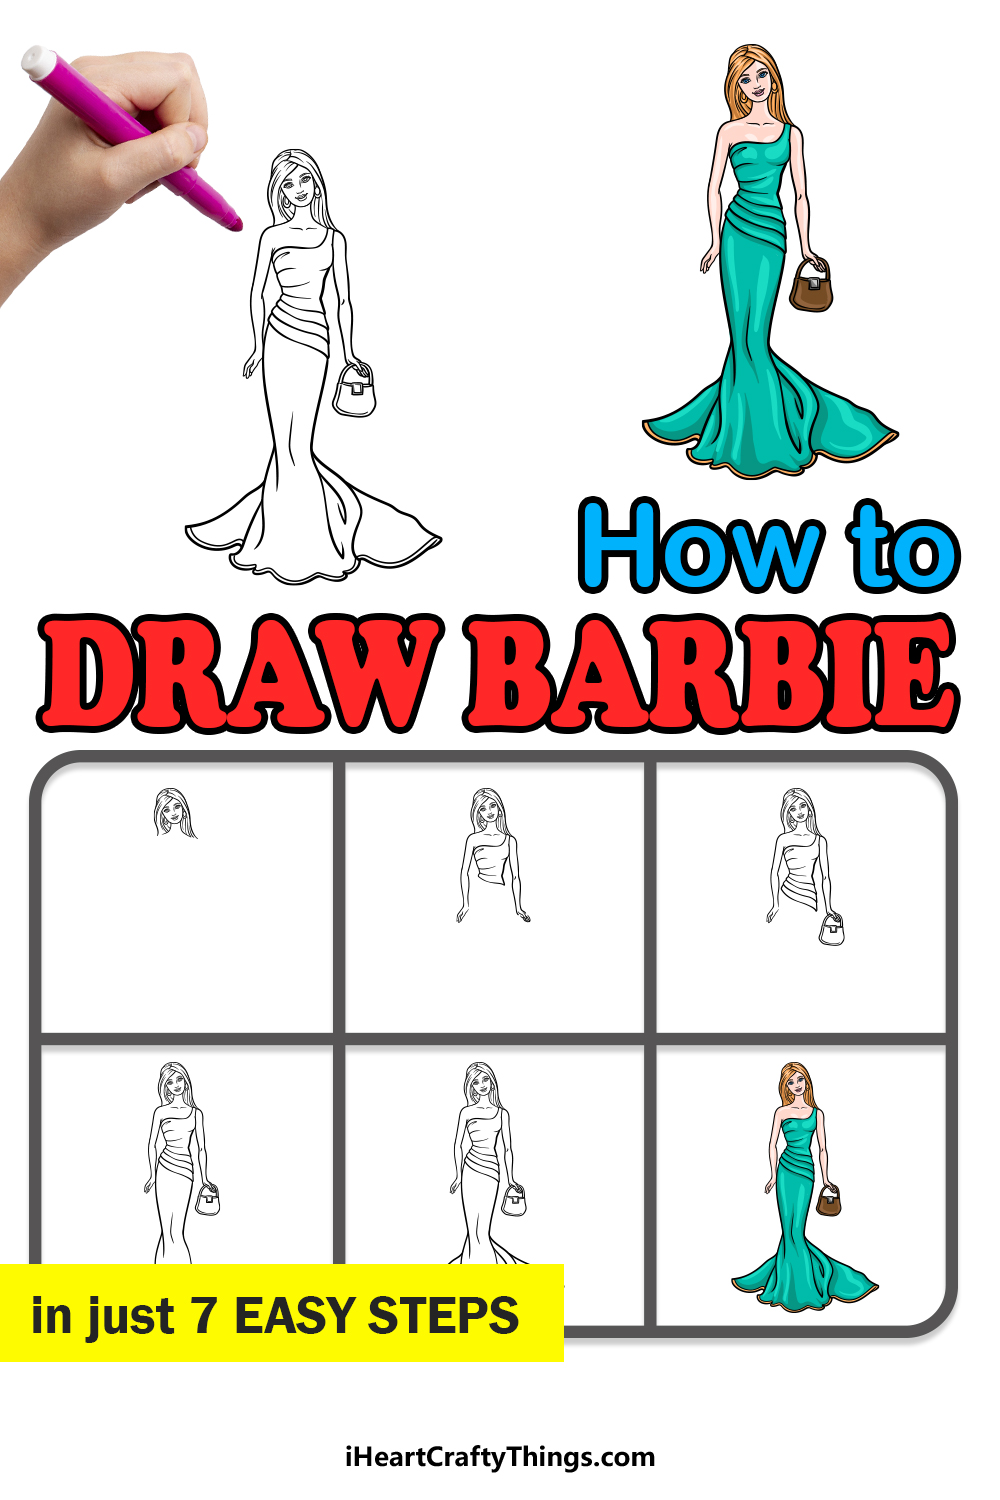
Fans of this iconic doll will love this guide on how to draw Barbie! Discover how you can design your very own Barbie dolls in just a few steps.
Barbie was introduced all the way back in 1959, and she has remained the most famous doll ever created. Pretty much everyone has heard of Barbie, and millions upon millions of people have owned their own doll.
She comes in many different styles and variations, and now you can design some of your own! You will see how to draw Barbie in a pretty dress, but once you have the hang of it you could draw her in other styles and accessories.
It all begins with the first step, so let’s embark on this journey together!
Watch And Learn How To Make Your Barbie Drawing
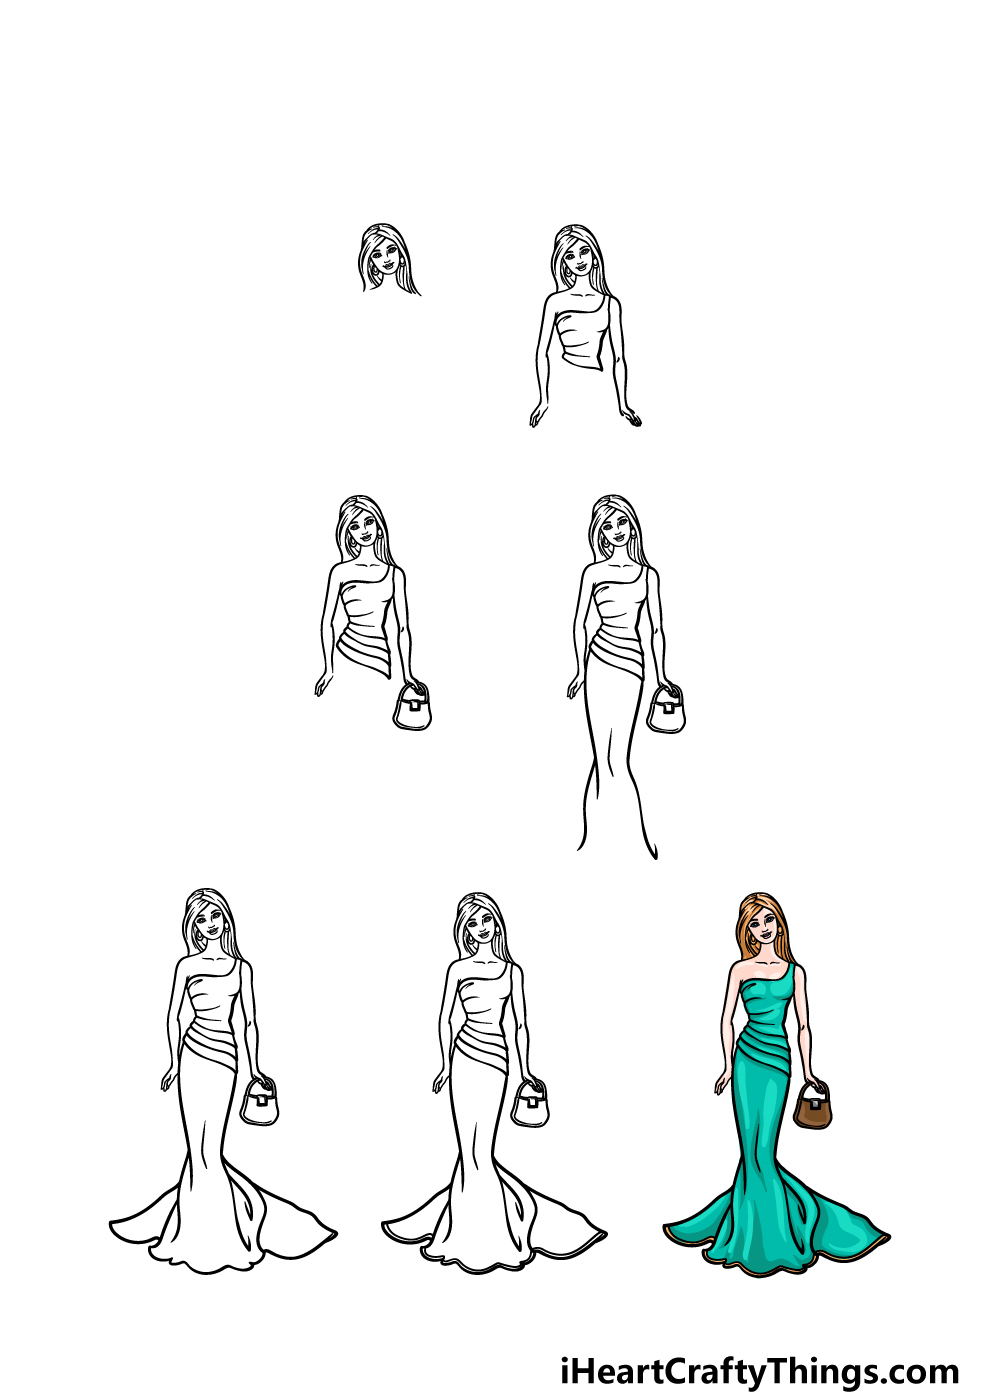
How to Draw Barbie – Let’s get Started!
Step 1
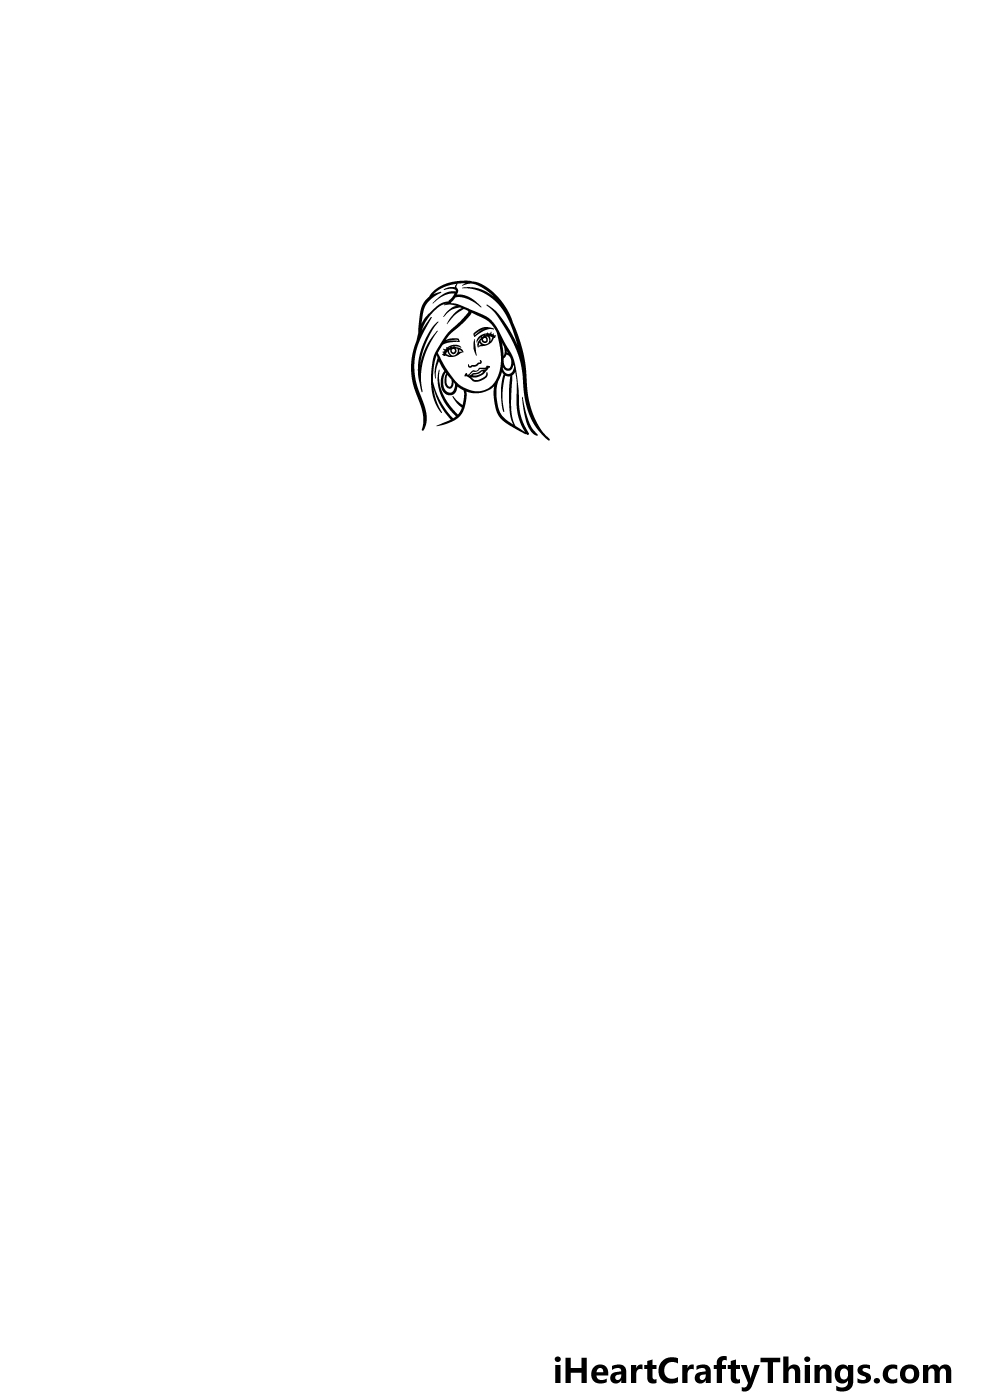
We mentioned in the introduction to this guide on how to draw Barbie that she has come in many different styles and variations throughout the years.
Her most common incarnation has her with her iconic face design along with long blonde hair, and this is the design that we are going for in this guide.
There will be room to change up some of her design later if you wish, however!
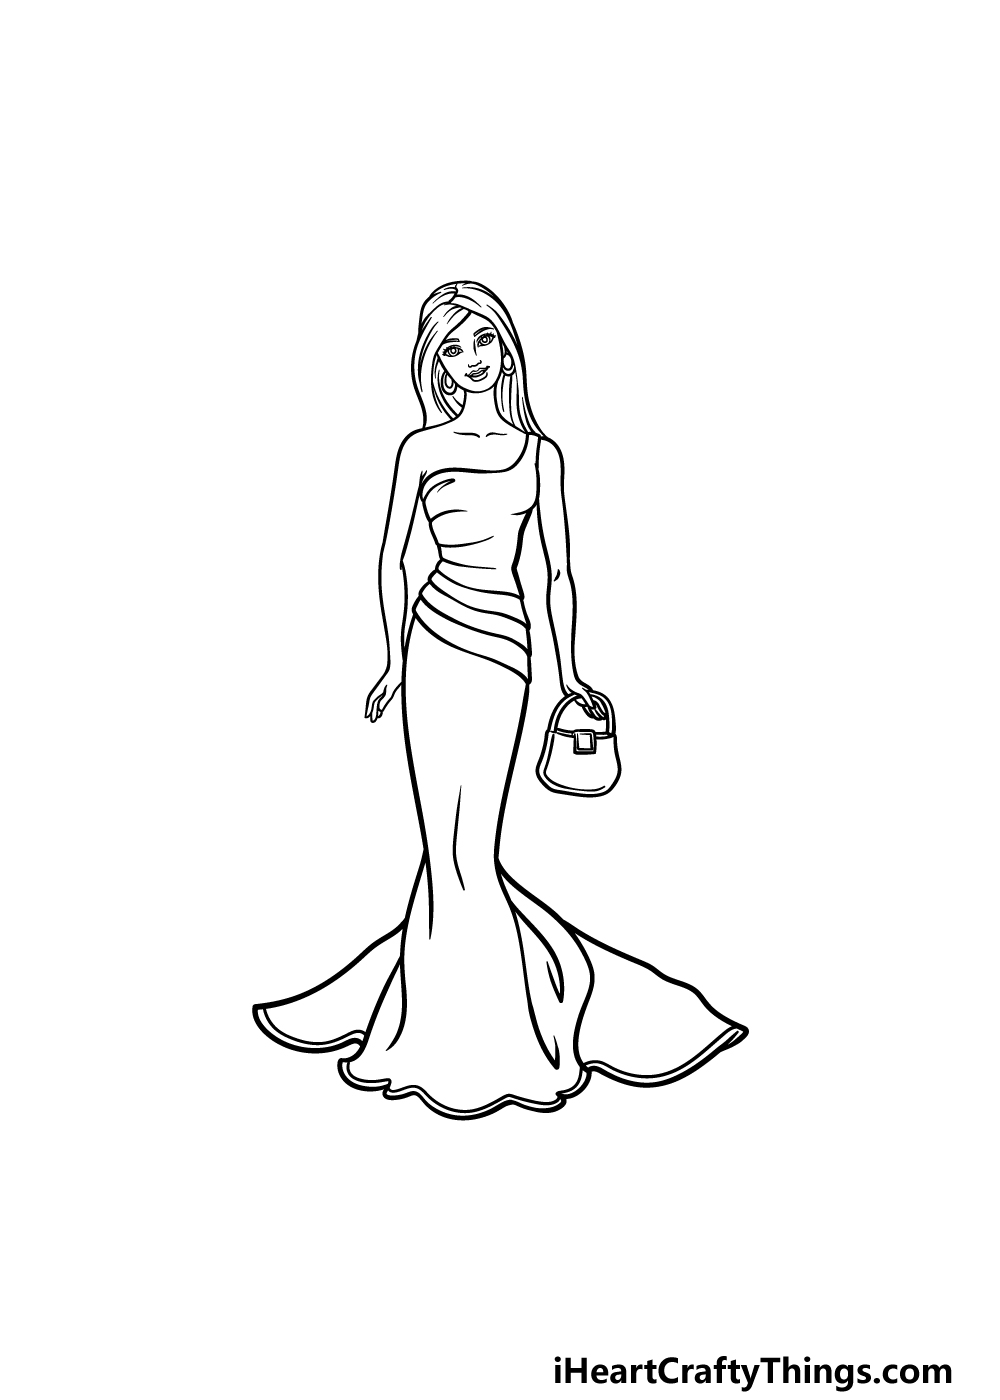
For now, you can replicate her face as it appears in the reference image. This will help you to get her expression looking good.
Then, use lots of curved, flowing lines for her long hair coming off of her head. She will also be wearing some looped earrings, which you can draw with some round shapes.
Step 2 – Draw the top of her body
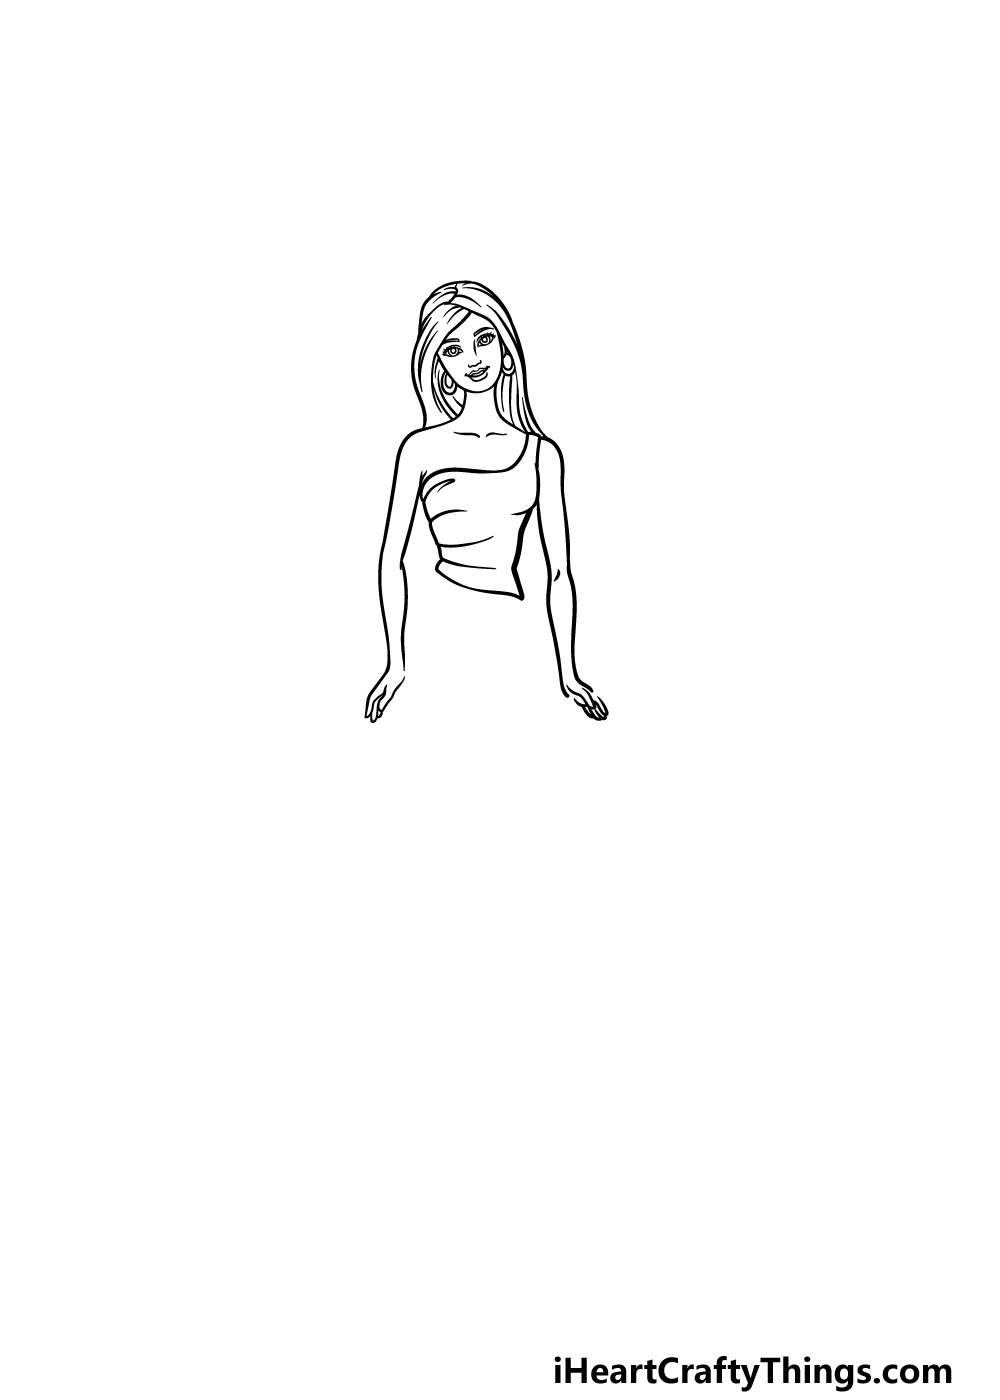
Continuing on with your Barbie drawing, we can now start to draw her chest and her arms. Her neck is fairly long and thin, and it extends down from the base of her jaw.
Then, we will be drawing her top that hangs over one of her shoulders. We will also be drawing her arms in this step, and they too will be fairly long and thin, hanging at her sides.
Step 3 – Draw some more of her dress and her purse

For the next part of this guide on how to draw Barbie, we will be adding to the dress that she is wearing while also adding her purse.
For her dress, we will be using some curved lines to add three more sections to her dress. The reference image will guide you as to how the angle of the dress should look.
We will then finish off this step by drawing her small, stylish purse hanging from her hand.
Step 4 – Now draw the bottom half of her dress

This part of your Barbie drawing will be based on adding to the rest of her dress.
This lower half will be long and flowy, and you can use two curved lines that move out a bit, inward near where her knees would be and then flow outward a bit near the base of it.
Once you have finished that part, we can finish off the outline for the dress in the next part.
Step 5 – Draw the rest of the dress

Now it’s time to finish off the outline of her dress in this step of our guide on how to draw Barbie.
This is quite a stylish dress that she is wearing, and while it is tight around her legs, it flows out elegantly at the base.
You can draw this flowing base by using some curved liens moving outward from near the base and all around it.
This can be a bit tricky to get right, but try your best to replicate it as it looks in our reference image, as that will help with getting the look of the fabric looking correct.
Then it will be on to some final details in the next step!
Step 6 – Now, add some final details
We will be finishing off the final touches of your Barbie drawing in this step so that you will be ready to color her in when you get to the final part.
We kept it simple in our reference image, as we kept it to a thin rim at the very base of her dress.
This is the final touch that we added for our design, but you could also add some of your own before you move on!
There is a lot that you could do to put your own spin on this design, and these could include adding some detail to her outfit or giving her some more accessories.
You could even draw a background, maybe adding another iconic character such as Ken to go along with her!
These are just a few ideas that you could try, but what else can you think of to finish it off?
Step 7 – Finish off your Barbie drawing with some color
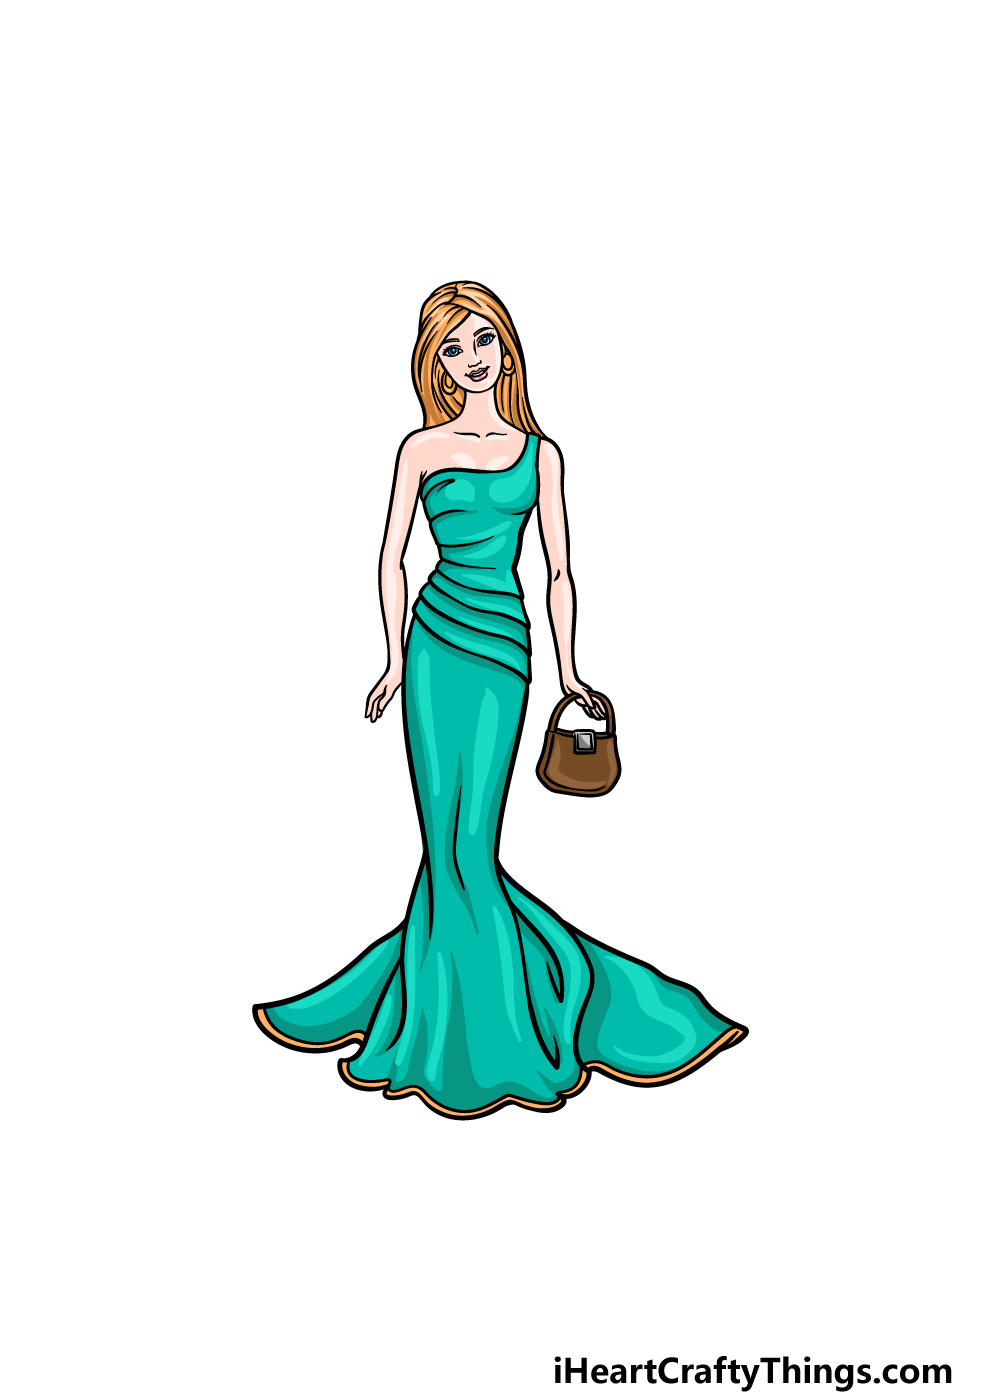
You have now arrived at the final step of this guide on how to draw Barbie, and in this one you can finish it off by adding some amazing colors to it!
We showed you one way that you could color her outfit in our reference image, and we chose a pretty turquoise along with subtle yellow highlights for it.
We also went with her classic blonde hair color, but all of the colors that we chose are just suggestions!
When you color your own drawing in, you can have fun experimenting with different colors and shades to create your very own unique Barbie design.
We know that whatever colors, techniques and art mediums that you choose will look incredible, so have fun experimenting!
4 More Ways To Make Your Barbie Drawing Unique
Make some stylish artwork with these tips for your Barbie sketch!
This drawing of Barbie shows her in an elegant outfit. Barbie is all about different looks, so you could change her style for your own picture.
To do this, you could keep her pose the way it is and then change her dress. You could base this new look on a Barbie doll you own or you could use a fashion look that you have liked recently.
Do you have some stylish looks in mind that you could use to give Barbie a makeover in this image?
Clothes are just one aspect of a fashionable style, so you could also make her look more stylish by adding some accessories to her outfit.
These could be small, such as having her wear some earrings or a pretty necklace.
You could also give her a cute handbag or maybe some kind of scarf. These are just a few ideas for some accessories that would look great on Barbie, but what else could you think of to finish her look?
In her long history, Barbie has gone through many changes and has been joined by many other characters. For this reason, we think it could be fun to add other characters to your Barbie drawing.
These could be based on different Barbie incarnations or some of the friends she has had through the years. You could even add her famous love interest, Ken.
Adding these characters would also allow you to try out different fashion styles!
Finally, you could add a background to finish off your Barbie sketch. Barbie has taken on many different roles in her history, so you could use all sorts of fun settings.
She could be somewhere like a fashion show or a big movie premiere to make it nice and glamorous. Or, you may have chosen a job theme for Barbie such as making her a doctor.
In that case, you could put her in a hospital setting. What kinds of backgrounds would suit your design?
Your Barbie Drawing is Complete!
That brings you to the end of this stylish guide on how to draw Barbie! We hope that this guide was a lot of fun for you to work on, and we also hope that it made it nice and easy for you to do as well.
Now you get to take over and show off your creativity with the details, additions, changes, colors and art mediums that you use to finish it off.
The fun is far from over, as we have many more awesome drawing guides for you on our website for you to enjoy! There are more on the way as well, so be sure to keep checking in.
Once your Barbie drawing is complete and colored in, please go ahead and share your elegant artwork on our Facebook and Pinterest pages for us to see!