There are many different kinds of trees to enjoy in nature, and whether they are bursting with life in Spring or covered in orange and yellow in Fall, there is much beauty to enjoy!
There is also a different kind of beauty to a dead tree, as you can really appreciate the complex branch structure of it.
They can also give off a creepy and moody vibe, which can make learning how to draw a dead tree lots of fun, especially around Halloween time!
By the end of this guide, you will be able to create some incredible artwork featuring these dead trees.
We hope that this step-by-step guide on how to draw a dead tree will show you how easy and fun it can be!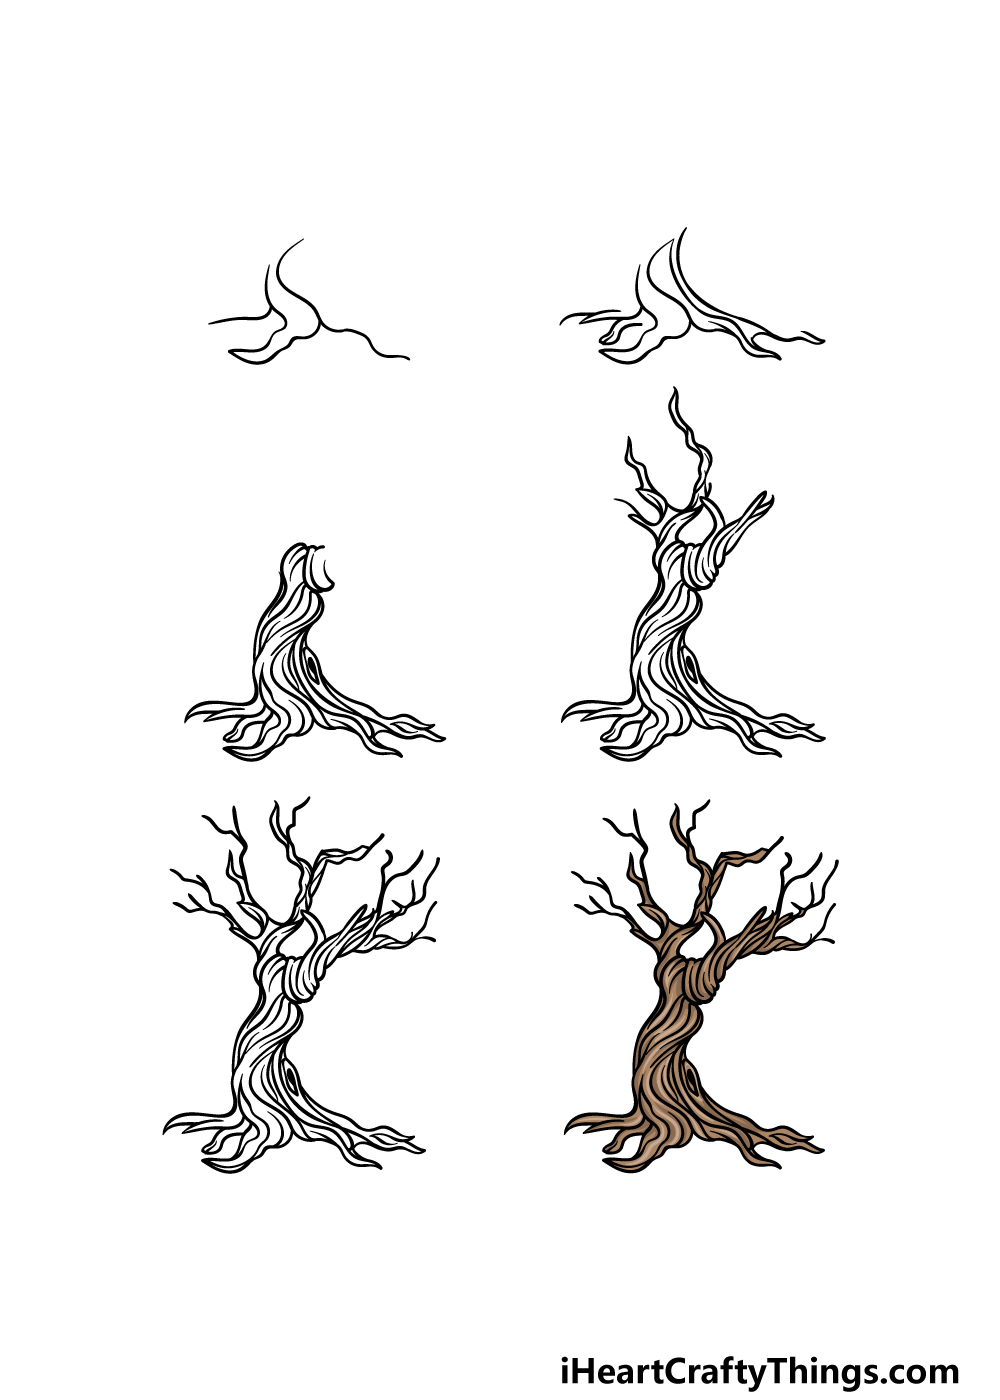
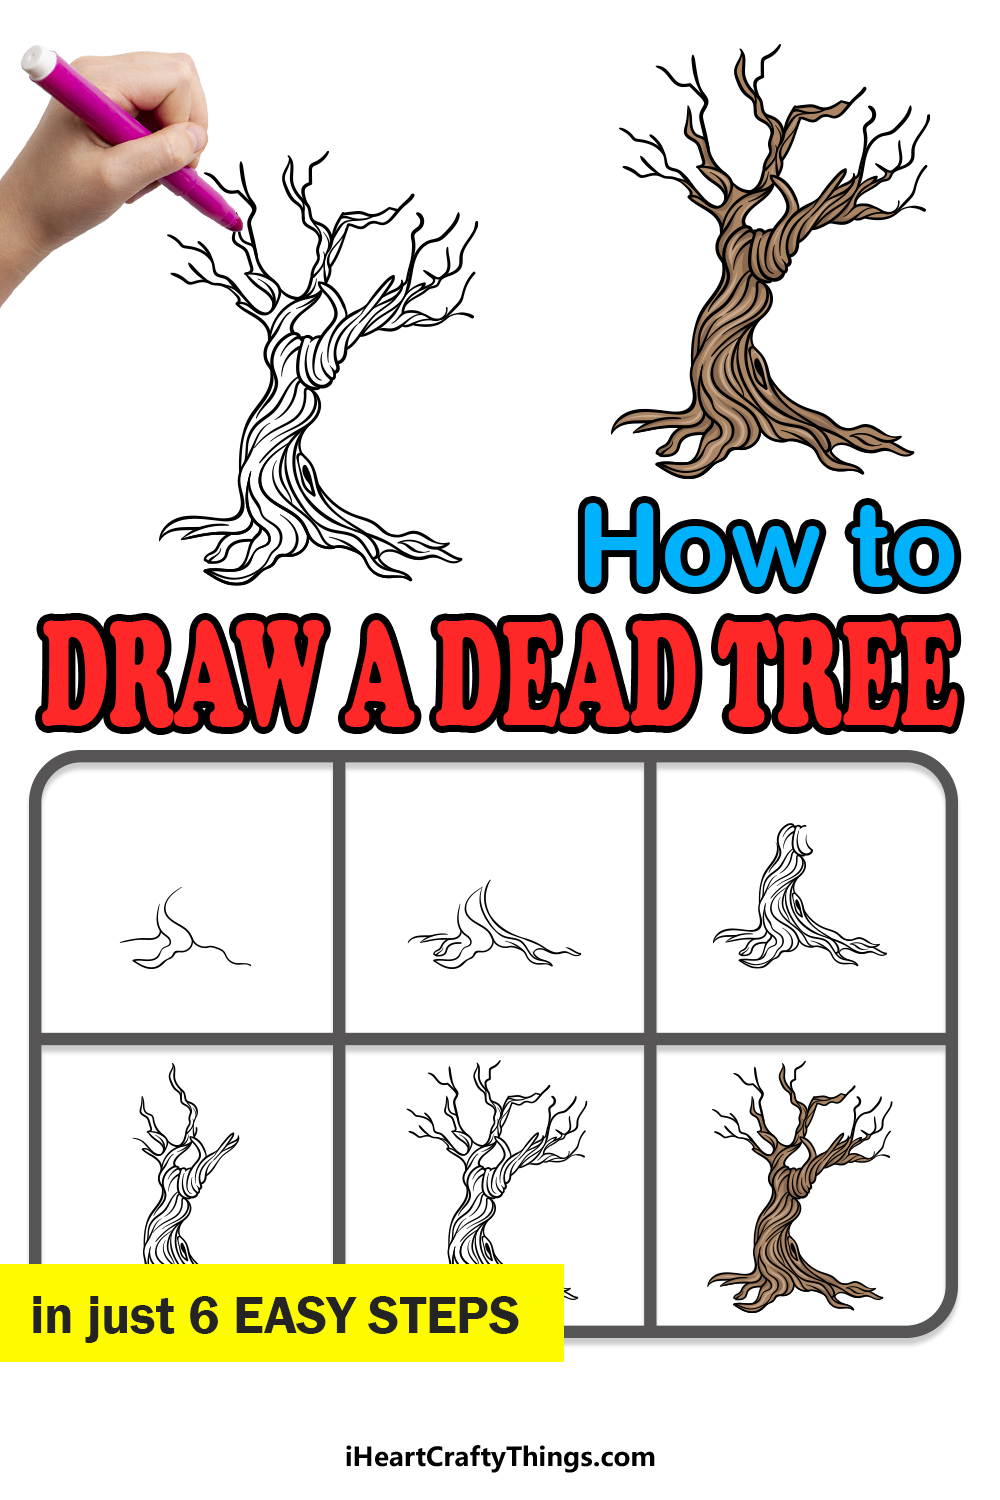
How to Draw A Dead Tree – Let’s Get Started!
Step 1
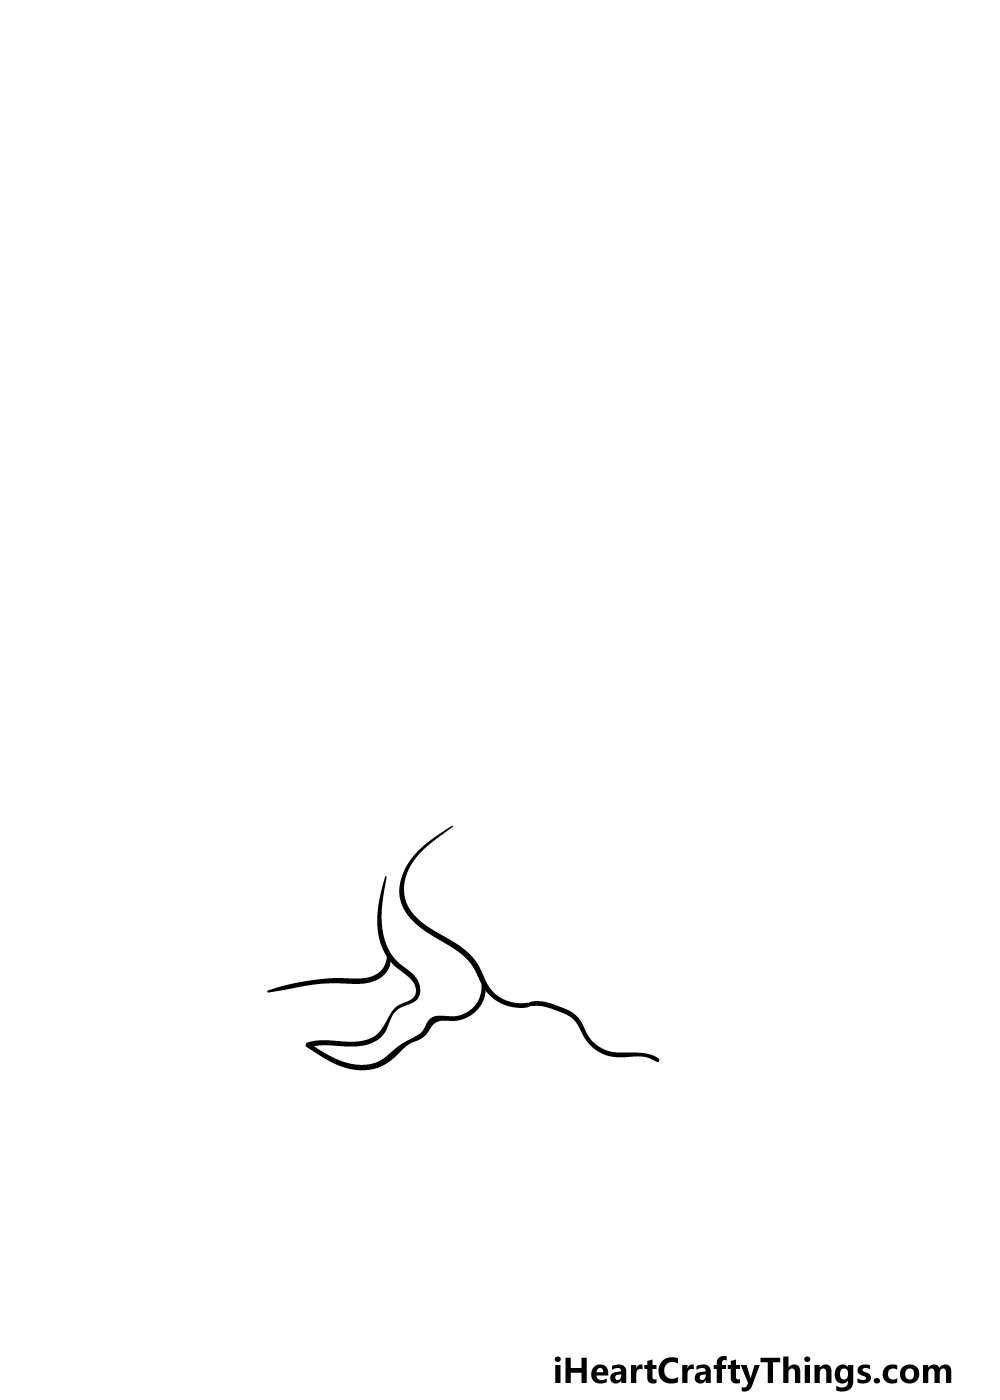
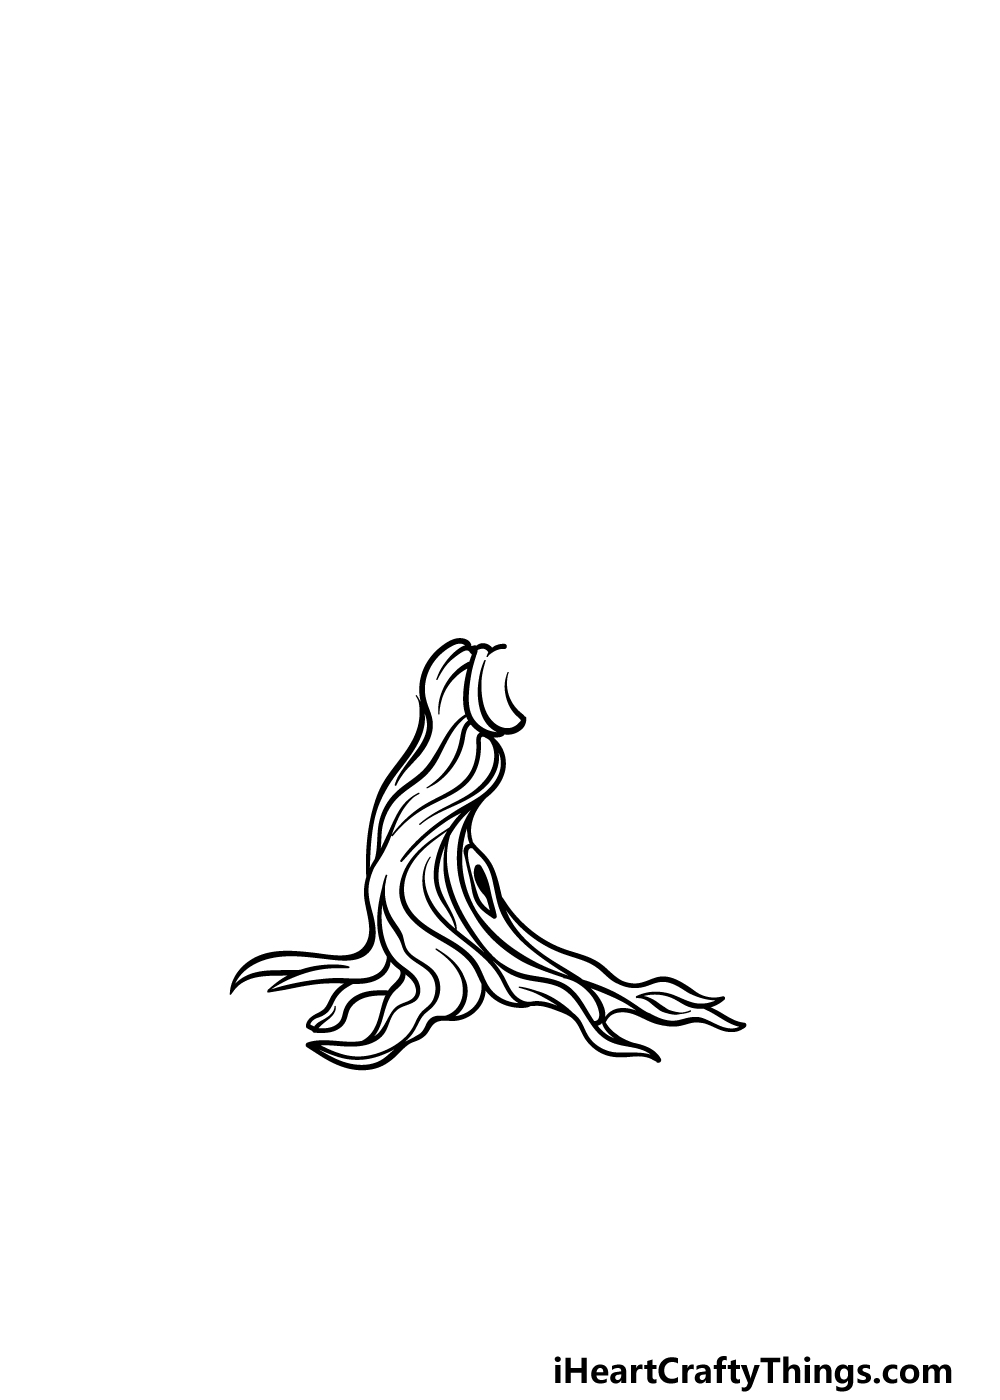
To kick off this guide on how to draw a dead tree, we will be starting with the root of the tree.
Throughout this drawing, we will be using lots of different lines to give the bark an aged, gnarled look.
That’s worth keeping in mind as you draw these roots, and as you can see in the reference picture we will be using some curvy and twisty lines for the roots digging into the ground.
Once you have drawn these roots as they appear in the example, you will be ready for step 2, so let’s proceed!
Step 2 – Next, draw some more of the roots
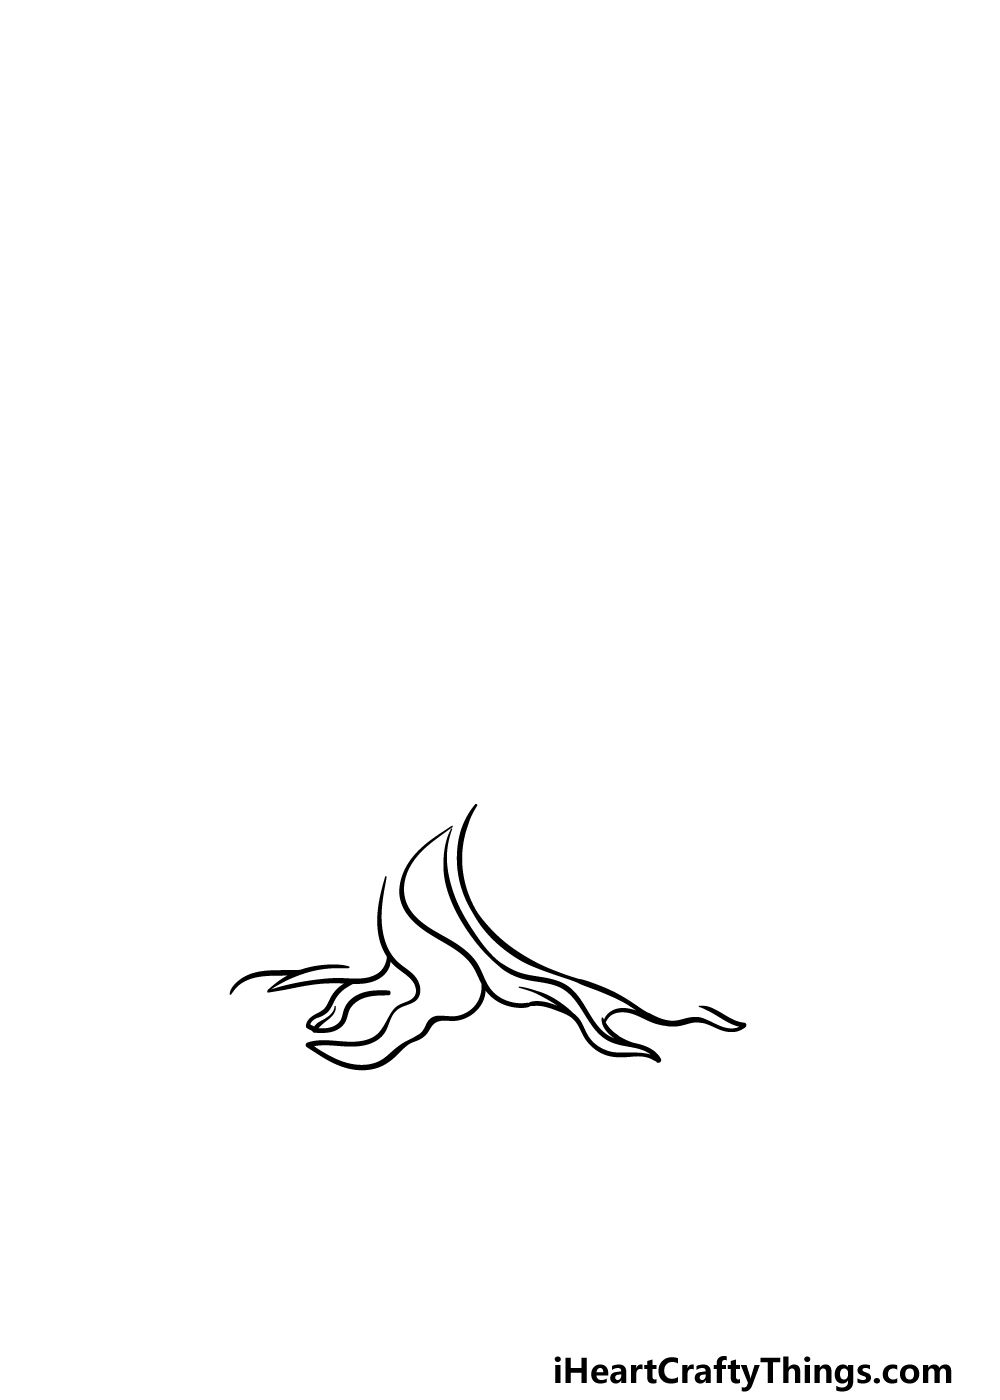
You have started drawing the roots of your dead tree drawing, and now we will finish them off to have you ready for the next sections of the tree.
To do this, we will be adding some more of those curved and rounded lines specifically to the sides of the root base.
Once again, when it comes to making the tree look more aged the more rounded and twisting you make the lines the better!
That will finish off the roots for now, and as we move on we will be working on the trunk for the tree.
Step 3 – Draw the trunk for your tree
In this third part of our guide on how to draw a dead tree, we will start to draw the trunk for it. We used a lot of rounded lines connecting to one another for the roots of the tree, and we will be using even more for this step.
You can add some line detail to the roots that you already drew, and these line details will extend up into the trunk.
The trunk will have a lot of line detailing on it, and again this will help to give the tree a weathered look.
The trunk will be a bit bent over as well, and this will help to portray the look of a tree that has spent years being blown on by heavy winds.
Finally, add a knot to the tree with a small black shape and then you can move on.
Step 4 – Now, draw the first branches
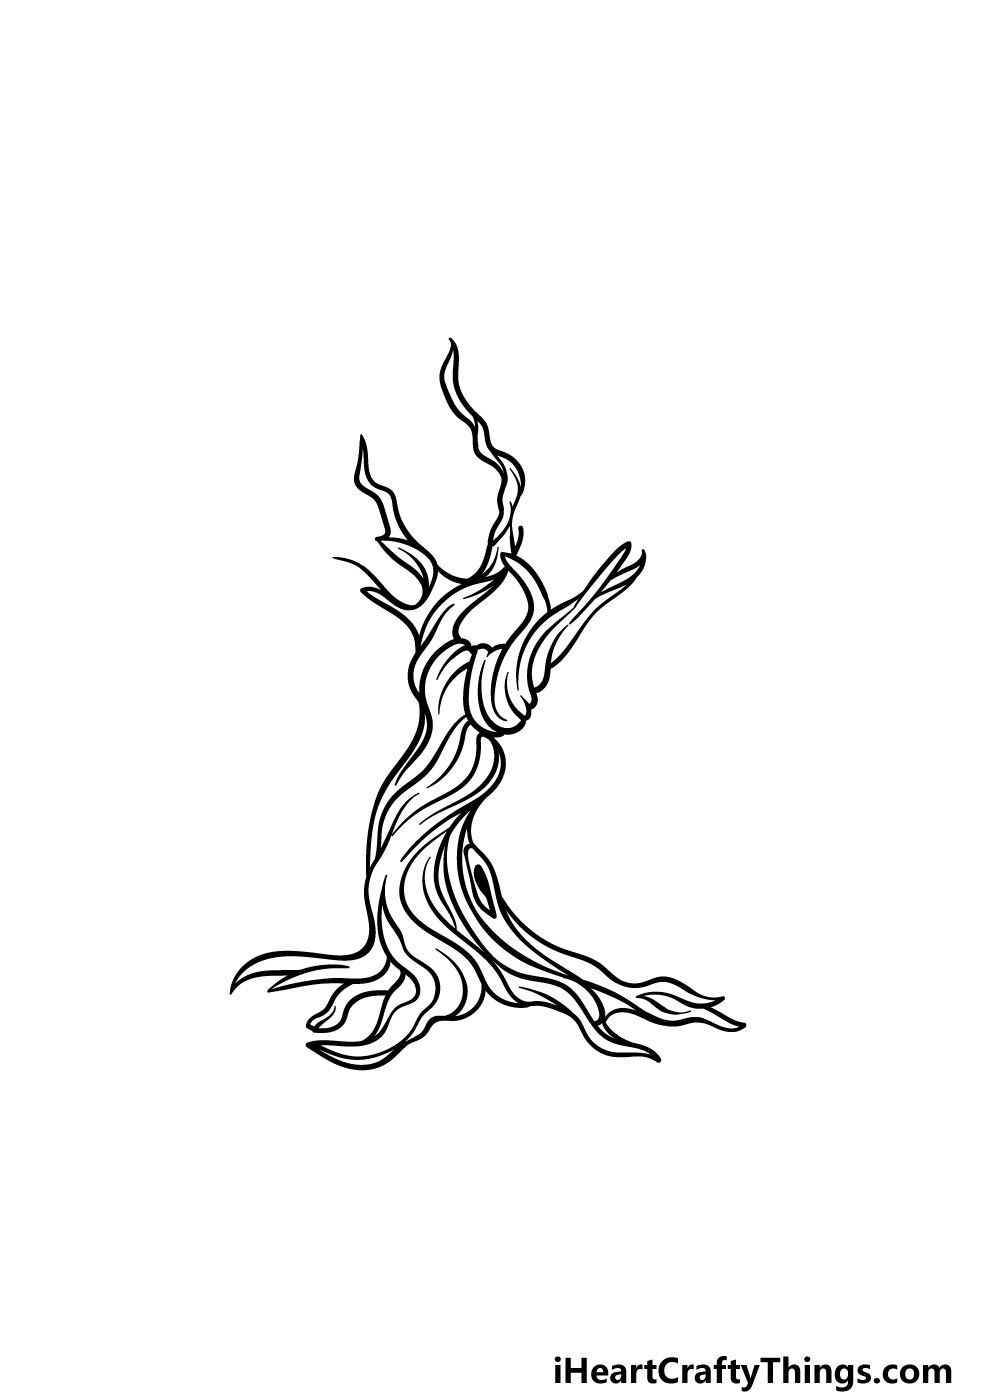
Now it’s time to start adding some branches to your dead tree drawing. These will also be made up of lots of rounded lines connecting to each other as they looked on the other sections of the tree.
There will be one thicker branch on the right-hand side, and then on the left there will be a thinner one that branches out in three places.
Once that is drawn, we can start to add some smaller branches and twigs to the ends of the ones you drew, along with some smaller final details.
Step 5 – Finish off your dead tree drawing
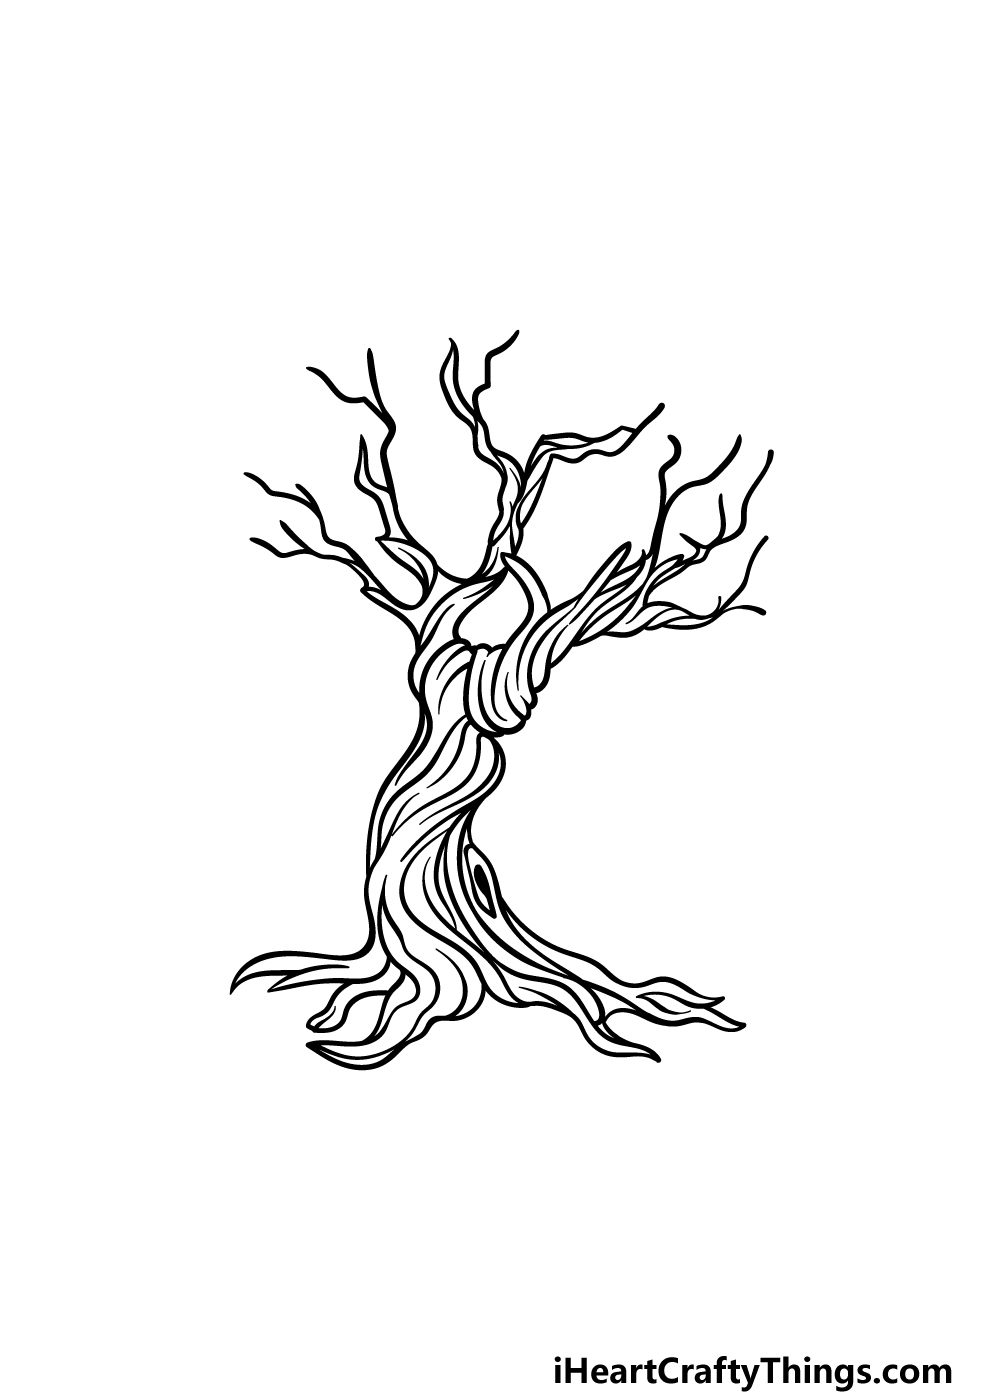
This step of our guide on how to draw a dead tree will be all about finishing off the final details to have it ready for the final part of the guide.
To finish off the branches, add some thick lines coming out from the ends of them for the thinner portions.
These will also help to make this dead tree look even more dead and aged. Then you’re ready for the final step! Before you move on to that part, you can also add some touches of your own.
We mentioned in the introduction that this would make a great Halloween picture, and there are tons of things you can add for that effect.
You could draw some jack-o-lanterns with an ominous moon with bats flying across it for one idea.
There is a lot that you could do as well, so this is your chance to let your creativity flow! How will you finish off this drawing before you color in?
Step 6 – Finish off your dead tree drawing with some color
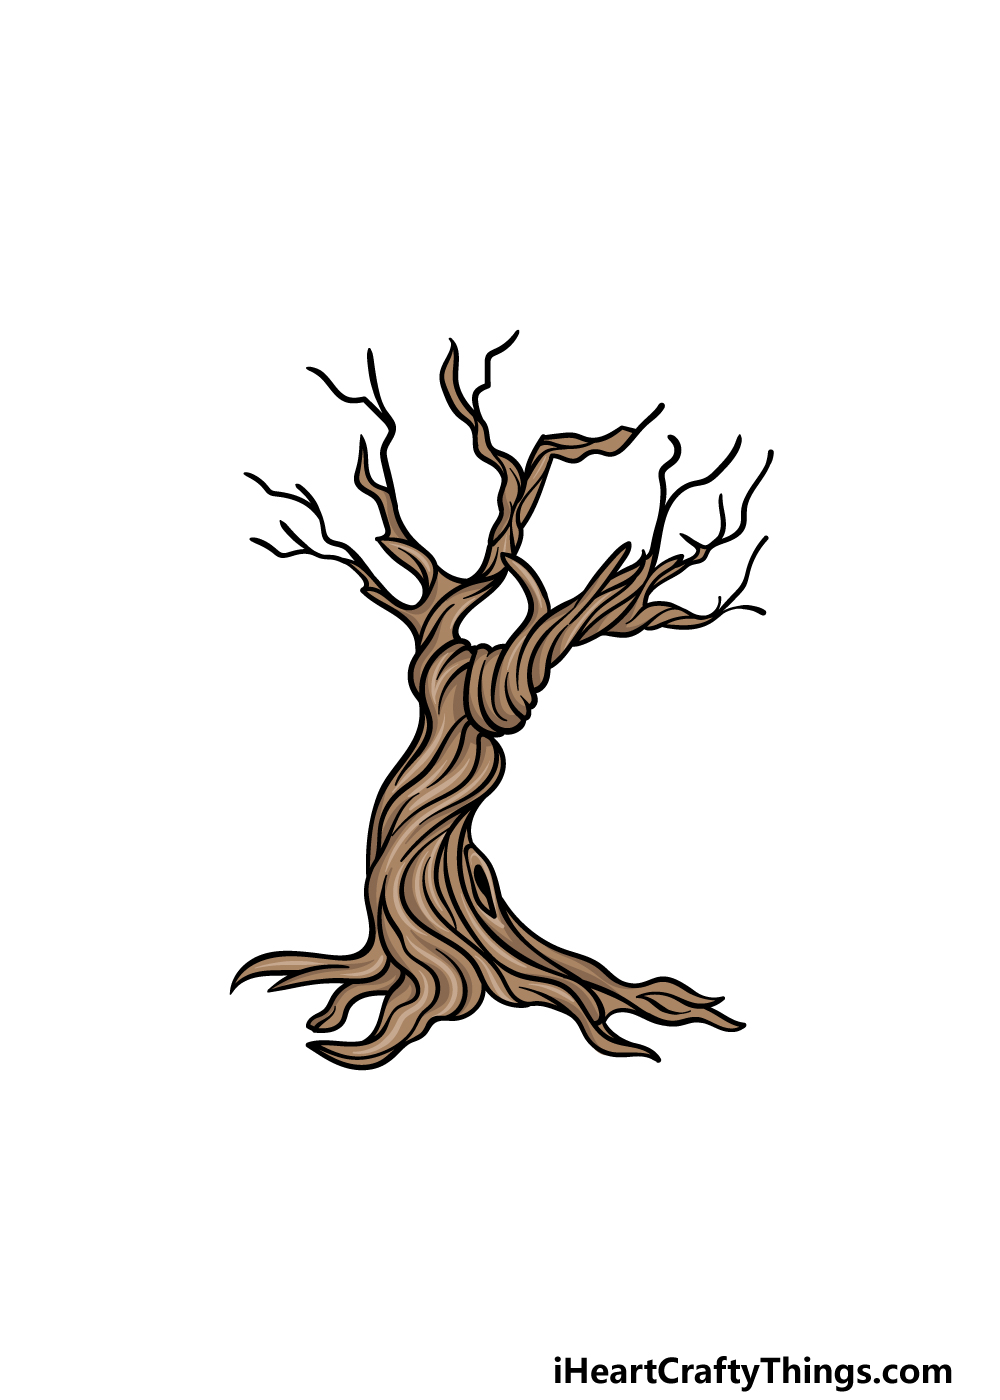
Now that your dead tree drawing is complete, you can finish it off with some amazing colors in this final step.
To keep on with our goal of making this tree look old and weathered, we used some darker shades of brown for it.
This is a look that you could replicate for your own drawing, but you should also feel free to use any colors that you like!
Even if you use these darker browns, there are ways to bring brighter colors in as well.
You could use some oranges and yellows for the base in order to make it look like there is a blanket of Fall leaves there for one idea.
Which colors and art mediums will you use to finish off this drawing?
Do this to take your dead tree drawing to the next level
Grow this dead tree sketch even further with these 4 fun and easy tips!
This dead tree drawing we created looks really great, but it could always use some more details!
There are loads of subtle details you could add to make it even better.
Even though it is a dead tree, you could add some small dead leaves hanging from the branches. Or, you could add some more details and holes on the bark of the tree.
These are a few small ways you could make this dead tree look more dynamic. What other smaller details could you add to finish it off?
Another way to make this drawing of a dead tree even better would be by adding some animals around it. For example, it would be fun to have an owl sitting on one of the branches.
Or maybe there could be a squirrel relaxing on the tree! These are just a few of the critters you may expect to see on a tree, but what other ones can you think of?
This dead tree sketch we drew has a rather spooky feeling to it. For that reason, you could add some bigger, scarier characters than an owl or a squirrel.
Maybe there could be a werewolf beneath the tree, howling at the moon. Or maybe there is a ghost doing spooky ghost things!
What are some other spooky and scary creatures and characters you could add to finish off this design before the final tip?
Once you have added all of your ideas and changes, you can finish off this dead tree drawing with a background. The background you add would depend on the other changes you made!
If you want this to be a more normal-looking design, then you could use a forest background, for one idea. For a spookier setting, you could show a haunted house or a graveyard.
These are just a few suggestions, but we encourage you to use your imagination for this one! What will you use?
Your Dead Tree Drawing is Complete!
All six steps of our guide on how to draw a dead tree are complete, and you have a great drawing to show for it!
Our main goals with this guide were to make sure that it was fun and easy for you, and also that you would have room to customize and add to it as you wish.
That means it’s up to you with how you finish off this drawing! We went through a few ideas that you could do to add to it, but this is your chance to get creative and see what you come up with.
We have so many more drawing guides like this one for you to enjoy, so be sure to keep checking our website, as we add new ones frequently.
It would be great to see your finished dead tree drawing, so please do share it on our Facebook and Pinterest pages for us to enjoy!