The main characters of A Nightmare Before Christmas have become quite iconic and ingrained in popular culture.
The skeletal Jack Skellington and the Frankenstein-like Sally are the main characters of the film and form the heart of the story.
Thanks to their unique designs and character traits, they remain popular with audiences to this day. For fans of this beloved couple, it can be lots of fun to learn how to draw Jack and Sally.
This is the guide to be on if you would like to celebrate these incredible characters!
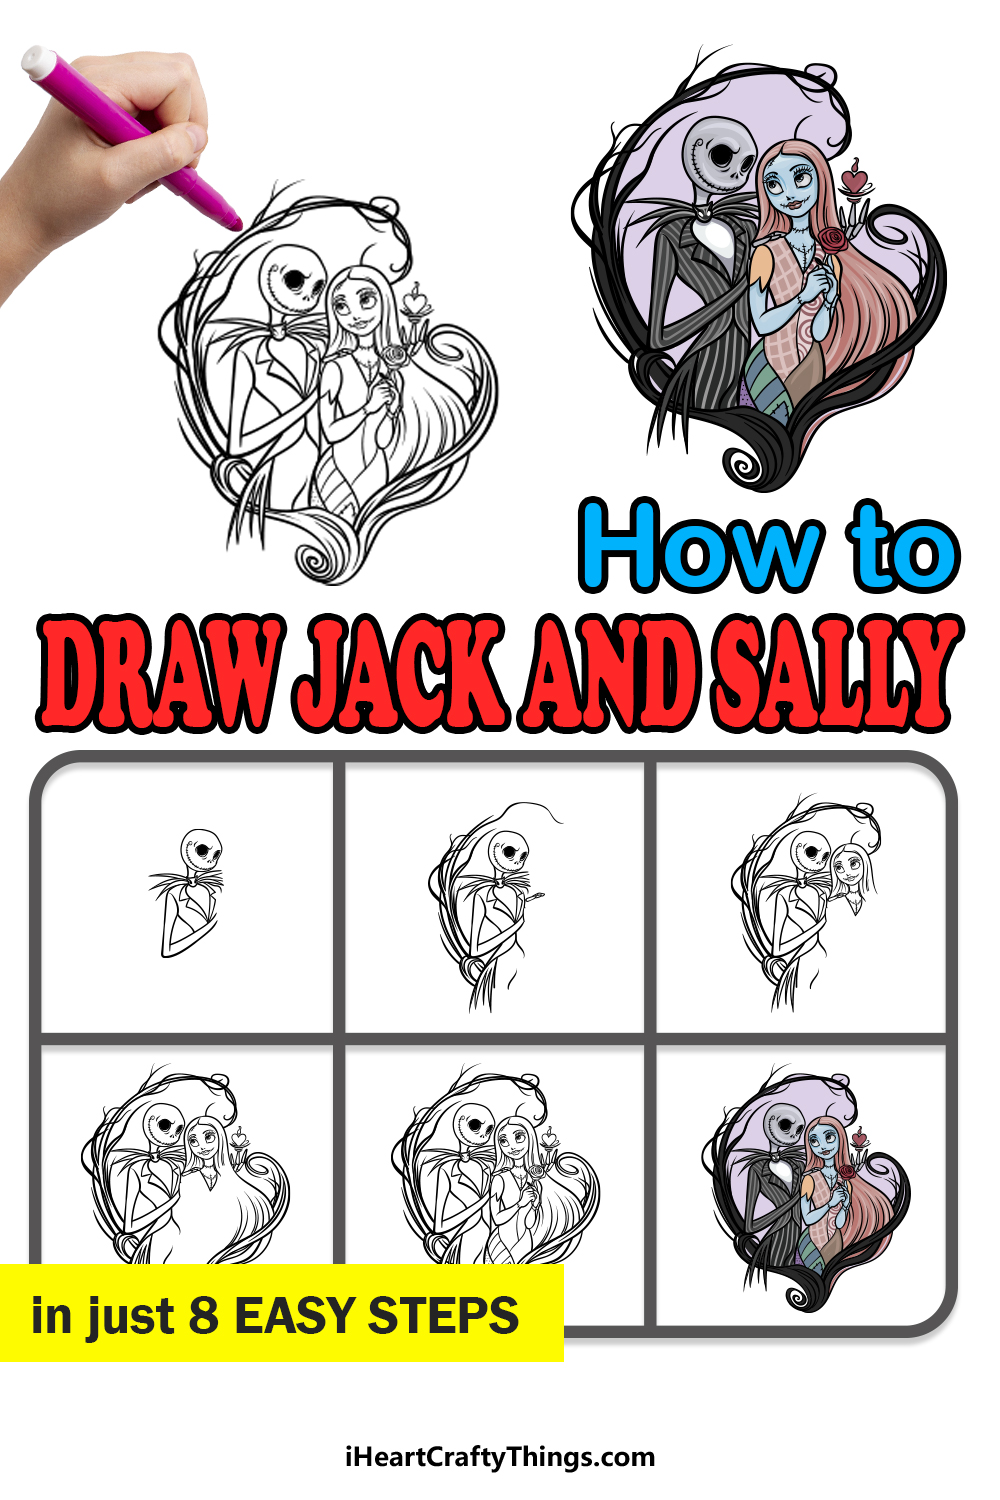
Our step-by-step guide on how to draw Jack and Sally will show you how fun and easy it can be.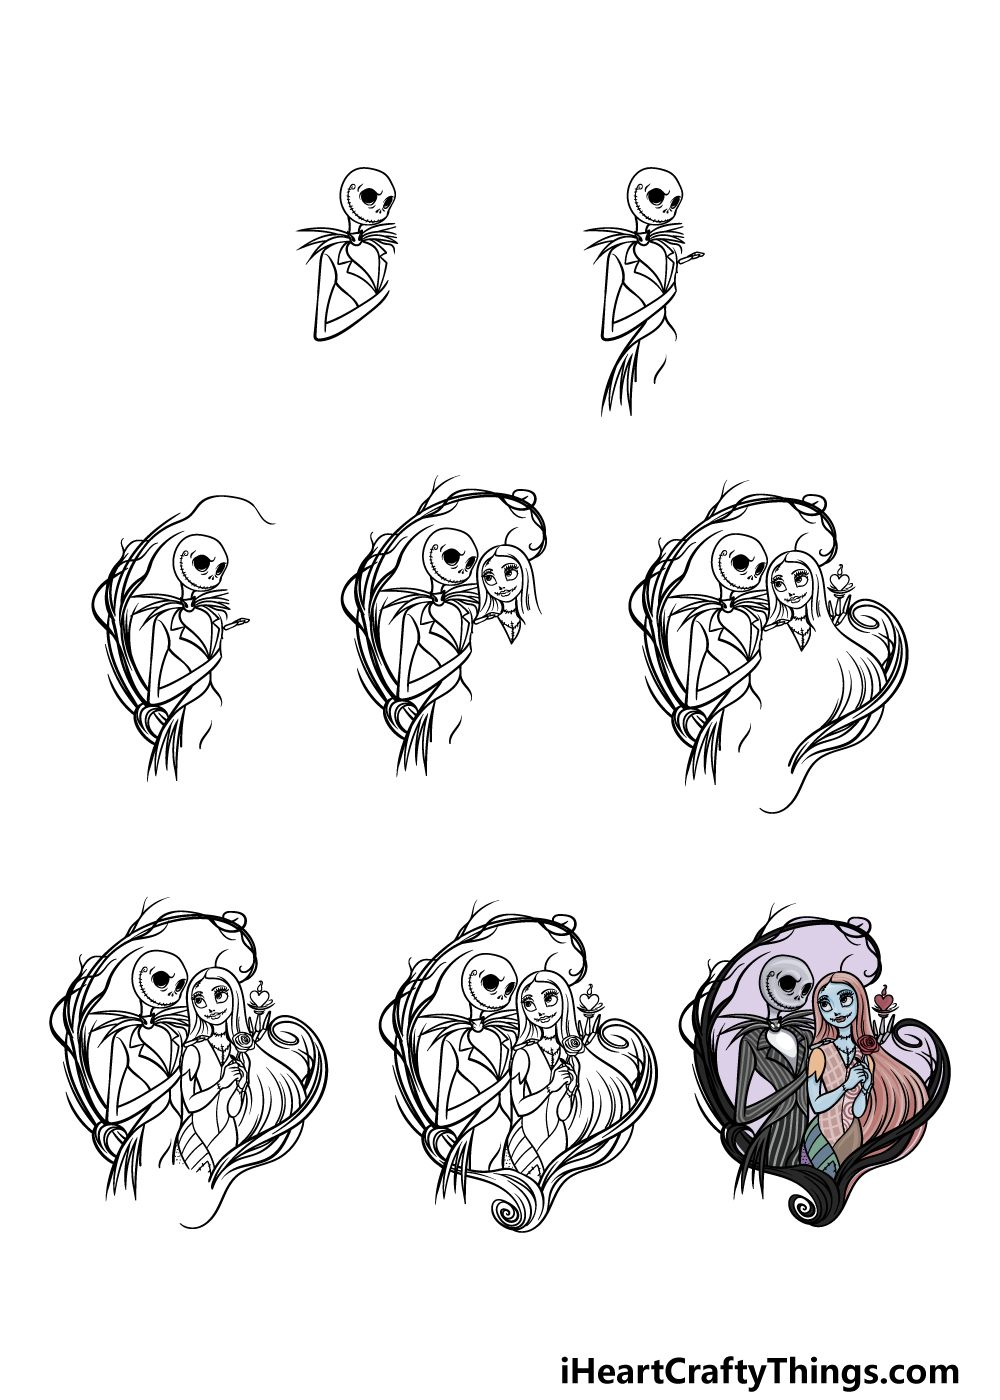
How to Draw Jack and Sally – Let’s get Started!
Step 1

We shall begin this guide on how to draw Jack and Sally by starting with Jack. Jack’s skull head is quite squat and rounded, with a slight protrusion at the base for his jaw.
Once you have drawn the head outline, you can add his eye sockets which will be drawn as big, round black shapes.
His nose will be drawn with two small lines, and then you can add his mouth as a long curved line to give him his wry smile. The mouth will also have lots of little vertical lines on it to show that he has a skeleton mouth.
Then we will draw some long, sharp shapes for the parts sticking off his collar, and then you can finish off with the start of his arms and chest.
Step 2 – Next, draw more of Jack’s body
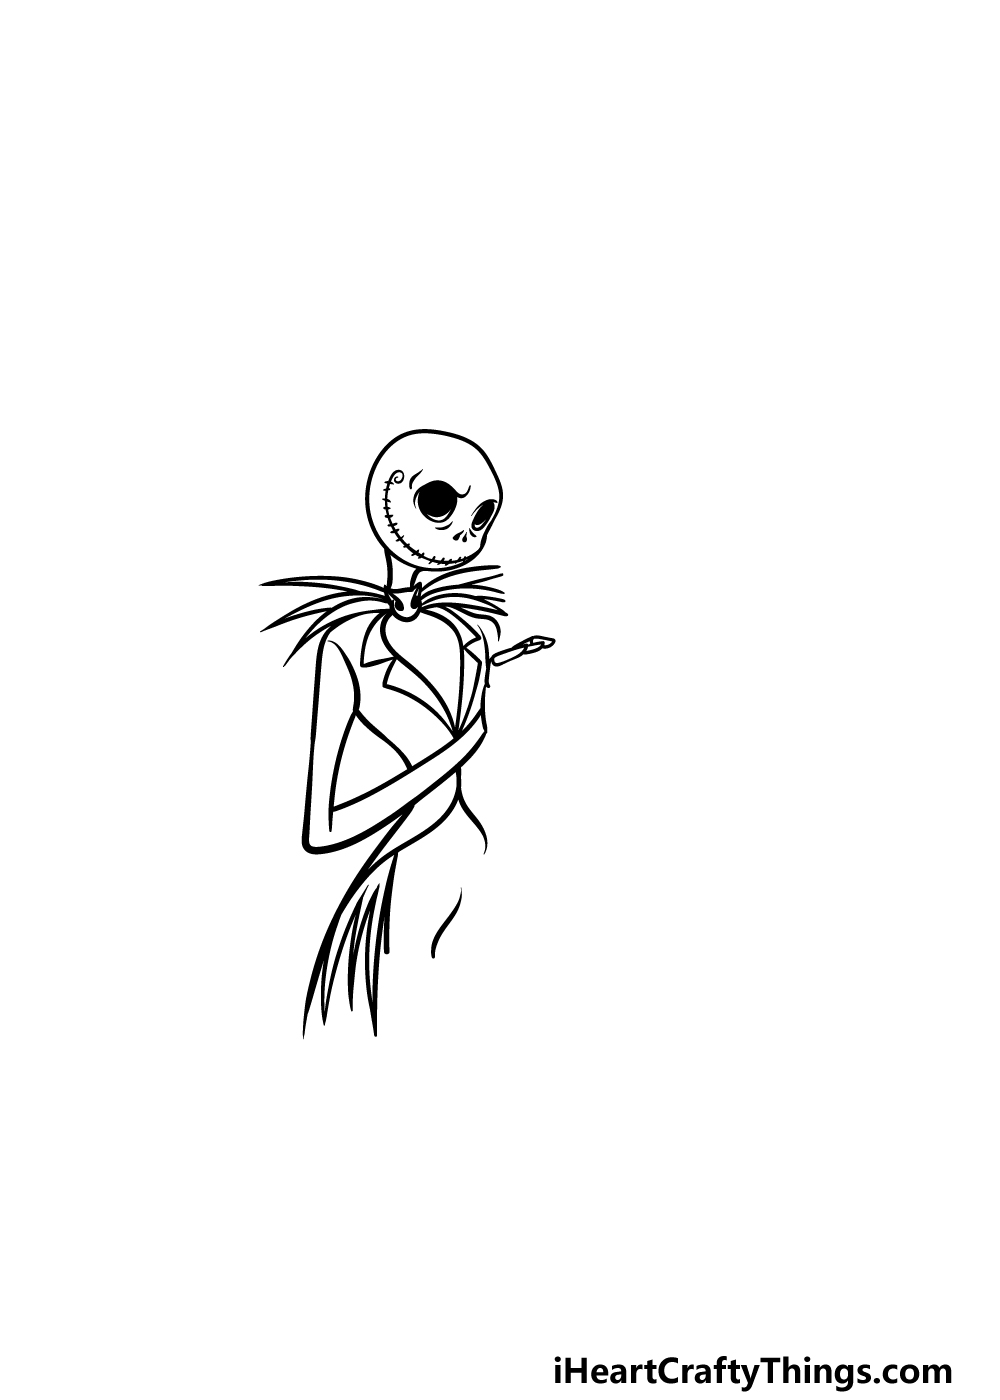
This second step of your Jack and Sally drawing will see you drawing some more of Jack’s body and outfit.
Using some curved and sharp lines, we will draw the tails of his coat hanging behind him. We will also be drawing the bottom of his jacket buttoned at the front.
You can then finish off this step by drawing his skeleton hand.
Step 3 – Now, draw the pattern surrounding the characters
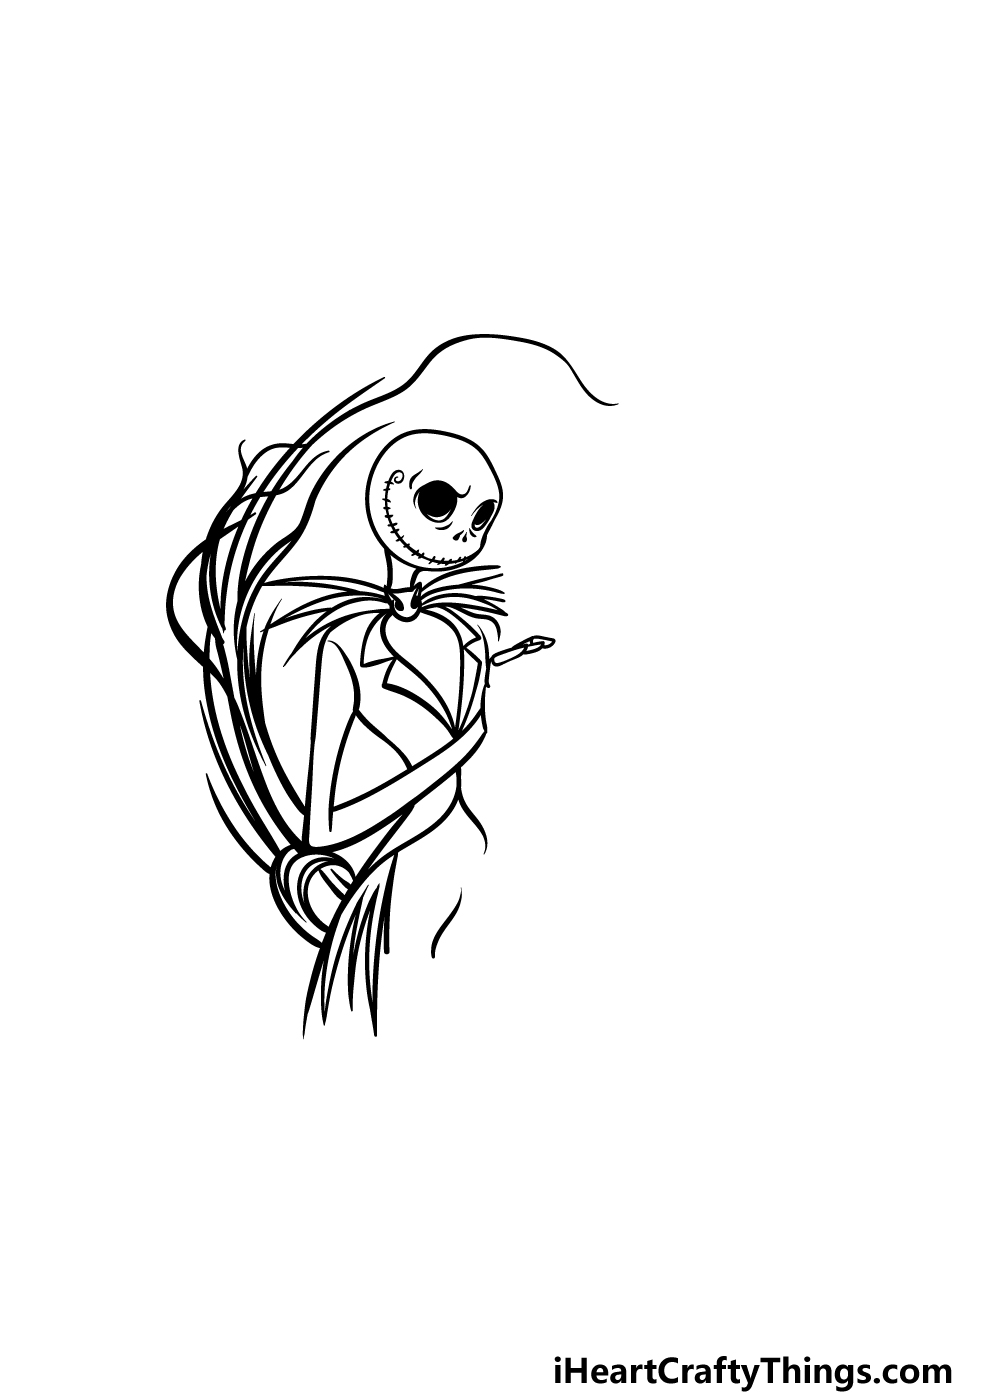
We have designed a border for the characters to stand within to capture the feeling and style of the film.
This border looks a bit like it is made of spindly twigs and branches, and we shall start drawing them in this step of our guide on how to draw Jack and Sally.
Starting from the bottom of Jack’s body, you can extend some curved lines up and around him with lots of curvy lines poking off of it.
Step 4 – Next, start drawing Sally’s head
Now it’s time to start drawing Sally for this step of your Jack and Sally drawing. For now, we will be drawing just her head.
Unlike the skeletal Jack, Sally has a bit more detail to her facial features. She has her long hair that you can draw with some curved lines, and then her large eyes will have some nice detailing to them.
Be sure to add some stitching detail to her face and lips, as she is supposed to be reminiscent of Frankenstein’s monster.
You can also draw her neck and the start of her shoulders before moving on to the next step.
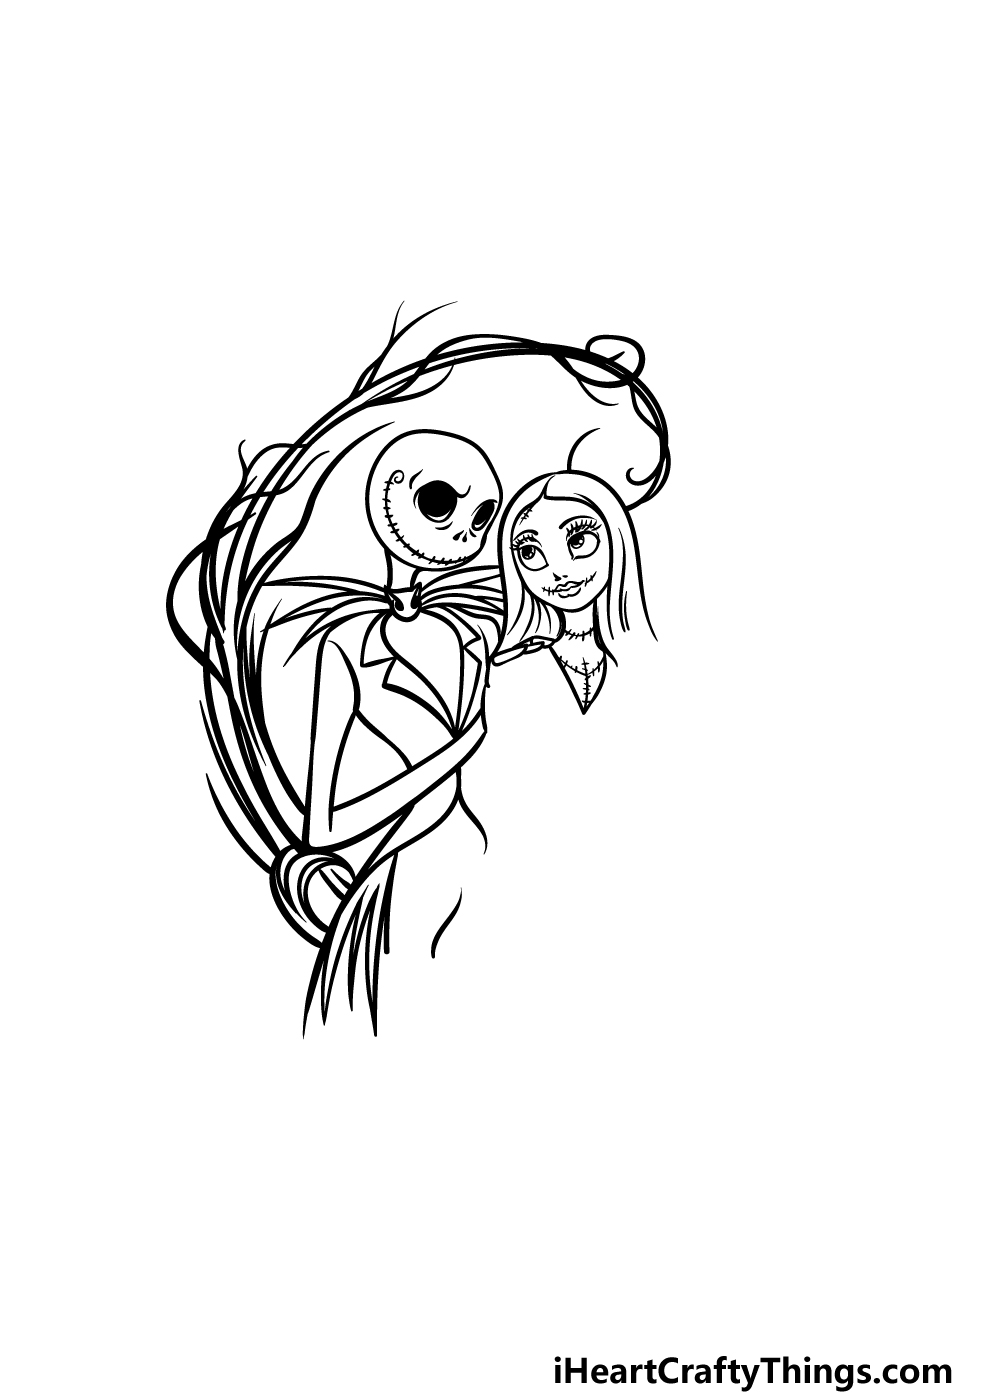
Step 5 – Now, draw some more of the border
We will be adding some more to that stylish border that you started in an earlier step in this guide on how to draw Jack and Sally.
First, you can draw Jack’s skeleton hand with a heart twirling on his finger over her other shoulder.
Then we will be adding some more of those curved and twisty lines for the border near Sally, and you can also draw her long hair flowing down.
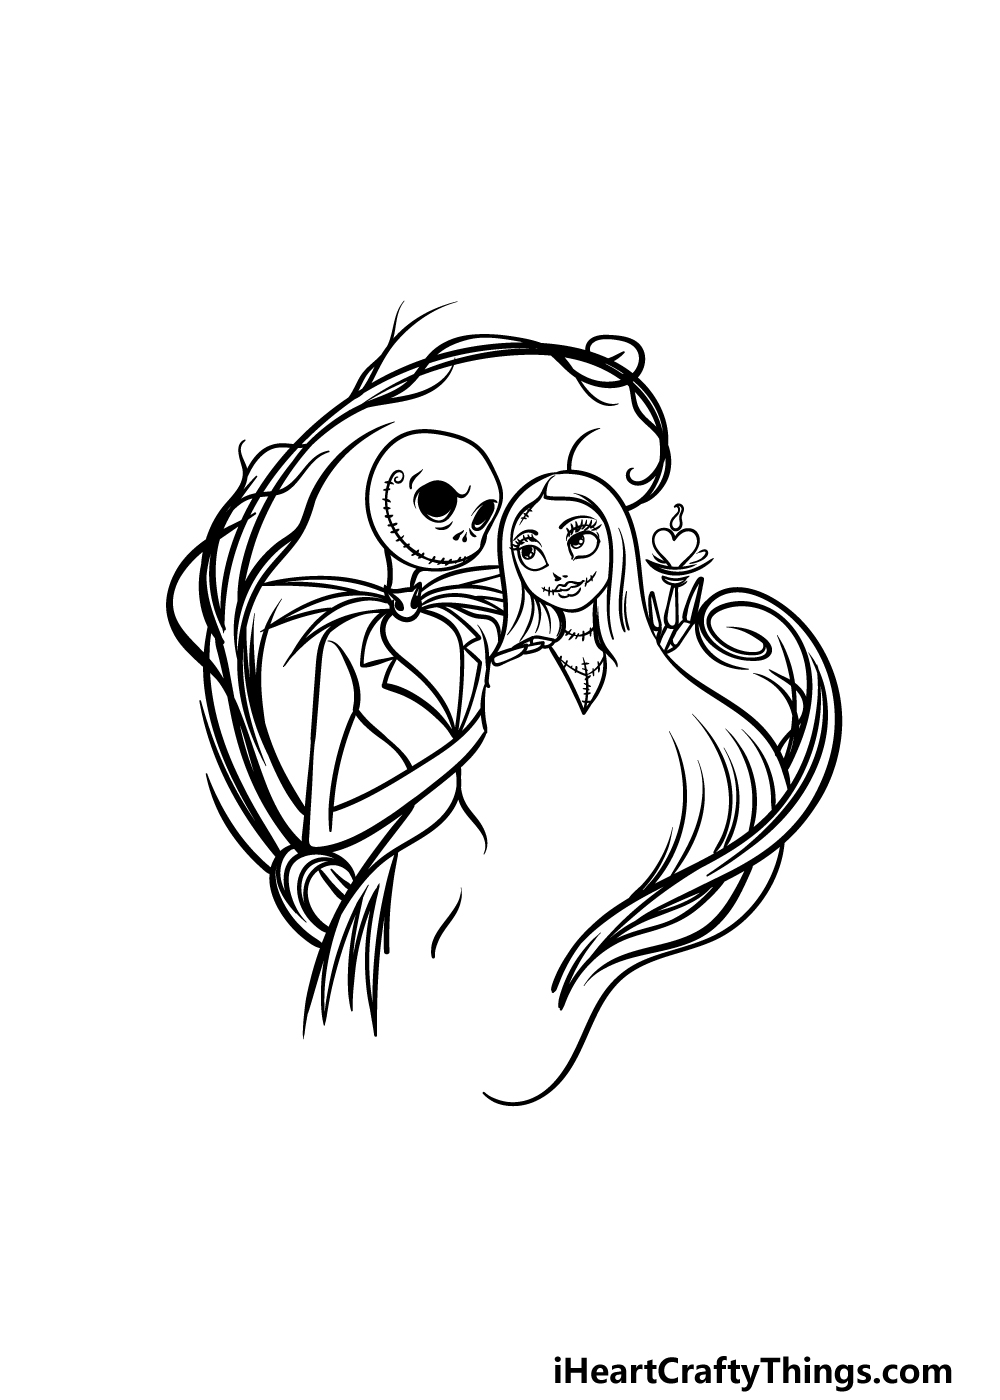
Step 6 – Next, draw Sally’s body
Now you’re ready to finish off the rest of Sally for this part of your Jack and Sally drawing.
We will be using some smooth lines to show her arms close together and have her clutching a rose to capture the romance of this scene.
Her clothes are made to look like they are patched and sewn together, and you can draw that in this part as well.
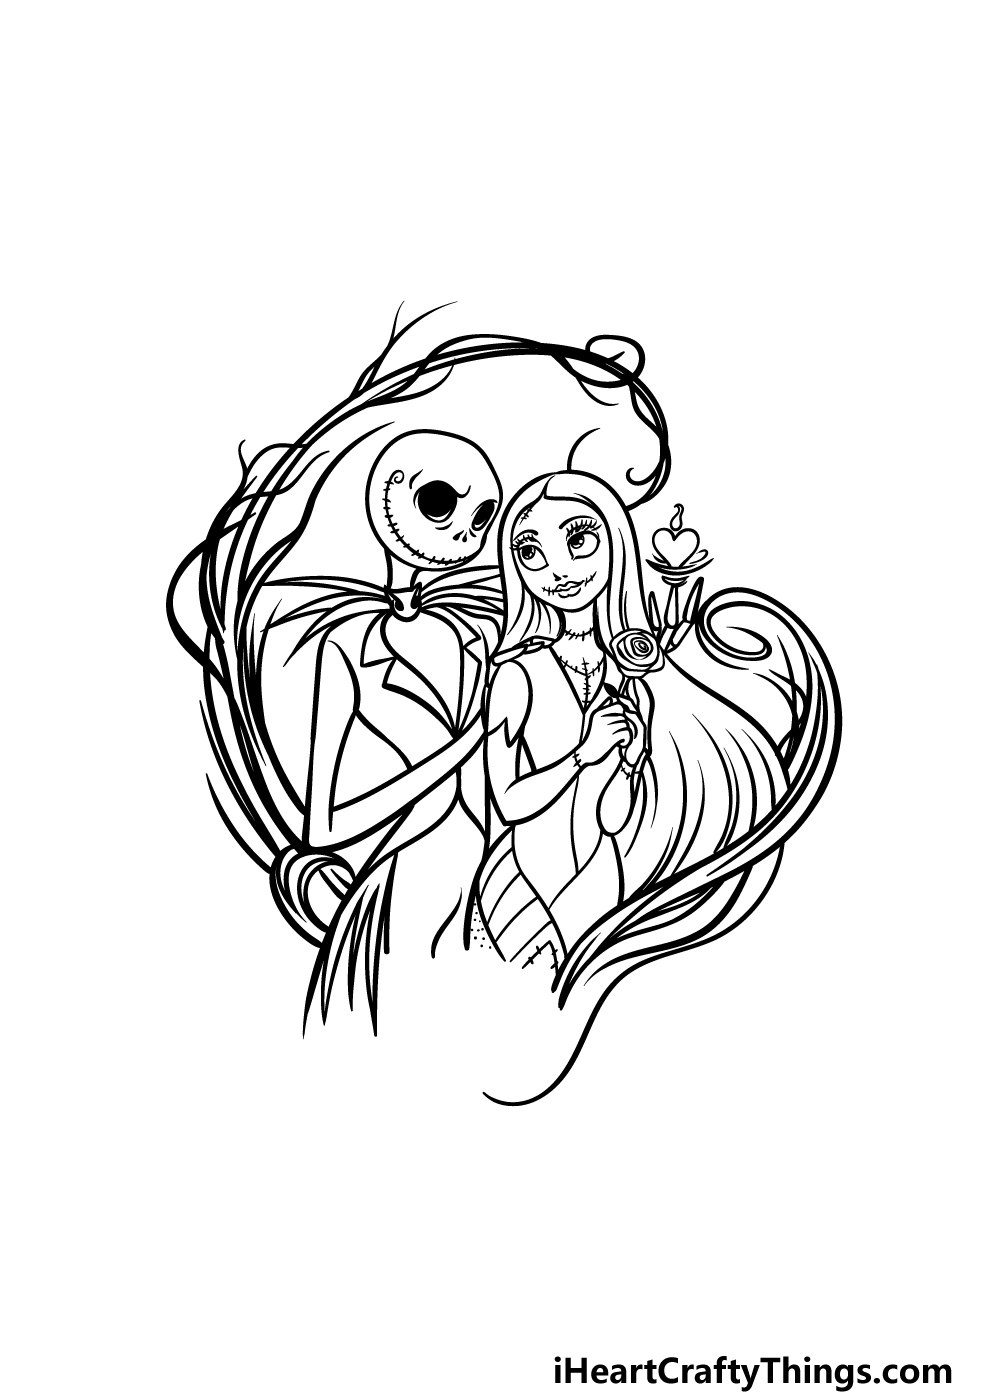
Step 7 – Next, finish off the details and border
Before you move on to the final step of this guide on how to draw Jack and Sally, we have a few final details to add.
First, use some more twisty lines for the base of the frame that they are standing in. Once that is drawn, you can then add some final touches to the image.
You could also add some details and elements of your own, so be sure to get creative and add some final touches if you would like!
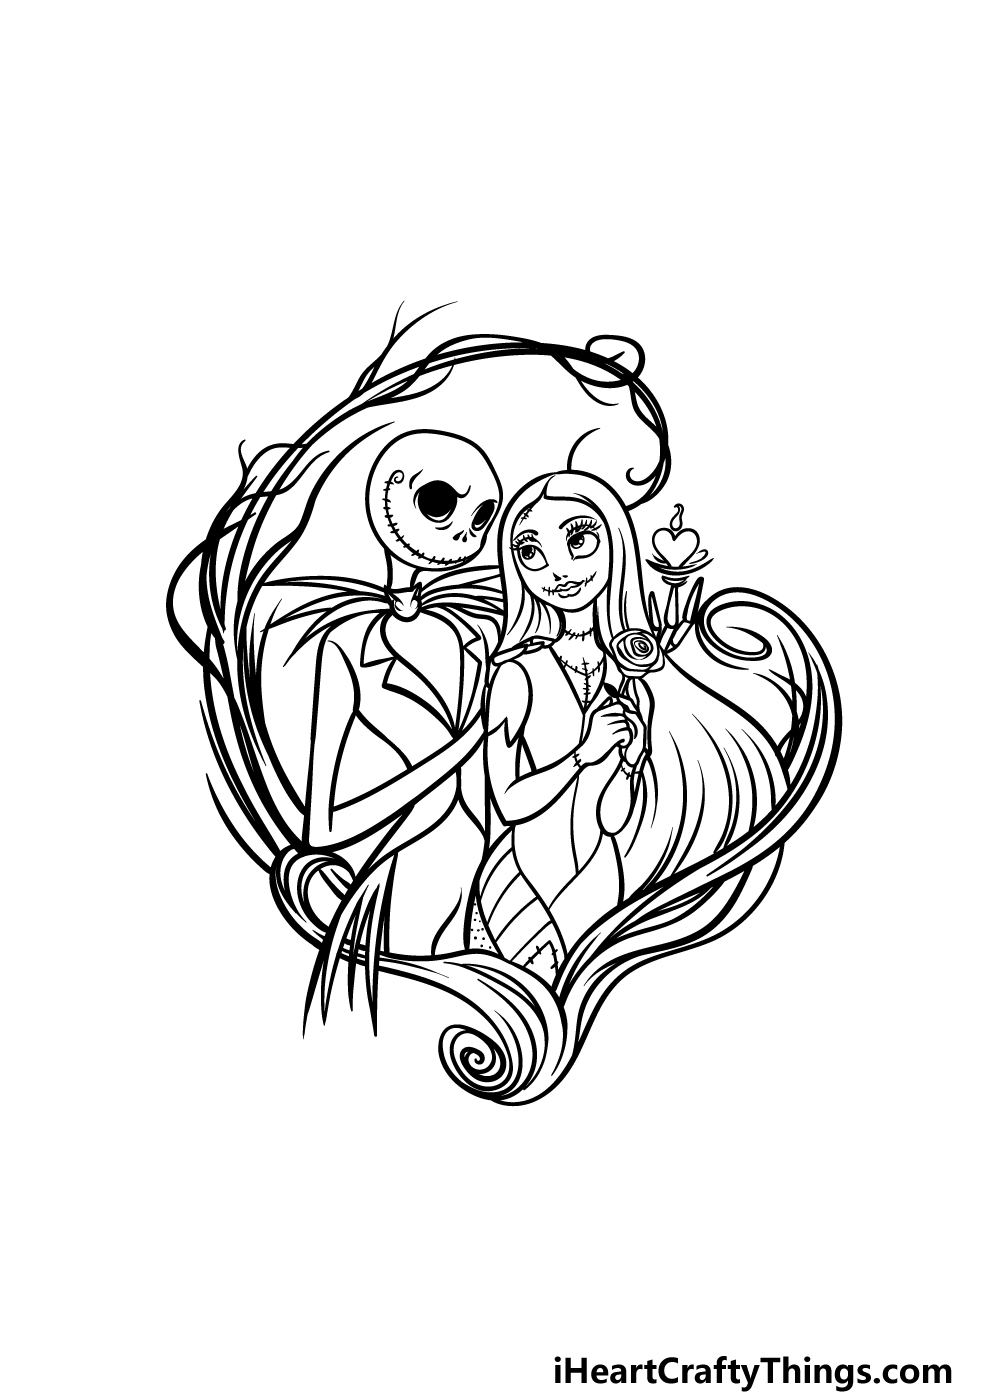
Step 8 – Now finish it off with some color
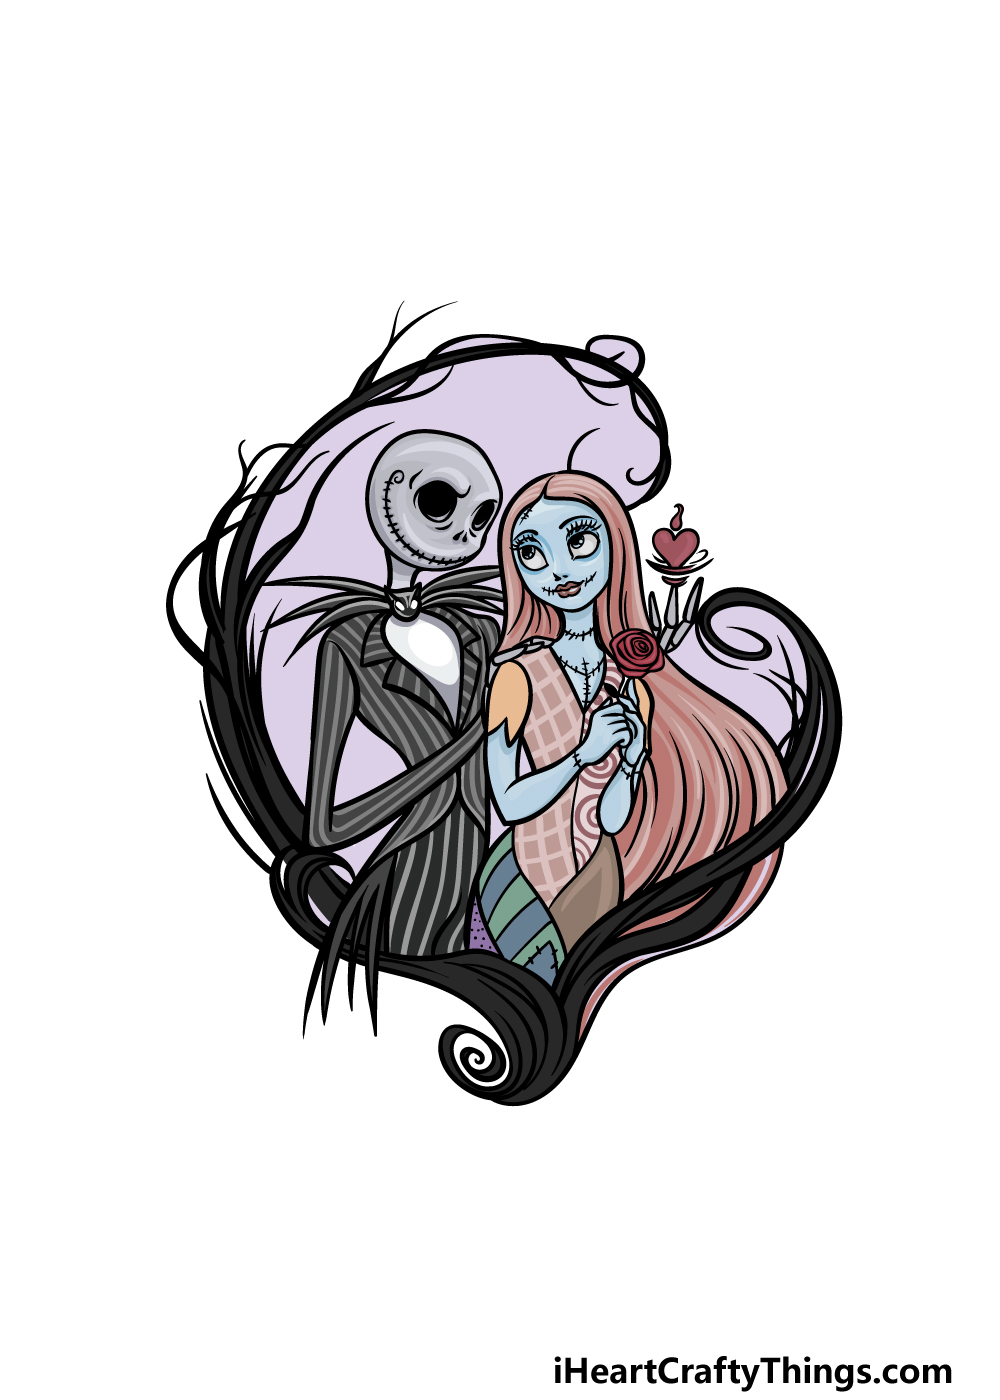
It’s time to finish off your Jack and Sally drawing with some colors! We kept the colors in our reference image looking accurate to the film, so you can use it to guide you if you would like to use their typical colors.
We also went with some more muted tones for the colors, as that helps to capture the feeling of the color palettes used in the film.
If you would like a similar look for your own colors, then you could use some watercolor paints or colored pencils as a few suggestions.
It would look just as great if you changed up the colors or used some more intense mediums, so be sure to really express yourself with color!
Do this to take your Jack and Sally drawing to the next level
Celebrate this iconic movie couple with these tips for your Jack and Sally sketch!
This drawing of Jack and Sally that we created in this guide is surrounded by a beautiful frame. If you want the drawing to focus more on the characters, you could consider removing the frame.
Then, you could zoom in more to show more of their details, or you could add some more of their bodies to finish off the pose in this image.
You could use the film or images online to help you draw more of their bodies!
Next, you could go in the opposite direction of our previous suggestion and make the frame around them even more involved.
This could be done by adding more twisty shapes and branches to the design.
Depending on how big your page is, you could fill the page with this twisty branch design. By using some real sticks and twigs stuck on the image, the frame could have some real texture to it as well!
How else could you add to this frame?
Adding text would be another great way to really take this Jack and Sally drawing to new heights. First, you would want to find a font that you feel suits the tone of the picture.
Then, you would need to pick the words you would like on the page. This could be anything you like, from the characters names to a memorable line from the movie.
What would you like to have written on this image?
The film that Jack and Sally appear in is filled with many weird and wonderful characters. You could add some of these characters to really finish off your Jack and Sally sketch!
If you were to do this, you would probably want to remove the branch frame around Jack and Sally to have more space for these additional characters.
Or, you could just have their faces in the background.
Which iconic characters from A Nightmare Before Christmas would you like to include?
Your Jack and Sally Drawing is Complete!
We hope that you had a frightfully fun time working on this guide on how to draw Jack and Sally alongside us!
We aimed to create a lovely representation of this film and these characters, so hopefully the guide made it fun and easy for you to work on.
Don’t forget that you can also add some details and elements of your own along with your own color and medium choices to put your own spin on it!
Then, when you’re ready for more you can join us on our website for more awesome drawing guides. We have more coming soon, so keep on the lookout for that!
Once your Jack and Sally drawing is finished, we would love to see your interpretation of this picture. Please share your artwork on our Pinterest and Facebook pages for us to see!