The human body is made up of many different muscles, bones and other parts, and this complexity can make it hard to depict in drawings.
Because we are so familiar with human bodies, we can spot an inconsistency a mile away. The abs are no exception to this, and learning how to draw abs is as tricky as any other part of the body.
It doesn’t have to be hard though, and you have the right guide in front of you to make it easier.
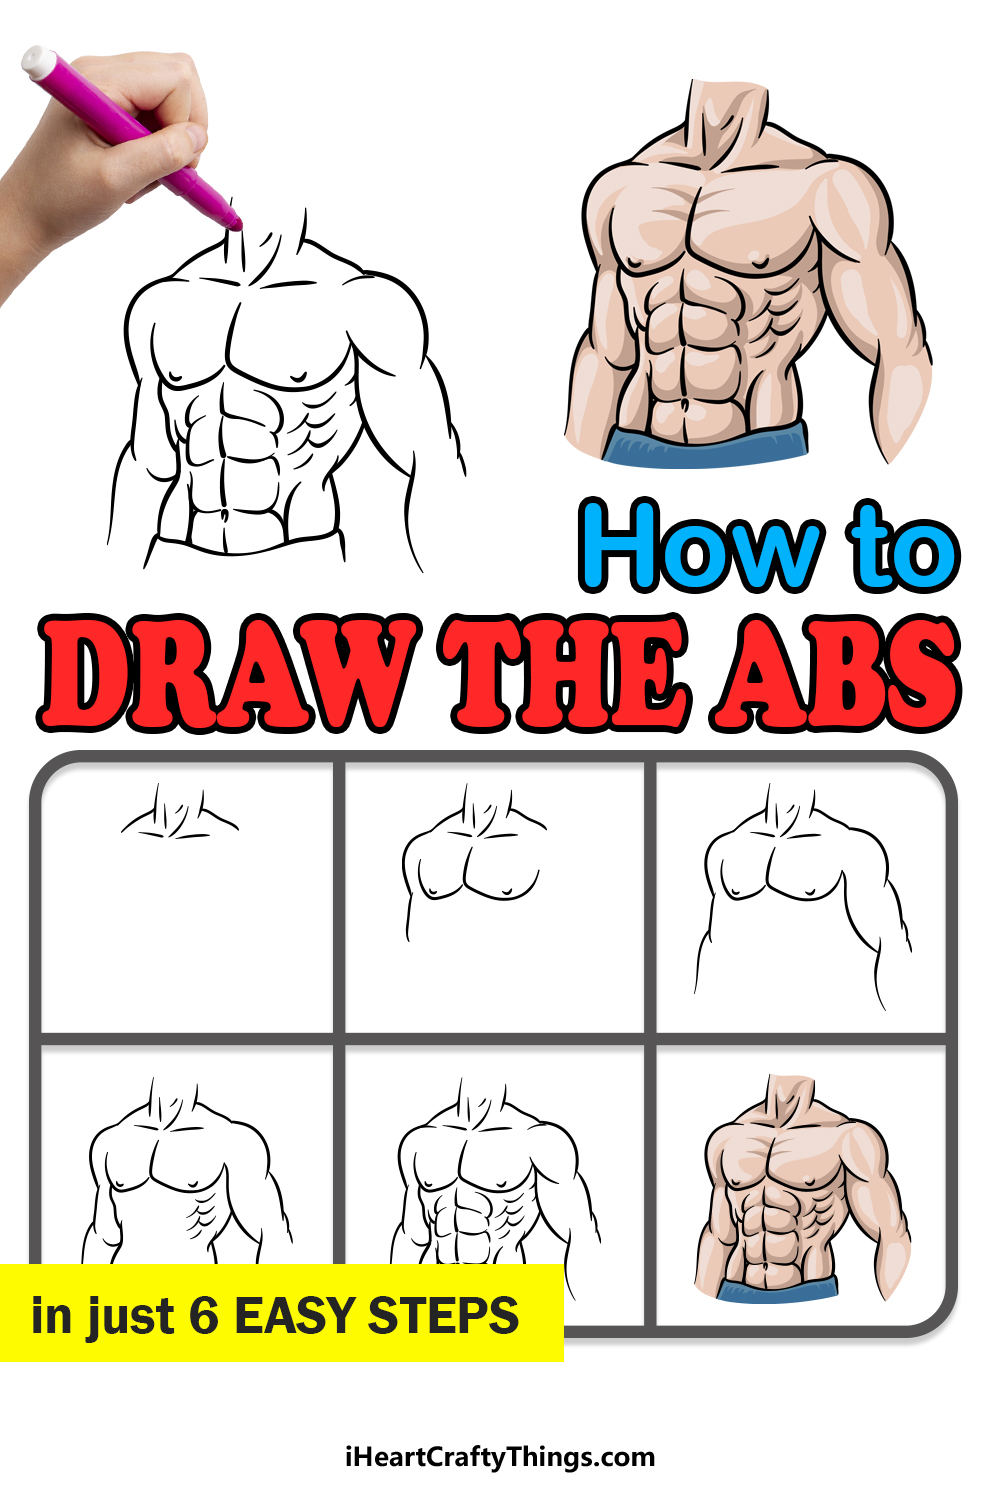
By the end of this step-by-step guide on how to draw abs in 6 steps, you will be able to easily draw this set of muscles!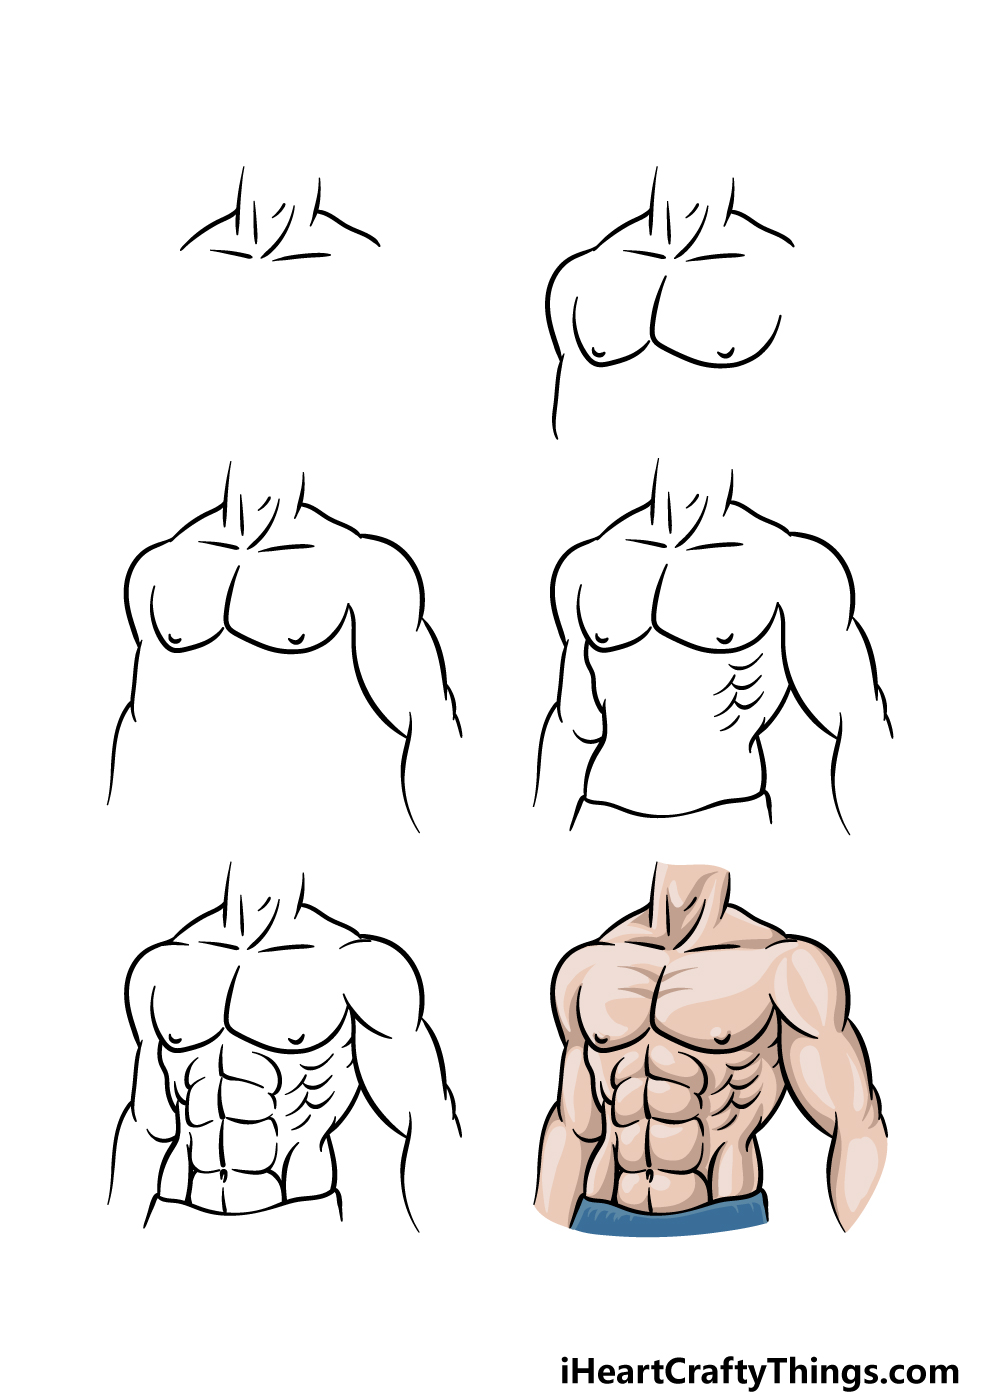
How to Draw Abs– Let’s Get Started!
Step 1
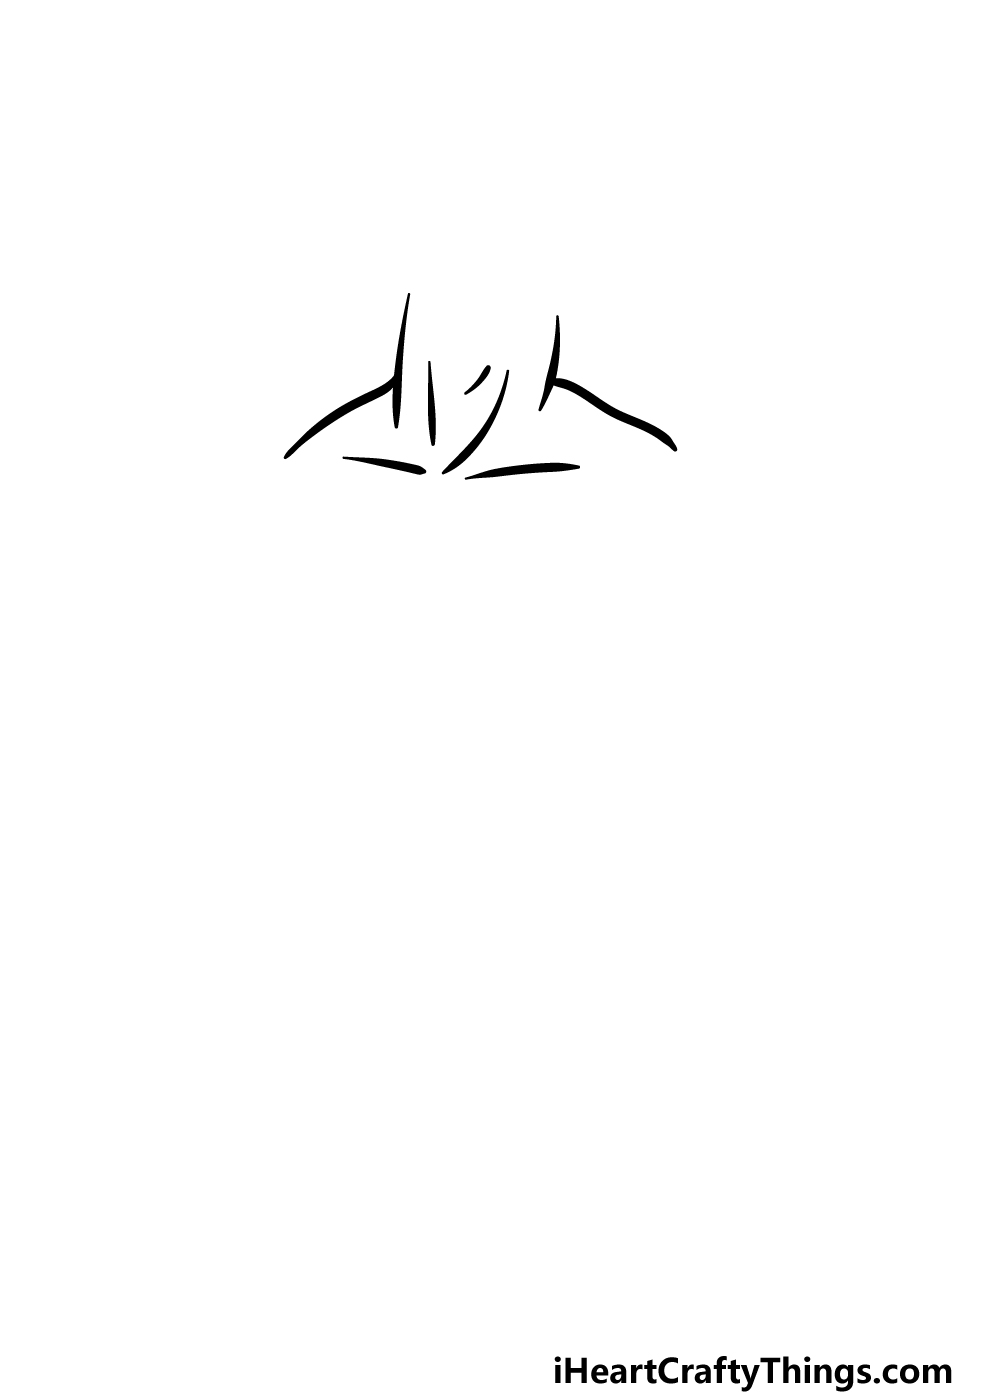
When drawing any part of the human body, the best way to make it easier on yourself is to take it slowly and break it down into smaller parts. That’s what we aimed to do for you in this guide on how to draw abs, so let’s get started!
For now, we will be working on the neck and shoulder muscles. You can start off by drawing two vertical lines for the neck.
Then, draw two more diagonal lines coming down fro them for the start of the shoulders.
Finally, we will finish off this step by drawing some lines from the base of the neck extending down for the bone structure of the neck. Once you have it looking as it does in our reference image, you will be ready for step 2!
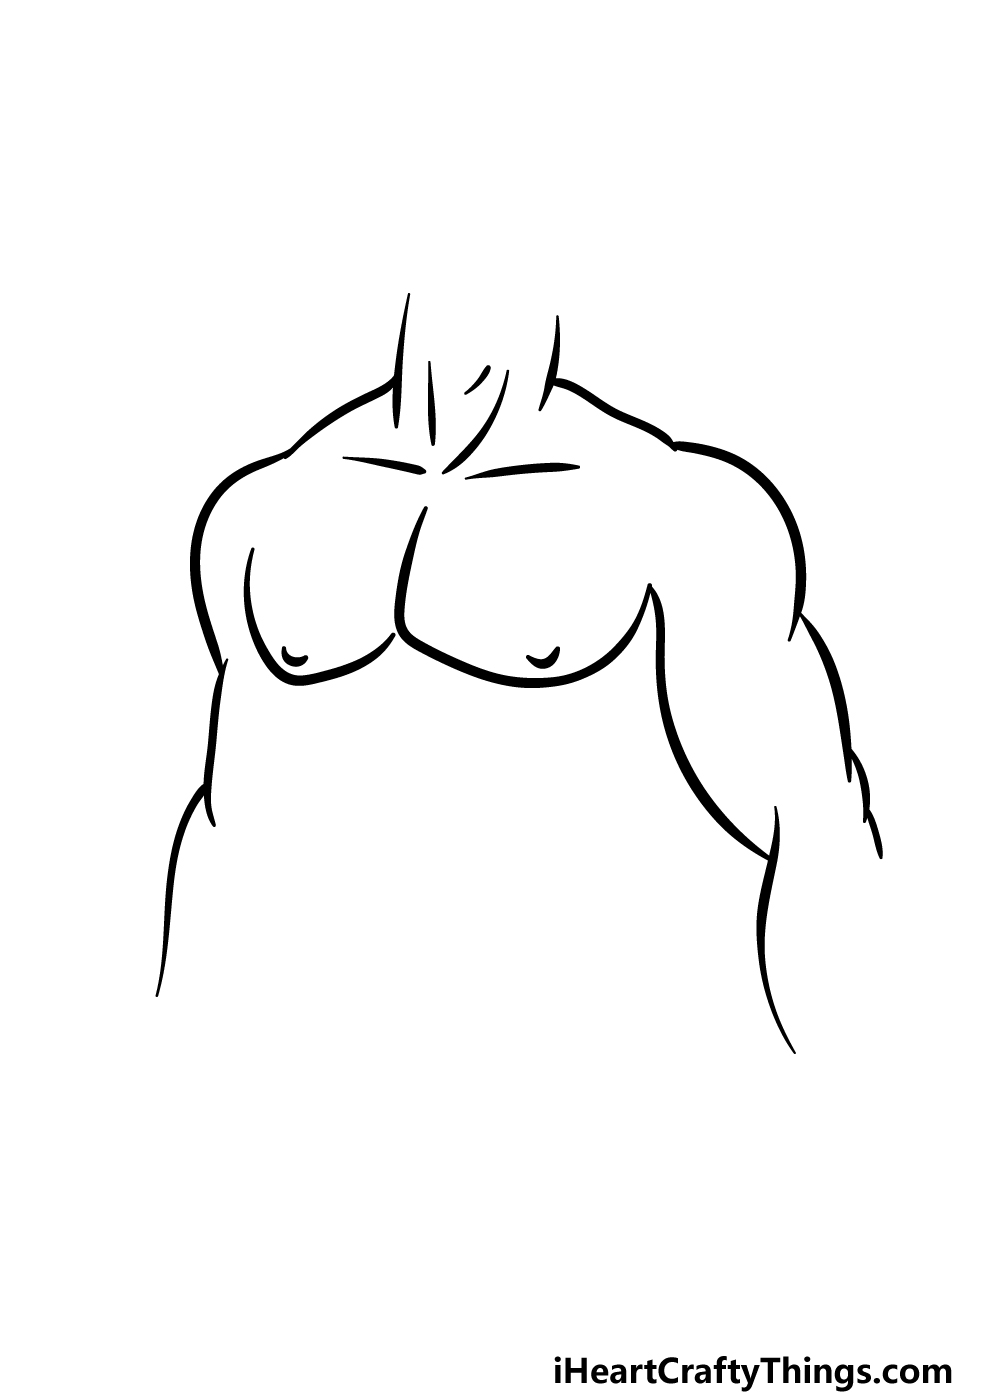
Step 2 – Next, draw the pecs and first arm
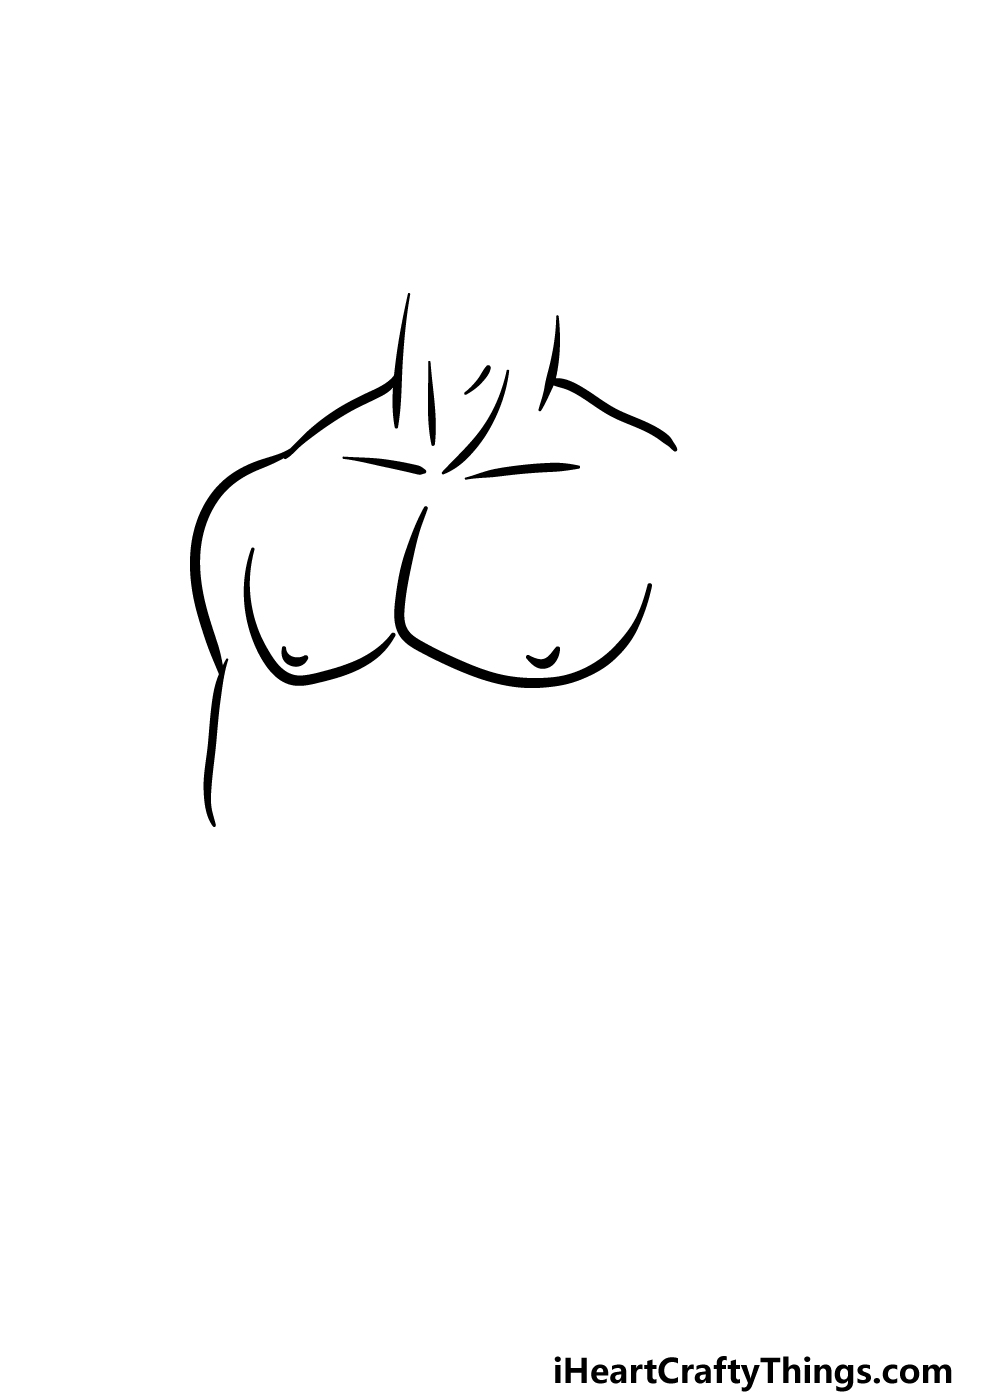
Having a floating pair of abs would look a bit odd, so we will be drawing the rest of the chest as well.
For this second part of your abs drawing, we shall be drawing the chest pec muscles along with the first arm.
For the pecs, simply draw two curved lines that connect to one another as shown in the reference image. Then you can add two small curved lines near the base of each pec.
Next, you can draw a rounded line for the shoulder on the left. Finally, finish off by drawing the arm on the left coming down from the shoulder.
Step 3 – Draw the arm on the right
We shall be adding another arm to the drawing in this step of our guide on how to draw abs. Before you start on that, use another curved line on the left arm for the forearm.
Once that arm is done, we can draw the arm on the right. Much like the last one, you can start with a curved line for the right-hand shoulder.
Then we shall be drawing the musculature of the arm. Use a slightly wavy line to connect the arm to the pecs, as shown in our example.
Then, use a series of smaller curved lines on the right-hand side of the arm to create the muscles there.
These three lines should be about as lone as the single line for the left side of the bicep was. Finally, draw one more wavy line coming down from the bicep to close off this step.
Step 4 – Now, start drawing the waist
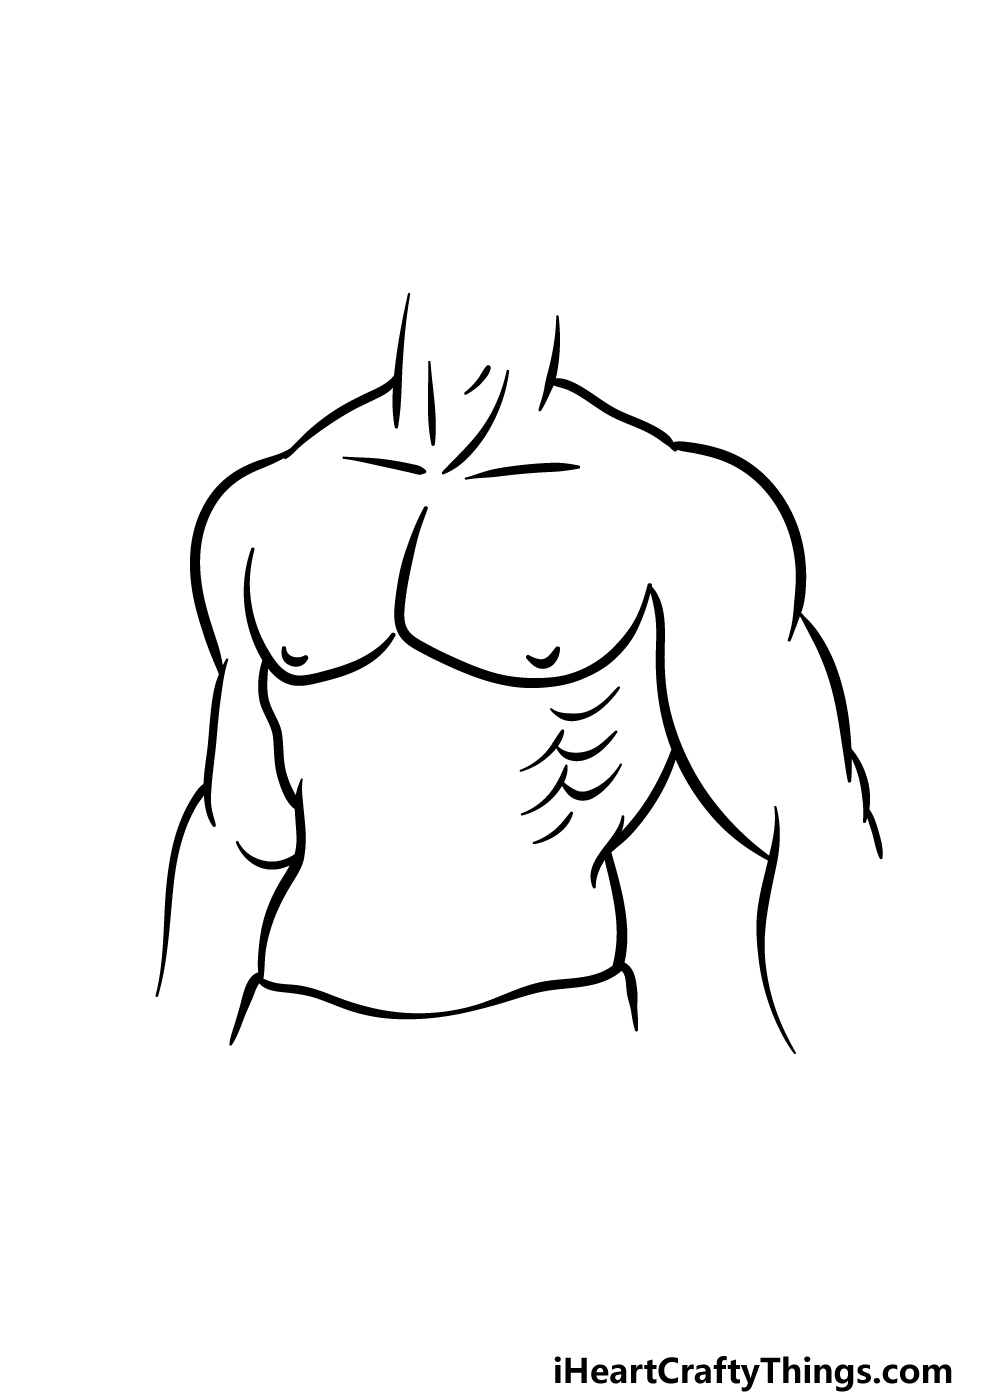
Now we can start to finish off the outline of your abs drawing so that we can draw the abs themselves in the next part.
Using some lines that start outwards and move inward the further down they go, draw the outline of the waist coming down from the chest. Then draw a slightly rounded horizontal line for the start of the pants the person is wearing.
Once you have replicated this outline as it appears in the reference image, simply add some smaller lines connecting to one another on the right-hand side for the ribs there.
Then you will be ready to move on to the next part in order to draw the abs!
Step 5 – Finish off your abs drawing
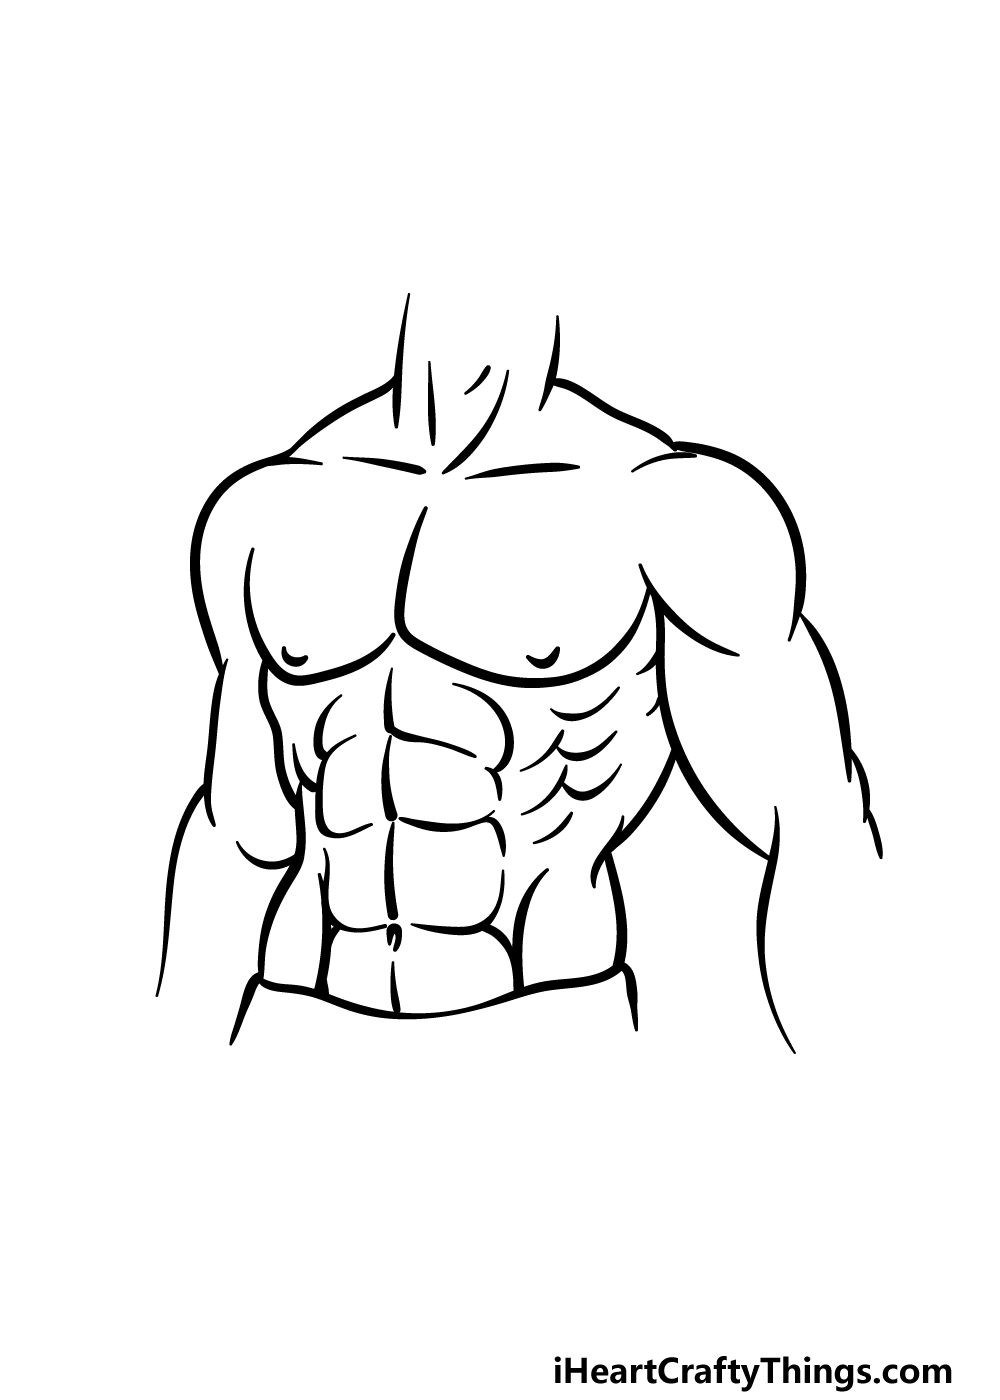
For this fifth step of our guide on how to draw abs, we shall be drawing the abs themselves. Try to think of the abs as eight separate muscles connecting to one another as you draw and follow the reference image. Then, you can draw some curved and rounded lines connecting to one another to create each of these abs.
Draw two lines coming up from the base of the abs, and then finish off by drawing a belly button.
It will just be a matter of adding the final details after that! We added a few more detail lines throughout the drawing, and you can also add some more details of your own as well.
Perhaps you could draw a head or more of the body for it!
We look forward to seeing how you finish off your abs drawing.
Step 6 – Finish off your abs drawing with some color
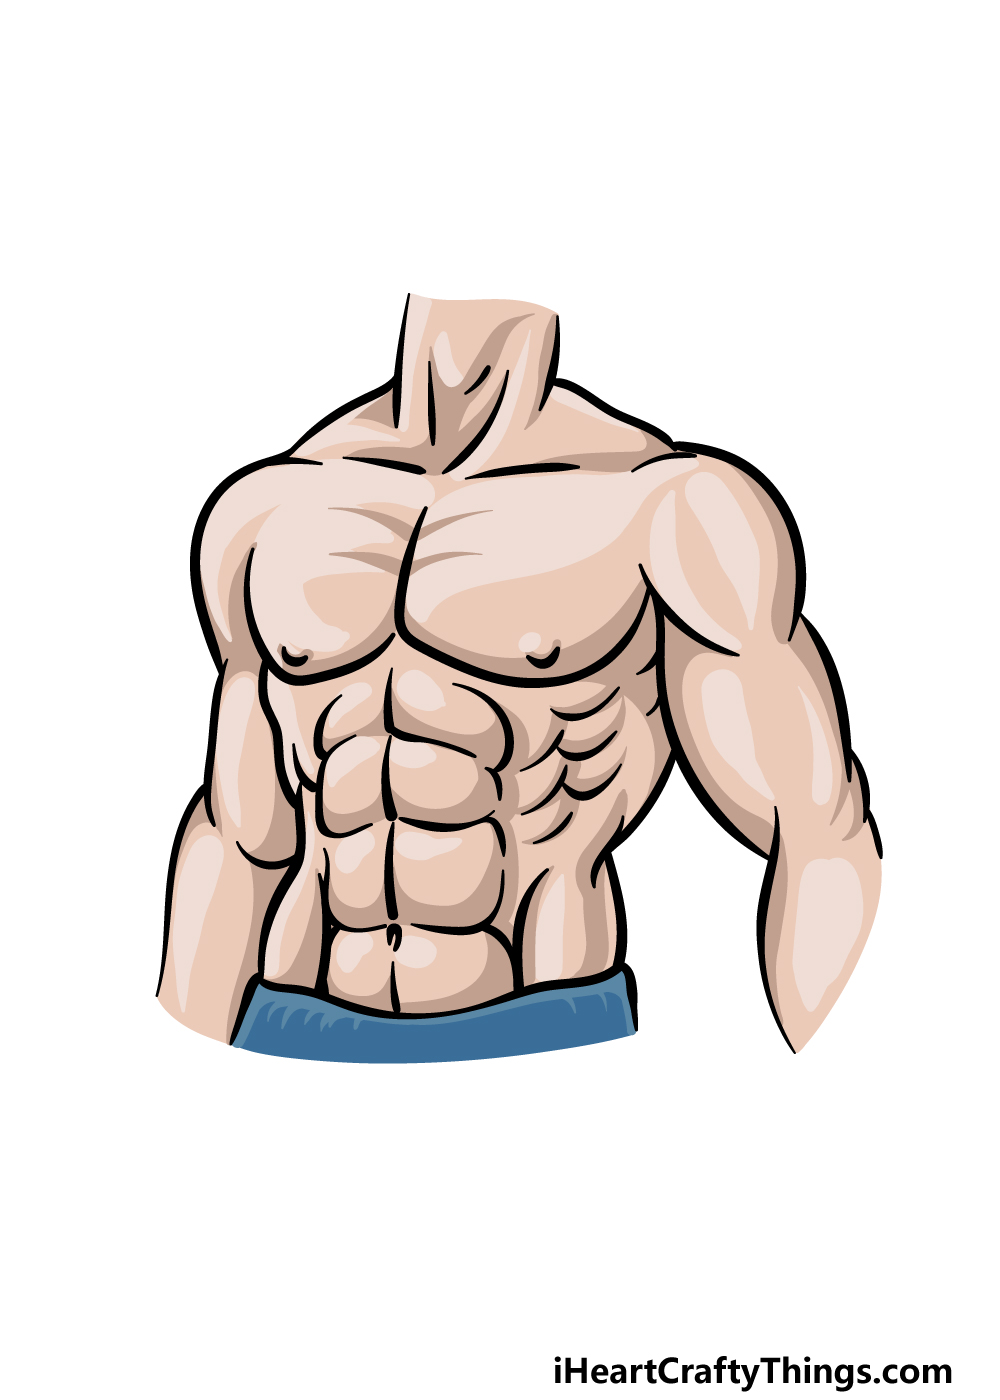
You have arrived at the final step of your abs drawing, and now you can finish it off with some awesome colors!
In our reference image, we showed off just one way that you could go about coloring in your drawing. The best part of this is that the colors you end up using are completely up to you!
There are many different skin tones that you could choose to personalize this drawing as you wish. Then you can choose which art mediums you will use to achieve the colors you desire.
Watercolor paints and colored pencils can be great if you want a bit of a softer tone for the drawing.
Alternatively, you could go for some colored markers or acrylic paints for brighter colors. These are just a few suggestions, but it’s up to you! Which colors and mediums will you use to finish off this drawing?
4 More Ways To Make Your Abs Drawing Unique
Enjoy a creative workout with these 4 fun and easy tips to make this abs drawing even better!
You overcame quite a challenge learning how to create this abs sketch, so now you can add some details such as clothing.
You could easily add a shirt to this design with just a few line details. Then, depending on how tight the shirt is you can remove lines to see less of the musculature beneath the fabric.
You can also add a design to the shirt to add another great detail!
Another way to make this drawing of abs more unique is by adding some more of the character’s body. Simply extend the arms and draw the hands, and then you can add the head and legs.
If you are going to try this, then you may want to look up pictures of people online to help with details like the hands and face.
You could create a really personalized character by extending the abs drawing we created in this guide!
You can also make this drawing more unique by adding a background. This would be perfect if you added more of the body as well.
Adding a background will help to create a scene, and it would show where you think this character is hanging out.
If you were to add a background, what sort of setting would you like to put the character into? Don’t be shy to create a really fun and quirky setting!
When you have the hang of this abs sketch, you can take what you’ve learned in this guide and add some more people to the picture.
If you were to do this, you could follow the steps of the guide and change a few things.
By changing the positions of the arms or by adding different shirt designs, you could easily create some different characters.
If you go with this tip, you can combine it with the previous steps to create a complete scene that shows where they are hanging out.
Your Abs Drawing is Complete!
That will finish off this guide on how to draw abs!
As mentioned in the introduction, drawing any part of the human body isn’t always easy, so hopefully by using this guide and taking it slowly, you found it to be much easier than expected.
Don’t forget that you can keep the drawing fun going on our website! We have many more free guides for you there and we upload new ones all the time.
Once your abs drawing is finished and colored in, please do share it on our Facebook and Pinterest pages, as we would love to see it!