While pirates were quite a menace when they roamed the seven seas, they have become romanticized in literature and film, and there are many icons associated with them.
One of the most classic pirate tropes is that of a treasure chest filled with booty to be buried, and learning how to draw a treasure chest can be a fun way to imagine all of these pirate spoils!
If you’ve ever wanted to imagine what it would be like to be a swashbuckling buccaneer, then this will be the perfect tutorial for you!
This step-by-step guide on how to draw a treasure chest will show you how you can imagine your own pirate stash!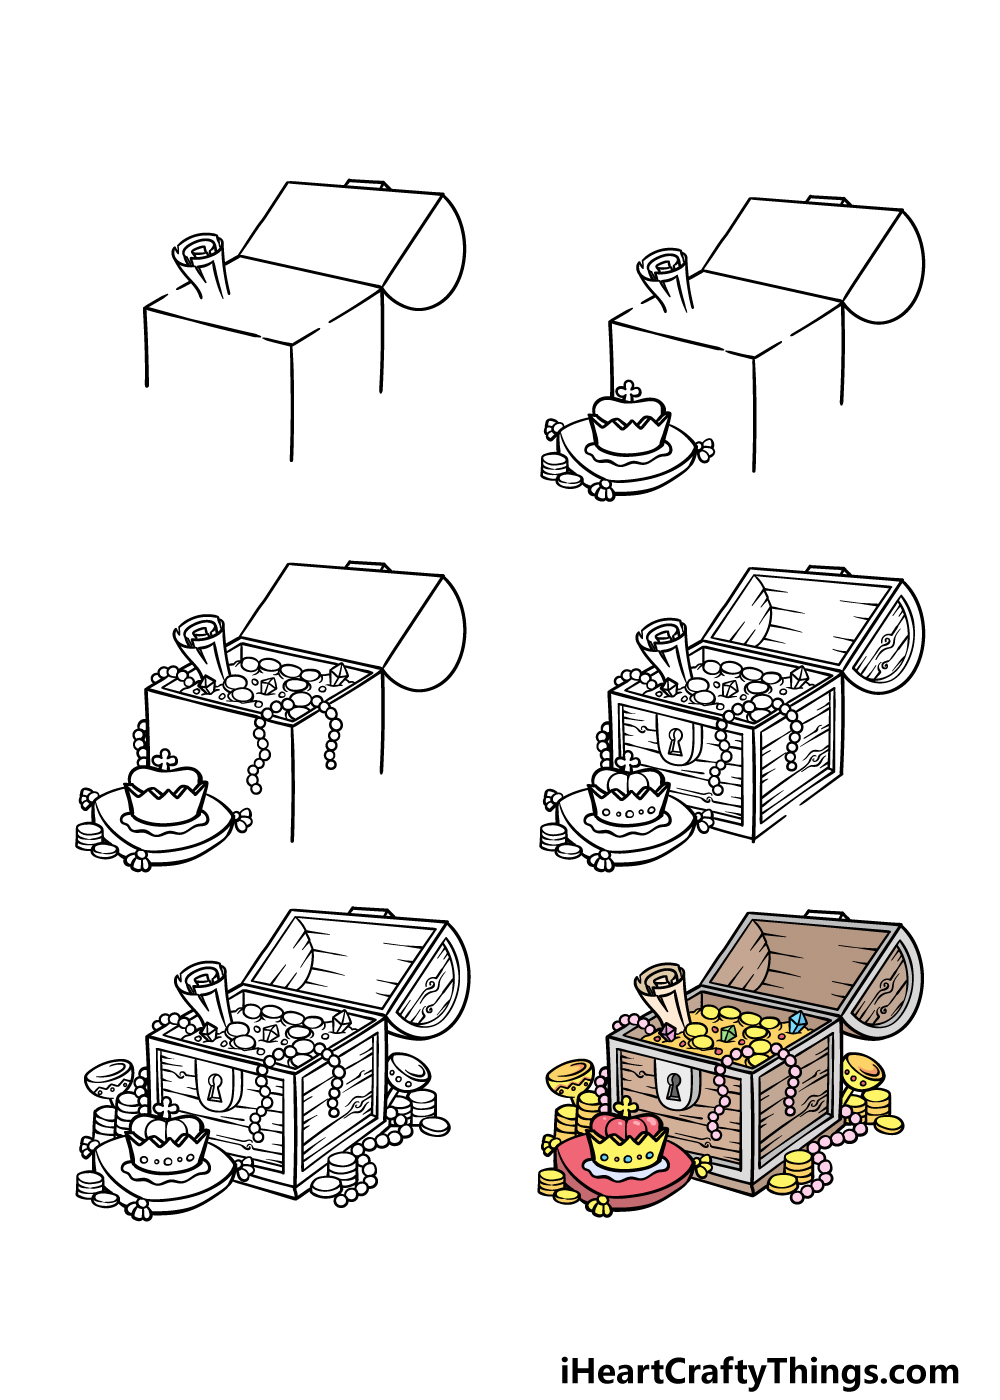
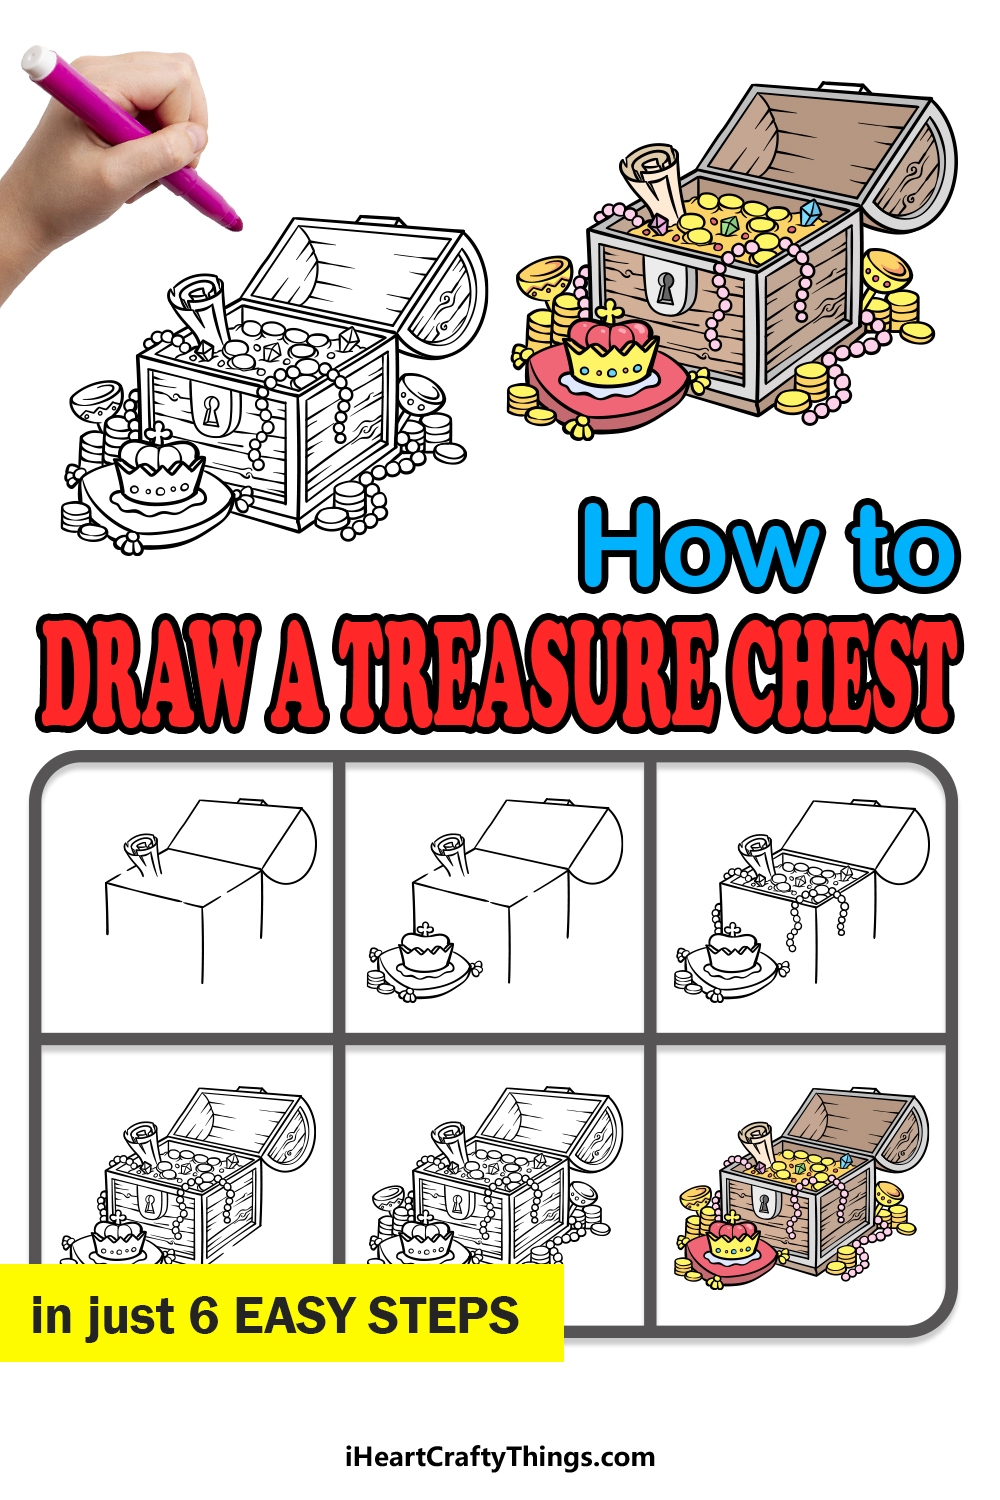
How to Draw A Treasure Chest – Let’s Get Started!
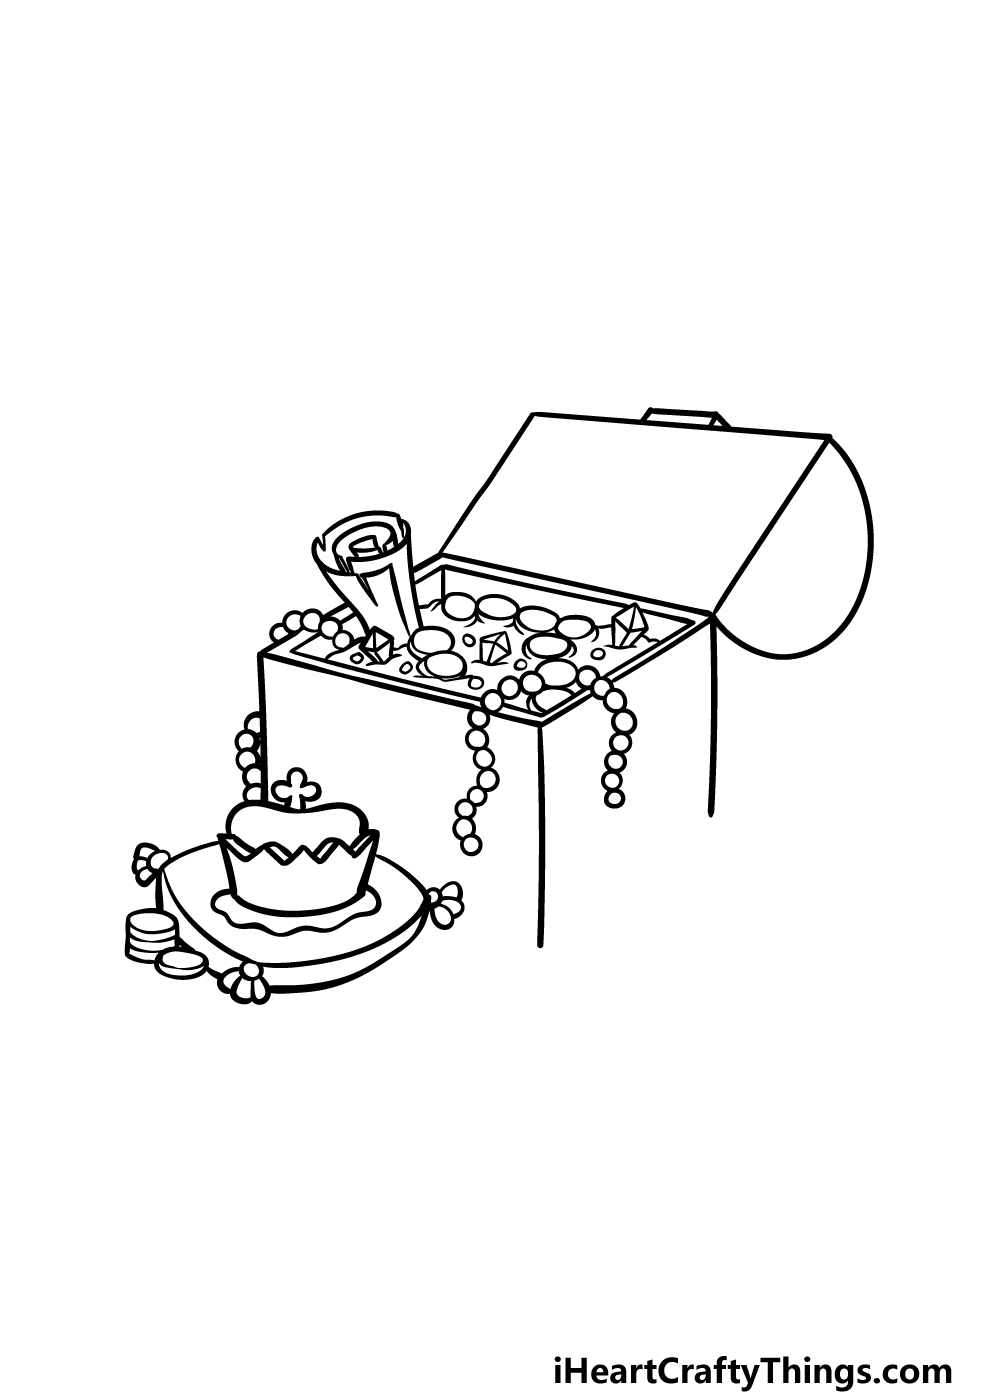
Step 1
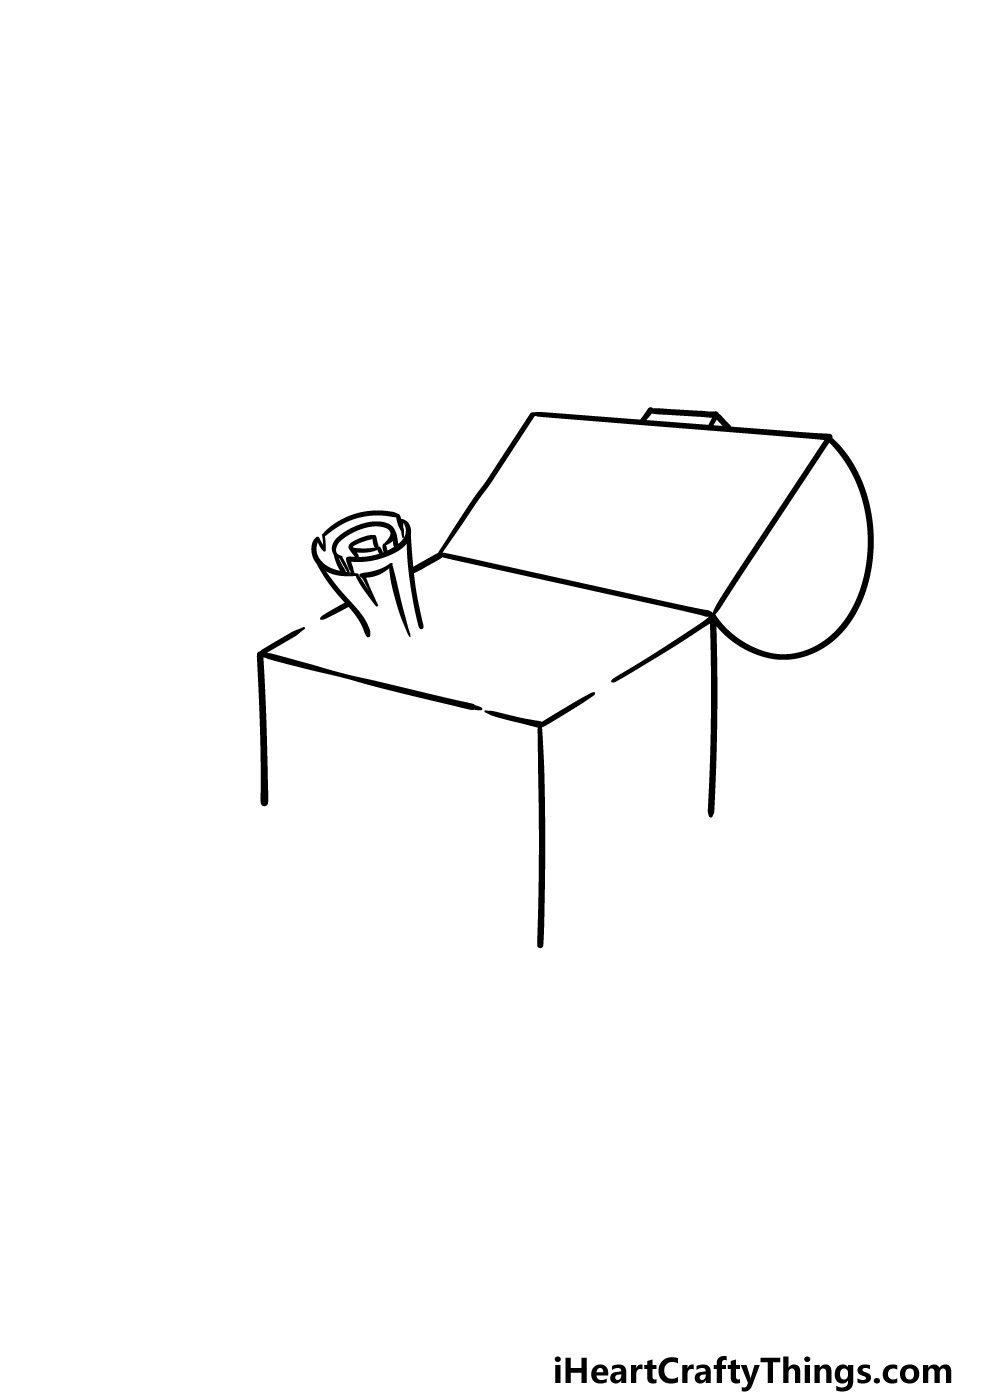
In this first step of our guide on how to draw a treasure chest, we will be starting with the outline of the chest.
For this step, you may want to use a ruler if you have one handy, as we will be aiming to have some straight edges for the chest and the lid.
For the opening of the chest and the lid, we will be drawing two rectangles connected to one another. The reference image will guide you as to the angle at which these rectangles should be.
The rectangle on the bottom will also have a few small gaps where the treasure will be spilling out.
Finally, add a rounded line onto the right-hand side of the lid, and then draw some straight lines down from the corners of the bottom one. Finally, we will draw a rolled-up map poking out of the chest interior.
Step 2 – Draw some treasure for the picture
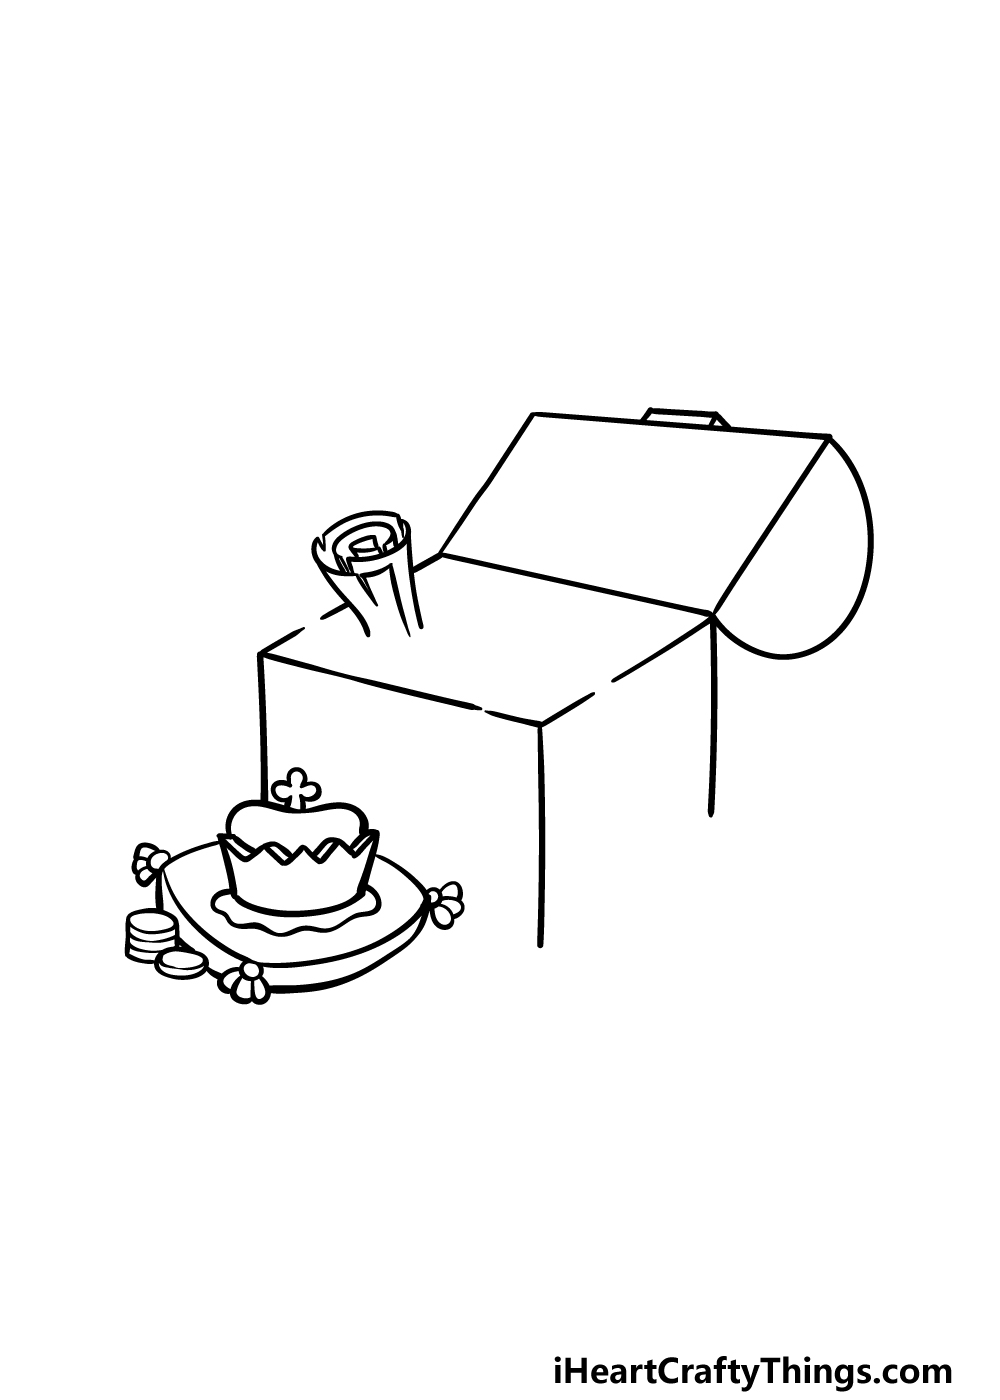
A treasure chest is only as impressive as the treasure it contains, and it looks like whoever packed this chest had quite a royal haul! In this part of your treasure chest drawing, we will be drawing a fancy crown on a little pillow with some coins.
This crown will be going on the lower left-hand side of the chest, and we will be using a combination of curved and straight lines to draw it.
There will also be a little rounded crown on top, and then you can also draw the pillow that it is sitting on.
Before the next step, you can also use some rounded shapes for some coins sitting beside the crown.
Step 3 – Next, add some more treasure for the image
We will be adding some more treasure to the picture in this step of our guide on how to draw a treasure chest.
In this step, we will be showing you some of the treasure we would imagine being in this chest, but you should feel free to add any other pieces of treasure that you would like for it!
We added some more circular shapes to show some more coins sitting inside of the chest to start with.
Then, we added lots of small circles connected to one another to show some strings of pearls dropping out of the chest.
These pearls will also fill in some of the smaller gaps you left in the rim. Finally, we added some small triangular shapes for some diamonds sticking out of the treasure.
Step 4 – Now, draw some more details for the chest
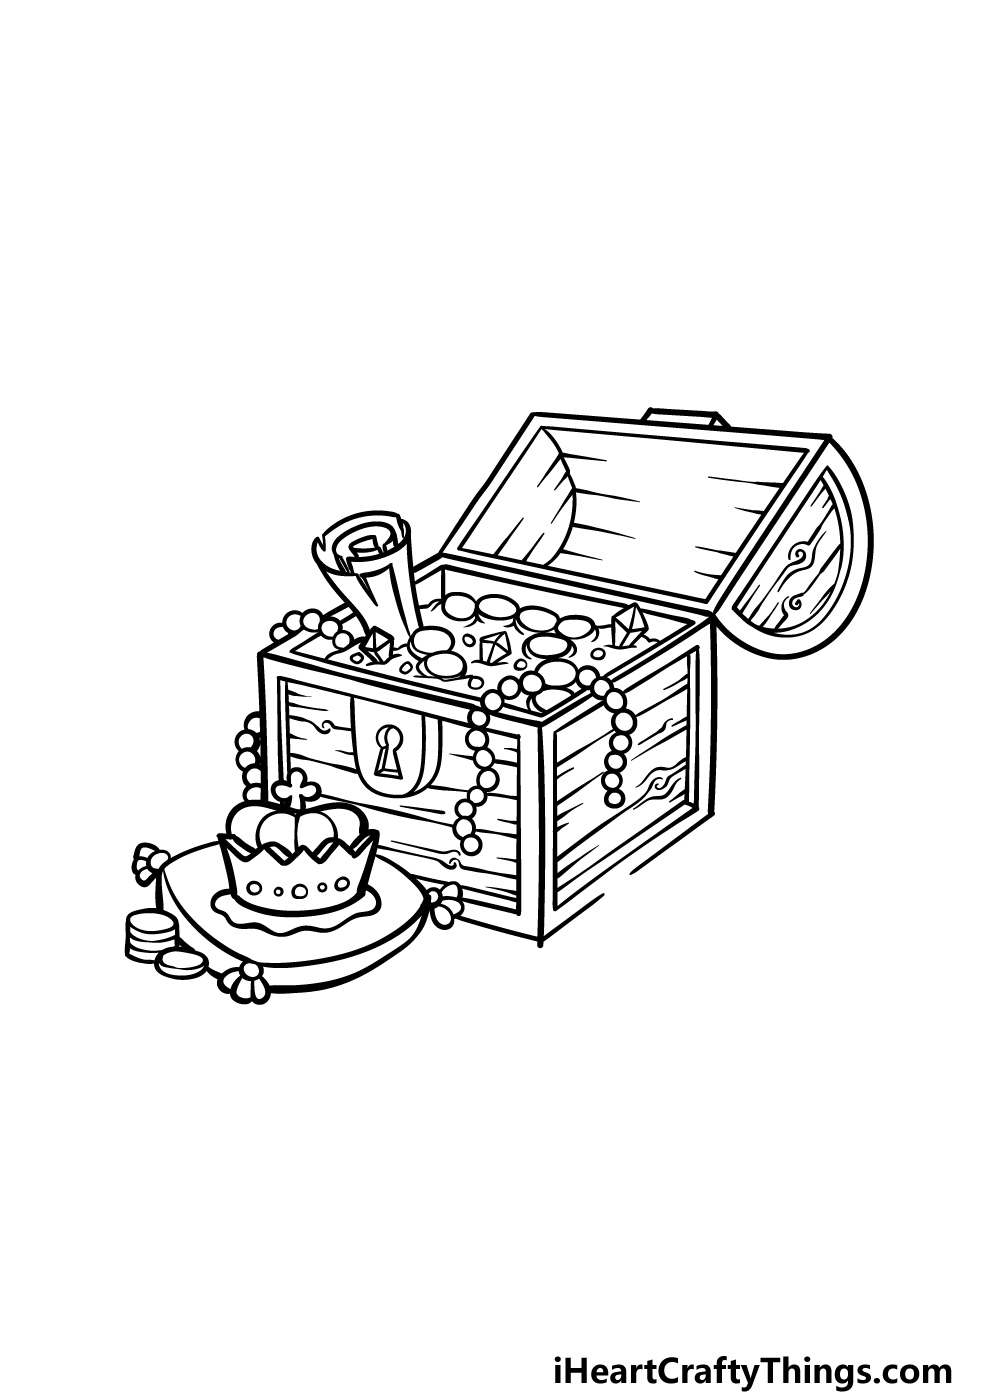
In this fourth part of your treasure chest drawing, we will be moving the focus away from the treasure for now as we focus on some details for the chest itself.
First, add another rectangular shape inside the perimeter of the lid outline for the inner portion of the lid.
Then, add a jagged curved line on the left-hand side. Once these are drawn, you can add some straight lines for a wooden effect.
Next, draw some square shapes inside the perimeters of the front and side of the chest and also add some straight lines for more wooden texture as well.
You can also draw a keyhole into a rounded shape on the front of the chest.
Then you will be ready for some final details and elements in the next part!
Step 5 – Add some final details to your treasure chest drawing
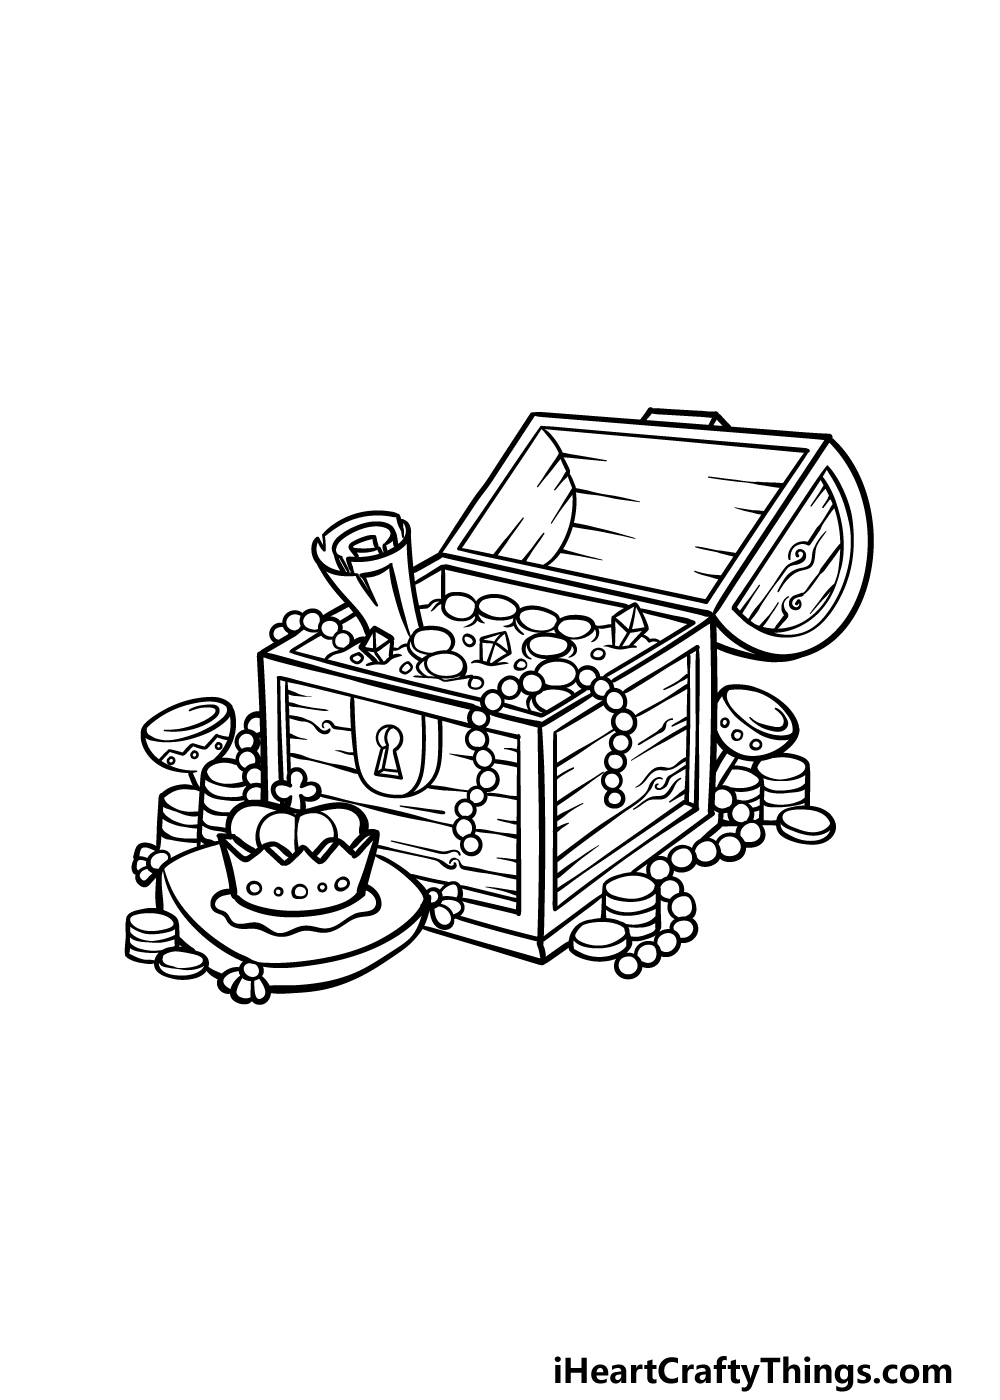
Before you start to add some color in the final step of this guide on how to draw a treasure chest, we will first add some final pieces of treasure to finish it off.
This is another step where you could get creative with it and add some unique pieces of treasure to the image.
As for what we added, we drew some more coins piled on top of one another along with some more strings of pearls along with some small goblets.
These are the kinds of pieces we would add to this treasure chest, but what else can you think of to add to it?
Step 6 – Finish off your treasure chest drawing with some color

Now it’s time to finish off your treasure chest drawing by adding some amazing colors to it that will really bring it to life!
In our example image, we kept the colors for the treasure nice and bright by incorporating some yellows, reds and other vibrant colors.
Then for the chest, we used some light browns and greys for the wooded and metallic parts, respectively.
These are the colors we chose, but you should feel free to use any others you would like!
You can also have some fun choosing the art mediums you will use to color in this image, so what do you think would best suit this image?
4 More Ways To Make Your Treasure Chest Drawing Unique
Find some tips to treasure as we make your treasure chest sketch even better!
There is plenty of amazing treasure within this treasure chest drawing we created together. There is always room for more, however, and this is a great way to personalize the picture.
Even if you keep all of the treasure as is, you could add all kinds of valuable things lying in and around it. You can always do with more jewels, diamonds and gold coins!
What other treasures could be contained within this treasure chest?
When we think of treasure chests, we probably associate them with pirates first and foremost. For that reason, adding a pirate character to this drawing of a treasure chest could be lots of fun!
The pirate could be drawn in any style you like in order to finish off this fun scene. They could be posed gazing into the chest, or maybe their foot could be resting on it for a powerful pose.
What kind of design would you like to use for a pirate character if you add one?
When it comes to coloring this treasure chest sketch, you don’t have to stick to just traditional art mediums. There are all sorts of fun mediums you can use to make it look amazing!
For instance, you can use crafts to make the treasure look more dynamic. Using small beads and stickers would make the treasure have a more 3D look.
Using glitter or glitter glues can also make the treasure really sparkle!
Finally, once you have finished customizing this treasure chest drawing, you can add a background! This is something you could have a lot of fun with.
The first setting that comes to mind for us is a small island in the middle of the ocean with a palm tree. That would be a really classic setting for a treasure chest, but you could go with any other settings you can think of.
What would be the perfect background to finish off this treasure chest?
Your Treasure Chest Drawing is Complete!
You have completed all six steps of this guide on how to draw a treasure chest, and we hope that you had a great time imagining some pirate spoils!
This guide was made to show you that doing this drawing can be fun and easy, but it was also designed to give you some freedom for your own details.
We will look forward to seeing what creative touches you use for it!
You can check out our website for many more guides like this one when you’re ready for your next drawing challenge.
Once your treasure chest drawing is complete, we hope that you will show us by sharing it on our Facebook and Pinterest pages for us to enjoy!