In a basic sense, lanterns provide one function: to give off light to make it easier to see in the dark. While they serve this function well, they can also serve other purposes.
They can also be ornamental and stylish in their own right, and one of the most interesting kinds of lanterns is what is known as a paper lantern.
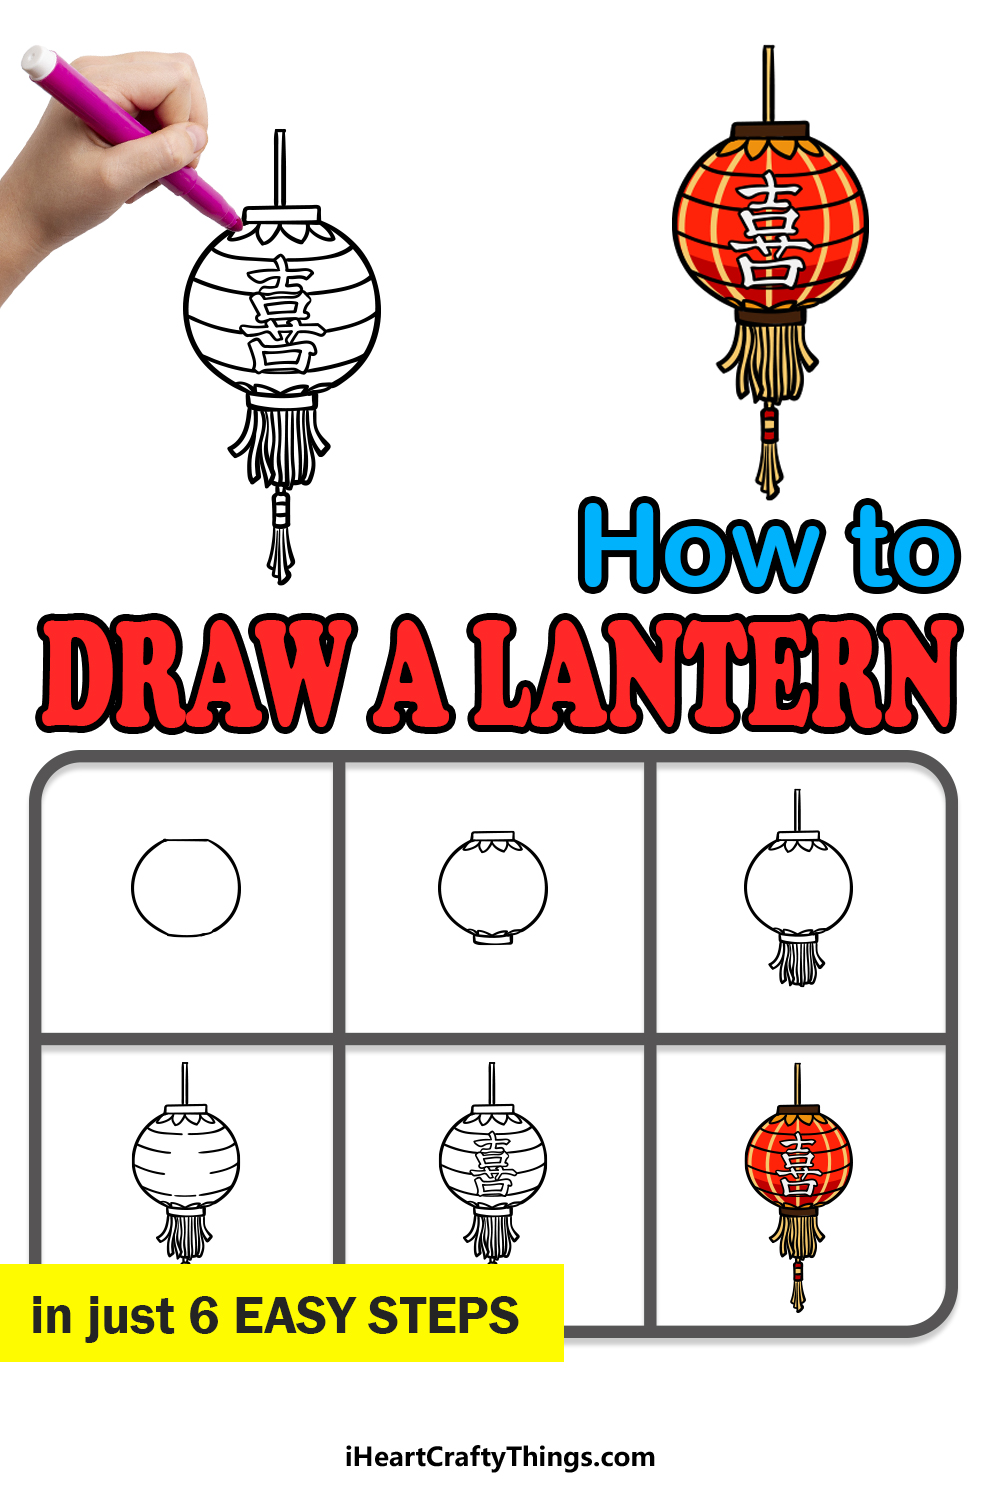
These lightweight lanterns originated in China and are a thing of beauty. Learning how to draw a lantern so that you can replicate this beauty can certainly be a fun and rewarding experience.
That’s why we will be learning how to do just that in this step-by-step guide on how to draw a lantern in just 6 steps!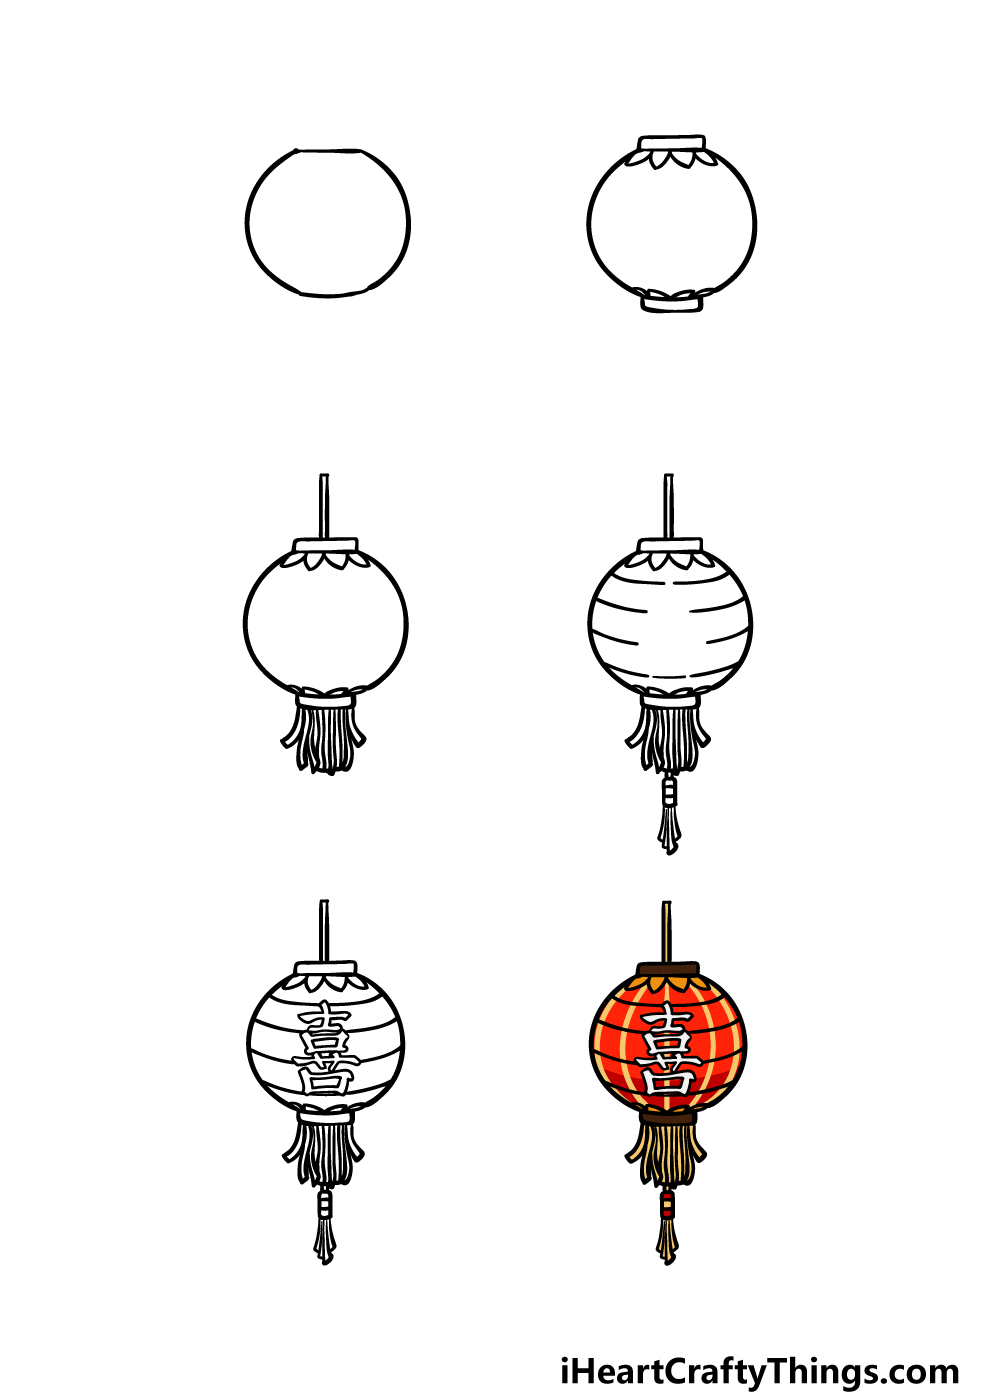
How to Draw A Lantern – Let’s Get Started!
Step 1
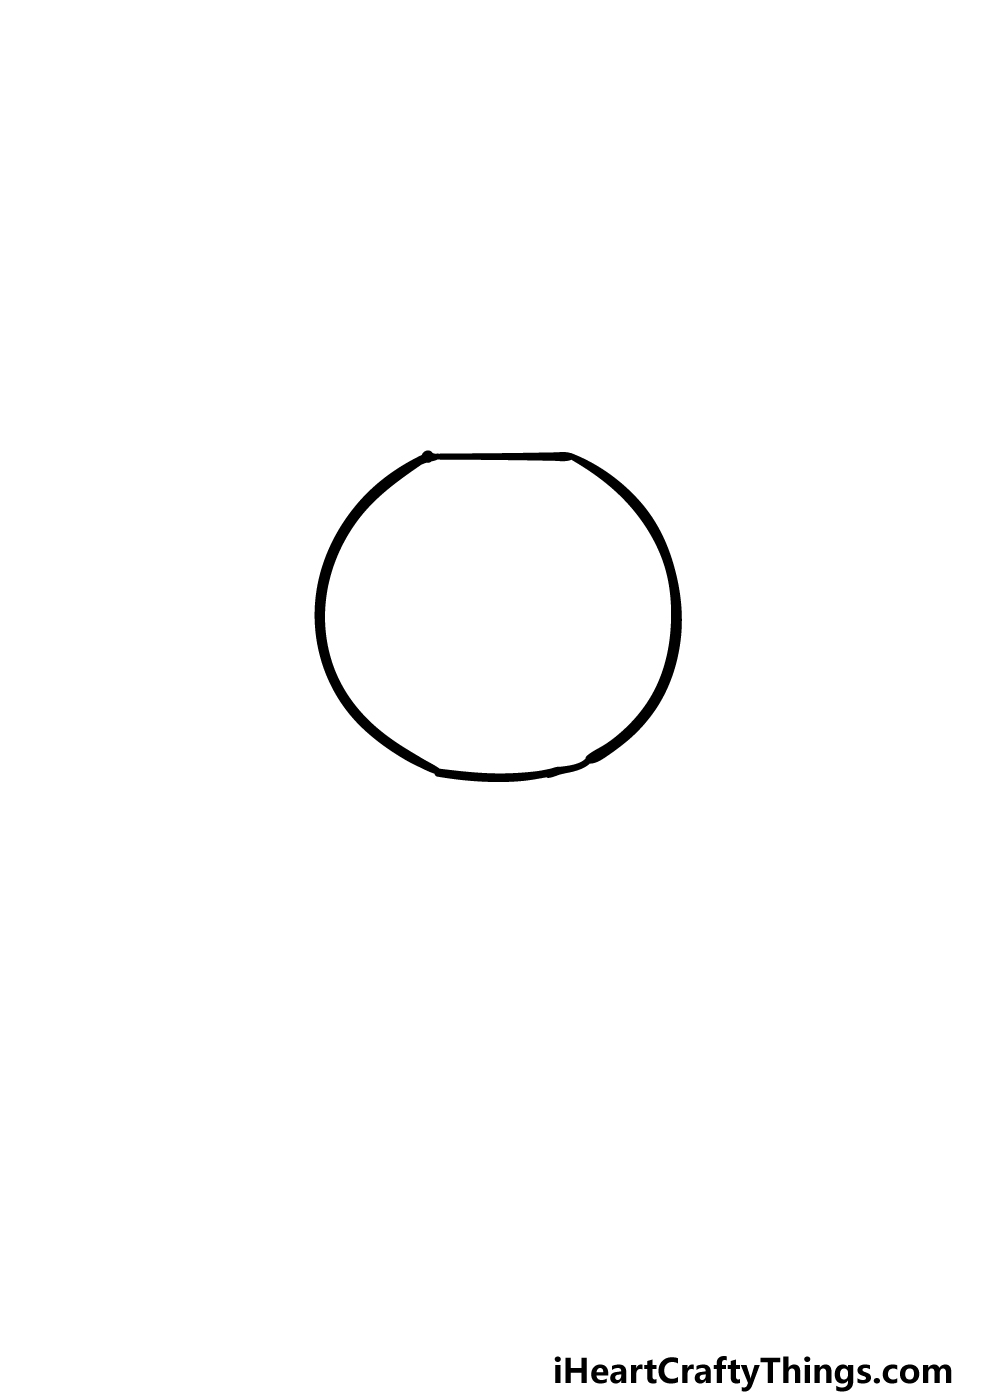
The paper lantern that we will be drawing in this guide on how to draw a lantern will be quite round. These lanterns will usually hang in the air, casting a lovely soft glow all around them.
To get started with this particular lantern, we shall be drawing a rounded shape.
To make this easier, one thing you could try would be to use a drawing compass and a light pencil to draw a circle.
Using your drawing pen, you can then give this circle a flat top and then draw over the rest of the circle.
This will help you to end up with a shape that looks like the one in our reference image. Then we will be ready to move on to the next step!
Step 2 – Next, draw some details for the lantern
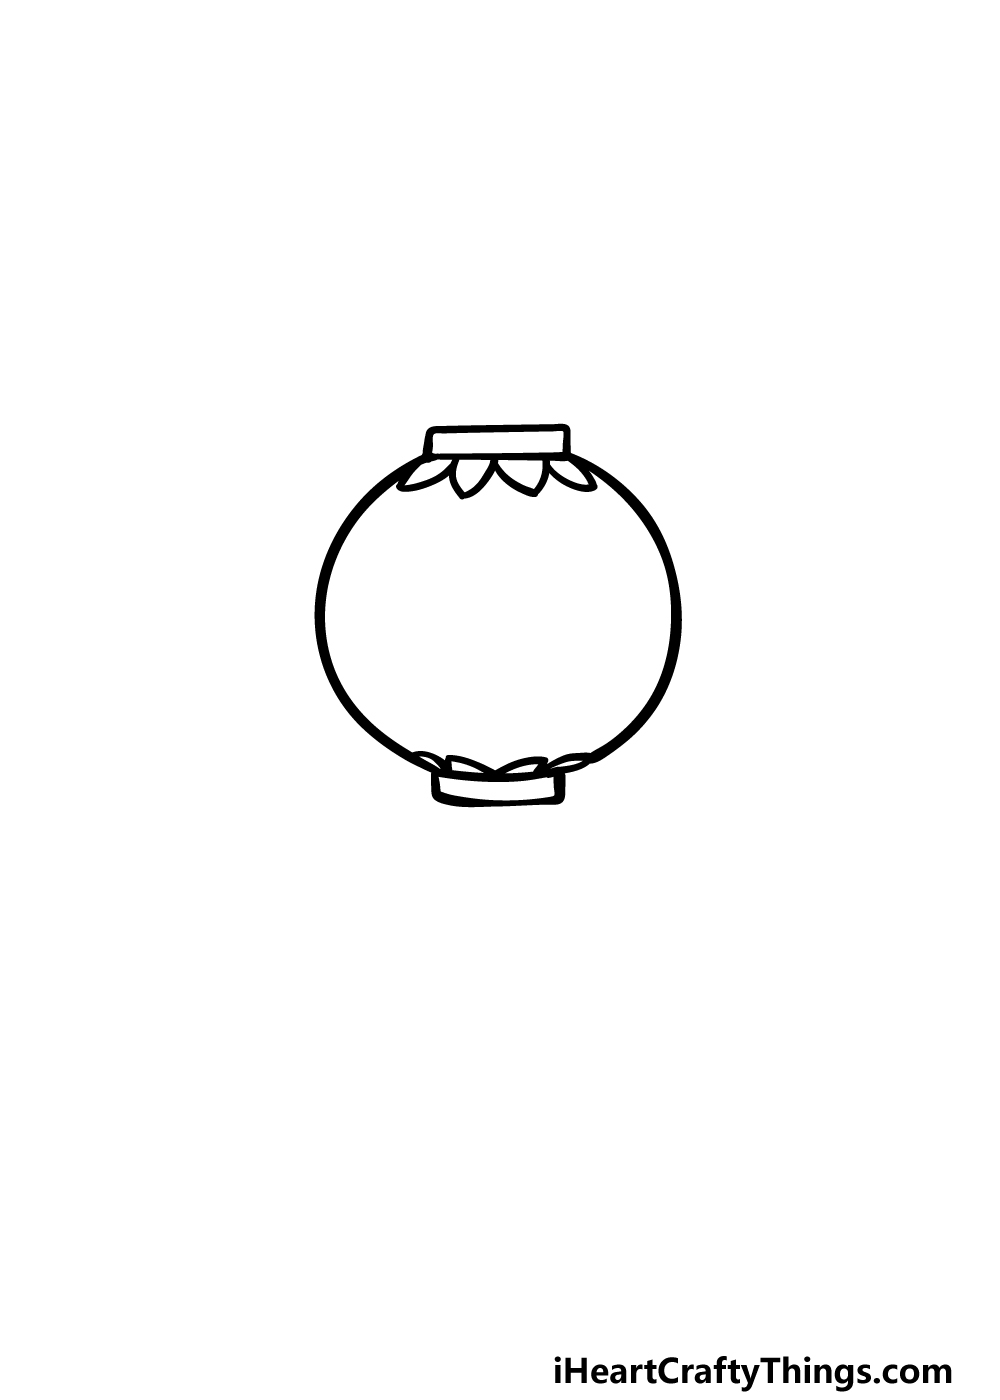
You have the main outline of the lantern drawn now, so in this second part of your lantern drawing we can begin to add some finer details to it.
To start doing this, you can first draw a small, thin rectangular shape to the top and the bottom of the lantern.
Once you have drawn these rectangular shapes, we will then add some more details to the interior of the lantern.
You can do this by drawing some rounded lines with sharp points in them to create some shapes that look a bit like flower petals.
These will go underneath the rectangle on top and above the one at the base. The ones on the bottom will be quite a bit smaller than the ones on top, as shown in our reference image.
Step 3 – Draw the string and tassels for the lantern

We mentioned earlier in this guide on how to draw a lantern that these paper lanterns often will hang in the air from a string or a rope.
We will be drawing the string that it is hanging from along with some additional elements in this next step.
Drawing the string should be easy enough, as all you have to do is draw two straight lines very close to one another on top of the lantern.
Once you have drawn that string, we will then be drawing some little tassels hanging from the lantern.
These can be drawn with some wavy lines to show them hanging below the lantern. Once these have all been drawn, we will then be ready for the next step.
Step 4 – Now, draw some more details for the lantern
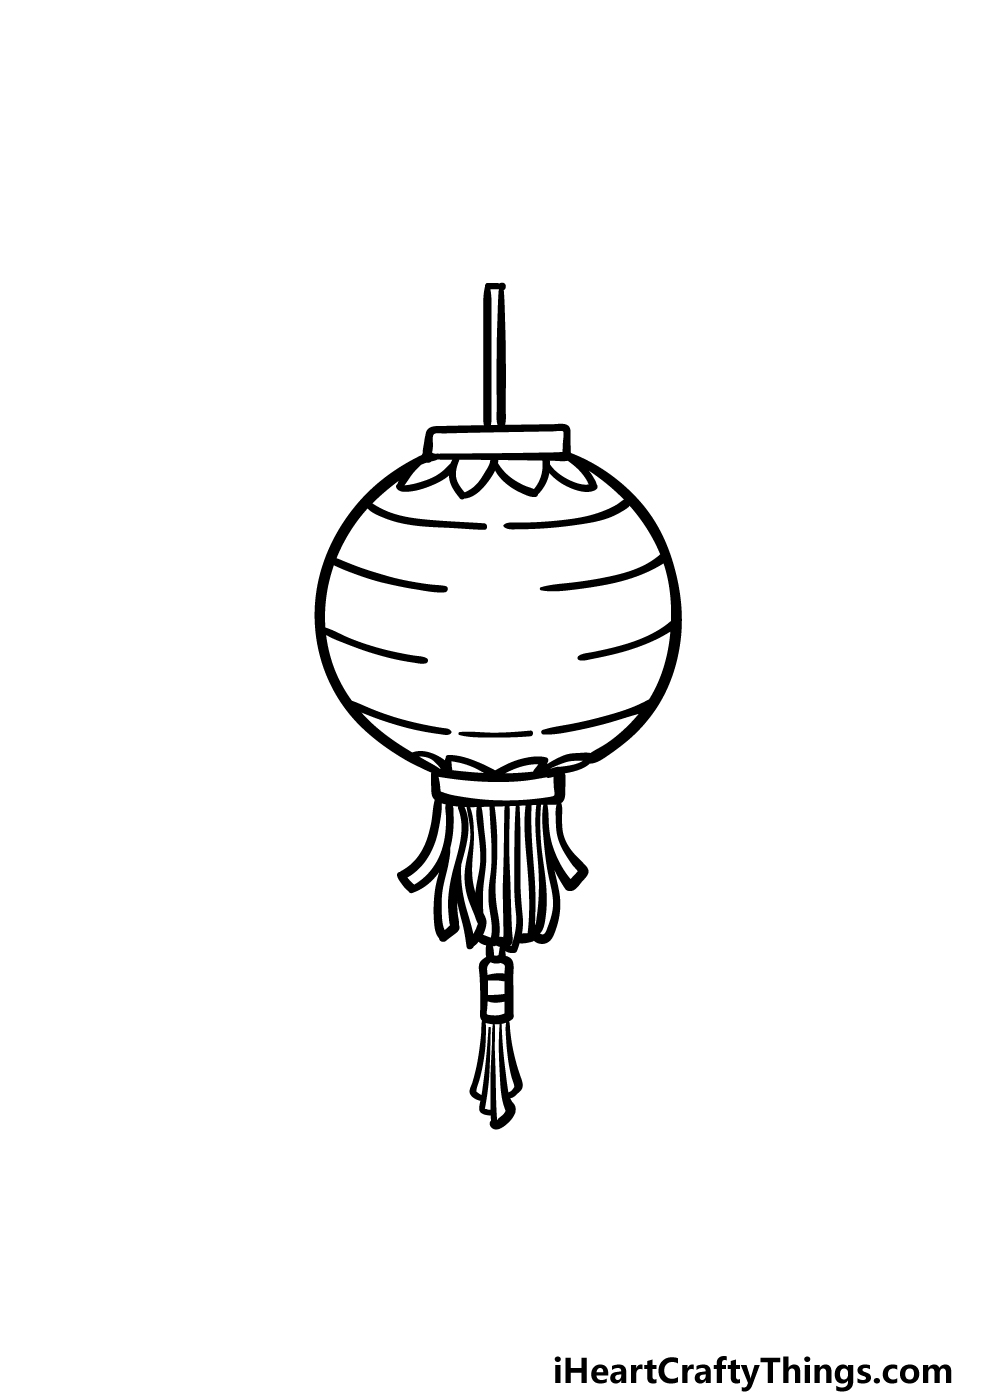
This step of your lantern drawing will see you adding even more detail elements to the lantern. These lanterns often fold out, and we will be drawing the fold lines now.
To do this, you can draw some curved lines across the body of the lantern.
These will be curved in such a way as to show the curvature of the lantern, and the reference image will show you how to bend these.
Be sure to leave a space in the center, as we will be adding some more decoration to that area in the next step.
Before you move on, you can also draw a beaded tassel to join the rest of the tassel that you drew in the previous step.
Step 5 – Add some final details to your lantern drawing
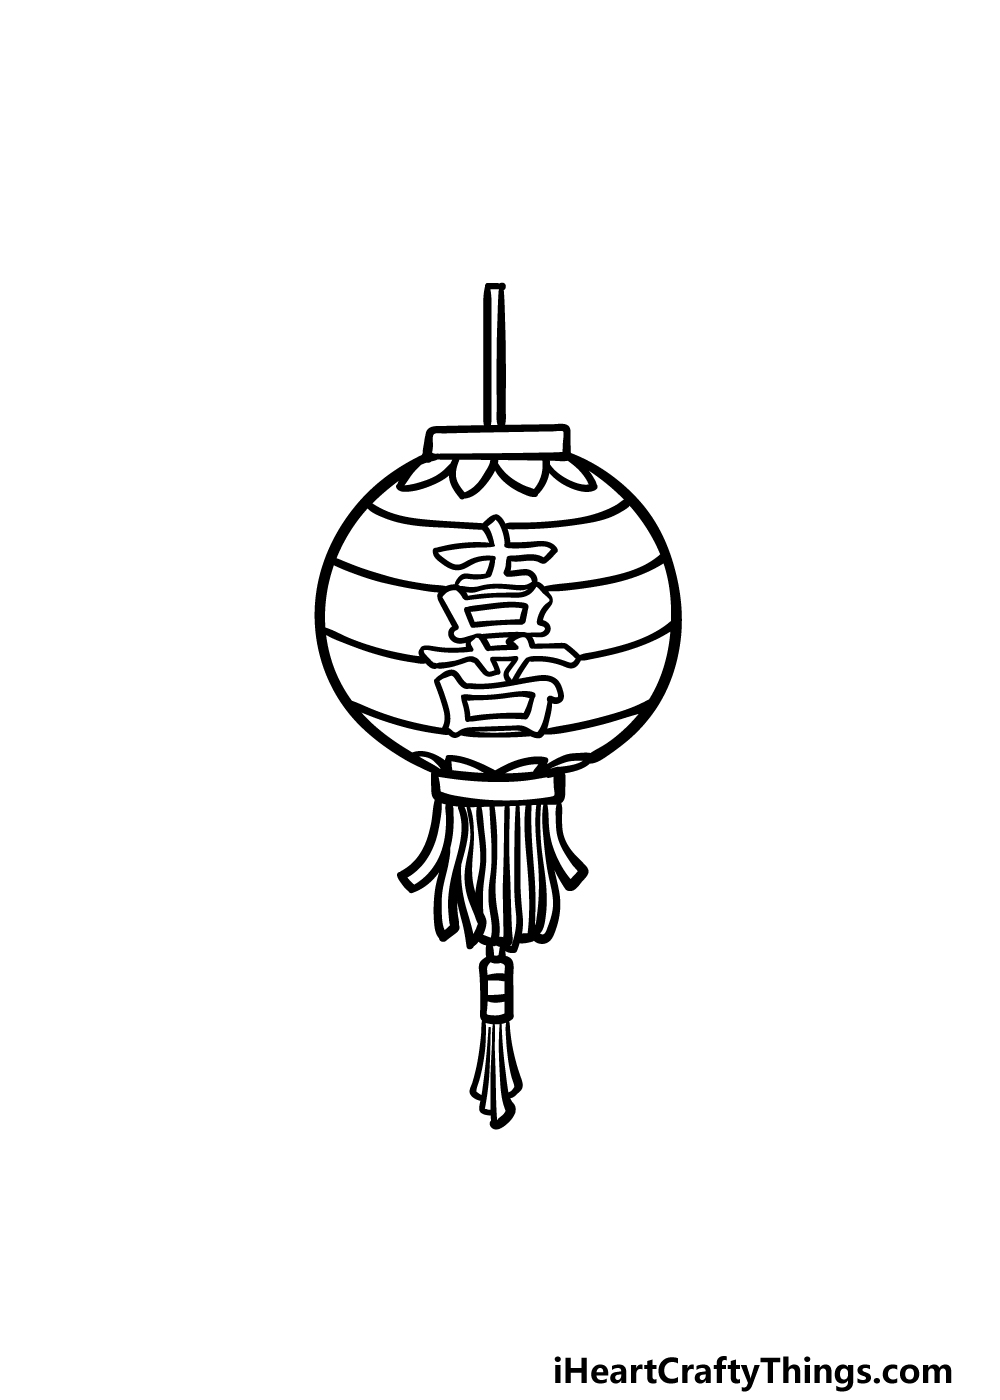
We left a space in the center of the drawing in the last step of this guide on how to draw a lantern, and we will be finishing it off now.
This lantern is in the style of a classic Chinese paper lantern, so we will finish off by adding some Chinese script to the front of the lantern.
This is a part where you will probably want to closely copy the reference image we have provided.
Once this detail has been added, you are ready to proceed! You could also add your own background before moving on.
These lanterns are often hung in great quantities, so you could draw more lanterns in the background to go with this one.
How will you finish off this picture?
Step 6 – Finish off your lantern drawing with some color
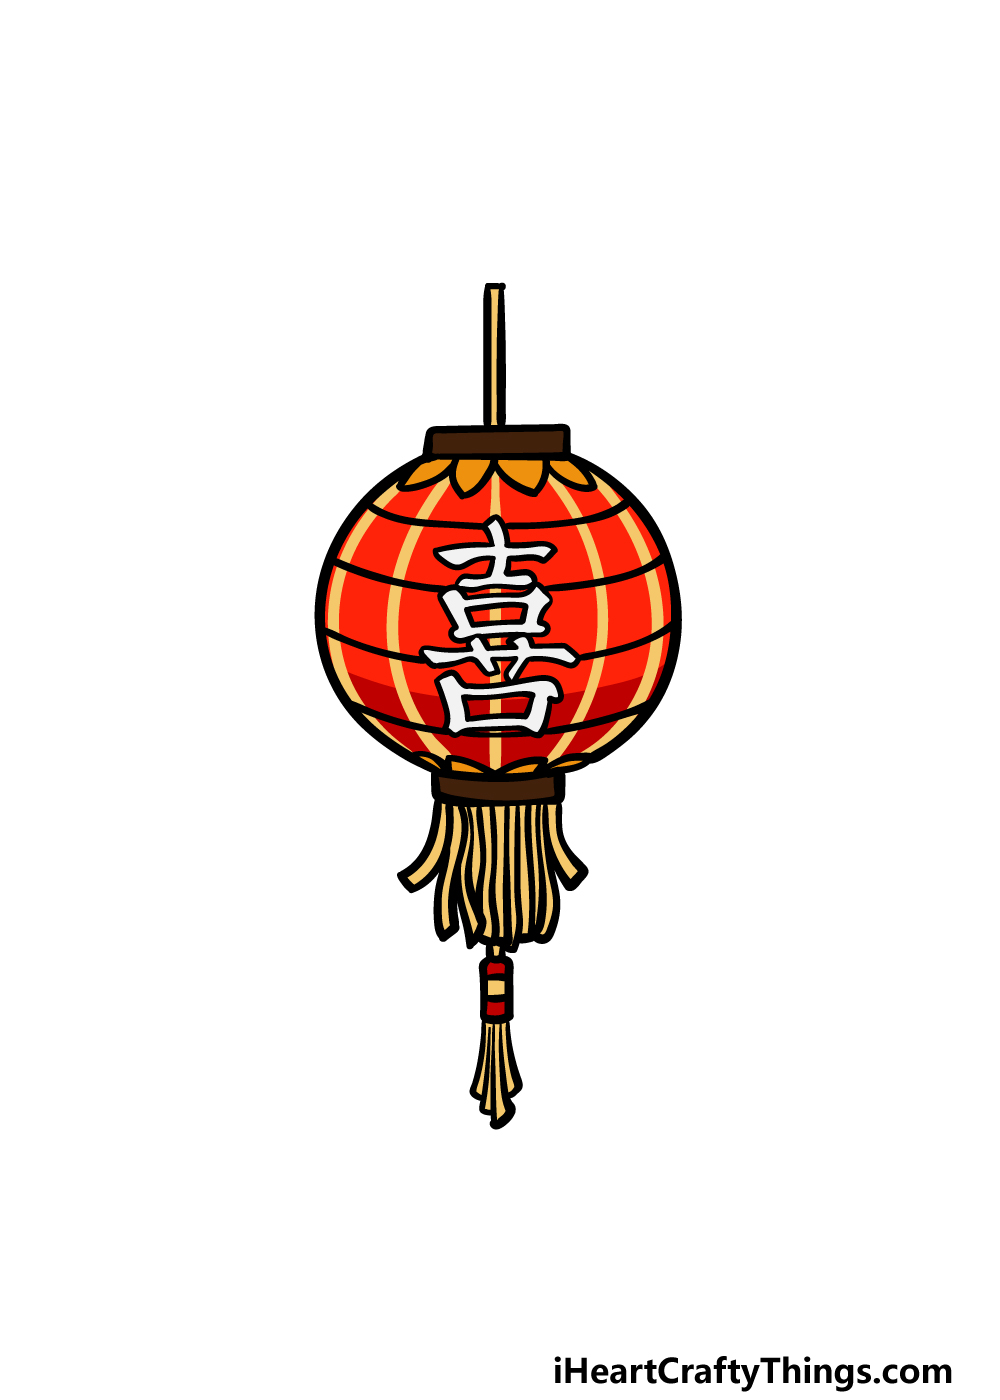
This is the final step of this lantern drawing, and in it we shall finish off by adding some lovely colors! Sticking with the theme, we used some bright reds and yellows to bring this lantern to life.
This creates a beautiful warm image, and if you like how this looks then you could replicate the colors for your own picture.
There are so many great colors you could use as well, so definitely be sure to use any other colors that you may prefer!
If you go for brighter colors, then you could use mediums like acrylic paints and colored markers to bring them to life.
These are just some ideas, so which colors and mediums will you use for this?
Here’s how you can make your lantern drawing even better…
Make this lantern sketch shine even brighter with these tips we have for you.
This drawing of a lantern is already looking stunning, but it could be fun to add even more to the scene! When you see lanterns such as this one in real life, you will often see many decorating an area.
Now that you know how to draw this lantern, you could add as many as you like to the image. If you feel up to it, you could even challenge yourself to see how many you could fit onto the page!
How many lanterns would you like to add to this picture?
Once you have drawn enough lanterns, you could also go for some other decorations. The lantern we depicted is a Chinese-themed one, so you could add other decorations from this theme.
Perhaps some ornate vases or some dragon ornaments would be a good place to start when decorating the scene.
What are some other decorations and additions you could add to finish off this page?
You can also have a great time experimenting with colors as you make this lantern drawing look even better. Using your colors, you could even create certain effects.
For example, by adding some soft glowing yellows or reds around the lantern, you could create the illusion of it shining a light. You could also go for a completely different color scheme to the one we used if there are other colors you would prefer.
What colors and mediums would best suit this pretty lantern?
Finally, once you have added all of your changes you could finish it off with a background. Perhaps this lantern could be in a pretty garden with flowers and a small stream.
If you’re feeling extra creative, you may even want to add some characters to this lantern sketch to make it even more complete! It’s up to you to decide where you think this lantern could be displayed.
We can’t wait to see how you finish off this artwork!
Your Lantern Drawing is Complete!
We hope that you had a wonderful time working on this guide on how to draw a lantern! At the end of it, you have finished with an artwork featuring a beautifully elegant lantern.
Hopefully this guide managed to show you that creating this picture could be not only easy but also lots of fun to work on!
If you enjoyed this guide then we have some good news for you. Our website is full of awesome drawing guides like this one with more on the way, so be sure to visit us there for your next drawing guide!
Please also share your finished lantern drawing onto our Facebook and Pinterest pages for us to enjoy!