One thing that all people share in common is that we will inevitably produce a fair amount of trash in our lifetimes.
This trash can range from uneaten food to various forms of packaging, and no matter what it may be you will certainly need a trashcan or other object to store it in.
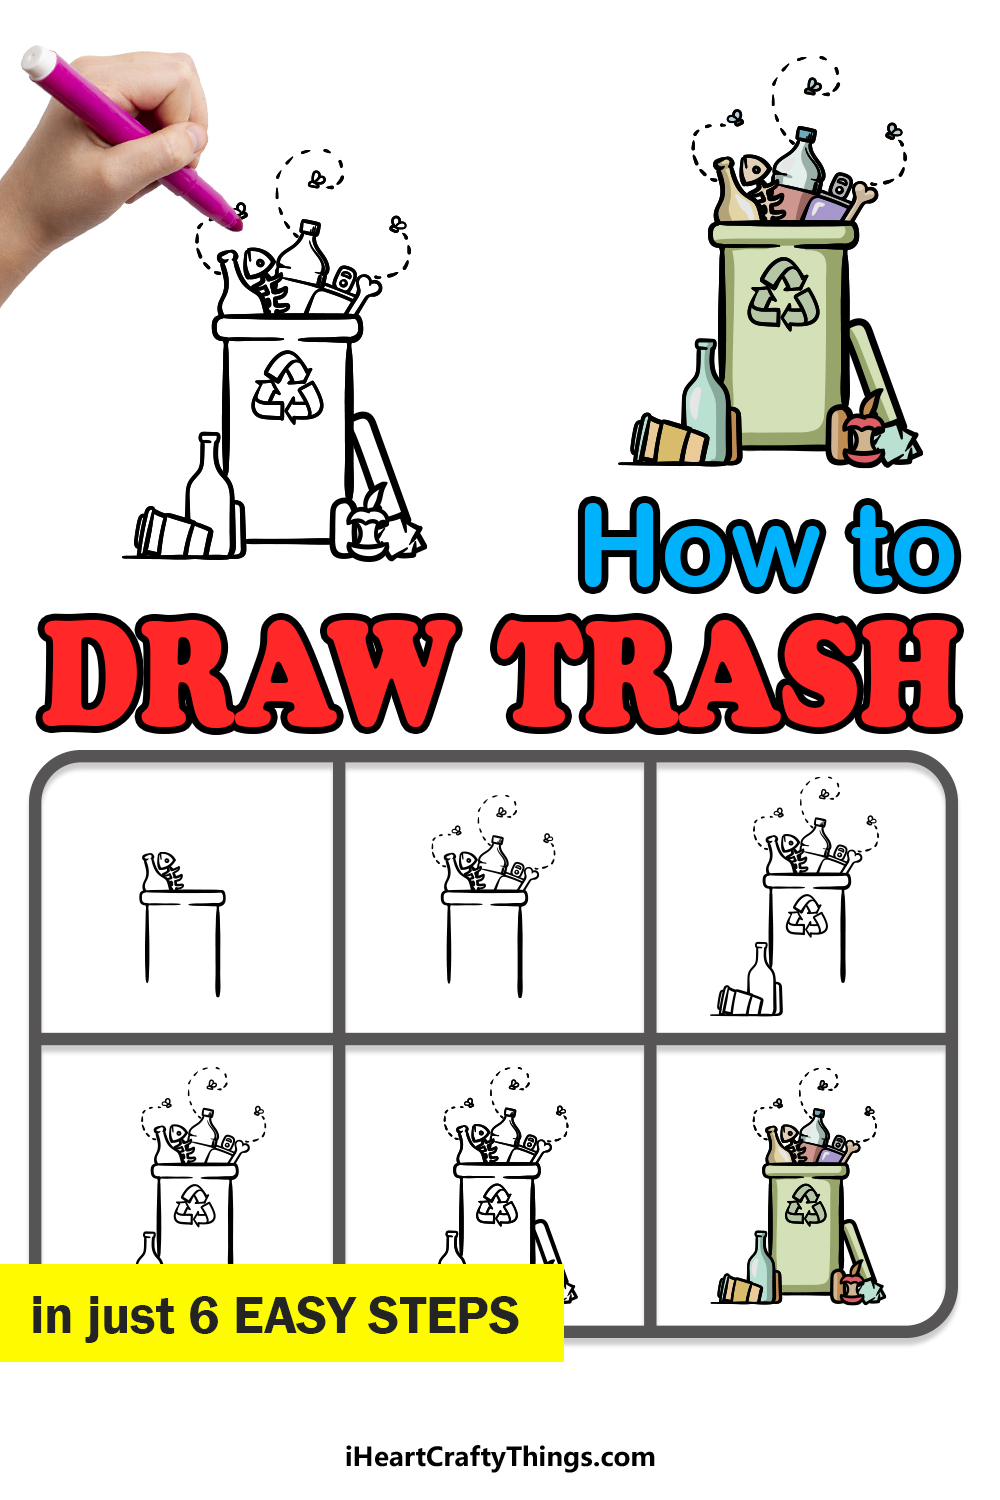
While seeing trash in real life isn’t a pleasant sight, it can be a surprisingly fun subject to draw. That’s what we are here to discover in this guide on how to draw trash.
By the end of this guide, you will be able to create your own cool trash drawing and even come up with your own variations.
Get ready to embark on this step-by-step guide on how to draw trash so that you’ll end up with an artwork that is anything but trash!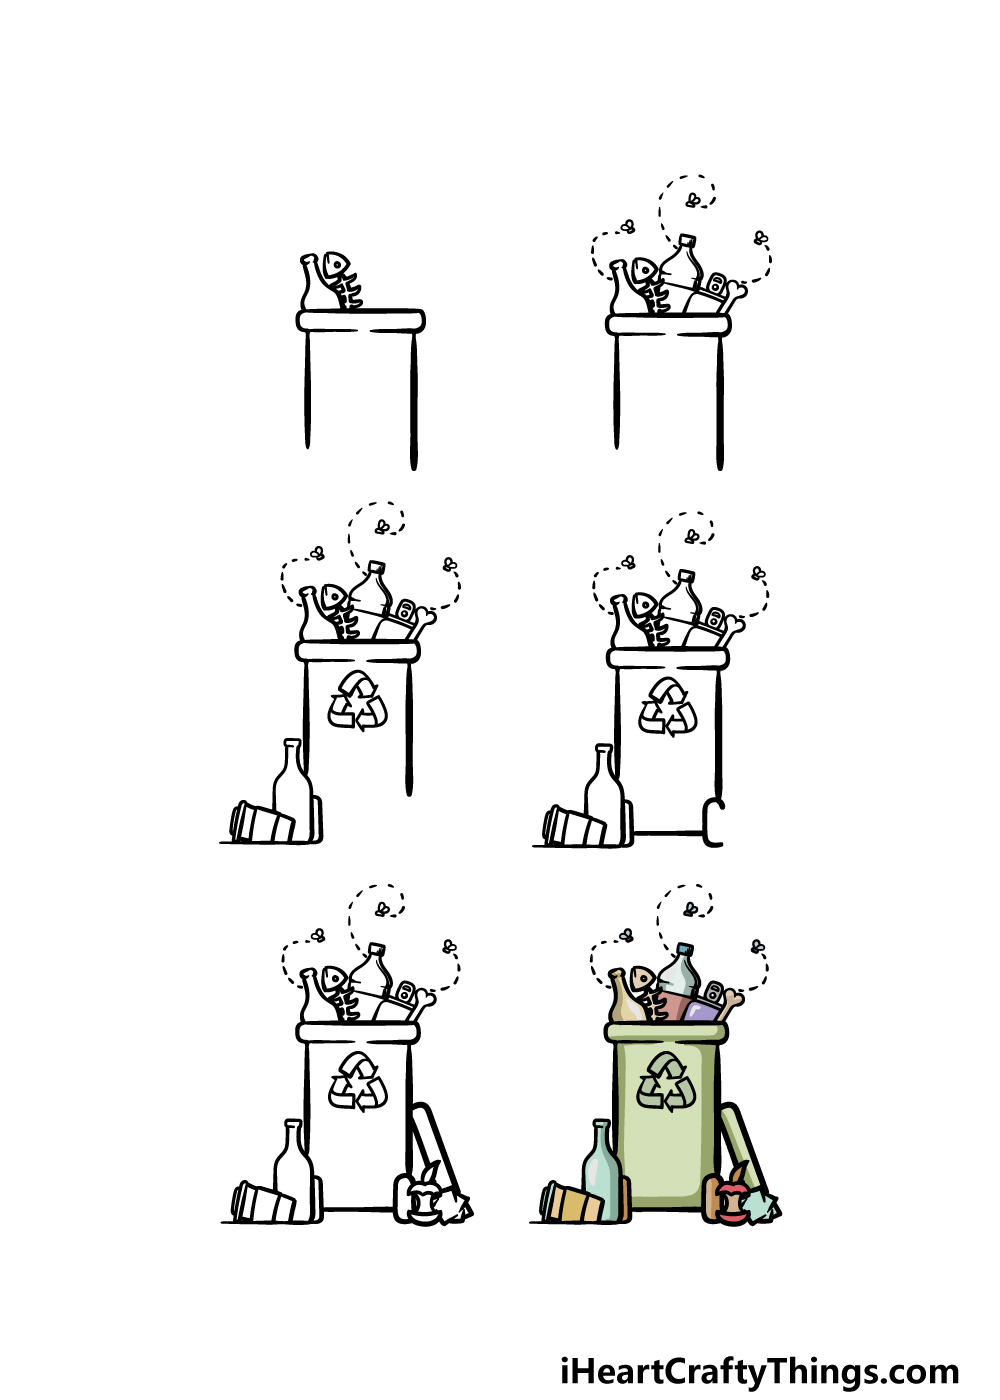
How to Draw Trash – Let’s Get Started!
Step 1
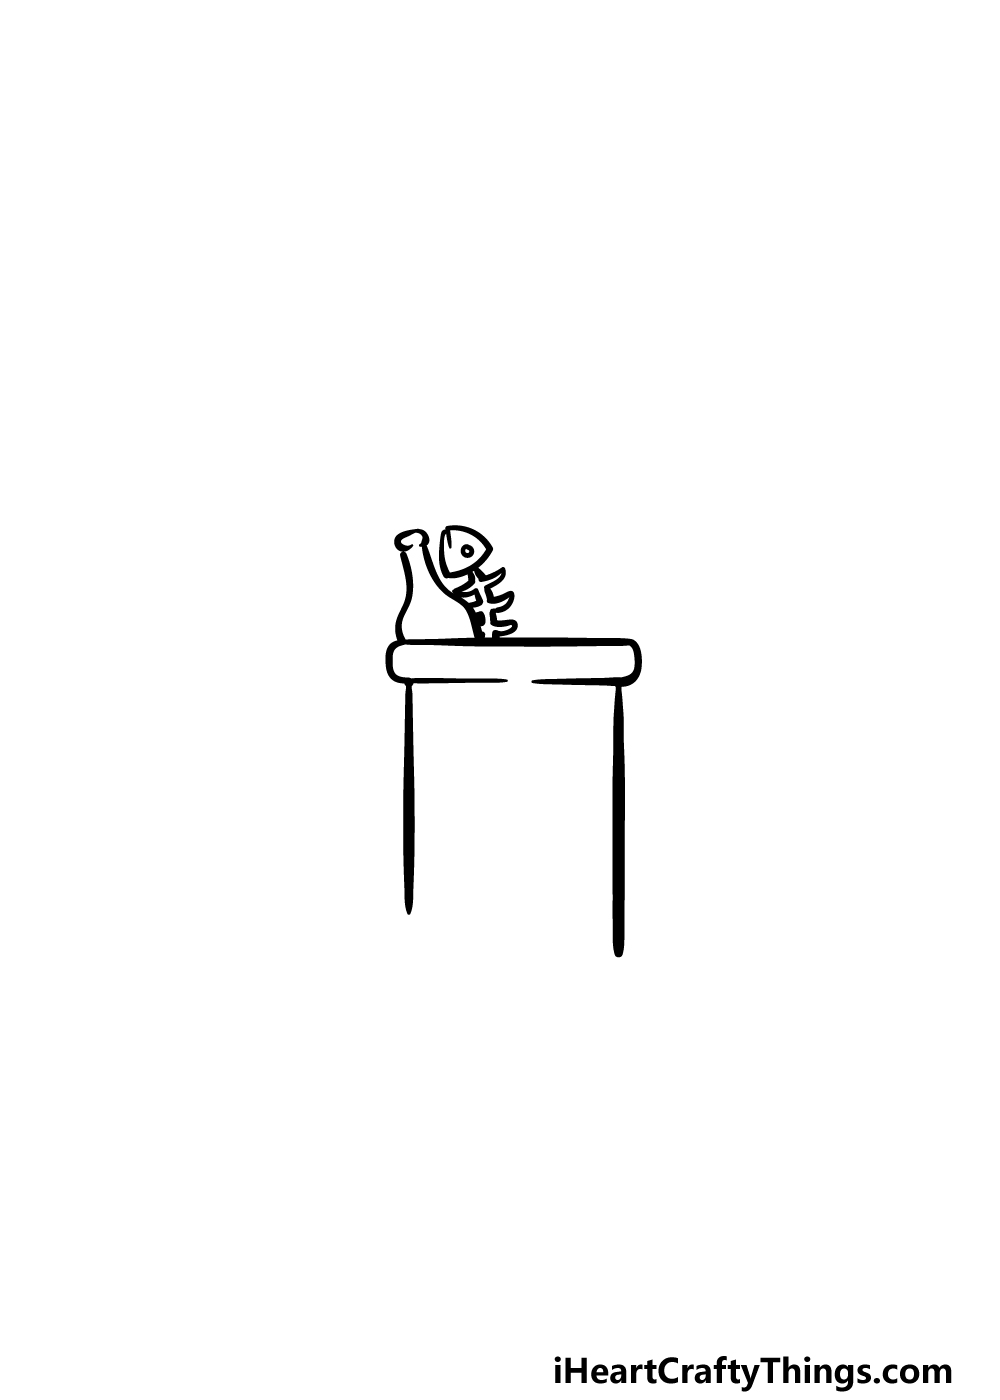
As we begin this guide on how to draw trash, we will start by drawing the trashcan that the trash will be contained within.
First, use some straight, vertical lines for the sides of the trashcan. The line on the right will be a bit longer and there will be an empty space at the bottom, as we will be adding some details there later.
Then, use some curved and straight lines for a relatively thick rim at the top of the trashcan. Finish off this step by then drawing some more of the trash in the trashcan.
We used a glass bottle and a fish skeleton on the left, and we will add more in the following steps.
Step 2 – Now, draw some more trash and add some buzzing flies
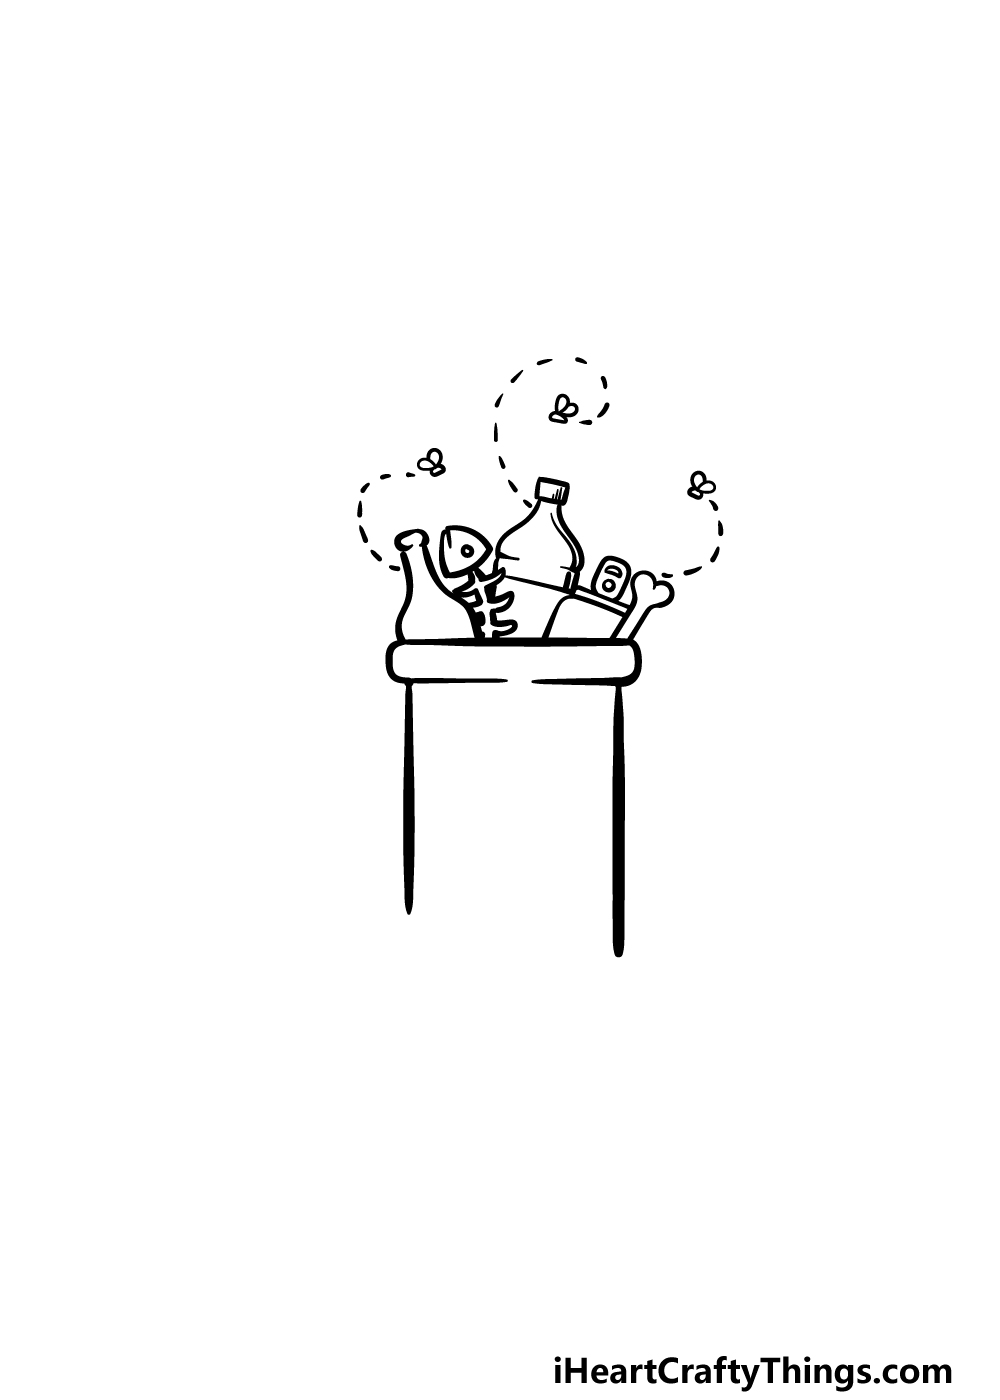
This trash drawing is nowhere near trashy enough yet, so we shall keep adding some more in the next few steps!
First, we added another bottle to the center of the trashcan rim. Next to this, we draw an open soda can along with some kind of bone.
Once these trash elements have been added, we will then draw some flies buzzing around.
When you have drawn these flies, you can then add a dotted line behind them to show the route they have been flying in.
Step 3 – Next, draw some more trash and other details
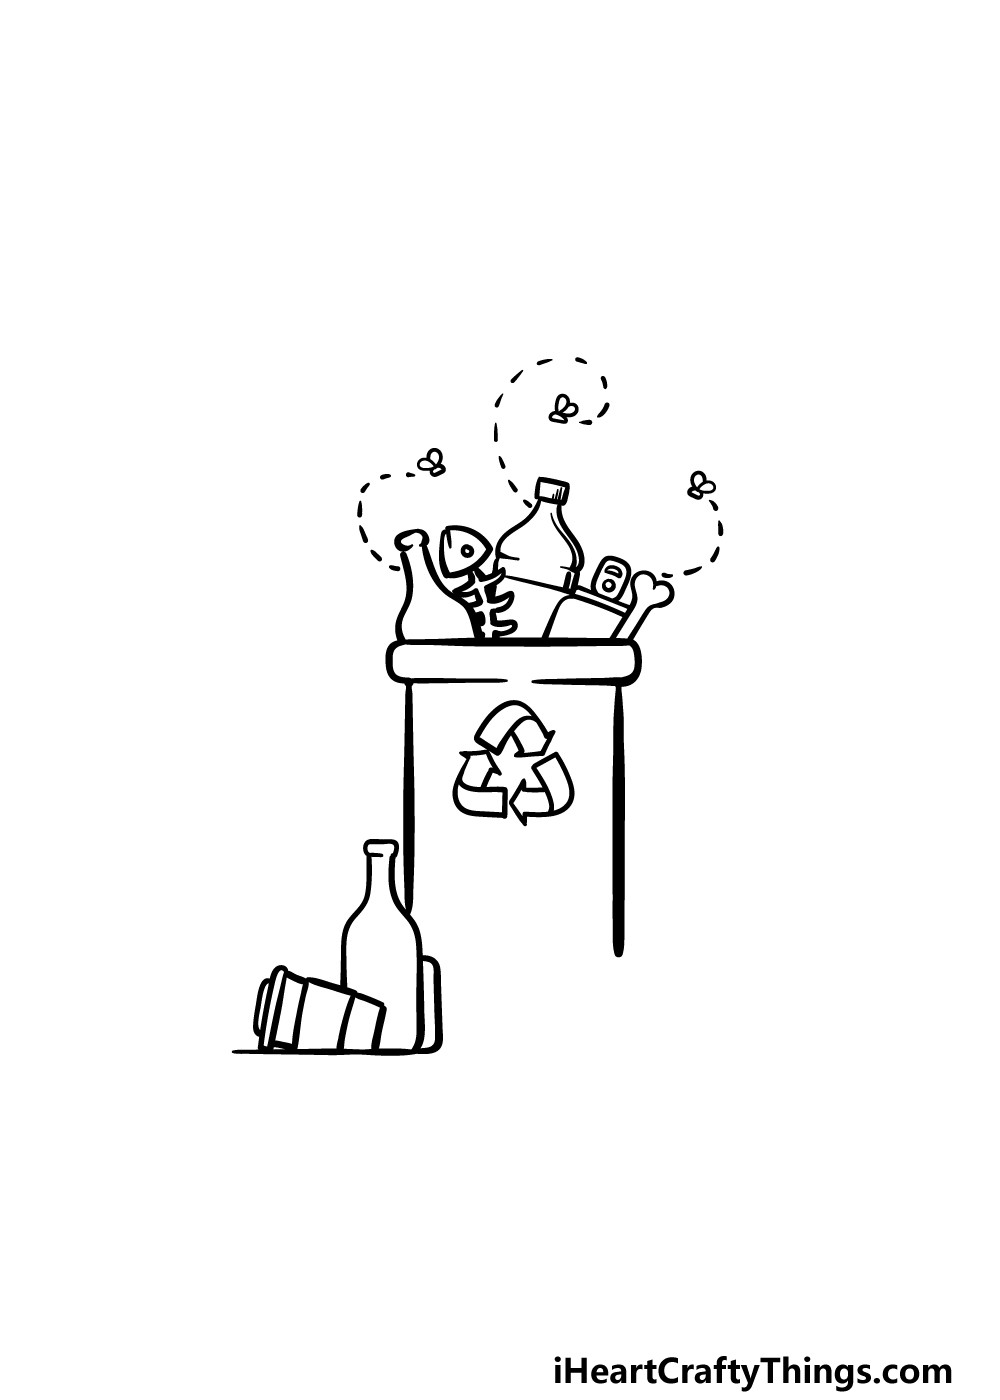
Continuing on with this guide on how to draw trash, we will be adding some more trash around the trashcan along with some more details on the trashcan itself.
First, lying near the bottom left-hand corner of the trashcan, we added a coffee cup on its side next to another upright glass bottle.
Then, we drew the recognizable recycling symbol using some twisty arrows. This can actually be quite tricky to draw, so you may want to try and copy it exactly as it appears in our reference image.
When you have drawn all of these aspects, we will be ready to proceed to step 4 of the guide!
Step 4 – Draw the base of the trashcan

We will keep things a bit simpler in this fourth step of your trash drawing. First, draw a straight horizontal line across from the bottom of the bottle for the base of the trashcan.
At the end of this line, we will be drawing half of a small, thin oval shape. That’s all there is to it for this step, and in the next one we shall finish off with some final details, elements and details!
Step 5 – Add the final details to your trash drawing
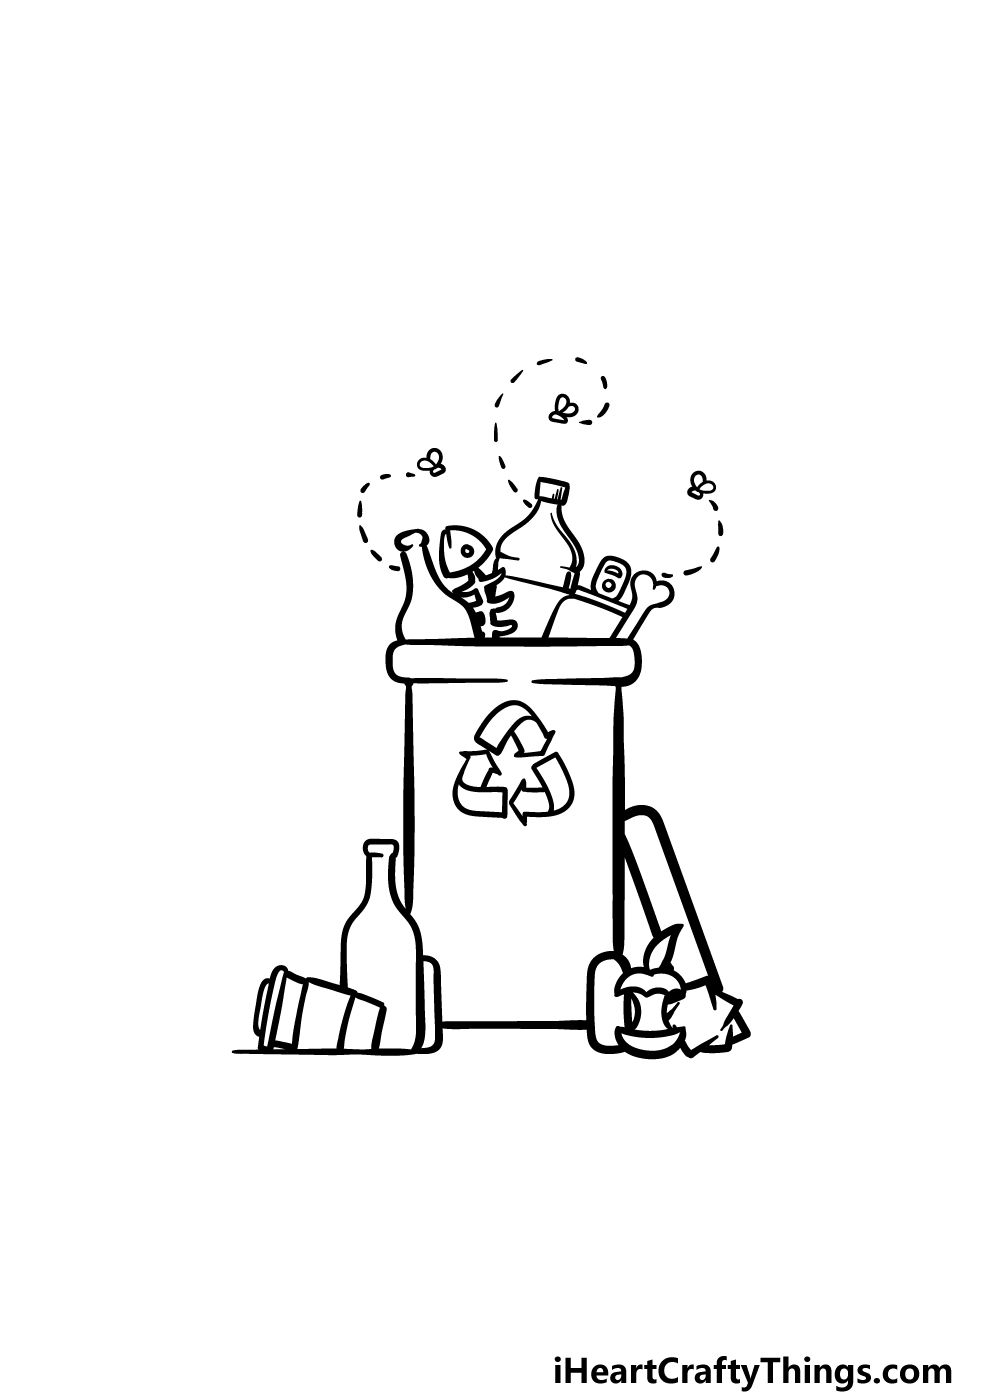
Soon you will be able to bring this picture to life with color, but first we have some final details to add in this step of our guide on how to draw trash.
We will complete the small pile of trash on the lower right-hand side by drawing an apple core using some simple lines.
Add some more small square trash pieces next to that, and then we shall draw the lid of the trashcan leaning next to it.
This will be drawn as a thin shape at a bit of an angle, as shown in the reference image. Once these details have been drawn, you can then finish off with your own ideas.
There are many different kinds of trash, so you can add even more to this picture! It wouldn’t be a nice sight to see a trashcan overflowing in real life, but it can make for an even more interesting image.
How will you finish it off?
Step 6 – Finish off your trash drawing with color
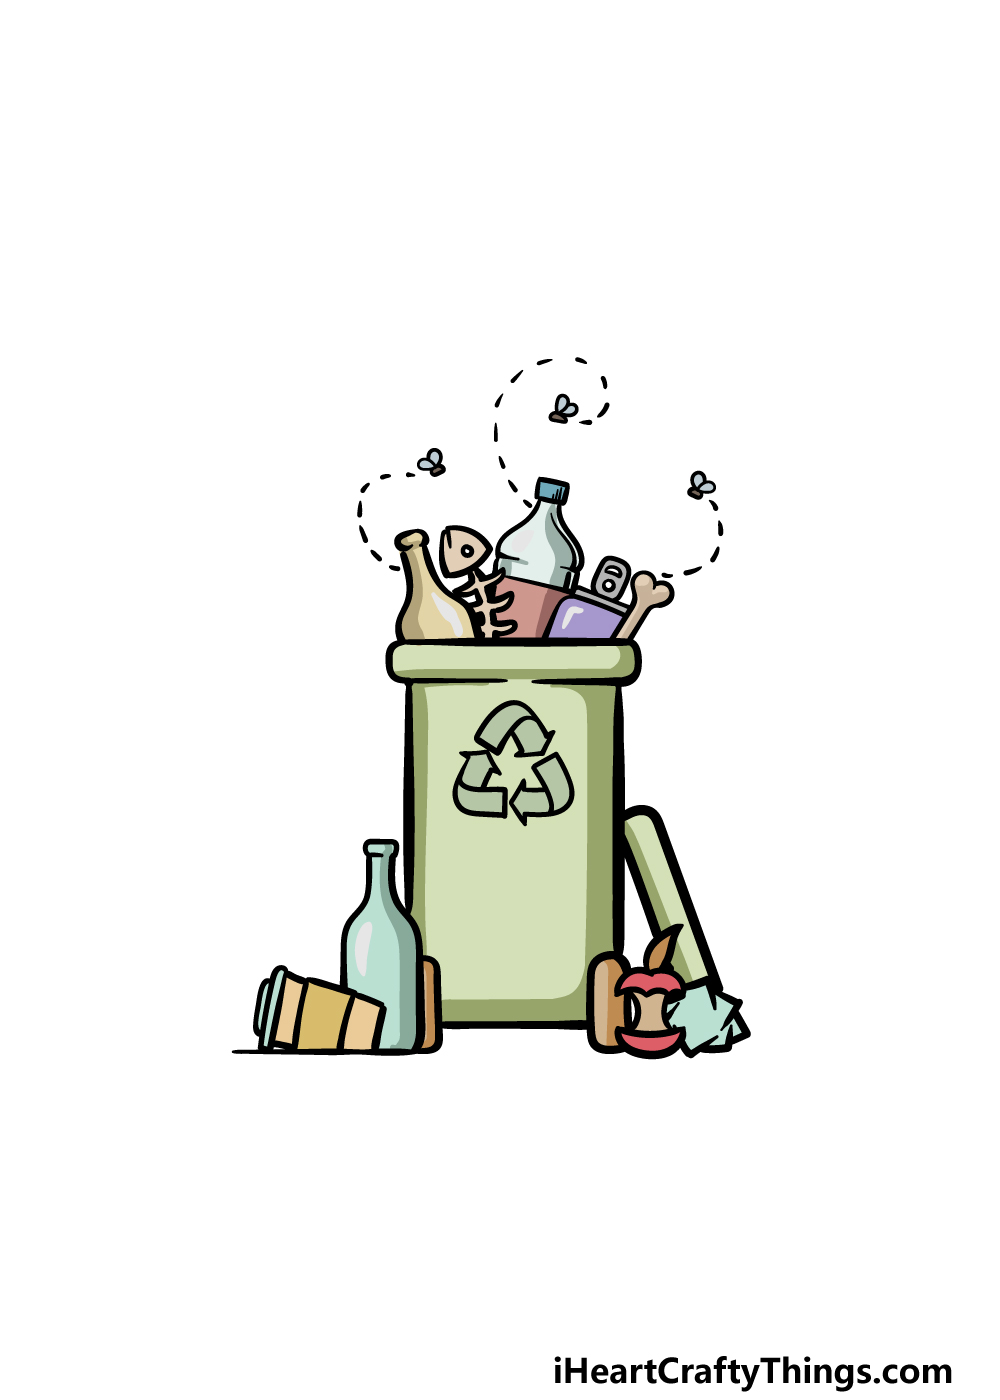
This is the final step of your trash drawing, and you can now finish it off with some colors to really bring it to life!
In our reference image, we tried to use a good variety of colors throughout the picture.
We used shades of greens for the trashcan, and then for the trash we tried to incorporate lots of different color variations.
With an image like this, the more colors you can use the better, as it will help to make the image ‘louder.’
If you would like the colors to really pop, then we would recommend some mediums such as acrylic paints and colored pens or markers.
Anything you choose will look great, however, so what are you thinking of using for this image?
3 More tips to make your trash drawing easy!
You won’t want to discard these tips we have for making your trash sketch easier.
For this drawing of trash, we added a few pieces of different trash to create the look of an overflowing trashcan.
If you wanted to make this drawing easier, you could do so by removing some of these pieces.
This would depend on your own preferences or the pieces that are giving you the most issues. You may also just prefer a less chaotic interpretation of a trashcan, in which case this tip would work too.
If there are other pieces of trash that you would find easier to draw then they could be substituted for the pieces you choose to leave out in the image.
Another way you could make this trash drawing a bit easier would be by drawing a different kind of trashcan.
The one that we drew here is simple, but drawing other ones could make the composition easier.
For example, you could go for a standard black trash bin. This would be larger, so it would also give you an excuse to draw less of the overflowing garbage details.
That is one idea, but you could go for any other kinds of trashcans that you would find easier to draw. You could look at some trash cans around you for some inspiration.
This final tip for your trash sketch will probably not smell so good, but it could make your artwork easier and more detailed.
We mentioned that you can look at real trashcans for inspiration, but you could take this a step further.
If you see an overflowing trashcan near you, then that could serve as a model for your drawing. You could also open a trashcan in your house to see some of the trash inside.
Just be sure to not make a mess and wash your hands afterward! You could use some of this real-life trash to populate your drawing and make it more personalized to your life.
It could also make drawing particular pieces of trash much easier.
Your Trash Drawing is Complete!
That will bring you to the end of this guide on how to draw trash! The great thing about an image such as this is that there is a lot of room for variations and cool details.
If you follow the steps we laid out for you, once you have mastered the drawing there will then be plenty of room for your own creativity.
We mentioned a few ways that you could go about doing this, but this is really your chance to show off what you can do!
Will you add some more creative trash, draw a background or maybe experiment with colors and art mediums? We can’t wait to see what you do!
Then, when you want a new drawing challenge to take on, you can check out our website for more drawing fun. We upload new ones often, so be sure to keep checking in.
When your trash drawing is finished, you can show off your artwork by sharing it on our Facebook and Pinterest pages for us to enjoy.