A bull is one of the strongest and most tenacious animals you can find! There’s a reason that the phrase “stubborn as a bull” came to be, as these mighty beasts have strong wills and personalities.
They are also a popular animal worldwide, and their striking appearance can make it fun to learn how to draw a bull.
If you would like to learn how to do it as well, then this is definitely the guide for you!
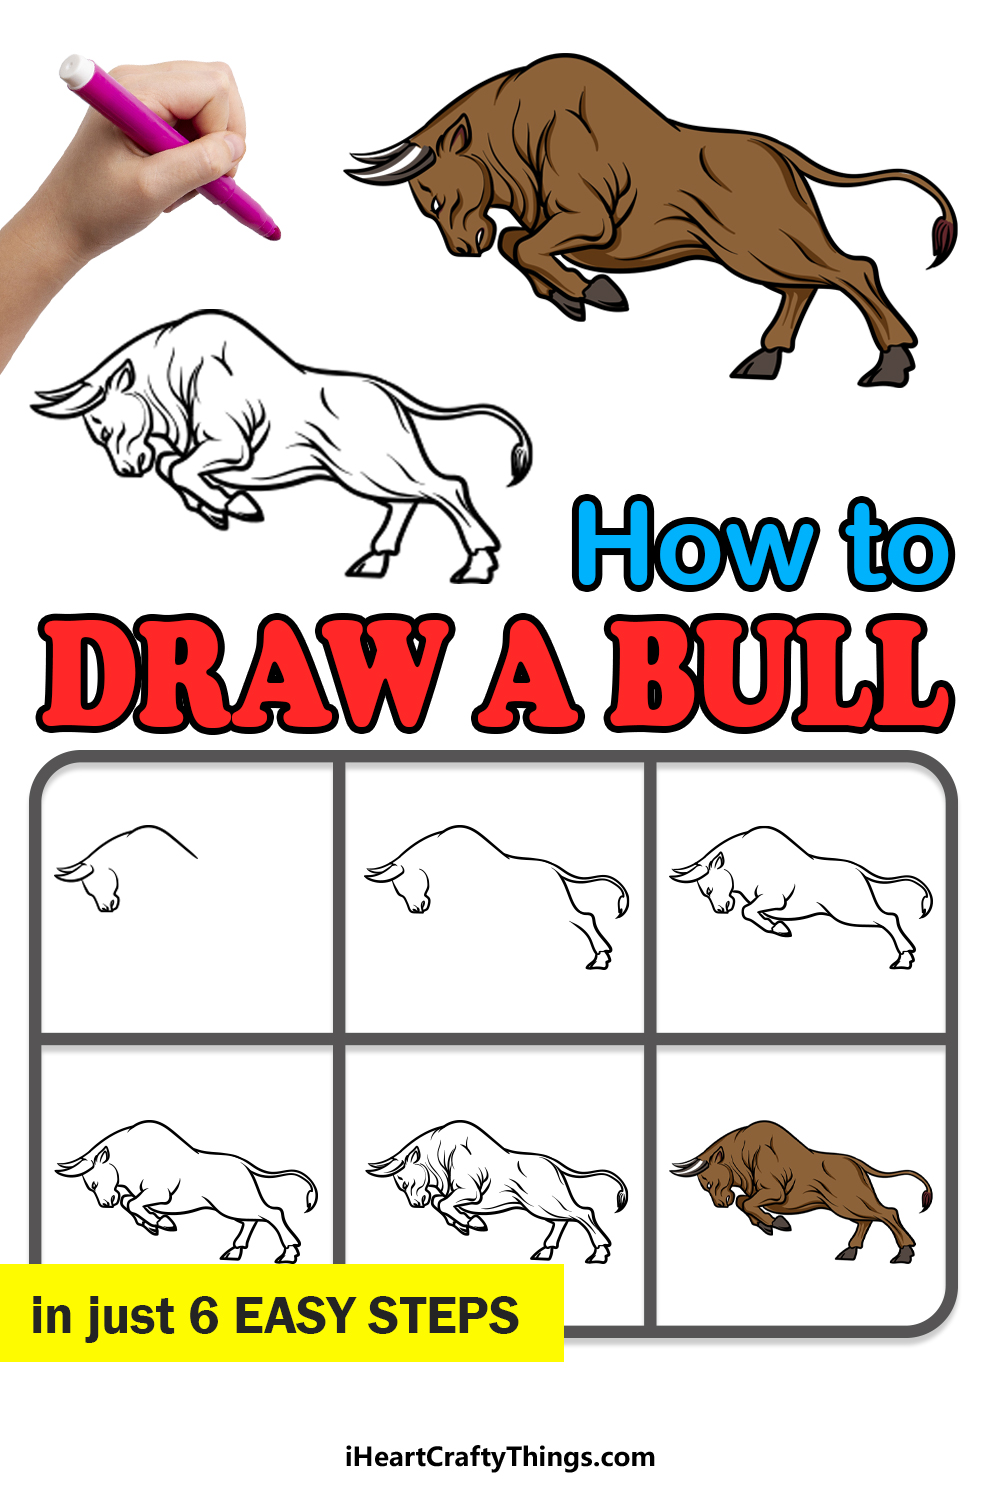
This step-by-step guide on how to draw a bull in just 6 easy steps will see you recreating one of these powerful beasts in no time!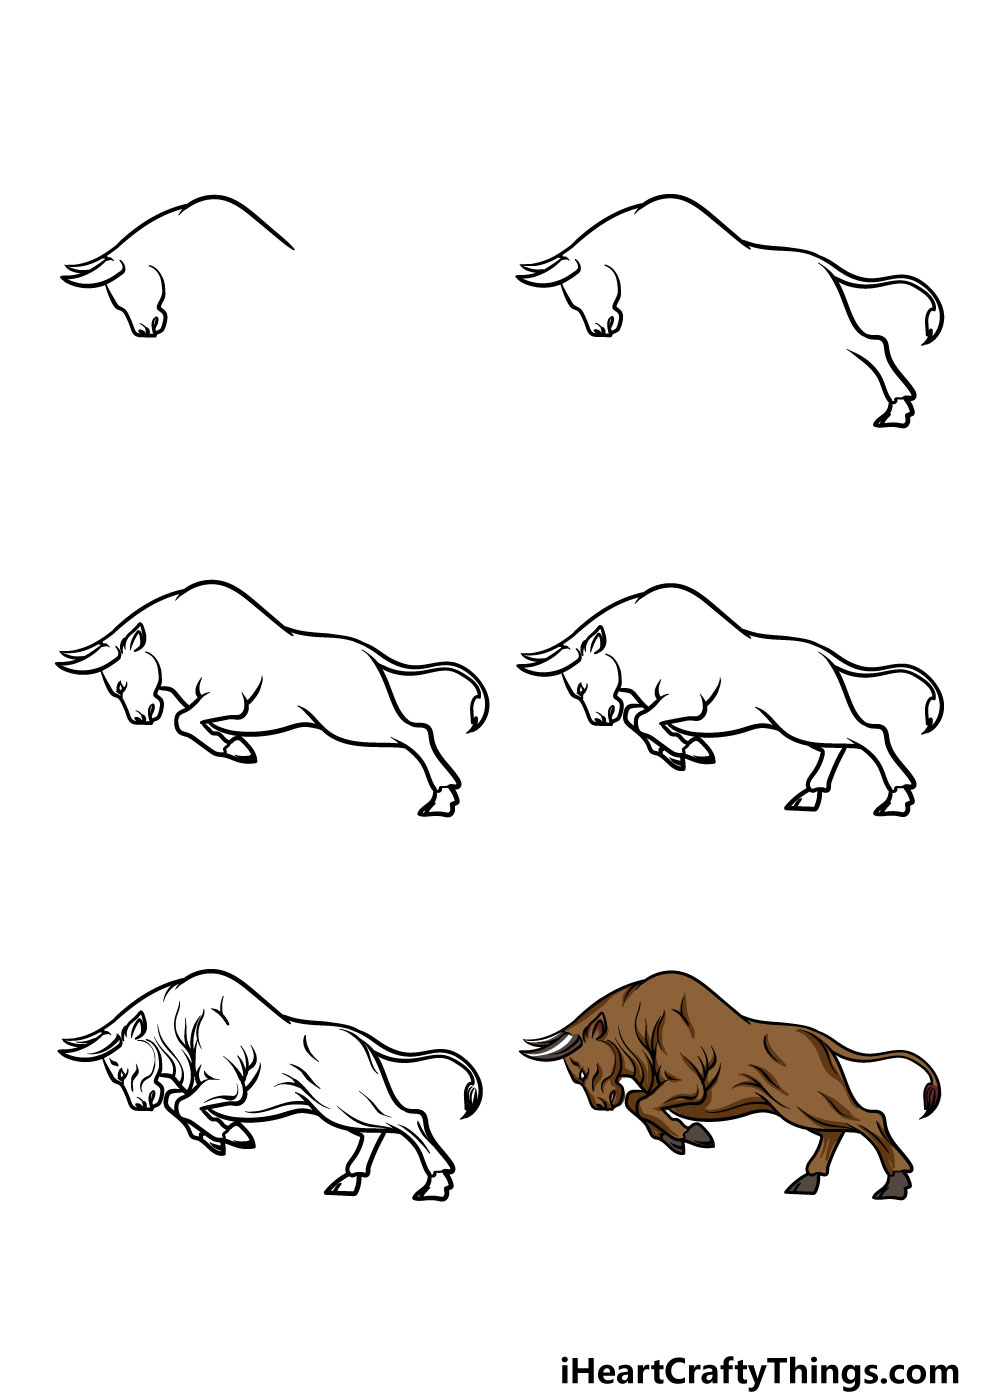
How to Draw A Bull – Let’s Get Started!
Step 1
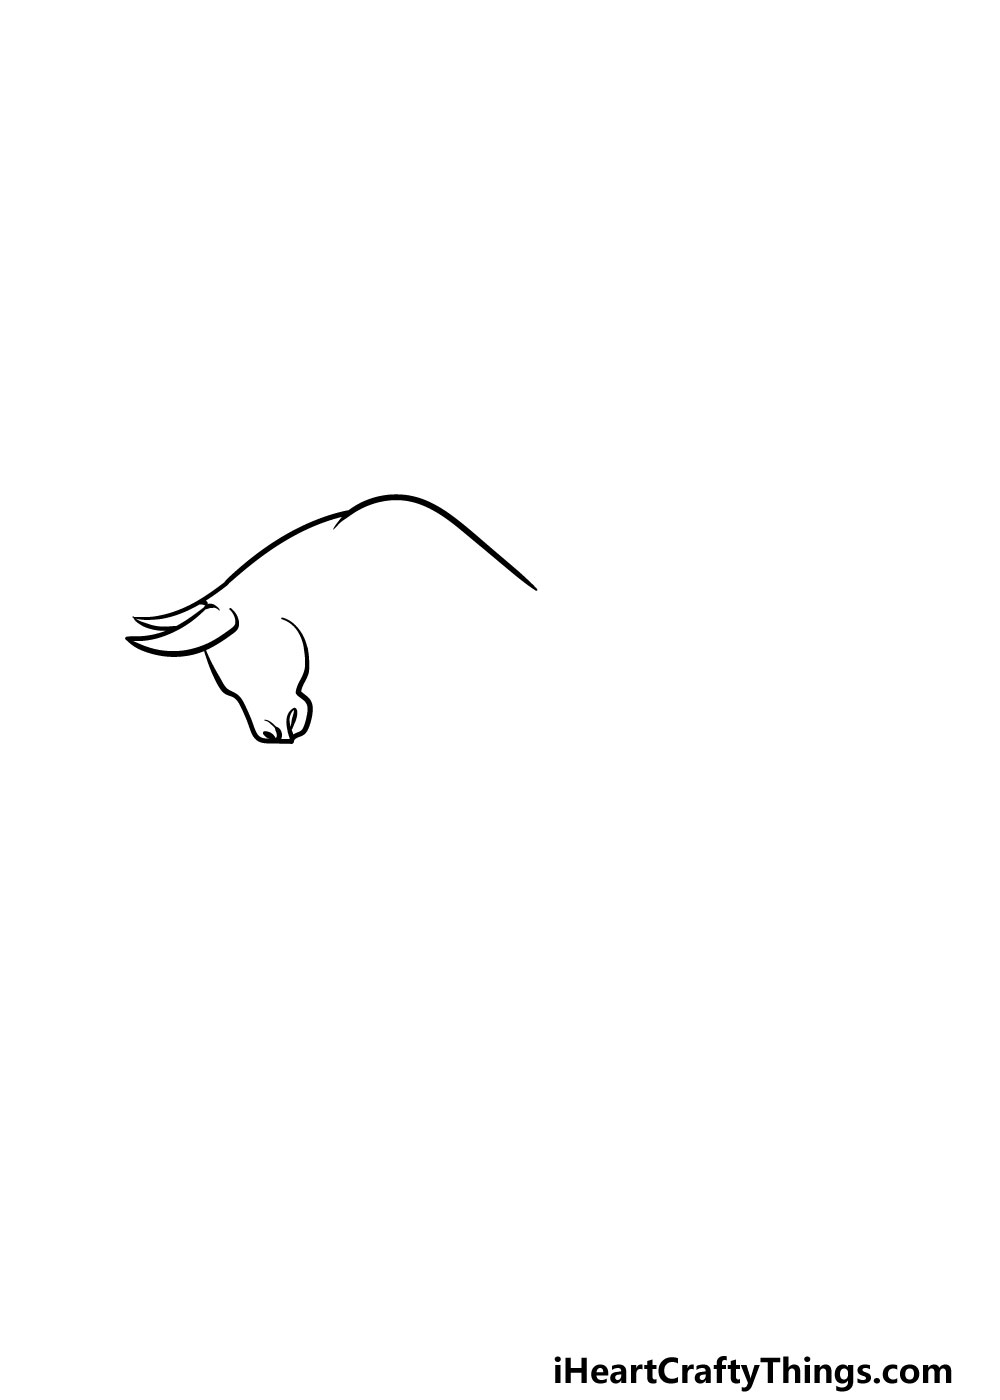
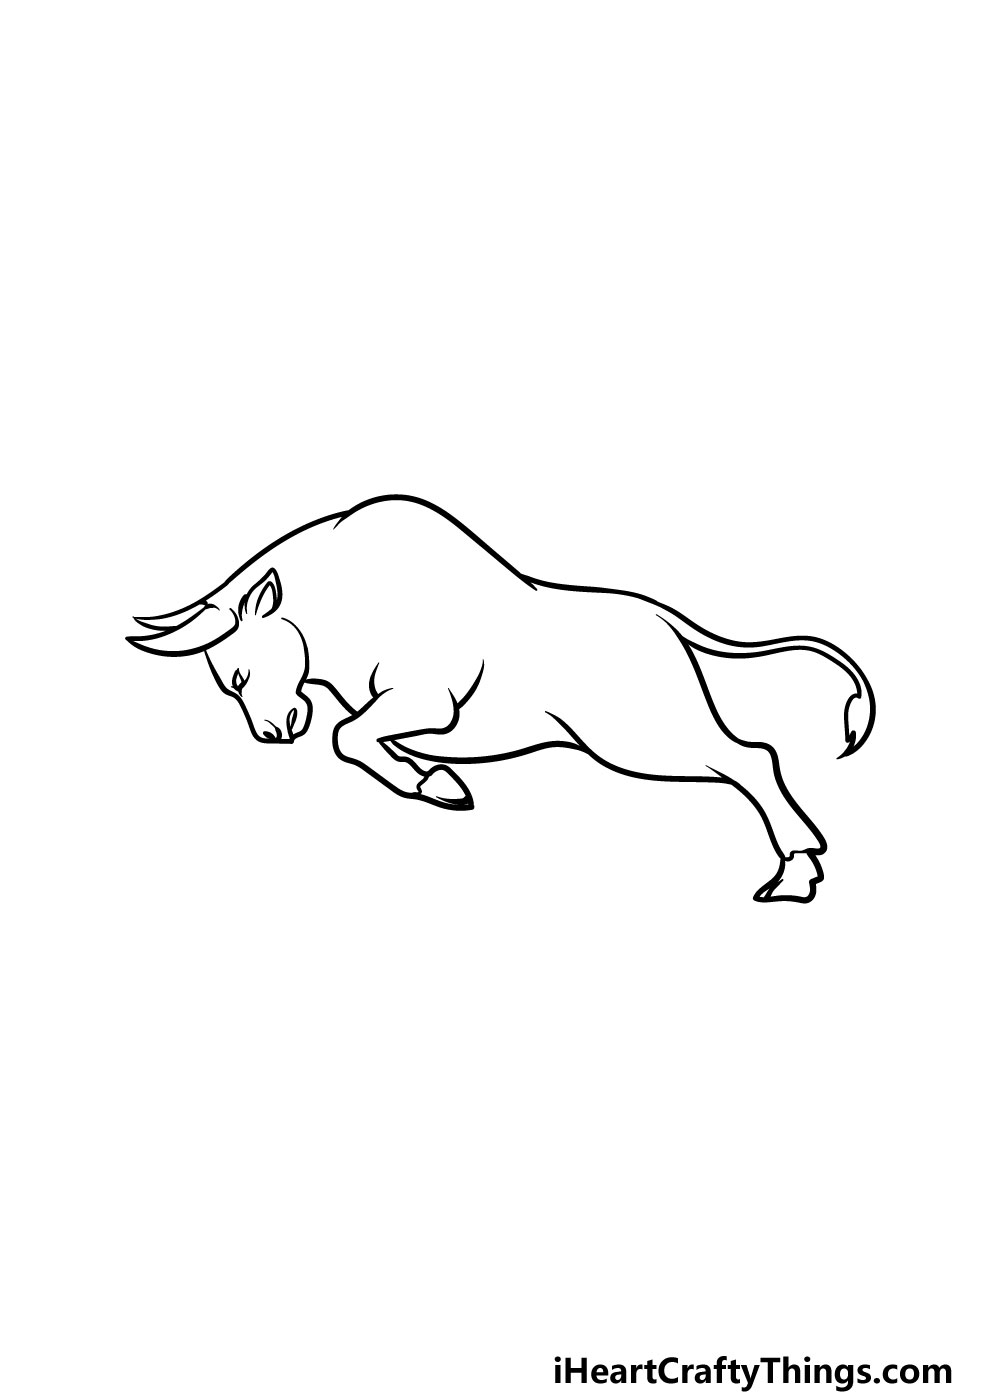
We will be drawing the first half of the bull in this first step of our guide on how to draw a bull. For this first step, you may want to use a pencil at first, as it can be a bit tricky to get it looking right at first!
This first half of the bull will comprise of the head and horns of the bull, and you will also be drawing the back of the bull.
Finally, the front legs will be curled beneath the bull. While you’re drawing, be sure to refer closely to the reference image and take your time with it!
There’s no hurry when drawing, and you’ll get the hang of it in no time!
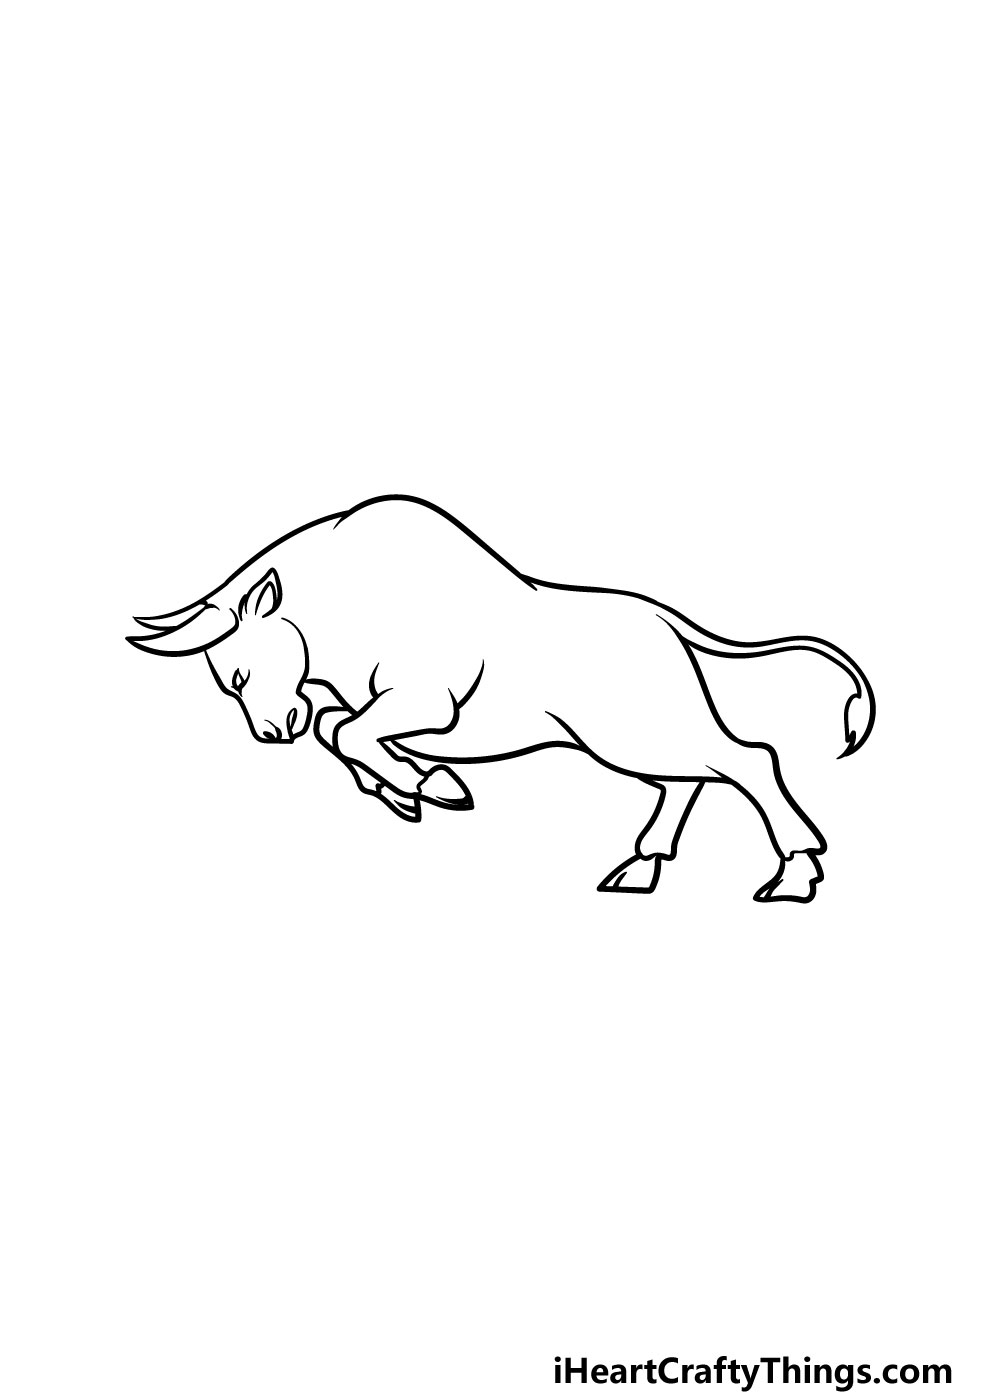
Step 2 – Next, draw the back half of the bull
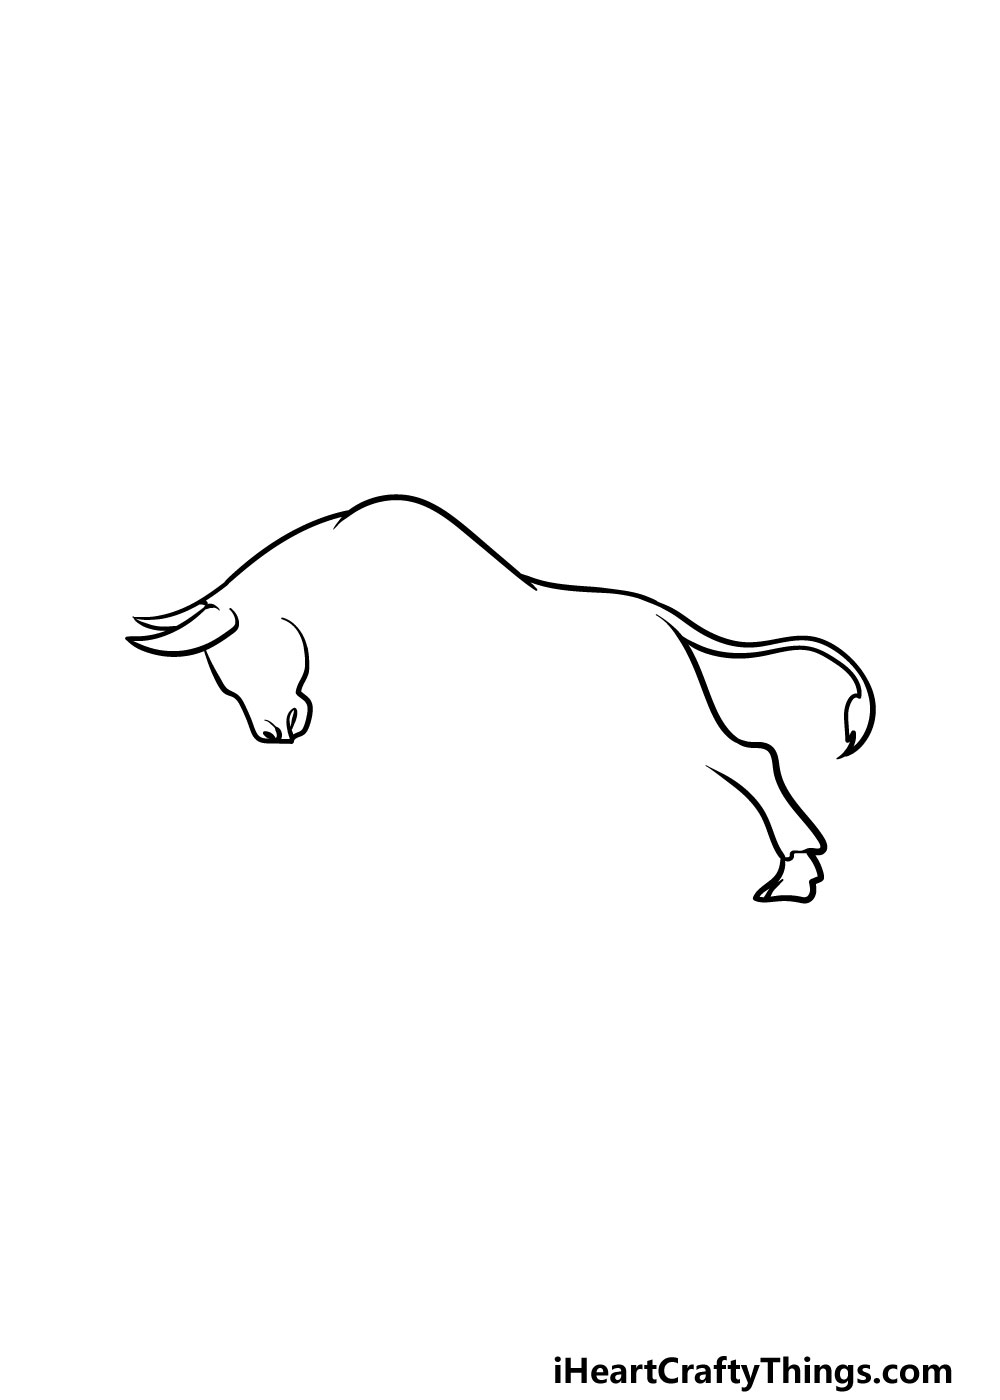
Now that you have the front of the bull drawn, you can add the back half in this part of your bull drawing.
The back half of the bull will see the back and belly sloping inward a bit, as the chest of the bull should be much thicker than the back half.
Then, the thighs will be quite thick and then end in the thin legs extending backward, as shown in the reference image.
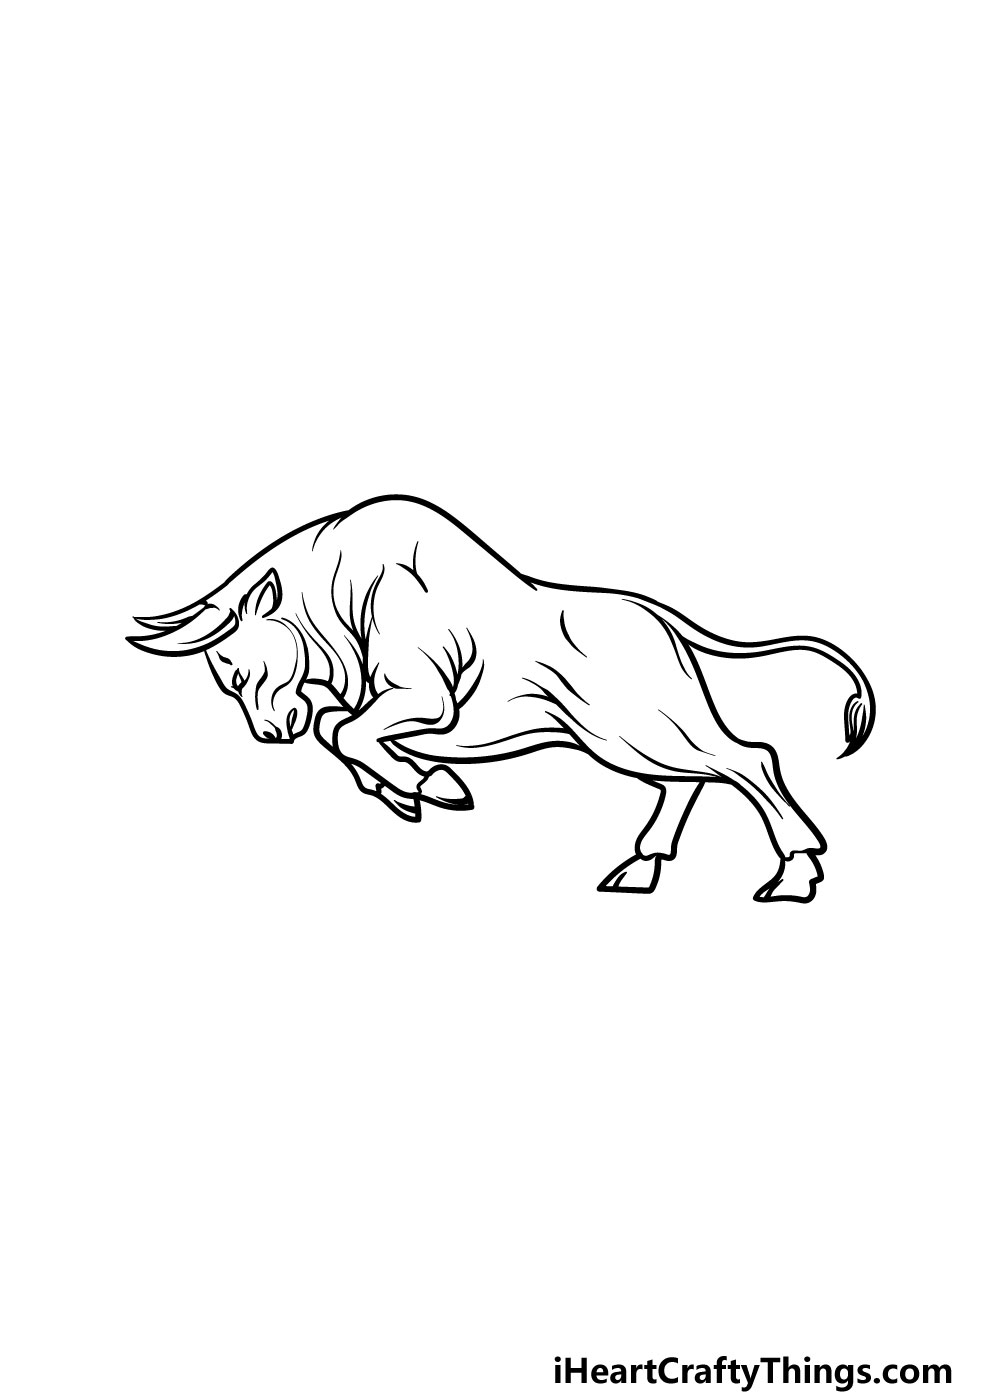
Step 3 – Now, draw a tail and the last leg for your bull drawing
This step of our guide on how to draw a bull should be quite simple! All you need to do for this step is draw a curved tail at the back of the bull.
You can also add the final leg beneath the bull, and this one will be extending straight down to touch the floor.
It’s as easy as that for this part, and once you’re happy with it you can move on to the next step!
Step 4 – Start adding some details to the bull
You have the majority of the outline drawn now, so we will focus on adding some inner details in the next few steps of your bull drawing.
The first aspects you should focus on are the face and neck details. The eyes, nose, and mouth will be drawn with some pretty sharp and angular lines.
You can then draw some curved lines throughout the neck to create some skin crease details.
This is another step where you will want to refer closely to the reference image as you draw! Once again, there’s no hurry and you can take your time as you draw.
Step 5 – Now, you can add some final details to your bull drawing
This fifth step of our guide on how to draw a bull will be all about adding the final details to the bull.
These will be going mostly at the back end of the bull, and will be an extension of the kinds of lines that you drew on the neck to add the skin crease details.
These lines will add some great texture to the bull and help to make it look even more realistic.
Before you move on to the final step of the guide, you can also add some of your own details to really finish this drawing off.
It would be great to add a cool background to the image, and you could even add some extra elements such as other animals or characters.
A background is a great way to personalize a drawing, so do you think you will add one to your bull drawing?
Step 6 – Finish off your bull drawing with some color
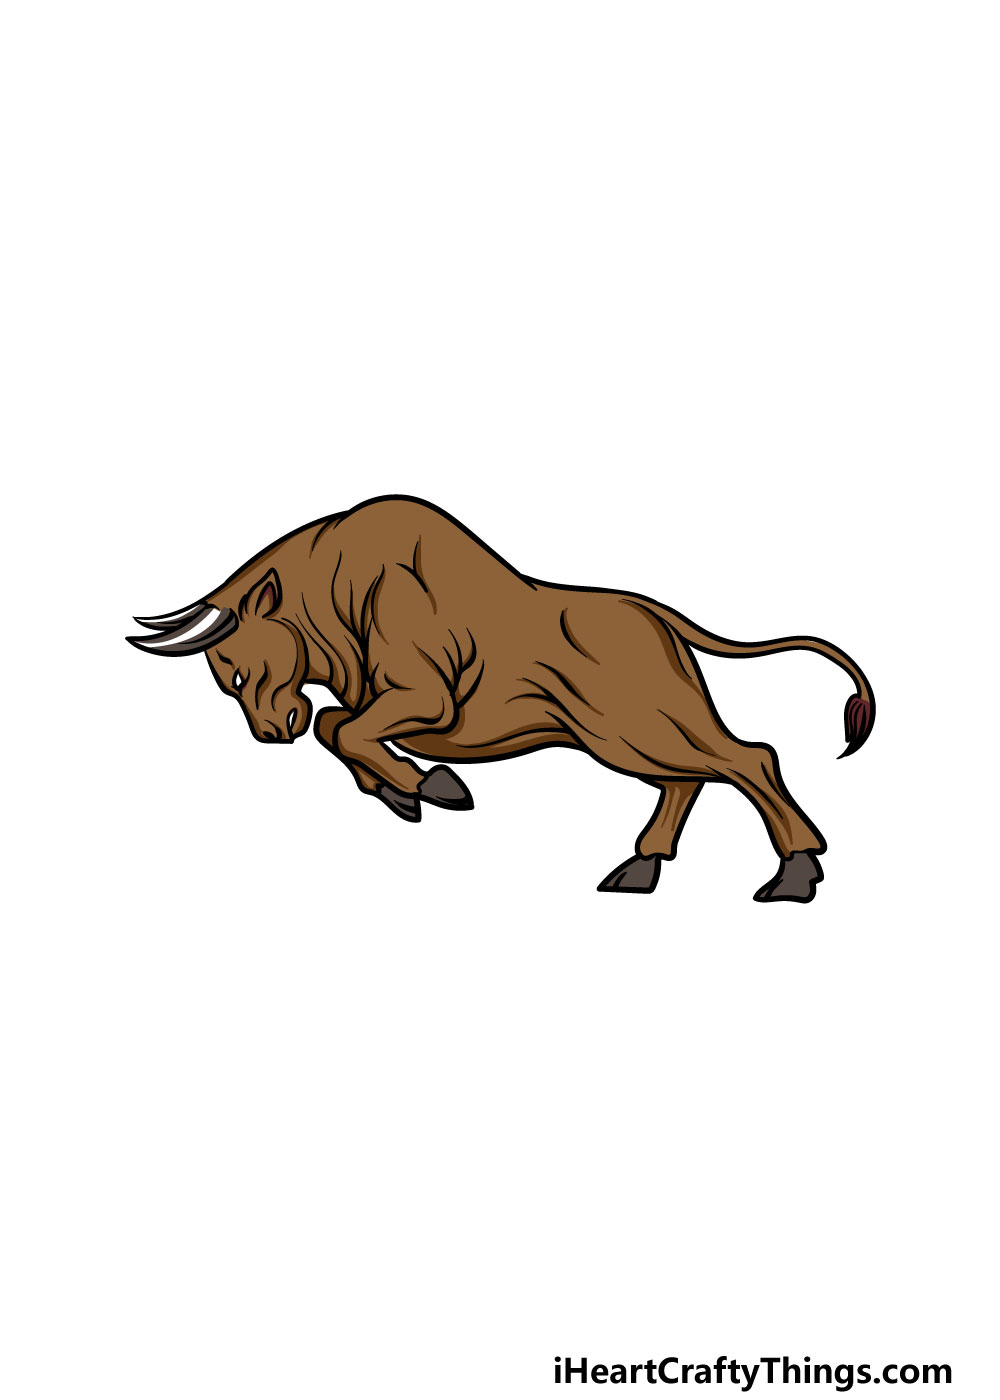
With your bull fully drawn and your final details added, you can now finish off your amazing bull drawing with some beautiful colors! In our reference image, we used a dark brown to color in the bull.
This is just one way that you could color in this bull, however, and you should feel free to use any colors that you would like for it!
You could keep the colors more realistic, but you could also use your favorite bright colors for a more stylistic look. There are no wrong ways to color in, so be sure to let your imagination run wild!
Choosing the colors that you will use is just part of the fun, however. You can also experiment with different art mediums that will really help to bring this image to life!
For darker colors, you could use mediums such as acrylic paints, colored pens and markers for more vibrant colors.
Alternatively, you could use some watercolor paints and colored pencils for a softer, more muted look. What do you think you will use to color in this bull drawing?
4 More Ways To Make Your Bull Drawing Unique
Make your bull sketch all that it can be with these fun tips!
The pose we created for this bull drawing is quite a dynamic one, and it makes you wonder what is going on! You could show what you think the scenario could be by adding some different characters.
These could be animals you would expect to see with the bull, or they could be human ones. For example, you could add a bullfighter waving his red cape.
That’s just one idea, but there are so many possibilities! What other characters could you add to this image?
Once you have decided whether to add characters or not, you can further build the scene by adding a background. That is a great way to put your own touch on this drawing of a bull!
The background could suit the extra characters and elements that you may have added. For instance, if you went with our bullfighter idea then you could have a stadium background with cheering fans.
What are some other background settings you think would work for this picture?
When you have the hang of this bull sketch, you could also change the pose a bit. We mentioned that we went for quite an exciting, dramatic pose, but you may want a more relaxed one.
If so, you could change a few details to have it just standing or maybe even lying down. Looking at photos of real bulls would be very helpful with getting these new poses looking good, too!
Finally, we also kept the colors of our example for this bull drawing quite muted and dark. This gives it a more realistic look, but you don’t have to stick to that!
You could change the tone of the browns to be darker or lighter depending on your preference while still maintaining that realistic look.
Or, maybe you would like to have a more striking image by making it a completely different color set! It all depends on how realistic you want it to look.
Your Bull Drawing is Complete!
With the final details and colors added, that means you have successfully completed this guide on how to draw a bull!
This was a detailed guide, but when you have some steps to follow and take it slow, it can be made much easier and also a lot more enjoyable!
Now that you have finished this guide, it’s up to you to take over and put your own spin on it! You could do this by drawing some extra elements, details and personal touches.
A cool background would also be great to put your own spin on this drawing! What can you think of to personalize this drawing?
When you’re ready for more drawing fun, we have plenty of amazing drawing guides for you to enjoy on our website! We also upload new ones all the time, so be sure to visit often to never miss out.
Once your bull drawing is complete, we would love to see your artwork! You can let us take a look by sharing it on our Facebook and Pinterest pages.