My Neighbor Totoro is one of the most delightful animated movies ever made.
This anime classic directed by the legendary Hayao Miyazaki has delighted audiences young and old with its charming story, characters and soundtrack.
The character of Totoro has become quite iconic as well, and to this day fans love to learn how to draw Totoro so they can create some fan artwork featuring him.
If you are one of these fans, then this is the guide for you, as we will show you how to draw a lovable portrayal of the equally lovable Totoro.
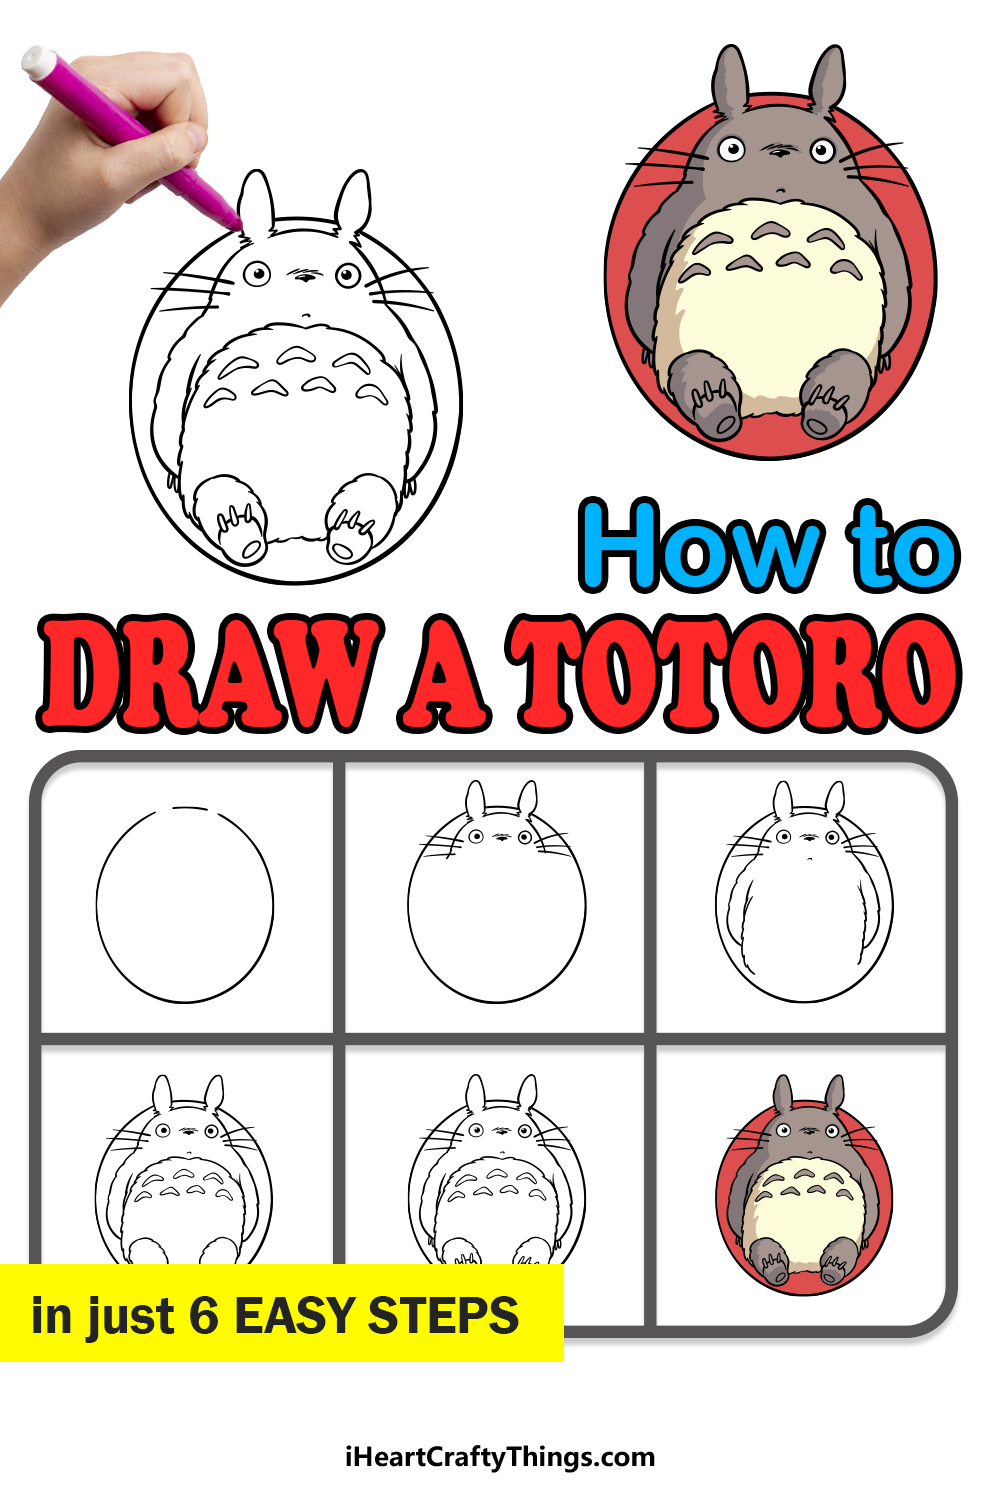
Our step-by-step guide on how to draw Totoro in just 6 steps will show you how you can recreate this adorable, classic character.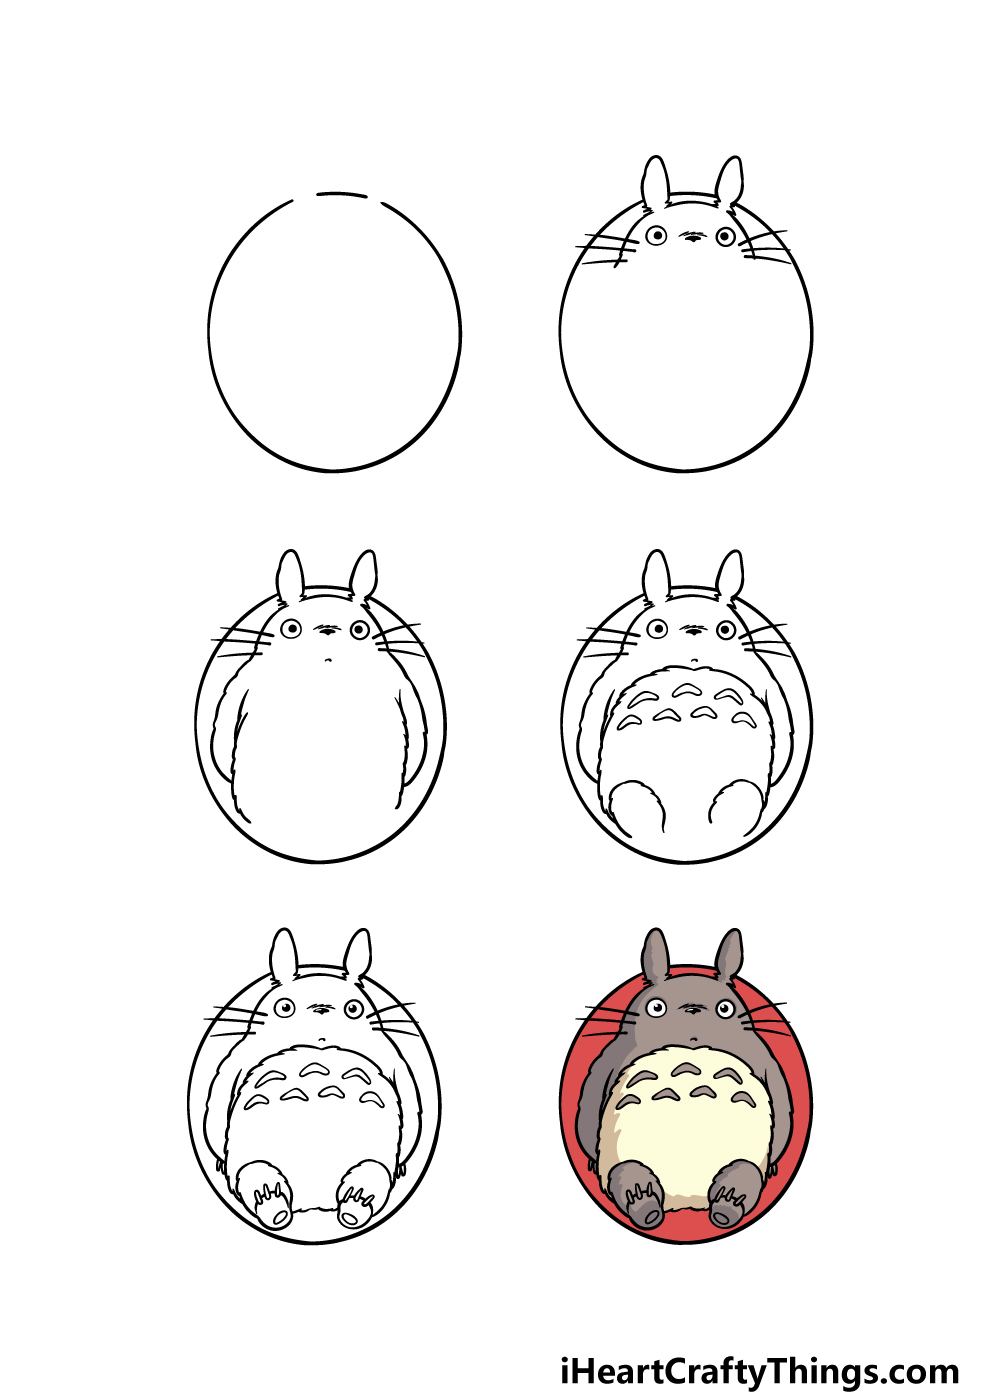
How to Draw Totoro – Let’s Get Started!
Step 1

In this first step of our guide on how to draw Totoro, we will not actually be beginning with Totoro himself. Instead, we will be drawing a border around him to help make this image even more charming.
The border will be oval and almost egg-like in shape. If you have a large, flat oval object to trace around then that should make this much easier, otherwise you can slowly draw it freehand.
As you can see in our reference image, there will be two small gaps on top of this oval, as his ears will be poking through there later.
Once you have drawn this border, it will be time to move on to step 2!
Step 2 – Next, draw the start of Totoro’s head and ears
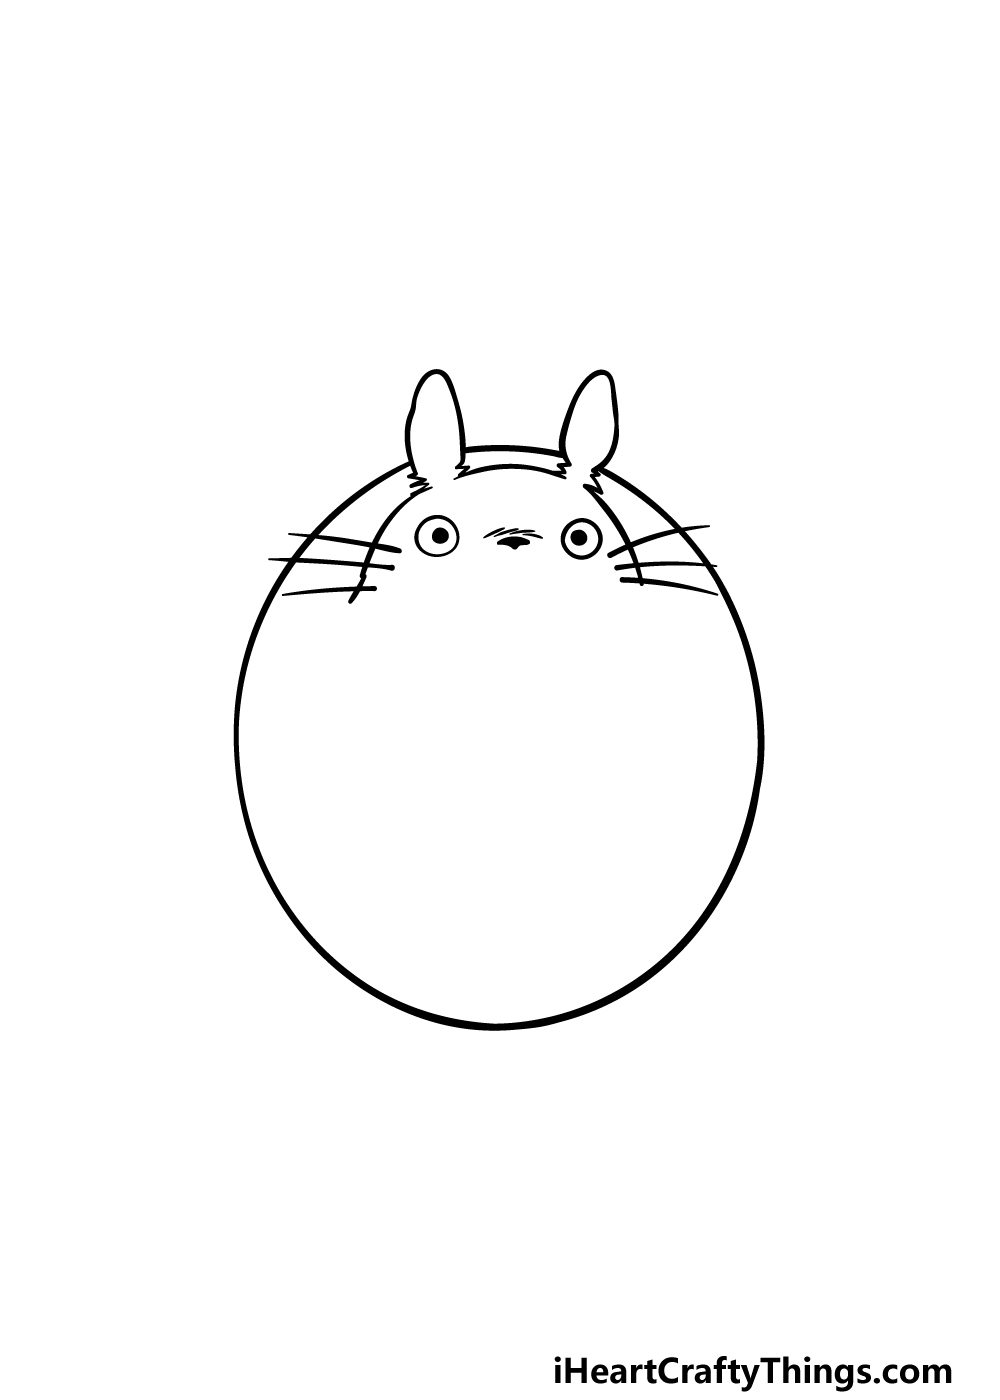
Now that you have the oval border of your Totoro drawing completed, we can now start to draw Totoro himself.
To start doing this, you can draw two small circles relatively far from one another. Add a dot to each one to finish drawing his eyes.
Then, we will use some curved lines for the sides of his head, and after that we can then add his ears.
His ears are quite rabbit-like, and they have a jagged line for the base and a rounded line for the top of them.
Finally, draw a small black nose between the eyes with some line detail above it, and then finish off by drawing six long whiskers to his face.
Step 3 – Start drawing his body in this next step
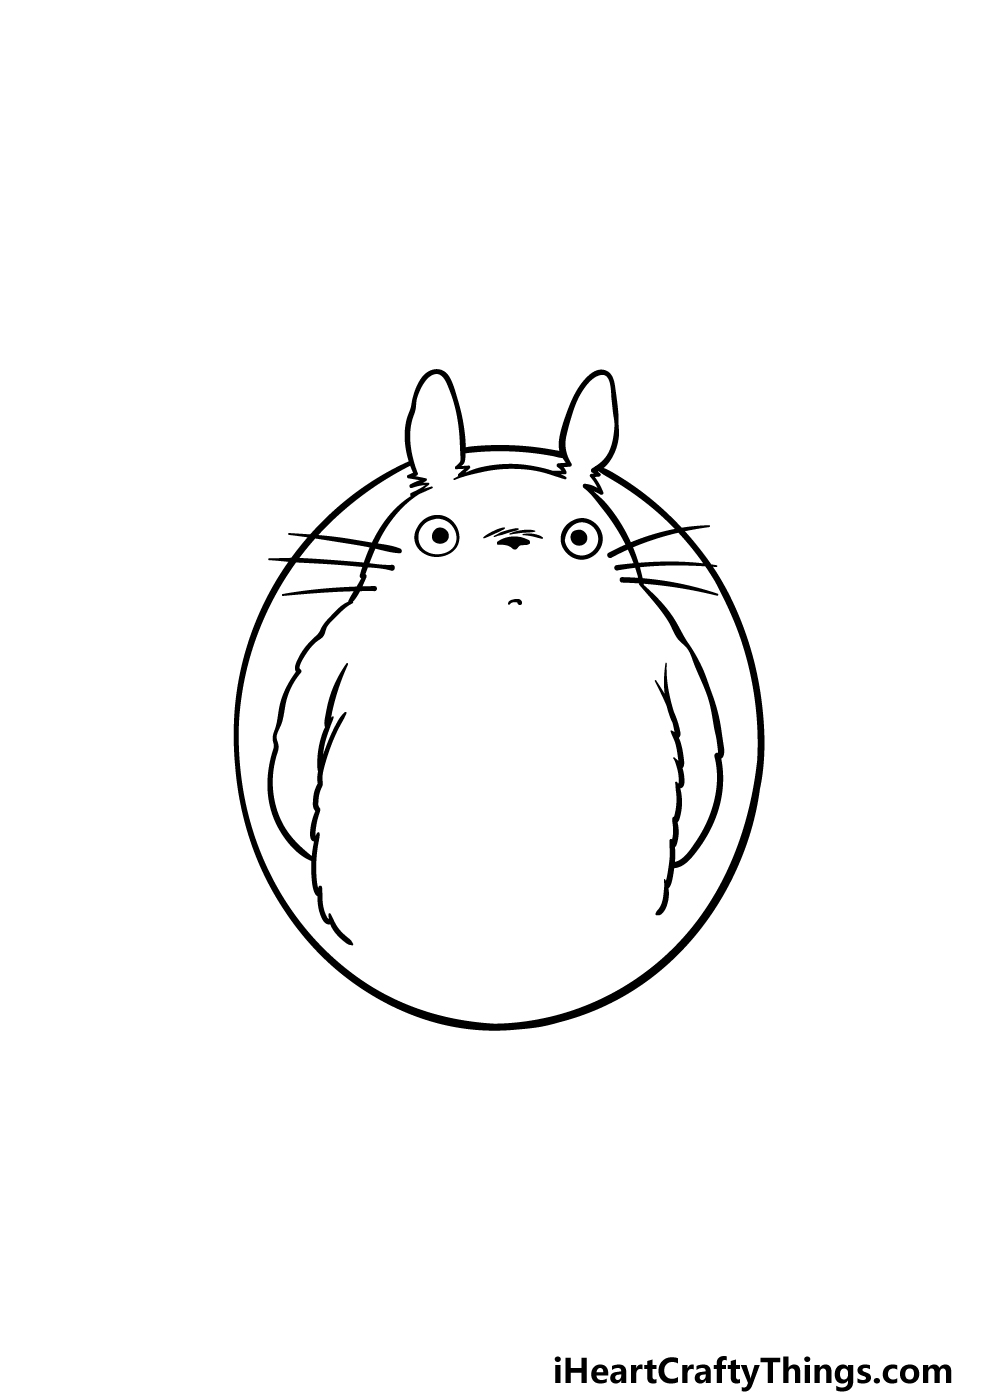
Continuing on with this step of our guide on how to draw Totoro, we will start drawing his body.
For his body, we will be using a slightly bumpy line to draw his arms extending down from the base of his head. We will be using this bumpy line to make him look fluffier and furrier.
Then, you can draw some more of these bumpy lines for the sides of his round belly on the inner edge of his arms. The final thing we will then add to the image will be to draw his little mouth.
The mouth will be a bit downturned to give him a bit of a bemused expression.
Then we shall move on to step 4!
Step 4 – Now, draw his feet and other details
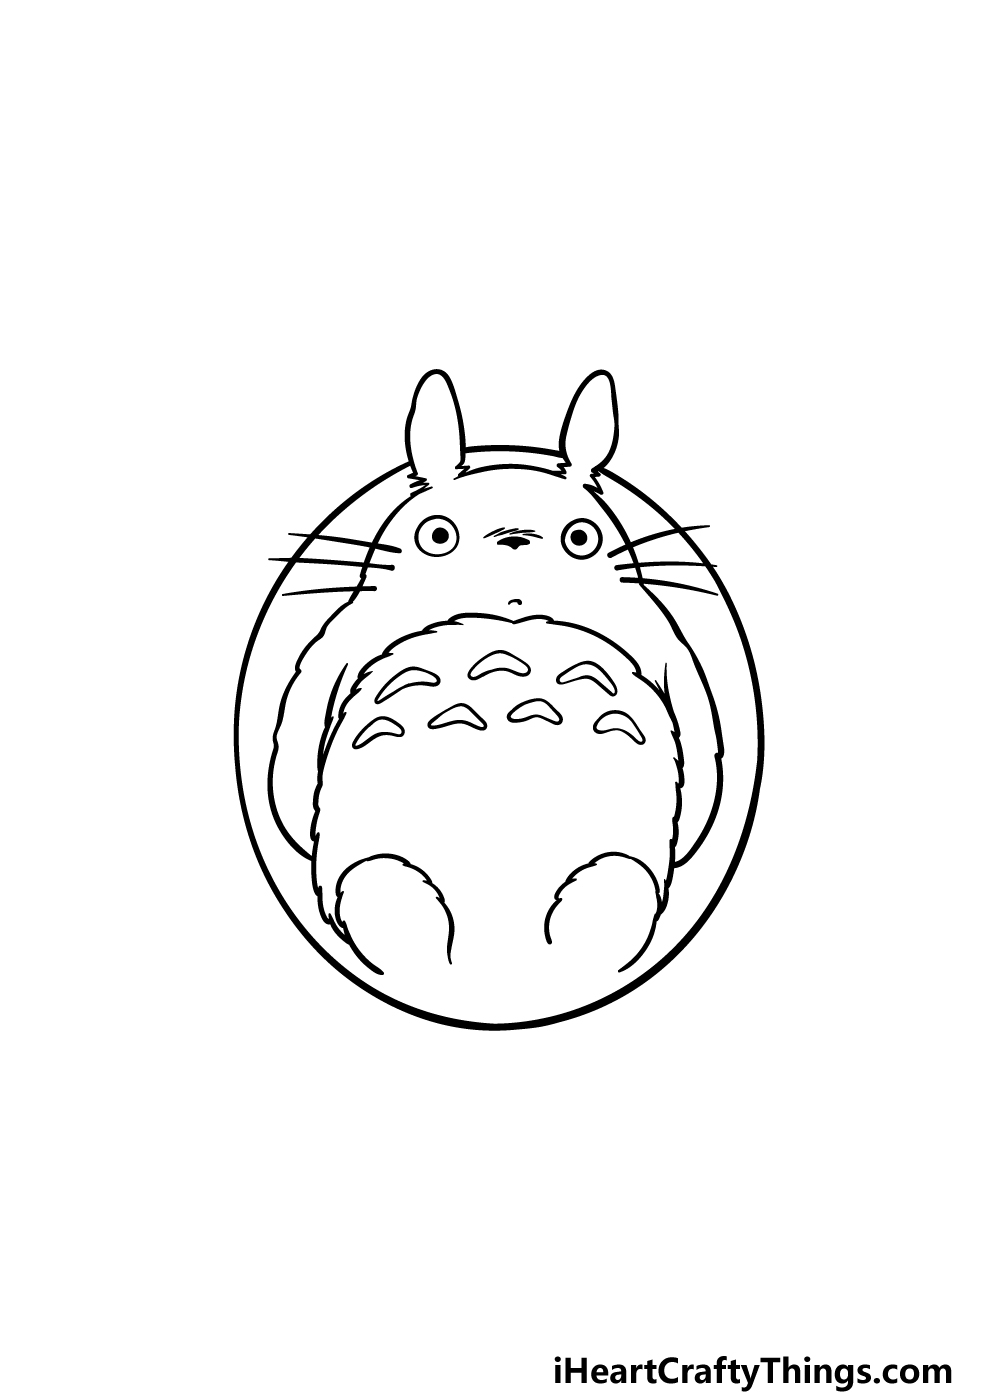
Your Totoro drawing is already starting to take shape! We will take it even further in this fourth step by drawing some details along with his legs.
First, you can draw another bumpy line similar to the ones you drew for his belly and arms across the top of his belly.
Then, we will be drawing some curved shapes underneath this line. These shapes will be small and almost boomerang-shaped, and there will be three on top with four below them.
Then, add two rounded shapes at the base of his body using that bumpy line again for the tops of his legs. We will finish off the legs along with some final details in the next part!
Step 5 – Add some final details to your Totoro drawing
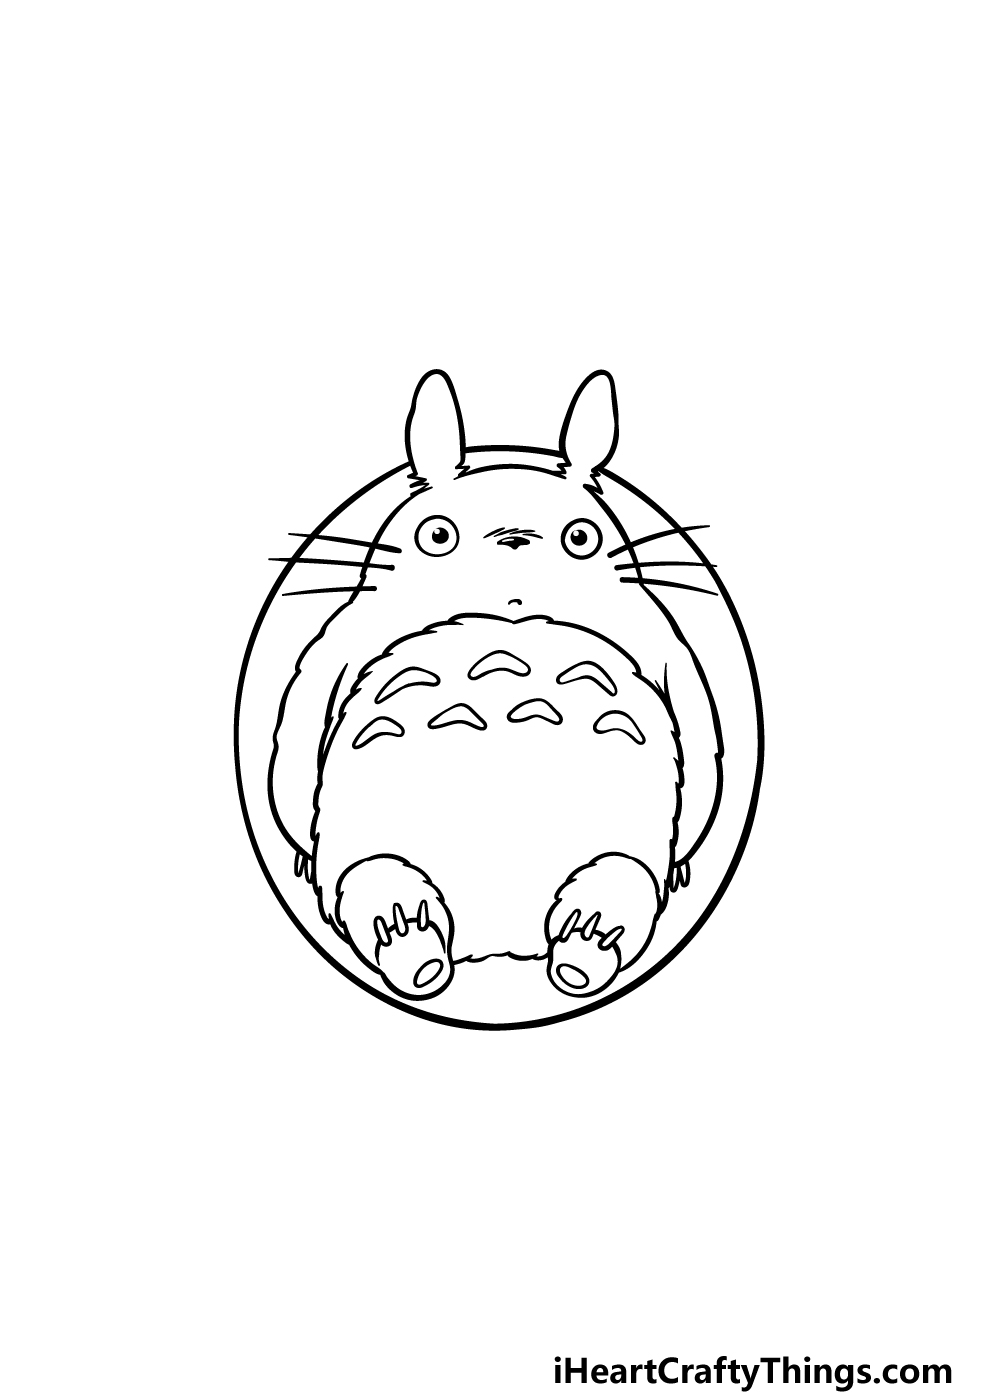
For this fifth step of our guide on how to draw Totoro we will be completing the image by adding his little feet beneath his legs.
The feet will be drawn with some rounded lines beneath the legs, and then we will draw three sharp claws onto each one.
Additionally, we will draw some rounded shapes at the bottom of each foot for some padding.
You can then finish off by drawing some claws at the ends of his arms, and then you’re ready for the final step! Before you move on, you could add some extra details to the image to really finish it off.
Maybe you could draw some more characters from the film or a background featuring elements from it. How will you complete this drawing?
Step 6 – Finish off your Totoro drawing with some color
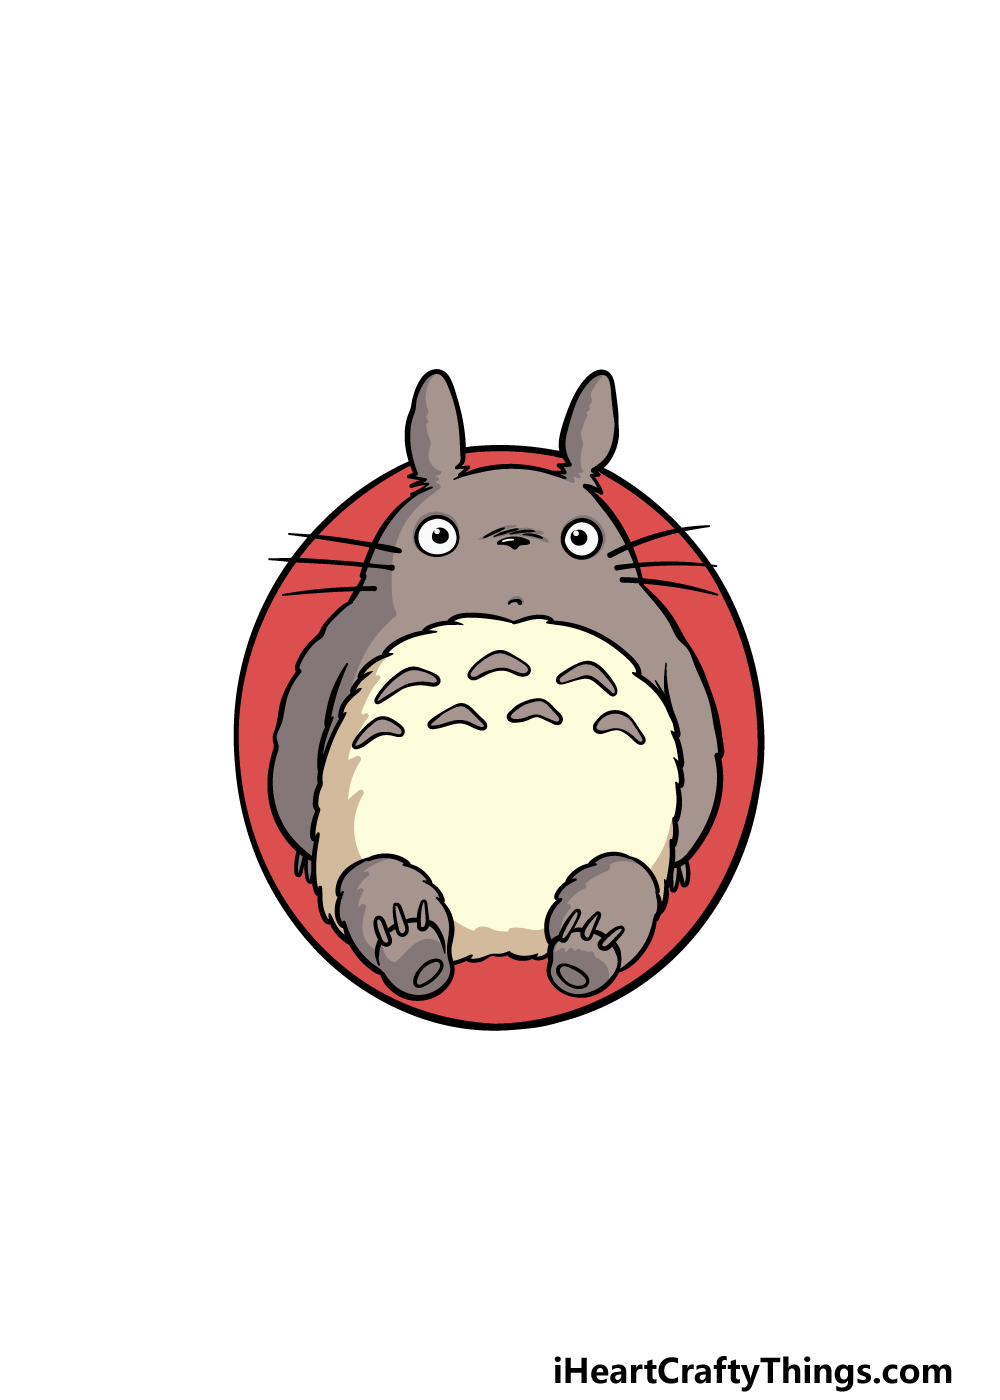
Now it’s time to complete your Totoro drawing by finishing it off with some great colors! In our reference image we went with the colors that Totoro is seen with in the film.
That means that we used some greys and browns for most of his body, and then we used some mild yellow for his belly.
We finished off by coloring the oval shape around him in a lovely rich red color for some contrast. Will you use these colors or will you switch it up with your own color choices?
We will look forward to seeing which colors and mediums you decide on!
Here’s how you can make your Totoro drawing even better…
Celebrate this iconic character with these tips for your Totoro sketch!
This drawing of Totoro shows the iconic character on his own. There are many other memorable characters from the movie, and they could be added to the scene as well!
Perhaps the most obvious example would be to add the little girl, Mei, who befriends Totoro. If you have some other favorite characters from the movie, then you can add them!
Which characters from the My Neighbor Totoro film would you like to be a part of this picture you have created?
When adding characters to this image, you don’t need to stick to the film that Totoro is from. You could add some characters from other Studio Ghibli films that you love, for example!
You also don’t need to stick to just anime characters, as you could also incorporate characters from Disney films, for example.
The only limit here is your imagination, so be sure to include any characters you love!
What are some characters from other media you would like Totoro to meet?
Once you have decided on the characters you would or would not like to have in this Totoro drawing, you could also add some other accessories and items.
One of the most iconic images of the film is of Totoro standing with an umbrella in the rain. This would be a wonderful accessory to add to the image!
That is just one idea, but you could add any other items from your favorite scenes from the movie. If you can’t decide, then you could draw a few different variations!
Finally, perhaps the best way to recreate your favorite scenes would be to add a background to your Totoro sketch. Let’s go back to the example of Totoro with his umbrella.
If you wanted to take that even further, then you could draw the bus stop he is at in that scene. That would be one idea, but another would be to show the famous Catbus in the background!
Your Totoro Drawing is Complete!
This is such a beloved and adorable character from an equally beloved film, and we hope that you had a great time learning to draw him in this guide on how to draw Totoro!
In this guide, we aimed to make sure that drawing him would be fun and easy, and we also wanted to leave room for your own creative touches.
Adding details and a background are one way to personalize this drawing, but you could also change up the colors and experiment with different art mediums.
As long as you allow yourself to have fun then you will certainly end up with something great!
We have more drawing guides on our website, and many of them feature other beloved characters! You’ll want to keep checking in, as we upload new ones frequently.
It would be great to see how your Totoro drawing turned out, so please share it on our Facebook and Pinterest pages for us to see!