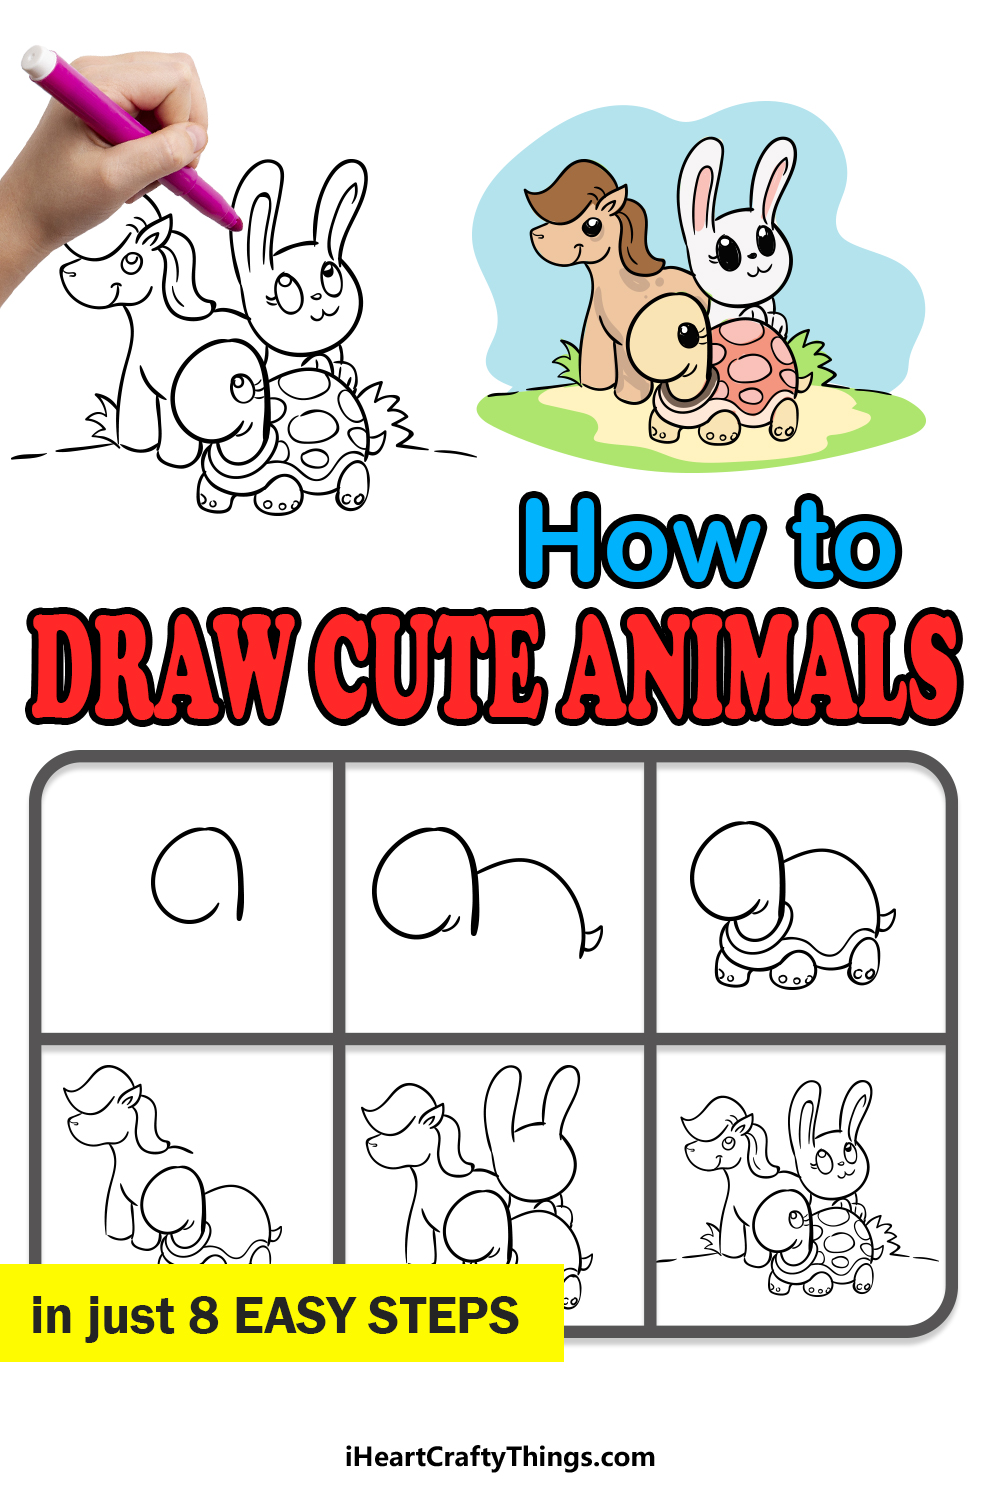
If you want to learn how to draw cute animals, then this guide for kids was made for you! In just a few steps you will discover just how fun and easy it can be when you have the right steps.
The design we will be working on together has a trio of a bunny, a pony and a tortoise. It’s impossible to decide which one of them is the cutest, so we will call it a tie!
If you think that this picture will be too difficult to draw, then you don’t need to worry as I will be breaking it down into simple steps that you can follow. By the end of it, you will easily be able to draw these three adorable characters!
You could even add a few more friends to join them once you have the hang of drawing in this style. It’s all happening in this guide, so let’s work through it together.
Watch And Find Out How To Make A Cute Animals Drawing
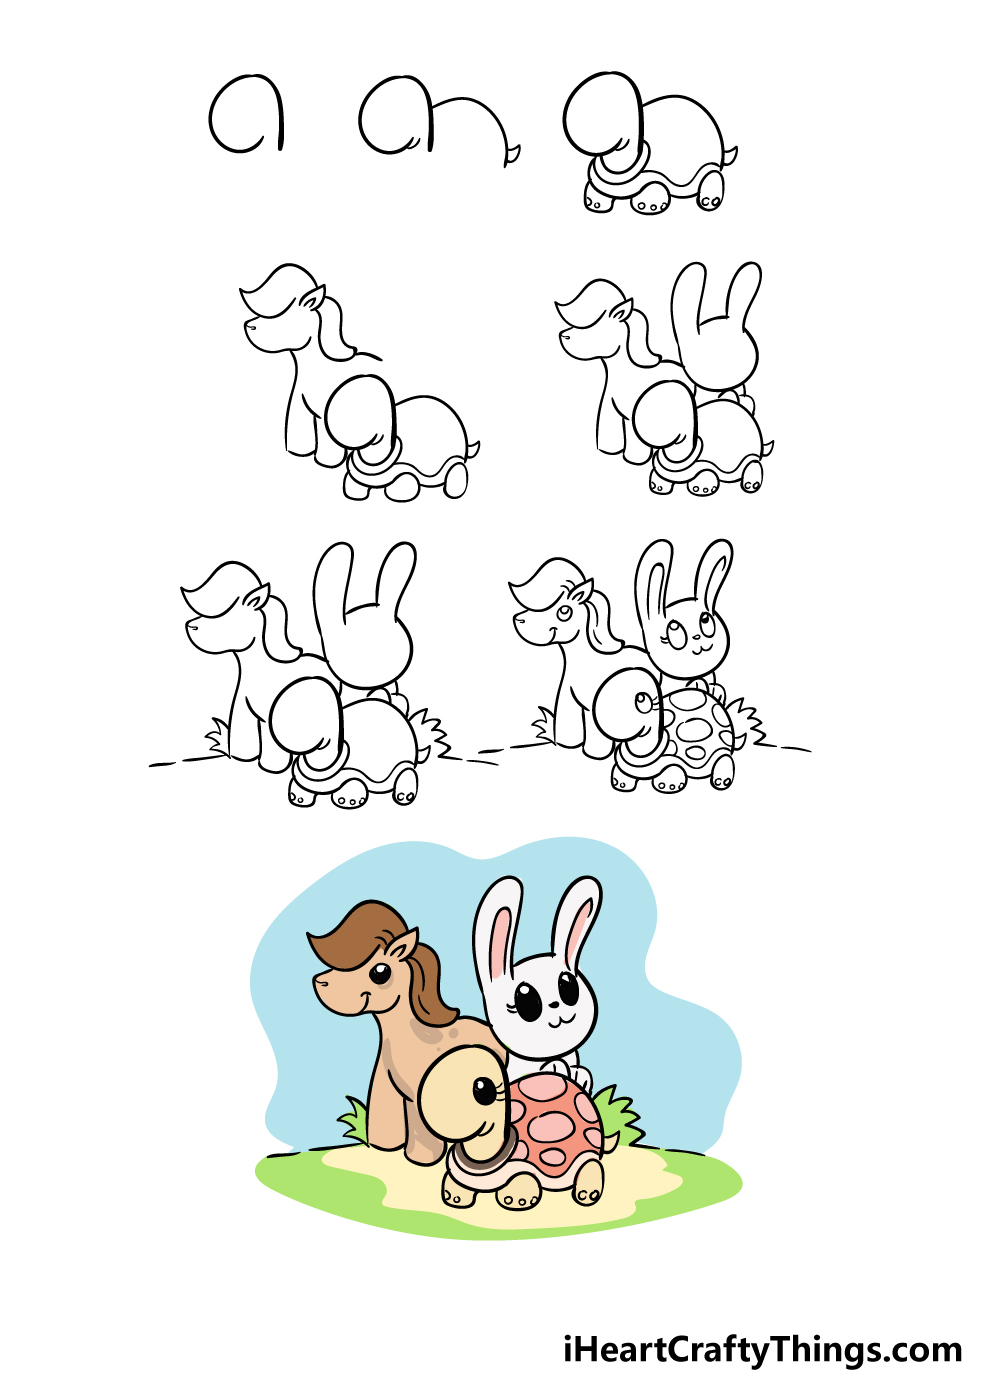
How to Draw Cute Animals – Let’s get Started!
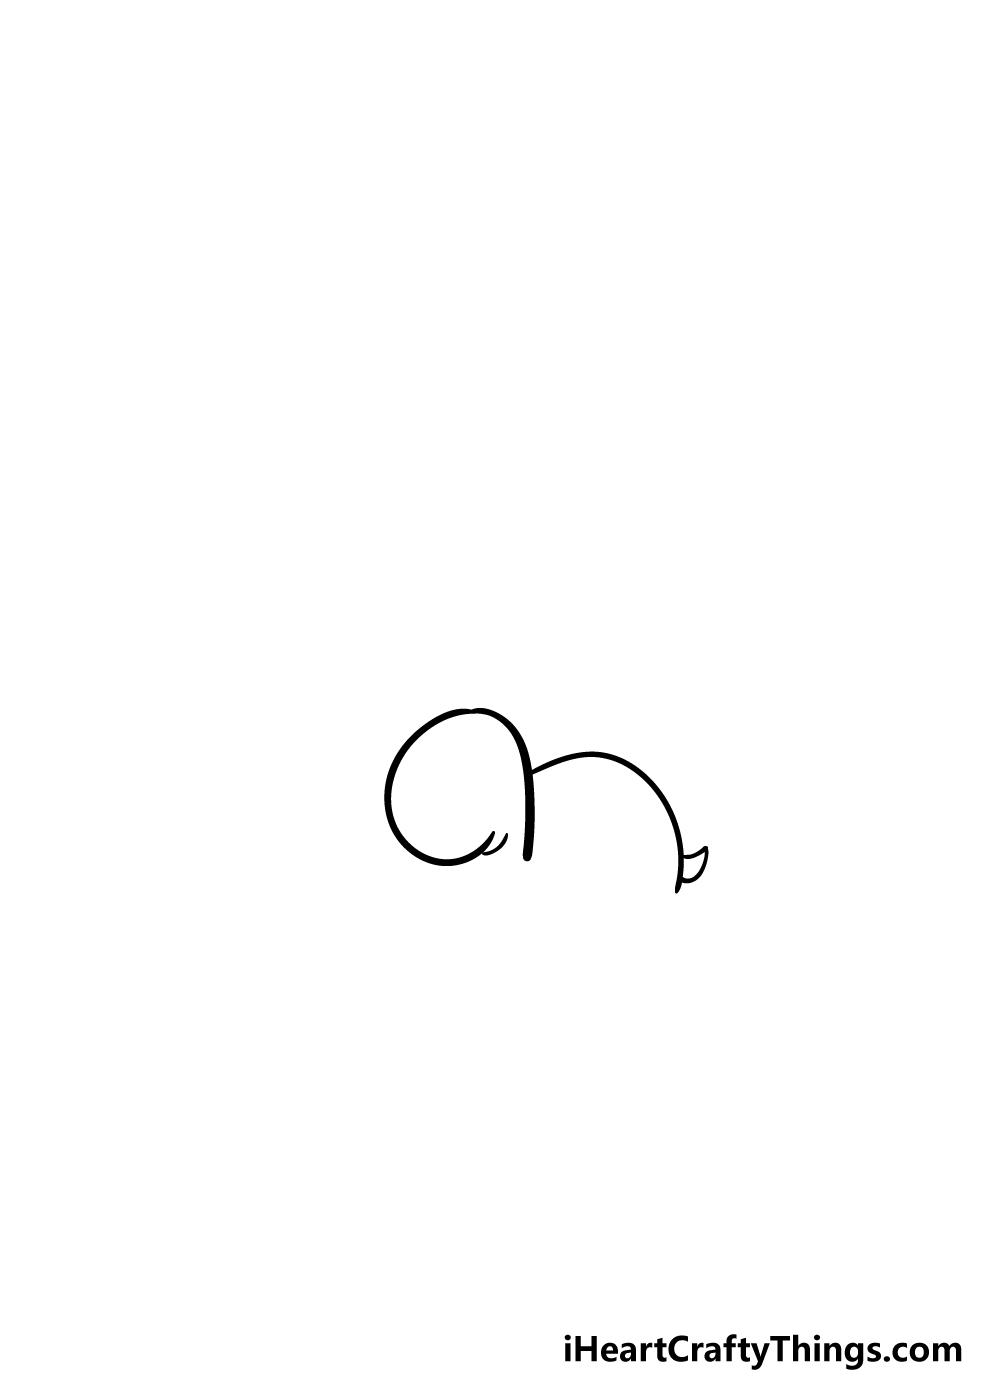
Step 1

As we mentioned previously, in this guide on how to draw cute animals we shall be creating three cute critters.
We shall be starting with the turtle, as this little guy will be standing in front of the others.
We shall start simply for this one, and all you need to do is draw a line going up that curves and rounds to the left to create his little head.
Once you have that drawn, we shall start to draw his body in the next step.
Step 2 – Start to draw the shell
Now that you have the outline of the head started, we can begin to draw the shell for this part of your cute animals drawing.
Starting from near the top of the head, draw a curved line going left to form the top of the shell.
Then, there shall be a tiny tail near the end of this line. Finally, draw a small line underneath the chin of your animals drawing to create a bit more detail.
Step 3 – Finish off the body of the turtle
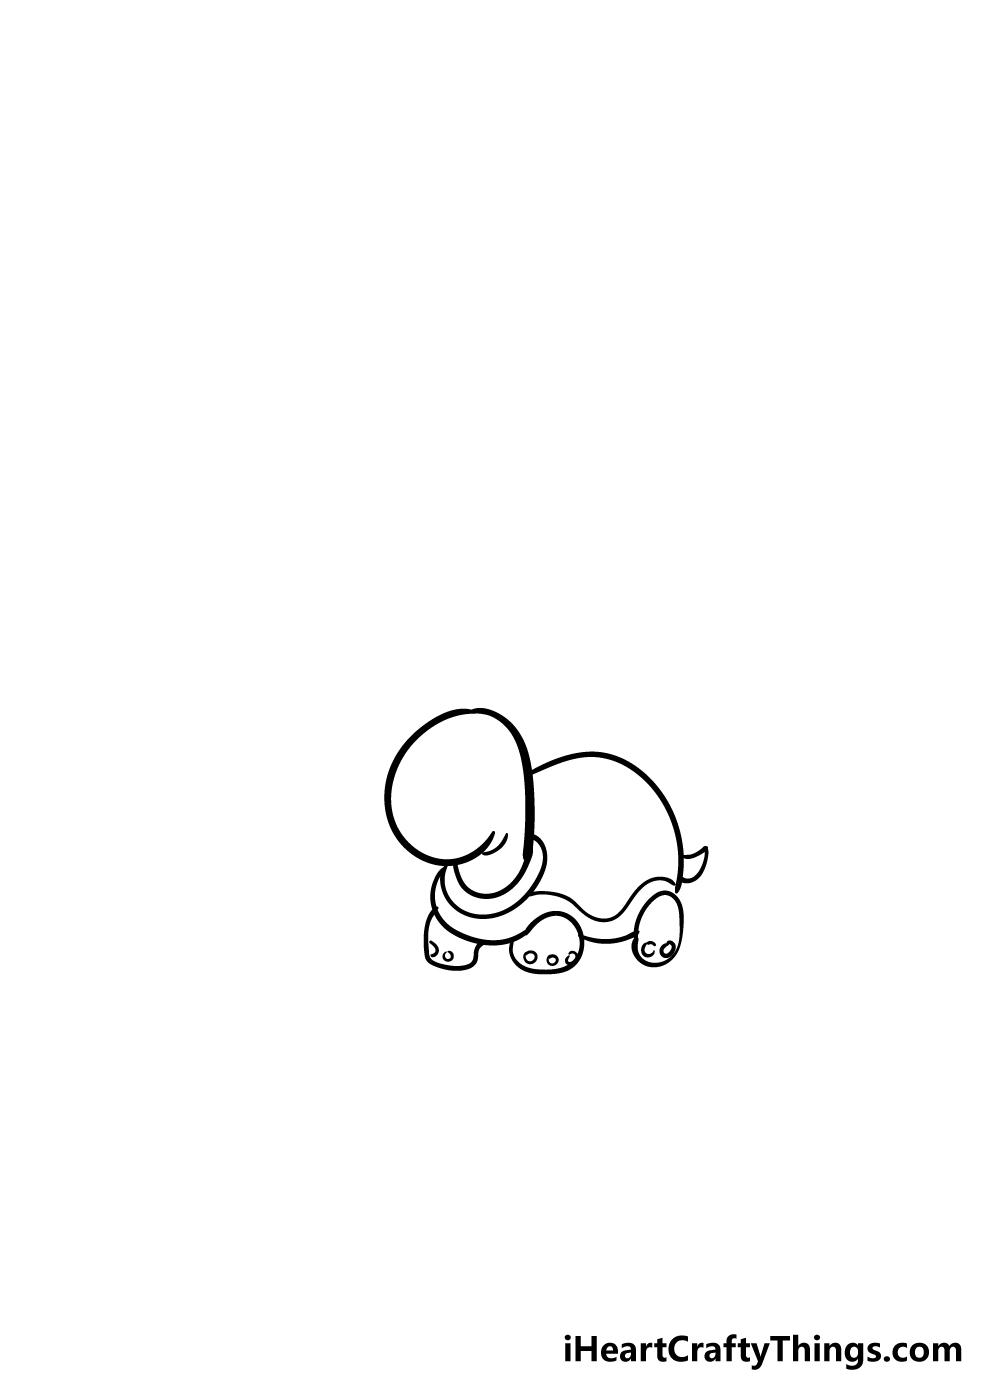
We will complete most of the turtle in this next step of our guide on how to draw cute animals.
Firstly, draw a line across the bottom of the neck, and then draw a thin oval around that to create the neck hole of the shell.
Then, use some wavy lines going horizontally to create the rim of the shell.
This turtle has some cute, stubby little legs, so you can use some flat circle-like shapes for the legs, and then add three small circles to the bottom of each for the nails.
Step 4 – Next, draw the pony
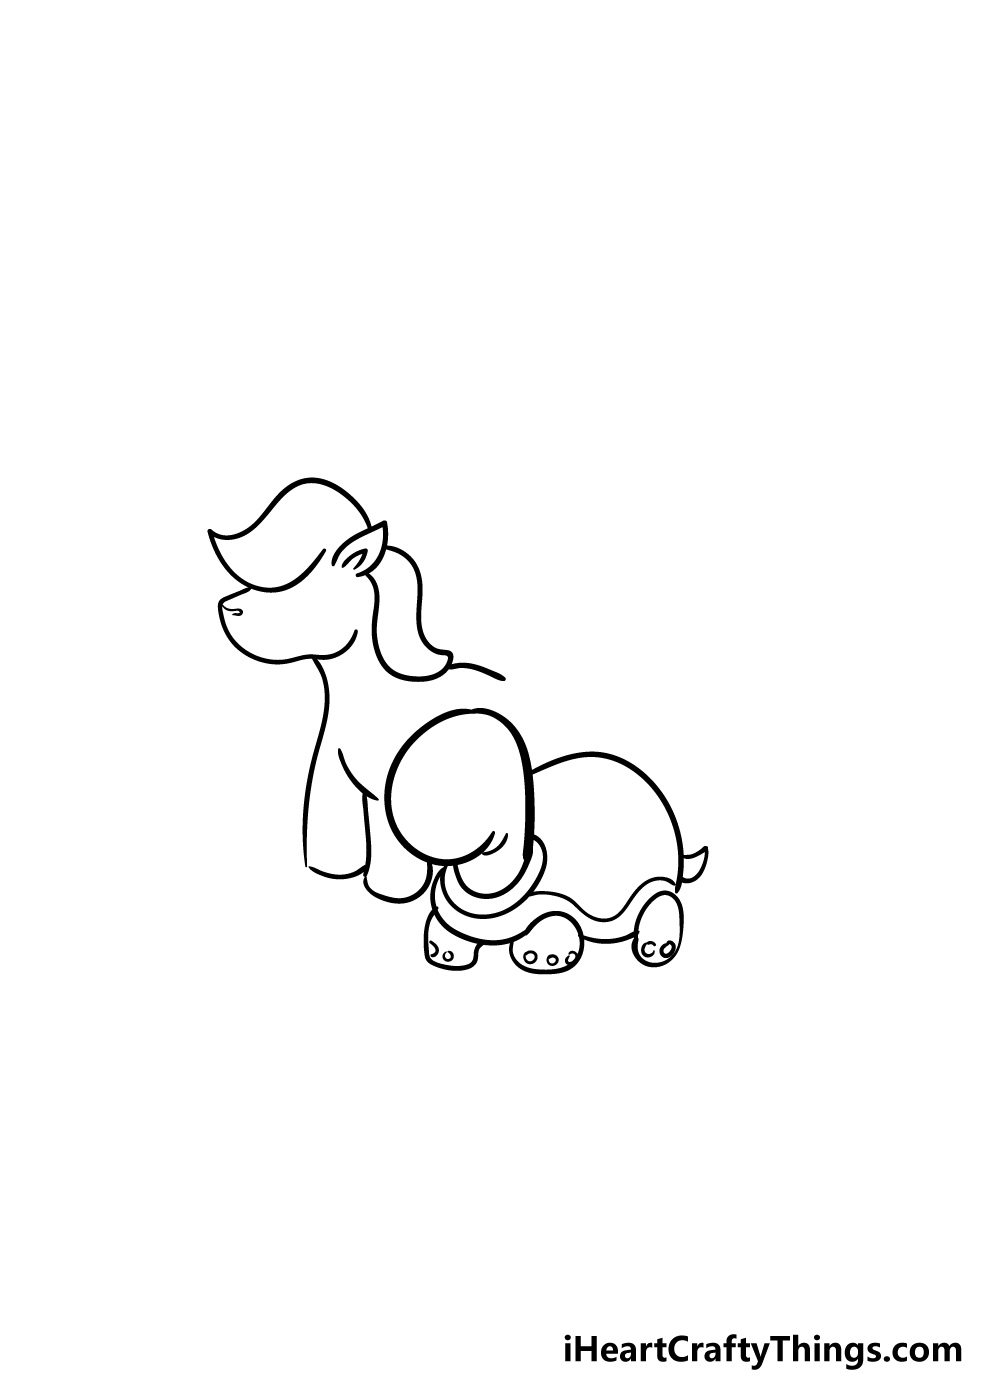
Let’s leave the final details of the turtle for now, and start on the pony. This is a step where you will definitely want to refer closely to the reference image for help!
Don’t be afraid to take it slow on this step of your cute animals drawing. The pony will be behind the turtle and pointing out to the left.
Carefully draw the mane of the pony while being sure to have the ear pointing out. Drawing with a pencil first could be very helpful in getting the layering looking correct!
Once you’re happy with it, you can always go over it with your pen.
Once you have the mane, you can draw in the face shape, and then have some straight lines coming don from the face for the legs.
Once you’re happy with the pony, we shall move on to the bunny!
Step 5 – Now, draw the bunny

In this step of our guide on how to draw cute animals, we shall add the adorable bunny! You can draw the head of the bunny directly over the shell of the turtle.
It will have a round, circular base, but you can use two curved lines at the top for the ears. You can then use some simple lines for the neck and paws of the bunny.
Step 6 – Draw a base for your cute animals drawing
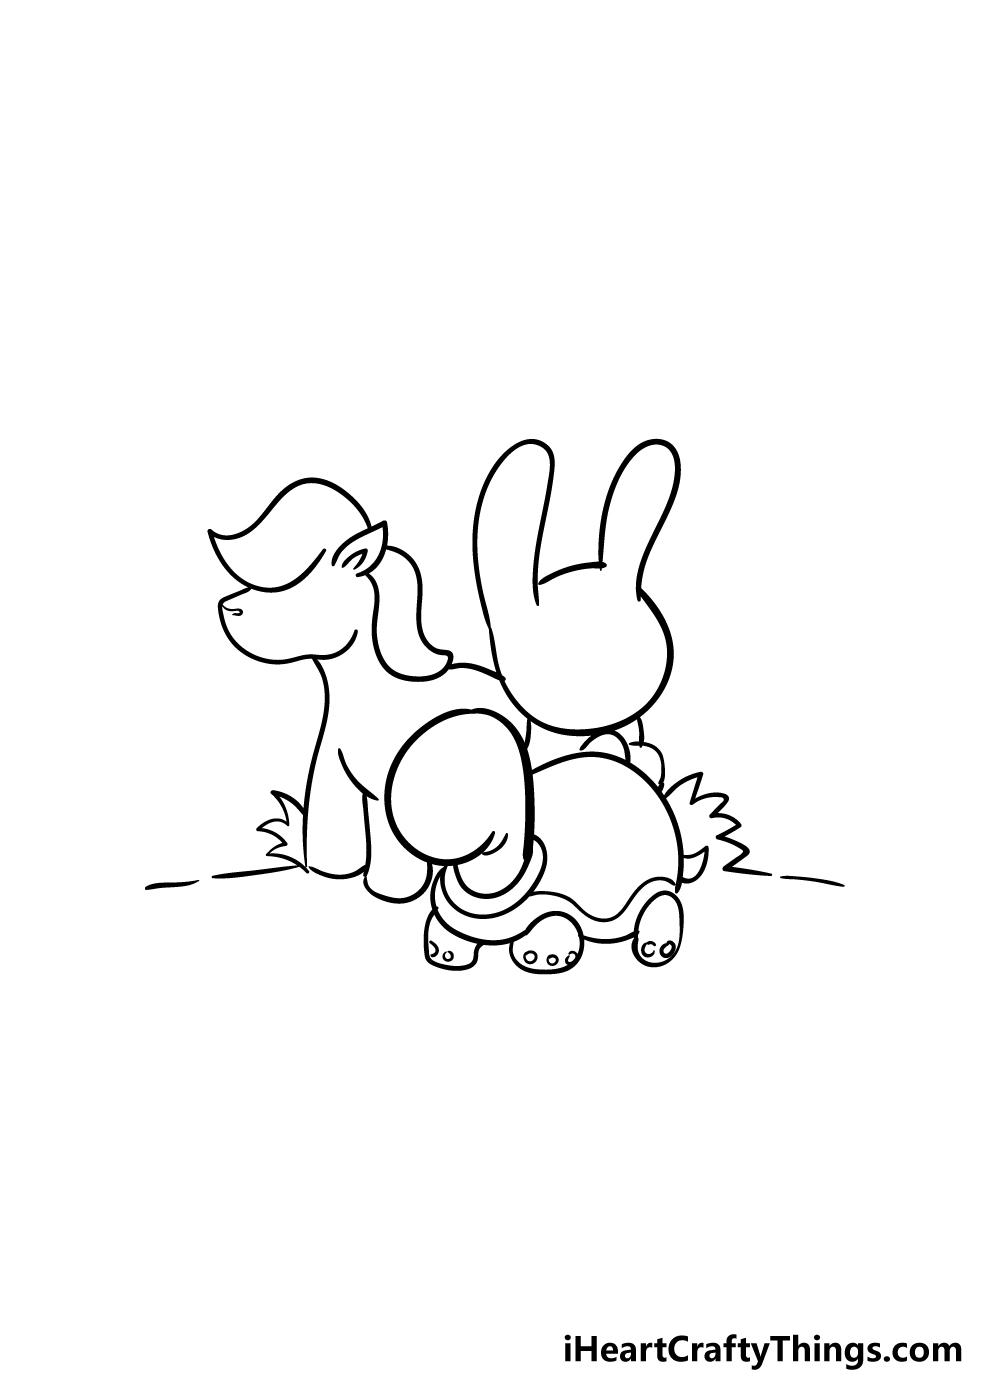
In our cute animals drawing, we created a simple, grassy base for the adorable trio. You can create this look using a mixture of straight lines for the ground along with jagged lines for some grass.
This is a step where you can also add some details and a background of your own! Perhaps these animal friends are in a mystical forest or in a beautiful garden.
What kind of settings do you think would suit these cuties?
Step 7 – Finish off the final details
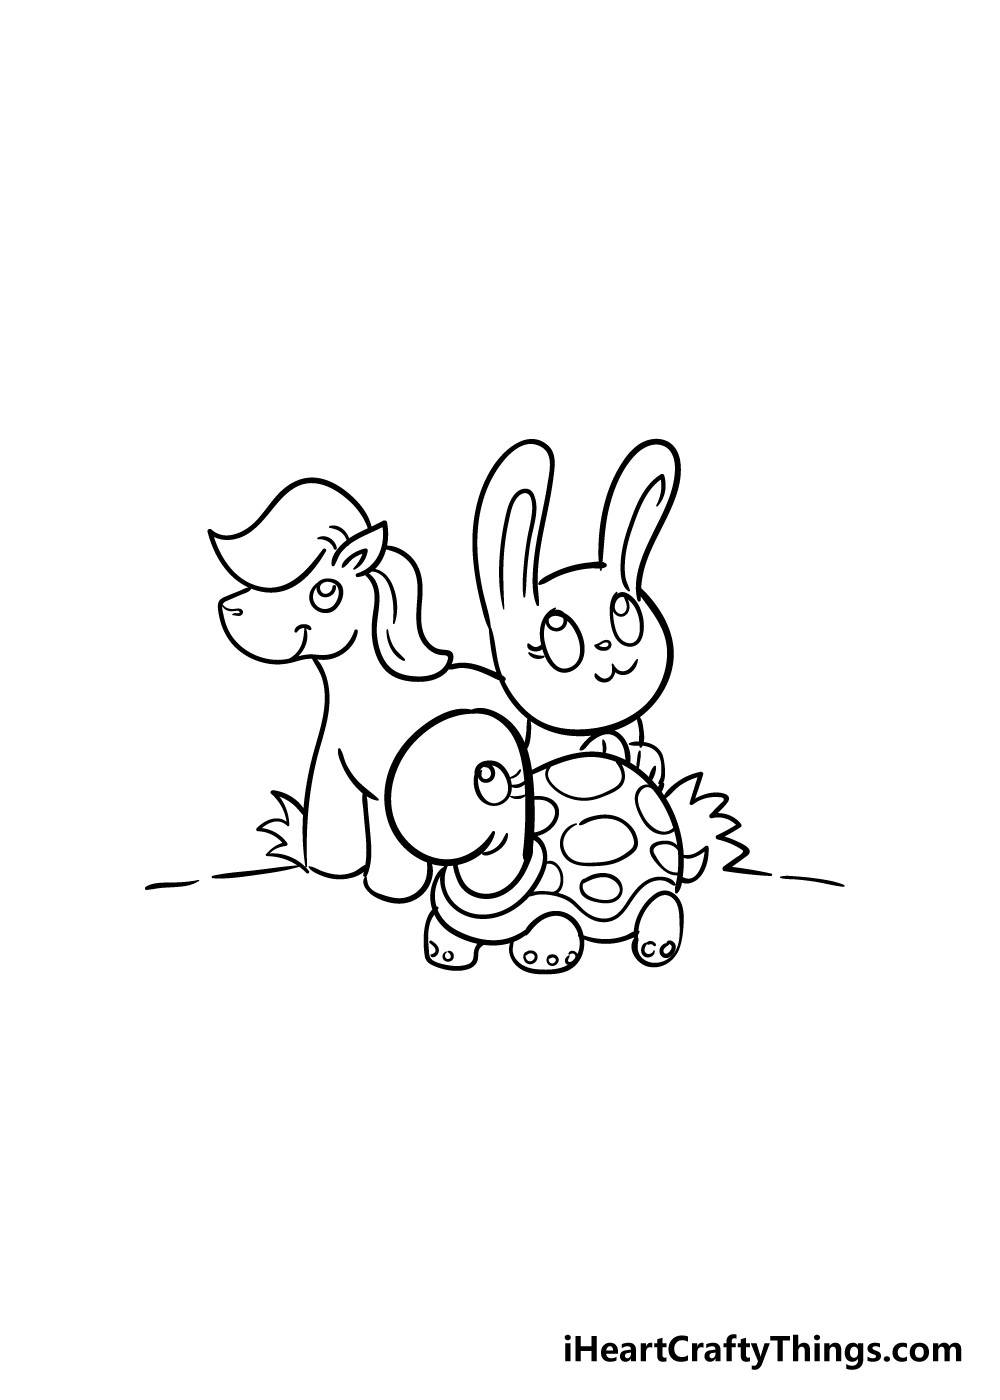
These adorable animals are almost done now, and they just need a few more details to have them ready for coloring! The main thing to add is some facial details.
You can give them some eyes using some rounded circles or ovals with a smaller circle within them.
Then, you can give each animal buddy a smiling mouth using a curved line on each face.
Don’t forget to add some details such as circles on the turtle’s shell and some lines to the hair of the pony to really finish it off!
Step 8 – Now finish off your cute animals drawing with some color
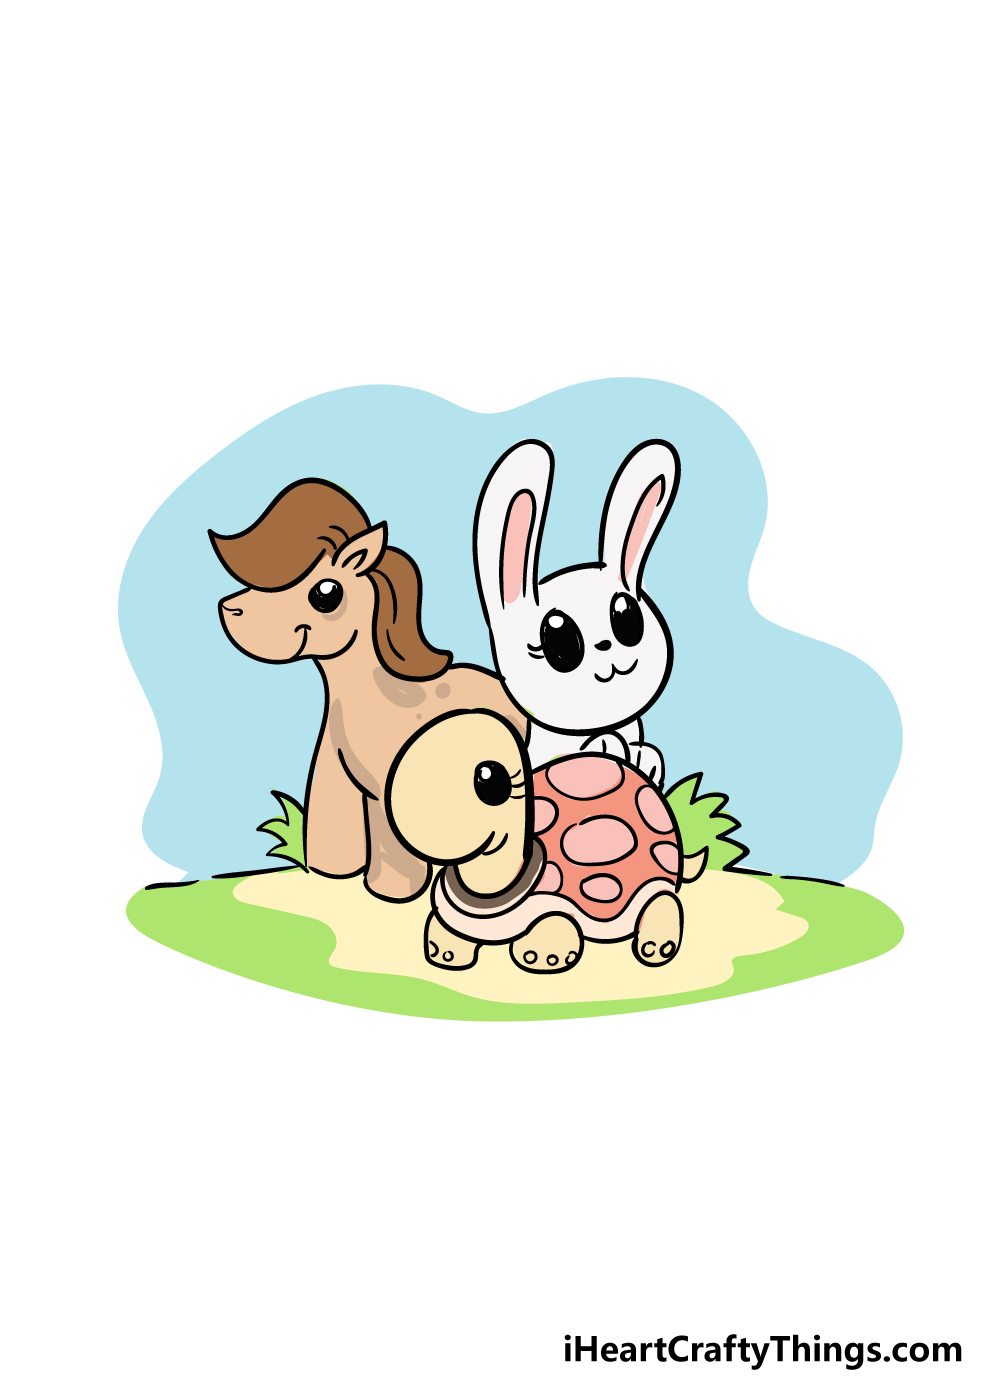
Now that all three of your animal pals are drawn, it’s time to have some fun with color!
We showed you how we would color ours in, but for this step of this guide on how to draw cute animals you should let your creativity flow and use any colors that you love!
Will you use musted and realistic colors, or will you go bright and beautiful by using mediums such as acrylic paints, colored pens and markers?
It’s all up to you now, and no matter what you choose I know it will look adorable and beautiful!
Bonus: Try These Unique Ways To Present Your Drawing!
You did an amazing job on this drawing of cute animals, and you should be very proud of your artwork! However, now that you have finished it, you may be wondering what to do with it.
We have a few ideas for some cool ways you could present your artwork. Our first suggestion is a simple one, yet one that is classic.
What do galleries do with the art they display? They will typically frame them, and that is something you could do for your artwork.
You can find frames at framing stores and some art supply stores as well, and you can surely find one that is the right size for your drawing. Often, these frames are rather inexpensive too.
This simple display option can elevate your amazing artwork even further! When you have finished your drawing of cute animals, you may want to share it with a friend or family member.
There are a few ways that you could present your drawing as a gift. One would be to turn it into a card, perhaps for a birthday or similar occasion.
By simply drawing the design on some cardboard and then folding it over, you could add some text and other elements that will make it more personalized to whoever receives it.
If you drew this design on a large piece of paper or cardboard and really went to town with the details, colors and art mediums you use, then it would make a great gift as a poster.
Scanning your drawing and making prints would be a good way to give it to multiple people as well. These are some simple ideas, but how else could you present your adorable artwork?
5 Tips To Make Your Cute Animals Drawing Even Better!
Create an even more adorable artwork with these 5 fun and easy tips!
One way to make this cute animals drawing even better would be to add some accessories and extra details.
These could be as simple as adding cute hats or glasses, but you could also add a carrot or some fruit.
These are just a few ideas for some fun accessories to add, but we’re sure that you can think of many more to add.
Next, you could really take this cute animals sketch to the next level by adding a background. There are so many wonderful settings you could create to match the cute design of this drawing.
They could be hanging out in a magic forest or maybe at an animal carnival. It’s up to you to decide, and there are no limits to the settings you can create!
You can also change some of the details of this drawing to make it even more unique. These could be simple, such as changing the facial expressions of the animals.
Or, you could add different patterns onto the animals or maybe make them look like they are stuffed animals. There are so many ways to have a fun time getting creative, so what ideas do you have?
Using your colors and art mediums can also help to create a wonderfully unique drawing of cute animals. We spoke of a few colors and techniques you can use and even gave you an example in the guide.
These are just suggestions, however, and there are so many great alternatives you could go for! Don’t be shy to use some unusual art tools and mediums as you color, as the more unique the better.
Now that you have completed this cute animals drawing, you can keep the fun going! You can do this by taking what you learned in the guide and add more animals to hang out with this trio.
You could use any animals that you love and then portray them in a similarly adorable style to go with these ones.
Your Cute Animals Drawing is Complete!
Hopefully you had an amazing time creating these new animal friends alongside us in this guide on how to draw cute animals.
It may have seemed difficult drawing three characters in one picture at first, but we hope that by using this guide and taking it slow you found it to not only be easy but also lots of fun!
Now you can really bring these cuties to life with your own details. Will you create a background, add some more details or even draw in a few new friends for them?
These kinds of elements along with the colors and mediums you use can really help to put a unique spin on this image!
Please remember to check our website often to always catch our new step-by-step drawing guides as we upload them! We have many more coming out soon, so be sure to join in the fun.
We would also be thrilled to see your finished cute animals drawing, so please do share it on our Facebook and Pinterest pages for us to gush over!