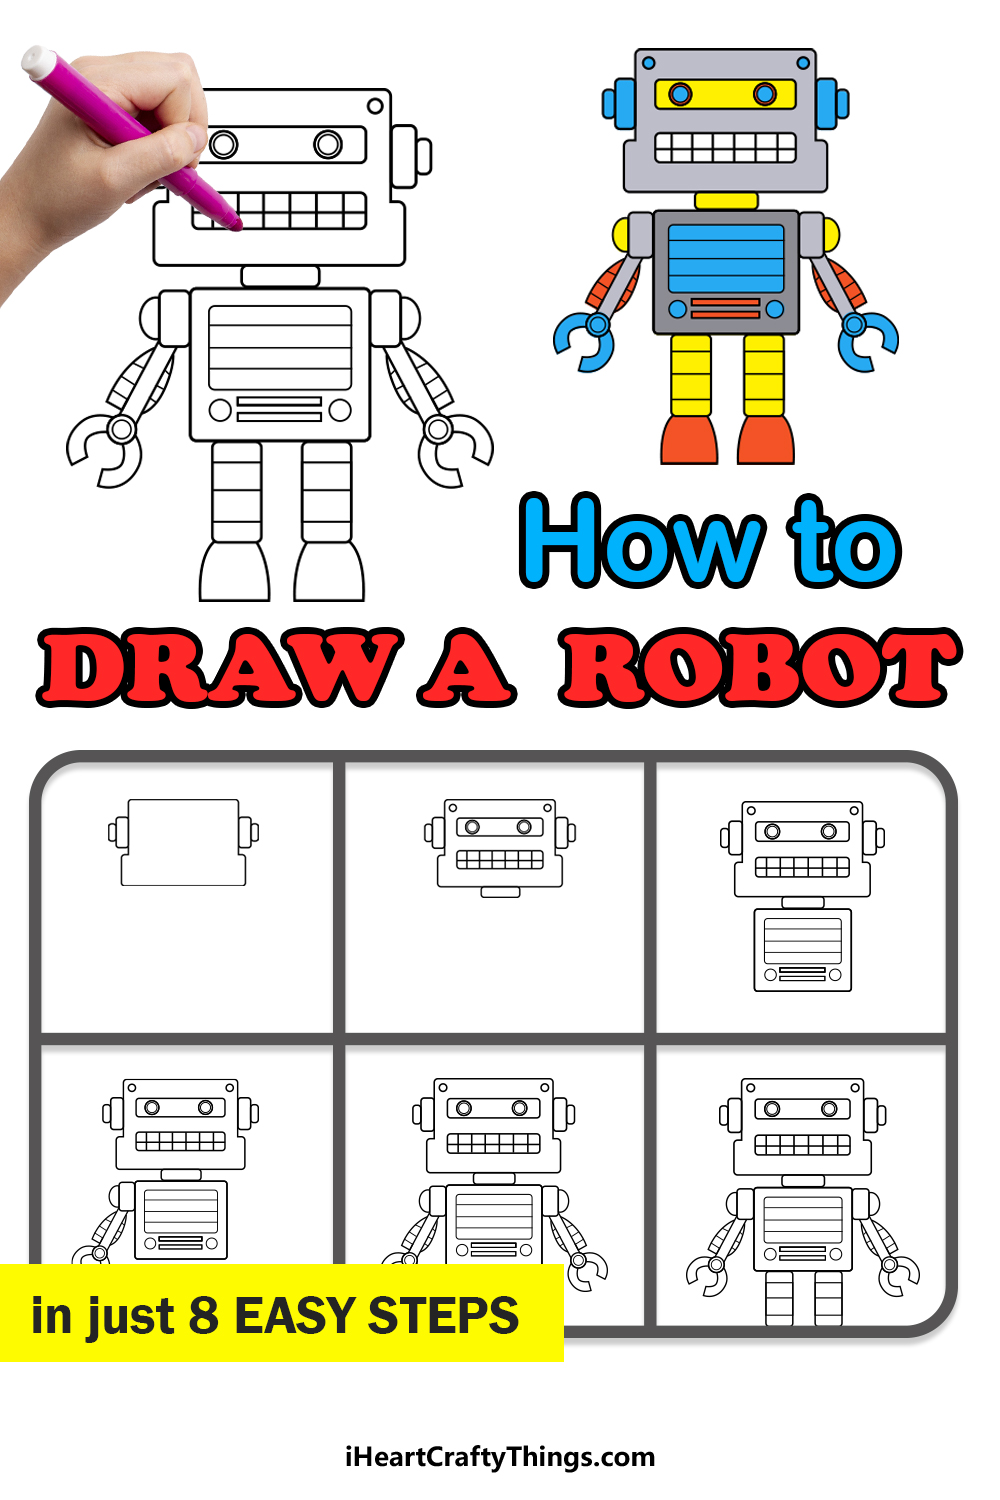
If you want to learn how to draw a robot, then this tutorial for kids is the place to be! Let’s work on this together and find out how to make a robot friend of your very own.
The dream of having functional robots in our society has been confined to science fiction for decades, but recent technological advances have made it seem more and more possible.
By drawing a robot, you can imagine what your own one would look like if it becomes possible. This guide will show you how to draw a classic robot design, but its simplicity allows you to customize it in any ways you like.
You could even design an environment and some robot accessories for the robot to access! All of these things are possible, and that’s just the beginning.
The first step is to work with me on these steps so you can find out how simple it really is.
Easily Create A Robot Drawing By Watching This Guide
How to Draw A Robot – Let’s get Started!
Step 1
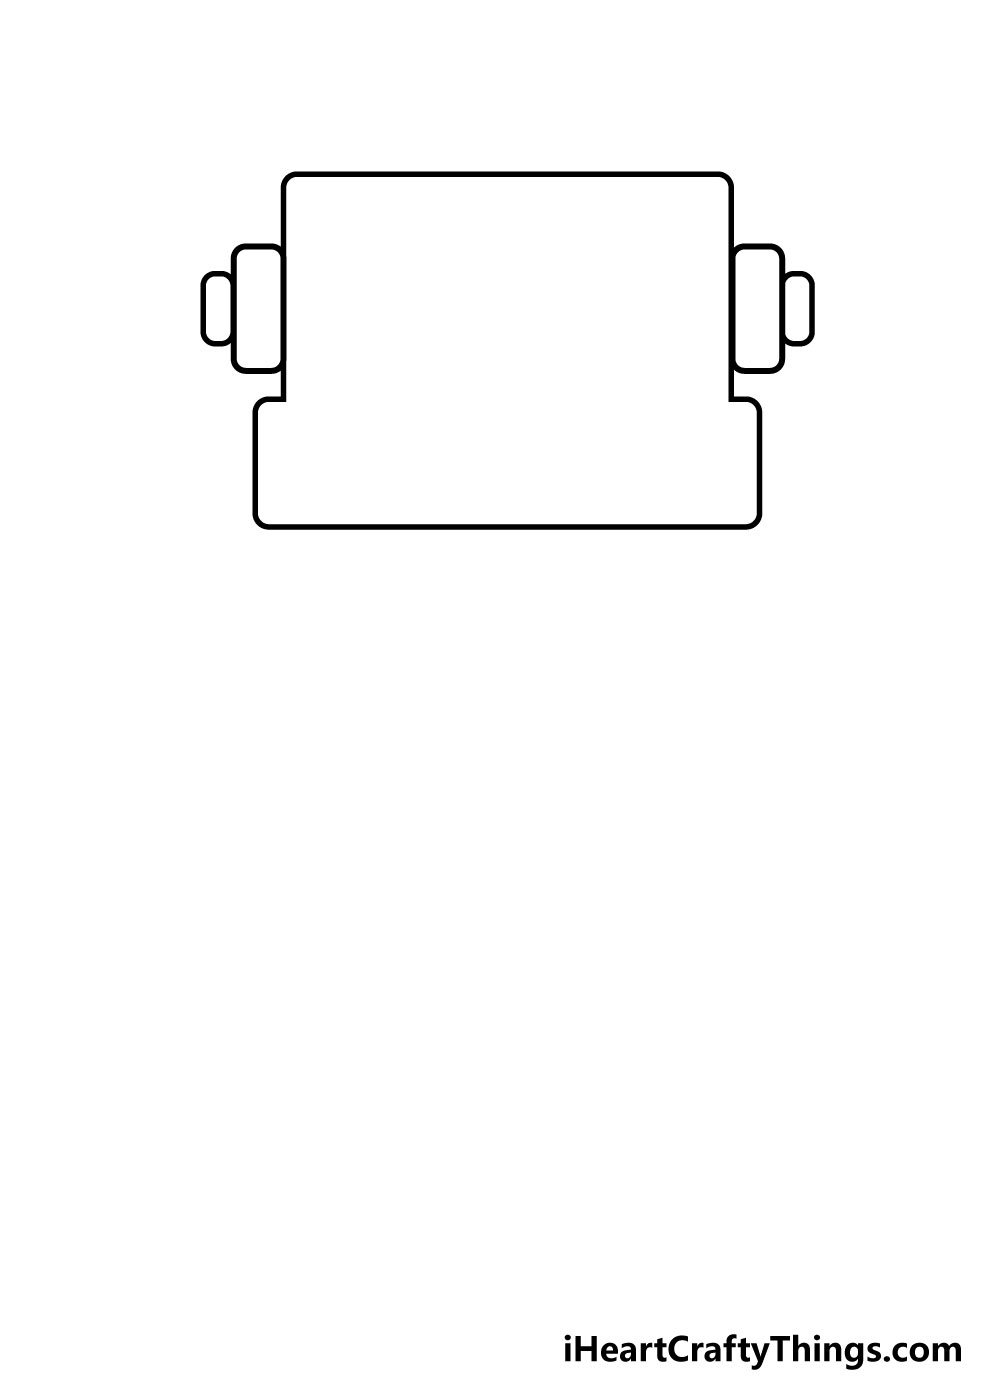
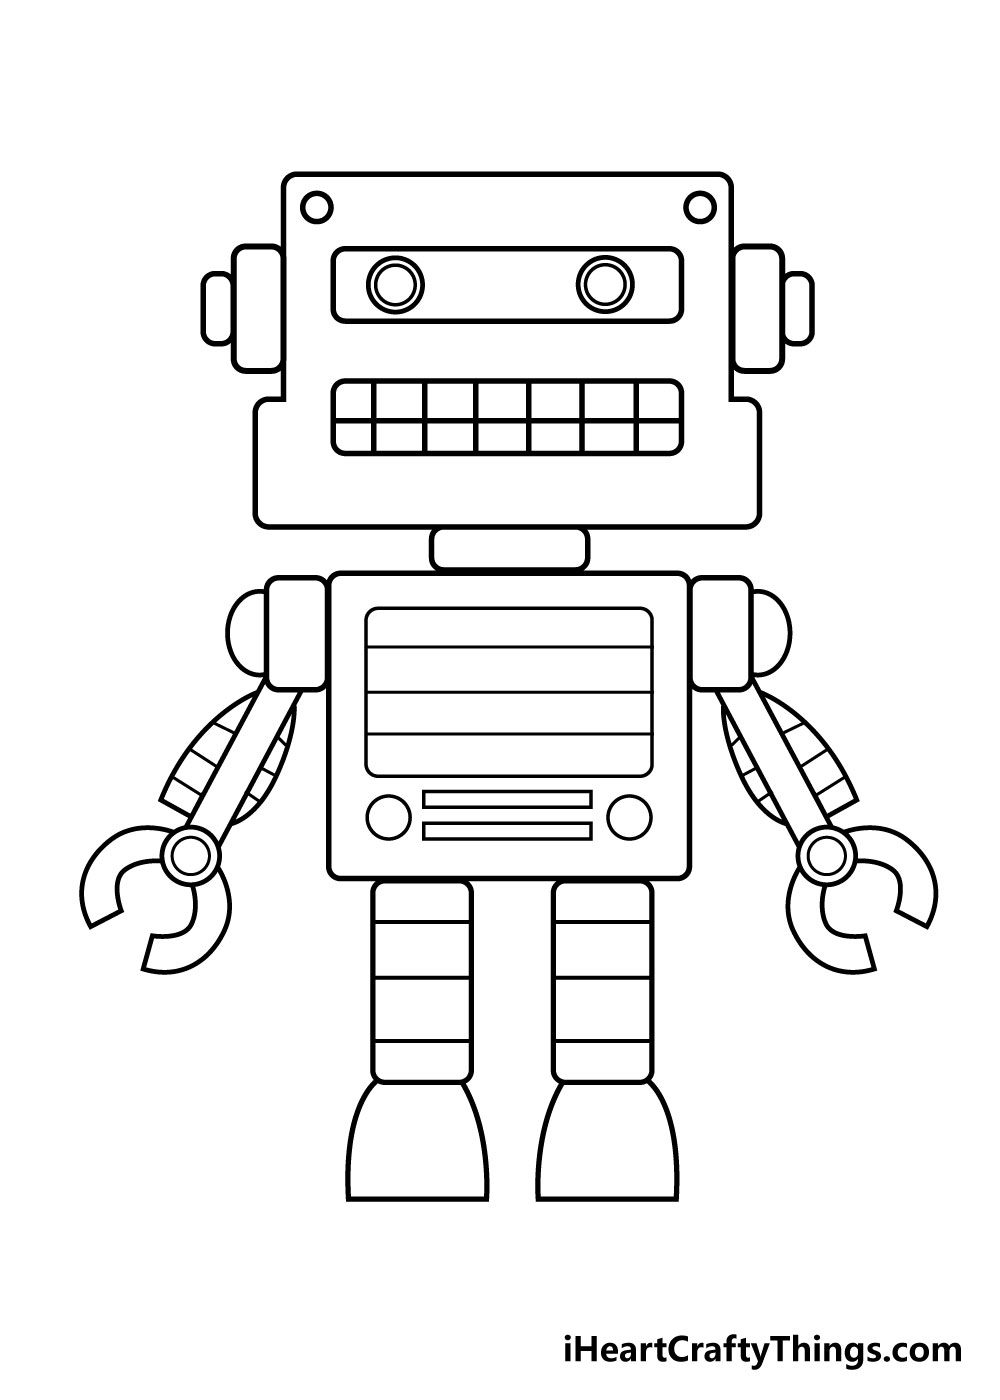
For this guide on how to draw a robot, it will be very helpful for you to have a ruler on hand, as there will be many straight lines in this drawing.
To get started, simply draw a square shape that looks like a square atop a rectangle with no line dividing them.
Then, draw two rectangles on each side of the head as they appear in the reference image.
Step 2 – Next, draw a face for your robot
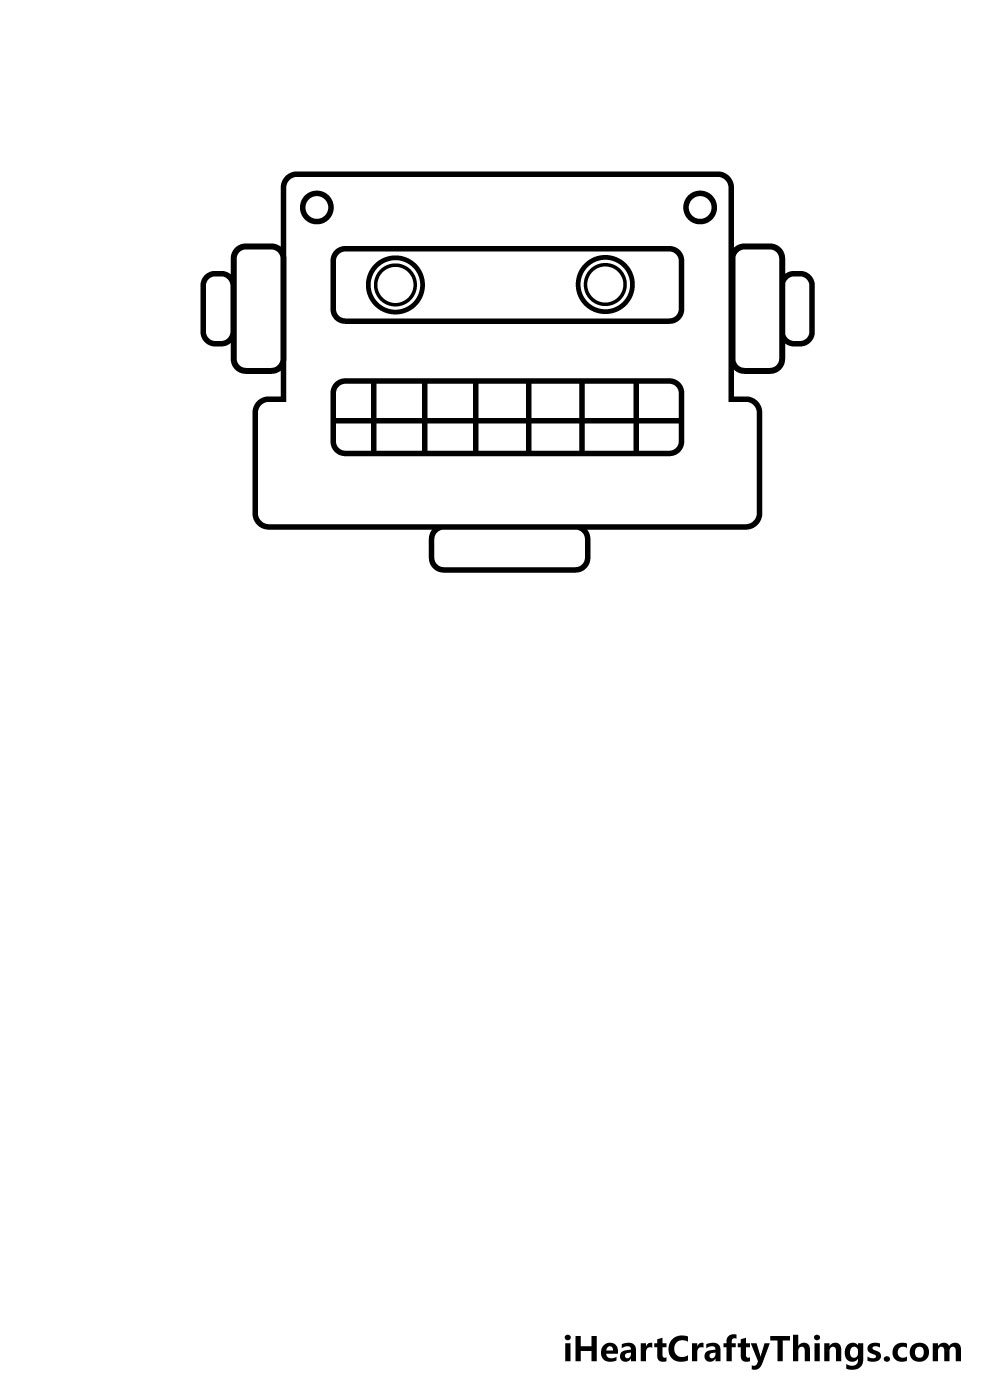
In this step of your robot drawing, we shall design a face for your robot. For the mouth, simply draw a rounded rectangle, then draw a line grid within it to make teeth that look like rows of lights or buttons.
Then, draw a rectangle above this to surround the eyes, which you can draw with some circles. You can also add some extra circles above the eye area for some extra details to really finish off this step.
Step 3 – Now, draw a body for your robot
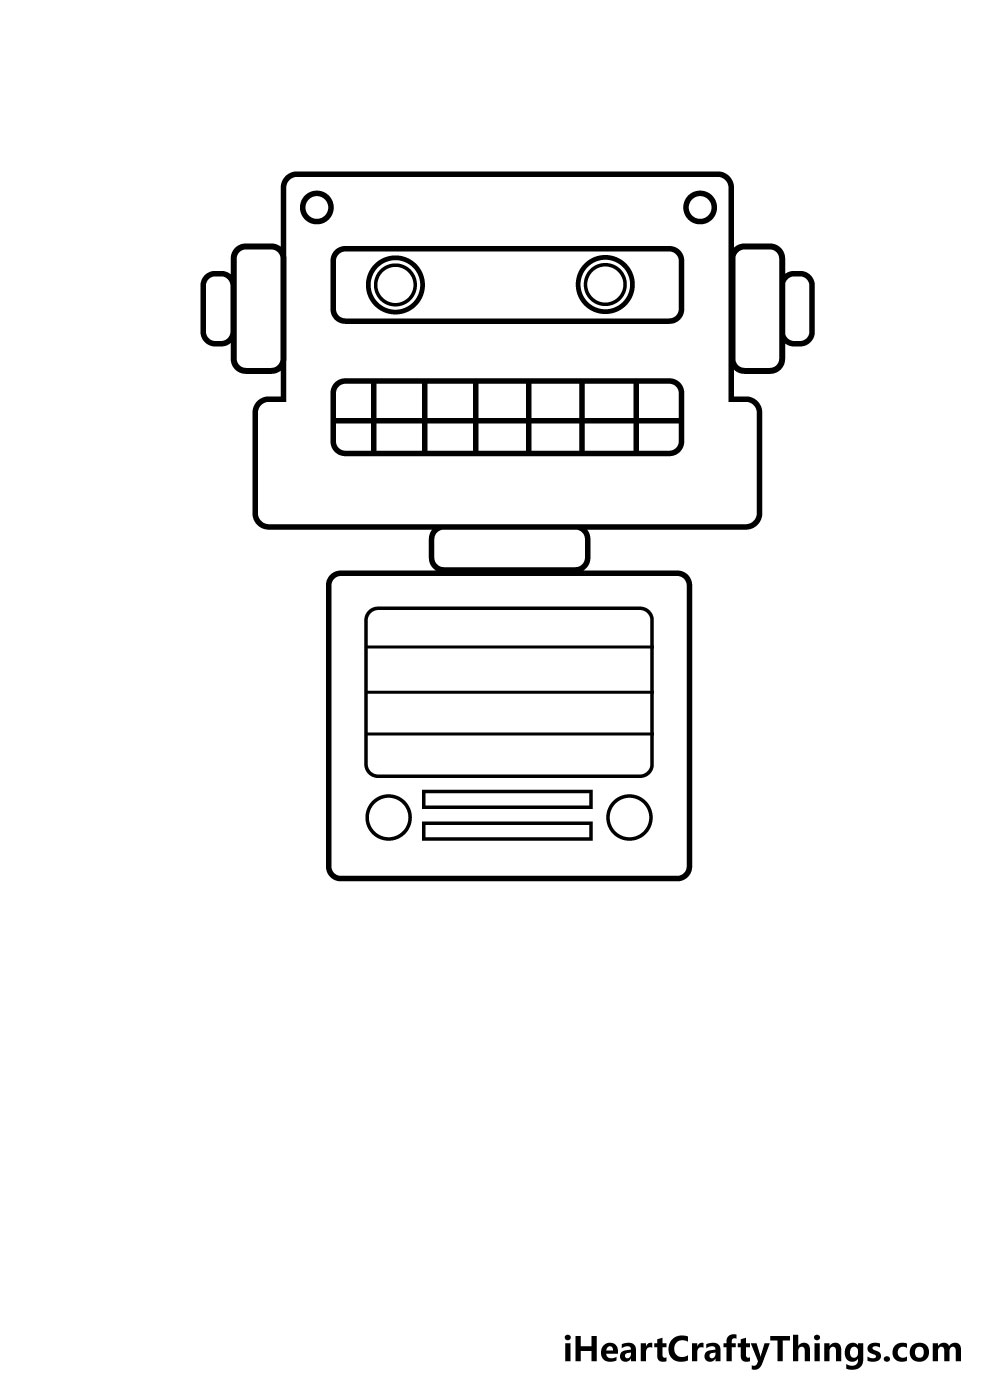
We shall draw the body for your picture in this third step of our guide on how to draw a robot. First, draw a small, flat rectangle to form the neck of your robot.
Then, you can draw a square for the body.
Once you have the outline for the body, you can draw some fun details to it. You can do this by drawing a rectangle inside the body with some lines inside of it with some circles as well.
These kinds of details will make it look like your robot is covered in lights and buttons!
Step 4 – Next, draw the first arm
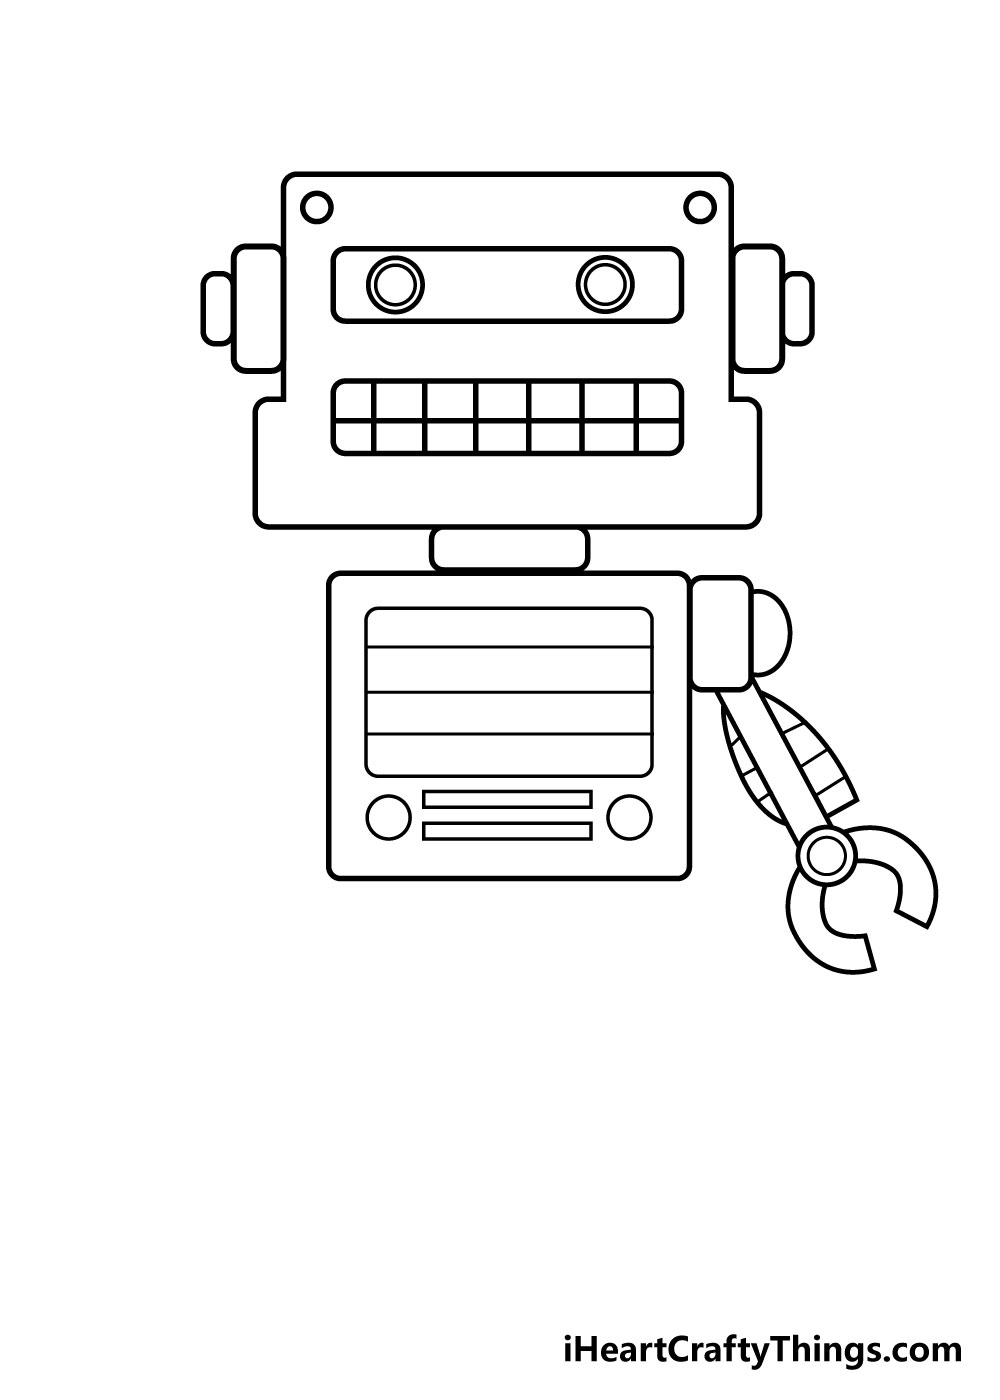
Your robot drawing needs some limbs, so we shall start to draw some in this step. As you can see in the reference image, the arm will be made from several different shapes.
For your robot drawing, you can also add or remove details to or from the arm to suit the design that you would like.
Otherwise, if you do follow the guide then the arm will be made up of lots of straight, square lines with some pincer shapes for the hands.
Step 5 – Now, draw the other arm
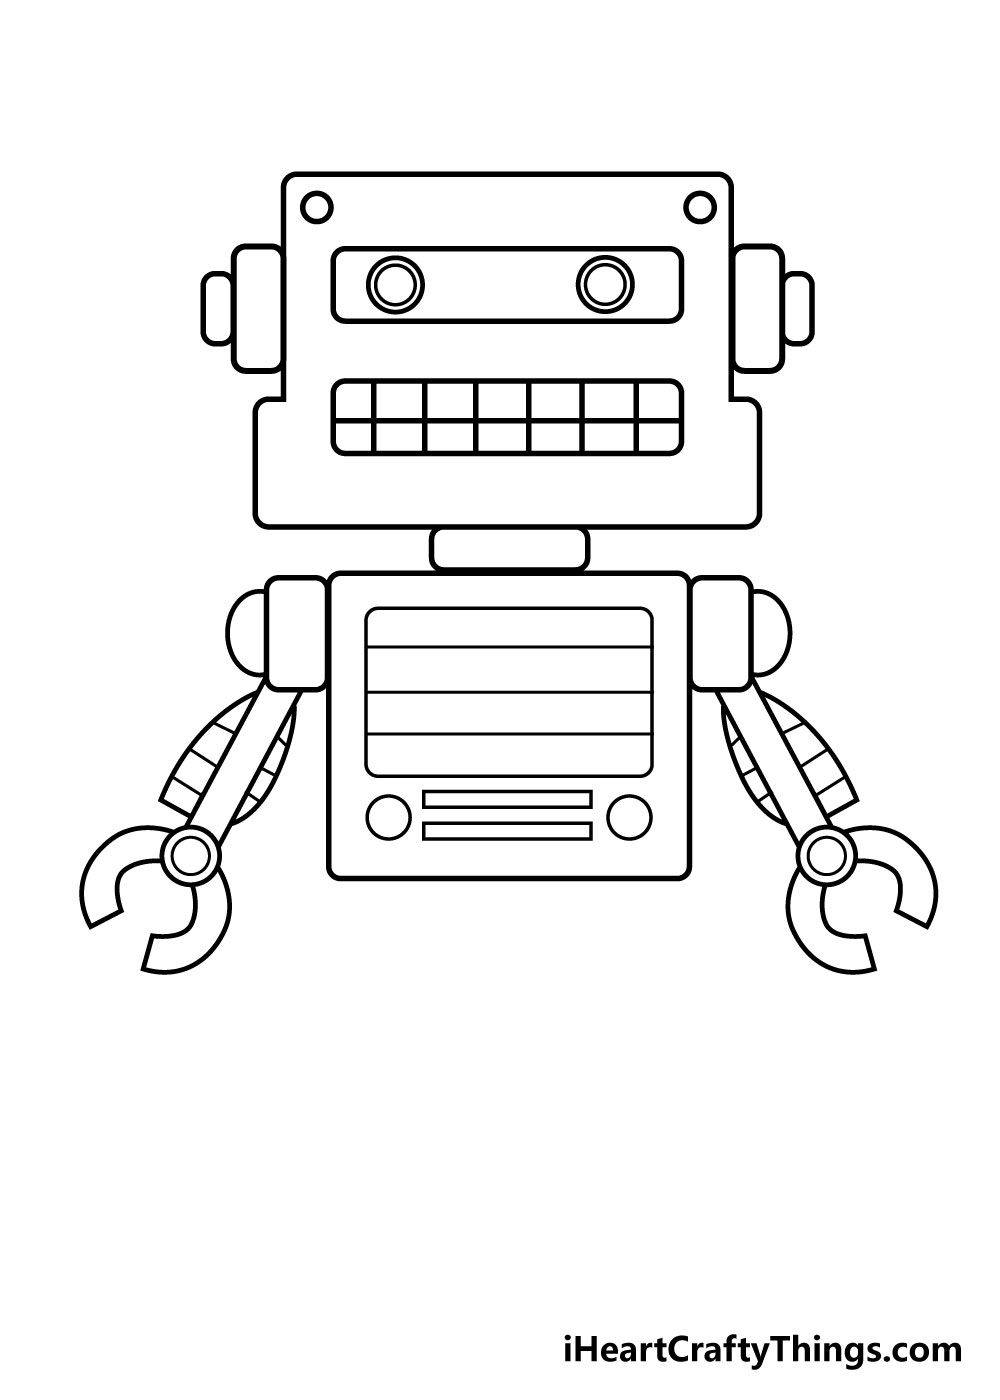
In step 5 of our guide on how to draw a robot, we will be replicating what we did in the previous one.
You could also change the angle of it if you would like to make it look like your robot is waving!
Step 6 – Draw the first leg of your robot
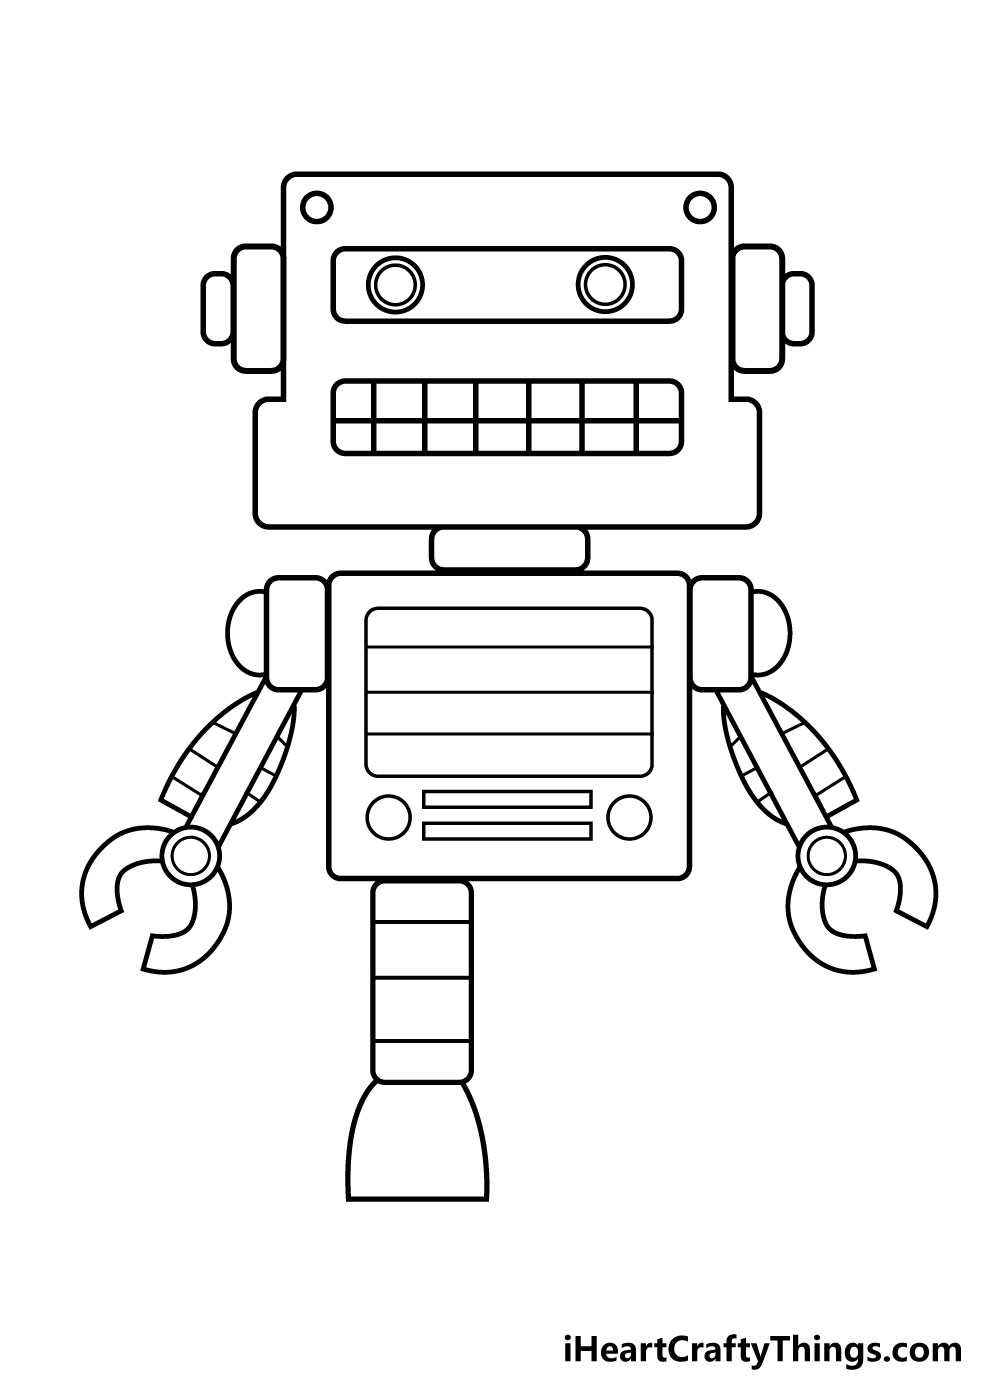
You have some arms for your robot drawing, so for this step let’s add the first leg. We have a simple design for the leg that is made from a rectangle with a rounded shape at the end for a foot.
You can draw some lines across the leg portion to make the leg look bendy.
Step 7 – Next, draw the other leg
You’ve drawn one leg, so now you can draw the other one in this step of this guide on how to draw a robot. Simply replicate the design of the other foot to have the robot standing on its own two feet.
With all the limbs drawn, you can move on to the final step. Before you do, be sure to draw any final details that you think would suit your robot drawing.
What fun details do you think would look good for your robot?
You could really use your imagination and totally change the design of the leg if you wanted to!
Perhaps this robot uses a giant spring or hovering technology instead of legs. How do you think that this robot would get around if it existed in real life?
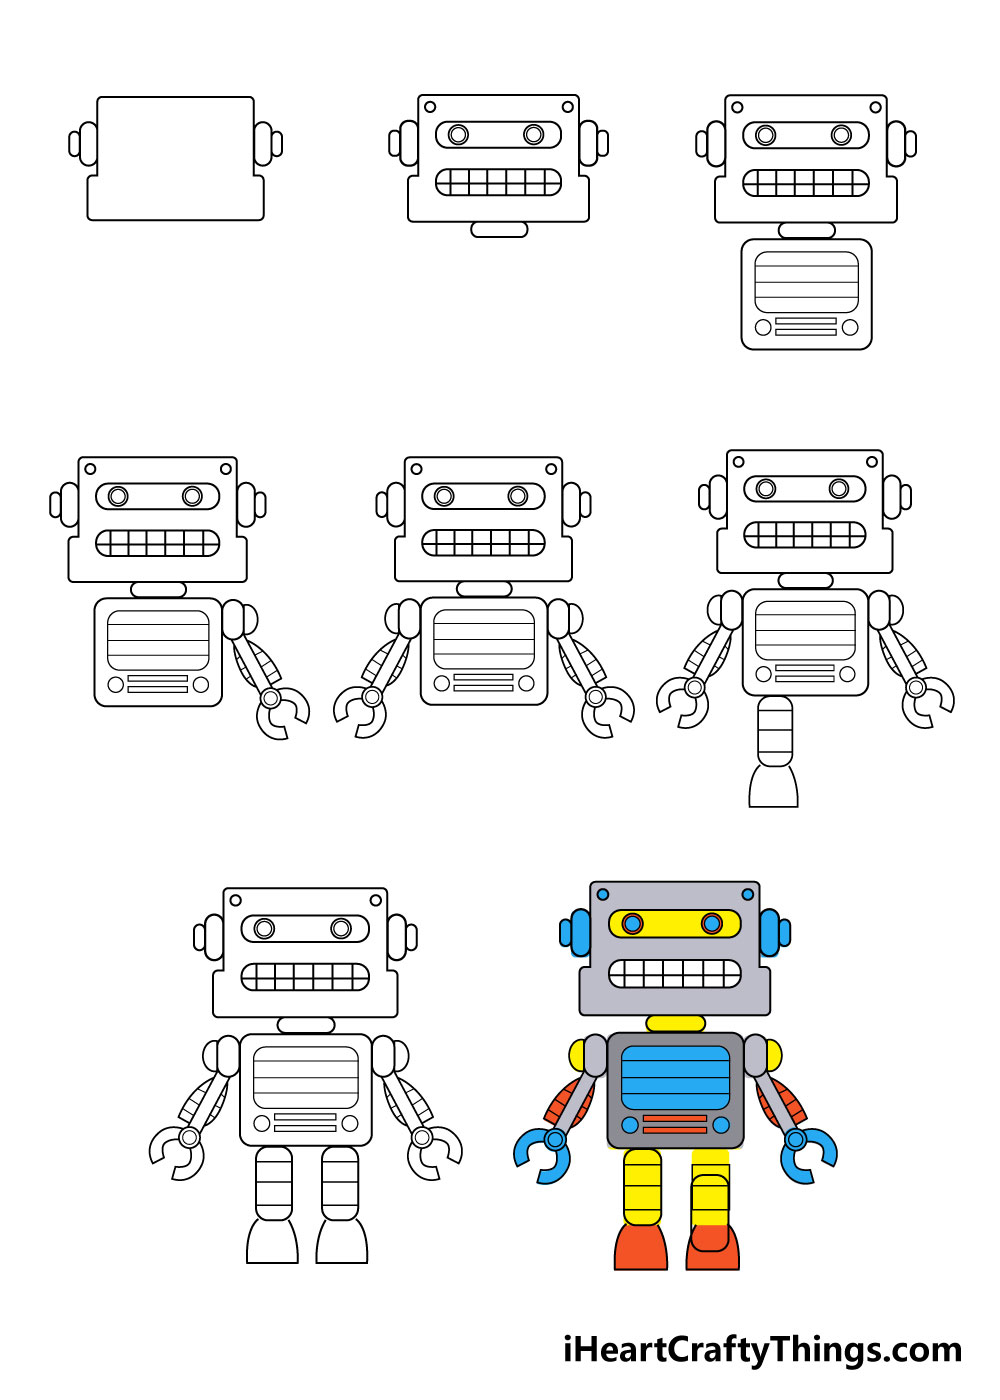
Step 8 – Now finish off your robot with some color
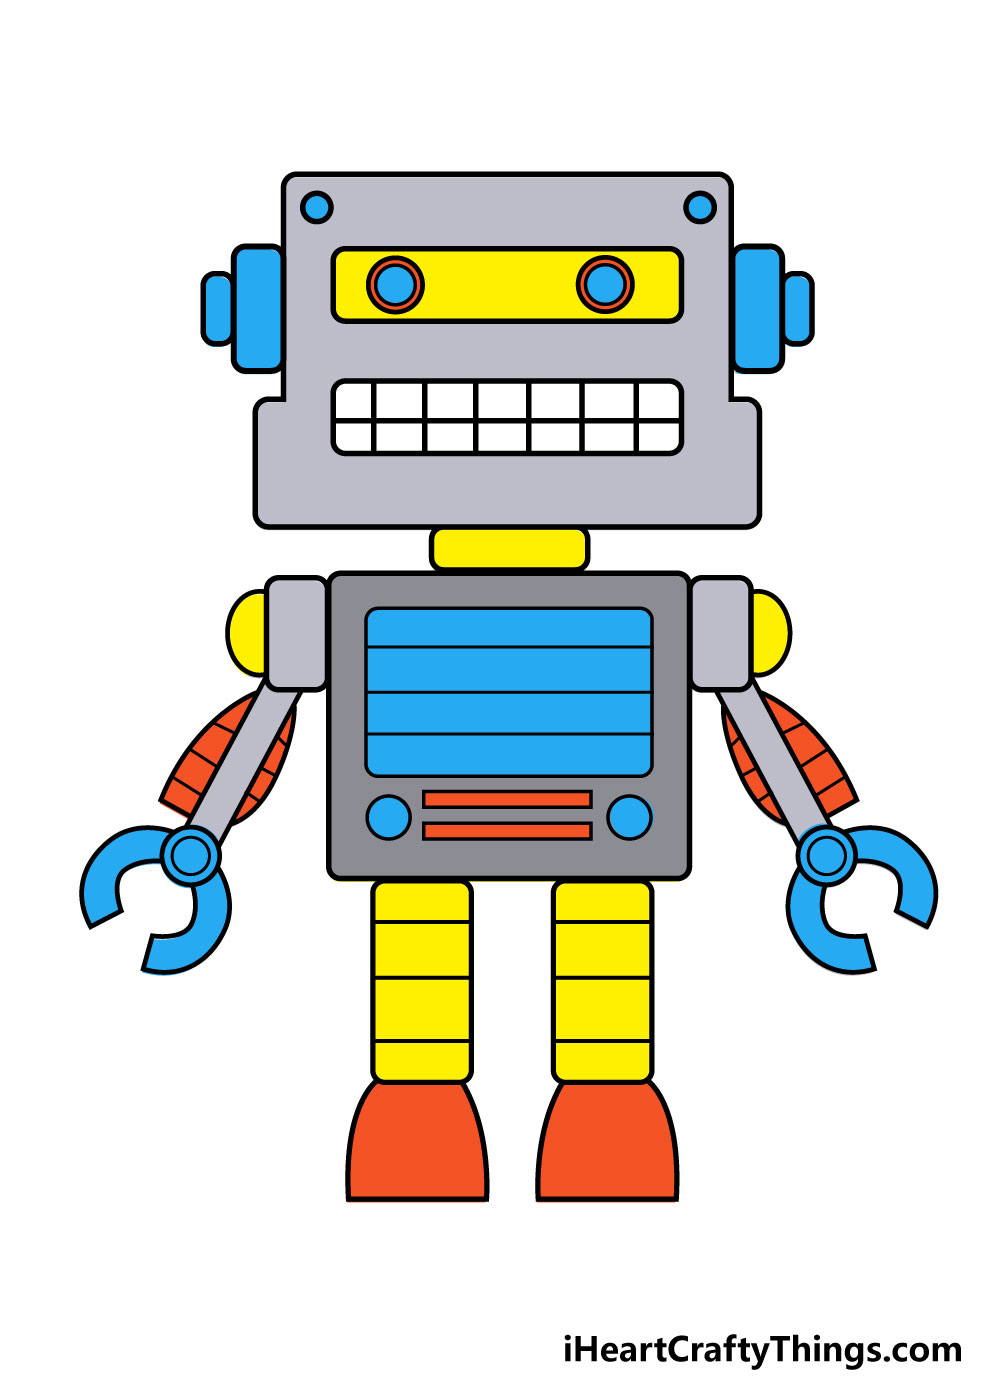
You’ve successfully drawn your robot, so now you can have some fun coloring it in! This is a step where you can really get imaginative with your color choices.
We’ve shown you how we would color in this cute robot, but this is your chance to show off all of your favorite colors to finish off your drawing.
I think that the wilder and wackier the colors are the better it will be for your robot drawing! If I were coloring this in, I would use lots of colored pens and markers for some amazing color brightness to this image.
Which art mediums and bright colors will you use to finish off your amazing artwork?
Bonus: Get Creative With Your Color Mediums
We’re about to take on the last step of this guide on how to draw a robot. In that final step, we will be looking at some colors you could use for your drawing.
While choosing the colors you use is important, there are also ways you can get creative with how you apply them, and that can be just as important.
For example, robots are made of metal, so if you can get a metallic look to the colors you use then that’s even better. There are certain special pens that you can buy that have a metallic texture.
These can come in many colors, but will mainly be found in silver or gold colors. If you can’t get hold of these pens, then there are other options such as using a very light sprinkling of glitter.
Metal surfaces will often have a sparkle and shininess to them, so some light glitter can really help to achieve that. Once you have the metallic effect, you can also use crafts and other things for the test of the details.
For example, if there are lights and buttons on the robot, you could use little beads and stickers to represent them. Doing that instead of painting or drawing them on will give your drawing some depth and texture.
Using transparent craft or gift paper can also bring a whole new element to your drawing, as some extra texture is never a bad thing. If you have small objects around the house then they can be used as well.
Basically, there are many ways to get creative with it, so feel free to try out all of your ideas! Then, we will cover some of the more conventional ways you can color this drawing.
Here’s how you can make your robot drawing even better…
These tips on making your robot sketch even better are sure to provide tons of fun!
This robot is looking ready to go, but you can make it even better by adding some accessories for it! There are so many fun and creative ways you could do this.
It could be holding some ray guns, a satellite device or maybe some kind of fancy beacon. These are just a few additions you could create for this robot drawing, but you can really let your imagination run wild for these additions!
Once you have added any accessories you want for your drawing of a robot, you could also add some new details to the robot itself. These could be small and could include a different facial expression or unique buttons.
The changes could also be more significant and include a different shape for the head and body.
You could create a really unique robot by changing just a few details, and that will tie into the next tip we have for you.
Once you have worked out how you can create some new robot designs, you could surround this robot with your unique creations. Depending on how large the piece of paper you’re using is, you could fit a huge selection of different robot designs.
This would be a great way to turn this robot sketch into a real robot party! There are all kinds of creative and interesting situations you could put these robots into.
What are some scenarios you can think of to create for this awesome picture?
The final tip we have for your robot drawing would be to draw a background setting. This would go really well with the previous two tips we had for you!
If you created a scene with the various robots, then you can make it even better by adding a background. It could be a futuristic lab setting or maybe some kind of alien spaceship.
These are just two of many ideas you could choose, and we’re sure you can come up with many more!
Your Robot Drawing is Complete!
We really hope that you had an amazing time working through this step-by-step guide on how to draw a robot! We aimed to create a guide that showed you how to draw this robot in a way that also leaves a lot of room for you to show off your creativity.
Now that you have drawn this robot, you can have lots of fun changing it up to create your own unique one! Maybe you could give it a conveyor belt for legs or create a wacky raygun for it to hold.
The possibilities for your creativity are endless, and we’re sure to see lots of fun and imaginative designs.
The drawing fun doesn’t have to end here, though. We bring out new step-by-step guides constantly on our website, so be sure to check in often to catch each new one as it comes out.
We would also love to see your incredible robot drawing once it’s done! You can let us see what a great job you did by sharing your drawing on our Facebook and Pinterest pages for us to admire.
Here Is A Cartoon Robot Drawing To Inspire You!
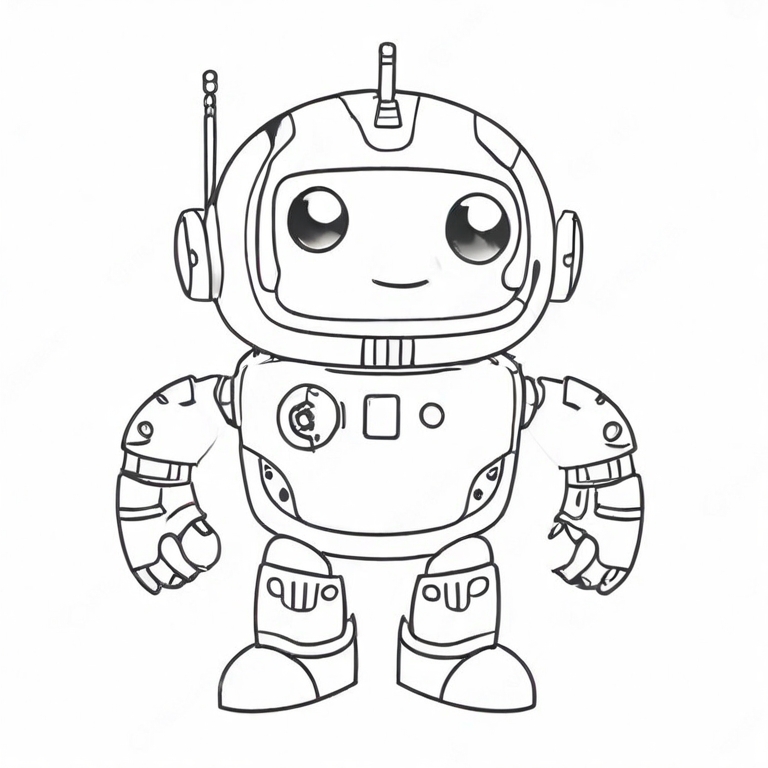
Many of us have dreamed of having our own robot friend, and this cartoon robot drawing for kids done by our artist Freddy shows what this robot pal may look like!
He created this drawing to inspire you for your own picture, and you can use it as a reference for your own drawing. The design is very rounded, and while it’s simple, there are some great details as well.
It makes you wonder where this robot may go to have some adventures. You could show us what you think with your own background!
Freddy left the background blank, but this opens up so many opportunities for you to show off your creativity. Some ideas would be an alien world or maybe a society made up of robots.
There are so many possibilities, so what are some you can think of?