The How To Train Your Dragon series is one of the most charming and unique animated movie series to come out in recent years.
Based on a popular book, the series features many thrilling adventures with wonderful characters.
The true stars of the show are the dragons featured in the films, and the most recognizable of these would be Toothless the dragon.
This dragon stands out with his unique design and playful personality, and learning how to draw Toothless is a great way to show your love for this character!
If you are one of his many fans, then this will certainly be a tutorial that you won’t want to miss!
Our step-by-step guide on how to draw Toothless will show you everything you’ll need to know about recreating this classic character.
How to Draw Toothless – Let’s Get Started!
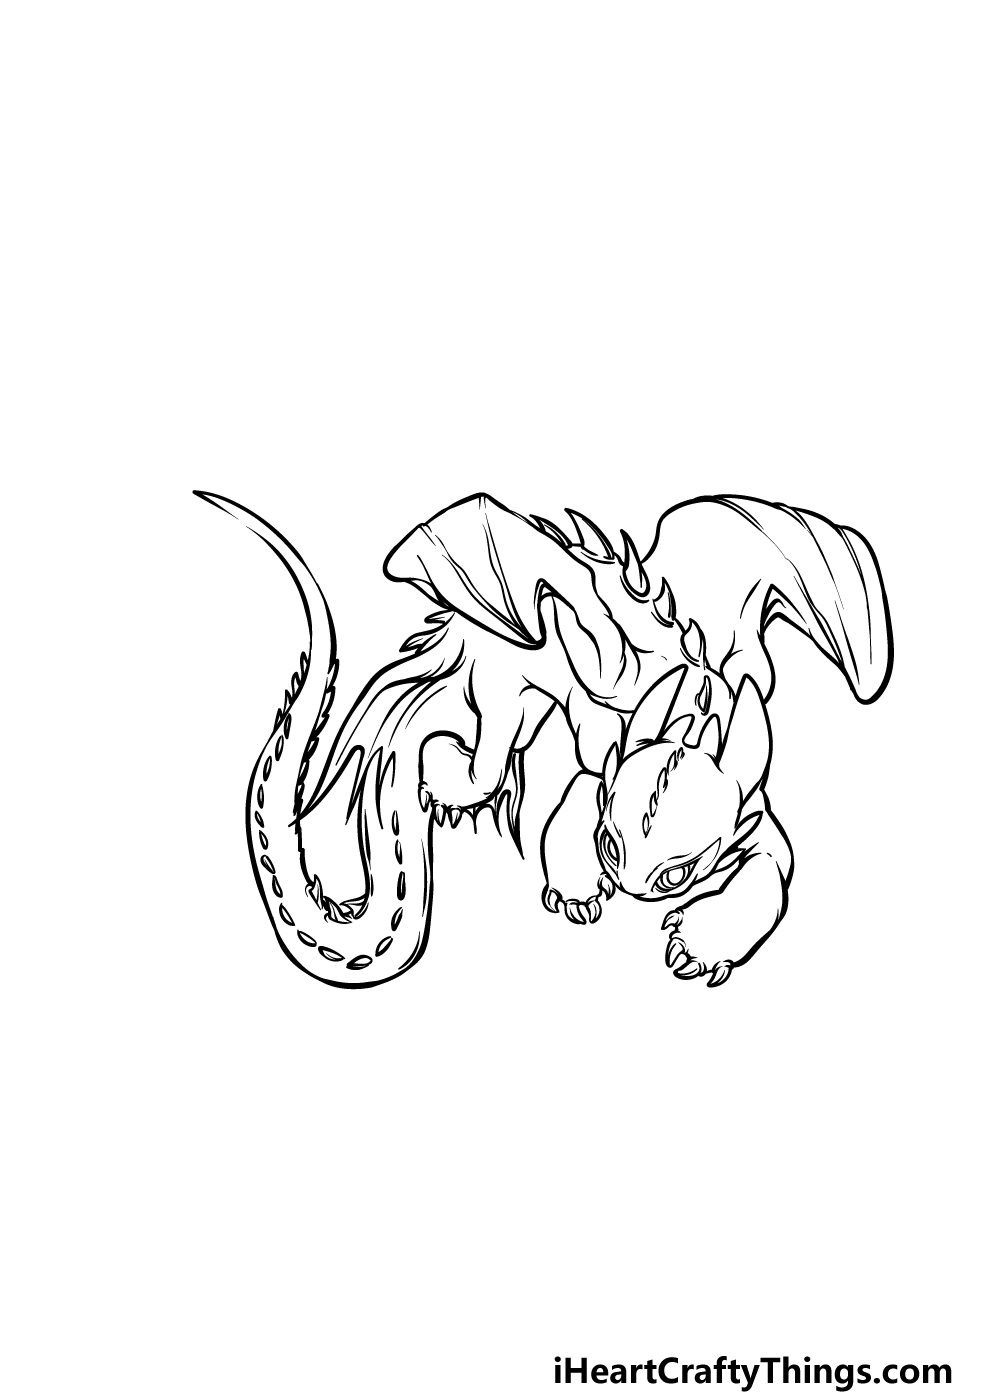
Step 1
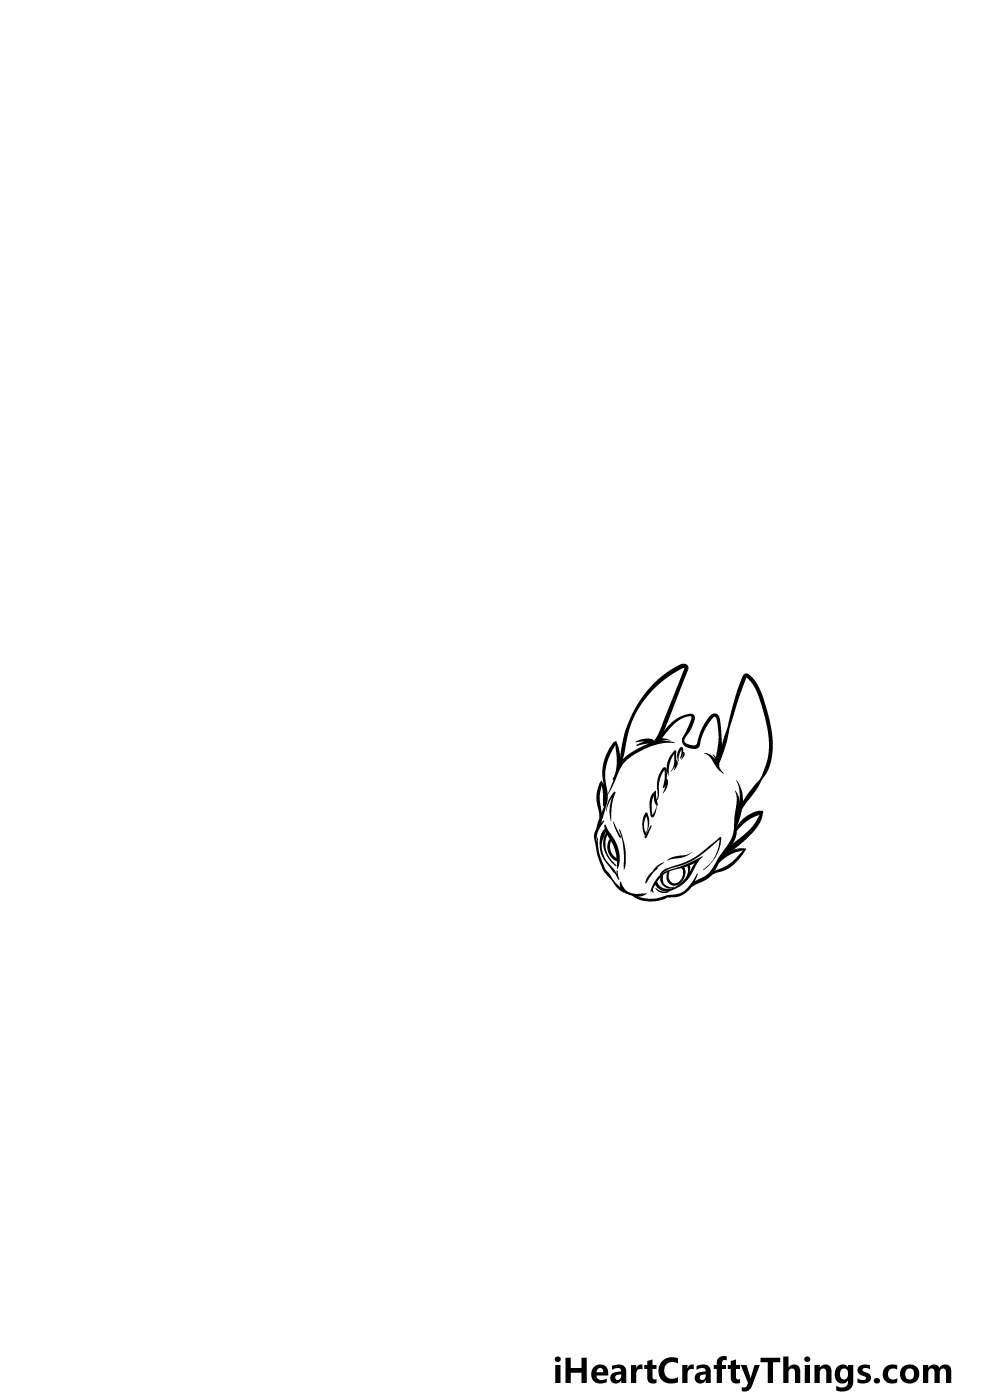
We will begin this guide on how to draw Toothless by starting with his head. His head is quite rounded and thin, and he has some large, thin ears that extend backward.
Then, there are some small spikes that poke off of the top and sides of his head. Finish off with his eyes near the front of his face, and then we can proceed!
Step 2 – Now, draw the start of his back
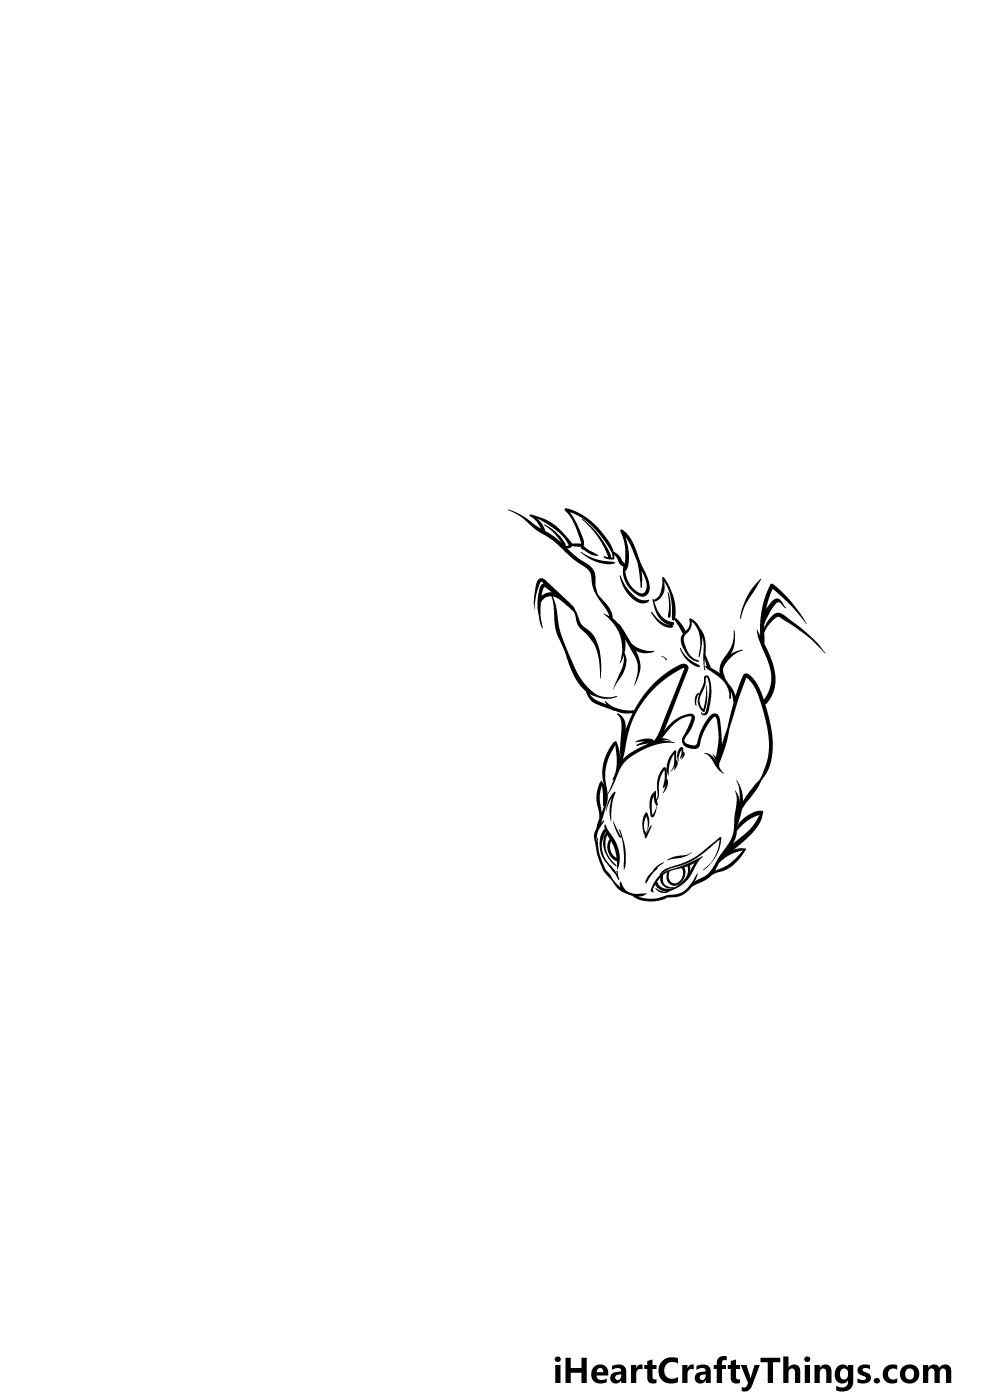
Continuing with this Toothless drawing, we shall be adding the start of his back. He has a row of large, rounded spikes on his back, and you can draw them using some curved lines.
Then, use some more curved lines for the bases of his wings that we will be drawing in the next few steps of this guide!
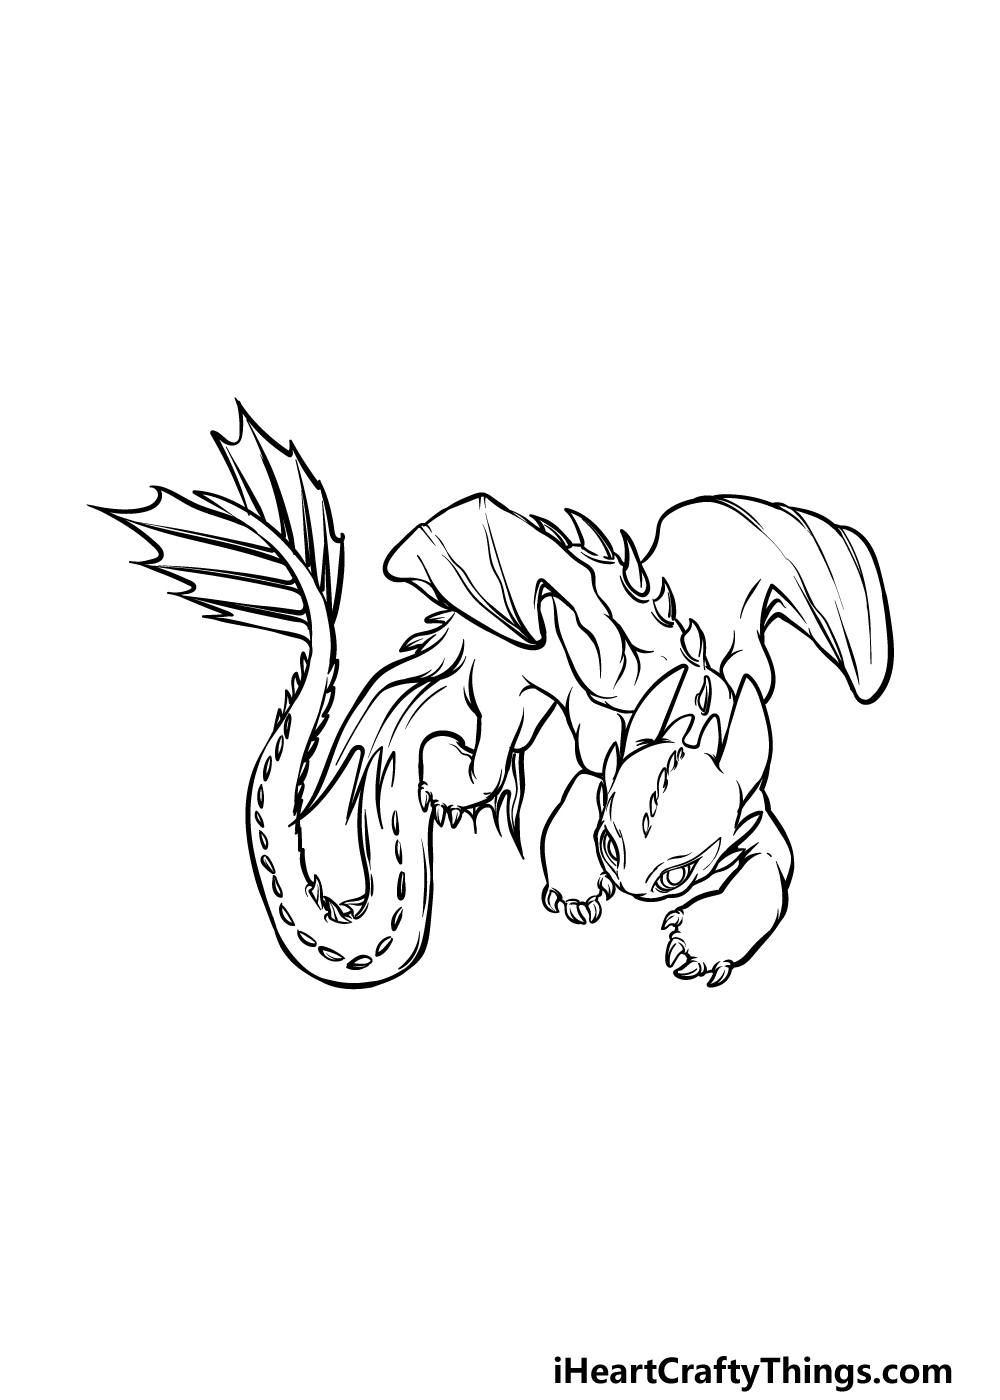
Step 3 – Draw the rest of his wings
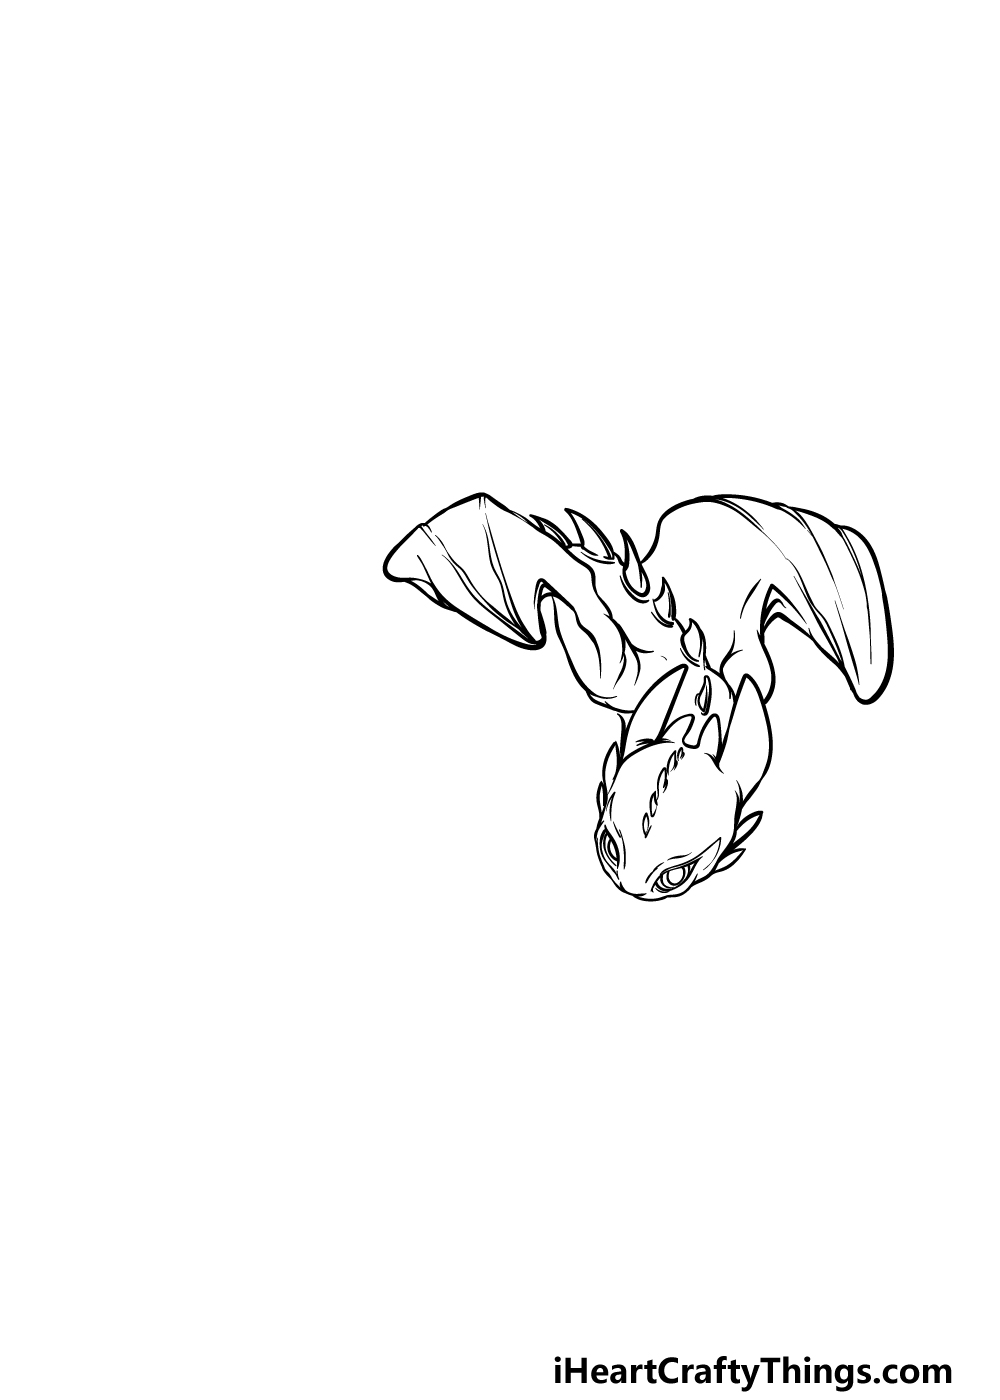
This character has relatively small wings, and these are what we will be drawing in this step of our guide on how to draw Toothless.
These will connect to the portions of the wings that you started in the previous step and also directly onto his back.
The wings are small and quite rounded with curved line details extending into the interiors of the wings.
Step 4 – Next, draw the legs for Toothless

Now we will be drawing some legs for this Toothless drawing in this step of the guide! His legs are quite thick at the ends, and are a bit thinner near the bases.
He also has some sharp claws at the ends of each foot. Also, the legs at the back are a little bit thinner than the front ones.
Once you have drawn his legs, we will also be drawing some more fins near the back of his body where his tail will be extending.
Speaking of his tail, we will be drawing that in the next step of the guide!
Step 5 – Now, start drawing his tail
This step of our guide on how to draw Toothless will be focused on starting his tail. The tail is quite long, thick and twisty.
It should look a bit like a large lizard tail, and it will also have some small bumpy spikes running along it.
It will also be thicker at the base and then get a bit thinner the further you go towards the tip.
With most of the tail drawn, we will finish it along with some final touches in the next step of the guide!
Step 6 – Add the final details to your Toothless drawing
It’s almost time to color this image in the final step of this Toothless drawing, but first we will finish off the final outlines.
When you have finished all of these details, we will also go over a few ways that you could add your own personal extra touches and details to the picture!
First, we will finish off his tail. As you can see in the reference image, there are some large, flat fins extending off the sides of his tail.
Each of these fins will have some pointy spines extending into them.
Once you have drawn these, it’s time to add your own final touches! It’s always a great idea to add a background, and if you did this you could show off your favorite scene or setting from the films.
You could even create a unique setting and even add other characters from the films to really finish it off. How will you finish up this image?
Step 7 – Finish off your Toothless drawing with color
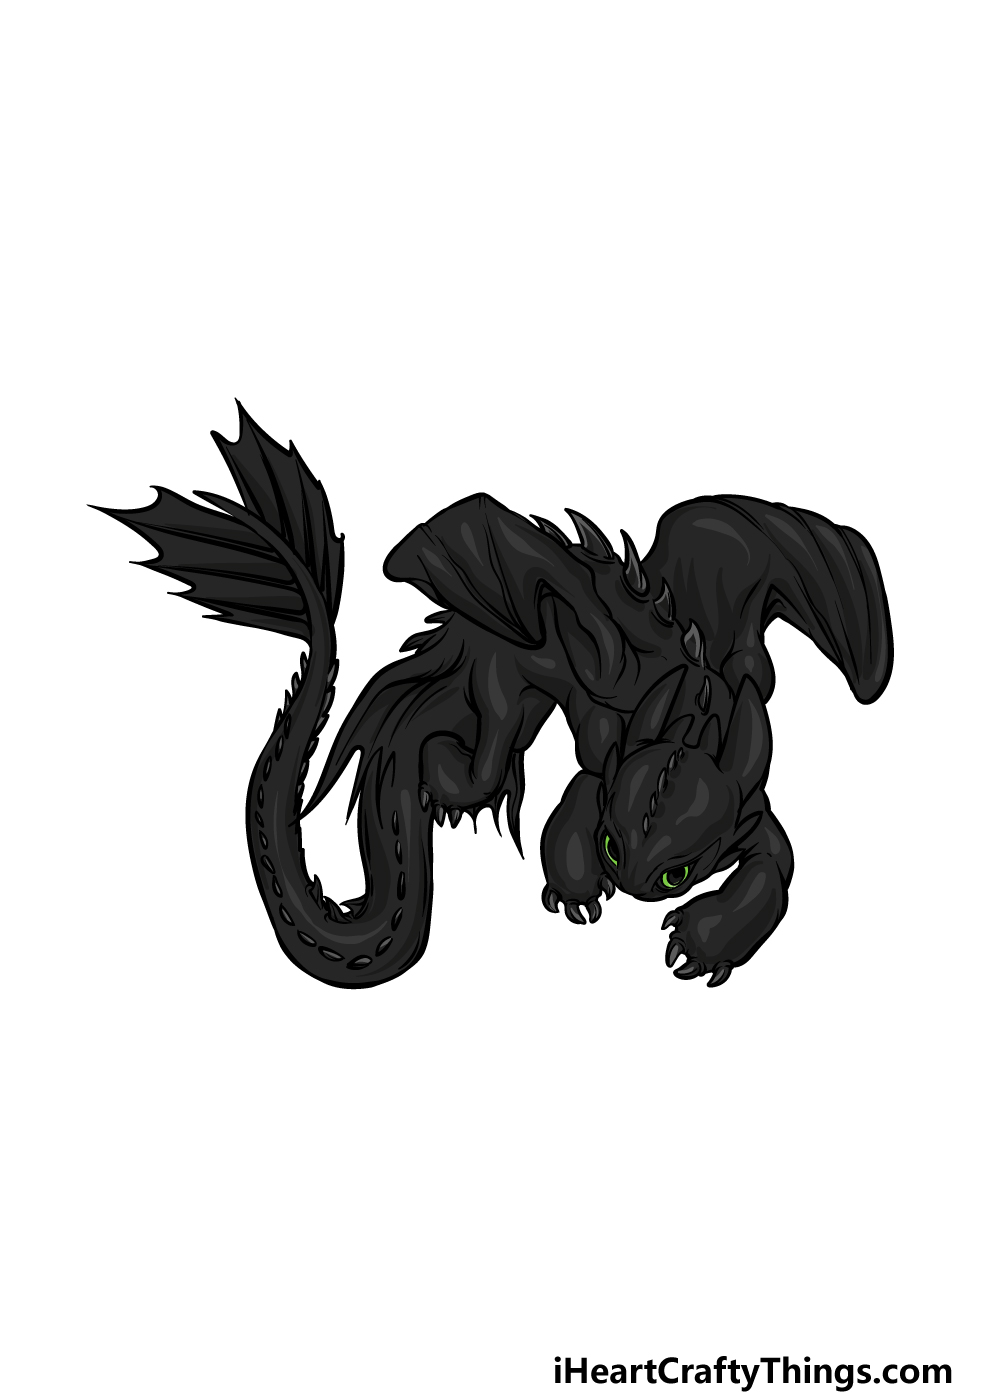
One of the defining features of Toothless’ design is the fact that he is colored in a black color scheme with bright green eyes.
We will be coloring the image in this step of our guide on how to draw Toothless! Even if you wish to keep with his screen accurate color scheme, there are still ways to make it look more dynamic!
By incorporating lighter tones, you can create some definition for the various parts of his body. Our reference image will show you how you can do just that!
You could also create a unique variation of this character by playing around with different colors and art mediums!
If we were coloring this, we would use some watercolor paints as that would prevent the finer details from getting lost. What do you think you will use to color this picture?
3 More tips to make your Toothless drawing easy!
Sink your teeth into these tips on making your Toothless sketch even easier!
This drawing of Toothless is highly detailed, and it looks really cool as it replicates the look from the movie. While it may look awesome, this can make it a lot harder to draw this famous dragon.
There are a few ways you could simplify it. One would be to leave out some of the interior details that can be quite tricky to draw.
Once you color him in later, these details won’t be as noticeable anyway. Therefore, it’s useless to struggle with them if you won’t even be able to see most of these details.
You could also change the design of Toothless to be more cartoony if you find that easier.
Dragons may not be real, but there are a few animals that they are similar to. You could use some of these real animals to make this Toothless drawing a lot easier.
The best place to start would be with lizards and crocodiles. Try to look at the structure of these animal’s bodies and see how you can translate it into your Toothless design.
You could also find images of other dragons and other poses that Toothless himself has been in to make the design easier.
These could also help you if you want to draw Toothless in other poses and scenarios.
If you’re still having a hard time creating this Toothless sketch, then you could make it easier by using a pencil to prepare the drawing a bit more.
He has a really wavy body, so you could start by drawing a wavy line that will serve as the guide for the shape of his body.
Then, use your pencil to draw some basic shapes that will make up his body proportions.
Once you have these basic shapes, you could then start adding some more details and elements to the design until Toothless resembles our guide image.
Add your final pen lines and then your artwork will be complete!
Your Toothless Drawing is Complete!
This cute dragon has a really unique design even amongst the other dragons in the movies.
We hope that you had a really fun time recreating this design as we worked on this guide on how to draw Toothless!
With any drawing challenge, you’ll find it much easier if you break it down into smaller steps, and this is what we aimed to do for you during this guide.
Now that you have mastered this image, you can keep it going by adding your own details, touches and ideas.
Will you draw a background or maybe add another character from the films? How will you finish it off?
You can also find many more drawing guides like this one on our website when you’re ready for a new drawing challenge!
We have a huge selection, and you’ll want to keep checking in as we plan to release many more frequently.
It would be great to see how your Toothless drawing turned out, so please remember to share your artwork on our Facebook and Pinterest pages for us to look at!