There are many different anime shows to enjoy, and they are all very varied in their settings, premise and characters.
My Hero Academia is one of the most popular of these anime shows to emerge in recent years, and it has many fans around the world.
One of the main characters is Todoroki, and he is a character that has captivated many fans around the world.
Learning how to draw Todoroki isn’t always an easy thing to do, but that’s what we’re here for now!
This will be the perfect tutorial for any fans of this awesome character.
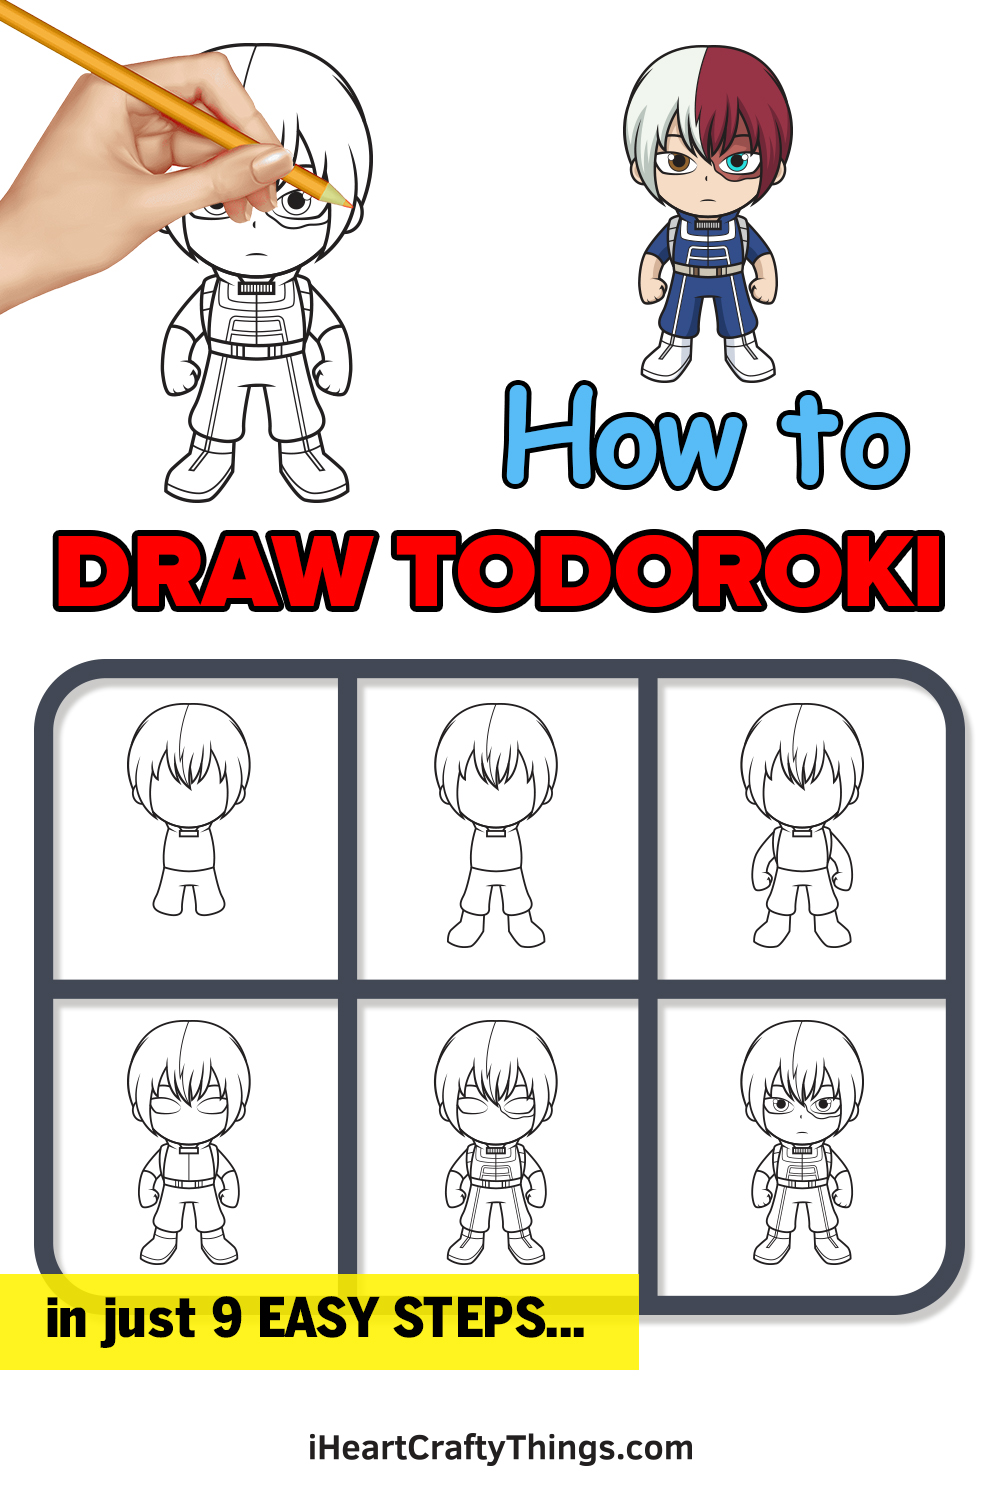
Please enjoy this step-by-step guide on how to draw Todoroki that we have for you and see how fun and easy it can be to replicate this classic character!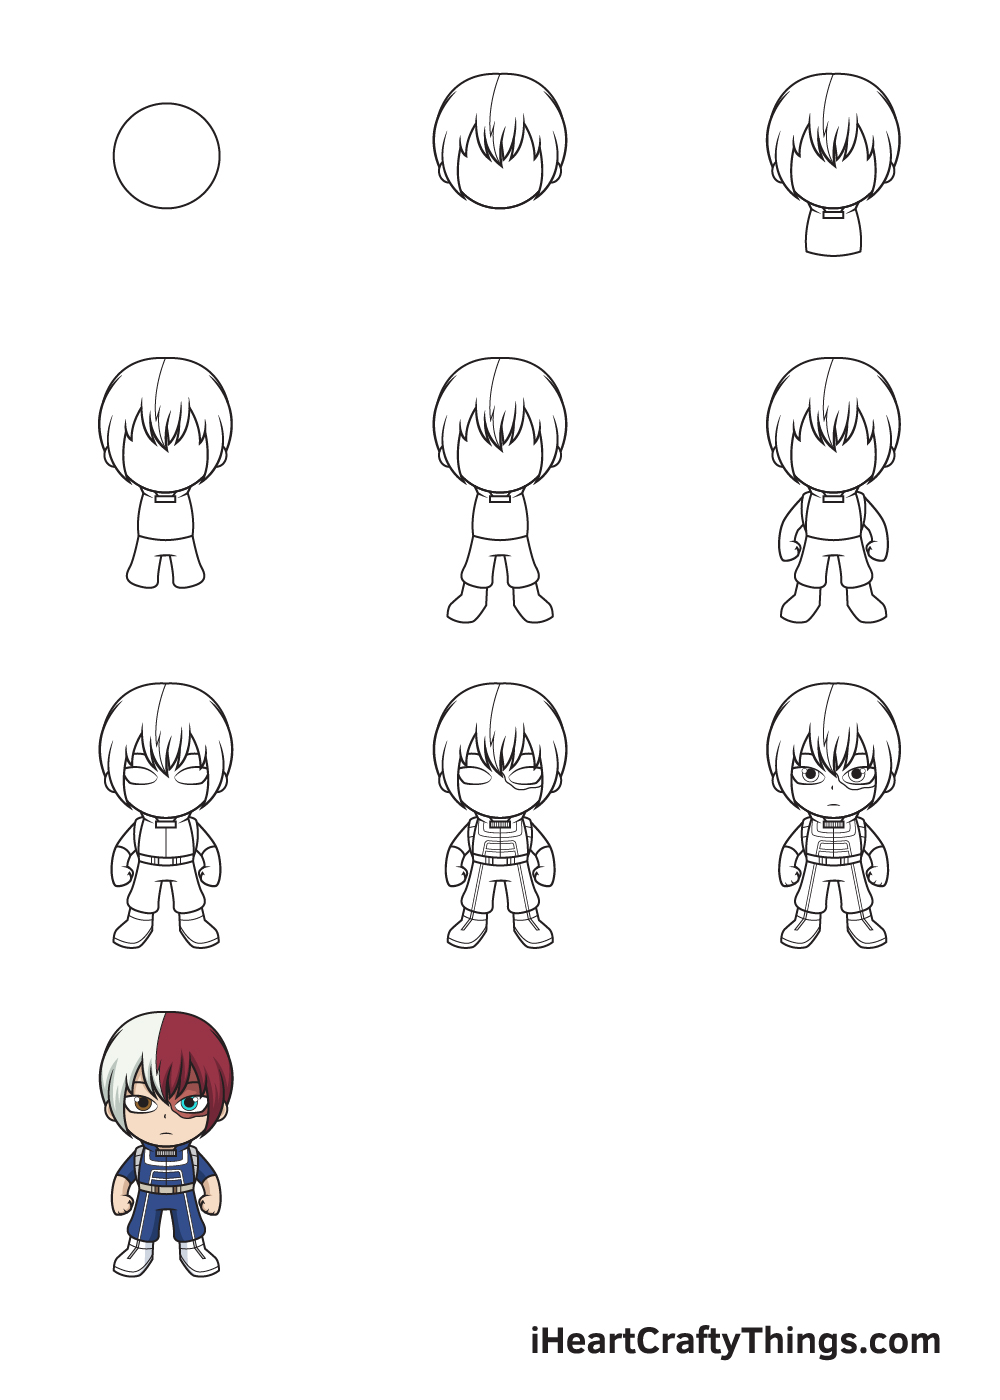
How to Draw Todoroki – Let’s Get Started!
Step 1

In this guide on how to draw Todoroki, we will be drawing a stylized version of the character. For this first step, you will need two things; a pencil and a drawing compass.
If you don’t have a drawing compass, then you may want something you can trace around. However you end up going about it, use your pencil to draw a perfect circle.
We will be using a pencil because there will be some details drawn over it later on.
Step 2 – Draw the outline for his hair
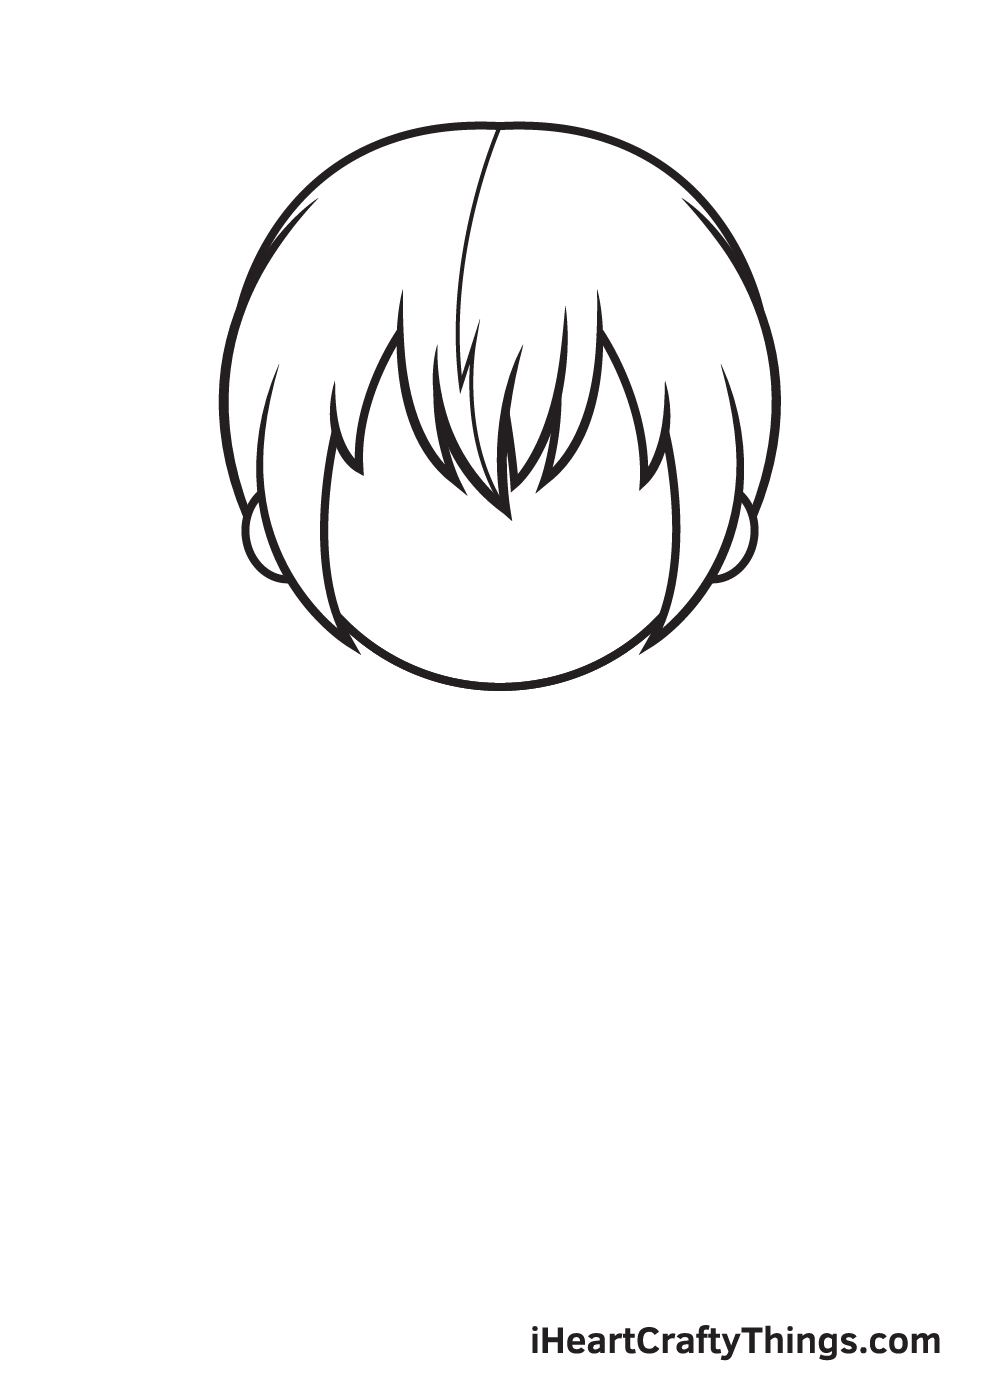
Now that you have the circle for his face outline drawn, we will next begin drawing the outline for his hair.
From this point onward in your Todoroki drawing, you can start using your pen to draw over the pencil.
Use your pen to draw some curved and rounded lines for the spiky hair dropping over his face, and then finish off this step by drawing some ears on the sides.
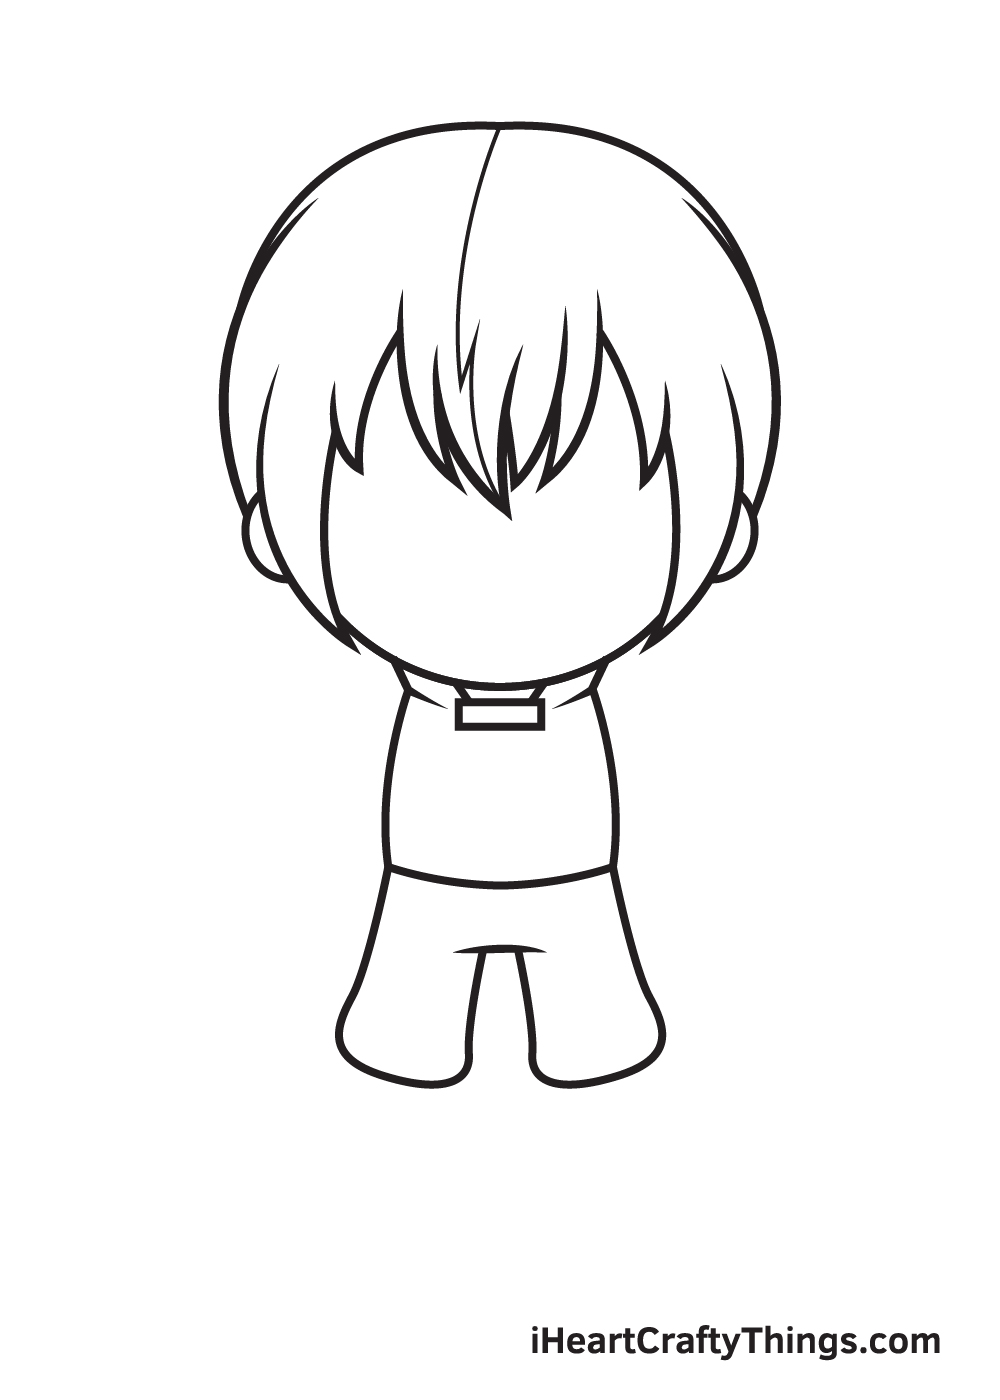
Step 3 – Next, draw the outline for his body
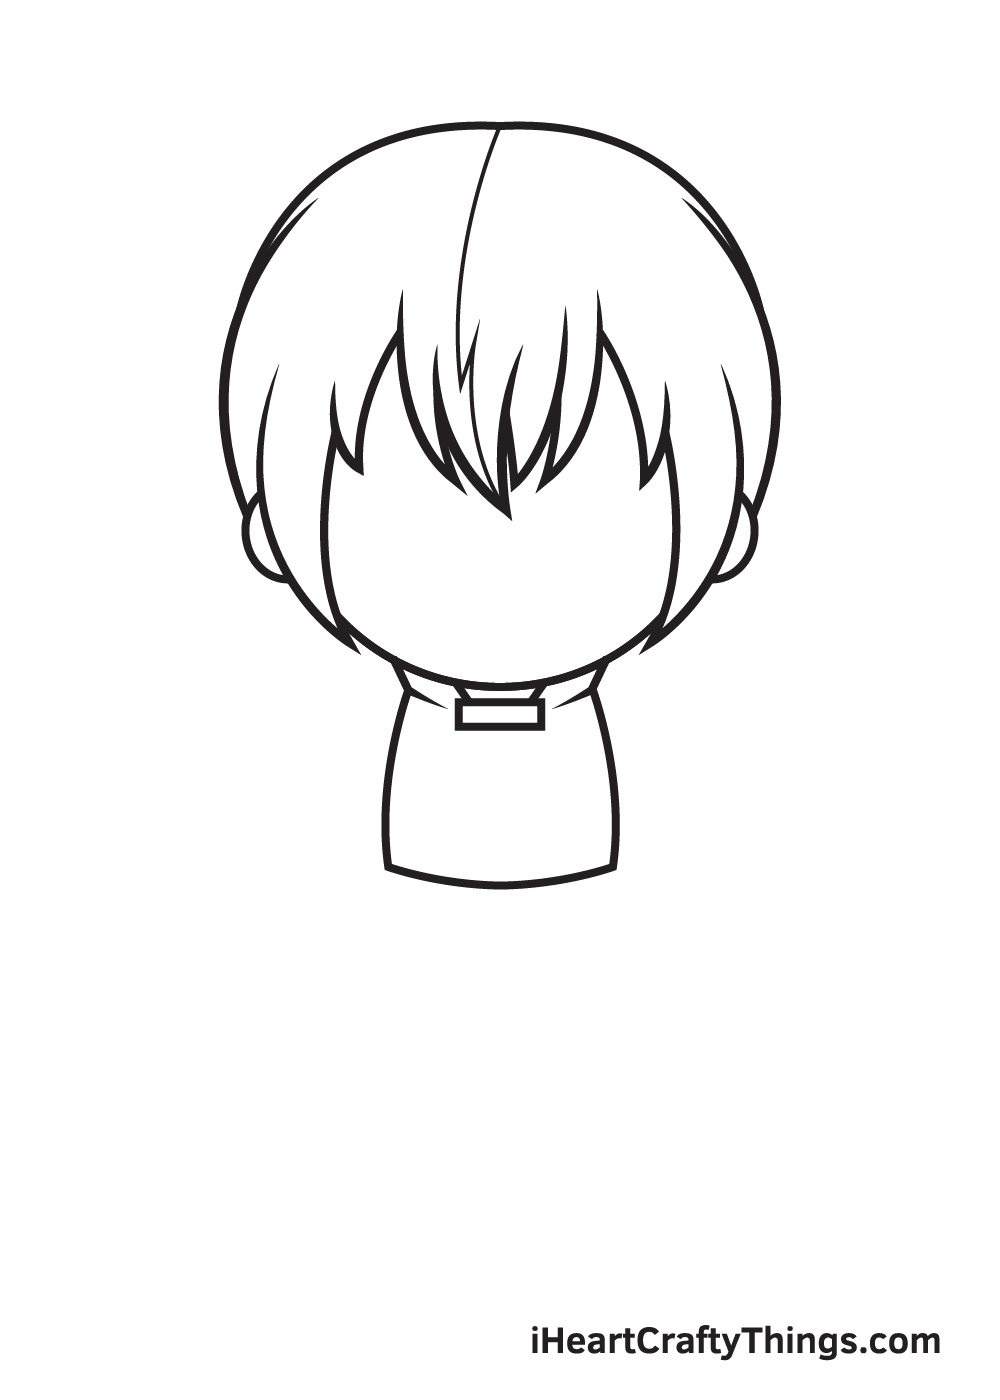
Carrying on with the stylistic design of this drawing, we will be drawing a disproportionately small body design for him now.
Draw a small curved collar under his head, and then use some slightly curved lines for the rest of the outline of the top he’s wearing.
Finish off by drawing a small rectangle shape underneath his face, and then we can proceed to step 4.
Step 4 – Now, draw some leg outlines
We will be adding the outlines for his legs in this step of your Todoroki drawing. To do this, simply draw some curved lines for the legs of his trousers below his chest.
We won’t be drawing any feet underneath them yet, but we will be adding those soon!
Step 5 – Next, draw some shoes for Todoroki
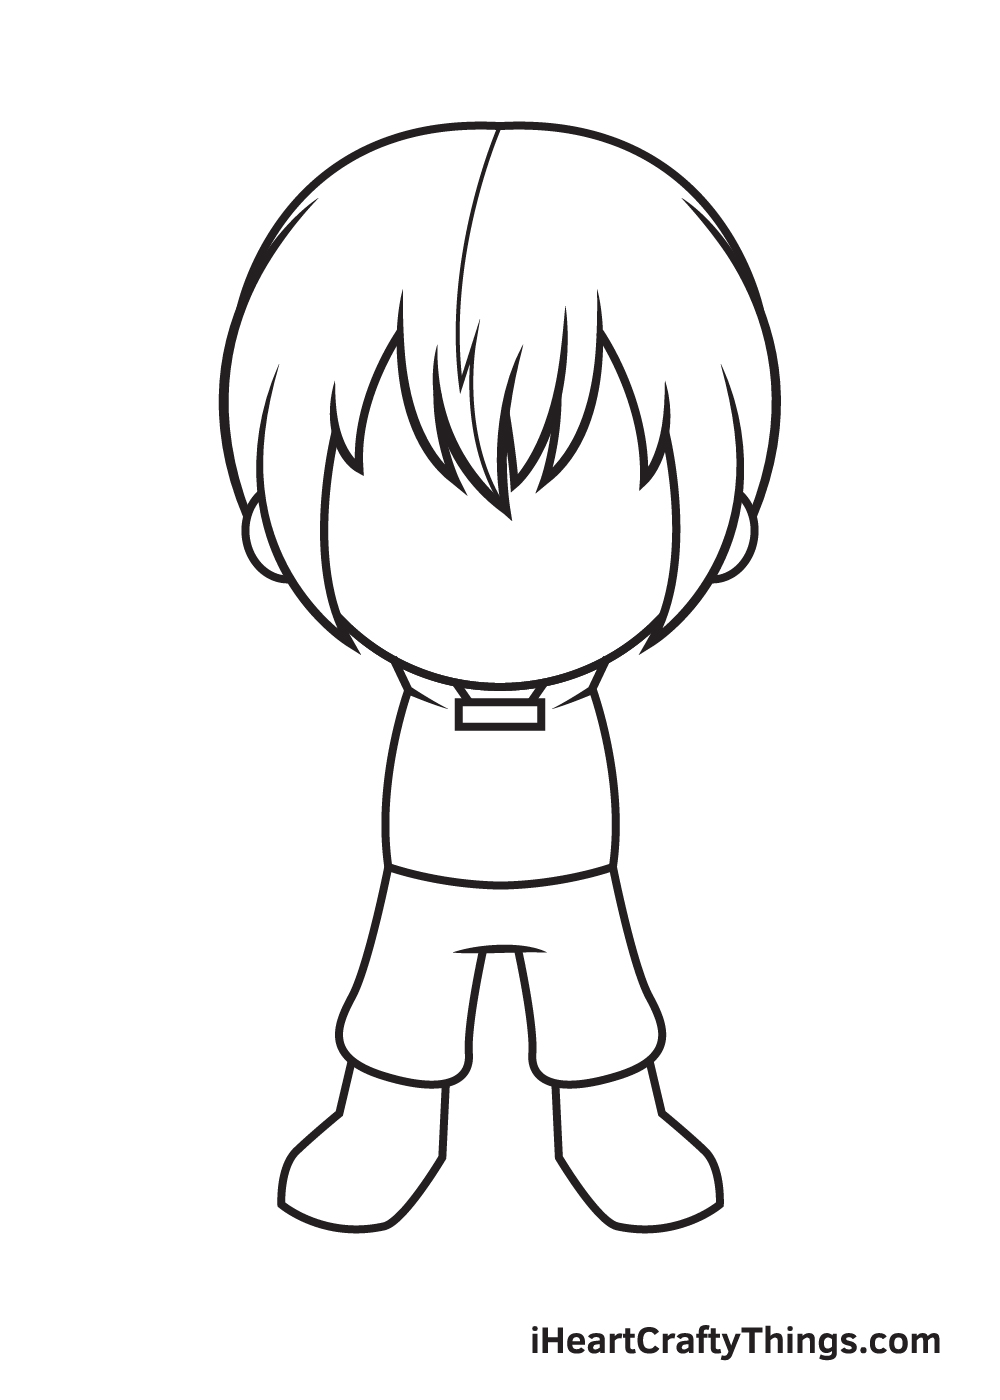
In the previous step of this guide on how to draw Todoroki, we mentioned that we would be adding some feet to the picture.
This step will see you doing just that, as we will be drawing the outlines of the shoes that he is wearing.
Use some straight lines for the sides, and then use some rounded lines for the bases of the shoes.
Step 6 – Start drawing some arms for Todoroki
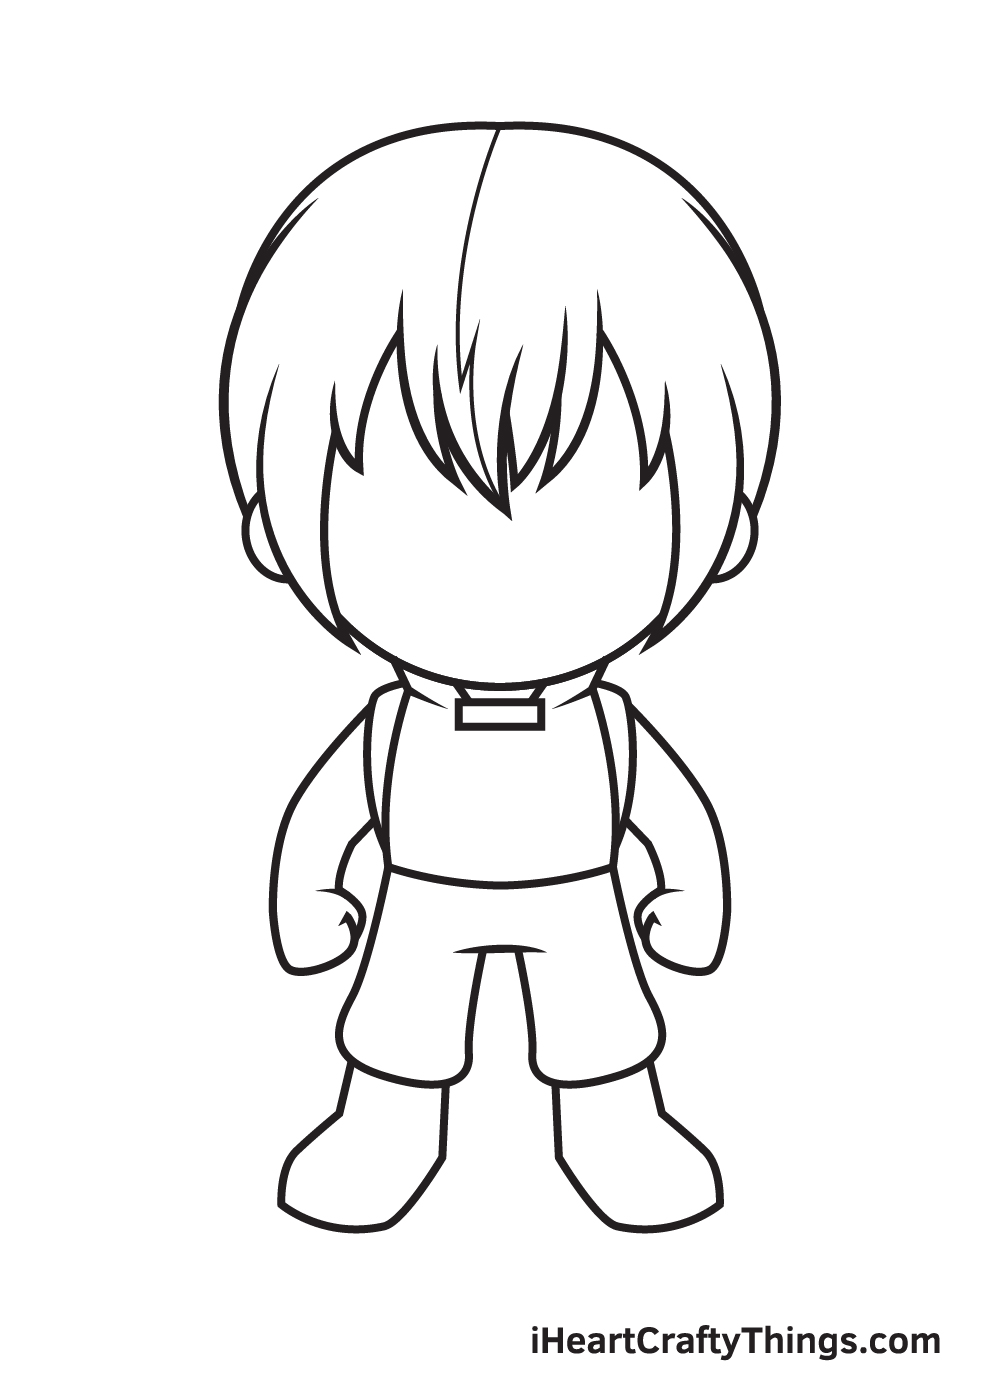
Now you’re ready to add some arms for your Todoroki drawing to have him ready for action!
These will be drawn with some curved lines for the outlines, and they will curve inwards at the ends to make it look like his hands are balled into fists.
Be sure to also draw some curved lines for the sleeves of his top that they are poking out of.
Step 7 – Now, draw some more details for Todoroki
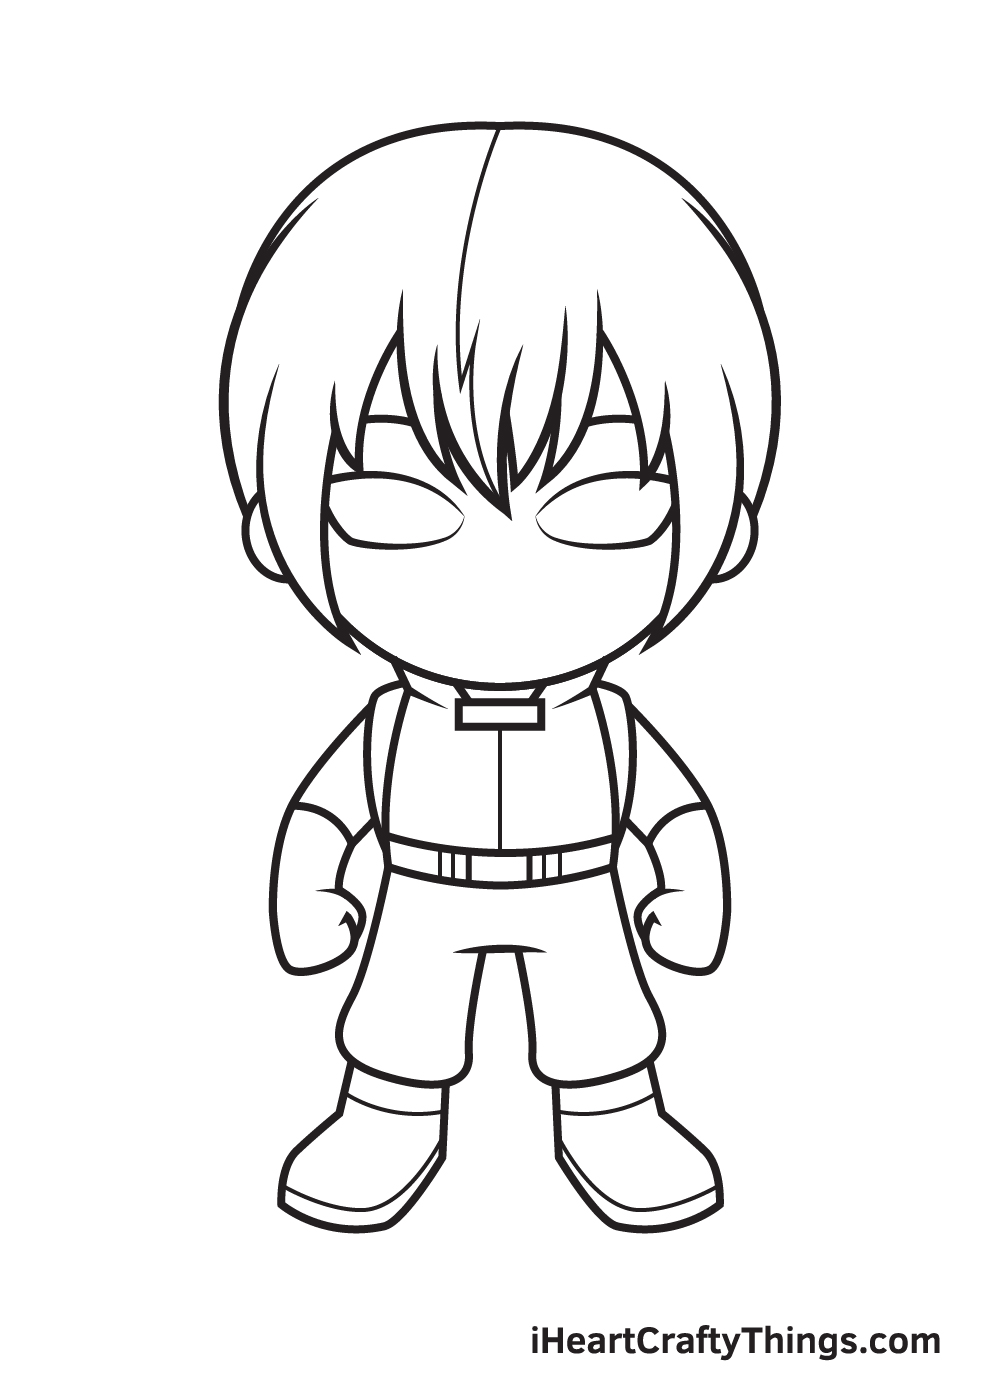
The next few steps of this guide on how to draw Todoroki will see you adding lots of details to really make this drawing come to life!
For his face, draw some rounded shapes for his large eyes and then add some eyebrows above them.
Then, add some simple lines for details such as his shirt sleeves and the belt that he is wearing. We will also add a divide to the center of his shirt as well as some details for his shoes.
Step 8 – Add some clothing details in this step
Before we move on to the final details of your Todoroki drawing, we will add some more details for his clothing.
To do this, we will be adding lots of curved line details to his various pieces of clothing, and you can copy them as they appear in the reference image.
Finish off with a curvy line around his eye on the right and then it’s on to those final details.
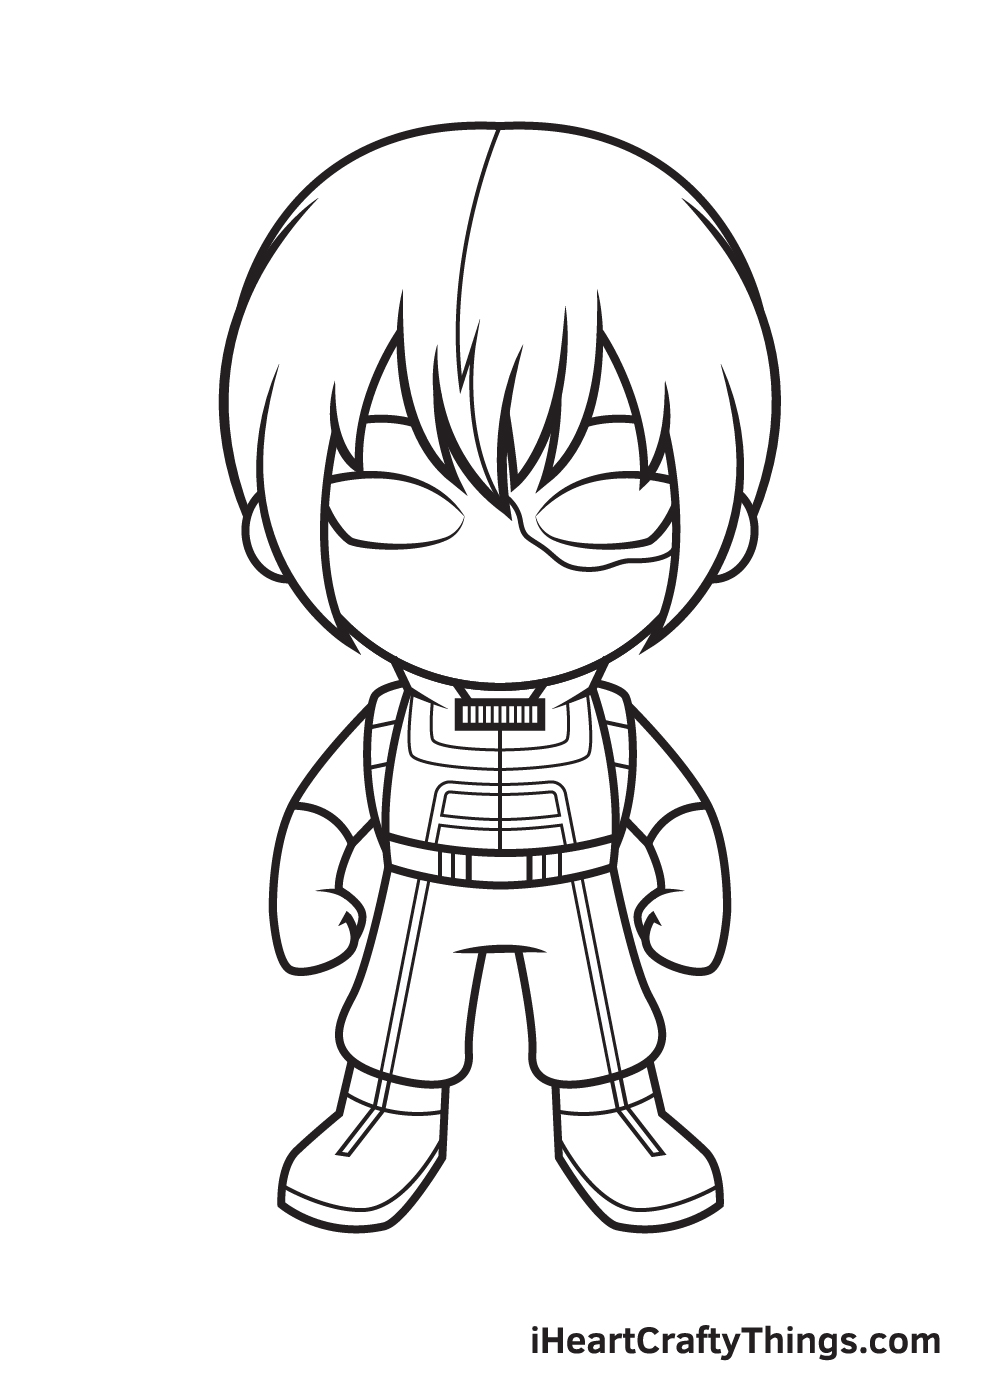
Step 9 – Finish the final details for Todoroki
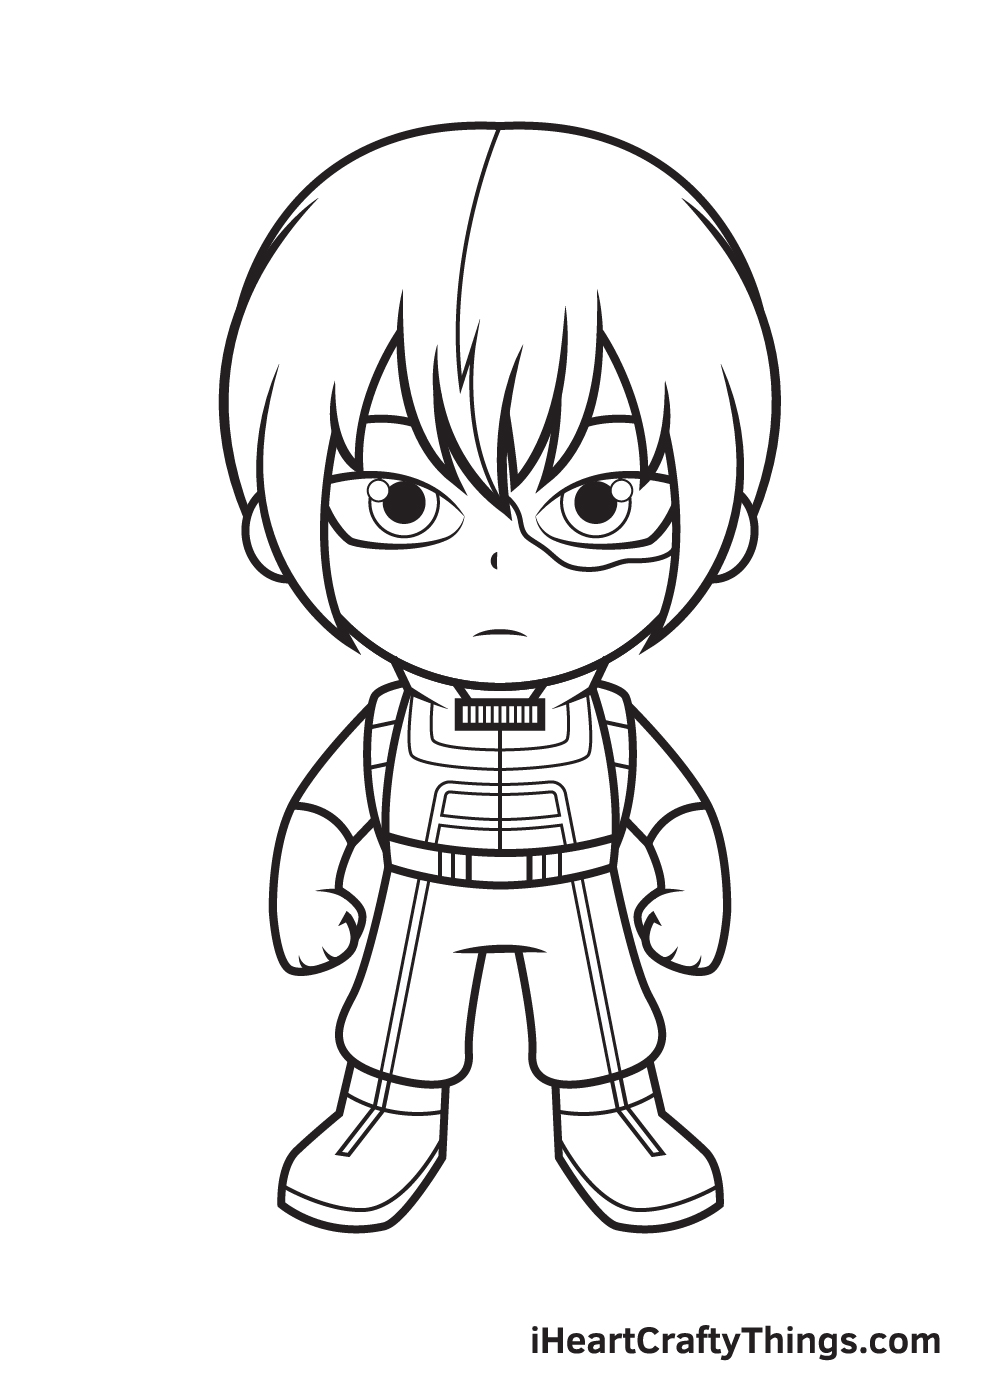
This step of our guide on how to draw Todoroki will see you finishing off the final details before you color him in.
First, draw some large pupils inside of his eyes. You can then use some small lines for his nose and mouth to finish off his face.
Then, add some small lines to his fists to show the divides of his fingers.
Now finish it off with some color!
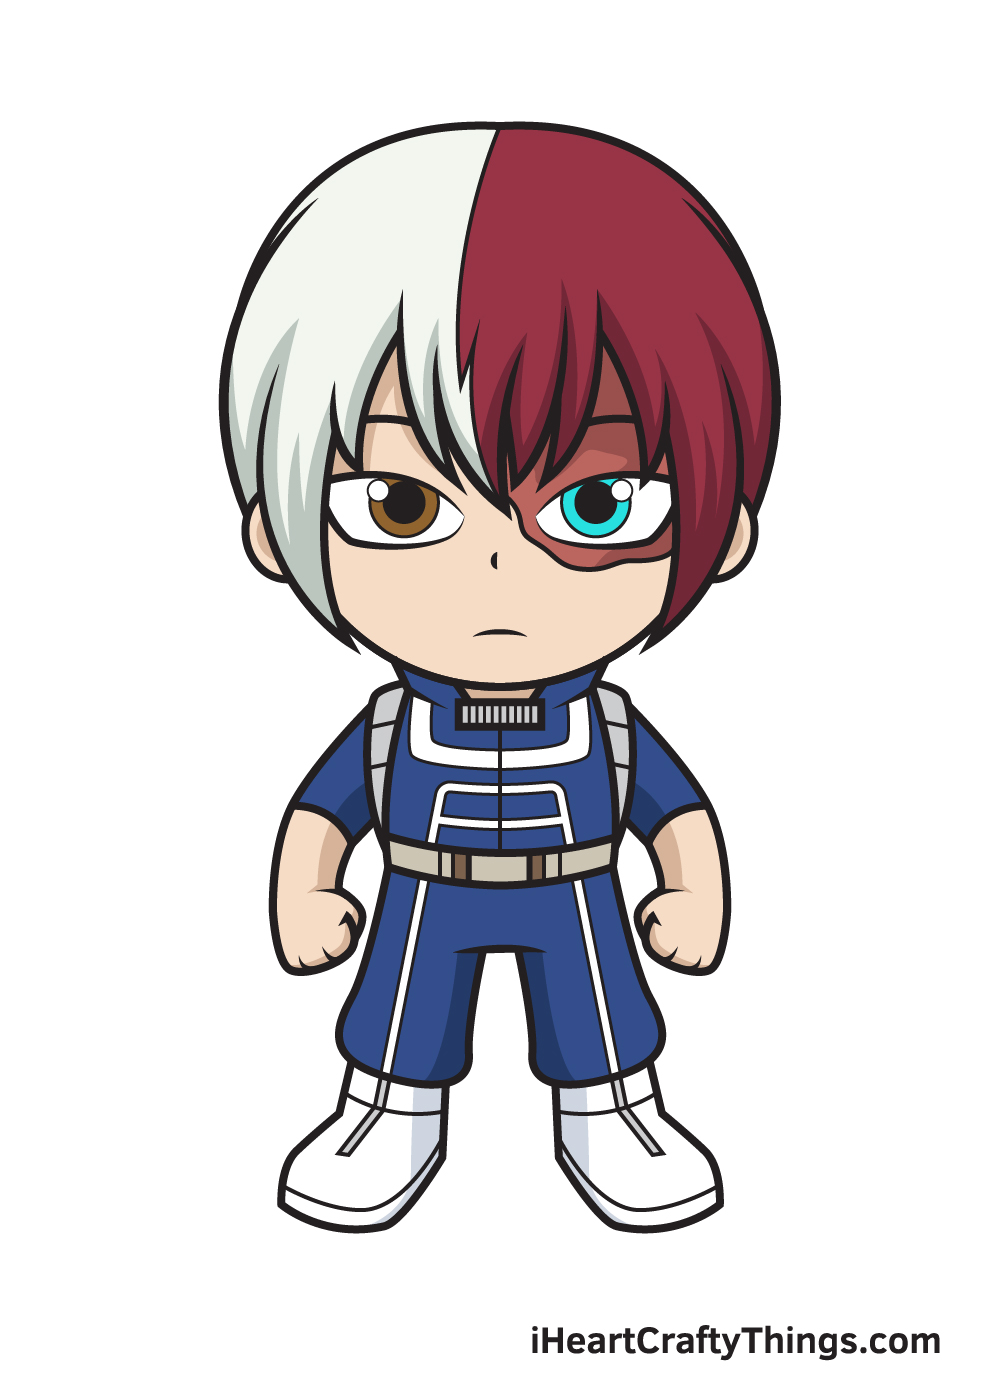
Todoroki has a specific color scheme, and we will be implementing them now. His hair is white on the left and red on the right, and then his clothing is blue with white highlights.
We used these colors for an accurate representation in our reference image, and you can go for these colors as well or use some unique ones of your own!
3 More tips to make your Todoroki drawing easy!
Make this portrayal of Todoroki easier to complete with these tips for your Todoroki sketch.
This drawing of Todoroki may be stylized, but it is still really detailed. If details are difficult for you to draw, then you could scale back the level of detail.
This wouldn’t necessarily mean removing the details, as many of them could just be simplified. When doing this, you can focus specifically on details that you are struggling with the most.
Not only could this make things easier for you, but it could also fit the cartoony style of the drawing a bit more.
This is also something you could do for now, and then you could do future attempts where you include more details.
When drawing people, even in a stylized form, the proportions can often be the hardest aspect to get right. To prepare for this, you can break your Todoroki drawing into smaller, simpler shapes.
This is a technique that can be used for any drawing you wish to attempt, and the best way to do it is by using a pencil.
The pencil will allow you to erase any mistakes, taking away a lot of the frustration.
Then, you can add layers of details until you are ready for the final lines with your pen. Once all the pencil lines are erased, no one will ever have to know about all the preparation you used!
Finally, you can use images of Todoroki from his various appearances to aid you in this Todoroki sketch. This could be his appearances in the My Hero Academia manga or anime series.
Or, you could look up images online that suit the style we have used in this guide. Even if the styles don’t match, you can use these alternative sources to make drawing the finer details much easier.
You could even use them to try out different styles and poses for your depiction of Todoroki. No matter what you use them for, they should make it all much easier to do!
Your Todoroki Drawing is Complete!
We hope that you enjoyed this guide on how to draw Todoroki!
We tried to prepare a really cool interpretation of this character for you, and our aim was to show you that it can be a fun and easy drawing to take on.
Now that you have finished the drawing, what extra details can you think of to add to it? You could also experiment with different colors and art mediums, so let your creativity flow as you add your own special touches!
When you’re ready for your next drawing, you can find more awesome guides on our website to enjoy. We update this list often, so be sure to keep checking in!
You can then show off your Todoroki drawing by sharing it on our Facebook and Pinterest pages for us to admire. We can’t wait to see how it turned out!