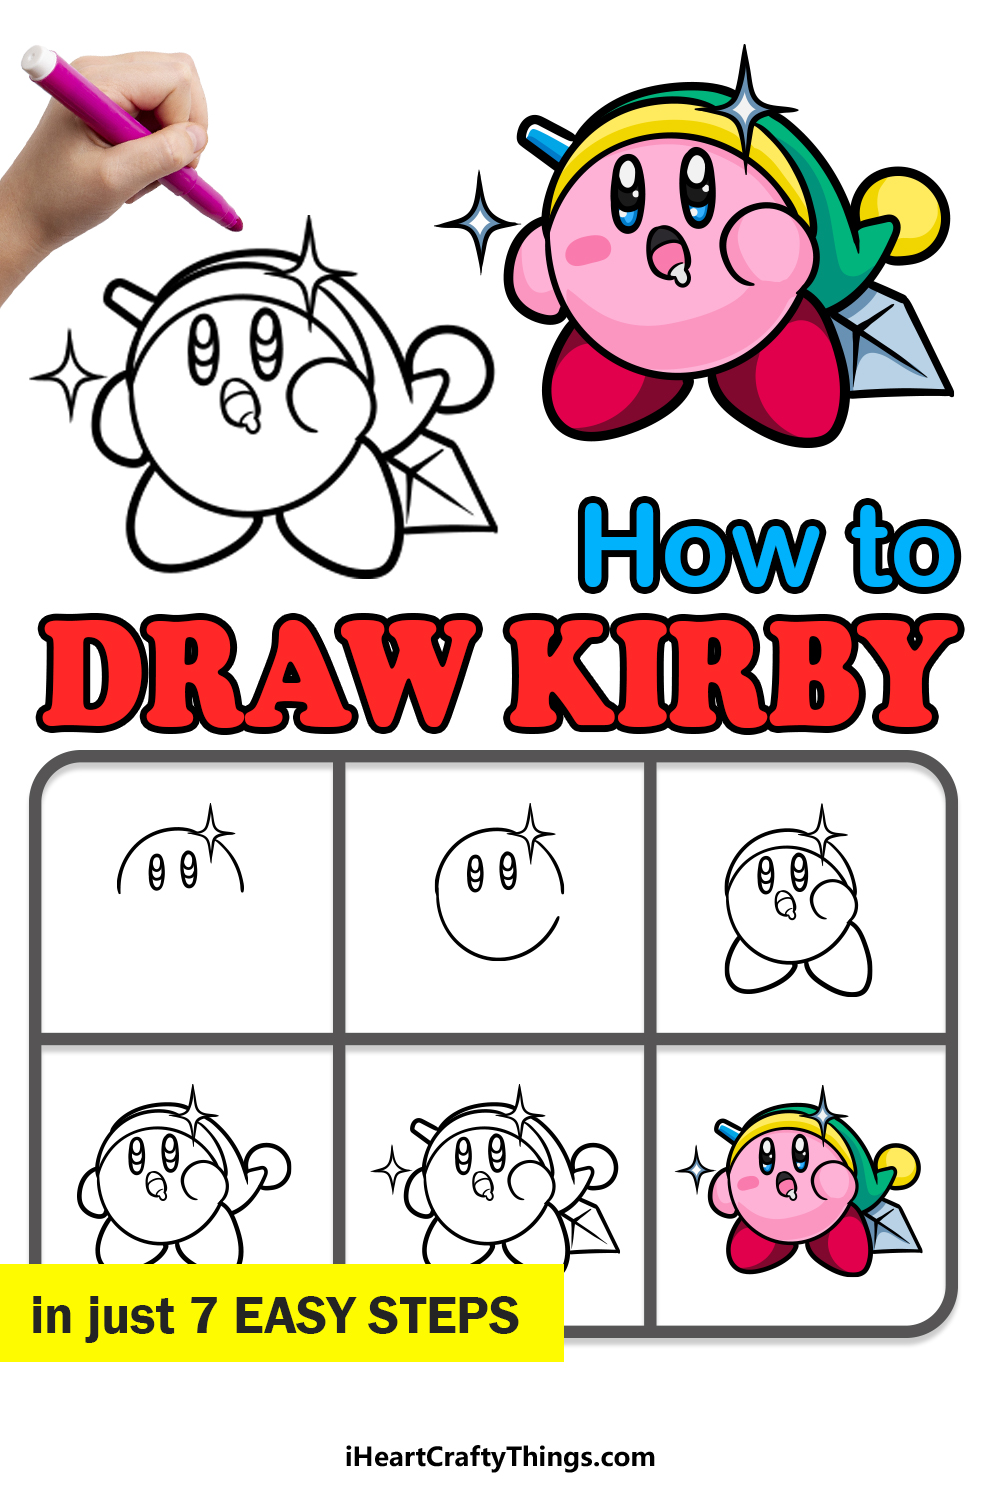
If you’ve always wanted to know how to draw Kirby, you’re in the right place! This guide for kids will make it fun and easy for you to master this drawing.
Kirby is a beloved character from Nintendo who has appeared as the star of his own games as well as in a supportive role in many other games.
He has a simple yet adorable design that has made him popular with gamers of all ages. You may think his simple design would make it easy to draw him, but it’s not as easy as you may think!
In this guide, we will see not only how to draw him but also add some accessories such as a hat and weapon. You can decide whether you want to include these or keep him in his normal appearance.
Whatever you decide, you’ll discover that it’s a lot of fun to draw him!
Watch These Steps On How To Make Your Kirby Drawing
How to Draw Kirby – Let’s get Started!
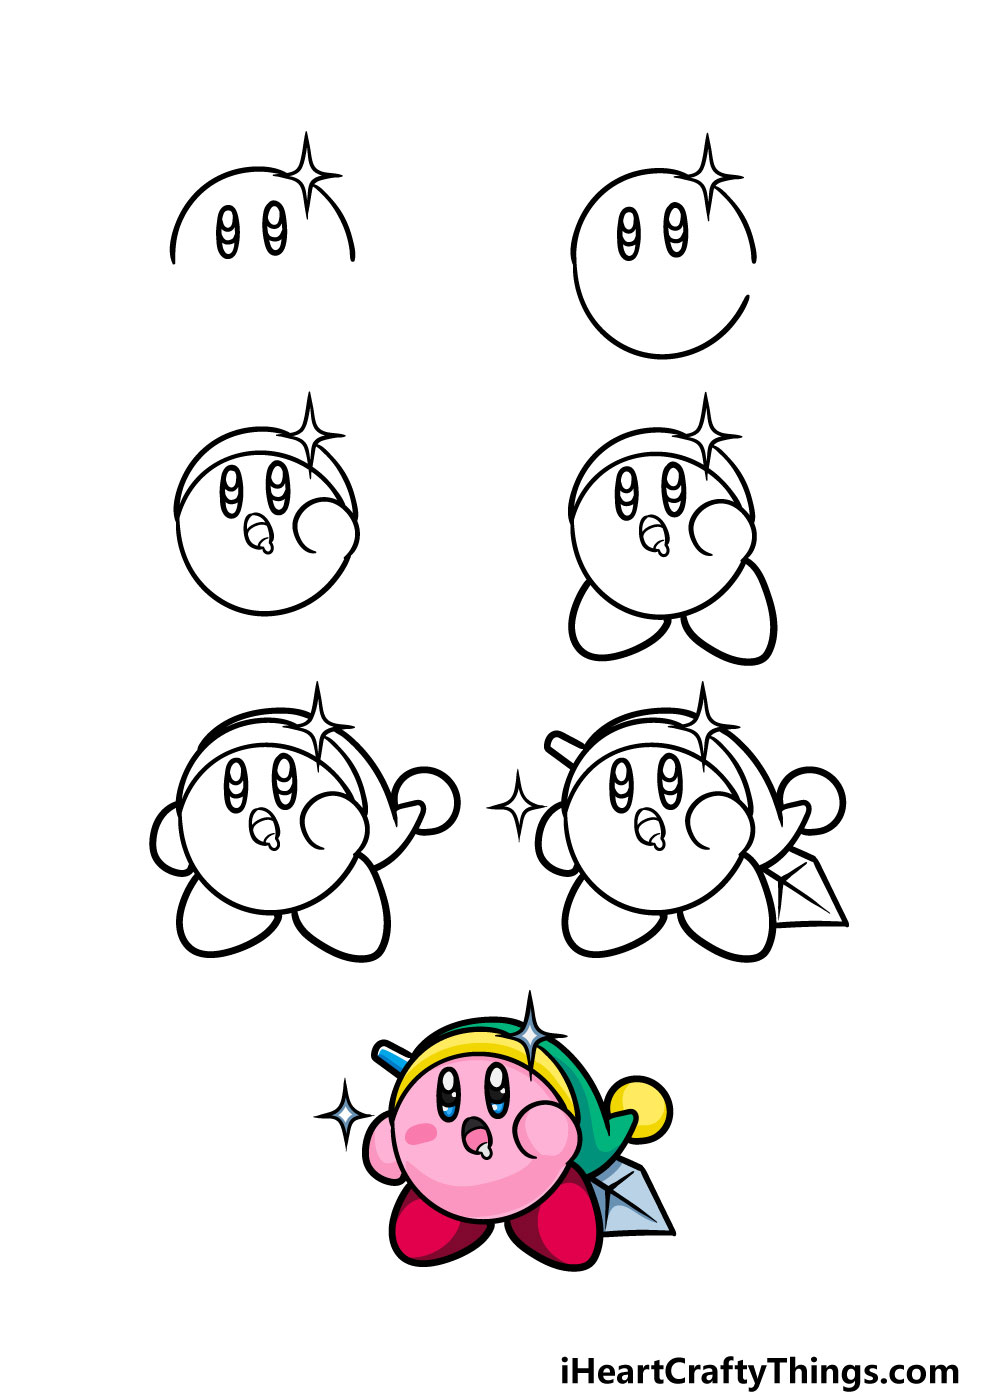
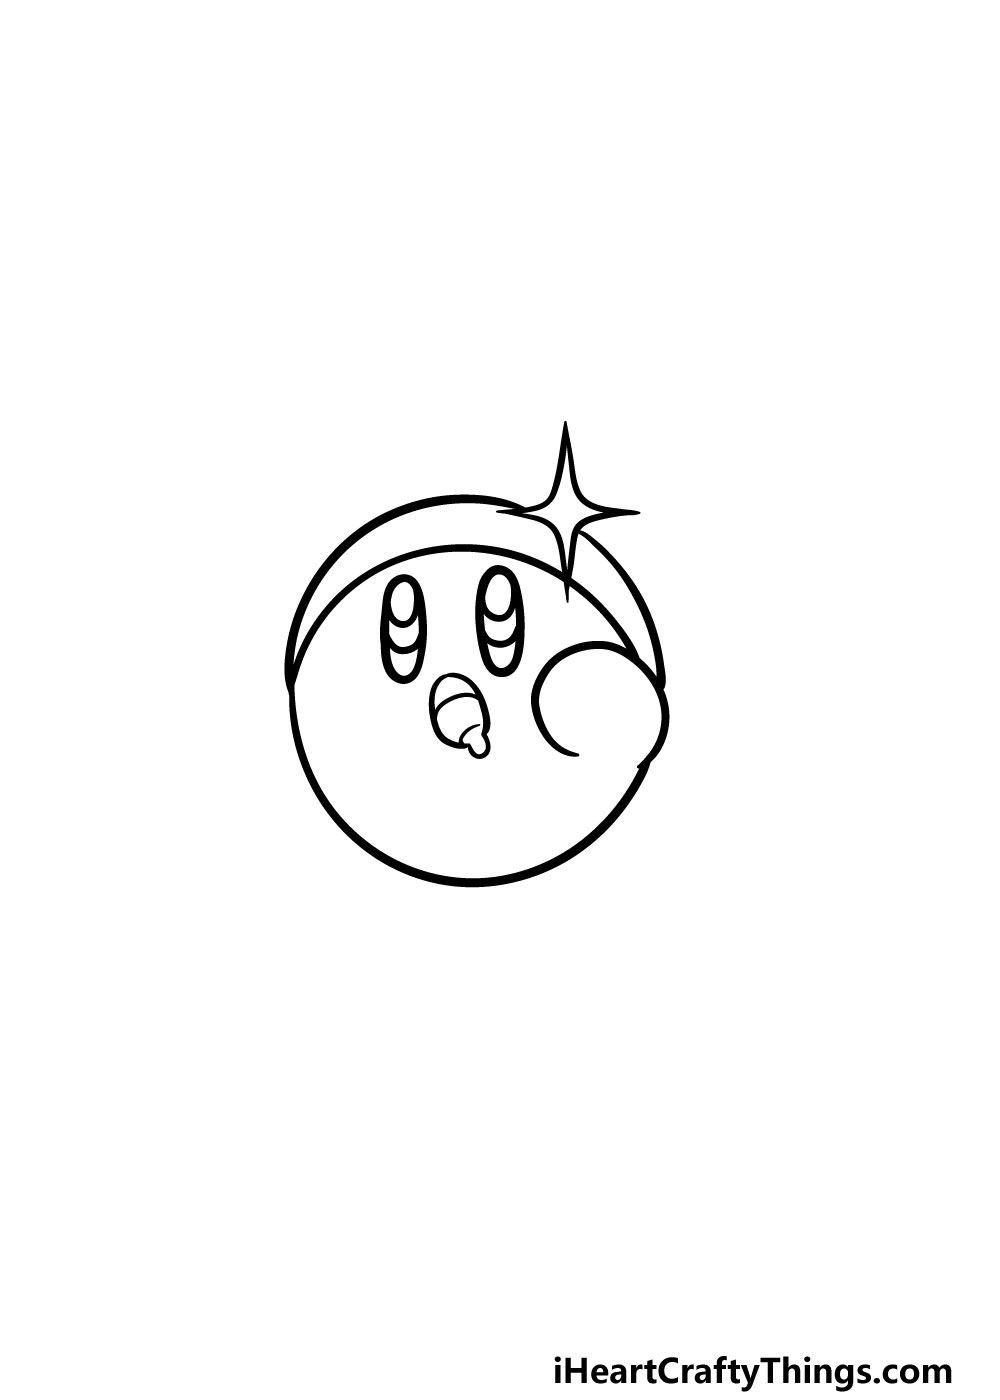
Step 1
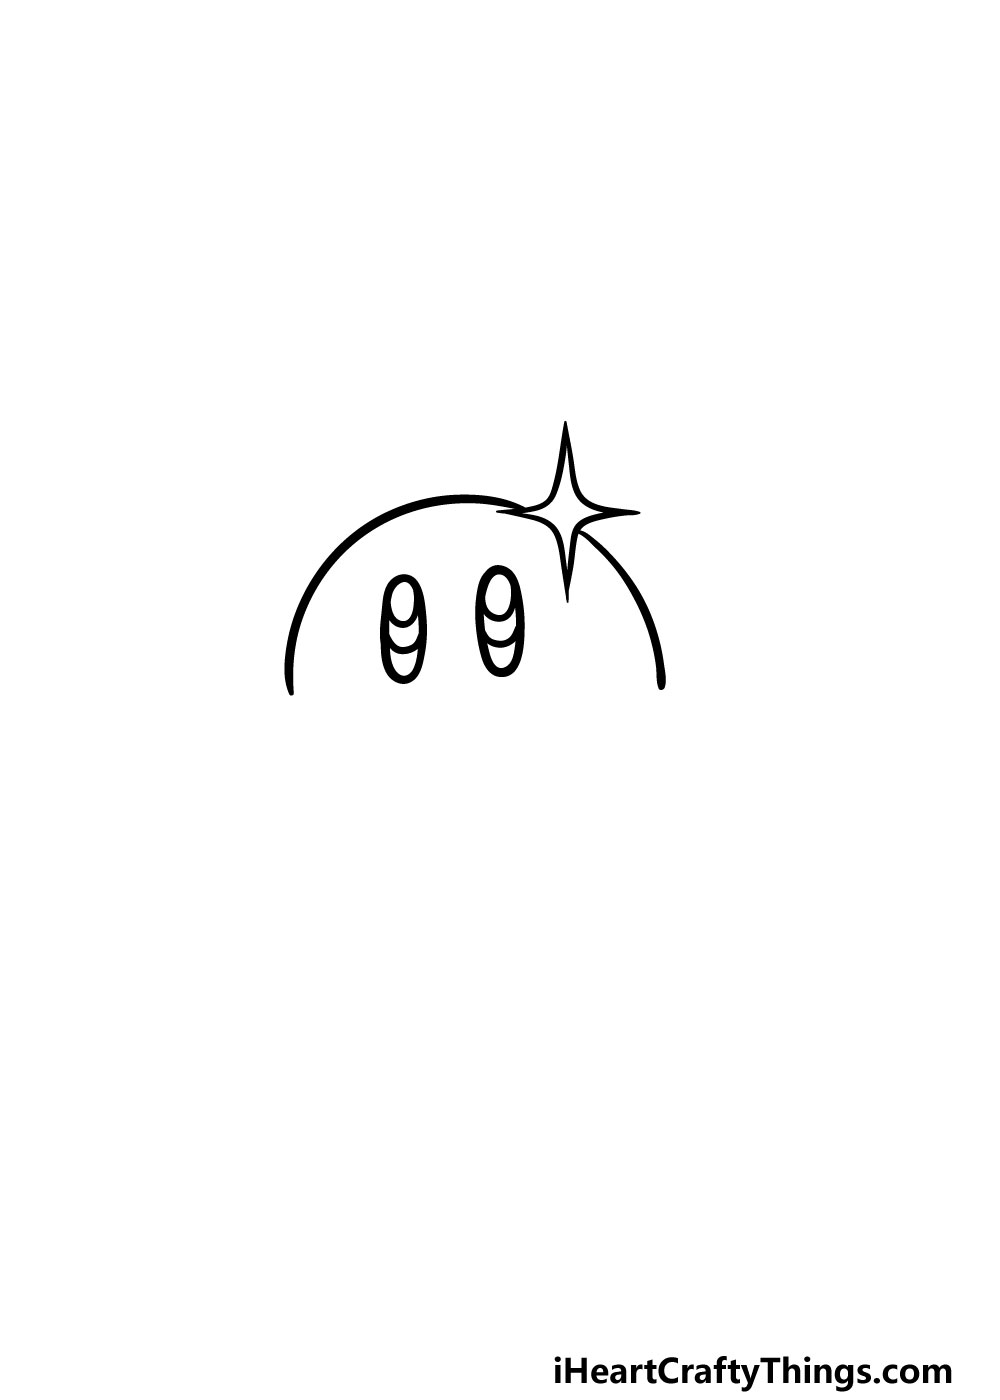
Kirby is made up of lots of simple lines and shapes, and we will start building these up in the first step of our guide on how to draw Kirby.
We will be starting with his eyes in this step, and you can draw these using two thin, vertical ovals. Then, you can add two more curved lines inside of these ovals for the pupil details.
Then, you can draw a star shape using some sharp lines, and this will be a big glint on his head.
Finally, use a curved line for the top of his round body. That’s all there is to it for this step and you’re ready to proceed!
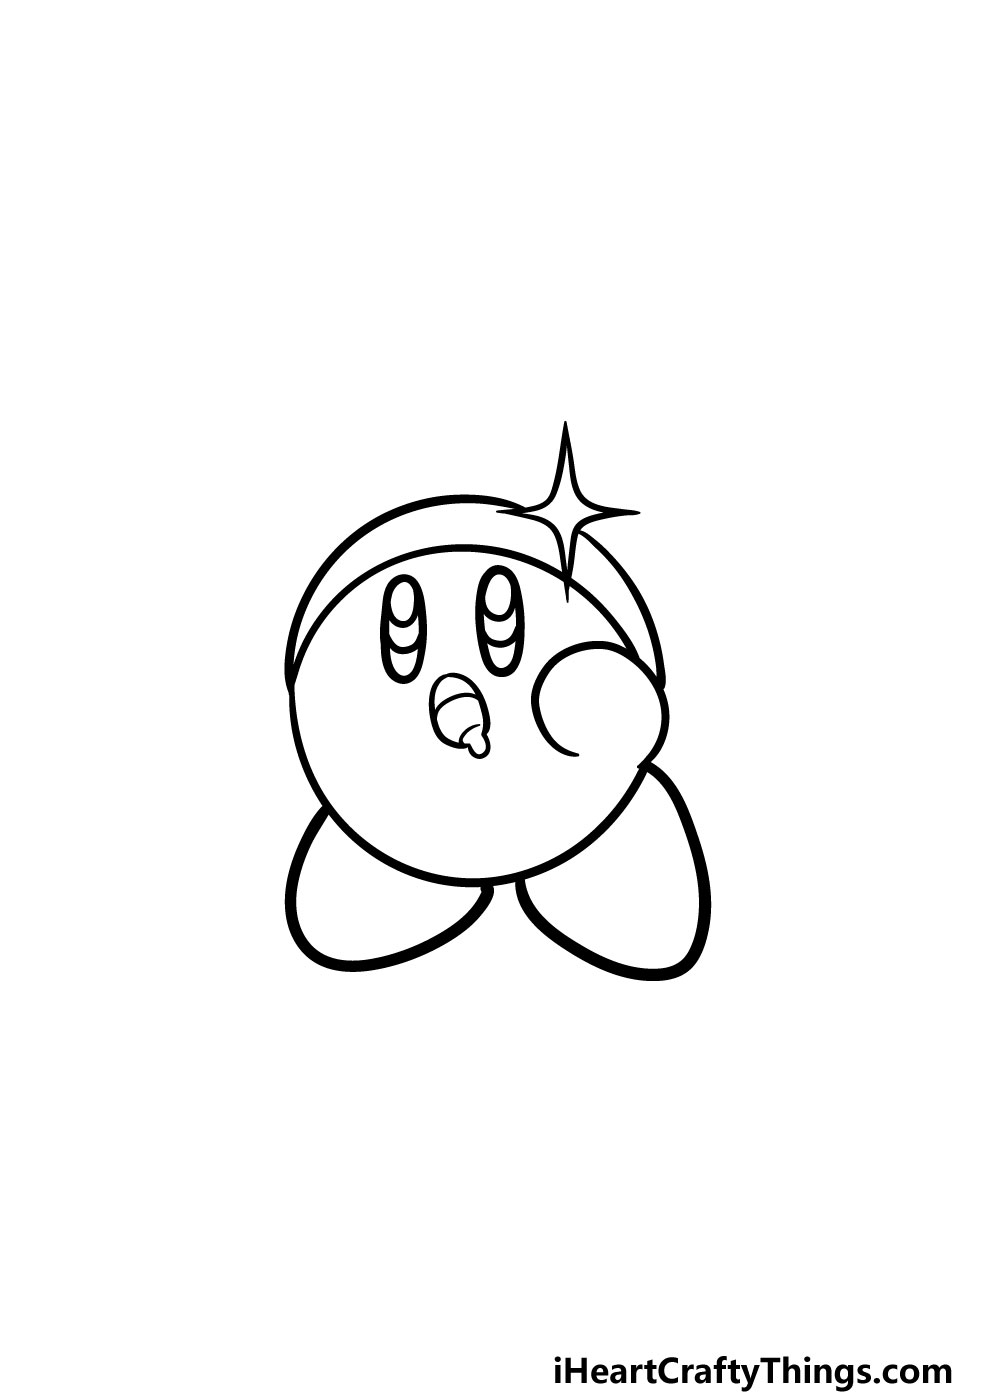
Step 2 – Draw the bottom of Kirby’s body
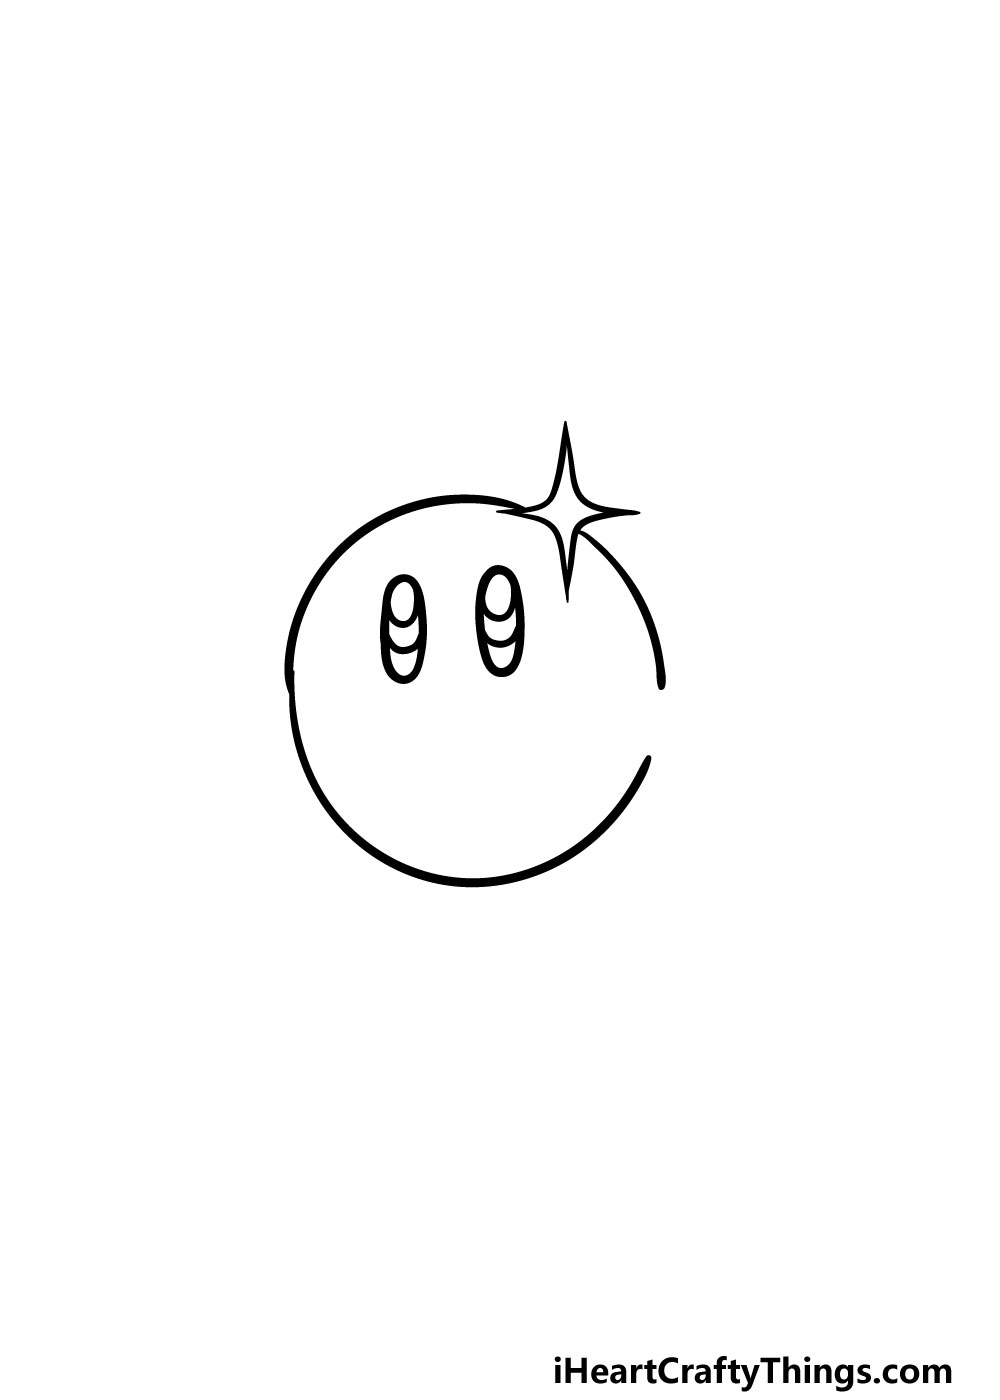
Now that you have the eyes and top of the head of Kirby drawn, we will be adding the bottom of his body in this part of your Kirby drawing.
To do this, simply draw a curved line at the bottom of his body, and after this line it should look like Kirby is almost a perfect circle.
Step 3 – Now, draw his arm, mouth and hat details
We will be adding even more details into the body outline for this step of our guide on how to draw Kirby.
First, you can draw an oval shape for his open mouth. Then, you can use some curved lines inside of this for his tongue, and you can add a small bit of drool coming out his mouth.
Then, use a curved and rounded line on the side of his body for his arm. Finally, draw a curved line across the top of his head for the rim of his hat.
Step 4 – Next, draw some feet for Kirby
Kirby has some pretty big feet, and these are what we will be adding to your Kirby drawing in this part.
His feet may be big, but they’re pretty simple as well. All you need to do is draw some large curved lines underneath his body for his feet that attach directly to his body.
That’s all you need to do for this step, so let’s move on to the next part!
Step 5 – Now, you can draw the other arm and hat for Kirby
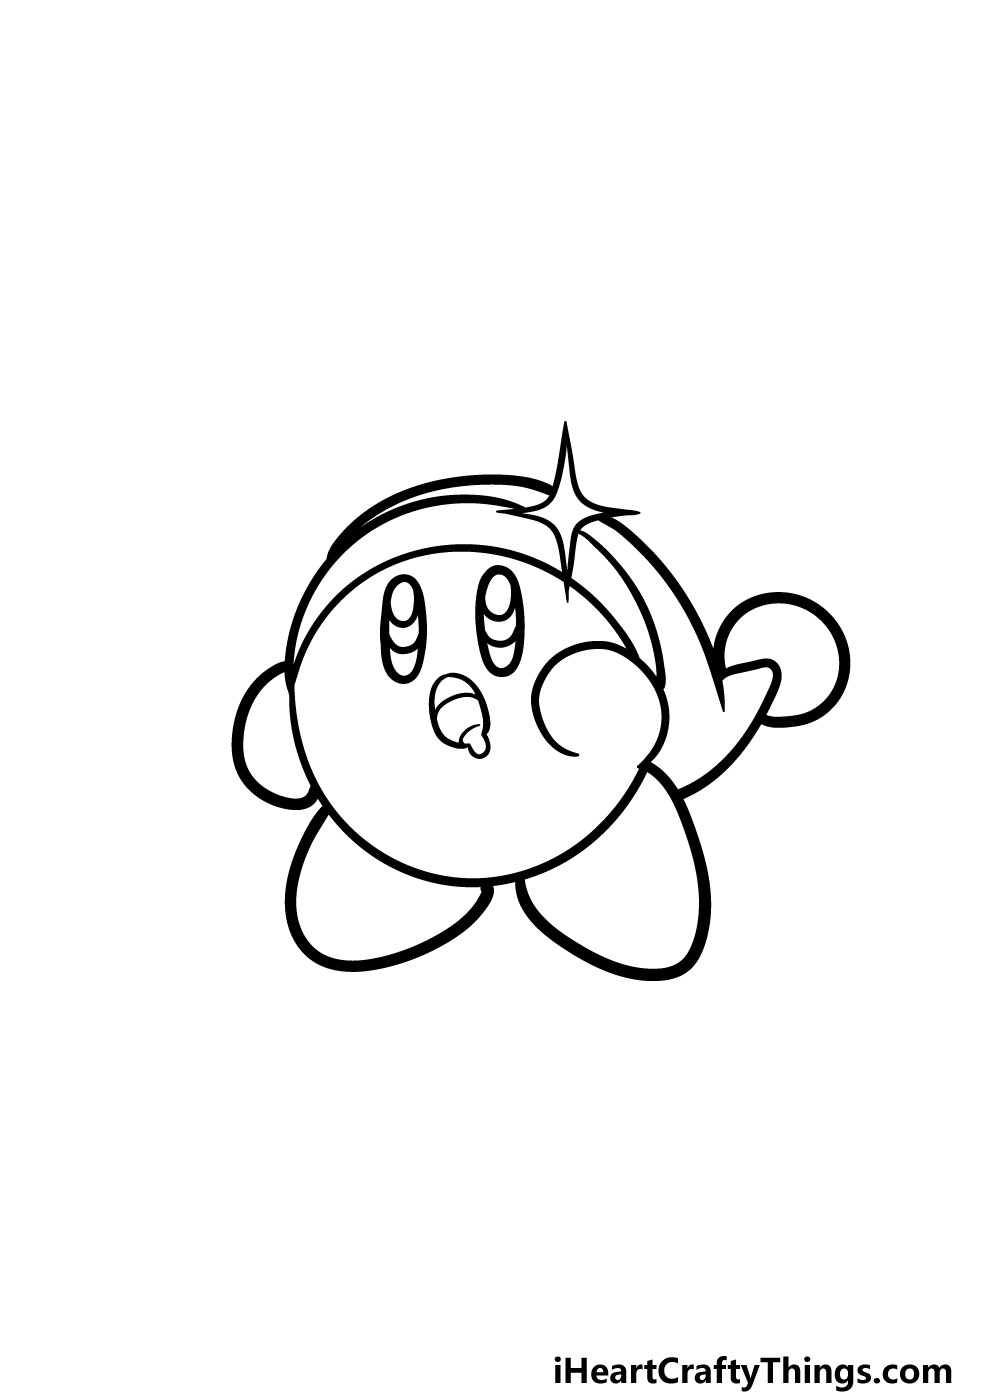
In this part of our guide on how to draw Kirby, we will be adding his hat and other arm before we move on to the final step of this guide.
To draw his second arm, you can first add another curved line onto the side of his body. Finally, use some more lines lopping out from the rim of his hat to show it flowing behind him.
The final touch will be to add a circle to the end for the bobble of the hat.
Step 6 – Draw his sword accessory and final details
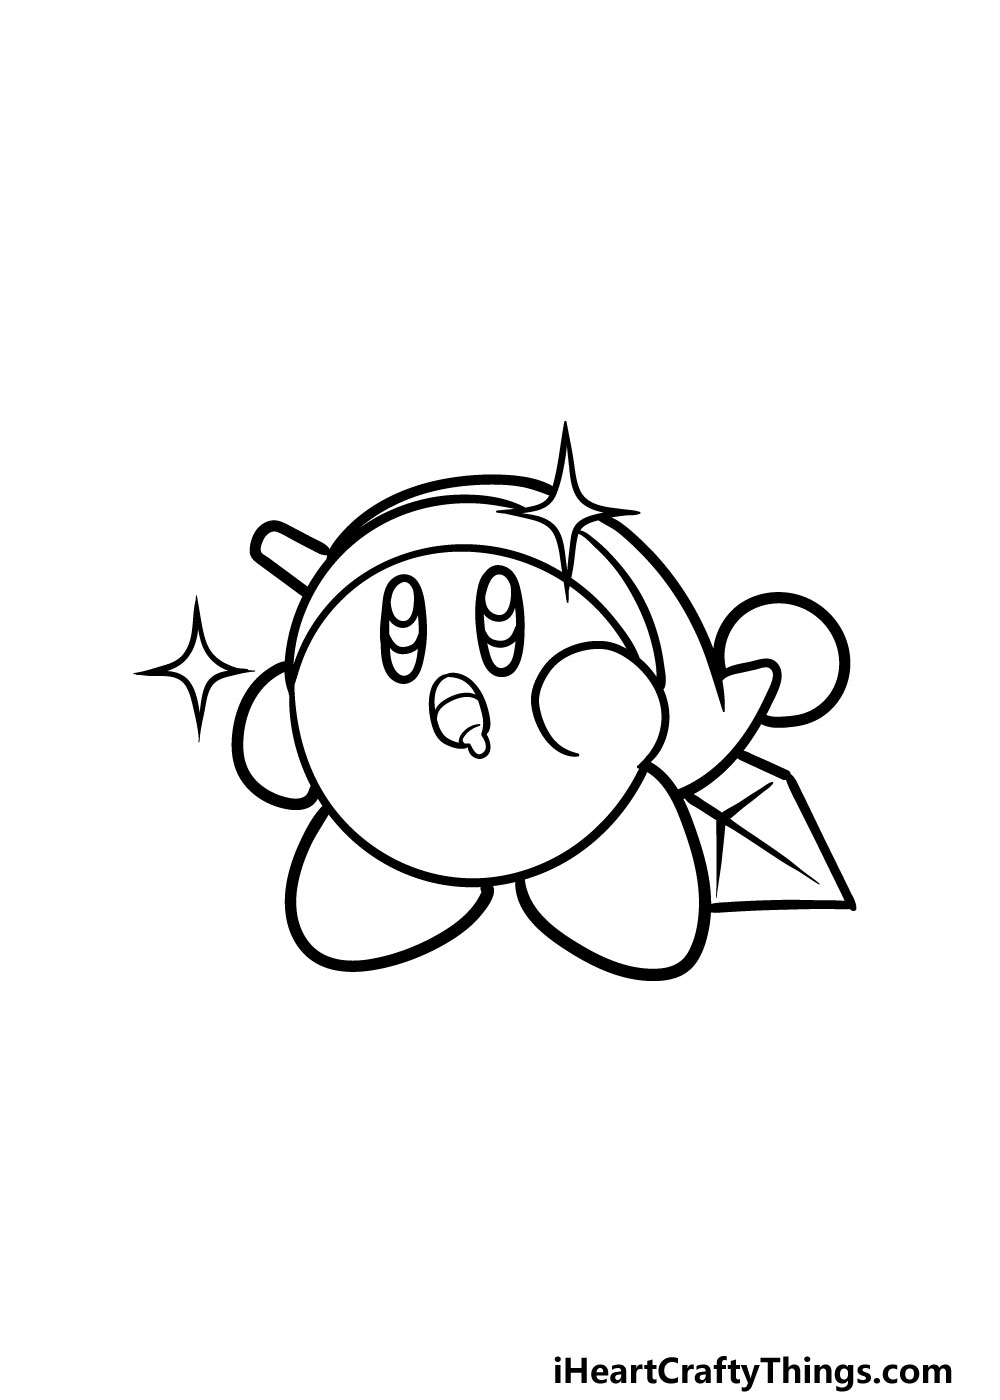
It’s almost time to add some amazing colors to your Kirby drawing, but before you do that it’s time to add the final details and touches.
To start, we will be adding the sword on his back. To do this, draw a rounded, thin shape on the top left-hand side of Kirby for the hilt. Then, use some straight lines on the bottom right-hand side of him for the blade.
Finally, you can draw another star shape next to Kirby that looks like the one you drew on his head earlier.
You could even add more if you want to as well! Before you move on, you should feel free to add any other details or elements you may want.
Perhaps you could draw a background to show what kind of environment Kirby is in or to replicate your favorite Kirby appearance. Be sure to get creative with it and see what happens!
Step 7 – Finish off your Kirby drawing with some color
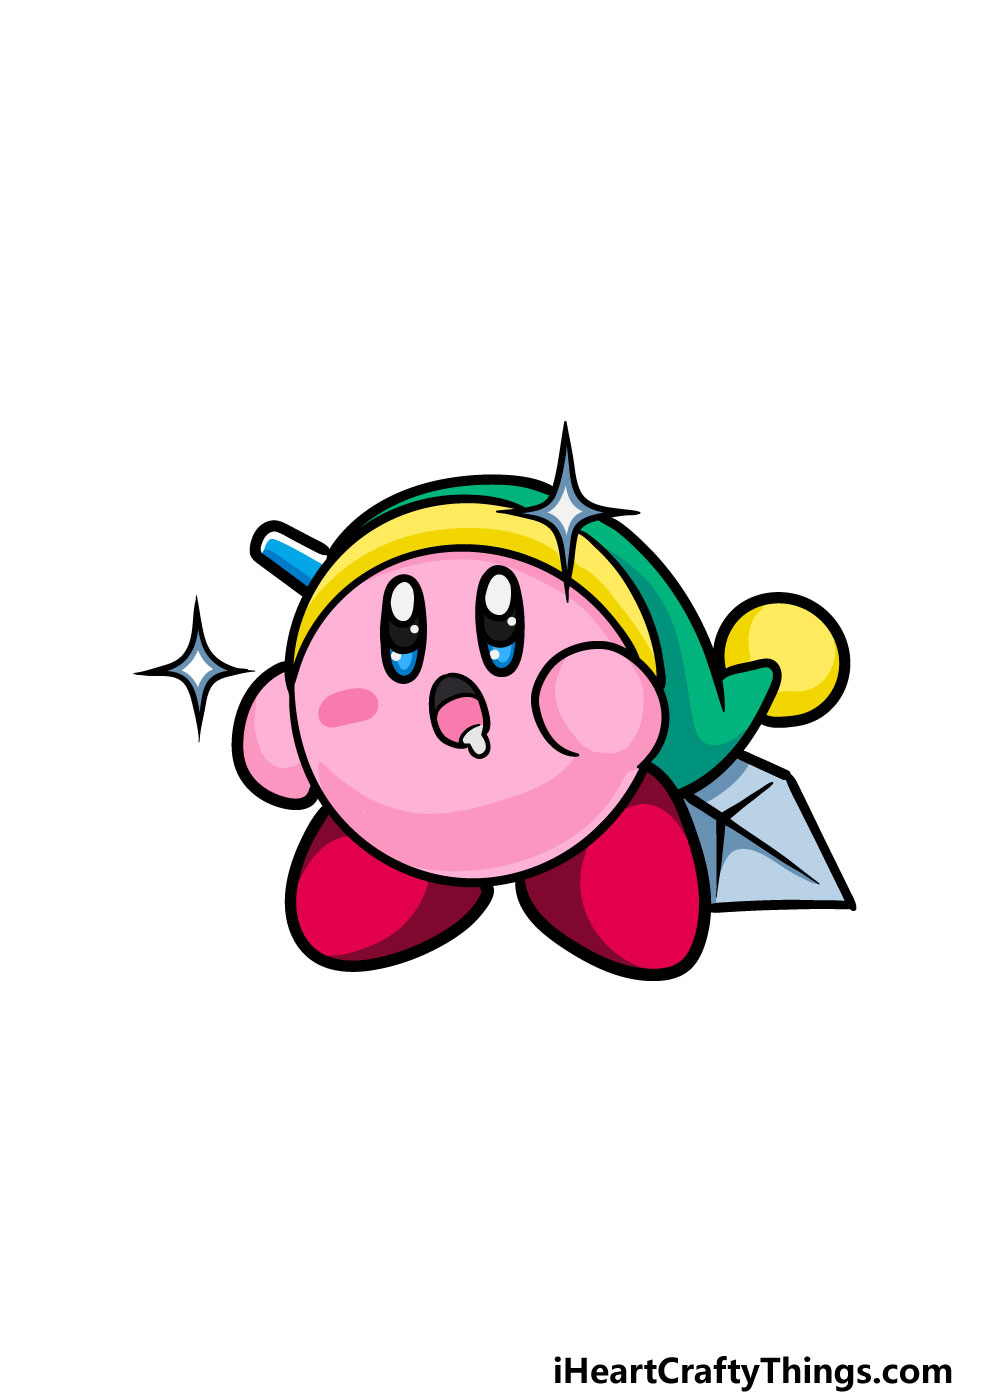
That brings you to the final step of this guide on how to draw Kirby! In our reference image, we used Kirby’s typical pretty pink coloring and incorporated some green, yellow, red and grey. This is just a suggestion, however, and you could use any colors that you want to finish it off!
You could also experiment with some amazing art mediums depending on what kind of look you would like for your Kirby drawing. What incredible colors and art tools will you use for your drawing?
Here’s how you can make your Kirby drawing even better…
Make Kirby look even better with these tips we have for your Kirby sketch!
In this drawing of Kirby, he is dressed in a hat that makes him look ready for adventure! While it’s a great look, you could also dress him in other outfits or remove it entirely.
You would have many options to choose from when looking at the various Kirby games, or you could give him a brand new look. You could also just go for the classic Kirby look with no accessories.
What kind of look would you like to create for Kirby?
Once Kirby looks exactly as you want him to, you could then draw a background to finish off this image. There are many ways that you could do this!
If you have some favorite levels from games Kirby has been in, you could use these as inspiration for the background. Or, maybe you could try and create a brand new environment that Kirby could be exploring.
Where do you think Kirby could be having an adventure in this picture?
Next, you could really make this Kirby drawing even cooler by adding some objects and accessories. This is another area where you could use the games as inspiration.
Kirby has the ability to swallow up characters and objects, and you could show this process taking place in this image. The extra objects and props could be as big or as small as you like.
You can really get creative, so what do you think you will add?
Finally, you could really complete this Kirby sketch by adding some more characters. You would certainly have many awesome characters to choose from by using the games that Nintendo has created.
These could include classic characters like Mario and Luigi, or you could stick to characters that exclusively appeared in Kirby games.
By adding these characters along with the other additions we suggested, you could create some awesome scenes starring Kirby and friends.
Which of your favorite characters could you add to finish off this picture?
Your Kirby Drawing is Complete!
We hope that you had an amazing time working on this guide on how to draw Kirby! As we mentioned earlier in the guide, Kirby may have a simple structure to him but it can still be harder than expected to draw him when you go in blind.
As long as you follow the steps in this guide and try your best you’ll be drawing him with ease in no time!
Finishing this guide is just the beginning, however, and now you can take over and put your own spin on this drawing.
Whether you incorporate your own details, change the position of Kirby or create a background, there are many things you can do to make this drawing your own.
You can also experiment with some amazing colors, art mediums and styles to bring this picture to life!
When you’re ready for more drawing fun, we hope to see you on our website! We have tons of amazing guides for you to enjoy, and we upload new ones frequently. Be sure to keep checking out the website to never miss out on the fun!
Once your Kirby drawing is complete, we would also love to see your adorable artwork. You can let us take a look by sharing it on our Facebook and Pinterest pages!