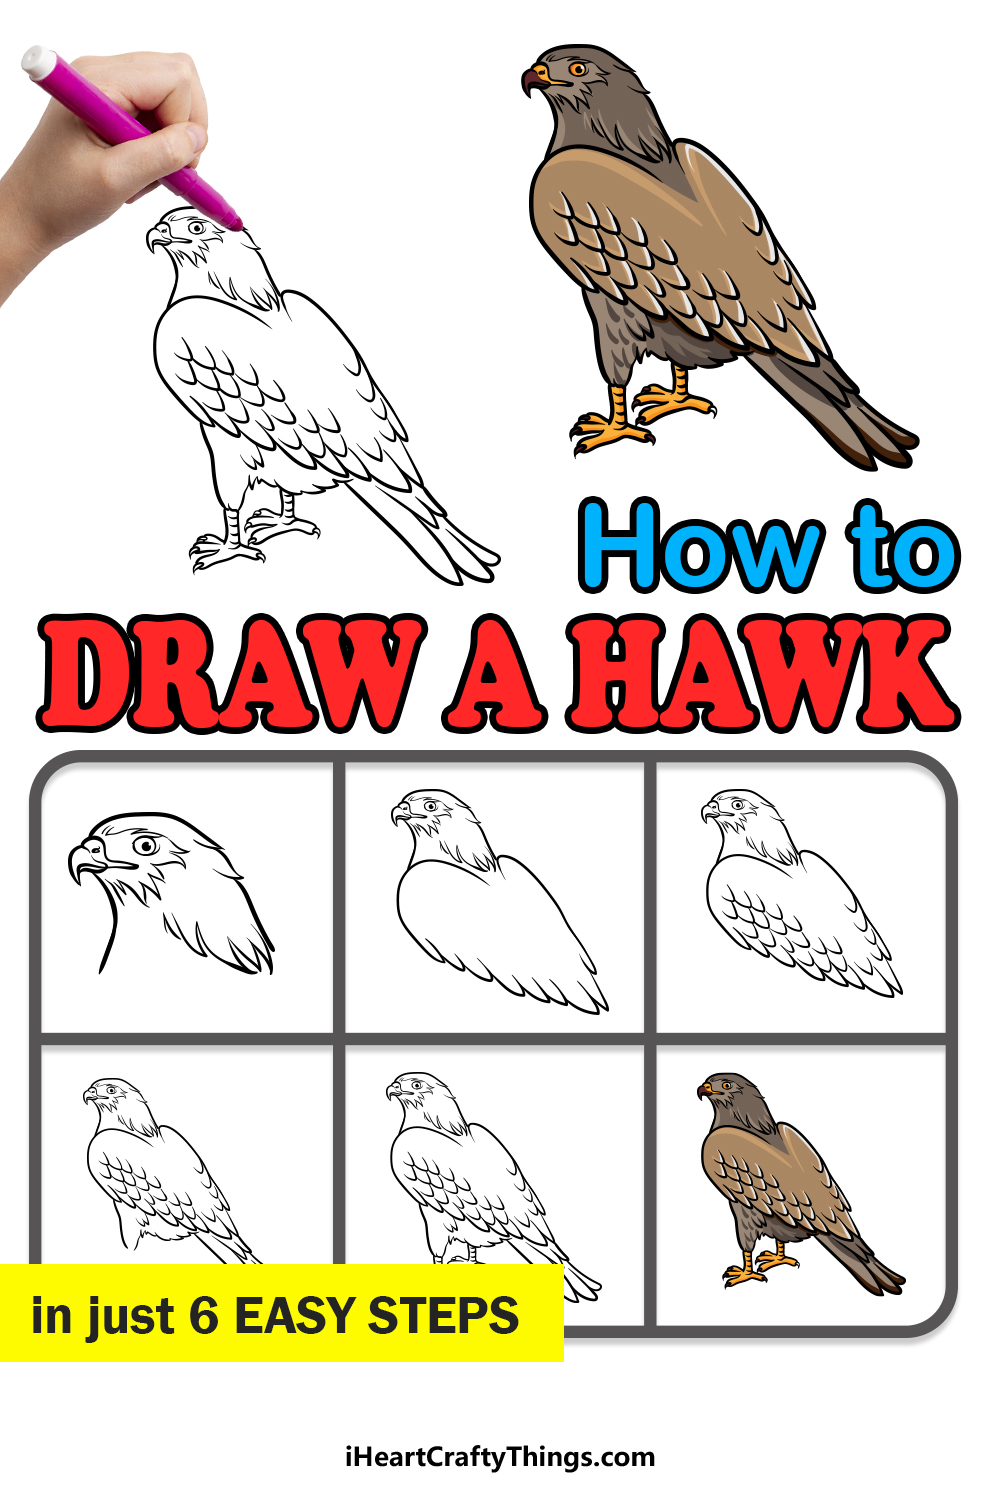
If you’ve ever wanted to learn how to draw a hawk, then this is the guide for you! Get ready to see how you can make your very own detailed depiction of one of these birds of prey.
Hawks are incredible and beautiful creatures. They are some of the most formidable birds of prey that hunt small animals with grace and efficiency.
Hawks are also a favorite of bird enthusiasts, and they are always a treat to see in the wild. It’s common for bird lovers to try and draw a hawk, but it can be quite a challenge.
Getting all of the little details right isn’t easy, and it can lead to frustration. This guide aims to eliminate that frustration as I guide you through all of the steps.
By the end, you will have a detailed hawk to be proud of and show off!
See How To Make Your Hawk Drawing By Watching This
How to Draw A Hawk – Let’s Get Started!
Step 1

In this first step of this guide on how to draw a hawk, we will be starting with a pencil outline of the hawk.
We will be using a pencil for now, as this will be a rough guide that will help you as you add details in the next few steps. For now, you can follow the reference image to draw the rough shape of the hawk.
Once you’re happy with how it looks, you can use your pen to start drawing the head and neck of the hawk.
You can also draw the eye and beak, and as you start with your pen you will be adding some finer details as well.
Step 2 – Next, draw the wings of your hawk drawing
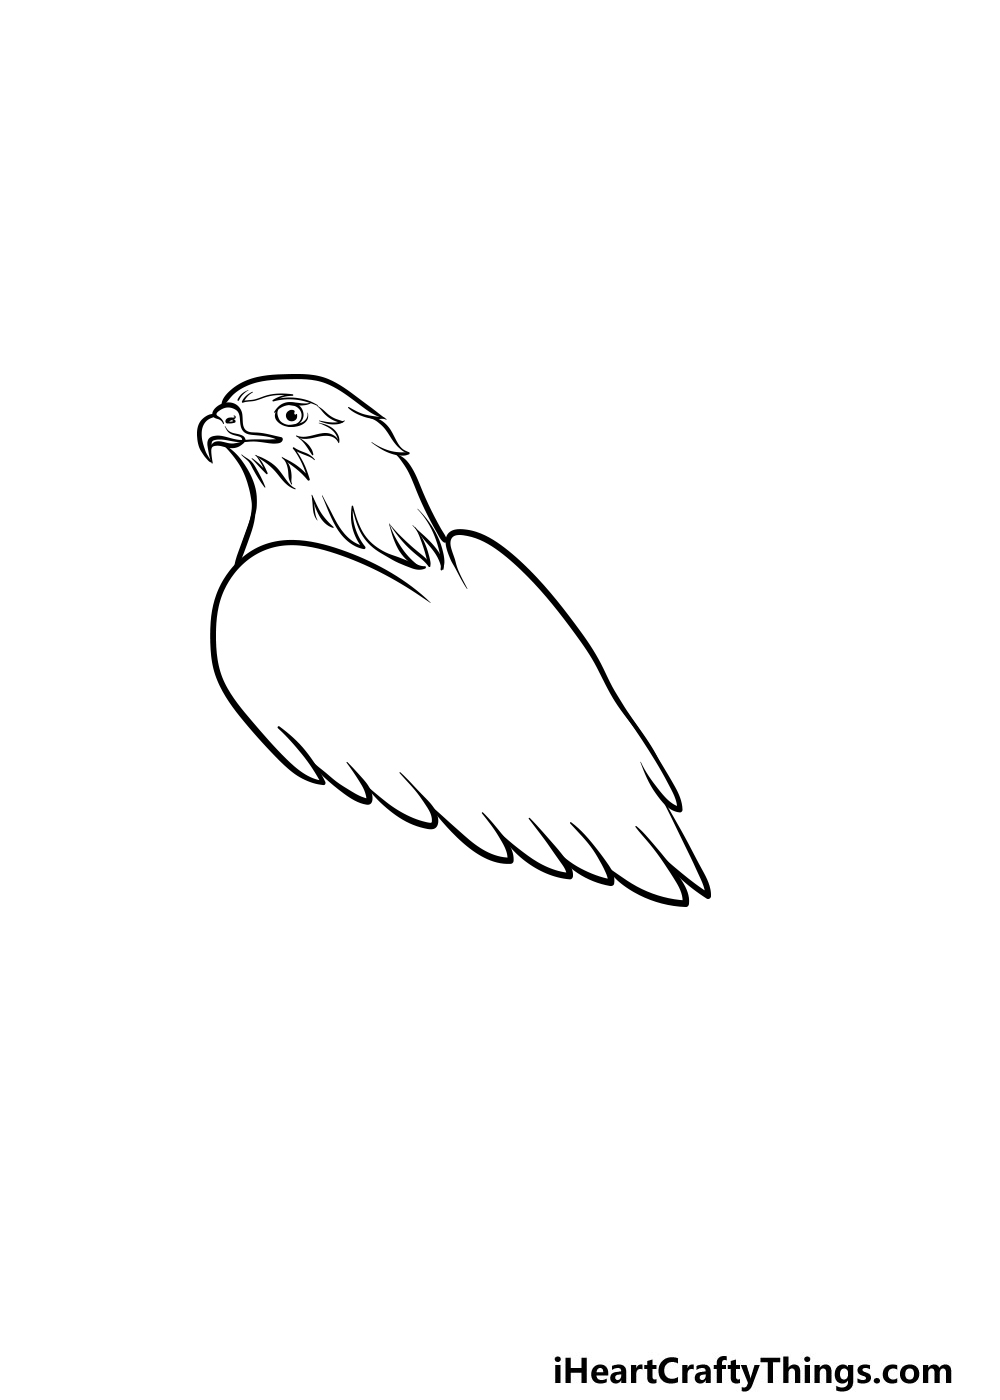
In this part of your hawk drawing, you will be using your pen to go over the wing outlines that you drew in step 1.
While drawing now, you will be adding some sharp lines along the edges of the wings to create some feathery detail. With these wings drawn, you’re ready for the next step.
Step 3 – Now, draw some feathery details for your hawk

We will be working inwards for some detail in this step of our guide on how to draw a hawk. To add some feather details, you can add lots of sharply curved lines that connect with one another.
These will extend inward from the edge of the wings towards the center of it. The wing on our left will have many more of these lines than the one on the right.
These lines are a simple detail, but they’re effective in creating some convincing feather detail!
Step 4 – Keep adding more pen lines in this step
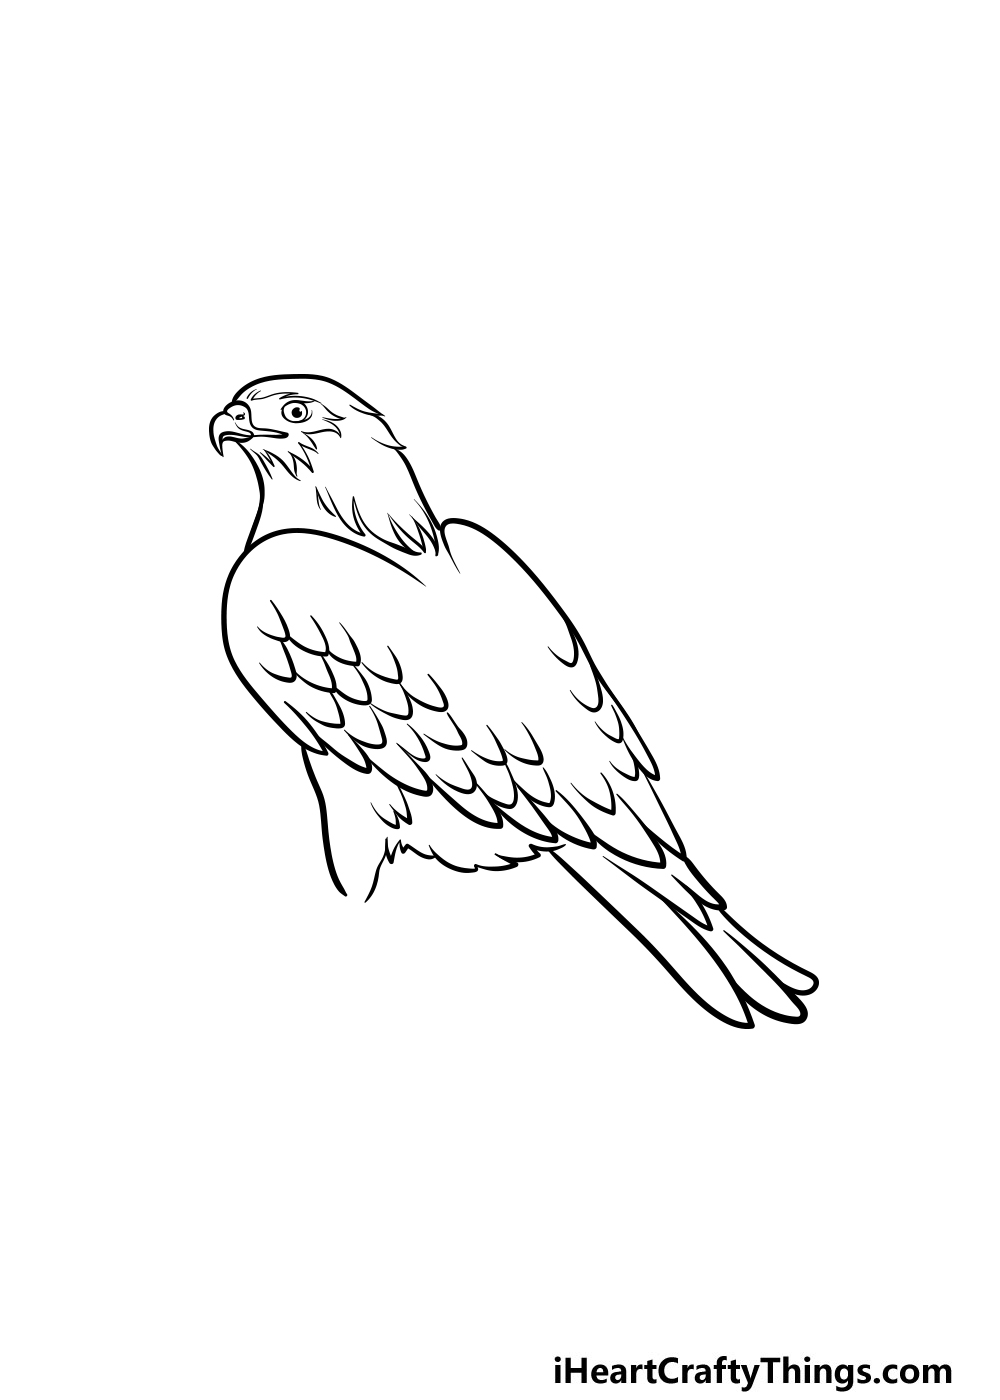
Your hawk drawing needs some more body outlines, so we will be adding these in this step. For this part, we will be adding some outlines to the legs and tail feathers of the hawk.
As you did with the previous steps, these lines will go over the pencil ones, but you will be adding more refined details as you go along.
Once you have these lines drawn, there are only a few more final details to add which we’ll take care of in the next step.
Step 5 – Now, add the final details and erase the pencil lines
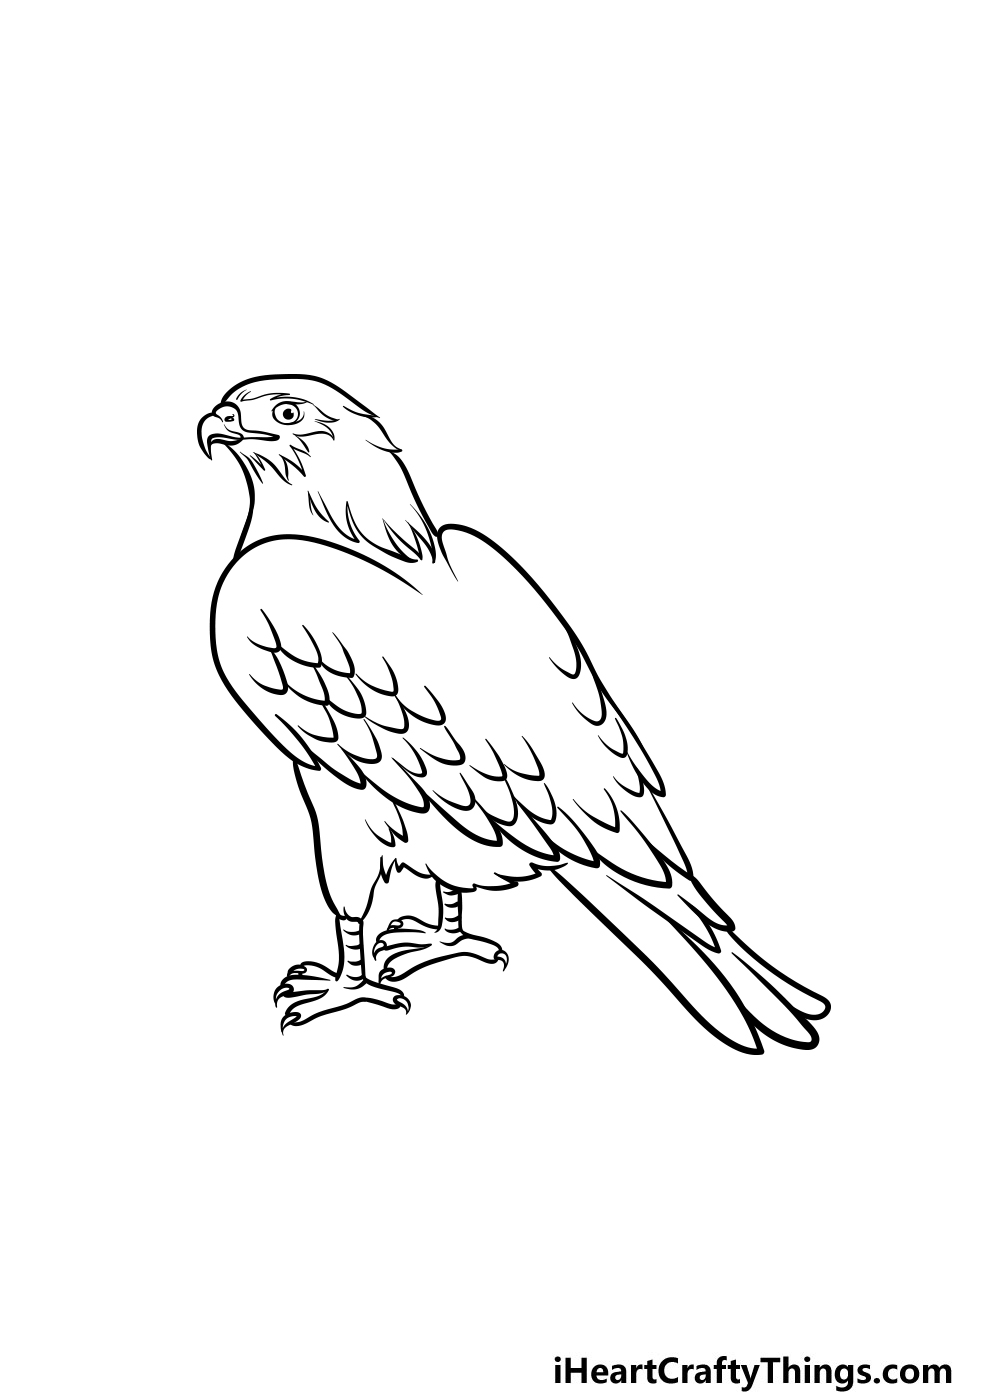
This part of our guide on how to draw a hawk will be all about finishing off the final details and elements before you color it in.
First, you can draw the bottom of the legs of the hawk. Then, when you’ve added all of the final details we show in this reference image you can erase all of the pencil lines from the first step.
Be cautious when doing this erasing, as you’ll want to be sure that all of the pen lines are completely dry before you start digging in with your eraser.
Before you move on to the final step, be sure to add any extra elements and details that you would like for your hawk drawing!
You could change the position of the hawk a bit, teak some of the finer details or even draw a background.
You could look up some pictures of some stunning scenic backdrops to use as inspiration for some backgrounds you could draw.
What extra details and fun elements can you think of to finish off this drawing before the final step?
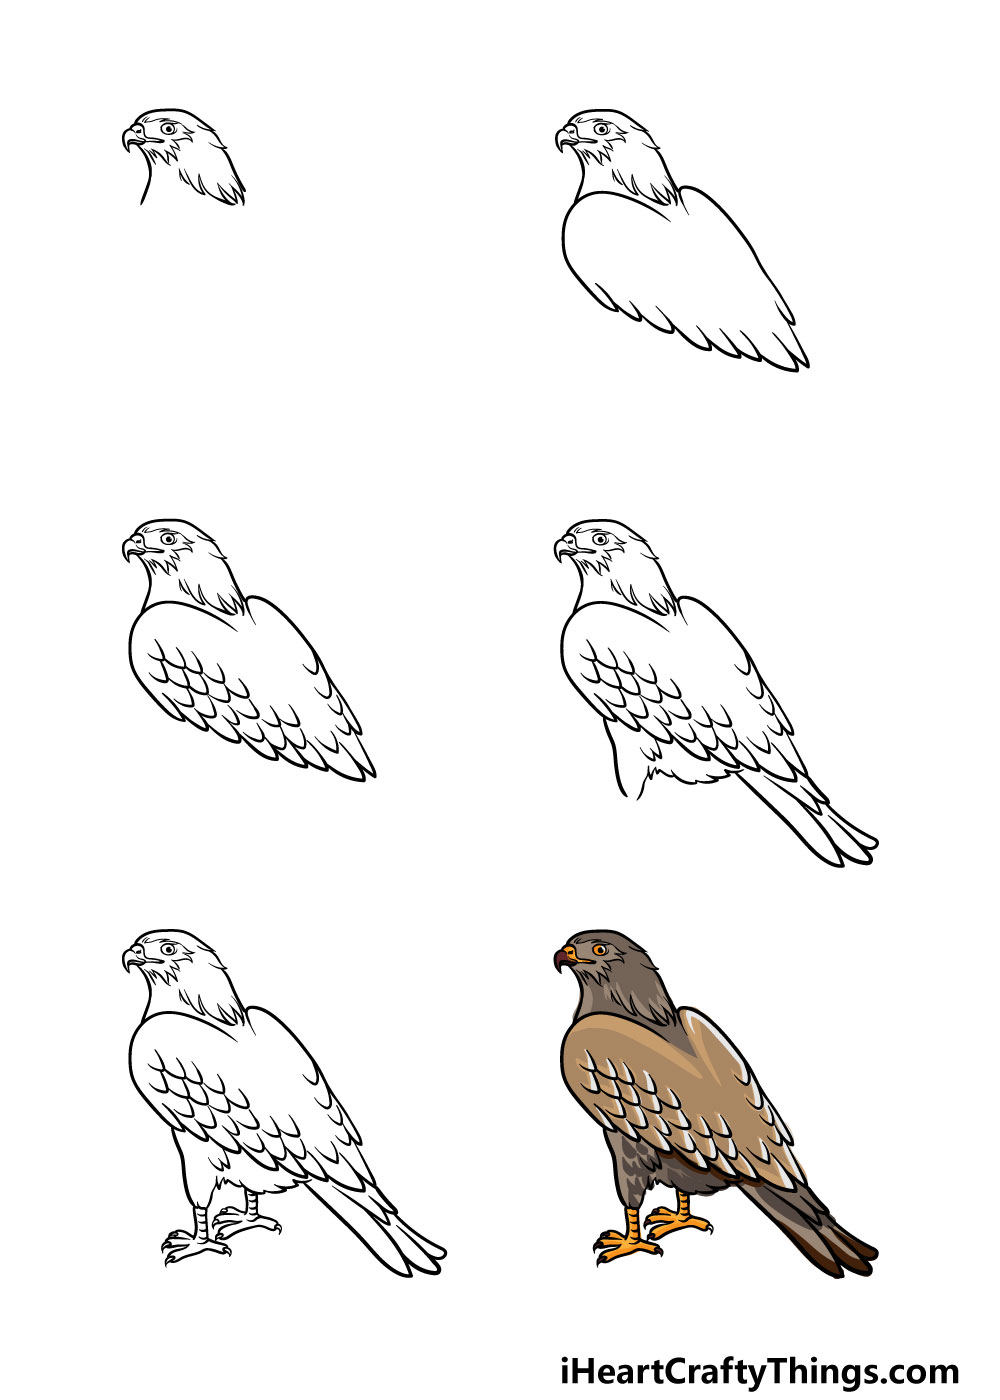
Step 6 – Finish off your hawk drawing with some color
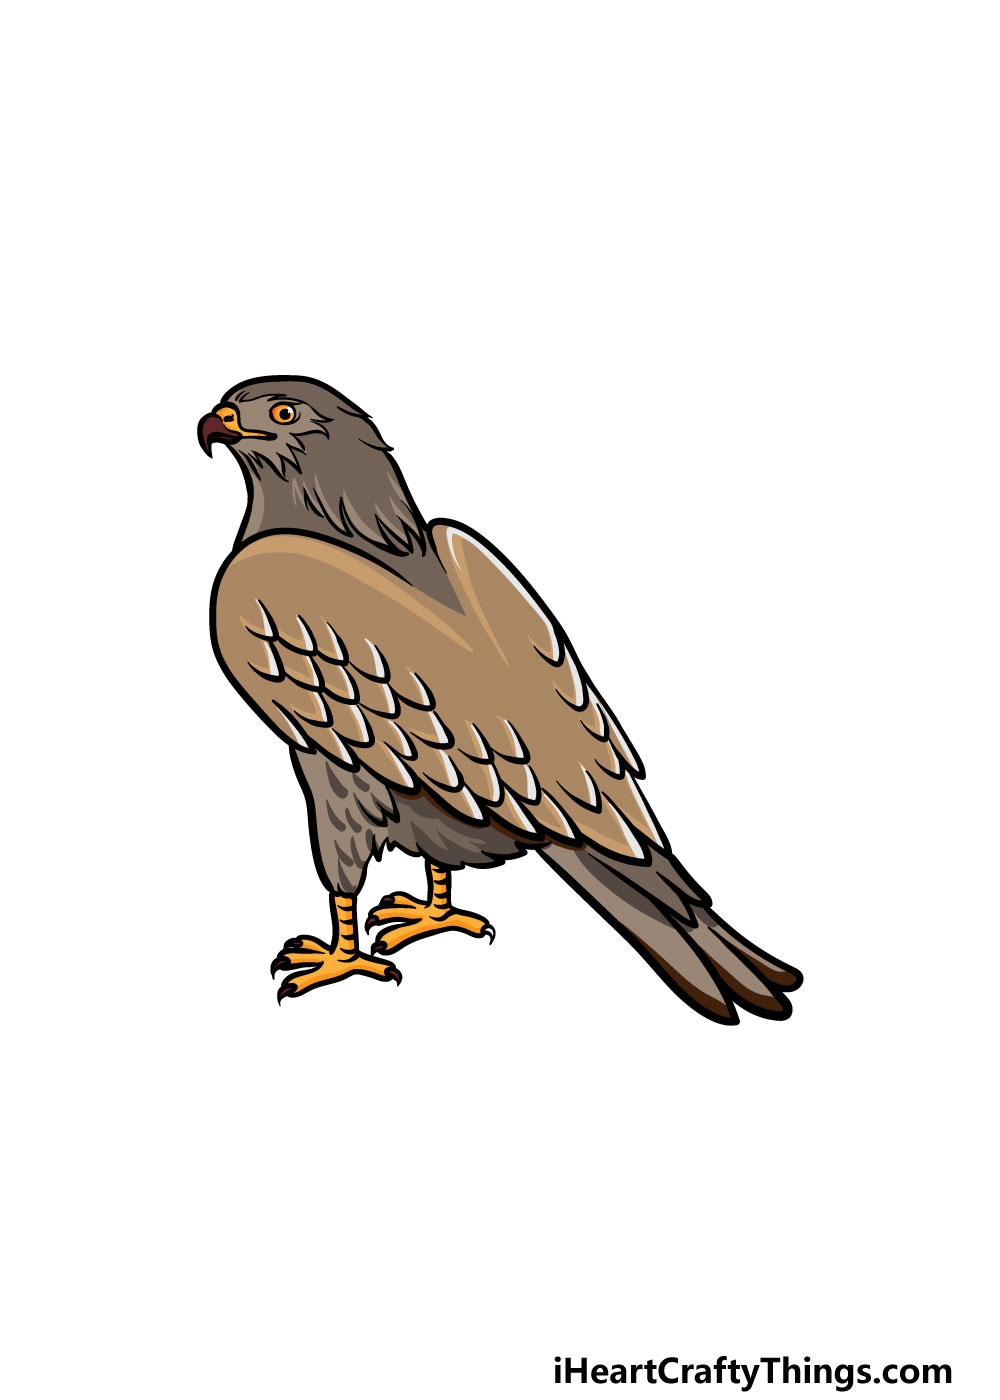
You’ve reached the final step of your hawk drawing, and this one is lots of fun! This is the step where you get to take over and show how creative you can be with your colors.
In our reference image we used a variety of different shades of brown for the feathers and used some oranges for the beak and legs.
These are the colors we chose to use for our example, but you could use any colors that you like for yours!
You could even go for a more stylistic look and use your favorite bright colors for your hawk!
If you drew a background or any extra details then you can also color these elements in for some extra color variation.
Whether you add your colors using paints, colored pens, markers or any other tools that you like we know that it will look incredible!
3 More tips to make your hawk drawing easy!
Make this easy to draw hawk even easier after we share these 3 fun tips!
For this hawk drawing, we went with a style that is halfway between being realistic and more stylized.
Depending on what you find easier, you could change the style to go more in a certain direction.
For example, maybe you generally prefer drawing in a completely cartoon style. If so, you could easily change this design to fit more with what you’re comfortable with.
The same can be true if you generally prefer drawing in a more realistic style. Do you have a style that you could adapt this picture into?
When taking on a drawing of a real thing, you may want to consult some more references as you draw. The same is true of this drawing of a hawk that we have for you.
We broke it down into easy steps for you, but it couldn’t hurt to consult other pictures as well. The very best source you could use would be actual photos of real hawks.
There are several places where you can find photos of hawks that you can use. The easiest way is by doing an image search online for hawks that you can use to help you as you draw.
Otherwise, you can check out wildlife books at your local library that contain pictures of hawks. If you use these references along with our guide images, you will certainly find it much easier!
When taking on any drawing, the temptation is always to dive in with your pen and start drawing. But that can get frustrating because if you make a mistake then you have to start all over!
One of the best ways to remove that risk is by using your pencil first. You can use this to create basic shapes that form the general outline of the hawk.
Then you can make these shapes more and more refined until you start to add the finer details. It’s a bit more work, but by the time you add your pen you will be completely happy!
Your Hawk Drawing is Complete!
With these final details added and the colors filled in you have reached the end of this guide on how to draw a hawk!
This picture may have looked like it would be a challenge when you set out, but a new drawing is always much easier to take on when you break it down into smaller steps.
We hope that this tutorial was not only helpful but also a lot of fun for you to work with!
Now you can take over and really show off your creativity as you finish off this picture. You can do this with your own details, elements or additions.
You can also really put your own spin on this image by creating an amazing background or with the colors and art mediums that you use. Be sure to let your creativity flow and see what happens!
Our website is full of amazing drawing guides for you to enjoy, so we hope you will visit us there when you’re ready for more drawing fun.
We upload new guides all the time as well, so be sure to check in often to never miss out!
When your hawk drawing is complete, we hope that you will share it on our Facebook and Pinterest pages. We can’t wait to see your incredible hawk artwork!