In the world of video games, it’s hard to think of any series that is iconic as the Mario series of games. These have covered many games, spin-offs, toys and even films.
There is a wealth of creativity in this world, and it’s filled with many beloved characters and creatures that fans around the world love.
Toad from Mario is one of these characters, and he is a fan favorite.
While he is named Toad, he is actually a little mushroom character, and he is really cute as well. There are some variations of Toad, but his design remains fairly consistent.
Fans of the Mario series love to create fan art of their favorite characters, and it can be a great way to show off favorite characters.
Fans of this character would surely like to know how to draw Toad from Mario in the easiest way possible.
That’s what we will be covering in this guide, as we will show you how to draw this classic Mario character.
Not only that, but we will also cover some changes you can make in order to make it even more unique.
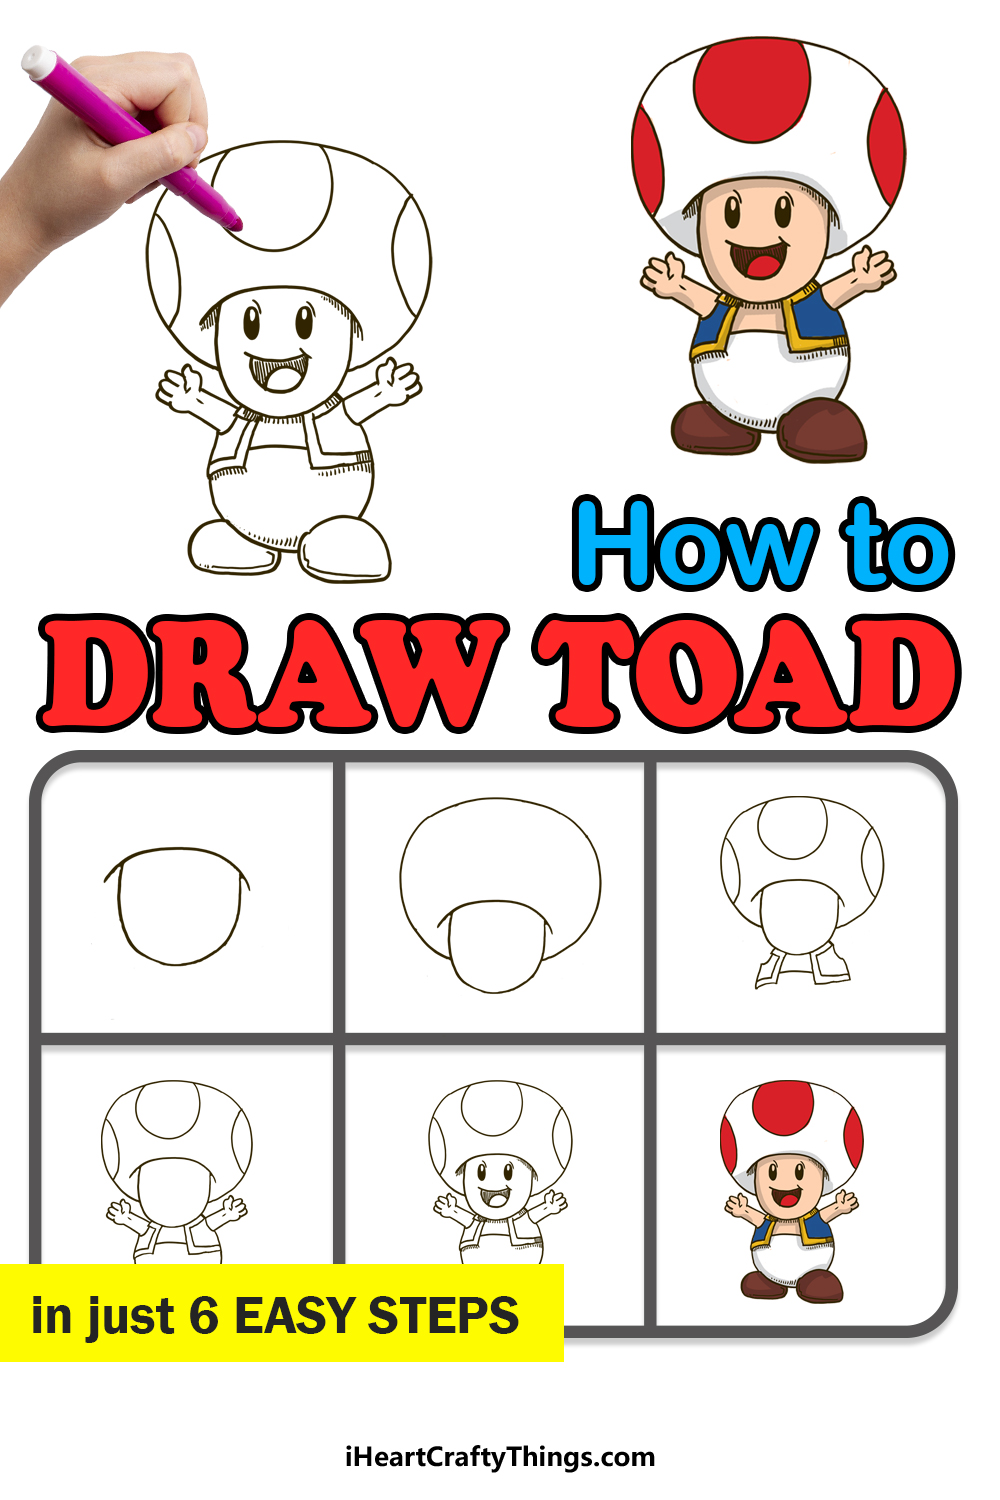
So let’s take a trip to the Mushroom Kingdom as we cover how you can create your own Toad from Mario drawing in just 6 fun and easy steps!

How to Draw Toad from Mario – Let’s Get Started!
Step 1

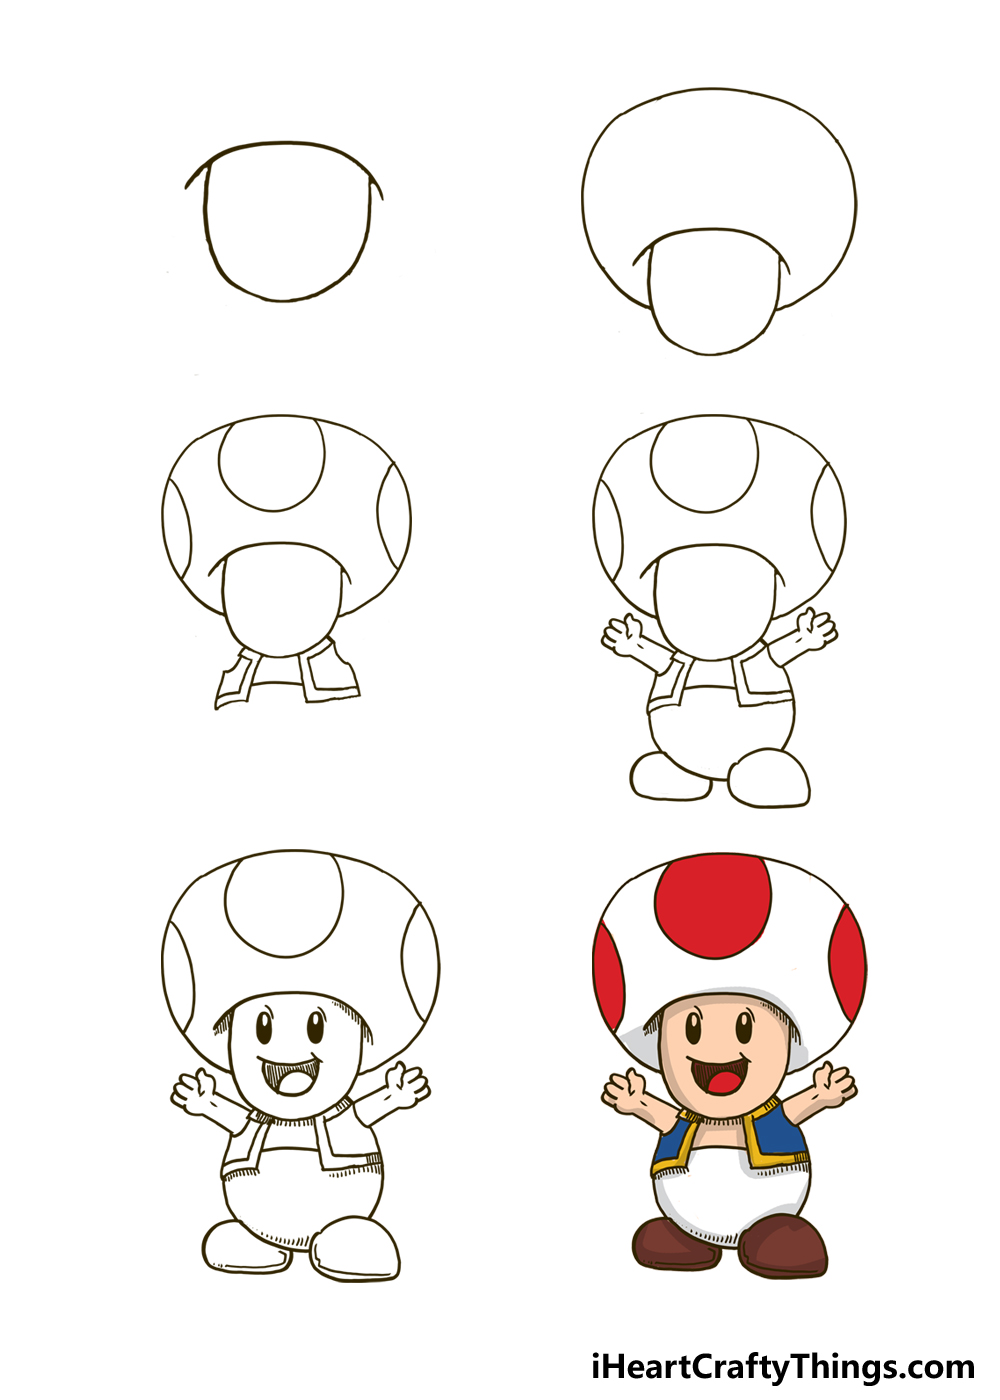
At first glance, Toad from Mario is a very simple character design that should be easy to draw. Like many characters from the Mario series, this simplicity could be deceptive.
That’s because there are some specific shapes and details that are needed to get the characters looking correct. We will break it down into smaller steps to make this easier.
If you look at Toad’s design, his mushroom head is the main feature of his design, and his body is smaller compared to his head. For now, we will focus on his face.
His face would be what could be considered the stalk of the mushroom if he were a regular mushroom. It is very small and bulbous, as you will see in the reference image.
Simply draw a curved, rounded shape for the base of his head. Then, add a curved line above it as we show off in the reference image.
The line on top should curve in the opposite direction to the curve of the face itself. That’s all there is to it for now, and we can add more details in the next steps.
Before you move on, you can also map out the rest of the drawing using a pencil and some rough shapes. That can help you to prepare for the rest of his head and his body proportions.
When you’re ready, let’s add the rest of his mushroom head in the next step of the guide!
Step 2: Draw the rest of Toad from Mario’s head

Now, we will draw the most iconic part of Toad from Mario’s design: his bulbous mushroom head! There is intense debate online as to whether this is part of his head or a hat that he is wearing.
While we may not be able to agree on which it is, we can certainly agree that it’s a vital part of his design. Luckily, it should be rather easy to draw as well.
In fact, it is composed entirely of a simple curved line. The bulbous mushroom part of his head should begin and end just under the halfway point of his face that you drew in the previous step.
Then, carefully extend it up and around the top of his head until it reaches the other side. It’s a long, curved line, so try to take it slowly to make sure the line is nice and smooth.
If you did the line details as they appear in our reference, it will look like his face is extending down from the cap, much like a real mushroom would.
Now that we have the iconic mushroom head for Toad from Mario, we can focus on adding not only the rest of his body but also some finer details.
Step 3: Add some details and start drawing his body

While the big mushroom head may be the most iconic part of Toad’s design, it’s far from the only iconic part!
There are some other details and elements that make Toad who he is, and we will continue adding them.
This step will start off simply as we draw the shapes on Toad’s cap. Anyone familiar with Toad will know that he has large red circles surrounding his head.
Other mushroom characters also have these circles, and they will sometimes be different colors. That’s something we will cover in the final step, so let’s leave that for now.
Let’s start by drawing these circles. The one in the center will be the most visible at this angle, so it will be the largest one.
To show the curve of his head, this circle will be cut off at the top as it is curling over the top of his head. Then, there will be two more circles on the far left and right of his cap.
These will be a lot less visible due to the angle we are viewing Toad. Each one will appear as a bit less than a half circle, as shown in our example.
Once these are done, we will start adding Toad’s body. Another famous aspect of Toad is the little vest that he is usually wearing.
We will add the start of this vest in this very step. The vest is separated into two sections, and there will be a separation at the center.
On the sides, there will be gaps for his arms to extend out of. There is also a border at the outline of the vest.
That’s all there is to it for now, so let’s continue adding to your drawing in the next steps.
Step 4: Now draw the rest of his body and limbs

As we mentioned earlier, Toad’s body is much smaller than his head, creating a unique look for this little guy. We will represent that for your Toad from Mario drawing in this step.
First, we will draw his arms sticking up. These will extend out from the gaps we left in the vest earlier.
His arms are quite small and short, and they will be poking up at an angle to give him a celebratory look.
Then, we can draw his body. The outline of his body will extend down from the sides of his vest that we drew earlier.
His body is very short and round, so try to keep that in mind as you draw. When you get to the base of his body, bear in mind that his feet will extend into his body outline a bit.
There are no legs to draw, instead, his feet are connected directly to the body. The foot on the right is the one that will extend into his body outline the most, while the one on the left will stay on the exterior for the most part.
With these elements drawn, we are ready for some final details! Be sure to finish up any lines and details before we move on.
Step 5: Draw the final details for Toad from Mario

We’re ready to finish off this design now, and some final small details should do the trick! Not only will we show off some final details to finish him off, but we will also go over some extra ideas that you can try.
First, let’s draw his face. Toad’s happy little face is another iconic part of his design, but it’s also relatively easy to draw. We shall start with his eyes.
His eyes are two thin, vertical ovals. You can draw them fairly close to one another, and then draw a smaller oval in the upper section of each one.
Next, color in the eyes except for the small ovals that you added inside the eyes as these will function as glints in his eye. Then we will add his smiling mouth.
Add a curved line for the top of his mouth and then add another curved line beneath it. We will then add a tongue inside his mouth and finally a curved line at the corner.
The final set of details will be some shading lines under his cap and under his arms and body. Then you’re ready for the final step!
Before moving on, be sure to add any extra ideas you may have for the drawing. You could start by adding your favorite Mario characters to join Toad.
You could also add some themed clothing like the headlamp that Captain Toad wears, or you could draw Toad in his cat form.
Fans of the games will likely have many more ideas, and you could also draw a background from your favorite stages. What other touches could you use to customize this drawing?
Step 6: Now, finish off with some color for Toad from Mario

Mario characters and stages are famous for their bright, happy colors. Toad is no exception!
In this final step of the guide, we will add the classic colors for Toad’s design as he appears in most games.
There are variations depending on the game you play, but you can always go for those instead.
First, we will color the spots on his cap with bright red. These spots will occasionally be other colors like blue, yellow or green, so you’re welcome to go with different colors if you prefer.
His skin tone is light and peach colored, but we added slightly darker tones to give him some more shading. Then, we can color in his vest.
The border of his vest is yellow, whereas the main section is a darker blue. His pants are white, but some stripes of light grey can help to add some shading.
Finally, we used some tones of dark brown for his shoes. And that’s all there is to it!
Choosing the colors you use is just a part of the fun, however. You can also have a good time trying out different art tools and mediums.
If you want to recreate the look of Toad in the 3D Mario games, then brighter mediums like colored pens and markers would be great.
Watercolor paints would be good to give the colors a softer look, which may represent the character in 2D games better. Will you go for his classic design or go for something more unusual?
Your Toad from Mario Drawing is Complete!
All six steps of this guide are complete, and you now have a wonderful Toad from Mario drawing to show off! We hope that these steps made it easier and even more fun to draw this classic character.
Toad is one of the cutest video game characters out there, and it is fun to create artwork featuring this adorable little guy.
Now that you know how to draw Toad from Mario, you can create all sorts of fun scenarios starring the character. These could be based on existing Mario levels or you could create some of your own.
Then you can bring in other characters from Mario or even other series to create the ultimate video game artwork!
When you’re finished with your drawing, we would love to see how it turned out. If you want to show off your artwork, you can do so by sharing it on our Facebook and Pinterest pages.
We can’t wait to see how you represented this adorable and iconic character in your artwork!


