Different items come to represent different things, and the tie is no different.
A tie can be used for many occasions from job interviews to presidential speeches, and it has become associated with professionalism and style.
Despite the simple design of the tie, it can be surprisingly difficult to learn how to draw a tie.
The good news is that while it can be harder than expected, it’s made much easier when you have some steps to follow!
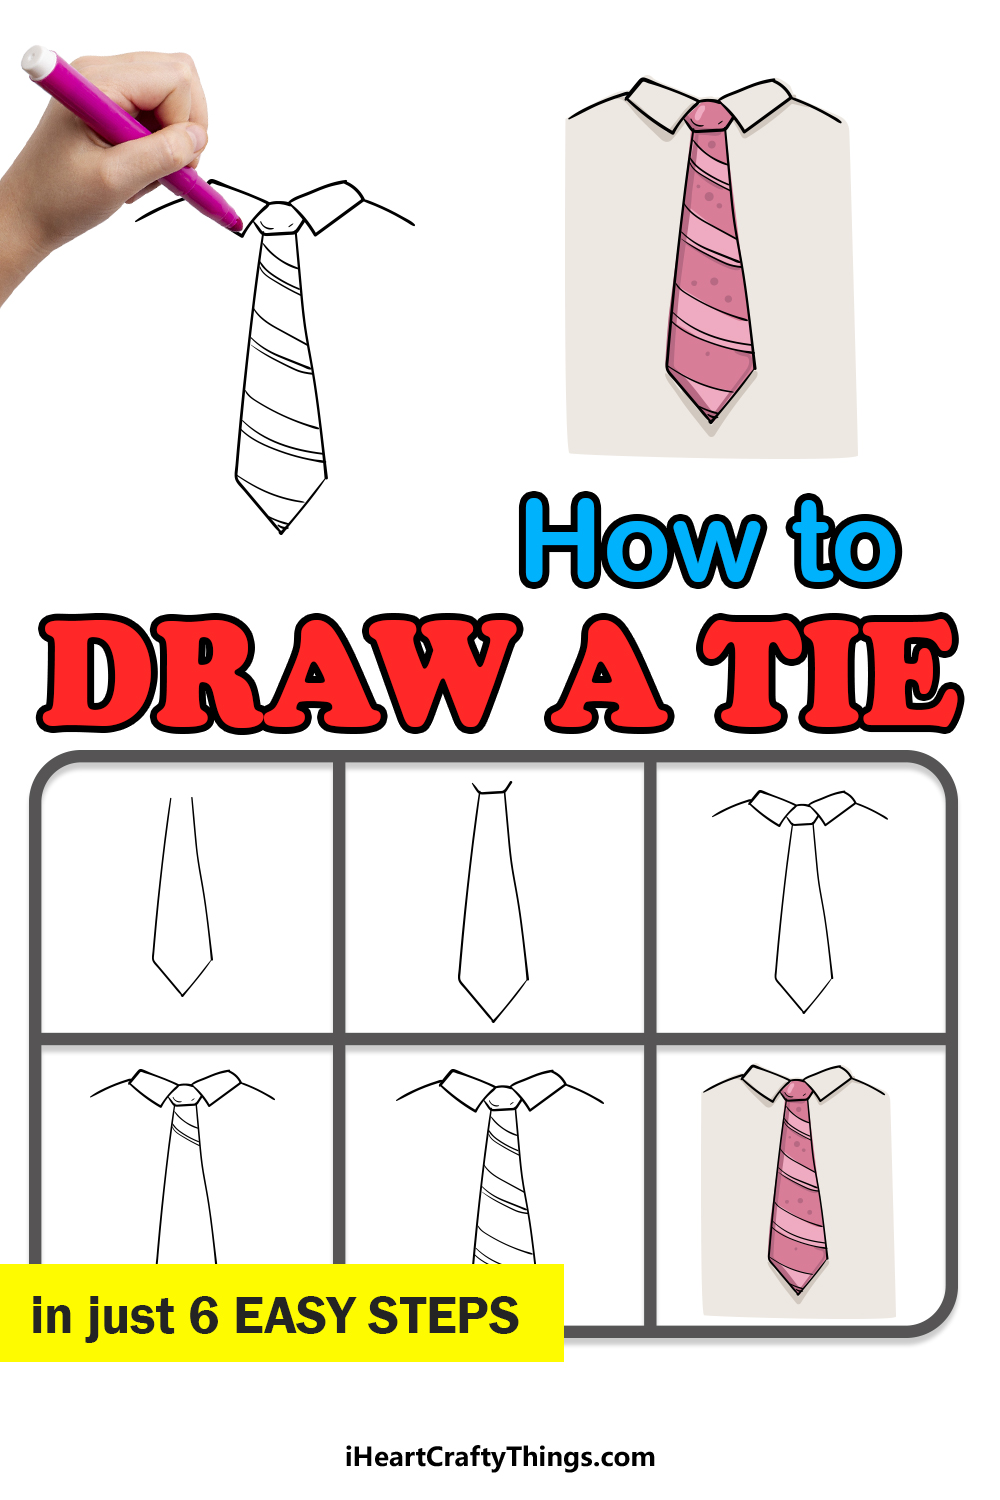
The step-by-step guide on how to draw a tie in 6 steps that you’re about to work through will show you how easy it can be!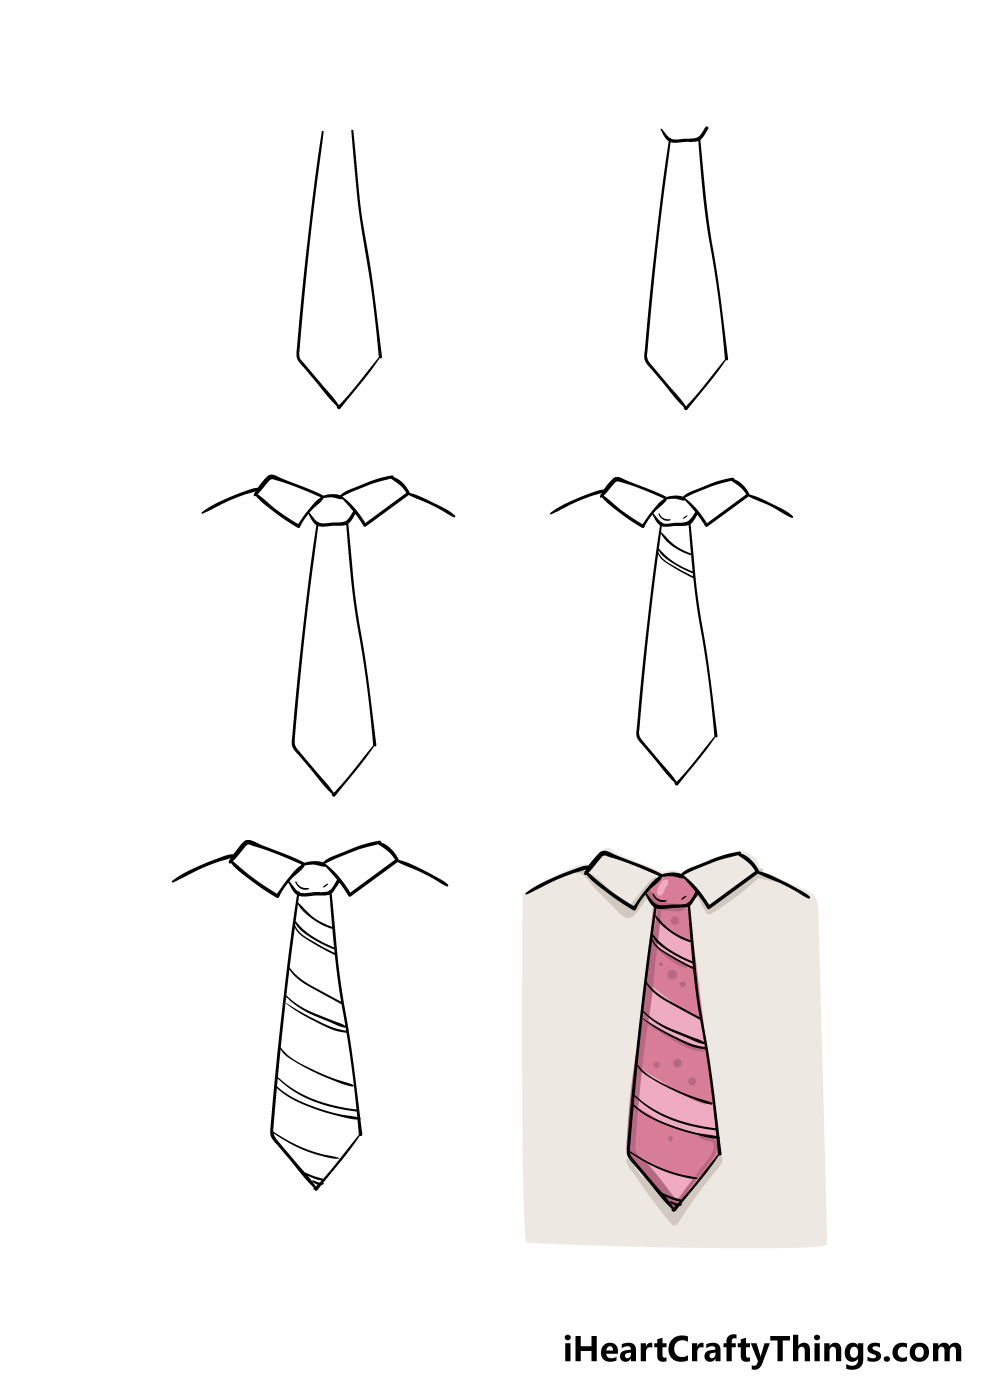
How to Draw A Tie – Let’s get Started!
Step 1
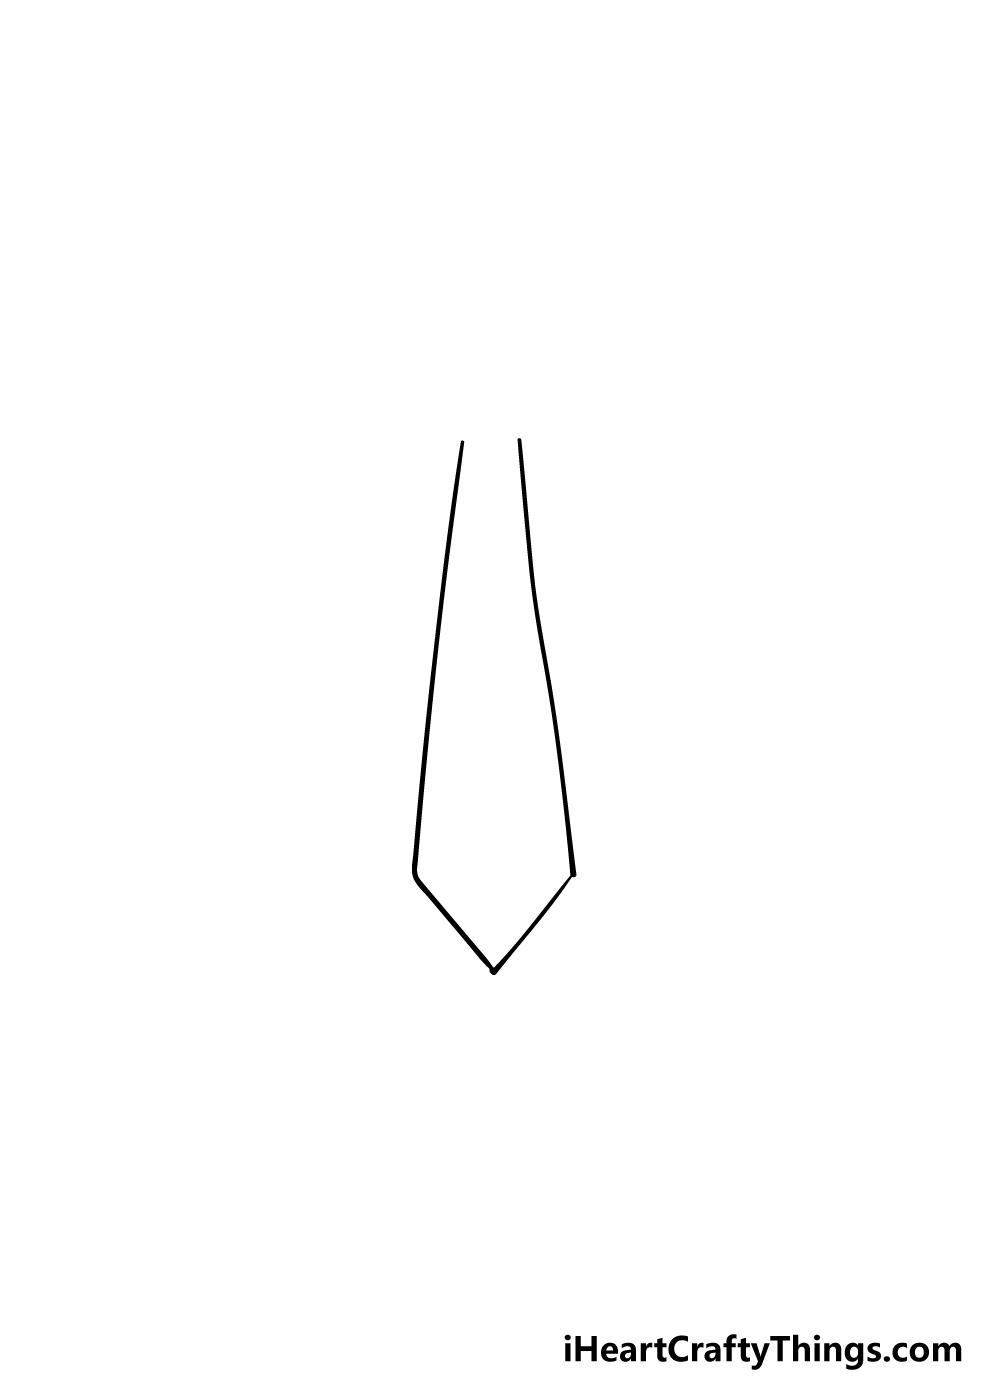
For this guide on how to draw a tie, you will find it much easier if you have a ruler to use, as there are lots of straight lines in this design.
To start, you can draw two lines that start fairly close together and a little further away the more they go down. It should basically look like two slightly diagonal lines next to one another.
Then, once you have those lines drawn, simply draw to more short lines that meet at a point for the end of the tie. Once you have this section of the tie drawn you’re ready for step 2!
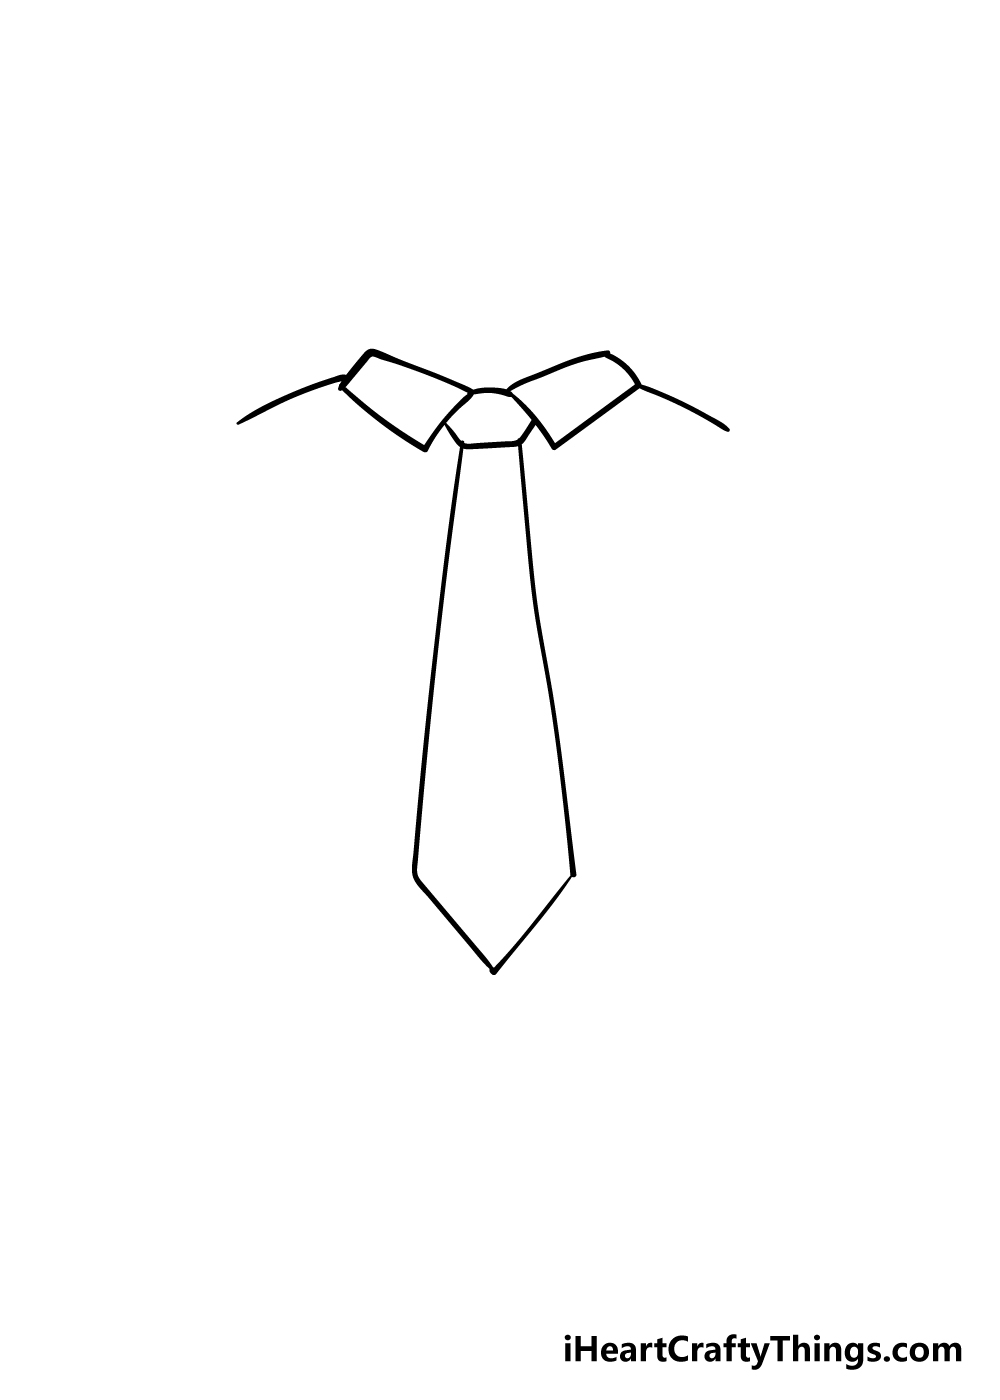
Step 2 – Draw in the top of the tie
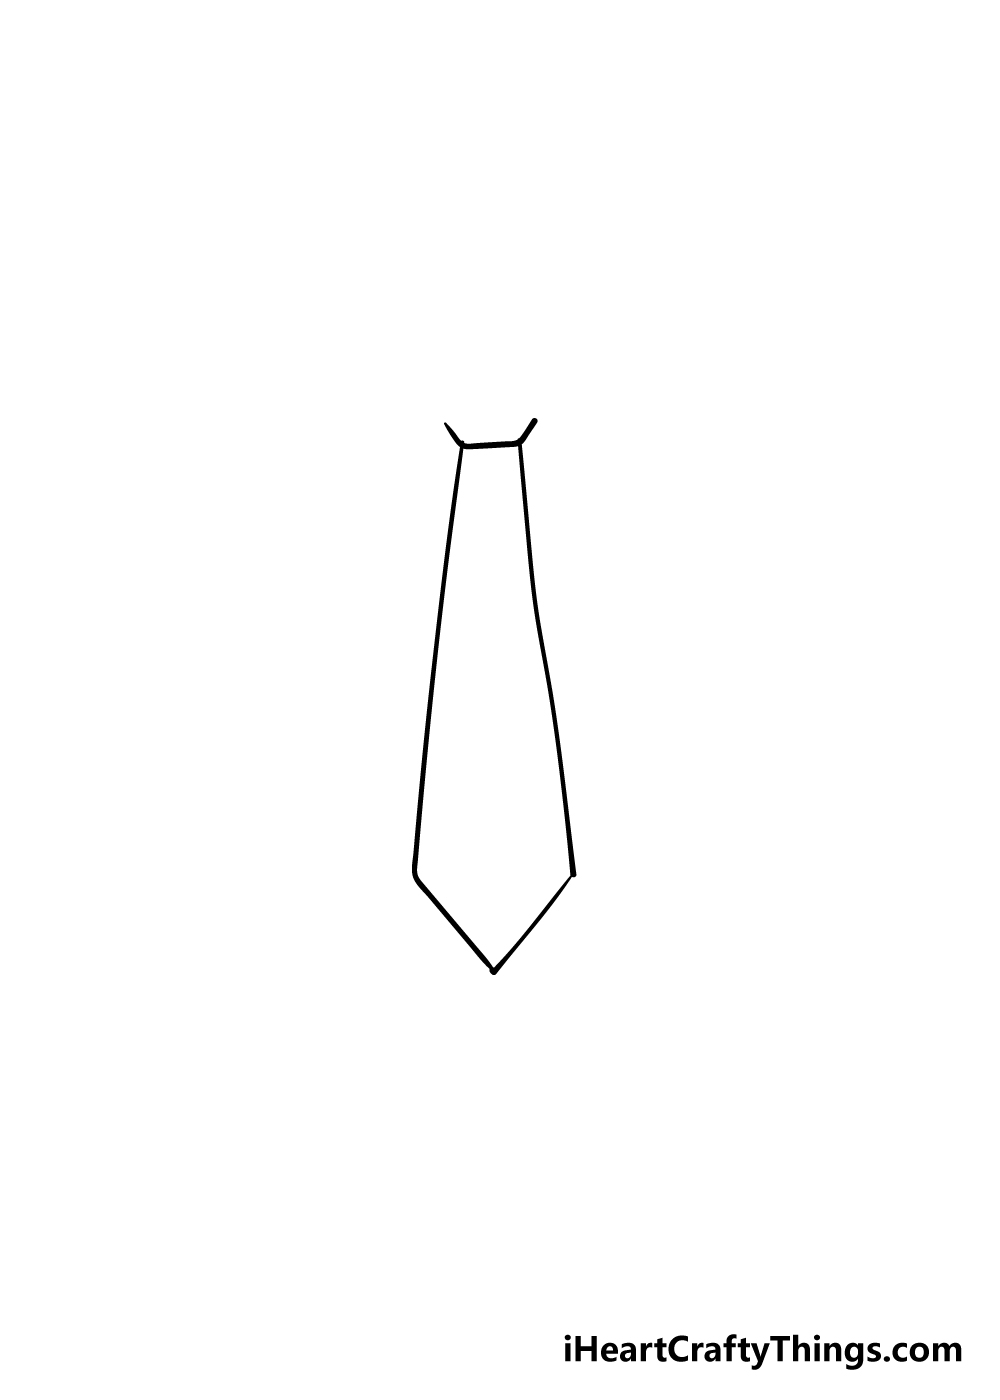
This next part of your tie drawing should be quite a simple one for you to do! This step will see you drawing the top knot of the tie, and all you need to do for this is draw three short lines.
The first of these lines will go horizontally along the very top of the tie. Then, the other two will be even shorter and extend diagonally upward from the top corners of the tie.
That’s all there is to it for this step!
Step 3 – Now, draw the top of the shirt
Our guide on how to draw a tie isn’t all about drawing the tie itself, and now we will be focusing on one of the other elements: the shirt!
To draw the top of the shirt, you can draw some diagonal rectangles attaching to the knot of the tie.
These rectangles will be wider on the inner edges that touch the knot, and they will get slightly thinner the further they go up.
Finally, you can draw a line gong out from the top of each bit of the collar to make the shoulders of the shirt.
Step 4 – Start the design of the tie in this step
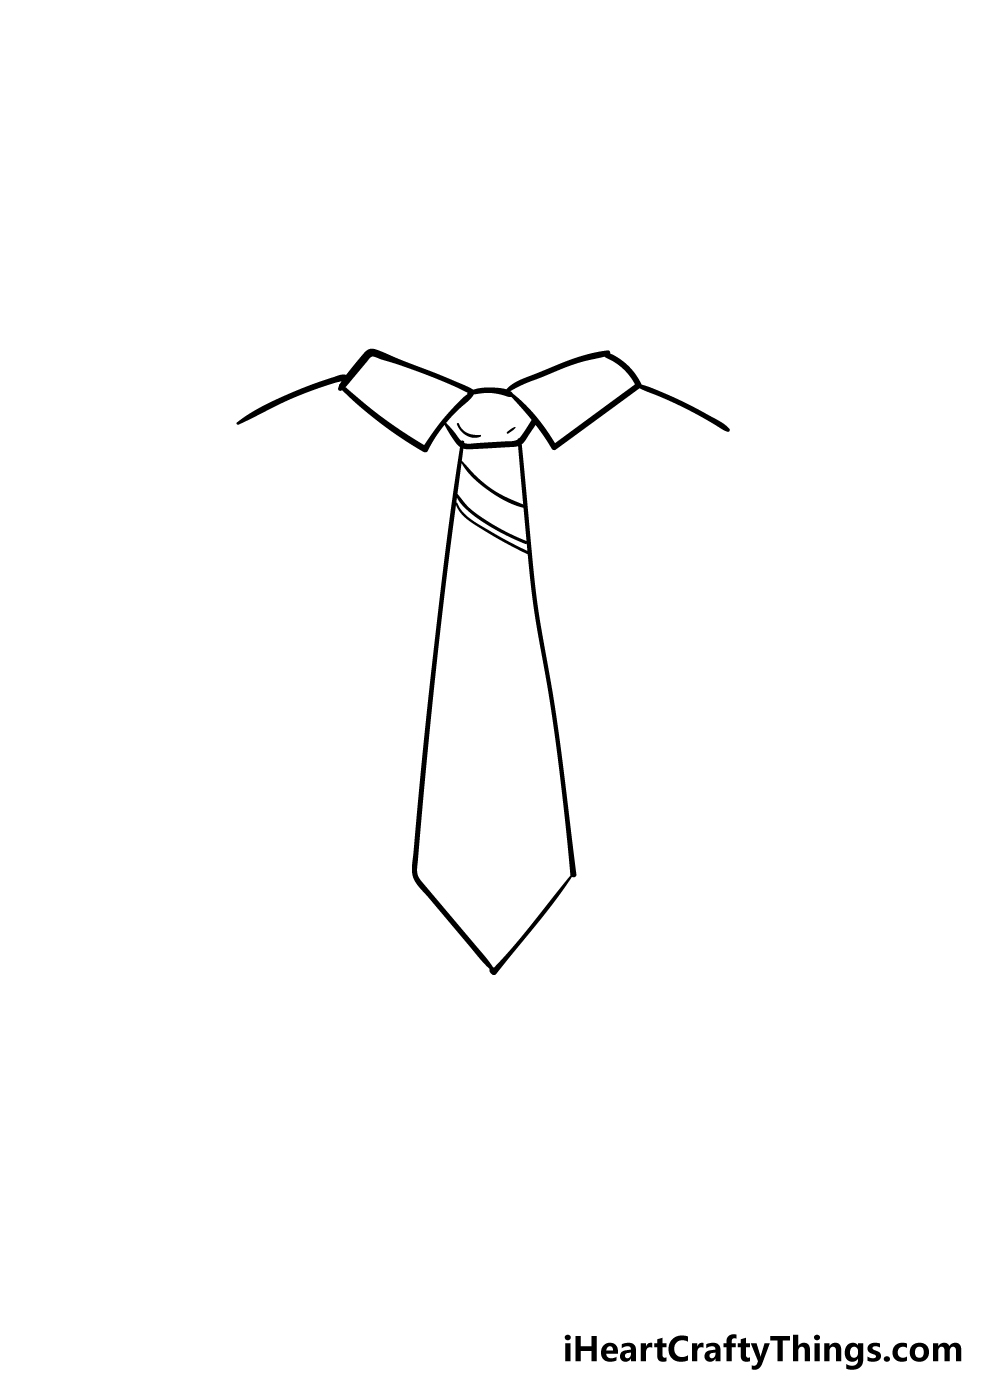
Our design for this tie has a striped look to it, and we shall begin with that design in this step of our guide on how to draw a tie.
You could always create your own design as well, and there are many great designs you can use!
For this design, you can draw a diagonal line across the interior of the tie. Then, you can leave a small space and then draw two more diagonal lines that are very close together.
That’s all you need to do for now, so let’s move on!
Step 5 – Now, you can add in the final details of the pattern
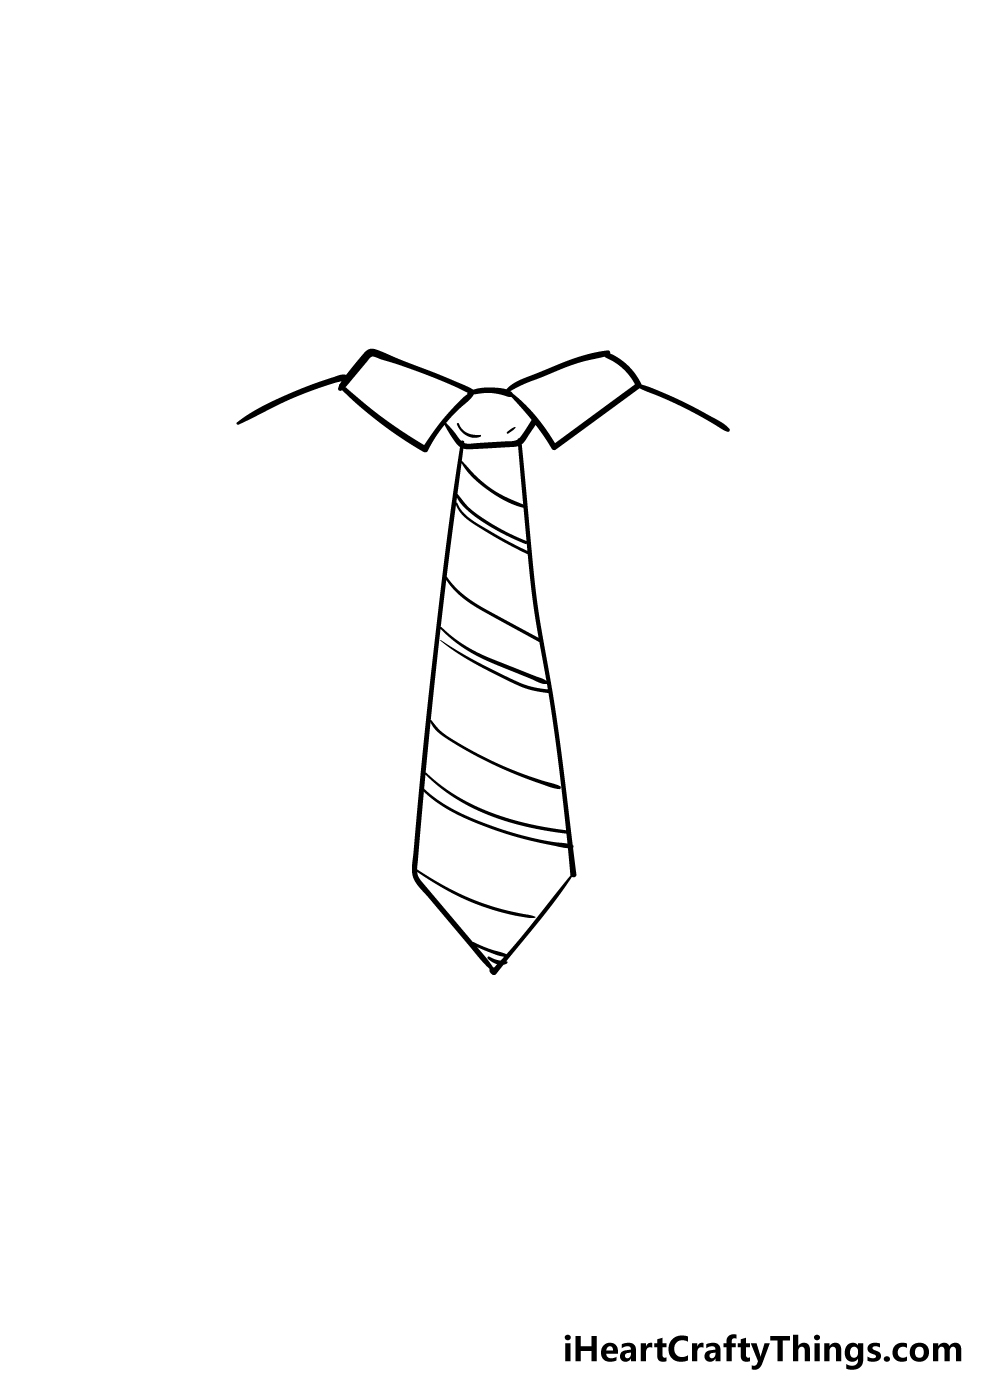
We will be finishing off the design of your tie drawing that you started in the previous step. For this step, all you need to do is repeat exactly what you did in the previous step three more times on the tie to finish off the design.
The one on the very bottom of the tie is a little bit cut off, as you can see in the reference image.
That does it for this step, but you can still add some of your own details to this picture before moving on!
We mentioned creating your own pattern for the tie, but there’s even more that you can do. One idea that you could go with is drawing the rest of the person who’s wearing the tie.
This could include the head and the arms of the person wearing the tie. Maybe you could use your own face to make it look like you’re wearing this tie!
What extra details can you think of adding for this tie drawing of yours?
Step 6 – Finish off your tie drawing with some color
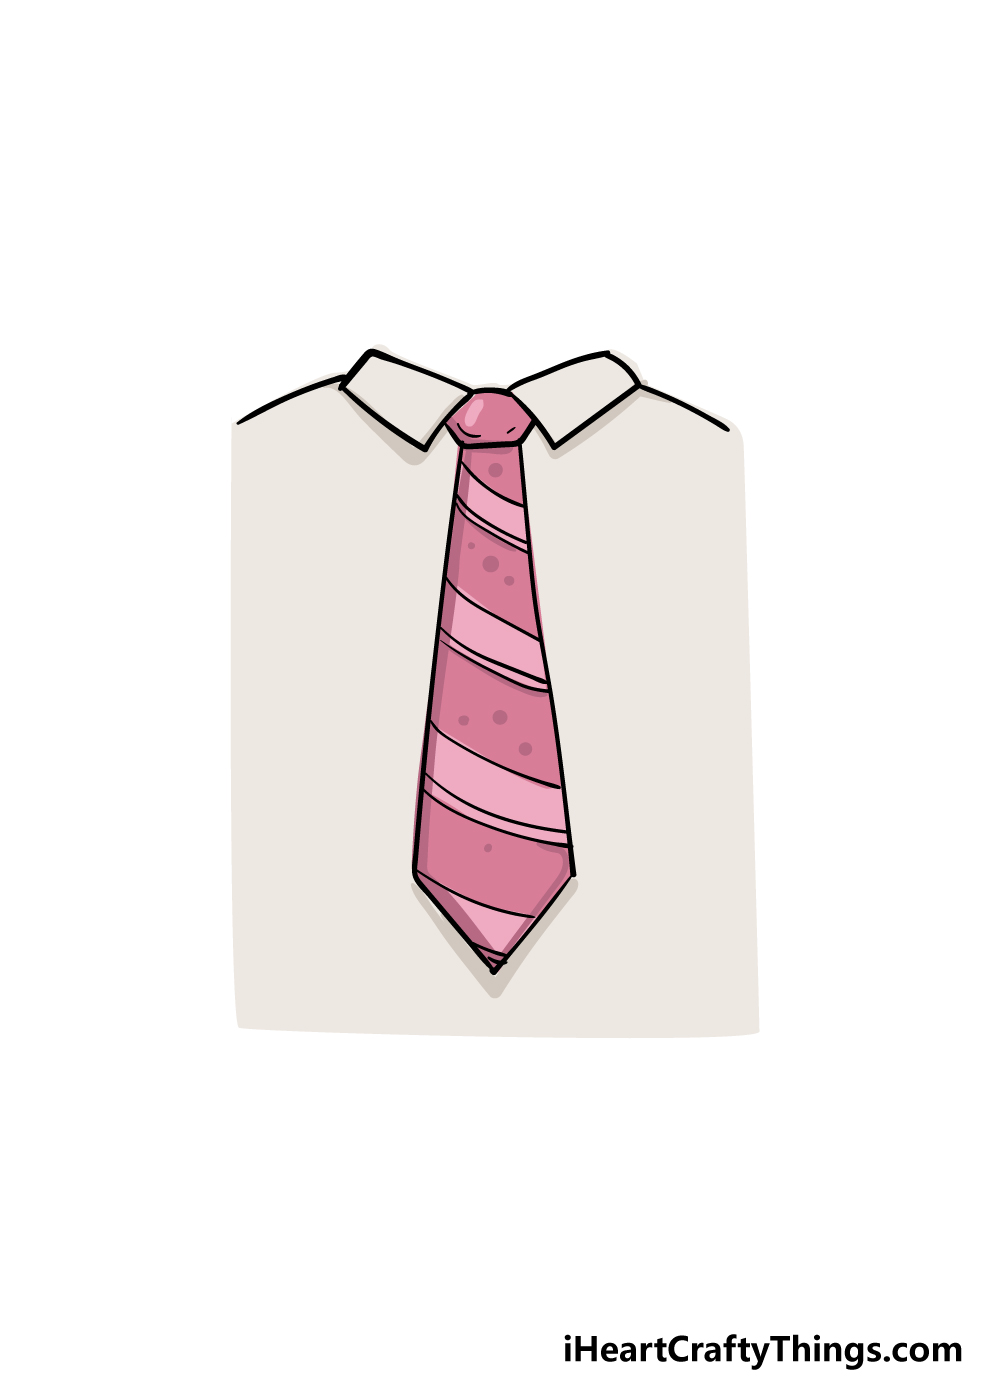
That brings us to the final step of this guide on how to draw a tie. In this step, you can have some fun coloring in your amazing drawing, and the good news is that this is the type of drawing that you could use any colors that you like for it.
If you created your own design on the tie, that also opens up a lot of opportunities for you to add some amazing color to this drawing.
Whether you want this to be a fancy business tie or a wacky one full of vibrant colors you can make it so!
Once you know what kinds of colors you would like to do, you can also decide on which art mediums to use for this image.
If you want a more vibrant look for the picture, you could use acrylic paints or colored pens to make the colors pop.
Mediums like watercolor paints and colored pencils would be great for a more muted look if that’s what you prefer.
How will you color in your amazing tie drawing?
Here’s how you can make your tie drawing even better…
Make this fashionable tie sketch even better with these helpful tips!
There are so many different patterns that come on ties, and it’s a great way to personalize an outfit. You could design all sorts of great patterns on this tie drawing!
We went for a simple striped design for our example, but you could really go with anything you like.
It could be polka dots, triangles or a zigzag shape for a few examples.
Some ties will even have a small picture on them, so that’s another option!
Adding a bit of movement to this drawing of a tie would be a great way to give it a whole new look. Anyone that has worn a tie on a windy day will tell you they flap all over the place, and that could be fun to draw.
Or, maybe you could make it look like the person is walking and the tie is swaying to the side a bit. How else could you incorporate some movement into the design?
We don’t get much of a look at the rest of the outfit of the person in this tie sketch, but that’s where you come in! This is your chance to be a fashion designer as you add more of this character.
This could include drawing a suit jacket, fancy pants or maybe some suspenders. There are many items of clothing you could go for, and you may even want to draw the face and arms of the character.
Bringing colors to this tie drawing is a great way to get creative with it! You could use colored pens, pencils, paints or even markers to achieve the colors you want.
There are ways you can get even more creative with it, though! For example, you could buy some material from a craft store.
Then, cut out the material in the shape of the tie and stick it over it. That way the tie will have actual fabric texture!
What other fun crafts and techniques could you use for this drawing?
Your Tie Drawing is Complete!
We hope that you had fun working with us on this step-by-step guide on how to draw a tie!
A drawing can be made a lot easier and more fun to work through when you have more manageable steps to follow.
With that in mind, our aim with this guide was to make it helpful and enjoyable for you to use.
You can continue making this drawing your own with some of your own designs, variations, colors and art mediums. We can’t wait to see how creative you get with it!
The drawing fun continues on our website, as we have lots of amazing drawing guides like this one ready for you to enjoy!
We also upload new guides all the time, so you should check in often to never miss out.
We would love to see your great tie drawing, so please do share it on our Facebook and Pinterest pages for us to enjoy!