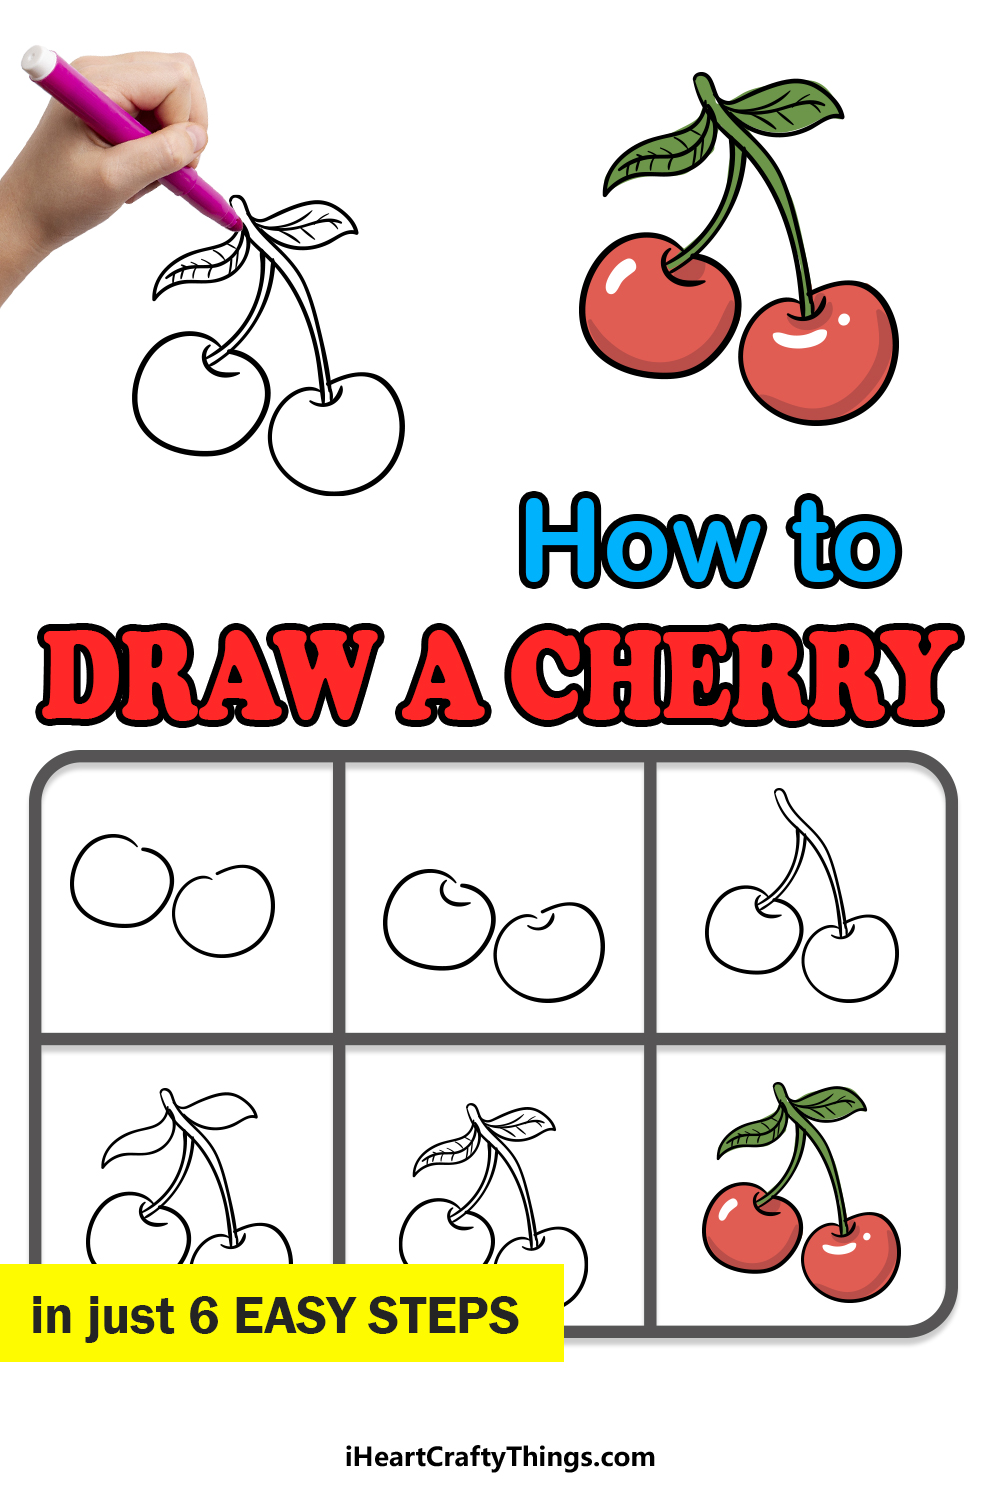
Do you want to know the easiest way to learn how to draw a cherry? Then this is the guide for you!
I will show you how to make this cherry design in just a few steps, and by the end you will see how fun and simple it is.
Cherries are not only delicious but also have a distinctive look. It’s easy to see why they are featured in so many designs, as they have a pleasing shape and bright vibrant color.
They’re as fun to look at as they are to eat! However, I’ve seen many people try to draw a cherry only to find that it’s hard to get it right.
That’s why I made this guide, as it will show you the easiest way to draw the stalk and cherries on the design. You can use this design as you wish and even add to it if you want to make it even more unique!
Your Cherry Drawing Will Be Easy After Watching This
How to Draw A Cherry – Let’s Get Started!
Step 1
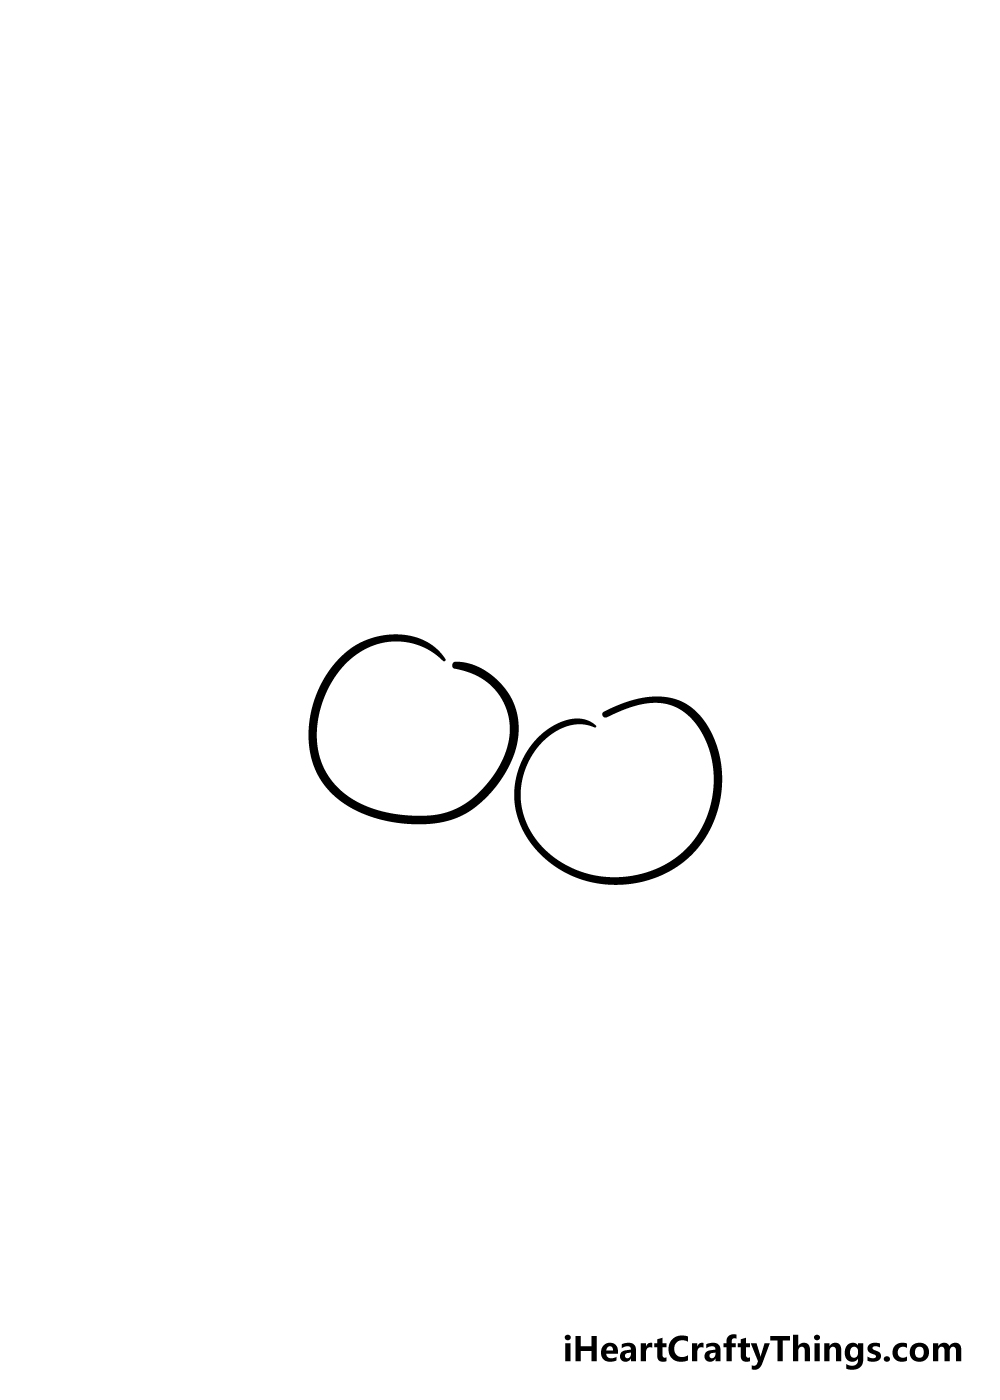
To get this guide on how to draw a cherry started, we shall begin with the two cherries themselves.
Cherries look simple on the surface, but it can be harder than you might think to have them looking accurate!
To draw these little fruits, you will use two rounded lines that curve in on themselves. They should appear almost but not quite circular, as they have flatter bottoms than a circle.
They also have a dip at the top where the stems will connect. Speaking of that area, be sure to leave a small gap there as we shall be drawing the stems a bit later
Step 2 – Draw some details for your cherry drawing
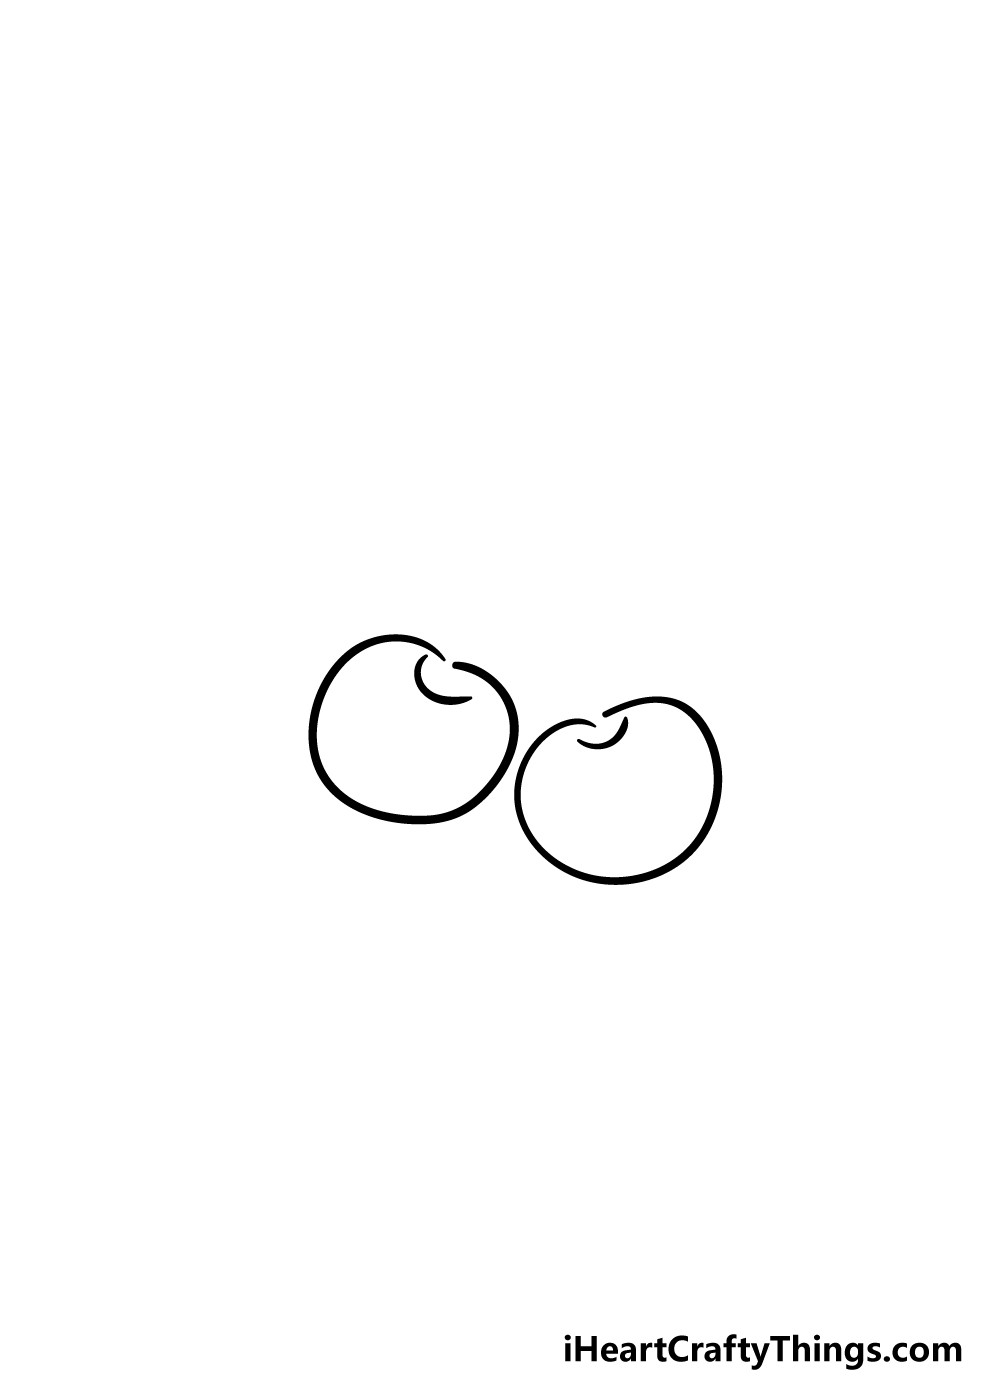
This part of your cherry drawing should be quite a simple one! All you need to do for this step is draw two curved lines, one for each cherry.
These curved lines will go just beneath the gap at the top of the cherries that you left in the previous step.
That’s all there is to it for this step, so now we are ready to move on!
Step 3 – Now, you can add some stems for your cherries
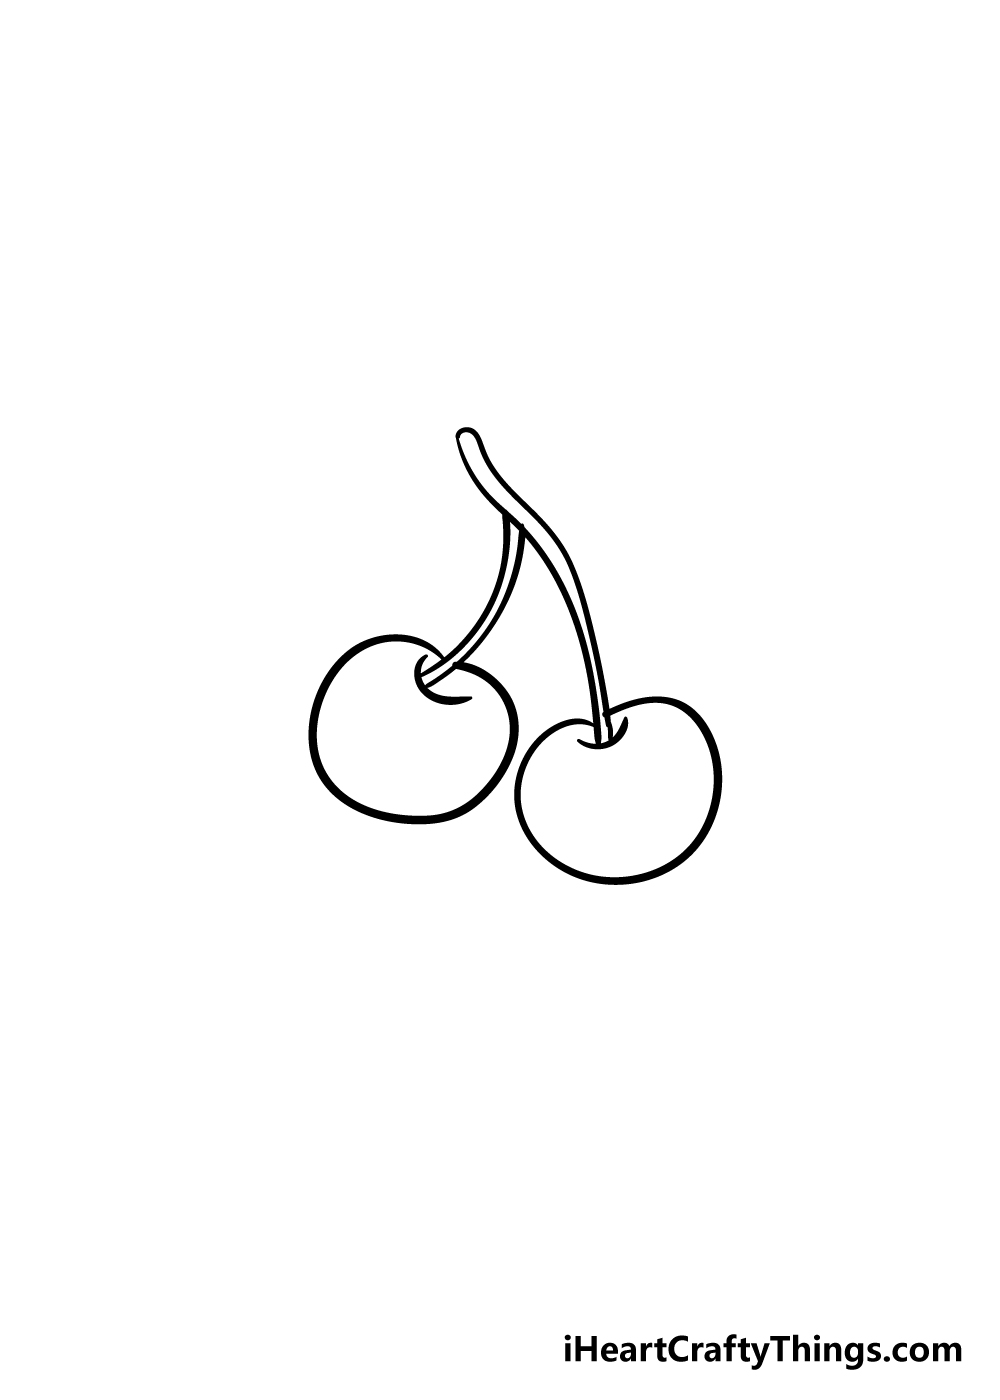
You’ll be seeing why we left those small gaps on top of the cherries in this step of our guide on how to draw a cherry!
This step isn’t too complicated, however it may require a slightly steady hand. Carefully draw two lines coming from the top of the right-hand cherry up and curved into the shape that you see in our reference image.
They should be quite close together, as the stem of the cherry is very thin. Once you have that stem drawn, then you can draw another one coming from the cherry on the left.
This one will extend up and connect to the stem for the right-hand cherry.
Step 4 – Add the leaves of the cherry
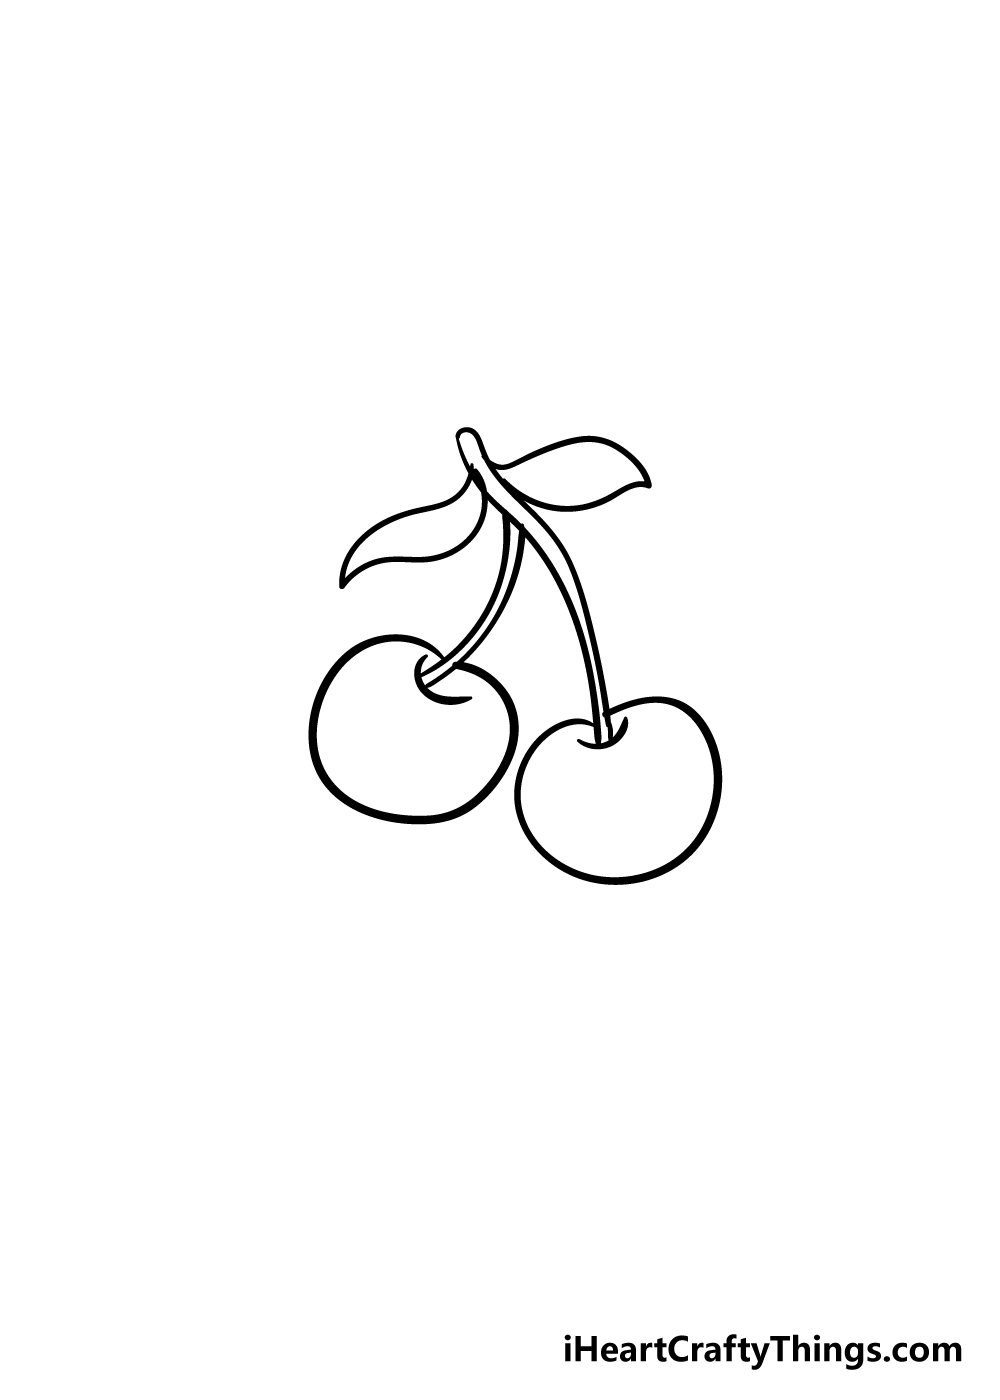
Your cherry drawing is really coming along nicely now! In this part, we shall add some leaves to the stem of the cherries.
These leaves will go near the top of the stem, and will be drawn with two curved lines that meet at a point. They may look a little bare now, but we shall be adding detail to them in the next step!
Step 5 – Now, you can add the final details of your cherry drawing
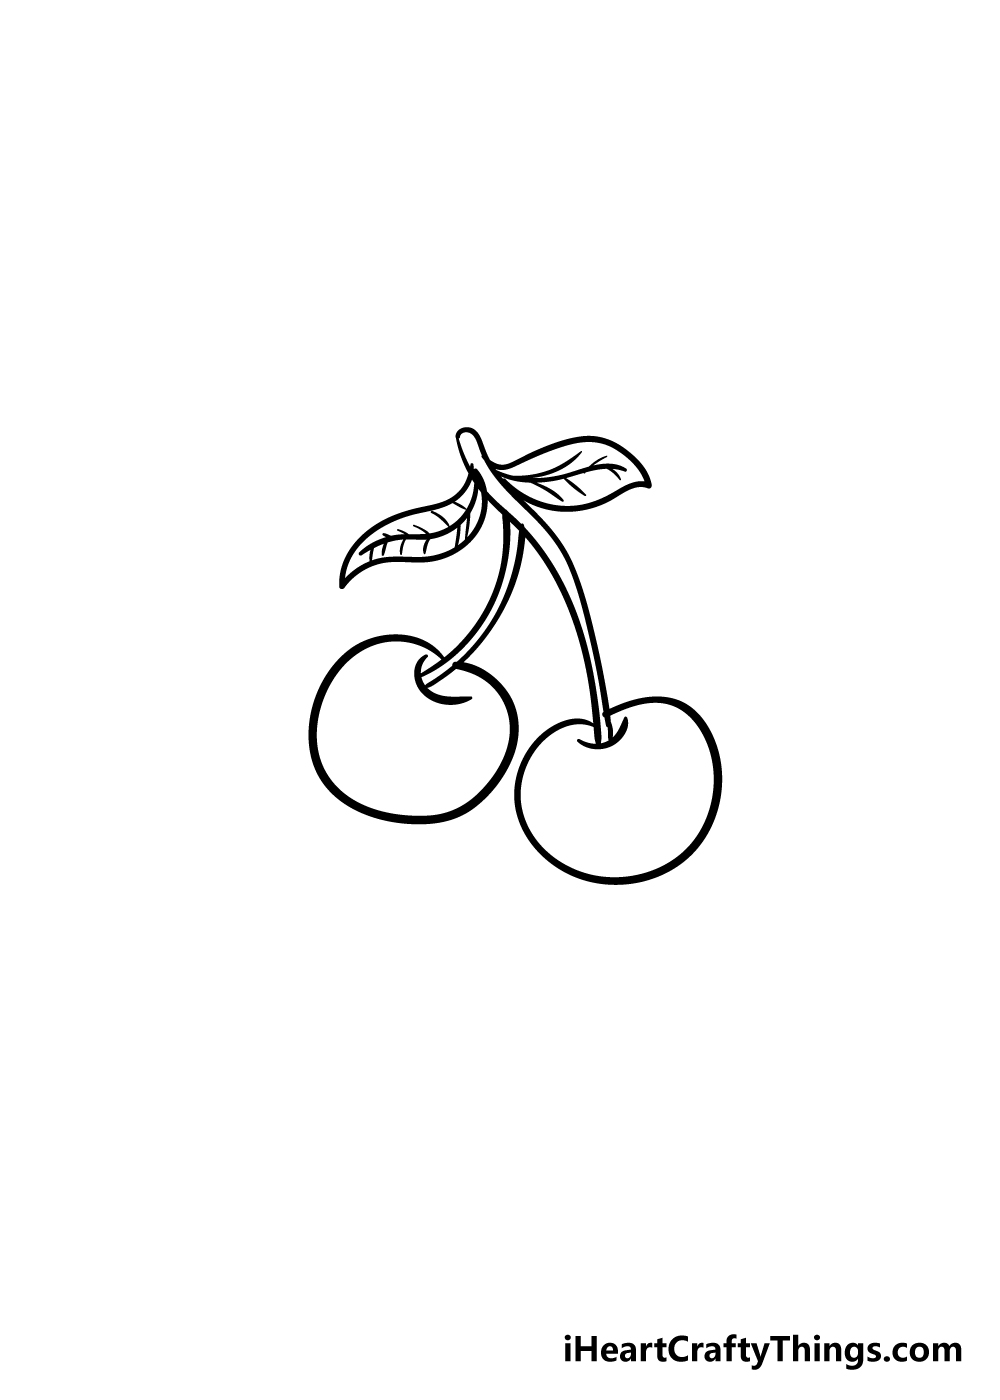
This step of our guide on how to draw a cherry is all about adding the final details and touches that the drawing needs before the final step.
The main aspect of the step is to draw a central line through the leaves from the previous step.
Then, once you have that line you can draw some smaller lines branching off of that central line to show the veins of the leaf.
Those final details mean that your cherry drawing is ready for the final step! Before you move on, however, you should feel free to add any extra details that you like for your picture.
These could include small details such as light reflecting on the cherries to showing these cherries on a plate with some other types of fruit.
How will you finish off this cherry drawing before the final step?
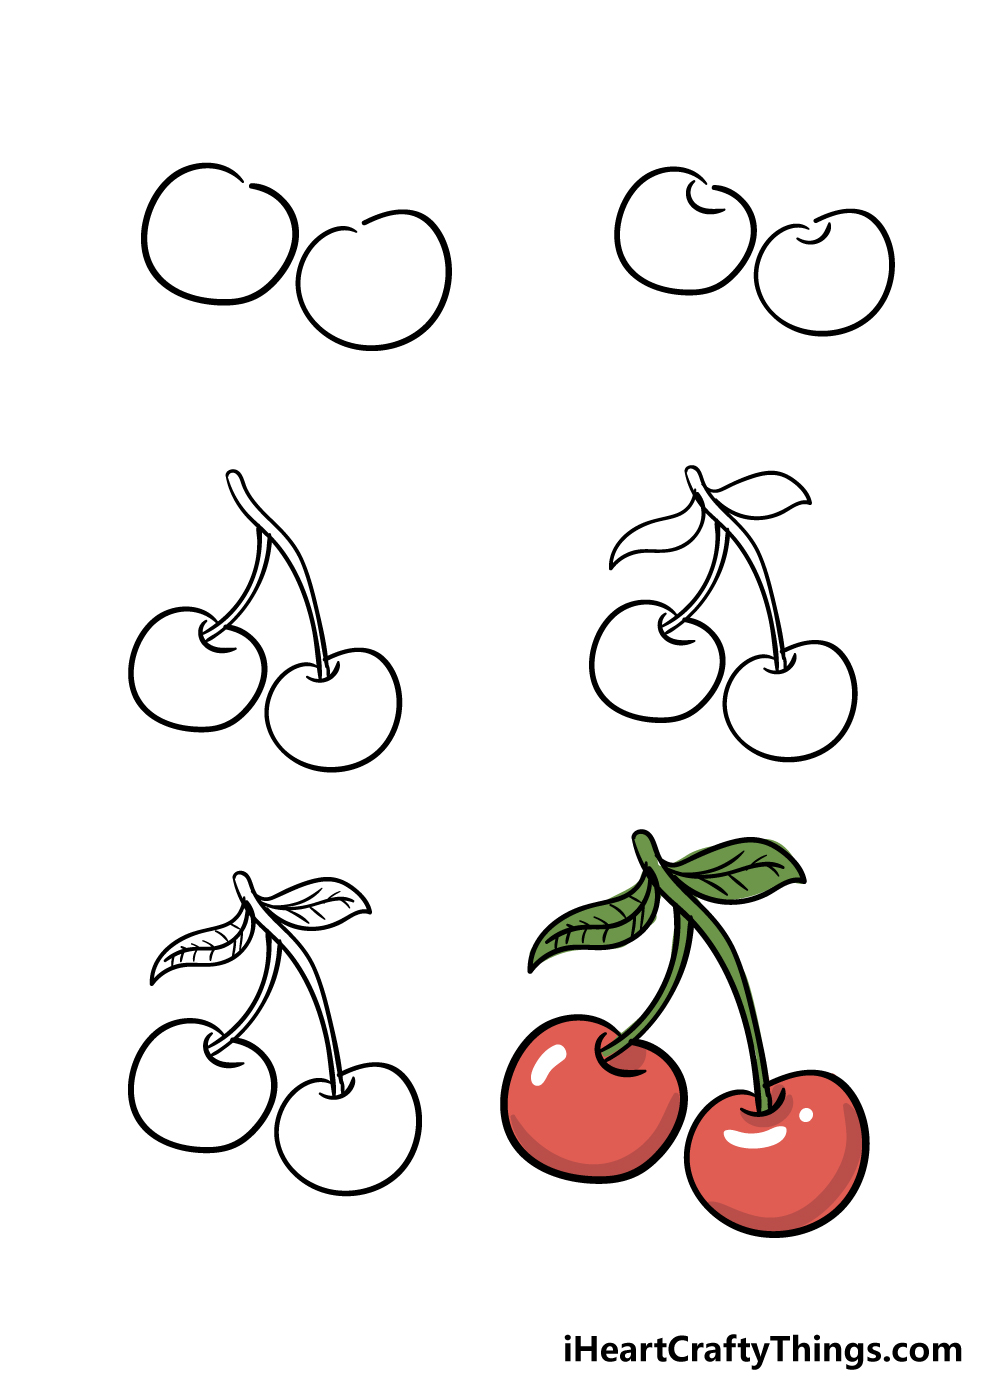
Step 6 – Finish off your cherry drawing with some color
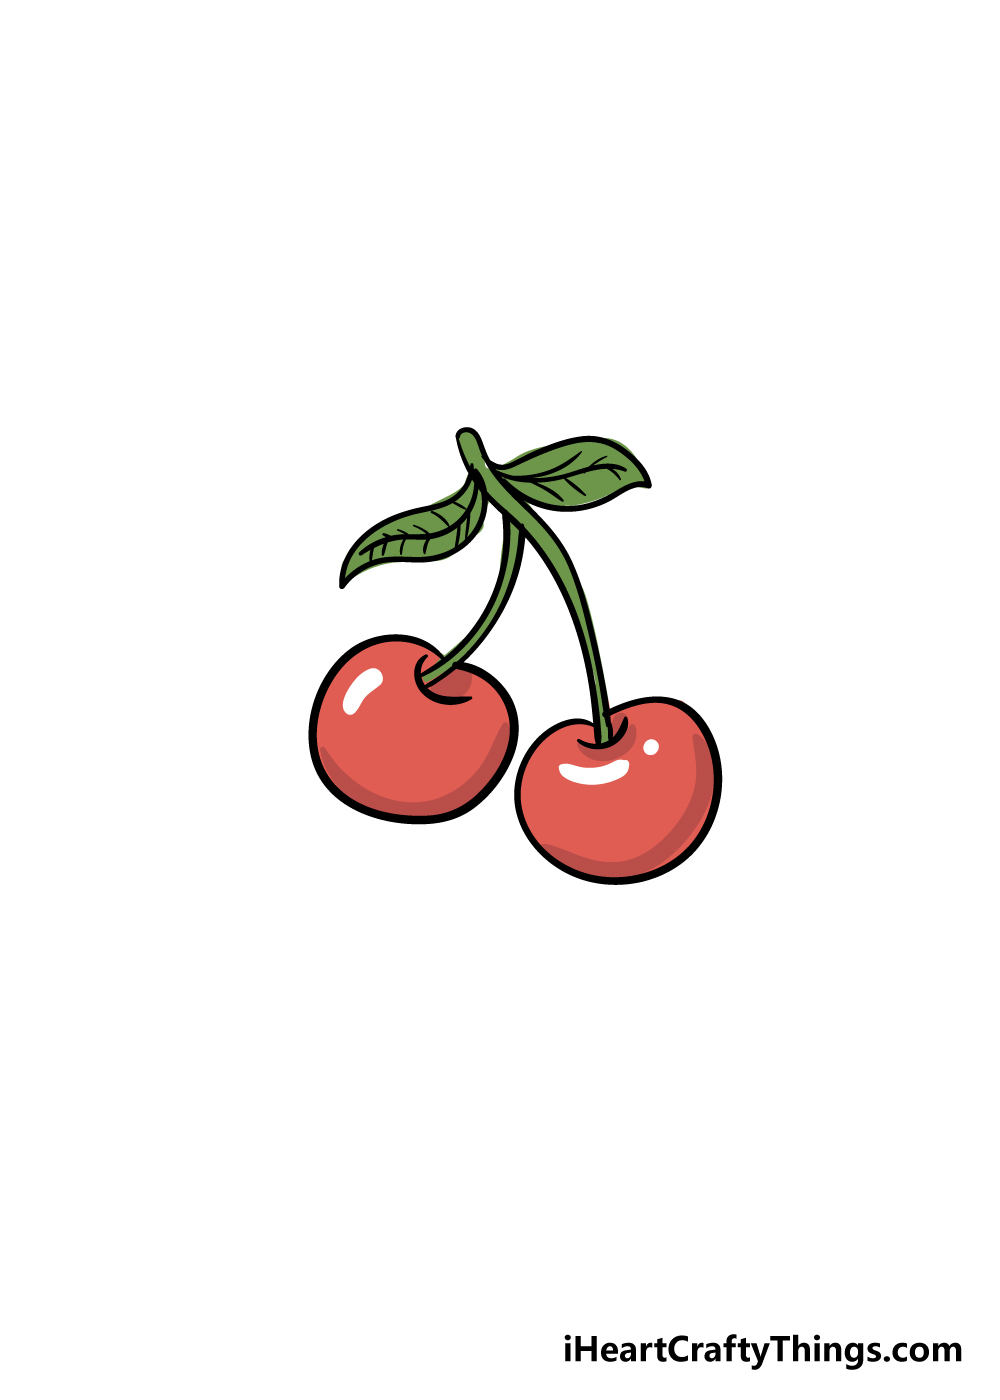
That brings us to the final step of your cherry drawing! Now that your cherries are drawn, you can have some fun coloring them in.
Cherries have a lovely bright red color to them, which makes them very striking to look at.
If you choose to go for this realistic color scheme as we did for our example image, then you have lots of options for creating these vibrant colors.
Art mediums such as acrylic paints, colored pens and markers would be perfect for making the colors pop off from the page!
You could also use these kinds of mediums if you wanted to use more stylistic colors for your cherry drawing.
Going bright and bold is just one approach you can take, and you could also get a wonderful look for these cherries by using more muted mediums such as watercolor paints and colored pencils.
These are just a few of the many art mediums you could experiment with, so maybe you could try one you’ve never used before.
It’s all up to you, and we know that whatever you choose will look incredible!
5 Tips To Make Your Cherry Drawing Even Better!
Find out how to make your cherry sketch even greater with these tips!
Whenever you eat a cherry, it’s hard to stick to just one! In this cherry drawing, we have two to enjoy, but you could add many more to the image.
Now that you know how to draw them, you could add as many as the page will allow! This would make a really striking image, and it would be interesting to see how many you can fit on the page.
Of course, you don’t need to stick to just cherries when it comes to populating this drawing of a cherry! There are so many different kinds of fruits and vegetables you could add to the scene.
These could be any ones you like, and you could even arrange them like a traditional still-life. What are some other foods you may want to add?
Once you have decided whether you would like to add additional cherries or other objects, you could then create a background setting.
This could be as simple as having the cherries sitting on a bowl or maybe in the hands of someone who is about to eat them. There are tons of settings you could put these cherries into.
What sorts of backgrounds can you think of that you could create?
It’s great to enjoy a cherry on its own, but it can also be great to enjoy them with other foods. This would be another way to present this cherry sketch!
For example, you will often find a cherry on top of some ice cream or maybe a tasty cake. These are just a few examples, but what else could these cherries be on top of?
Finally, you can really make the colors pop depending on the shades and mediums you use for this cherry drawing. If you want the colors to be bright and vibrant, you may want to use colored markers and pens.
Watercolors and colored pencils would be better for a more muted look, however. What will you choose?
Your Cherry Drawing is Complete!
You have successfully reached the end of our step-by-step guide on how to draw a cherry! We hope that you had a lot of fun working through this guide alongside us.
Whenever you take on a new drawing it can be intimidating at first, but if you have some steps to follow it can be much easier and a lot more fun!
Finishing this guide doesn’t have to be the end of your cherry drawing, though. Now that you can draw these wonderful fruits so well, there are many ways that you can put your own spin on it.
You could do this by creating a cool background for the picture or by using some creative colors and art mediums. Be sure to let your creativity flow for this picture!
We hope that you will visit us on our website, as we have lots of awesome drawing guides like this one for you to enjoy.
We upload new guides all the time, so visiting us often is the best way to never miss out!
Once your cherry drawing is complete, we would also love to see your amazing drawing! Please feel free to share it on our Facebook and Pinterest pages for us to admire!