Medical science has come a long way in the past century. As time has gone on, it has become easier and easier to detect various sicknesses and symptoms before they become more severe.
One of the most common of these instruments is the thermometer.
This tool can be found everywhere from most households to the fanciest hospital, and even though it may be common doesn’t mean it isn’t very useful!
Even though we have all probably encountered a thermometer before, it can still be surprisingly tricky to learn how to draw a thermometer.
That’s why you have this tutorial, however, and we will show you how it can be done with ease!
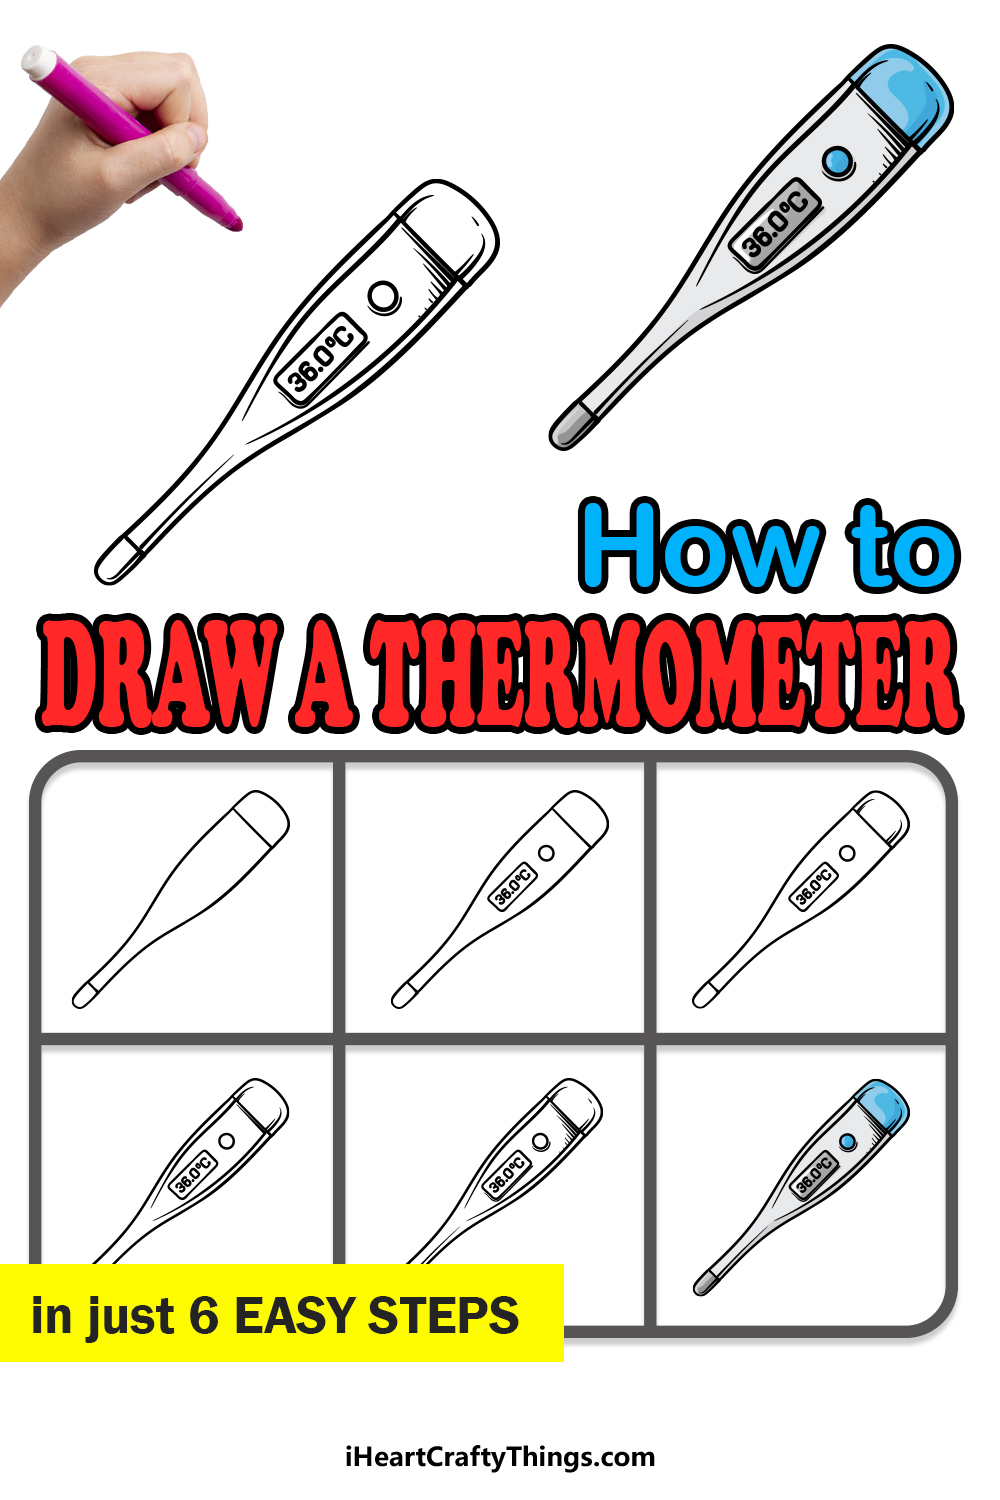
Please enjoy this step-by-step guide on how to draw a thermometer in just 6 easy steps as we take you through all of the steps you’ll need to know.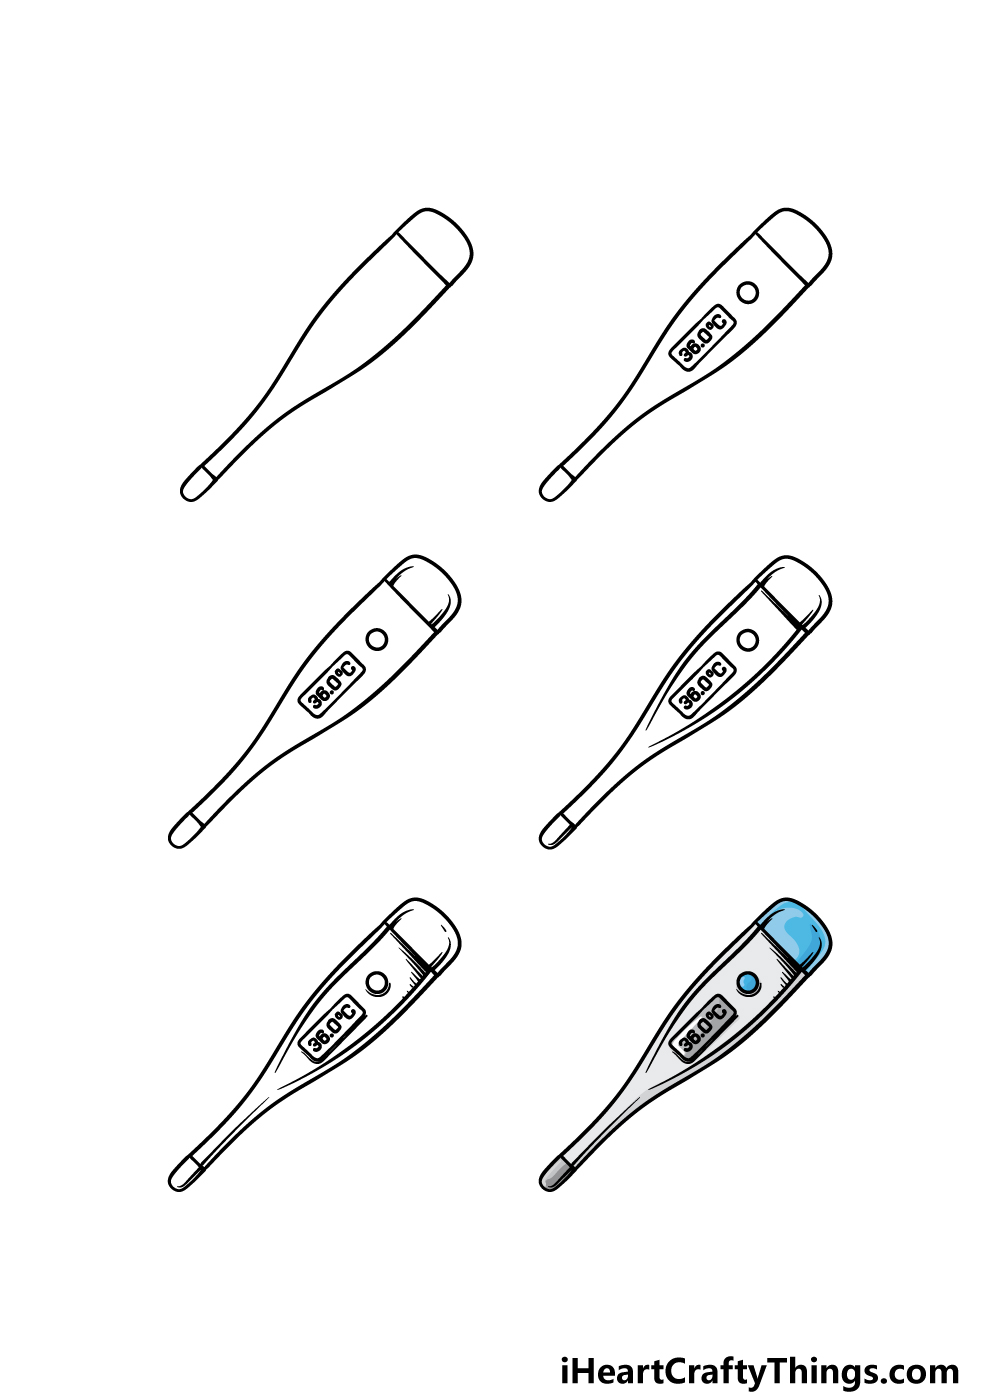
How to Draw A Thermometer – Let’s Get Started!
Step 1
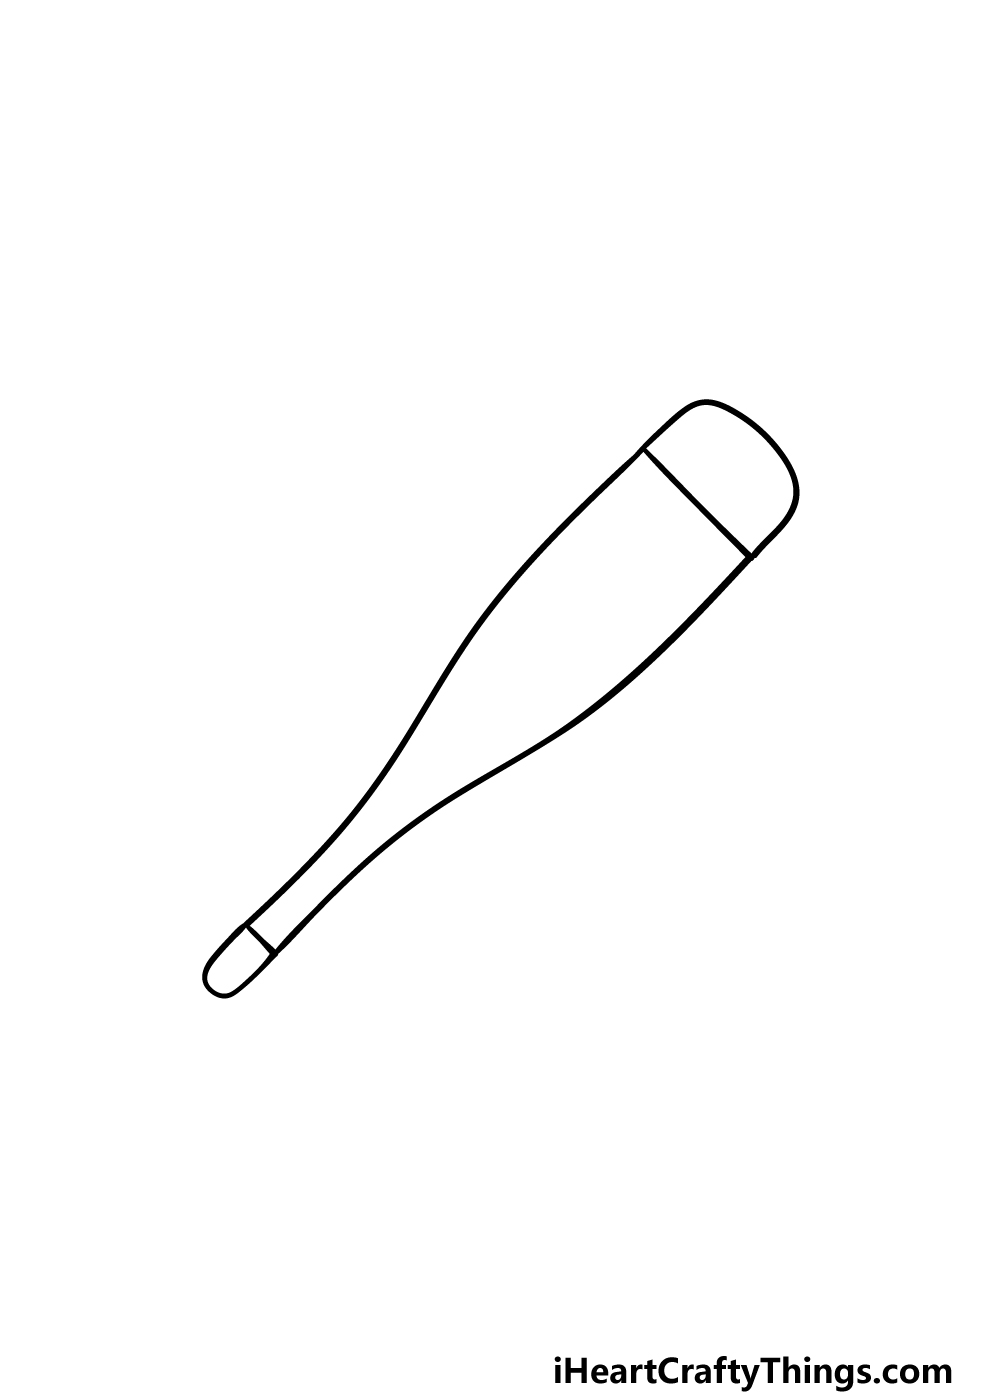
In this guide on how to draw a thermometer, we will be drawing a standard digital thermometer.
These kinds will typically be inserted under the tongue to gauge your temperature and determine if you may have a fever or other ailments. To get started with this drawing, we will be drawing the complete outline of the tool.
First, draw a long, thin section on the left-hand side. This would be the section that would go under your tongue if it were real.
Then, there will be a larger rounded rectangle section attached to the thin section, and the reference image will show you how it should look.
Finally, draw a small straight line near the tip of the thermometer, and then finish off by drawing one near the opposite edge of the tool. Then you will be ready for step 2!
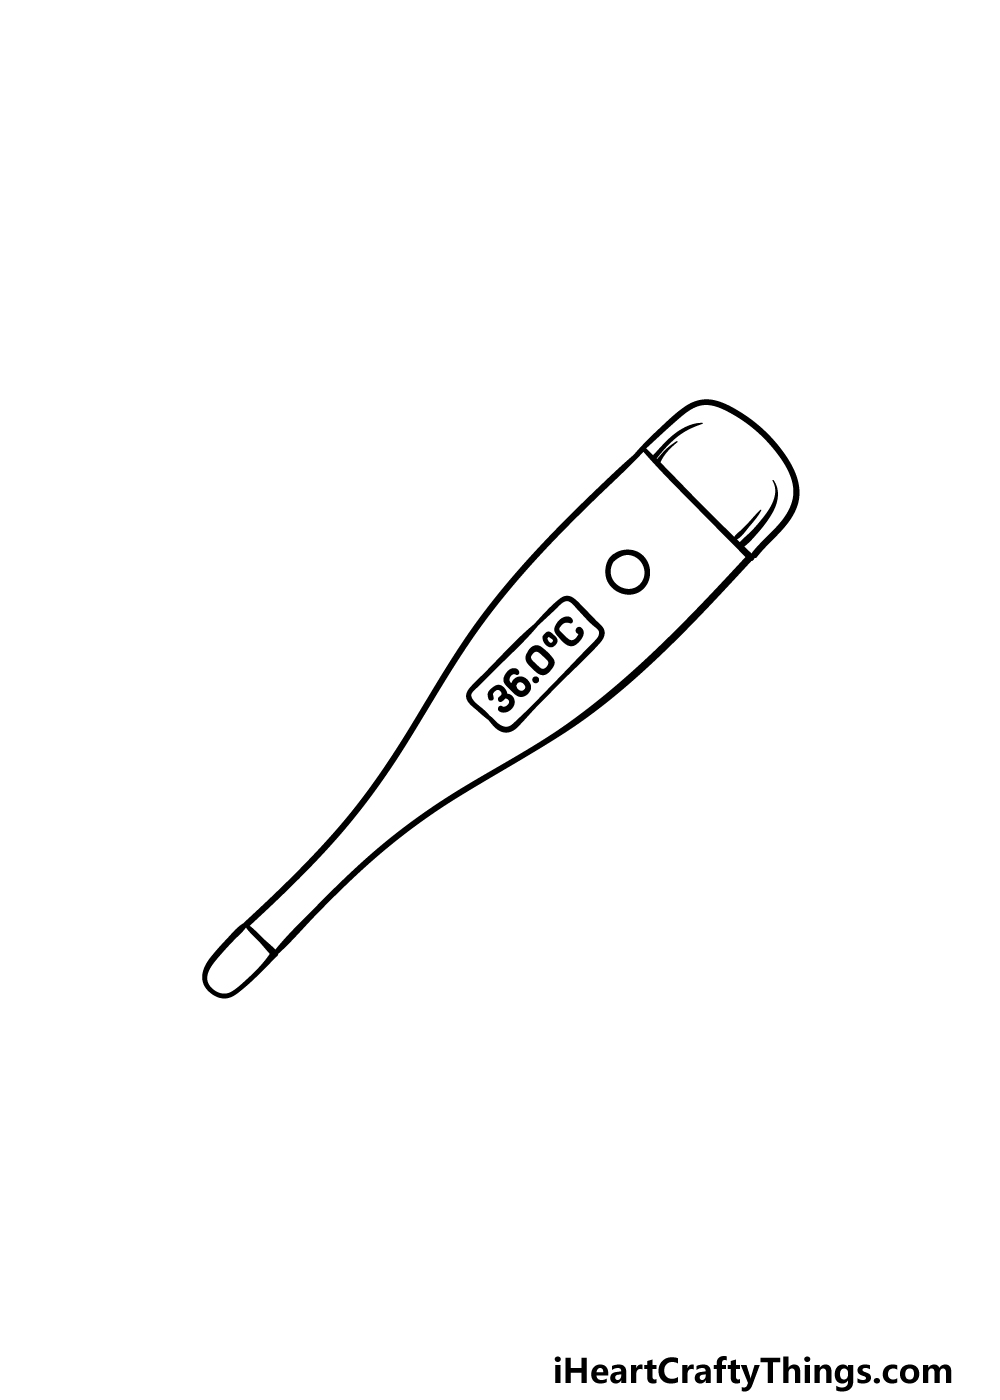
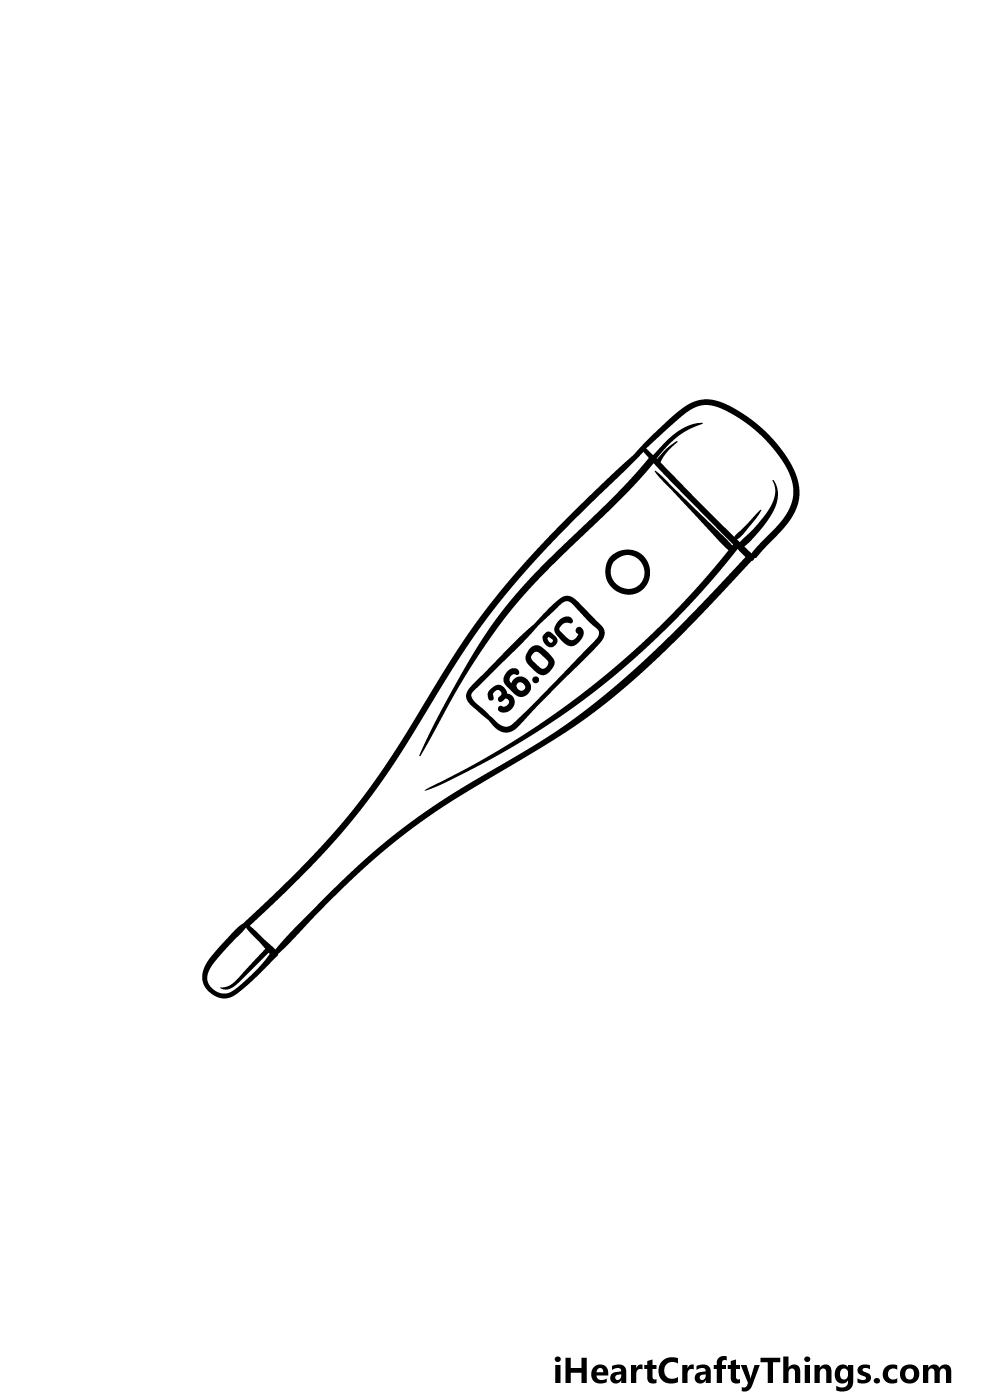
Step 2 – Now, draw the screen and button for the thermometer

Now that you have the outline of your thermometer drawing, we can start drawing some of the inner details.
For a thermometer such as this one that works digitally, there will be a small screen for you to read the temperature on.
You can draw this as a small rectangle near the center of the thermometer, but it will have some slightly rounded corners.
Next, we will be drawing a reading onto the screen. For our example, we write 36 degrees celsius, but you could add a different reading if you prefer!
You can then finish off this step by drawing a small round button near the screen. Then you will be ready for step 3!
Step 3 – Draw some dimension details for the thermometer
For the next few steps of this guide on how to draw a thermometer, we will be drawing some smaller details that will help to add some dimension to the tool.
To begin this, we will start simply. All you need to do in this step is draw some curved lines near the thicker tip of the thermometer on the right-hand side.
These will help to make it look a bit more curved and realistic. We will be adding some more details like this as we move to the next steps, so let’s proceed!
Step 4 – Next, draw some more dimension details for the thermometer
Continuing with this thermometer drawing, we will be adding some more lines that will add some dimension to the image.
The lines that we will be drawing in this step will extend from the ones that you drew in the prior step, and they will extend and curve down the body of the thermometer.
They will extend until just after the little screen, as shown in the reference image.
There will also be a small line added near the thinner tip of the thermometer. You will then be ready for some final details in the next step!
Step 5 – Add the final details to your thermometer drawing

Before you get to the final step of this guide on how to draw a thermometer where you will color it in, we have a few final details to add.
All you need to do is add some more curved lines near the dimension details that you have been drawing, and these will take care of the shading details for the thermometer.
Then you can go ahead and add more details of your own! It could be fun to draw a background, and one idea would be to draw it on a table with more medical instruments.
What background ideas or additions do you think would suit this drawing best before you move on to the final step?
Step 6 – Finish off your thermometer drawing with color
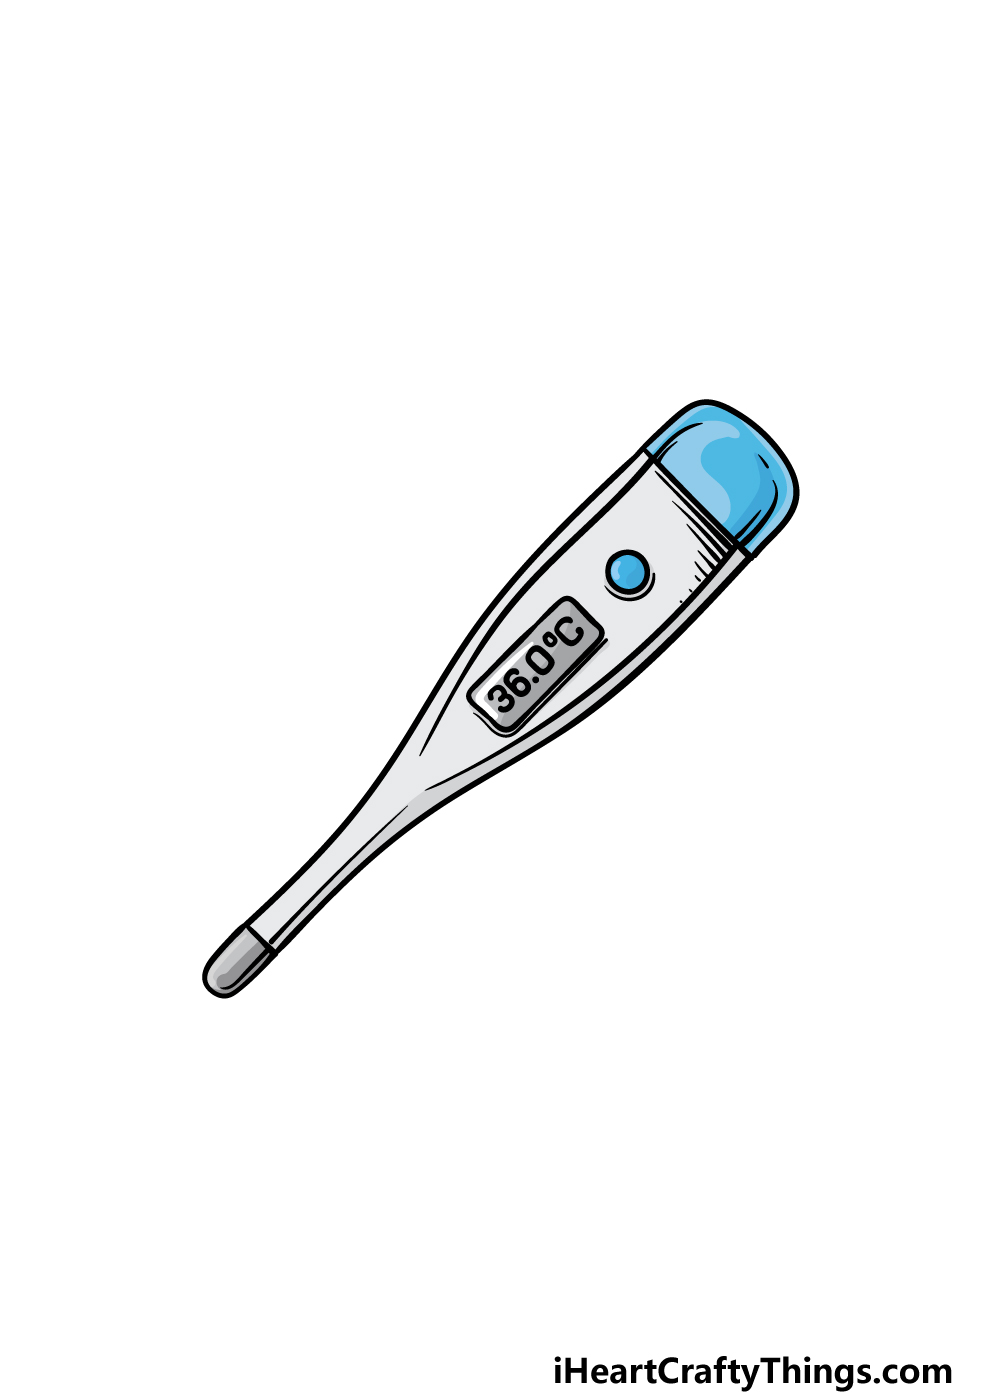
We can now move on to finishing this thermometer drawing with some color. Thermometers can come in a huge variety of different colors, so you have a lot of freedom with how you could color it in.
In our reference image, we went for a more muted color scheme. We used some lighter shades of grey for most of it, and then we incorporated some blues for the button and thicker end.
These are just a few of the colors you could use, but this is your chance to show off your color creativity!
Choosing the colors is just a part of the fun, however. You should also feel free to play around with different art tools and mediums to achieve your color choices. We can’t wait to see what you pick!
Do this to take your thermometer drawing to the next level
Turn up the heat as we make your thermometer sketch even better with these fun tips!
A thermometer can come in many different shapes, sizes and variations. We went with a digital one for this thermometer drawing, but you could change it to be a different variation!
Another classic design is that of a long, thin glass thermometer. This would be an example of one you could change this one into.
You could even draw the new design next to this one in order to compare them. Your parents might even have a thermometer handy that you could use to help you as you draw!
Another simple but effective addition to this drawing of a thermometer would be to show a hand holding it. Drawing hands is notoriously difficult, but you can make it easier for yourself!
One of the best places to start is by using your own hand as a model. You could also draw the hand in a simple cartoon style to make it easier.
These are a few ideas, but how else could you draw a hand holding the thermometer?
This next tip would pair well with the previous one, as we think you could also draw a background setting for your thermometer sketch.
There are a few background settings that would feel like obvious choices. For example, you could draw a doctor’s office for the background.
You could find plenty of pictures online to help you design the doctor’s office! What other background settings could you use for this thermometer?
As we mentioned, thermometers can come in many different variations. This is also true when it comes to the colors of the instruments.
We showed you one color scheme that you could use, but you should feel free to use any colors you like. The mediums and art tools you choose can also make a big impact on your thermometer drawing.
There are lots of fiddly parts to color, so you may want to use mediums like colored pens for more precision.
Your Thermometer Drawing is Complete!
That will conclude this guide on how to draw a thermometer! As we mentioned in the introduction, drawing objects like this that we have all encountered before can be trickier than expected.
We hope that this guide made it not only easier but also a lot more fun for you!
We also left this drawing open enough that you can add some details of your own. We mentioned a few ideas that you could try such as drawing a background, but what other ideas can you think of?
When you’re ready for your next artwork challenge, you can find more drawing guides like this on our website. We upload new ones frequently, so keep on the lookout for those!
You can also show off how your thermometer drawing came out by sharing your awesome creation on our Facebook and Pinterest pages for us to admire!