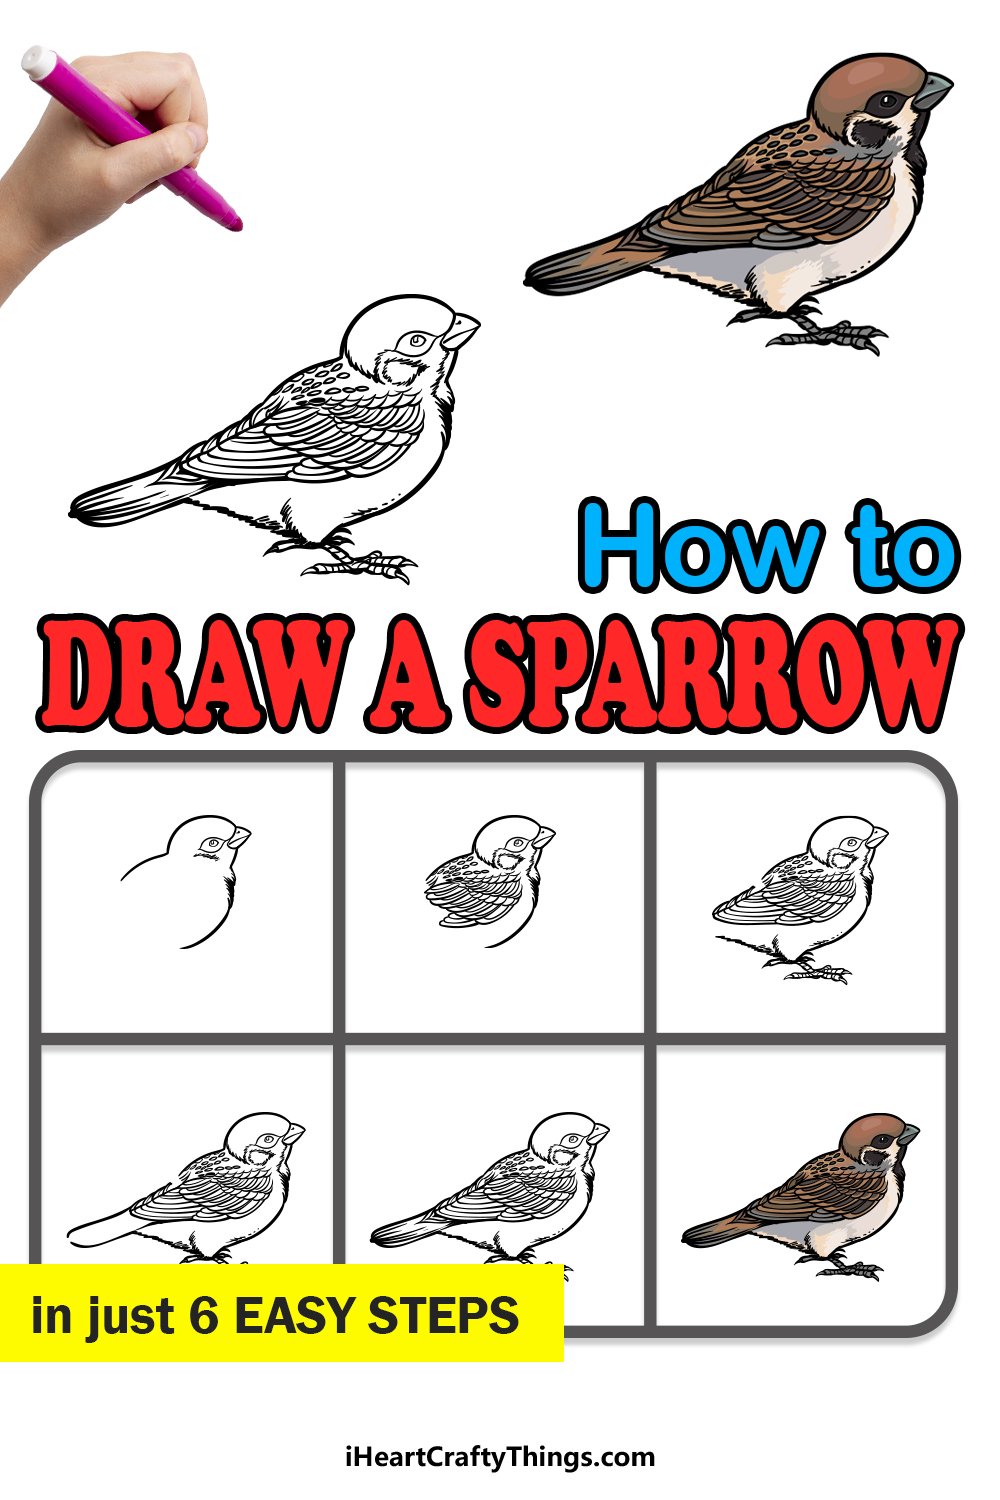
Birds can come in many different shapes, sizes and variations depending on their species. Some are big, some are small and some are brightly colored while others are more muted in tone.
The sparrow is a cute bird that definitely falls into the small and muted category.
They may be small and delicate, but they are also beautiful and detailed, and this can make it a fun challenge to learn how to draw a sparrow!
If you love this adorable little bird, then this should be the perfect tutorial for you to take on!
Our step-by-step guide on how to draw a sparrow will show you how to create a lovely depiction of this sweet little bird.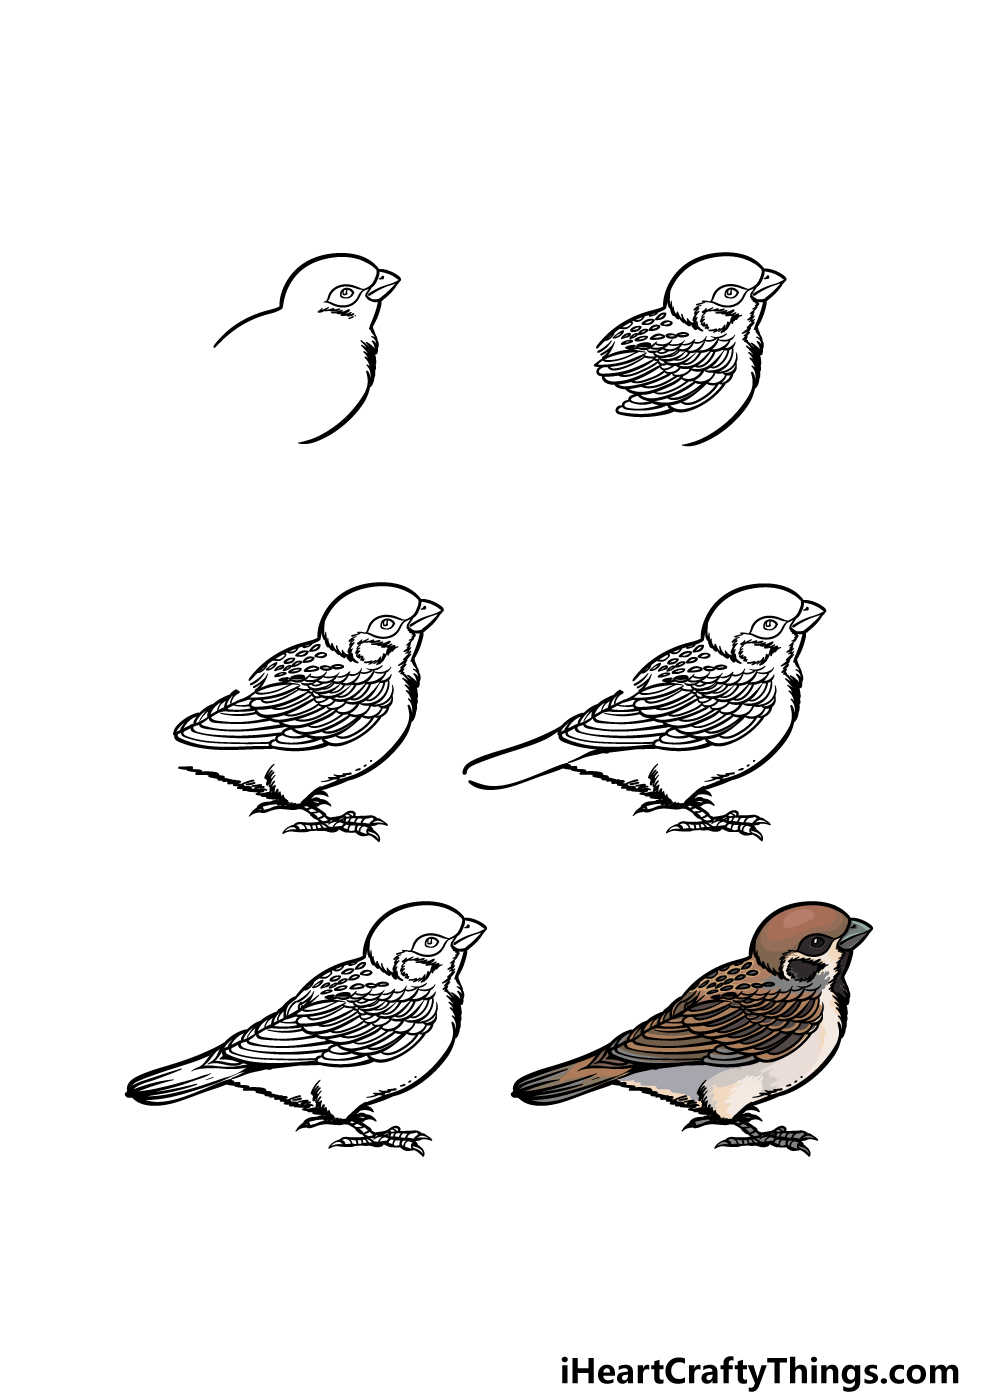
How to Draw A Sparrow – Let’s Get Started!
Step 1
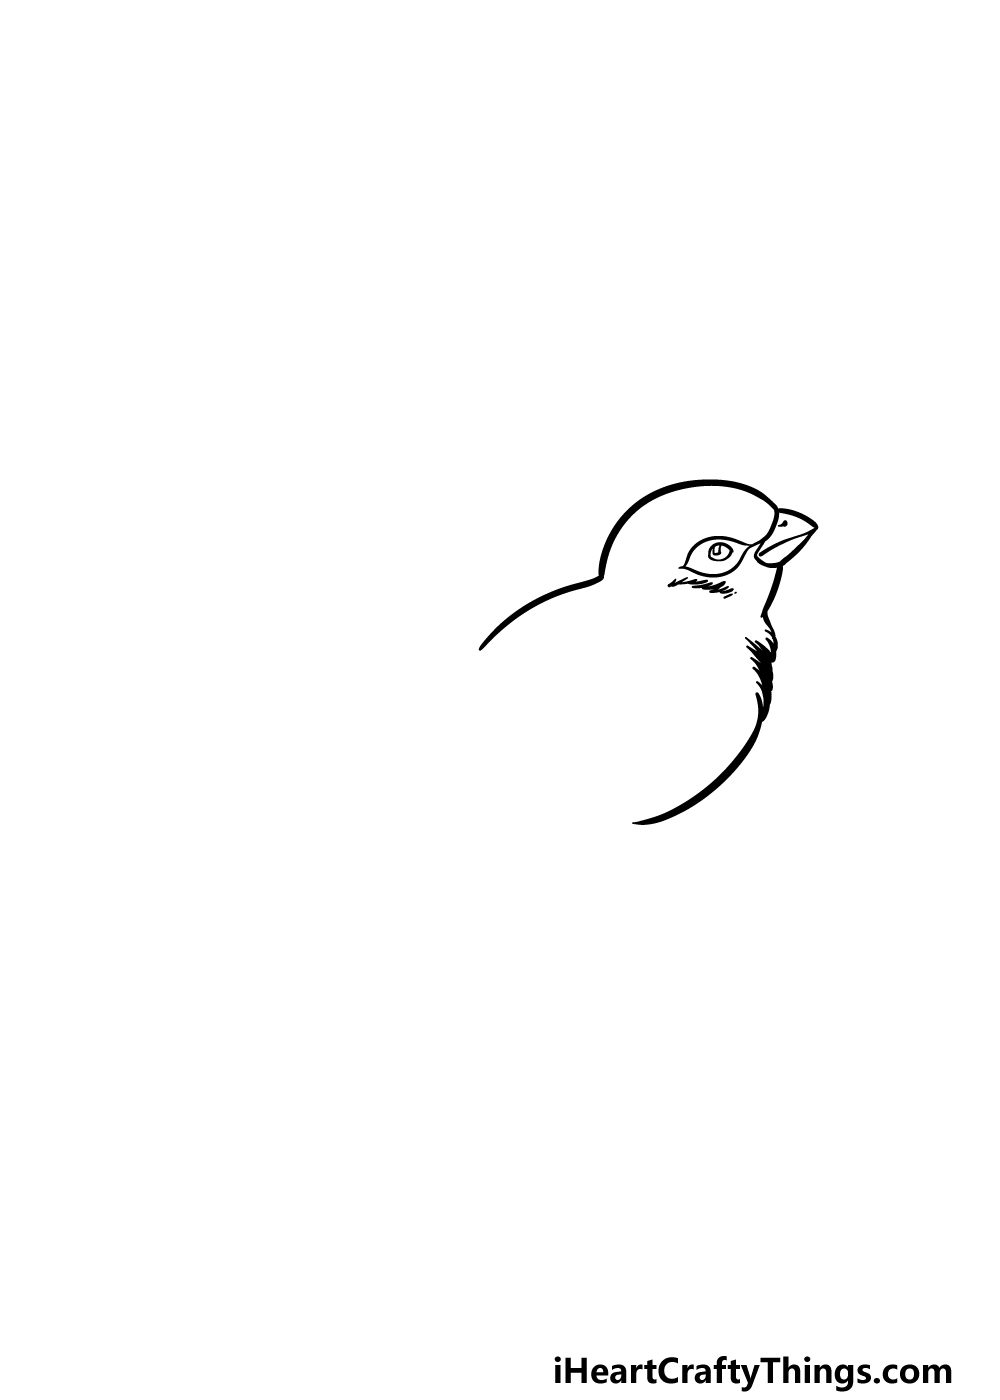
Despite the small size of this bird, we shall still try to pack a lot of detail into the drawing during this guide on how to draw a sparrow.
Even though lots of details can get intimidating, we shall work through that by taking it slowly throughout the guide! For now, we shall begin by drawing the head and the beginning of the body outline.
First, draw a small circular shape for the eye of the sparrow. Then, that will be surrounded by another rounded shape with two sharp points on either side.
This will then be attached to a small little beak on the side, and then you can use some curved lines to draw the top and bottom of the head outline.
The back can be drawn with another curved line, and then you can use some small curved lines for the feathery chest of the sparrow.
Step 2 – Next, draw some of the feather details
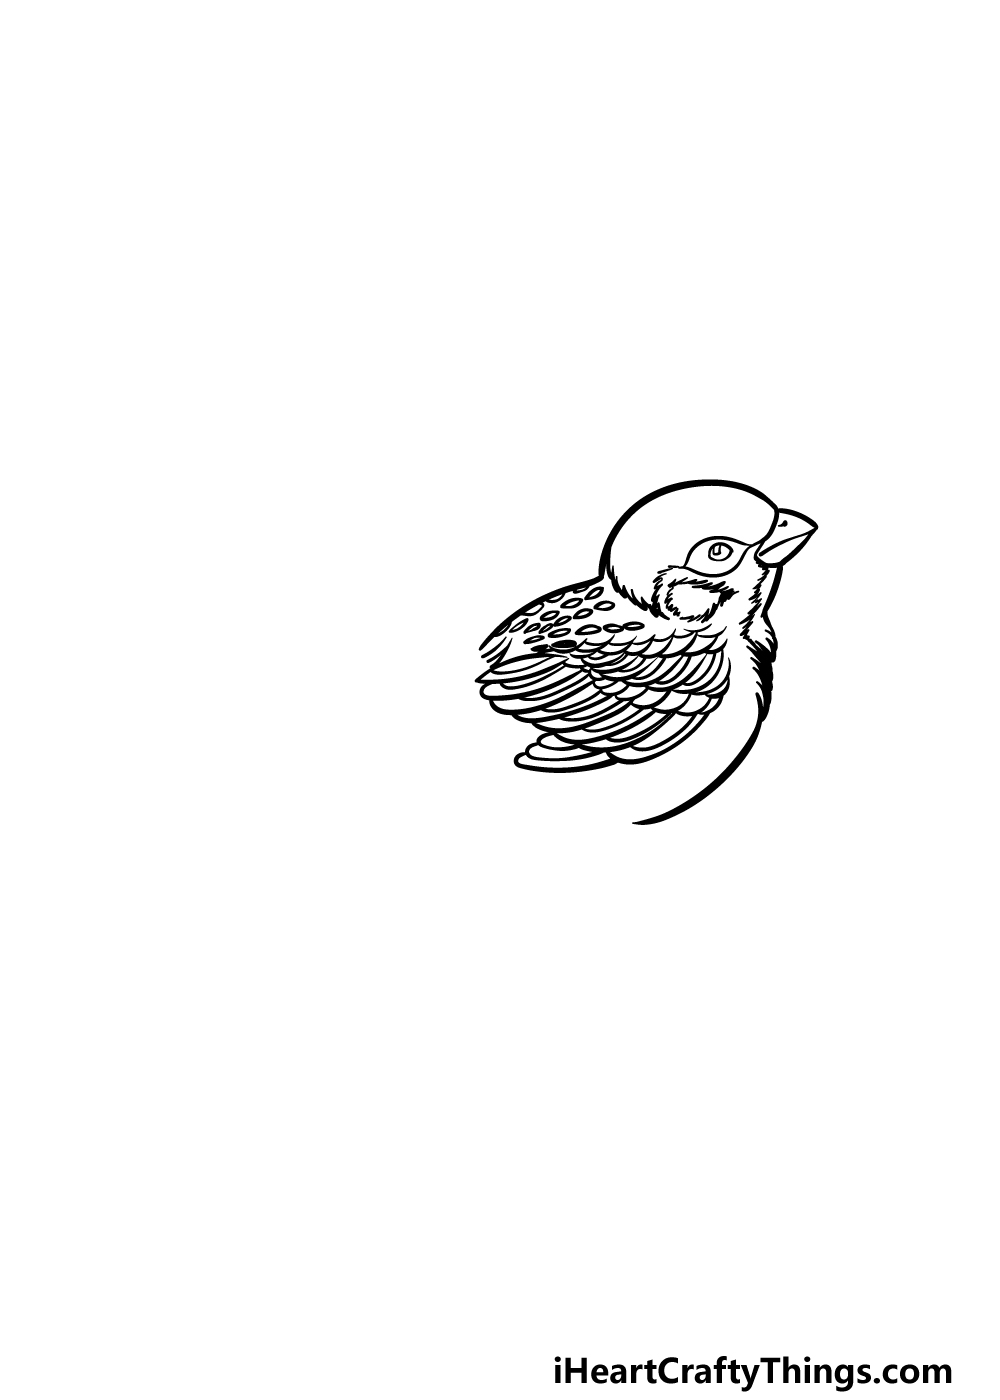
This second step of your sparrow drawing is where it may start getting a bit tricky!
There’s no need to worry though, for as long as you follow the reference image closely then you should have no problems. Use some curved, jagged lines to create the feathery base of the head first.
Then, we shall draw a series of small, thin oval shapes onto the back of the bird. The feathers for the wing may look complicated, but it’s not as hard as you think!
Try to look at the pattern created and then see how each individual feather contributes to the pattern.
Simply take it one feather at a time while using the reference image you guide you until you have the wing drawn.
Step 3 – Now, draw the rest of the wing and add some feet
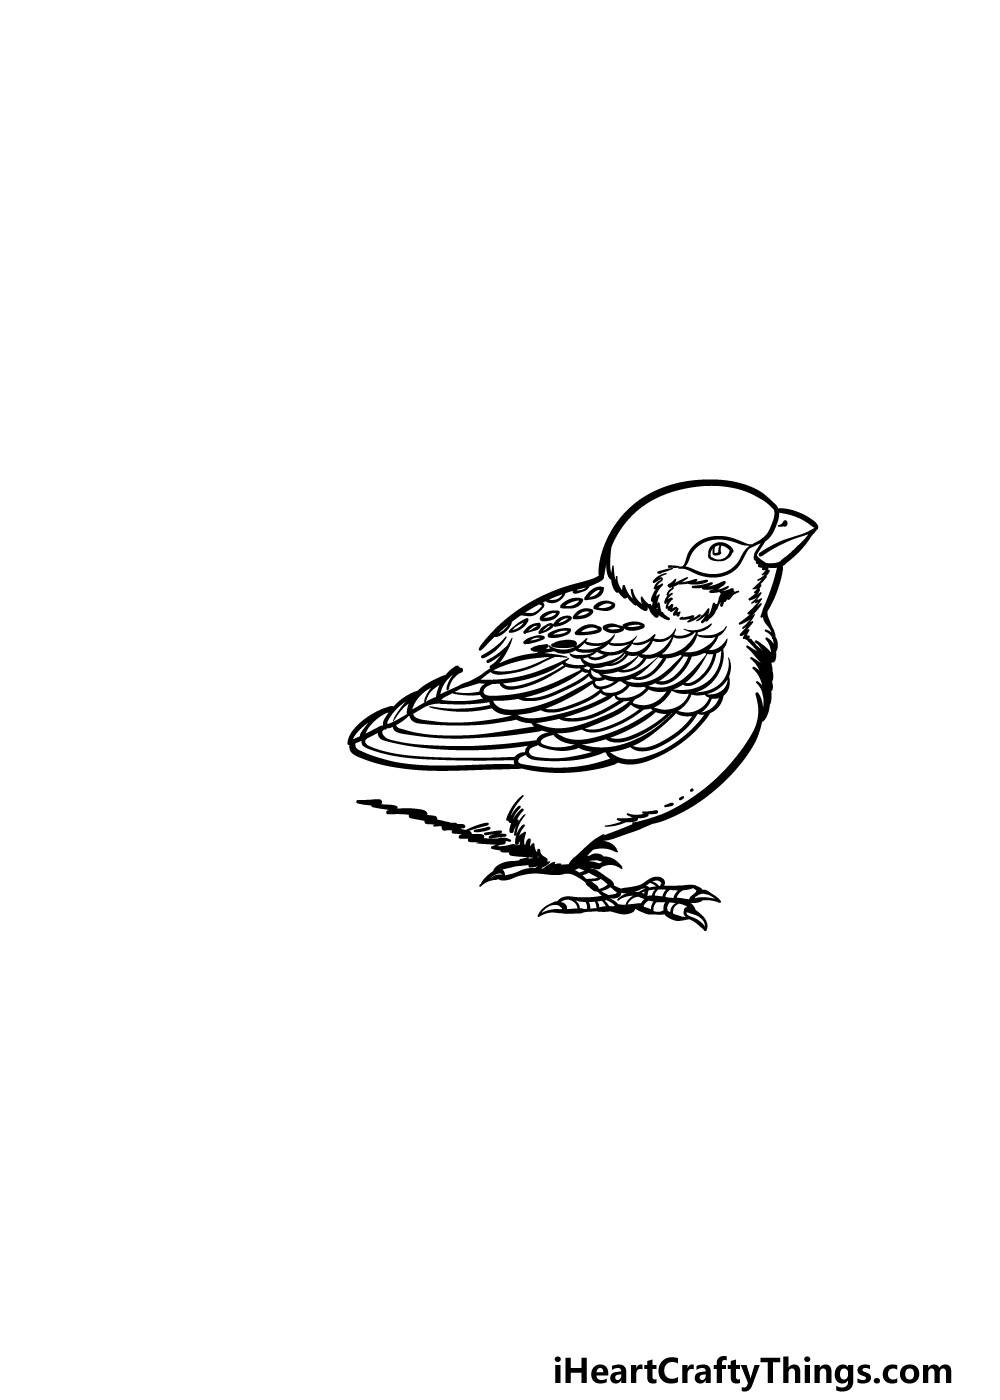
You started the wing in the previous step of this guide on how to draw a sparrow, and in this next one you can finish it off.
We will do this by adding another layer of feathers, and these ones will be a bit longer than the previous ones that you drew.
Then, you can extend the chest until it turners into more of those small, curved feather lines.
Then you can draw the thin leg and foot, and then finish off this step by drawing more of the feathery base.
Step 4 – Next, draw the outline for the tail
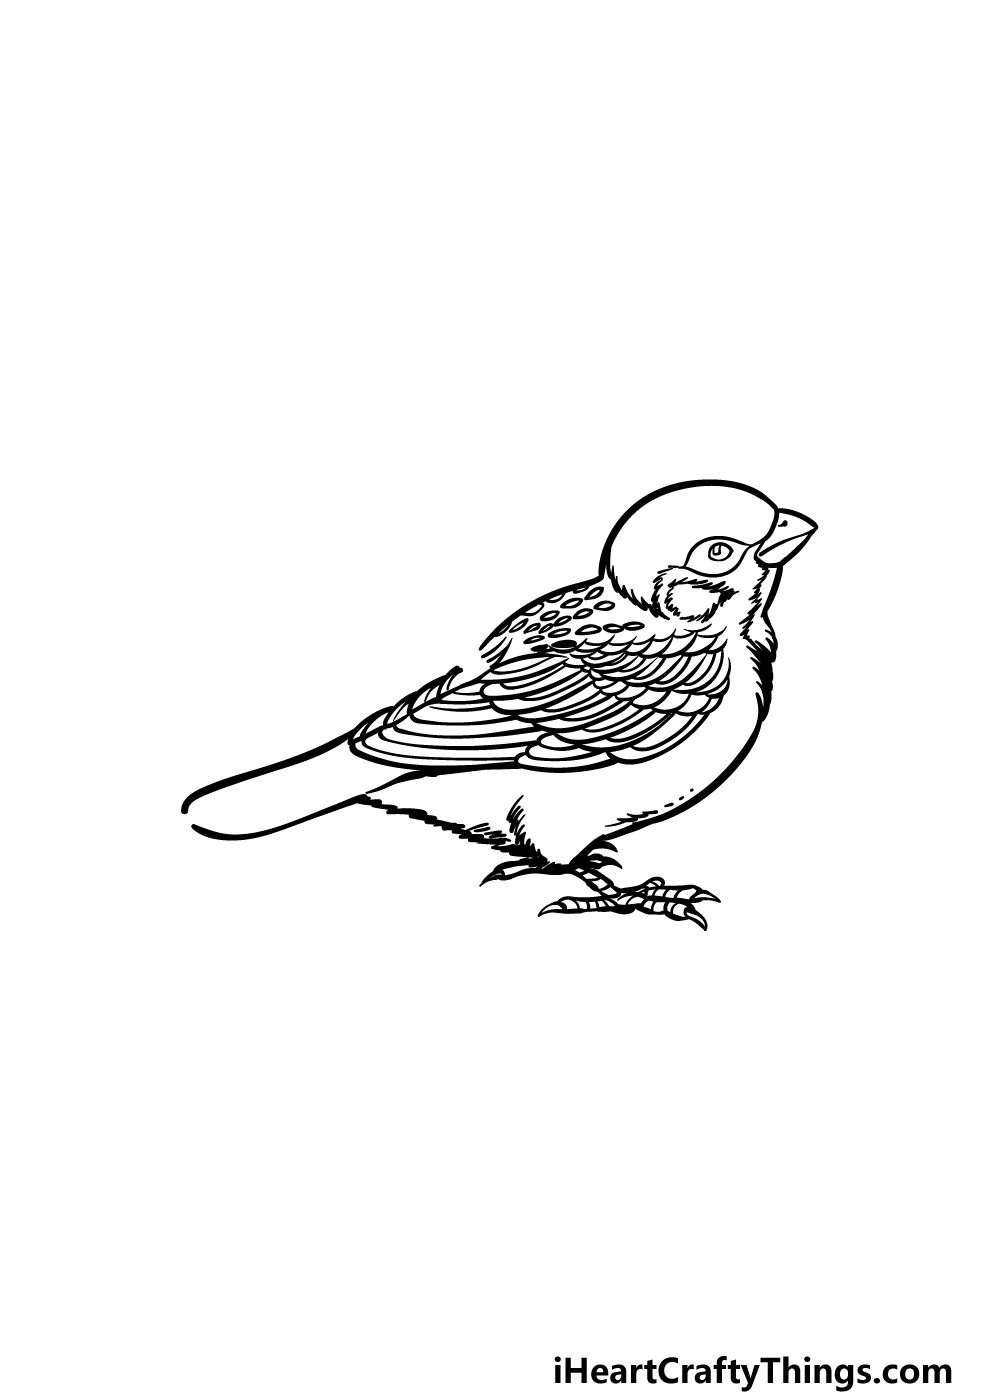
This sparrow drawing is really coming together now! To carry on with this image, the next thing we will be drawing will be the outline for a tail on the bird.
Compared to some of the previous steps, this one should be really easy for you to do! Simply draw two curved lines extending back from the bird to create the short, rounded tail.
It won’t look very detailed at the moment, but we will fix that in the next step where we add some details along with the final touches.
Step 5 – Add the final details to your sparrow drawing
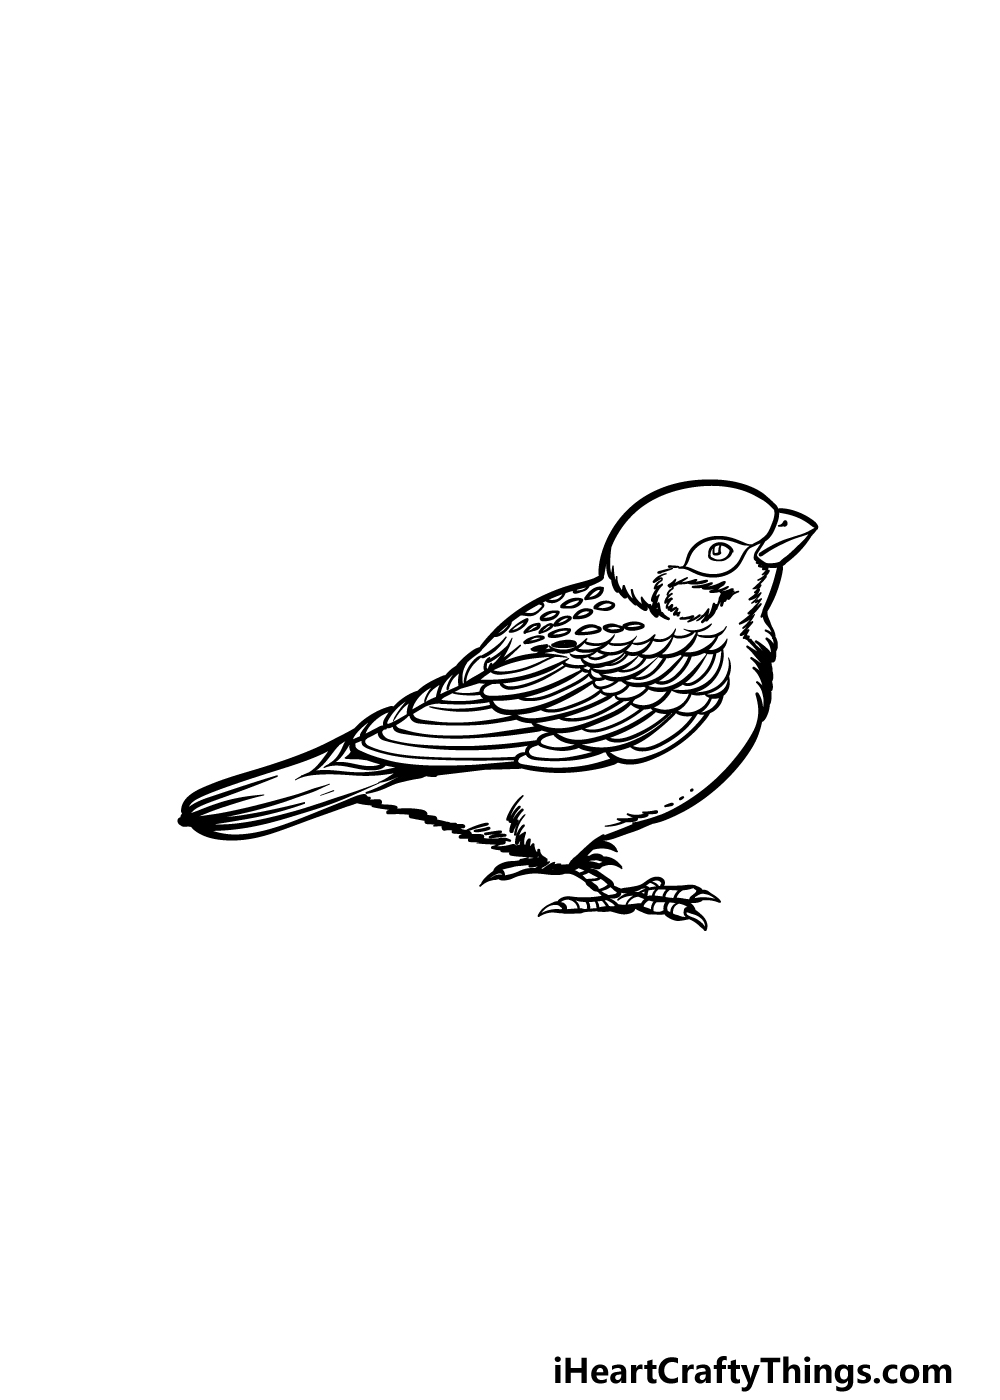
Now you’re ready to finish this image off to get you ready for some coloring fun in the final step of this guide on how to draw a sparrow!
First, we will add some detail to the tail that you started in the previous step. To do this, simply add some lines extending from the tip of the tail and then inward.
Once that is done, we will then be adding some more minor details throughout the rest of the sparrow. At this stage, you could also add some details of your own to really finish it off!
One idea would be to draw a background for this bird, so what kind of setting would you like to create for it?
Step 6 – Finish off your sparrow drawing with color
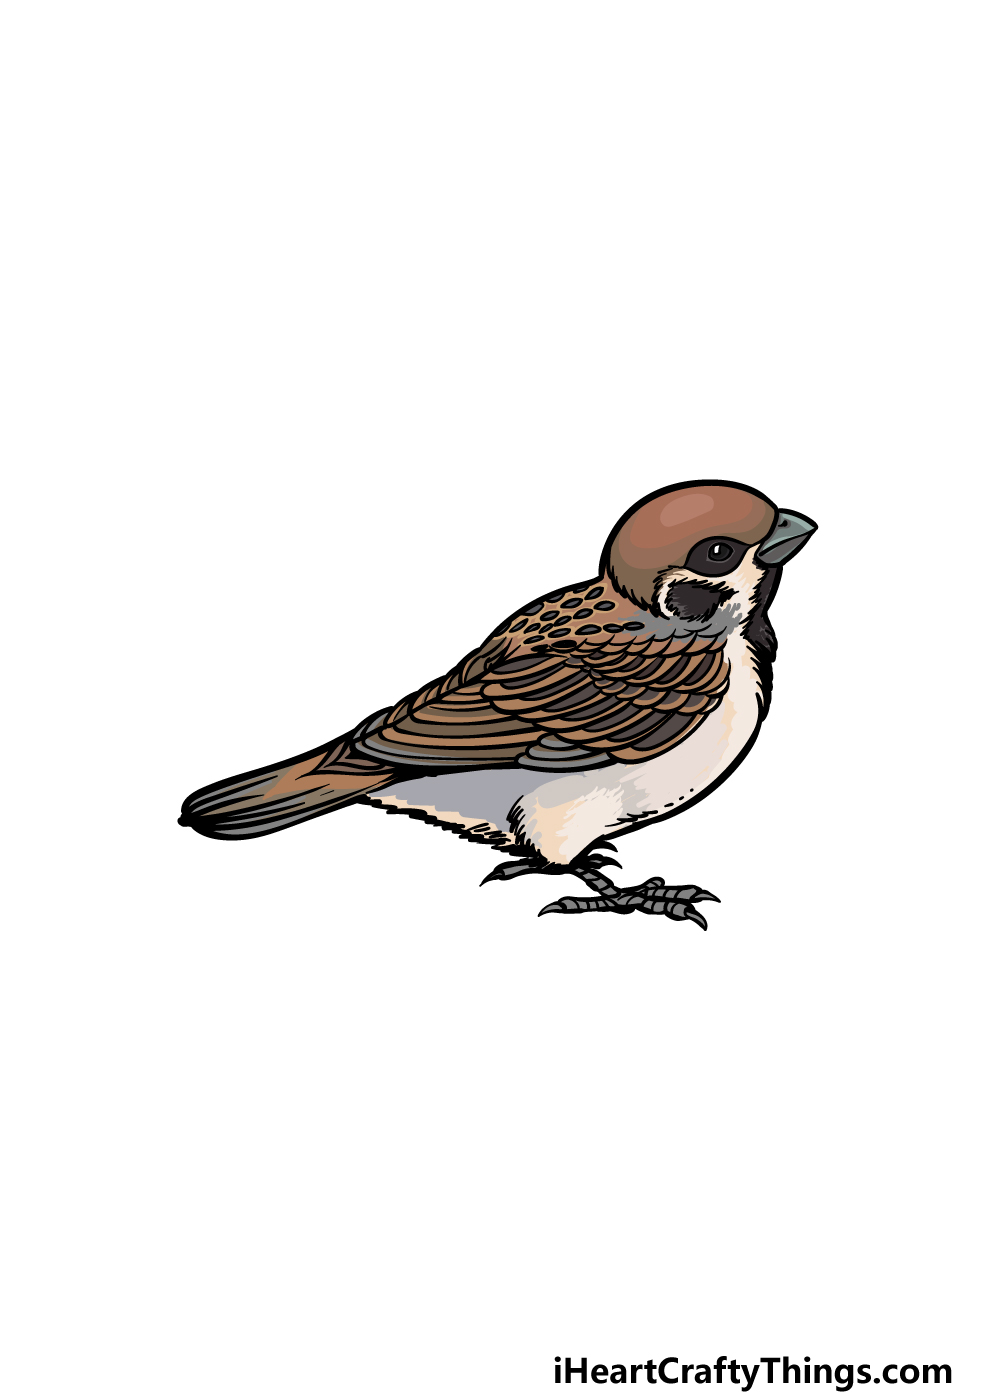
This is the final step of this sparrow drawing, and now you can finish it off with some color!
Sparrows aren’t really known for their bright and vibrant colors, so in our reference image we kept things a bit more realistic by using some more muted browns and beige colors.
When coloring in with these kinds of colors, mediums such as watercolor paints or colored pencils can often be great for a softer look to the image.
On the other hand, you could also go for a more stylistic approach and use some lovely bright and striking colors!
If you went for this kind of approach, then mediums such as colored marks or acrylic paints may be more recommended. What colors and mediums will you use for your artwork?
3 More tips to make your sparrow drawing easy!
Make this easy to draw sparrow sketch even easier with the help of these three tips.
This drawing of a sparrow that we created in this guide is done in a highly realistic, detailed style. It looks really great, but it can also make completing the drawing much harder.
If you’re having a difficult time drawing the sparrow as it appears in the guide, you may consider altering the design a bit.
You could simplify it by removing or changing certain details to suit your own art strengths.
Doing this will also make the drawing a bit more unique, so you don’t need to worry about the design being different from our example!
Another way that you could make this sparrow drawing easier to handle would be by adding a background. You may be wondering how adding more to the drawing would make it easier.
There are a few reasons for this, and one might be that you simply find drawing backgrounds easier than drawing birds. The main aspect would be that when the bird is on its own, all of the attention is on it.
If you were to make the sparrow part of a larger background setting, then there would be less attention drawn to it. That way, any parts you’re not happy with won’t be as noticeable and will blend into the larger image.
Finally, when drawing something real like this sparrow sketch, we always recommend looking at the real thing. Looking at a real sparrow could be tricky, so the next best thing would be using pictures.
You can find lots of pictures of sparrows online, but they can also be seen in encyclopedias or other educational bird books. If you can find one that is in a similar pose to the one in our example, that would be even better!
Even if it is in a different pose, you could still use it to help you as you draw the proportions and finer texture details of the sparrow.
Your Sparrow Drawing is Complete!
You have completed all six steps of this guide on how to draw a sparrow, and you have a wonderful depiction of this cute bird to show for it!
Even though it is such a small bird, we hope that this guide made it easy for you to depict all of the details. We also hope it was a lot of fun to do!
Now you can show off your creativity by adding your own ideas for some extra details, additions and color choices. Be sure to have fun with it and you may be surprised with what can happen!
Please be sure to visit our website for more fun when you’re finished. We have many awesome drawing guides for you there and more are on the way soon.
We hope that you will also share your finished sparrow drawing on our Facebook and Pinterest pages for us to admire! It will be great to see how your wonderful picture turned out.