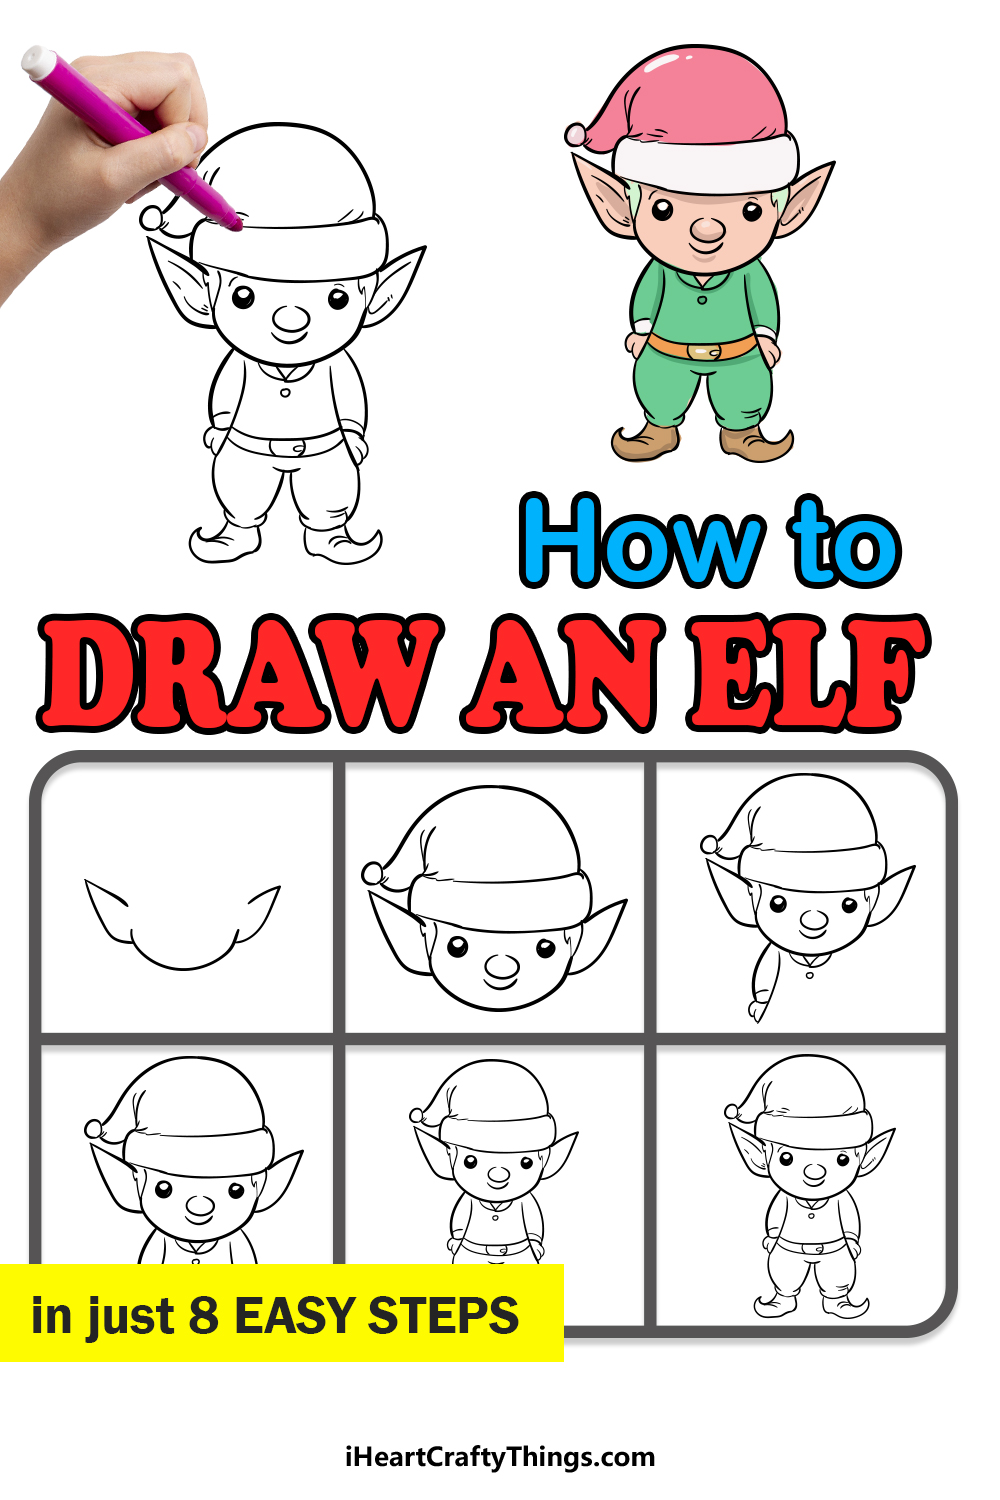
Enjoy some festive cheer as you learn how to draw an elf! You can create some cute Christmas art by following along with me on this drawing journey.
Christmas elves are a big part of the process when it comes to Santa’s operation. He relies on these elves to make all of the toys and presents for kids around the world.
They are also common to see in many forms of decorations around the festive season. When you see one of these little elves, you will immediately think of Christmas!
When you follow this guide, you will see how to make a cute, simple elf. Then, you can customize it to make your own designs and even create some background settings for your little elves.
It all begins with the first step of the guide, so let’s begin!
Watch And Learn How To Make Your Elf Drawing
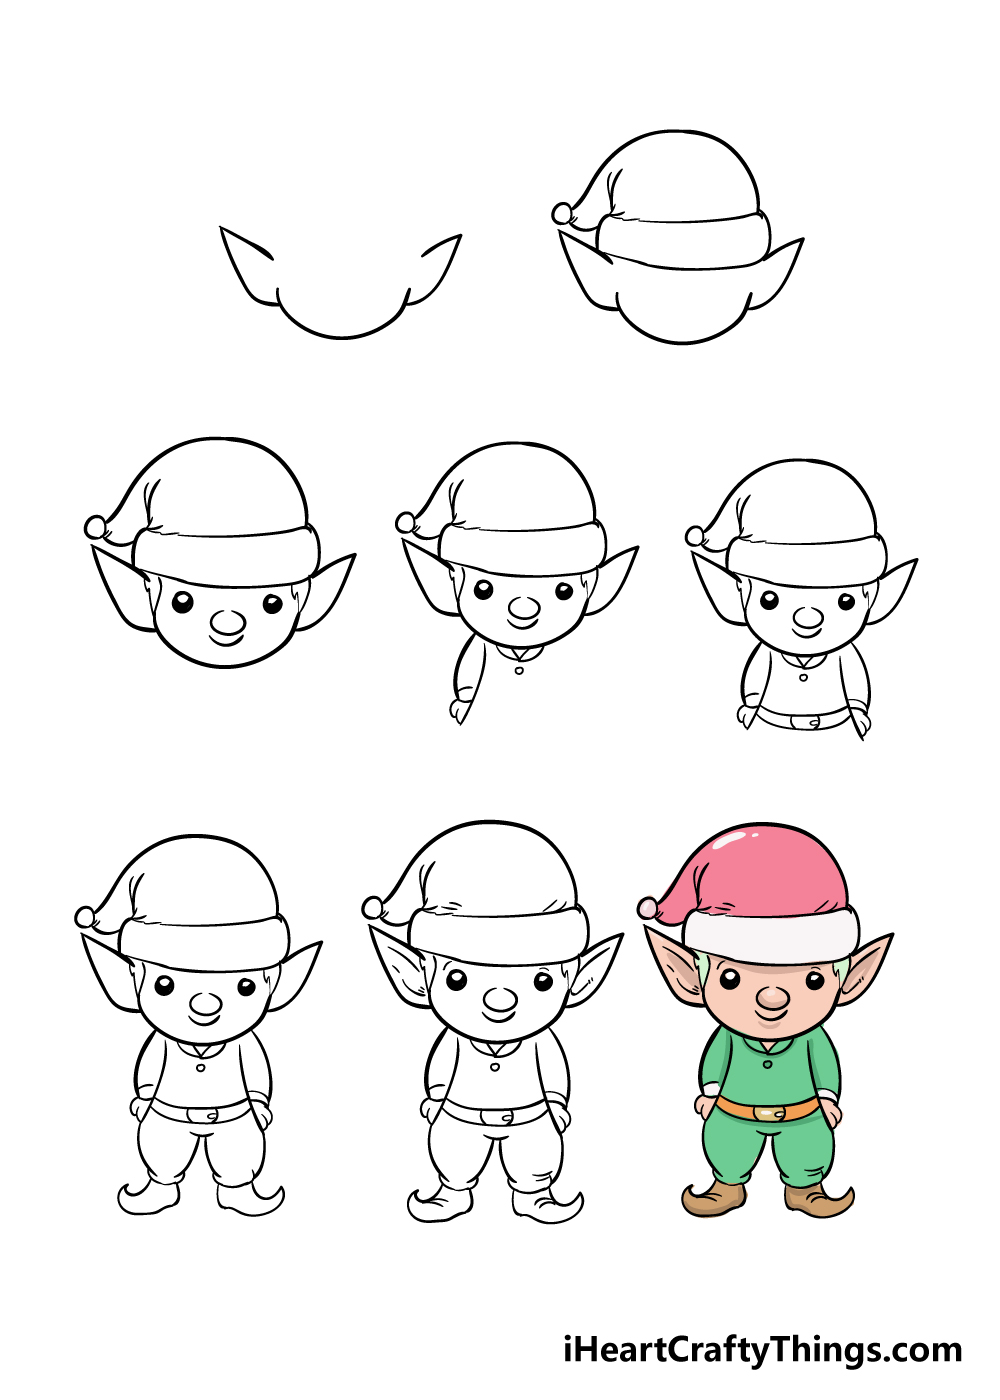
How to Draw An Elf – Let’s get Started!
Step 1
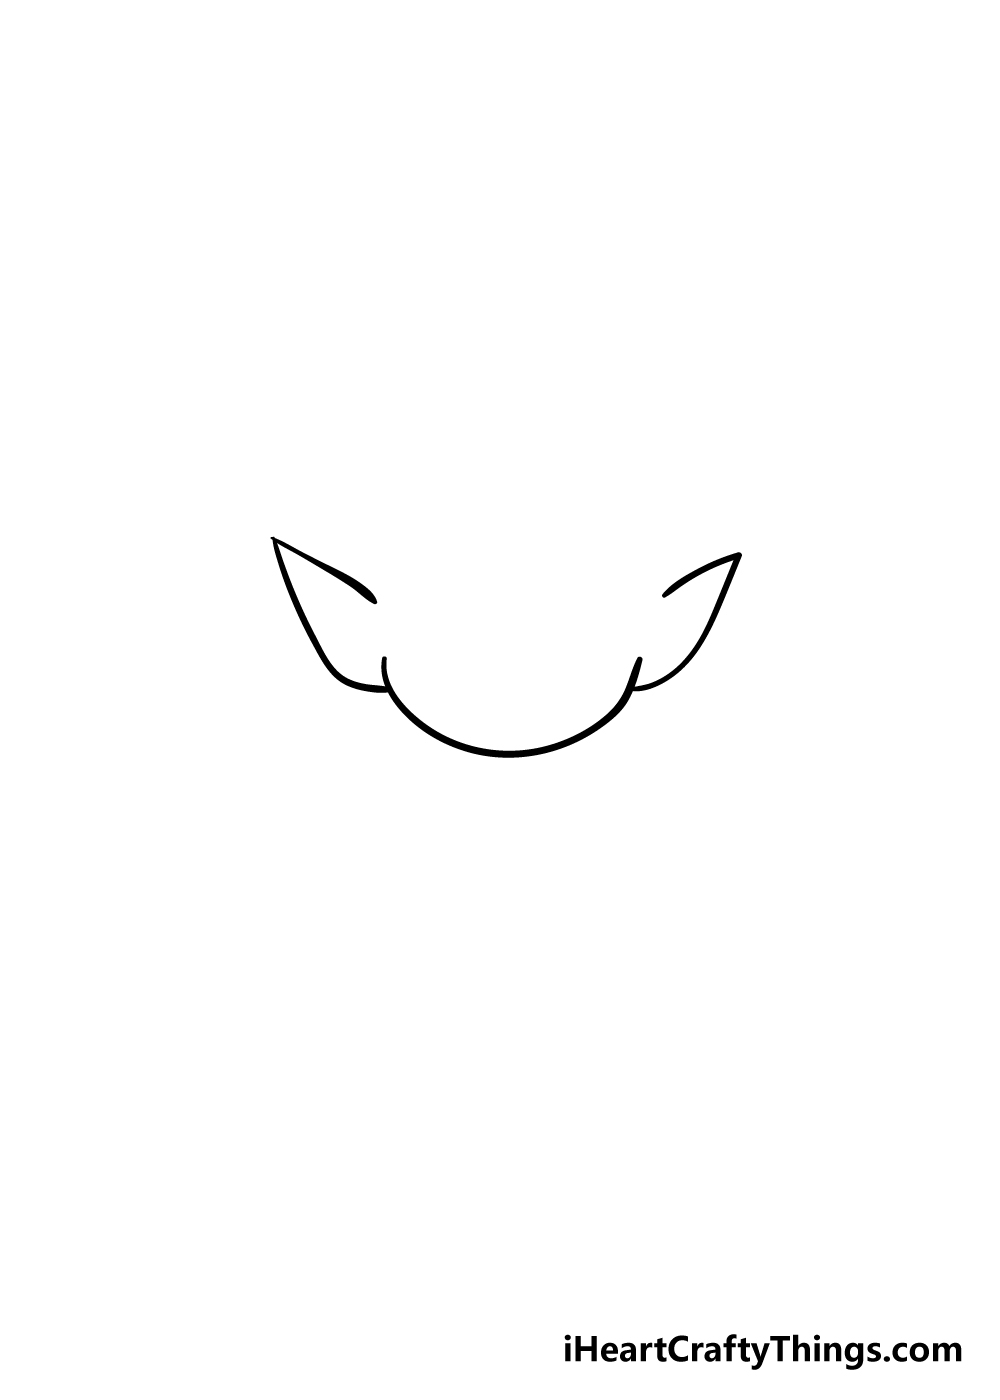
When you think of an elf, two characteristics that come to mind are their pointy ears and their little hats.
We shall be creating the first of those attributes in this first step of our guide on how to draw an elf!
First, you will be drawing the bottom of the elf’s face. You can do this with a curved horizontal line. Then, you can draw the pointy elf ears on the side of this face as shown in our reference image.
Once you have the chin and ears drawn then you’re ready for step 2!
Step 2 – Next, draw the hat for your elf
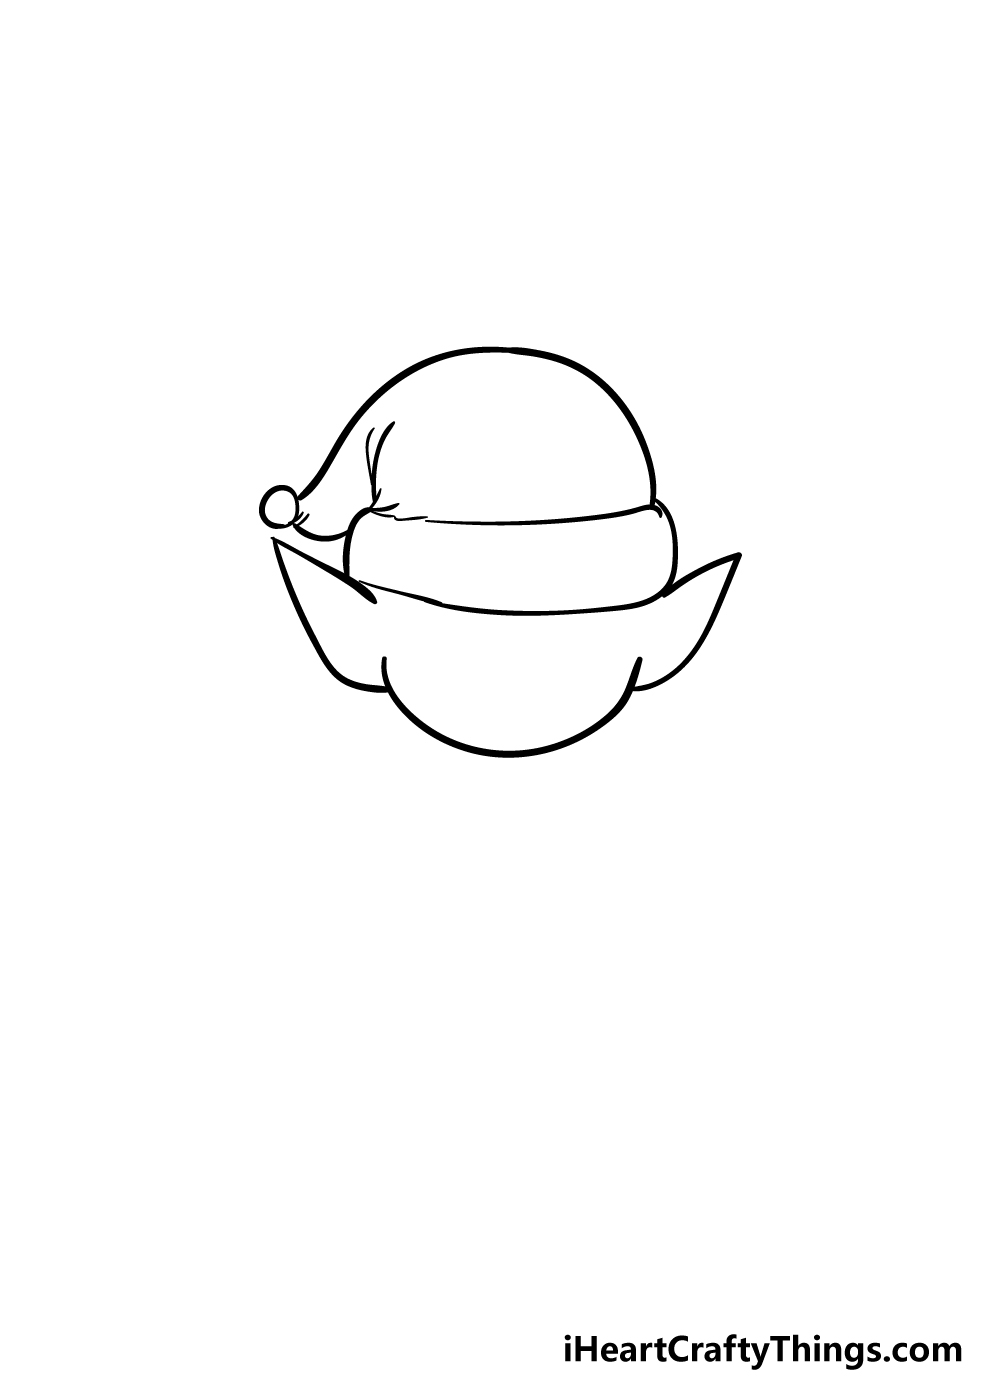
We mentioned the distinctive elf hat in the previous step, so we shall add one to your elf drawing in this next step!
To draw the base of the hat, you can add a very slightly curved line between the tops of the ears.
Then you can draw two vertical curved lines on either side of the base for the sides, and then you can connect the top of these vertical lines to finish the base of the hat.
Finally, you can use some curved lines to have the hat folding over itself as shown in the reference image. That takes care of the famous elf hat for now!
Step 3 – Now, draw some facial details for the elf
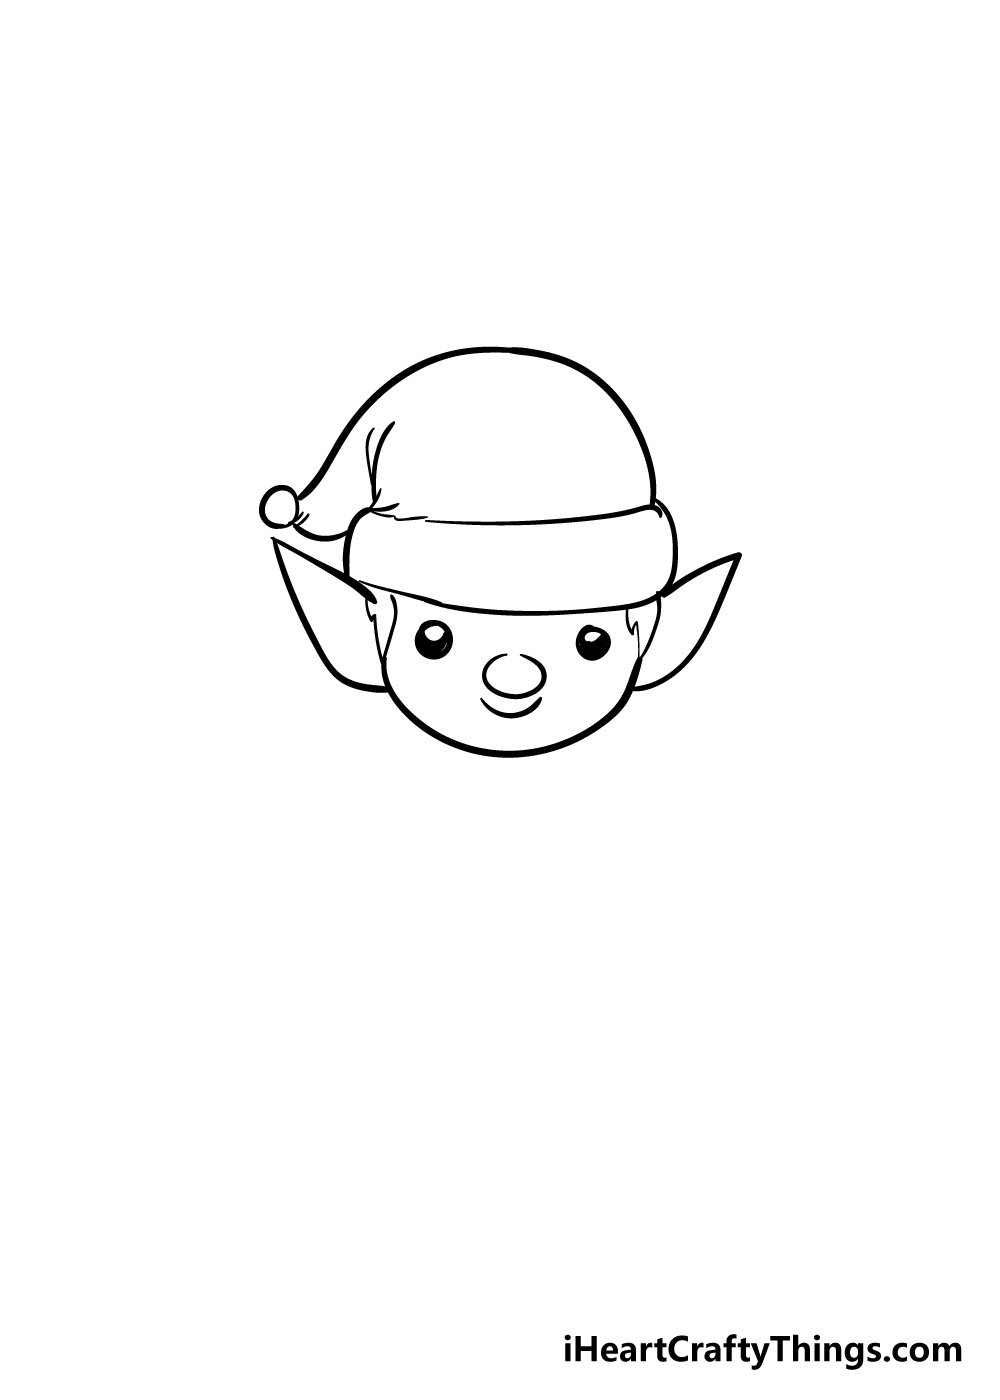
In this part of our guide on how to draw an elf, we shall be drawing a cute and simple face for the elf.
The eyes will be drawn using two filled black circles. These circles will have a smaller white circle inside of them to show the glinting of the eyes.
Then you can use some more curved lines for the round nose and smiling mouth. Finally, you can draw some hair poking out from beneath his hat.
Step 4 – Next, draw the first arm

We will work on the body of your elf drawing for the next few steps. To draw the first arm, you can draw some lines coming straight down from the head.
Then you can add a little hand at the end to complete this first arm. Before you move on, be sure to add the collar under his neck!
Step 5 – Now, draw the other arm and belt

You’ve drawn one arm already, so adding another one should be easy for you now!
Once you’ve drawn the second arm as you drew the first one, then you can use some curved lines across his body to make his belt.
You could also draw his arm in a different position, perhaps to make it look like he’s waving!
Step 6 – Next, draw some legs for the elf
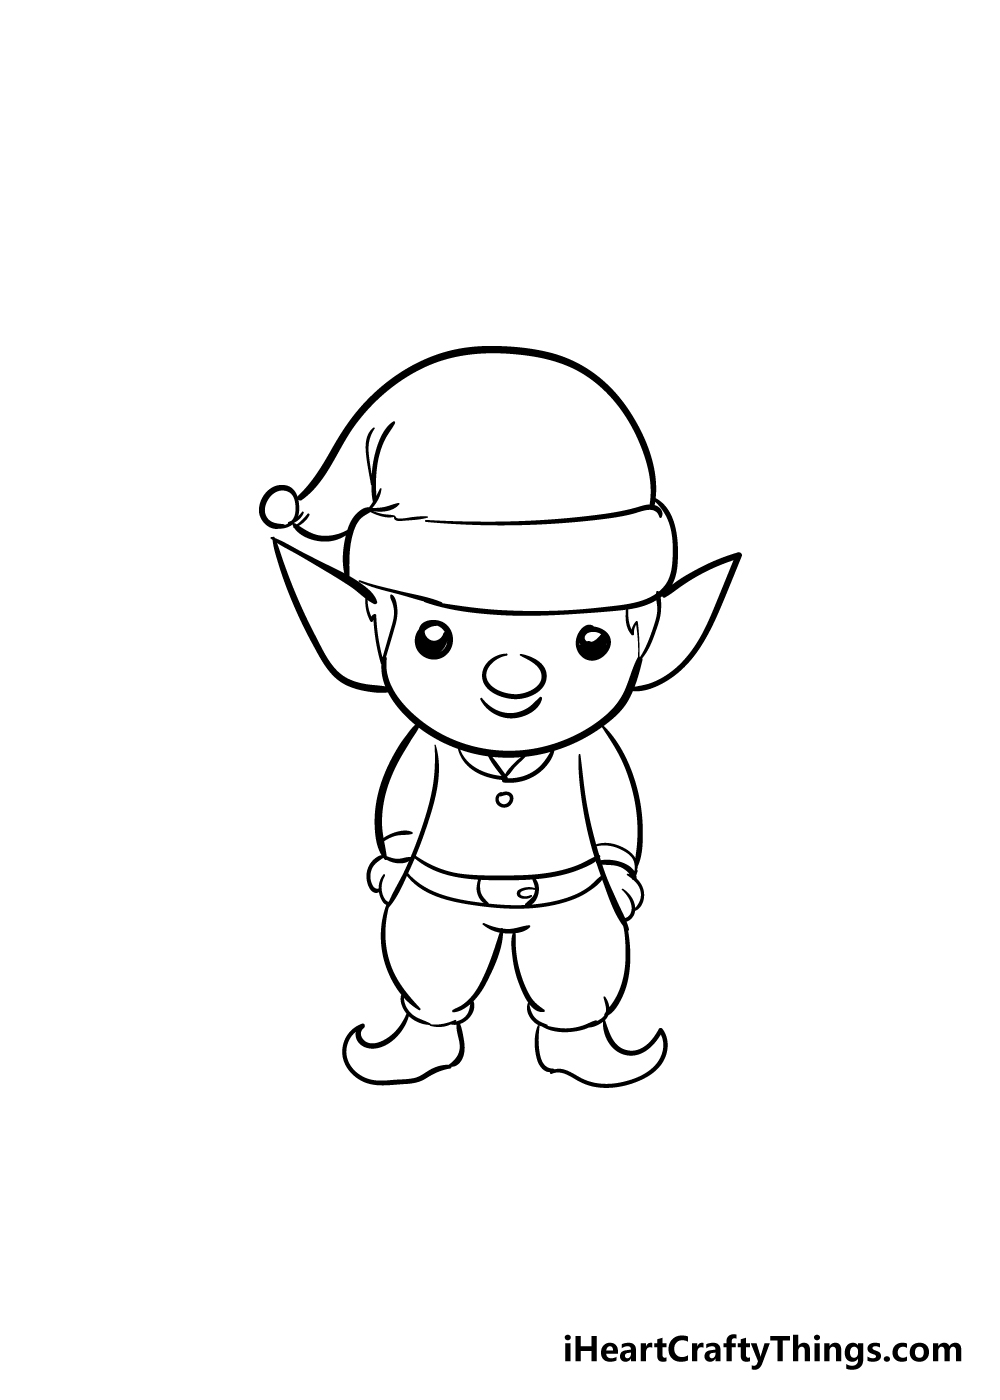
This cute little elf needs some legs, so we shall add some in this next step of our guide on how to draw an elf!
The legs will be small and rounded to make sure this elf is nice and short. He will also be wearing some pointy shoes as it appears in our reference picture.
Step 7 – Next, finish off some final details
It’s almost time to bring some wonderful colors to your elf drawing, but first we have some final details to add!
These details will all be drawn with some simple lines, but even though they are small and simple they will make a big difference!
These lines will go all over the elf’s body and all over his clothes to add some creasing and detail.
Before you move on, be sure to add a background or any other details you would like for the image.
Step 8 – Now finish off the elf drawing with some color
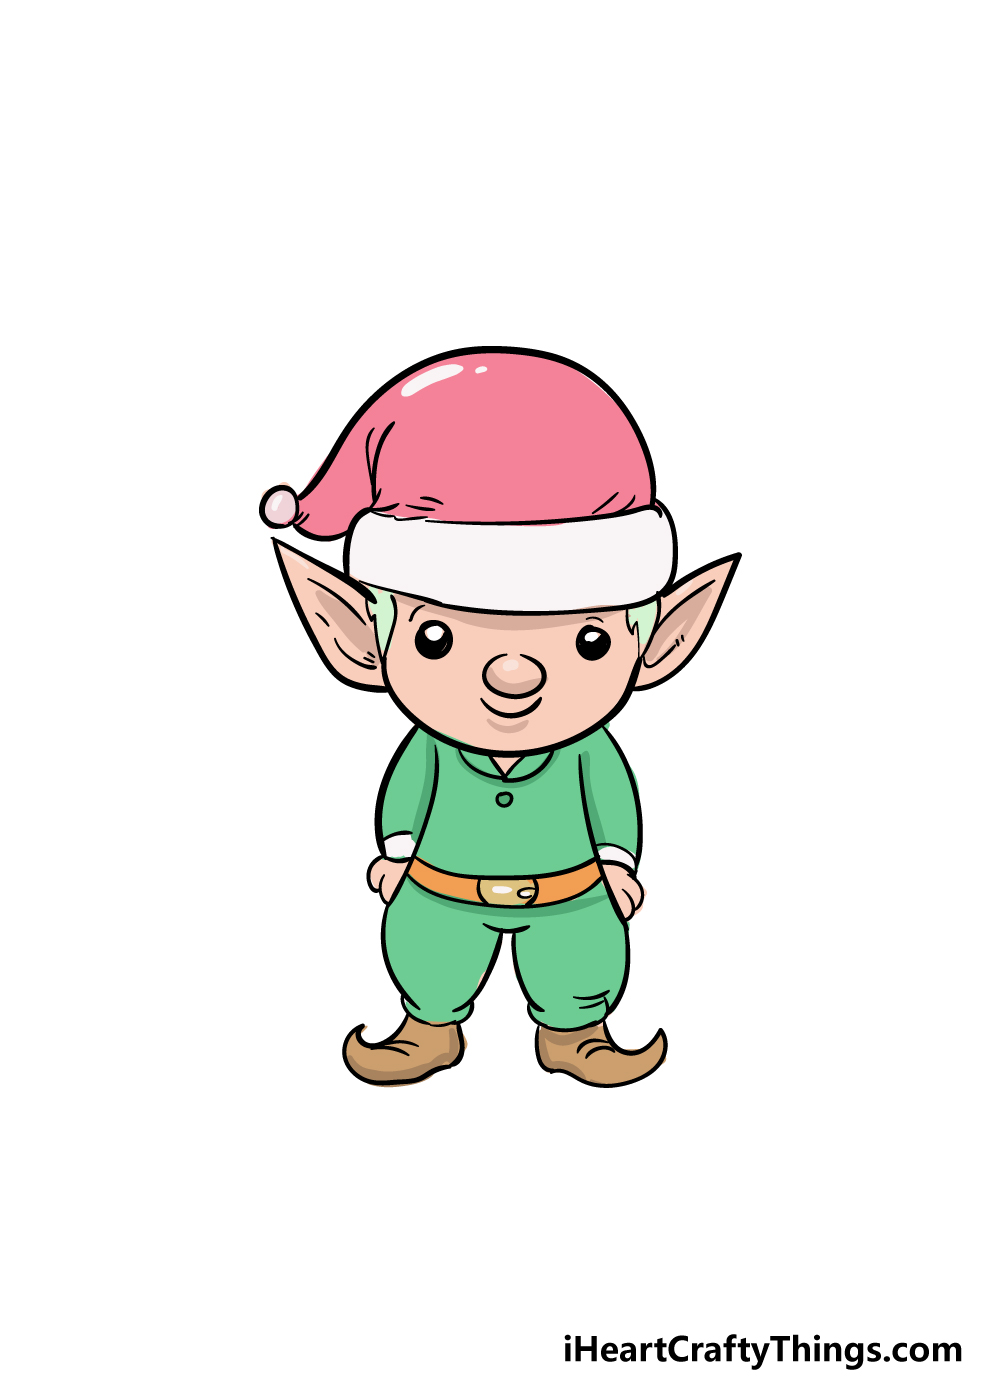
That brings us to the final step of this guide on how to draw an elf. Now that he is completely drawn, the last step is adding some beautiful colors to the little guy!
We used some green and red for our example image, but this is your drawing so you should use any colors that you love for this picture of yours!
You could go for some festive colors like reds, golds and greens or use some other amazing colors to really bring him to life!
I think that some vibrant mediums such as acrylic paints and colored pens would be perfect for this elf, but any mediums you choose will look amazing too!
Which awesome color styles and art mediums will you choose to finish off this cute elf drawing of yours?
Here’s how you can make your elf drawing even better…
Practice some elf improvement as we show you how to make this elf sketch even better!
If there’s one thing we know of elves, it’s that they rarely work alone. For that reason, we think this elf drawing would be even better if you added many more elves to the mix!
Now that you have mastered drawing this elf, this should be easy enough for you. You can follow the steps of the guide and change a few smaller details such as facial features and poses to add some variety.
What kinds of shenanigans do you think multiple elves could get up to?
Whether you add more elves or keep this elf sketch solo, you could also make it so much better by adding a background! The obvious choice for this would be to create a setting such as Santa’s workshop.
That’s one idea you could go for, but what other festive settings would be great for this cute elf? We can’t wait to see what you choose!
When most of us think of elves, we probably think of Christmas. That’s why we think going for some Christmas additions would be perfect for this drawing of an elf!
Doing this would be really fun and easy. You could add some stockings, mistletoe, baubles and other Christmas decorations.
These would be a great alternative if you’d rather not draw a background setting for the elf. What are some aspects that remind you of Christmas that you could use for this drawing?
Finally, we think you should have some fun with the colors you choose for this artwork. We showed you a lovely classical color scheme for our version of the drawing, but you could go for all sorts of fun colors.
Not only that, but you may want to try out some interesting art tools and mediums. For instance, using colored pens, acrylic paints and markers would help to make the colors pop.
Alternatively, watercolor paints and colored pencils would be great if you prefer a softer look for the elf.
Your Elf Drawing is Complete!
We hope that you had a fantastic time having some Christmas fun with this guide on how to draw an elf!
This guide was created to show you how a drawing can be so much easier when you have some steps to follow. We know that by following this guide you will be a master at drawing this elf in no time!
The fun doesn’t have to end once you’ve finished this guide, though. There are lots of ways that you can personalize and add your own details to your elf drawing.
These could include a beautiful background or extra elements such as some props for him to interact with! The only limit is your creativity and we can’t wait to see what you come up with!
Now that you’re finished with this guide, you’re ready for a new drawing challenge! Be sure to check out our website often, as we upload new awesome guides all the time.
We would also love to see your amazing elf drawing, so please be sure to share it on our Facebook and Pinterest pages for us to enjoy!