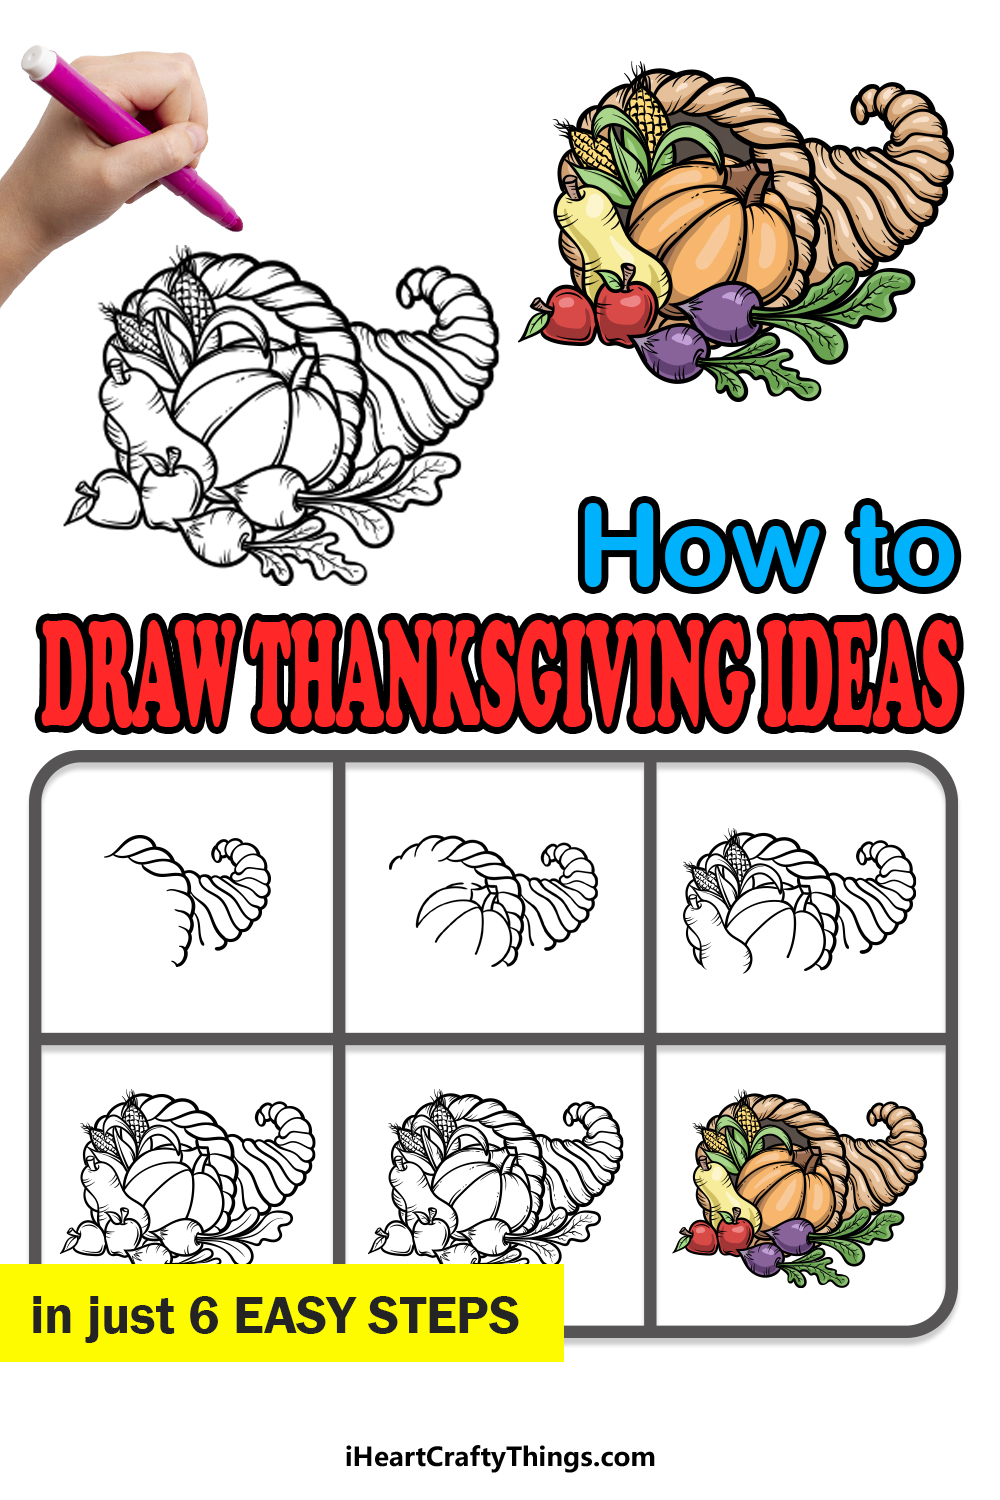
Thanksgiving is truly a wonderful time of the year! When it rolls around, Halloween has come and gone and the leaves on the trees have turned to brilliant shades of orange and yellow.
The holiday itself is one cherished by many people, and many of the decorations associated with it also tie into the Fall season as a whole.
With so many decorative options at one’s disposal, it can be hard to decide on which ones to go for.
Learning how to draw Thanksgiving ideas is a great way to imagine what you may go for when it’s time for Thanksgiving in real life!
This tutorial in front of you will be perfect to help get you into that Thanksgiving mood.
We hope you have a great time as we work through this step-by-step guide on how to draw Thanksgiving ideas in just 6 steps!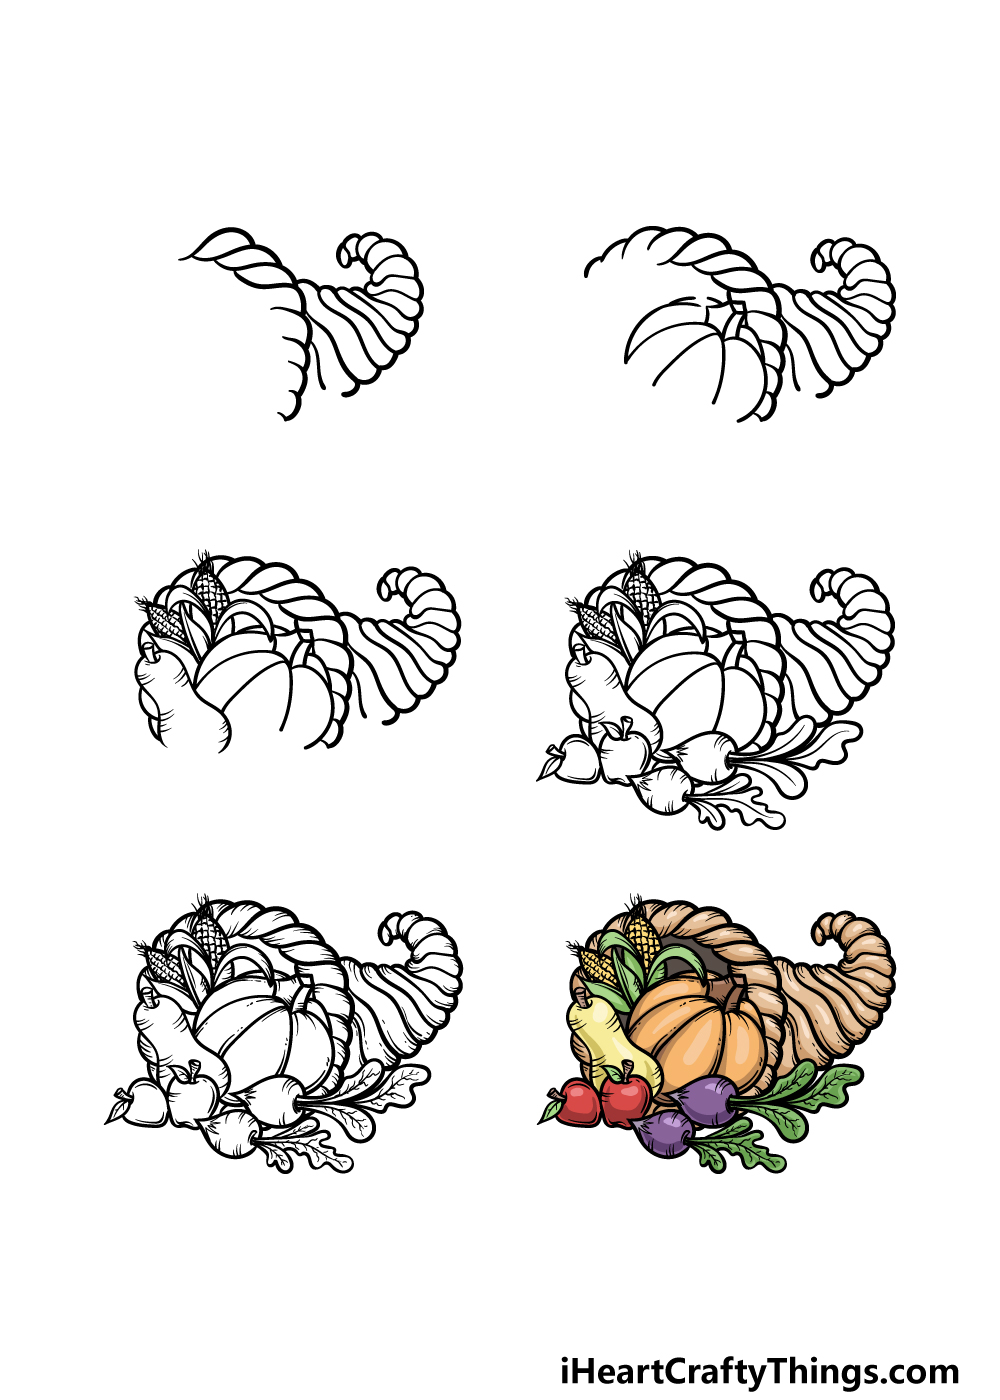
How to Draw Thanksgiving Ideas – Let’s Get Started!
Step 1
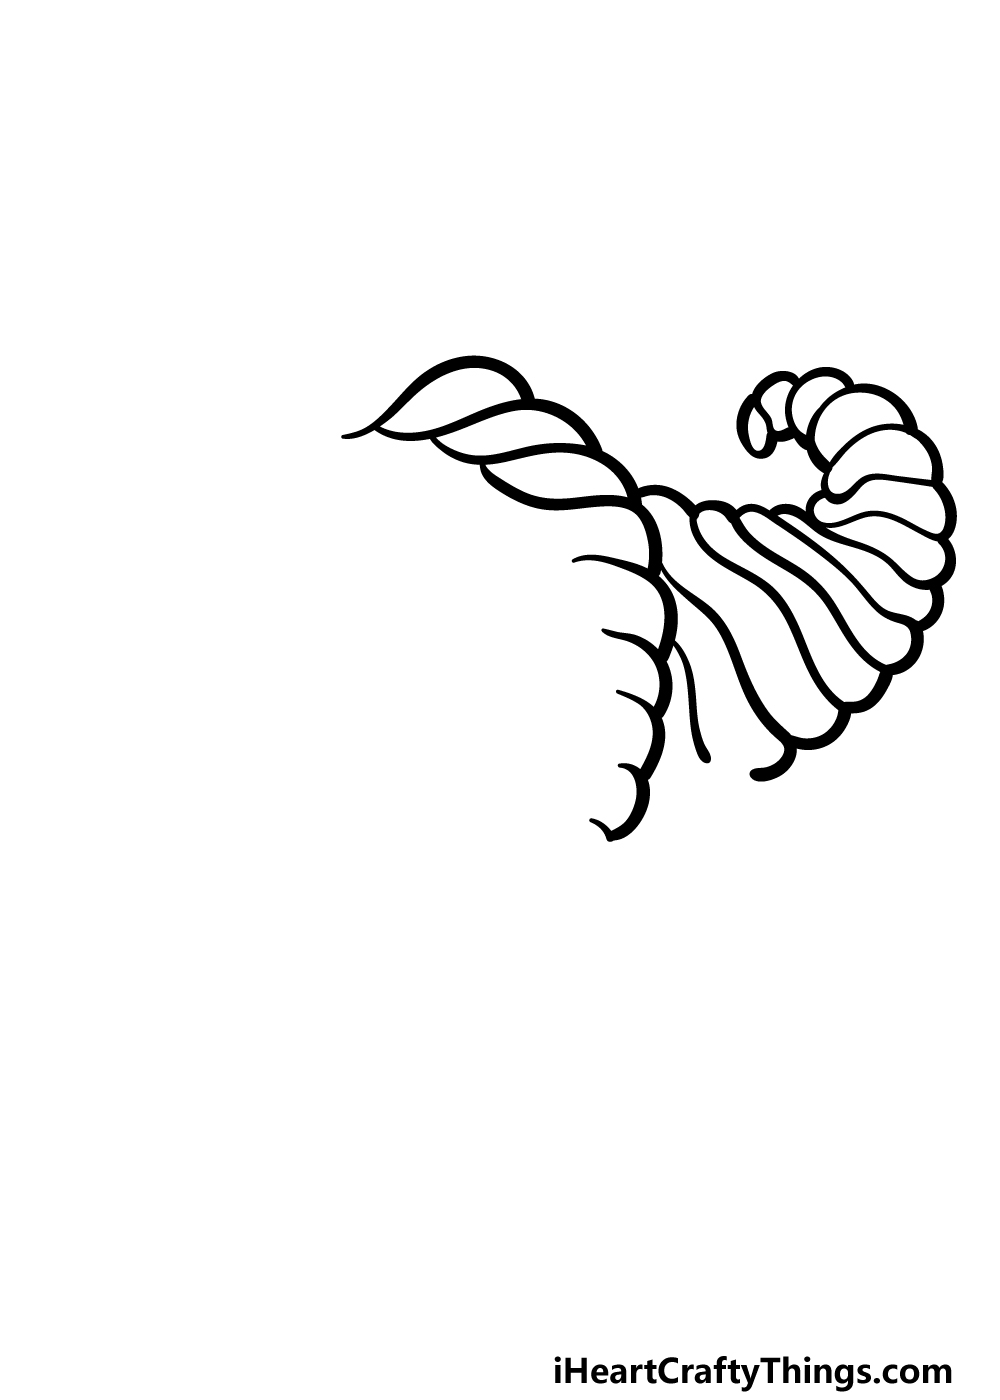
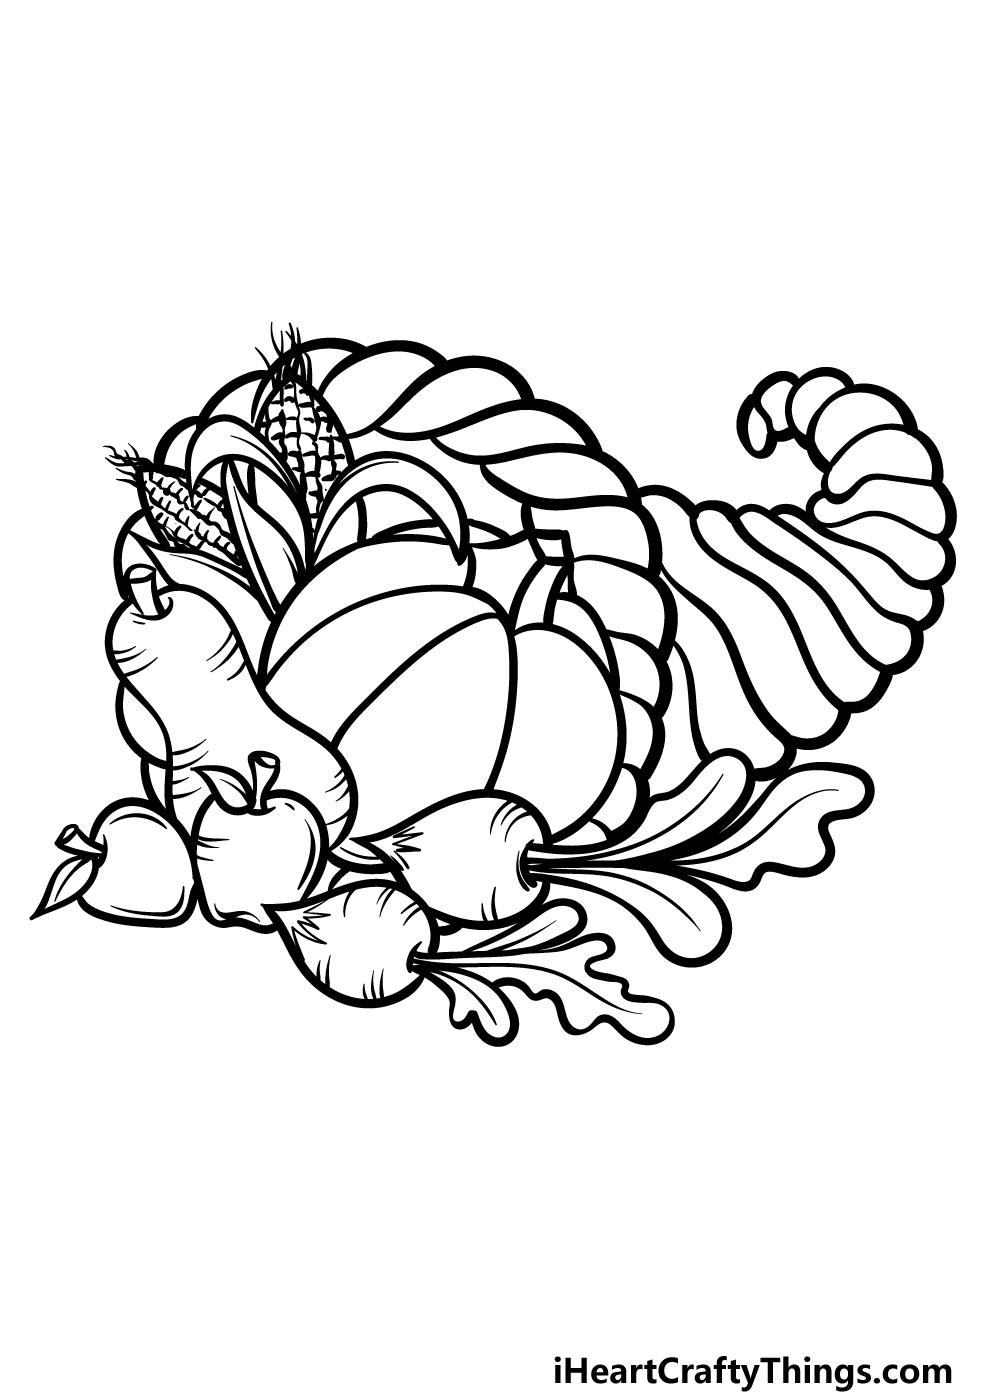
For a Thanksgiving setup, there will often be a centerpiece that is displayed on the table and around the house.
These centerpieces will often incorporate elements that are associated with Thanksgiving and Fall, and this is what we will depict in this guide on how to draw Thanksgiving ideas.
These centerpieces will often be in a horn-shaped wicker structure known as a cornucopia, and this is what we will start with in this first step.
First, you can draw the rim of this structure by drawing several rounded yet long shapes connecting to one another.
Once that rim is drawn, we will then be drawing the body of the structure. This will be drawn in several sections connecting to each other, and it will curve upward as we show in our reference image.
The will be some spaces left over, but we will fill these in as we move on.
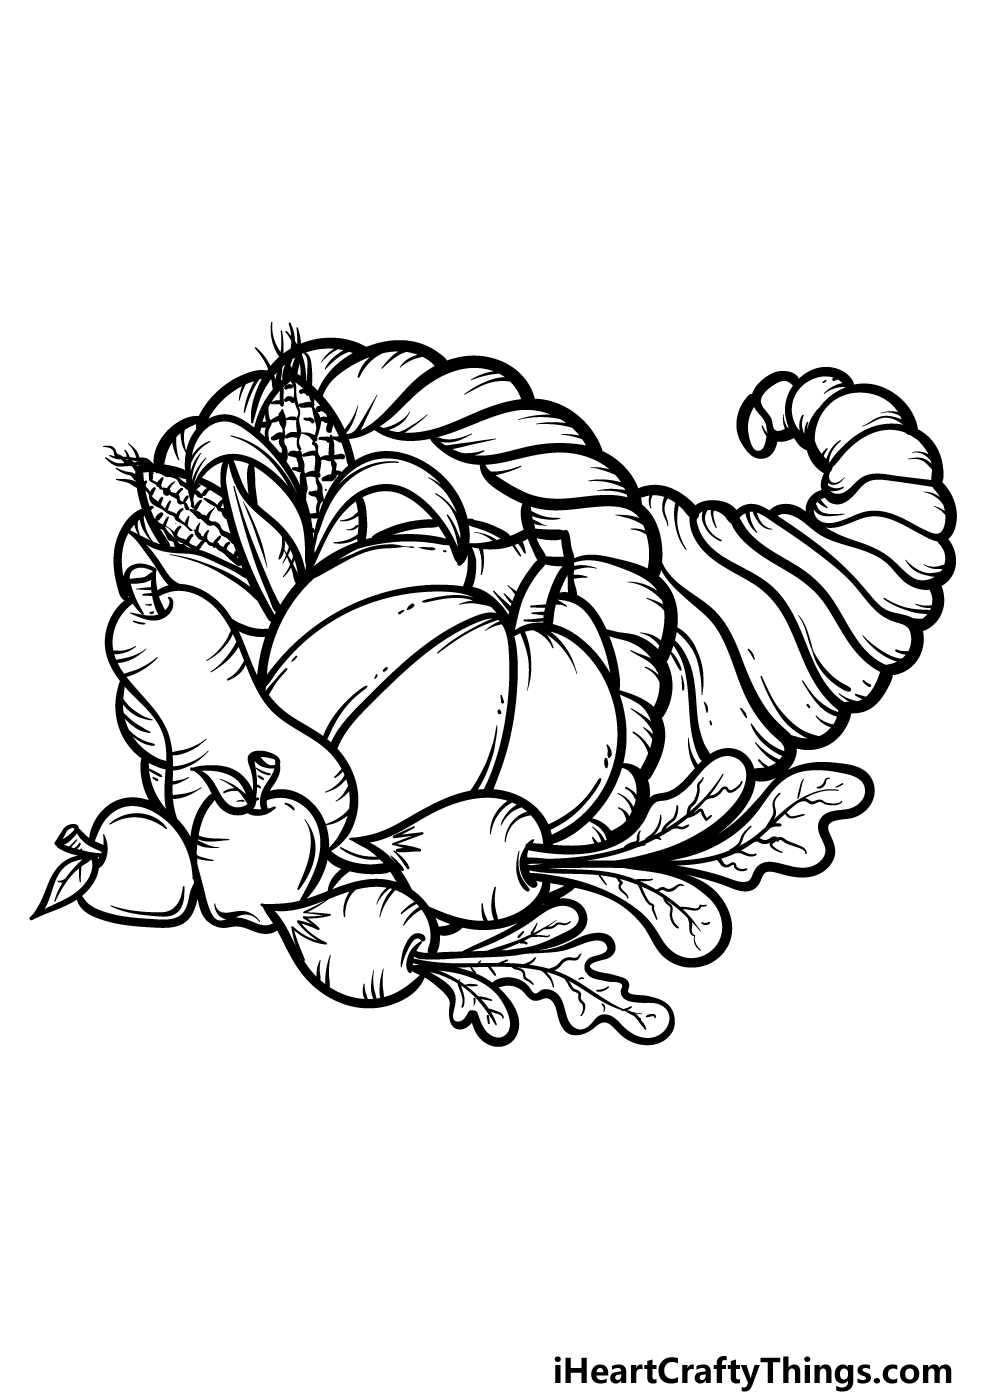
Step 2 – Now, draw the first object and add to the basket

You’ve started the basket cornucopia, and now we shall add the first object to your Thanksgiving ideas drawing in this second step.
Pumpkins may most often be associated with Halloween, but they are also a prominent Thanksgiving feature.
For that reason, we will be using it as the first object in the ensemble for this step. This will go at the mouth of the cornucopia on the right side.
It will have a thick, angular stem and then will have several rounded sections to it.
There will be an empty space at the base of this pumpkin, but that will be because other objects will fill it in later.
You can also draw a few more sections for the rim of the cornucopia before we move on.
Step 3 – Draw some more objects inside of the structure
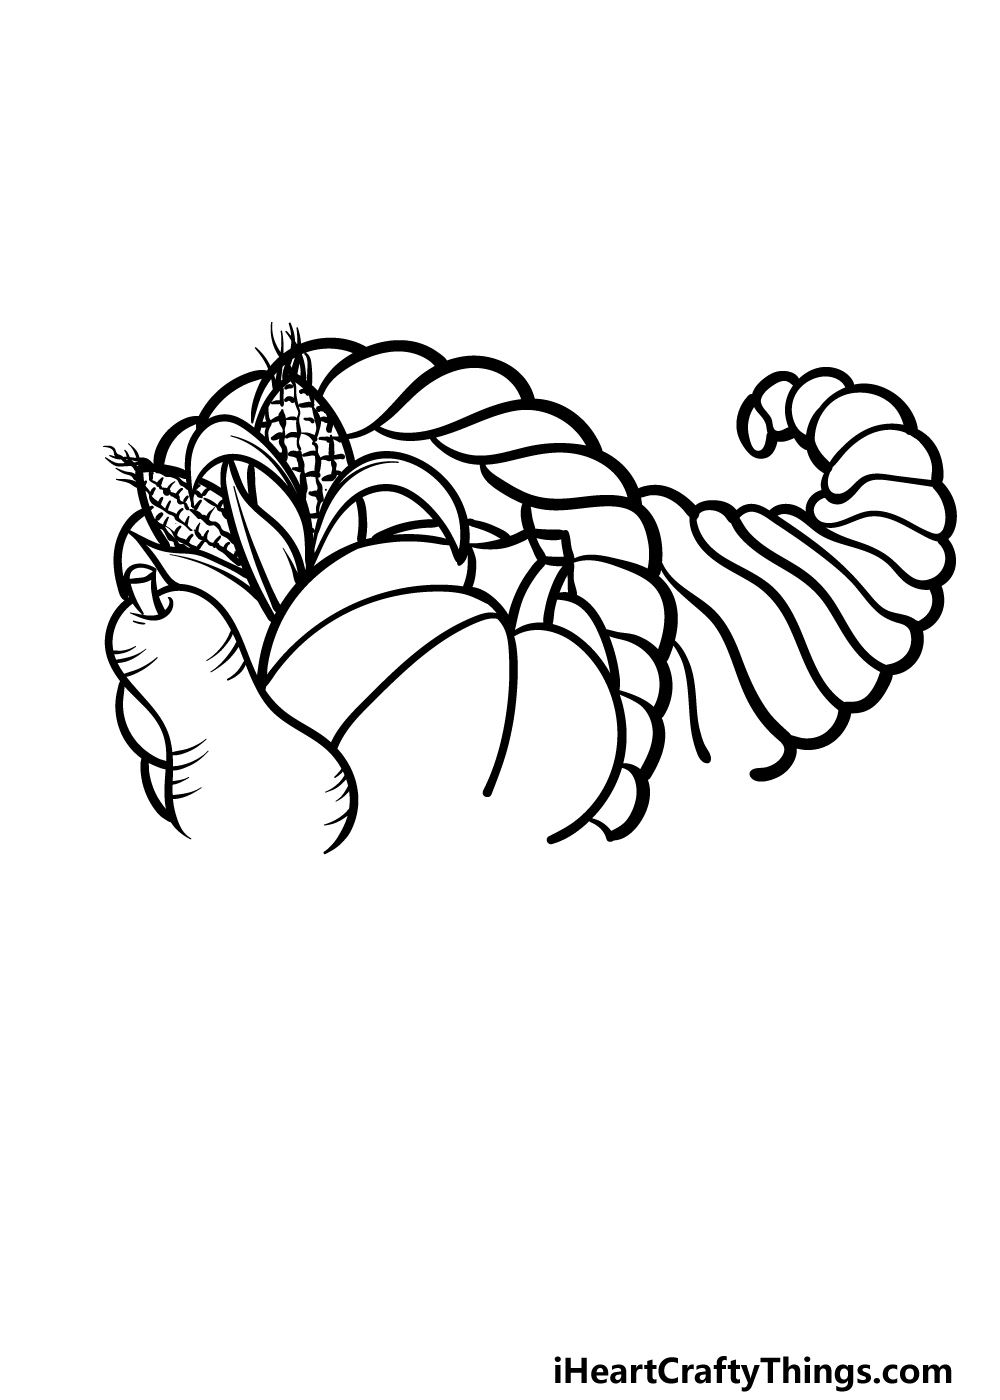
Now you’re ready to draw some more Thanksgiving objects into the mix for this third step of our guide on how to draw Thanksgiving ideas.
First, we will be drawing a butternut near the left-hand side of the pumpkin. This butternut will have a rounded base, and the top half will be rounded as well but will be slightly thinner.
Next, draw some pieces of corn that are still in their leaves near the left, upper side of the pumpkin.
Step 4 – Next, draw some more fruits and vegetables to the image
This fourth part of your Thanksgiving ideas drawing will see you adding a few more fruits and vegetables to the image as we prepare for the final details in the next step.
For this part, we will be drawing some small apples and radishes to the foreground of the image. These will fill in the final spaces left beneath all of the other elements that you have drawn so far.
This picture is already looking great! In the next step we shall add some final details and elements to have you ready for the final step, so let’s proceed!
Step 5 – Add the final details to your Thanksgiving ideas drawing
We will be coloring this image in soon as you move to the final step of this guide on how to draw Thanksgiving ideas, but first we will add some final touches.
These will mostly be subtle yet effective, but they will make a big difference! You can add some lines to the basket, fruits and vegetables to give them some more texture details.
Then, add some extra details to the leaves and the ends of the corn to finish them off nicely as well. Before you move on, you could also add some more ideas of your own!
One idea would be to draw a background, and this would be a great way to show off your ideal Thanksgiving setup! How will you finish off this wonderful Thanksgiving scene?
Bonus: Make This Thanksgiving Ideas Drawing Even Better With These Ideas!
Thanksgiving is a wonderful time of the year, and every family will celebrate it a bit differently. In this guide on how to draw Thanksgiving ideas, we represented a classic Thanksgiving setup.
There is plenty of empty space around it, however, so you could fill that empty space with anything that reminds you of the holiday! There are many forms these details could take.
One good place to start would be with different kinds of food. Food is a big part of Thanksgiving, and there are a few classics.
Most people think of turkey when they think of Thanksgiving, but you may have different food traditions in your home. It could also take the form of some decorations.
Maybe there is a special tablecloth that your family uses, or perhaps a special centerpiece. These are just a few examples, but you probably have some other thoughts going through your head!
Another way you could relate this picture to your own experience would be to add some members of your family to the arrangement.
This could perhaps be in the form of some cartoon versions of your family, and if you added some food details then they could be tucking into that.
As you can see, there are many ways to show off the different facets of your Thanksgiving experience. Whether it’s small or large details, you can share what it looks like to you with all of us!
When you have added all of your details, be sure to use any fun art tools, mediums and craft supplies you need to bring your vision to life.
What are some details you would like to add to make this Thanksgiving ideas drawing even more special?
Step 6 – Finish off your Thanksgiving ideas drawing with color
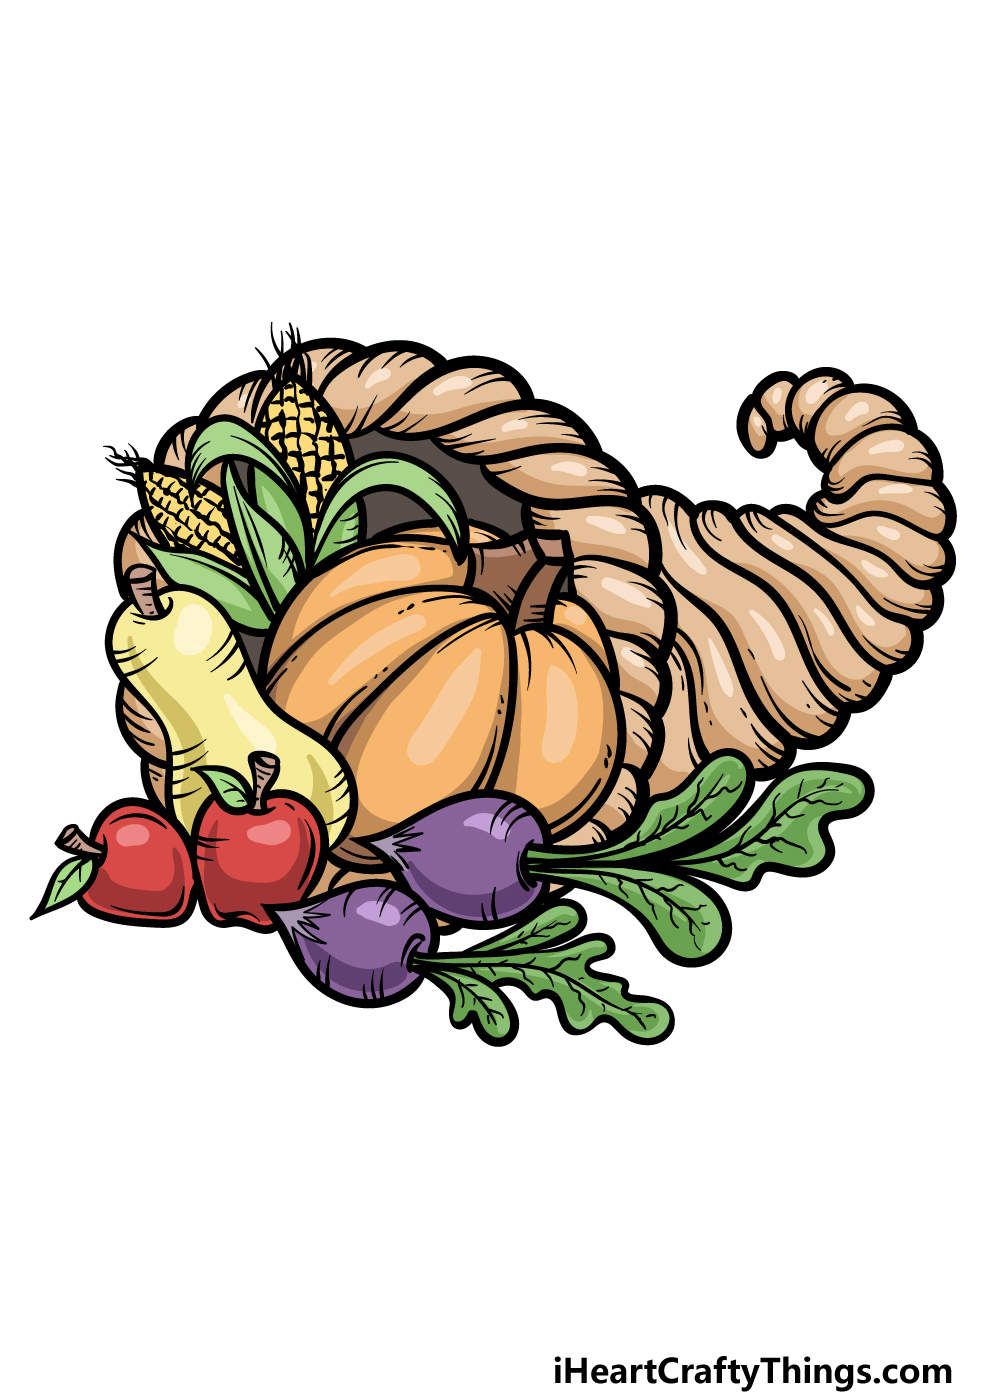
Now you’re ready to finish off this Thanksgiving ideas drawing with some colors to truly bring it to life!
Thanks to the variety of different objects in this picture, there is a really great variety of different colors, such as orange, yellow, brown and even purple.
We showed you the colors that we imagined for this picture, but while you could go for similar ones you could also use some unique colors of your own!
When you have chosen your colors, there is also a great variety of different art tools and mediums that you could use to achieve them. We can’t wait to see how you finish this one off!
3 More tips to make your Thanksgiving ideas drawing easy!
Make this Thanksgiving ideas sketch easier with these 3 tips to try out!
We not only included a lot of items in this drawing of Thanksgiving ideas but also made them very detailed.
High levels of detail can be rather challenging to draw, so you can simplify the elements a bit.
One way you could start to do this would be by removing certain vegetables and objects that are proving particularly difficult.
If you don’t want to remove anything, then you could simplify the texture details.
Using a simpler, more cartoony style could be another way that you could make it easier. If there are other art styles that you can think of that would make it easier, then you could adapt it to that style!
Another way that you could make this Thanksgiving ideas drawing easy would be by adding more elements.
This would also be a great way for you to add any other Thanksgiving ideas you may have.
For example, you may think of a big roast turkey when you think of Thanksgiving. You could add a turkey to the drawing, and that could help make the design we created easier in a few ways.
For example, adding this element would allow you to make the initial design smaller and you could also obscure parts of the drawing that you struggle with.
Plus, it could also allow you to create an even more dynamic image!
One of the easiest ways to make any drawing easier is to use real life to help you out. This could be true for your Thanksgiving ideas sketch, and there are a few ways to do it.
For example, you could look at Thanksgiving decorations your family ahs had throughout the years. If you happen to have some photos of these decorations handy, even better!
If not, then you could look up some images of Thanksgiving setups to use as a reference along with the images in our guide. This would also again allow you to create a more personalized image.
Your Thanksgiving Ideas Drawing is Complete!
All 6 steps of this guide on how to draw Thanksgiving ideas have been completed, and you have ended up with an image you should be very proud of!
Hopefully by following this guide you found the process of recreating this design to be fun and easy to do.
We also wanted to make it so that there would be some room for customization, so you could use this guide as a blueprint to create your own awesome designs!
When you’d like a new drawing challenge to take on, you can find it on our website. We have plenty of amazing guides with many more on the way, so make sure to keep checking in!
You can also show off how you finished up this Thanksgiving ideas drawing by sharing your creation on our Facebook and Pinterest pages for us to see!