


Cartoons have been around for hundreds of years, and they allow artists to depict a version of reality that is a bit more whimsical and stylized.
It may be assumed that drawing something in a cartoon style must be easier than doing so in a realistic one, but even the cartoon style can present some unique challenges.
This is especially true when depicting cartoon humans, and learning how to draw a little boy can be easier said than done.
Tutorials such as the one in front of you now can make this kind of challenge much easier, as they break it down into more manageable steps.
That’s what we aim to do in this step-by-step guide on how to draw a little boy in 6 steps, and by the end of it you will have mastered this drawing!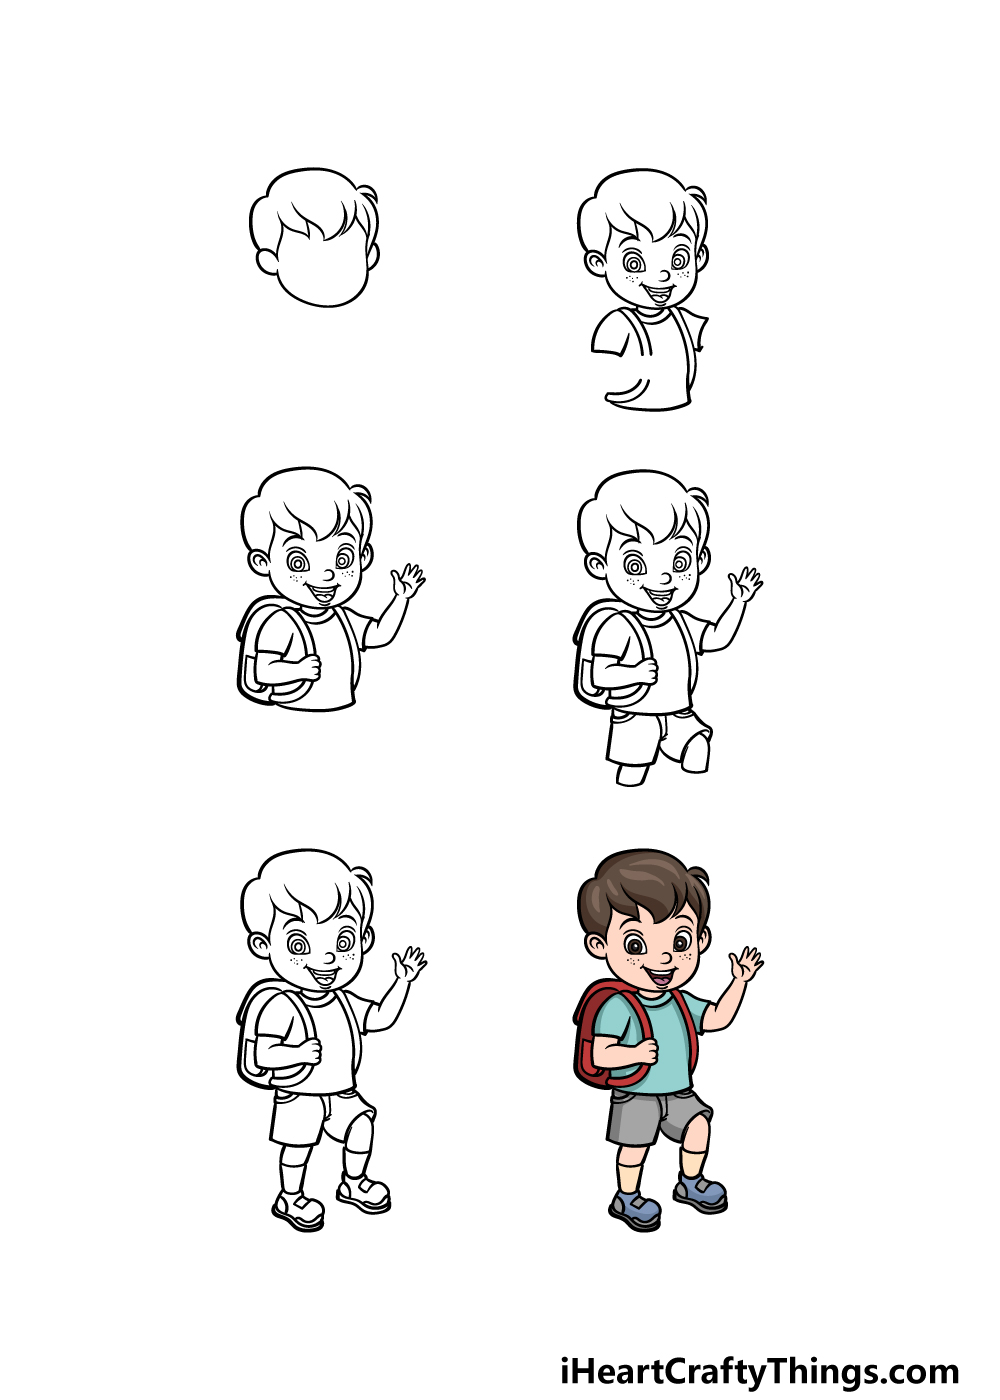
How to Draw A Little Boy – Let’s Get Started!
Step 1
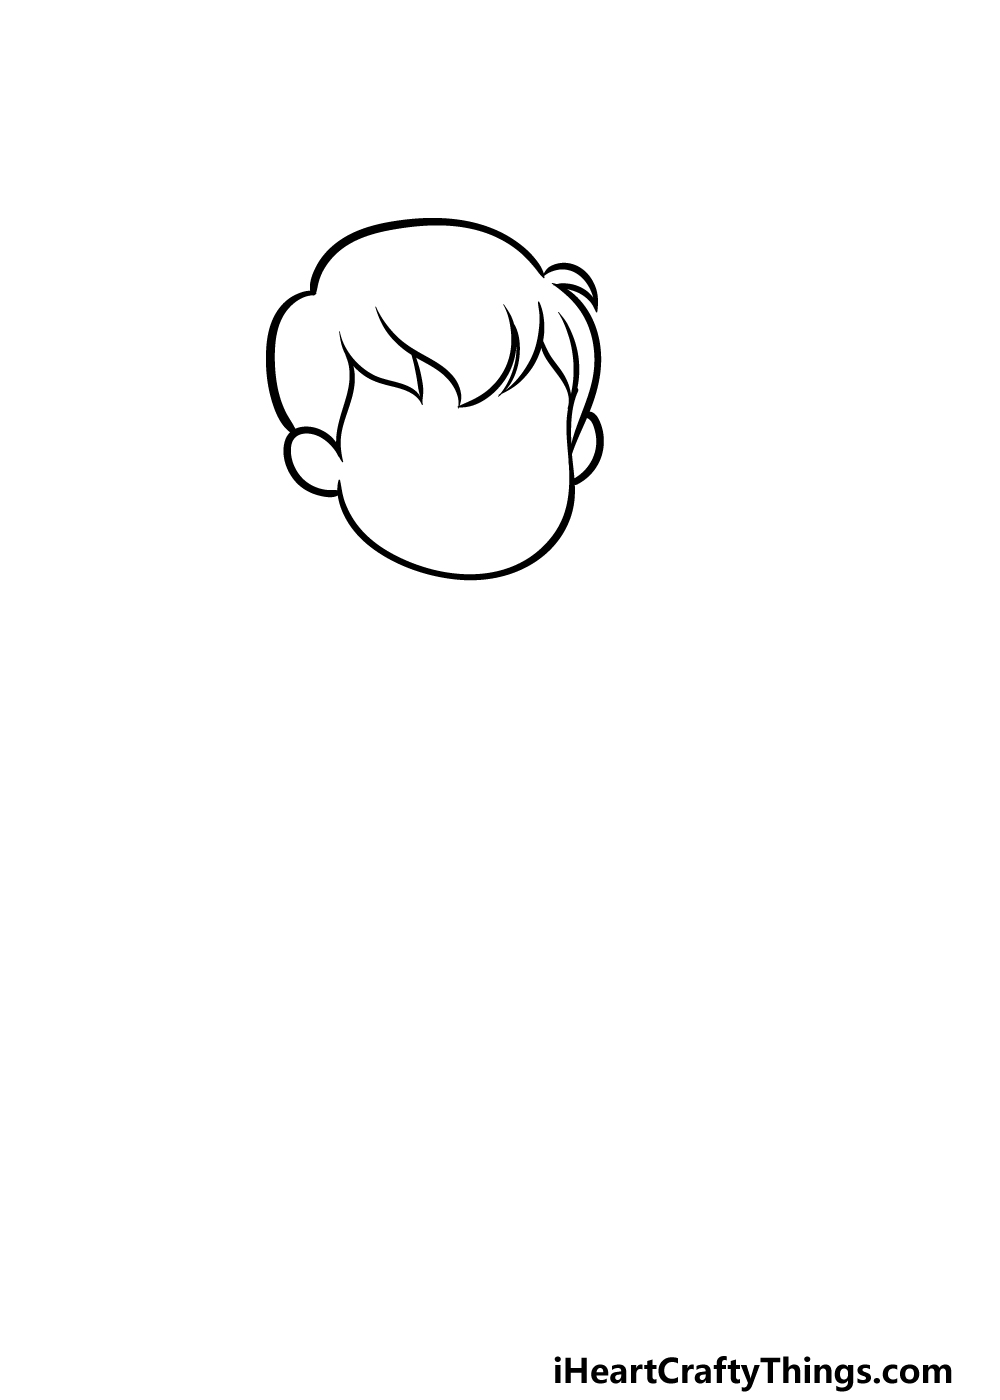
We will begin this guide on how to draw a little boy by drawing the outline of the boy’s head and hair.
First, use a curved line for the bottom of his face. Then, add a small round shape onto either side of his head for his ears.
The top of his head will be drawn with even more curved lines, and there will be a sharp curl poking off as well.
For the bottom of the outline for his hair, we will instead use some curved, pointy lines to make this part look like it’s made of similar curls to the one on top of his head.
Once these outlines are complete, we will move on to step 2 of the guide!
Step 2 – Now, draw some facial features and his chest
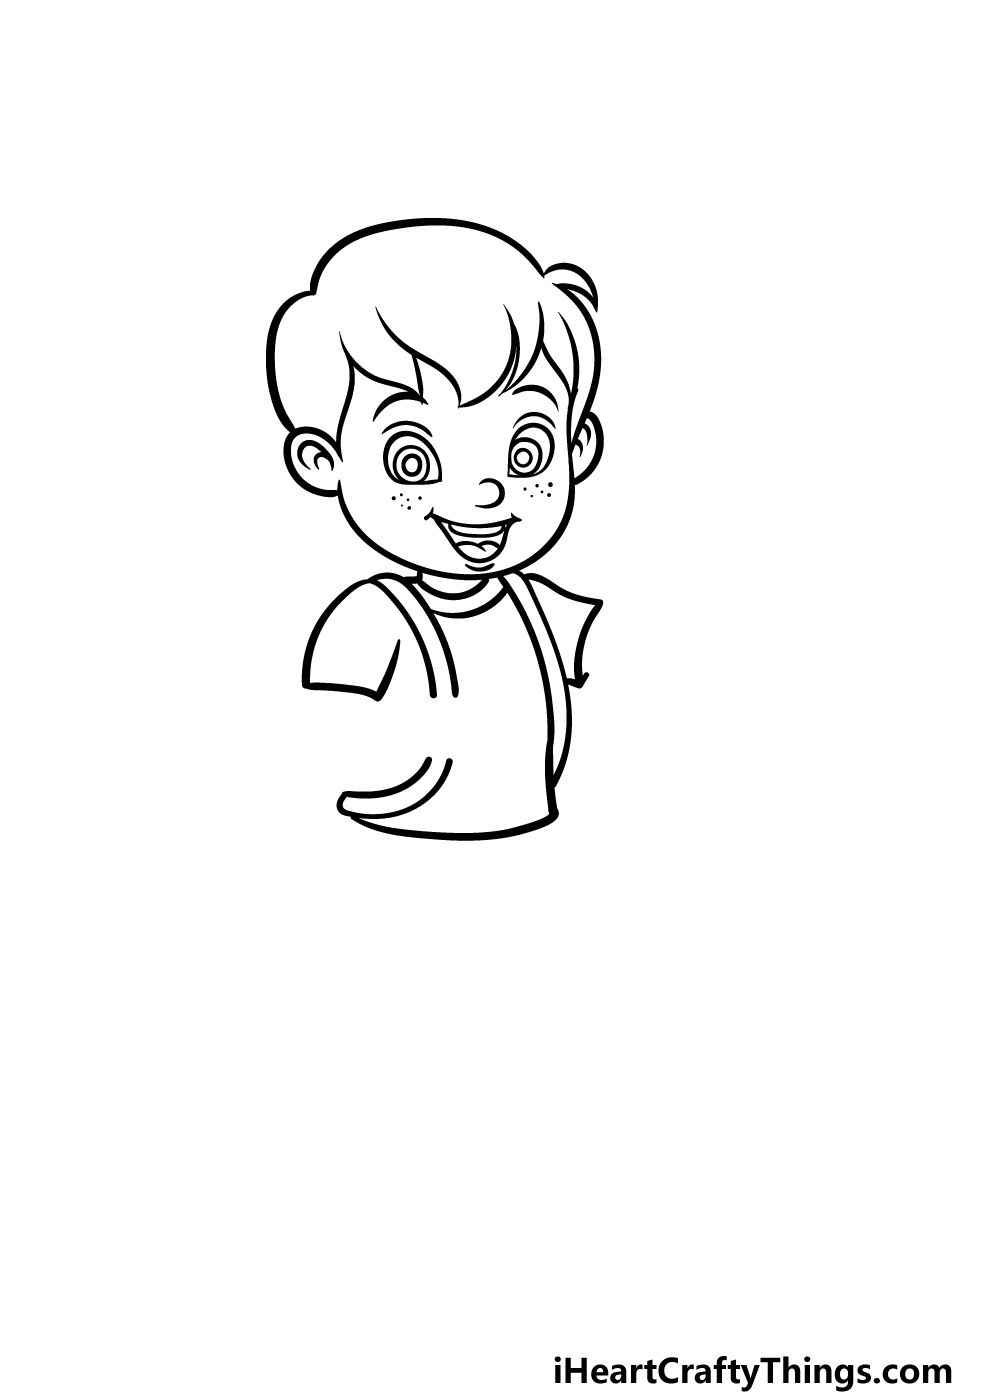
With the outline of his head and hair complete, we can now start to draw his chest and some facial features.
First, draw some rounded shapes with sharp points at the inner corners for his eyes. Then, draw some circles inside of these with a dot inside each one.
We will then draw some eyebrows above the eyes, and then use some simple lines for his nose and his smiling mouth.
Be sure to dot some freckles on his cheeks and also draw some details inside of his ears.
Finally for this step, you can use some curved lines for the strap of the backpack he’s wearing going over his shoulders and down to his waist.
Be sure to leave a gap in the left one, and then you can draw his shirt sleeves.
Step 3 – Draw his arms and his backpack
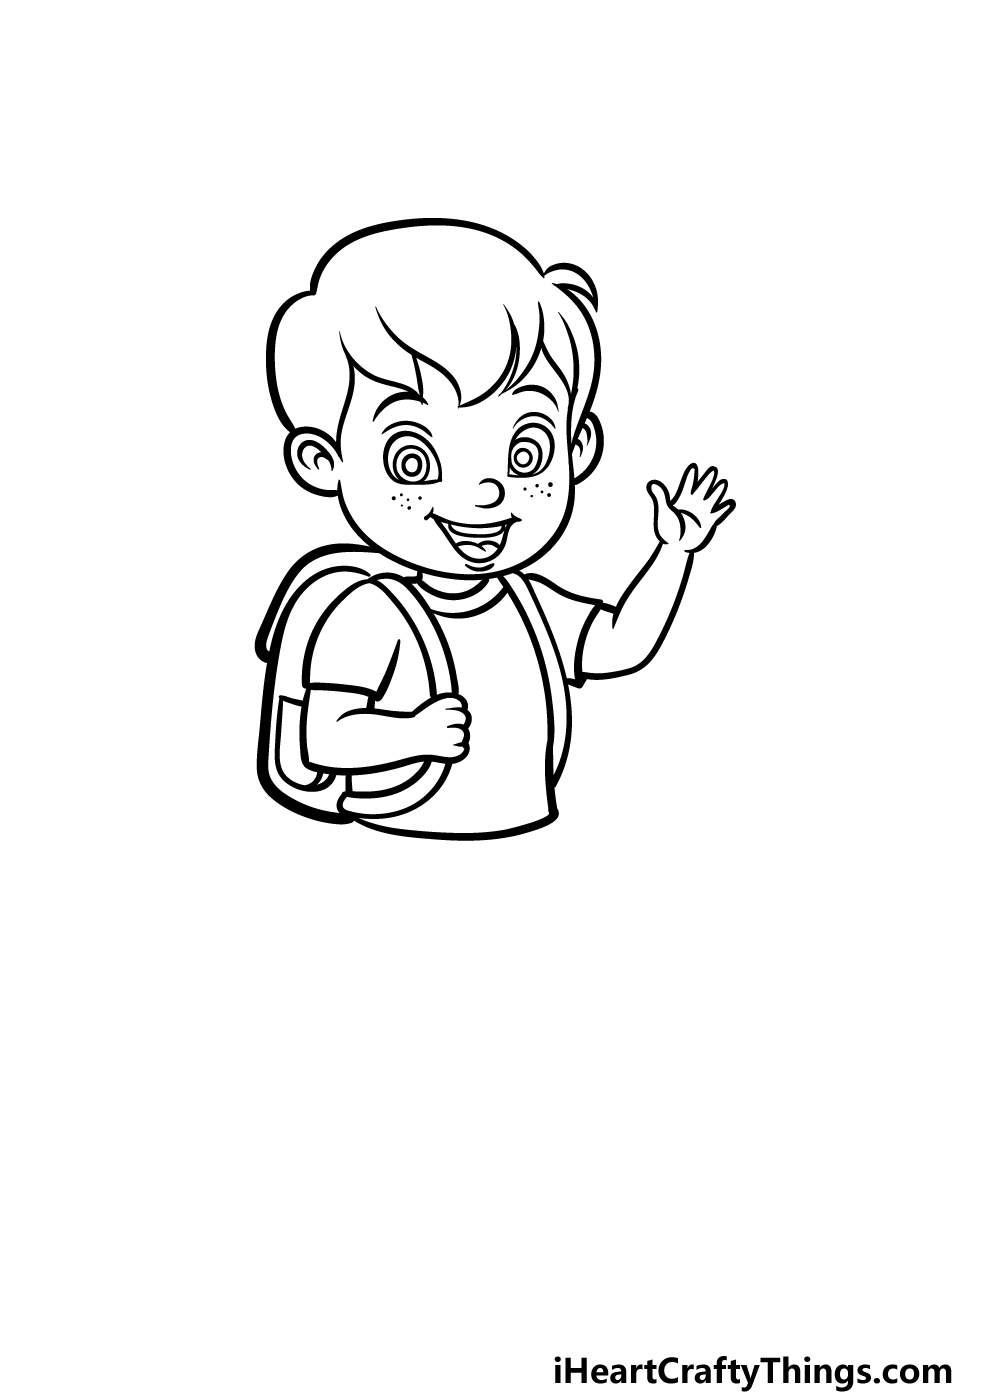
Continuing on with this guide on how to draw a little boy, you can now add some arms and a backpack for this little guy.
When drawing the arm on the left, you will see why we left a space in the strap, as the hand on that arm will be clutching it.
The arm on the right will instead be raised in a waving motion. Finally, use some curved lines for his backpack on his back, and then you can move on to step 4!
Step 4 – Next, draw the start of his legs
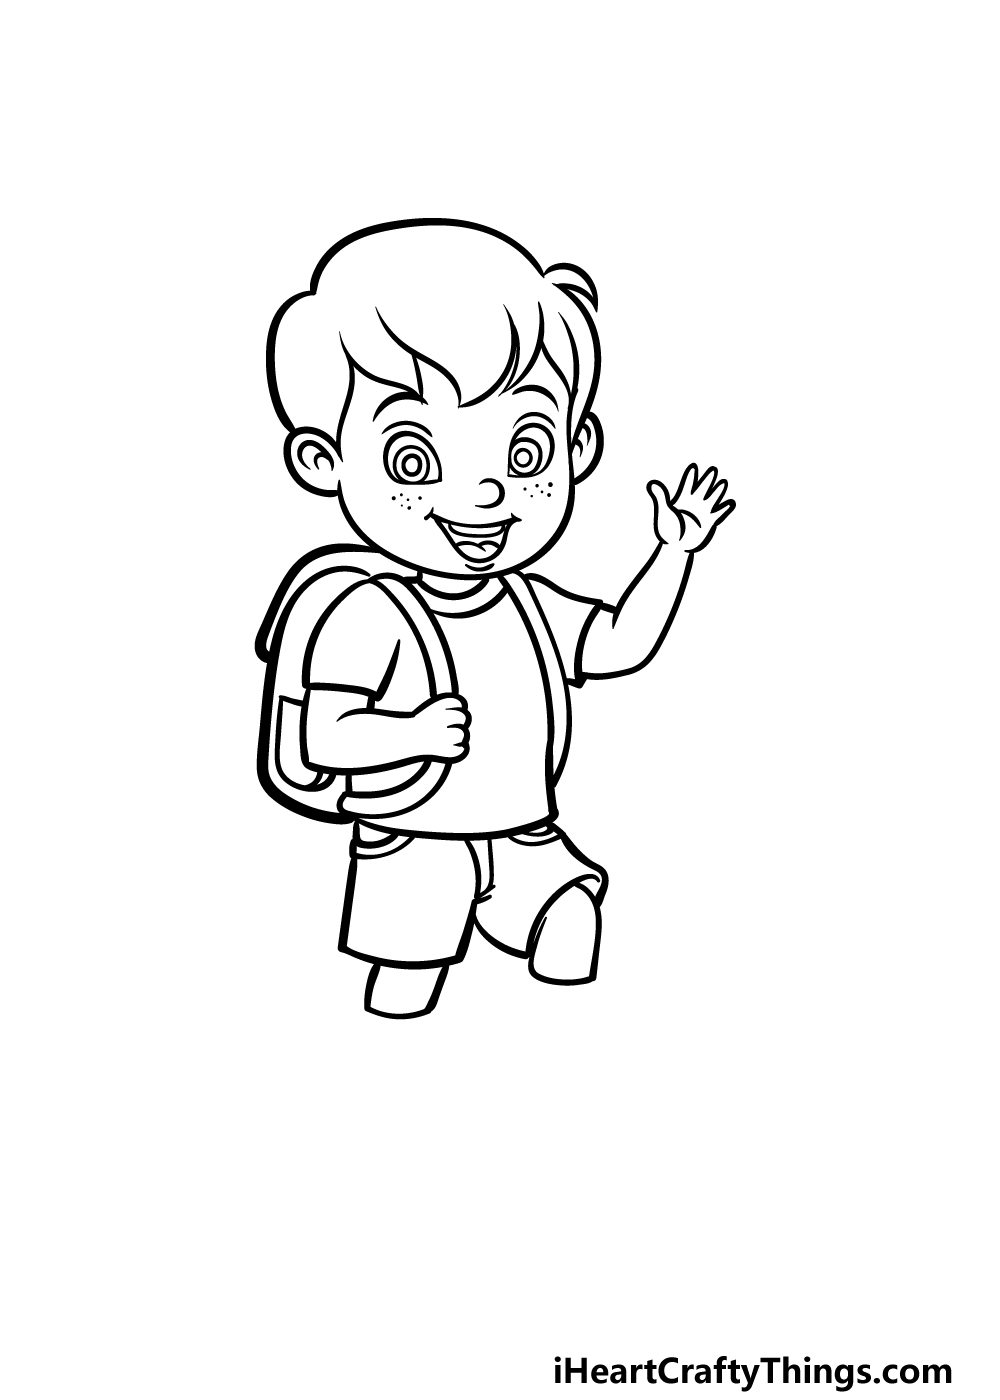
Now you will be drawing the shorts that he is wearing as the first part of the legs for this little boy drawing. Use some simple, slightly curved lines for the outlines of his shorts.
The leg on the left will be extended straight down, whereas the one on the right will be raised up a bit.
You can also use some more small, curved lines for details such as pockets and a zipper onto the pants.
Finally, draw the start of his shins before we go ahead to the next step to finish off the legs and any other final details.
Step 5 – Add the final details to your little boy drawing
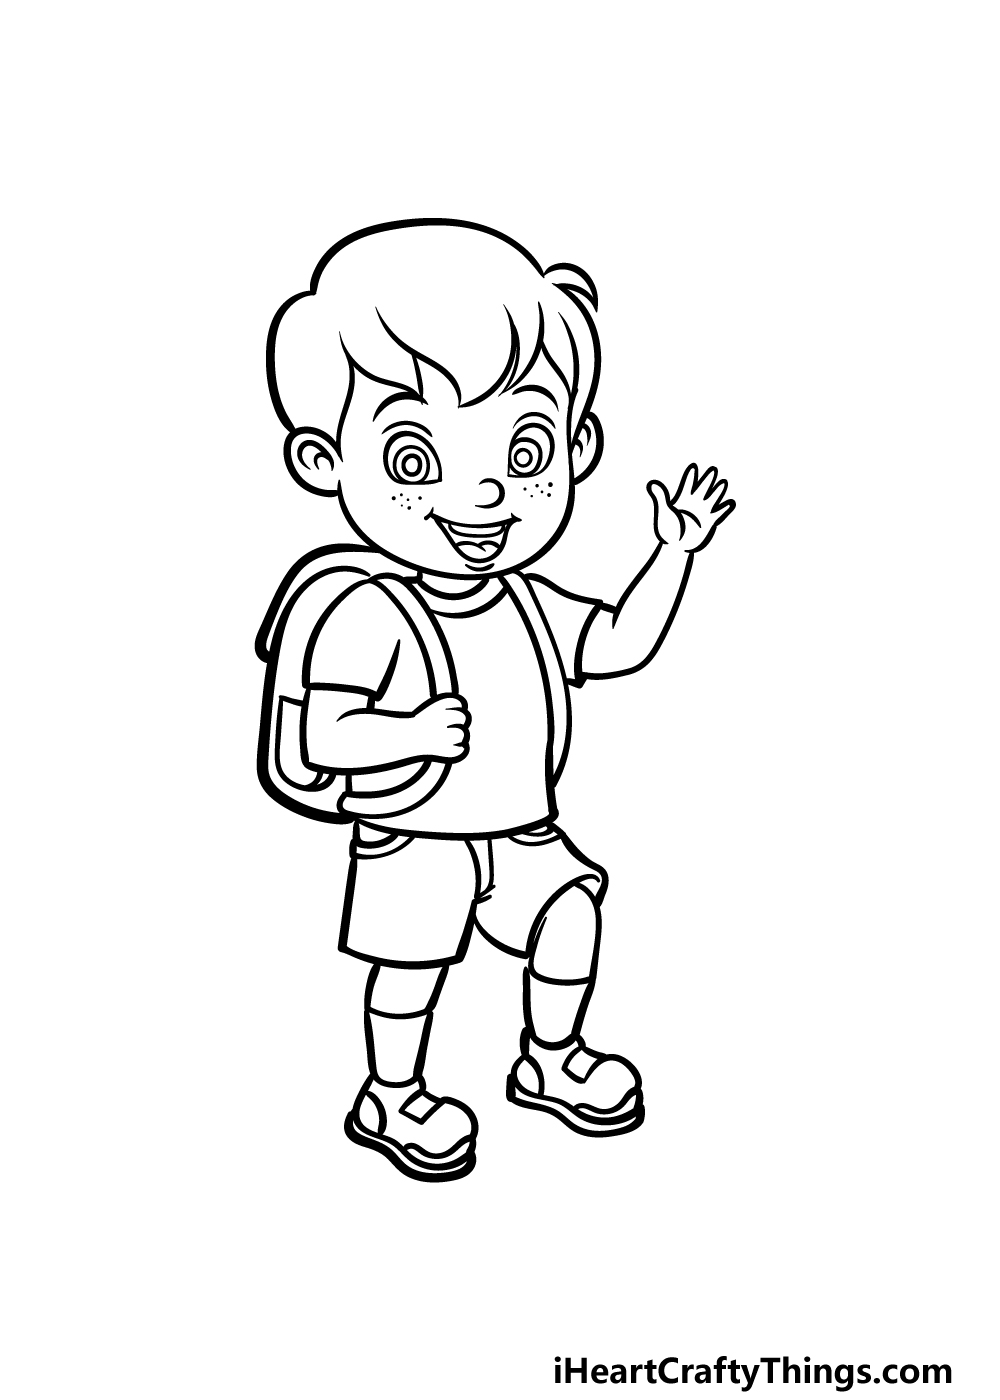
You’re almost at the final step of this guide on how to draw a little boy, but before you get to that final step we have a few final details to add.
The main thing will be to complete his legs. First, draw some lines down for his shins that are covered by his socks. Then, we will be drawing some shoes onto his feet.
When you have finished these aspects, you should feel free to add any additional details of your own!
One idea would be to draw a background, and this would be a great way to show off where you think this little boy would be hanging out or playing.
What kinds of fun extra details do you think would suit this picture?
Step 6 – Finish off your little boy drawing with color
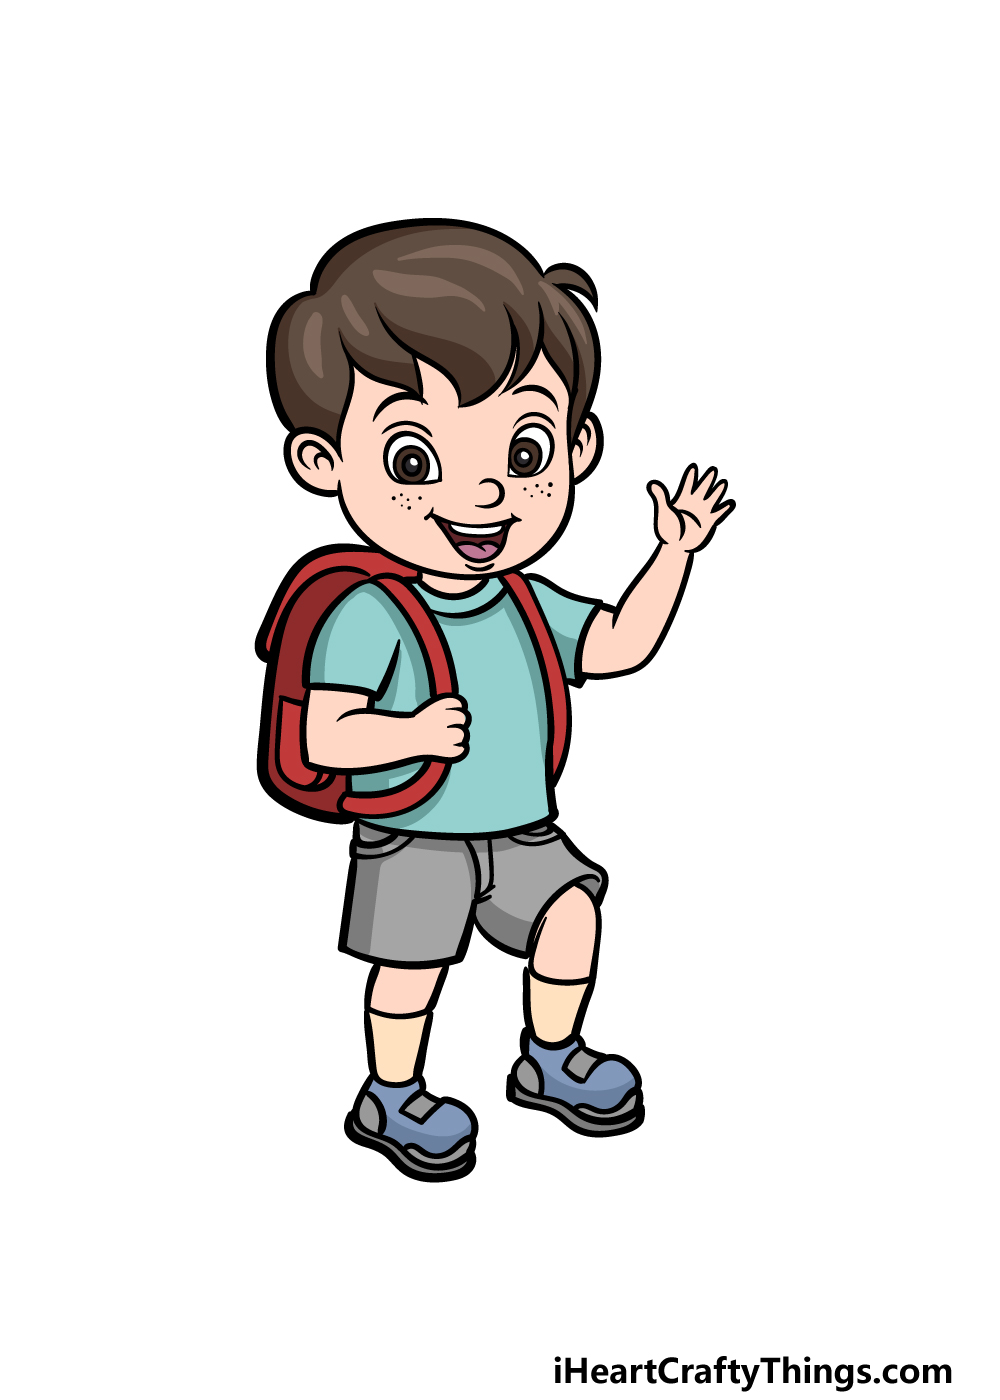
Now it’s time to finish off this little boy drawing with some color! In our example image, we used blues for his shirt, browns for his pants and hair and then incorporated some dark reds for his backpack.
While these are some colors you could go for, you shouldn’t feel like these are the only colors you can use!
There are many other amazing colors that you could use for this image, so you should definitely allow yourself to get creative and add some of your favorite colors.
You can also have fun experimenting with your art tools and mediums, so go for it and see what you can come up with!
Here’s how you can make your little boy drawing even better…
Make your little boy sketch look even better with the help of these tips!
We kept the clothing details on this drawing of a little boy quite simple so that the focus would be on the picture itself. Now that you have completed the drawing, you could change the clothing details.
This could be as simple as changing the colors of his various clothing items, or you could add new ones such as a hat or a jacket. Doing this can make your drawing even more unique!
If you want to challenge yourself even further, you could change the pose that this little boy is in. the pose you would use would depend largely on the kind of activity you would like to portray.
For instance, it could be as simple as showing him running around and having a good time. Or, you might want to show him playing football or a different kind of sport.
What are some fun poses you could create?
If you have a certain activity in mind, you could take it even further by adding a background for your little boy drawing.
We already mentioned a few activity ideas in the previous step, but you could take it even further.
For example, let’s again use the example of this little boy playing football. If you wanted to create that scene, you could draw a football field with some goals behind him.
The background will depend on what you want to show off in the image, so be sure to have fun with it!
Finally, the last thing this little boy sketch needs is some friends for him to play with. Now that you have completed the guide, you have everything you need to add some pals.
These additional characters could have a mostly similar design, but you could change a few details such as the hair, clothing and facial features of each new character.
It could also be fun to base these new characters on some friends you have in real life!
Your Little Boy Drawing is Complete!
As we talked about in the beginning of this guide on how to draw a little boy, drawing people can be quite a challenge, even if done in a cartoonish style.
As with any drawing challenge, it can be made much easier when you break it down into smaller steps, and we hope that this guide helped you with that!
Now you can continue this drawing by adding some of your own ideas and details to it.
Drawing a background or even some more cartoon characters for him to hang out with can add a lot to the image, so there’s plenty of room for creativity!
If that’s not enough, we also have many more drawing guides like this one on our website, and they’re just waiting for you to find and enjoy them!
We upload new ones often, so keep visiting us there and you won’t run out any time soon.
It’s always great to see how your drawings turn out, so please be sure to share your finished little boy drawing on our Facebook and Pinterest pages so we can see!