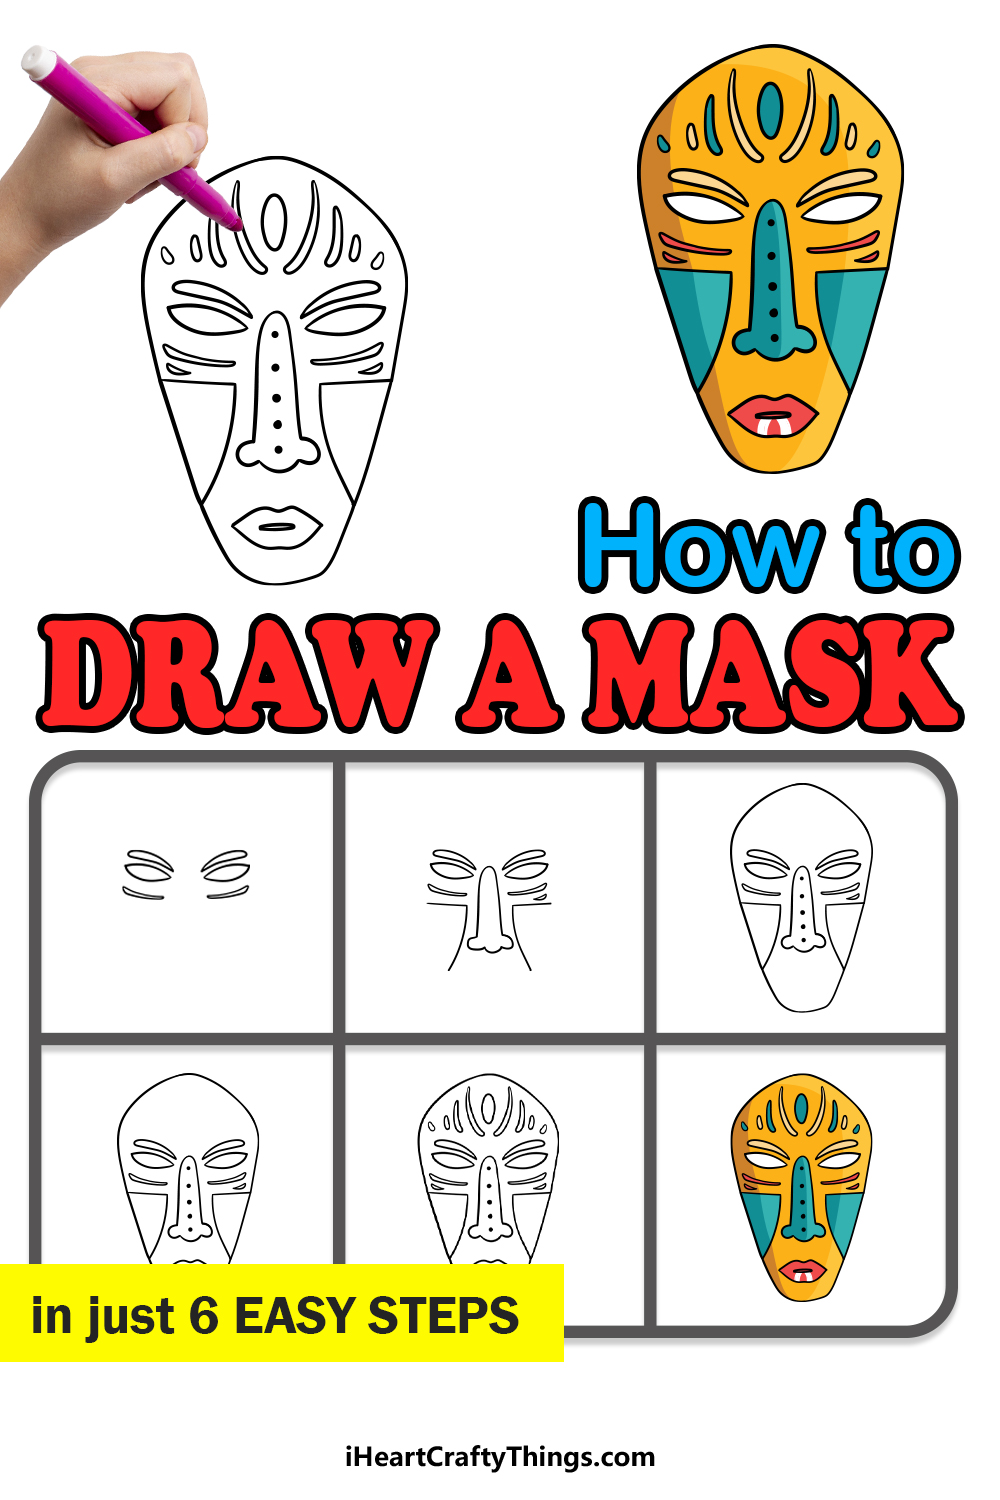
A mask can serve many different functions, and these functions can be as varied as masks themselves can be!
A mask can be used for face protection, as a Halloween accessory or even as an important cultural artifact. No matter what a mask may mean to you, it can be lots of fun to learn how to draw a mask so that you can design your own.
By the end of this guide, you’ll be able to do just that!
We hope that you have lots of fun with this step-by-step guide on how to draw a mask in 6 steps.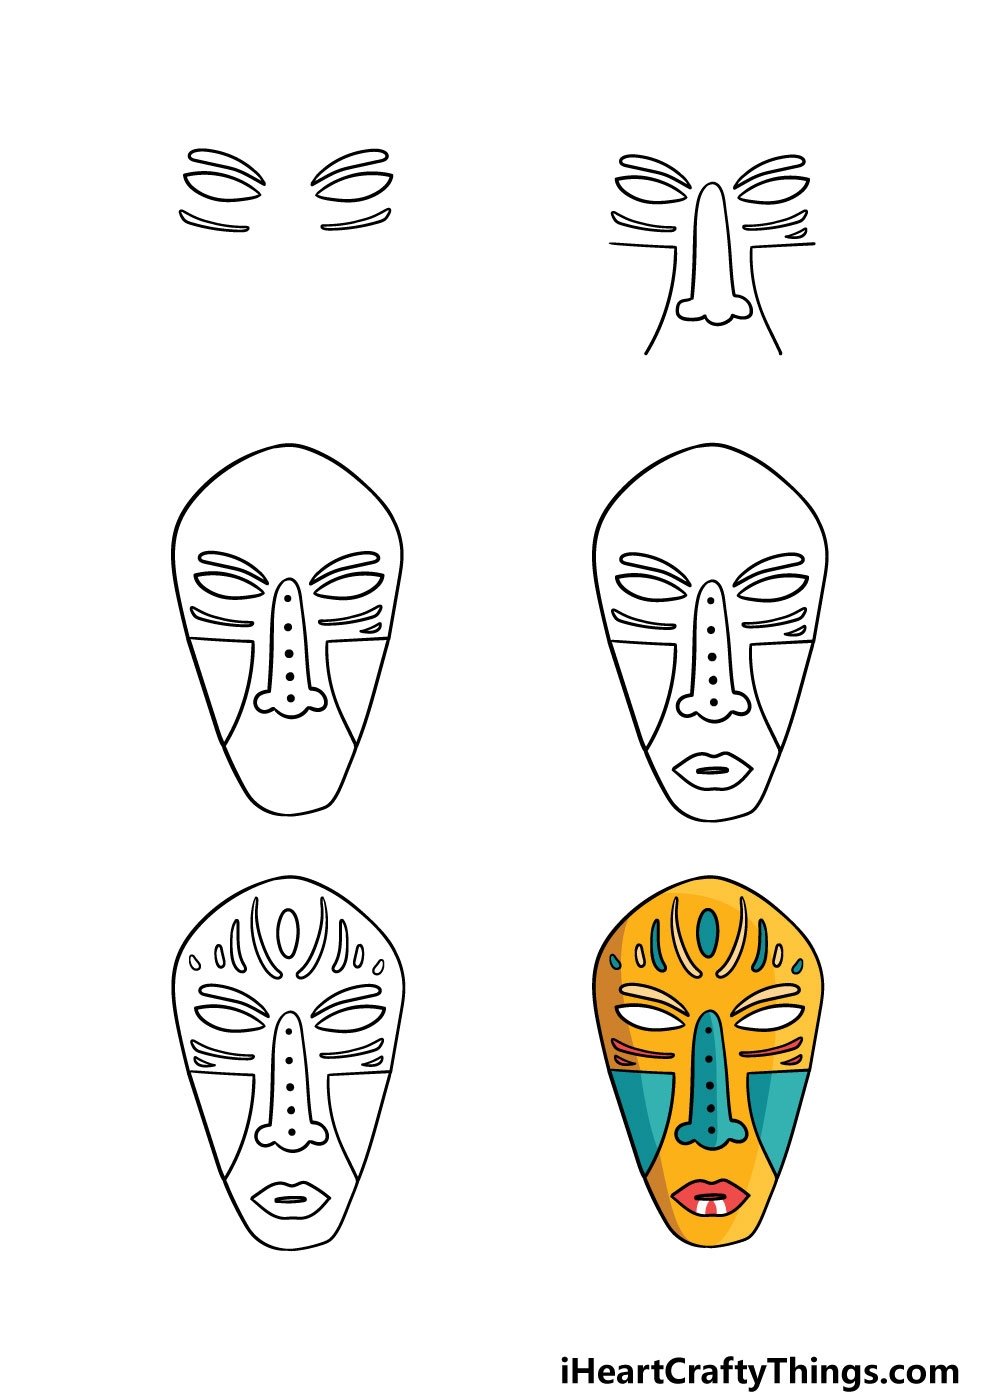
How to Draw A Mask – Let’s Get Started!
Step 1
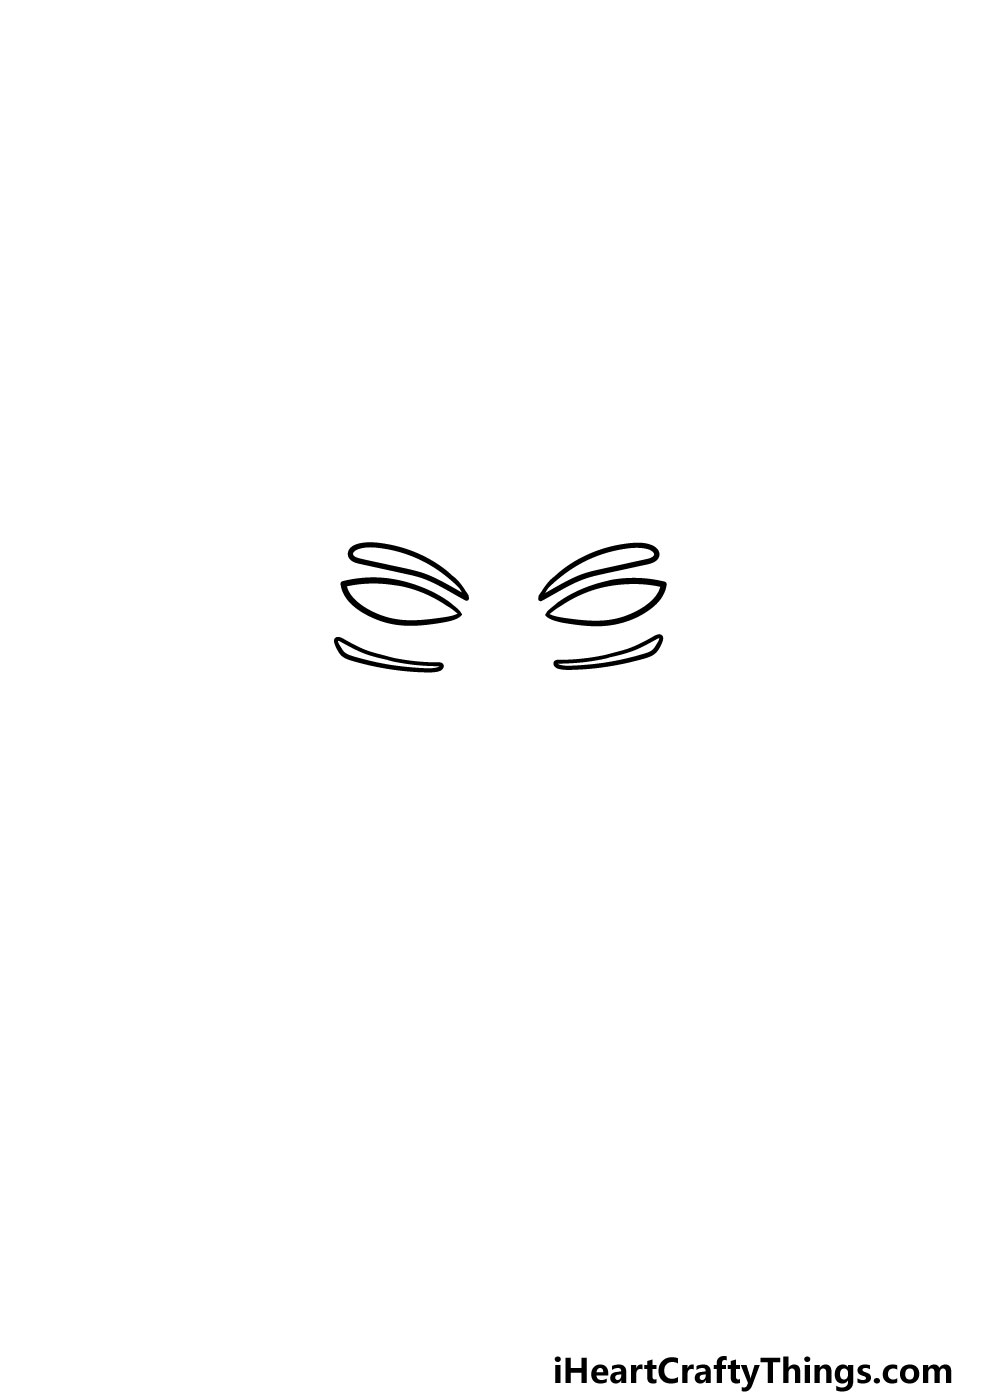
In this first step of our guide on how to draw a mask, we will be starting with the eyes and some smaller details around them.
The eye holes will be drawn using some horizontal ovals with sharp points at each end. Then, you can draw some thin, sharp shapes above them for some eyebrow detail.
Finally, you can draw some even thinner details underneath them, as shown in the reference image. That’s all that we will be doing in this step, and now you’re ready for the next step.
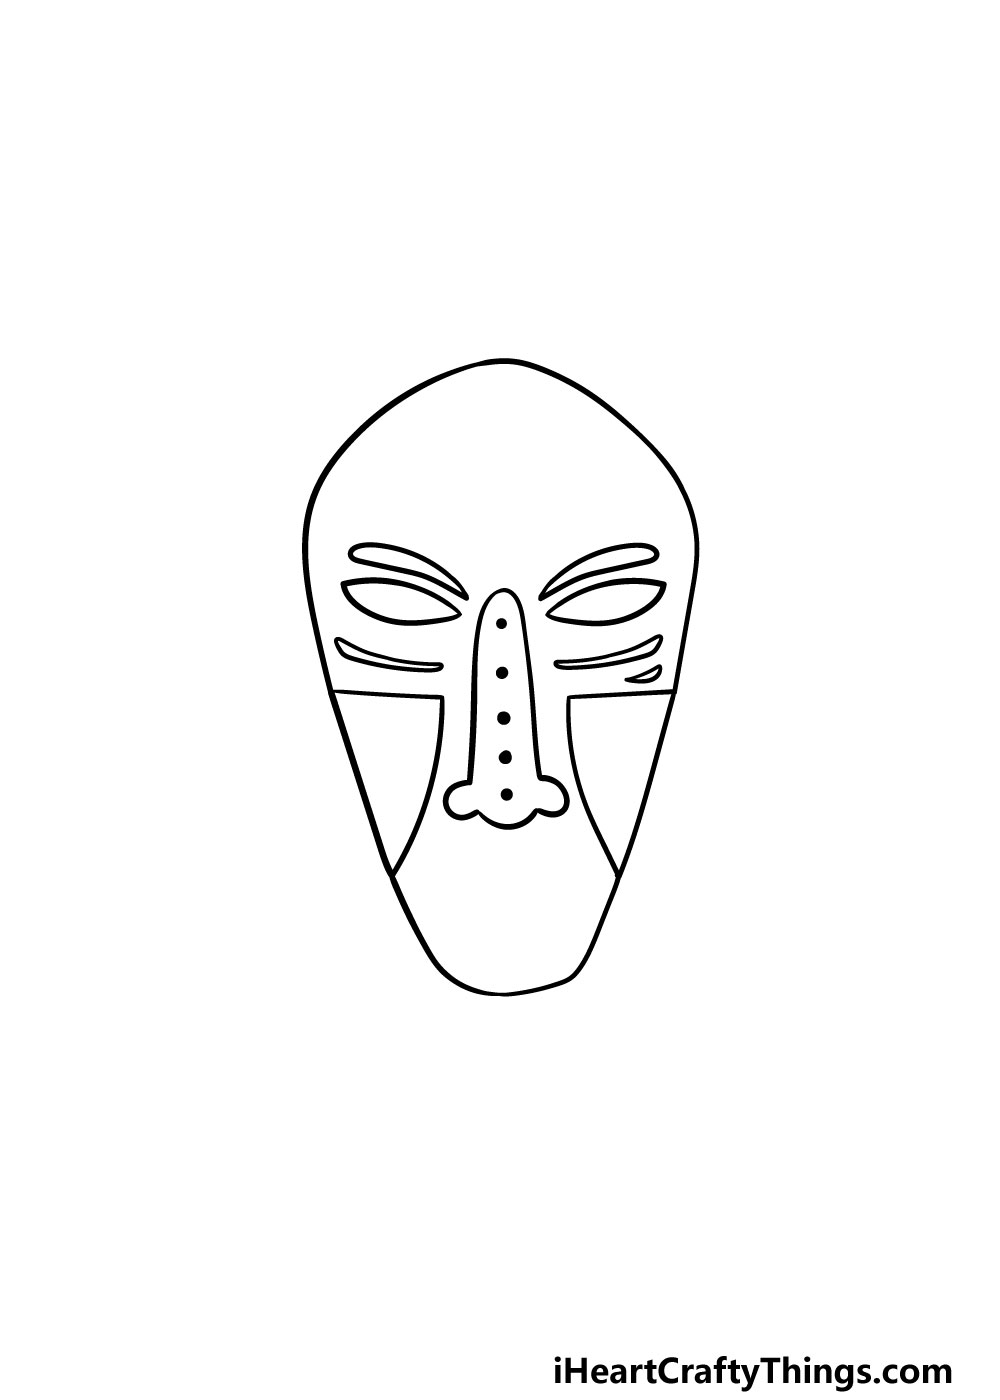
Step 2 – Draw the nose and other details
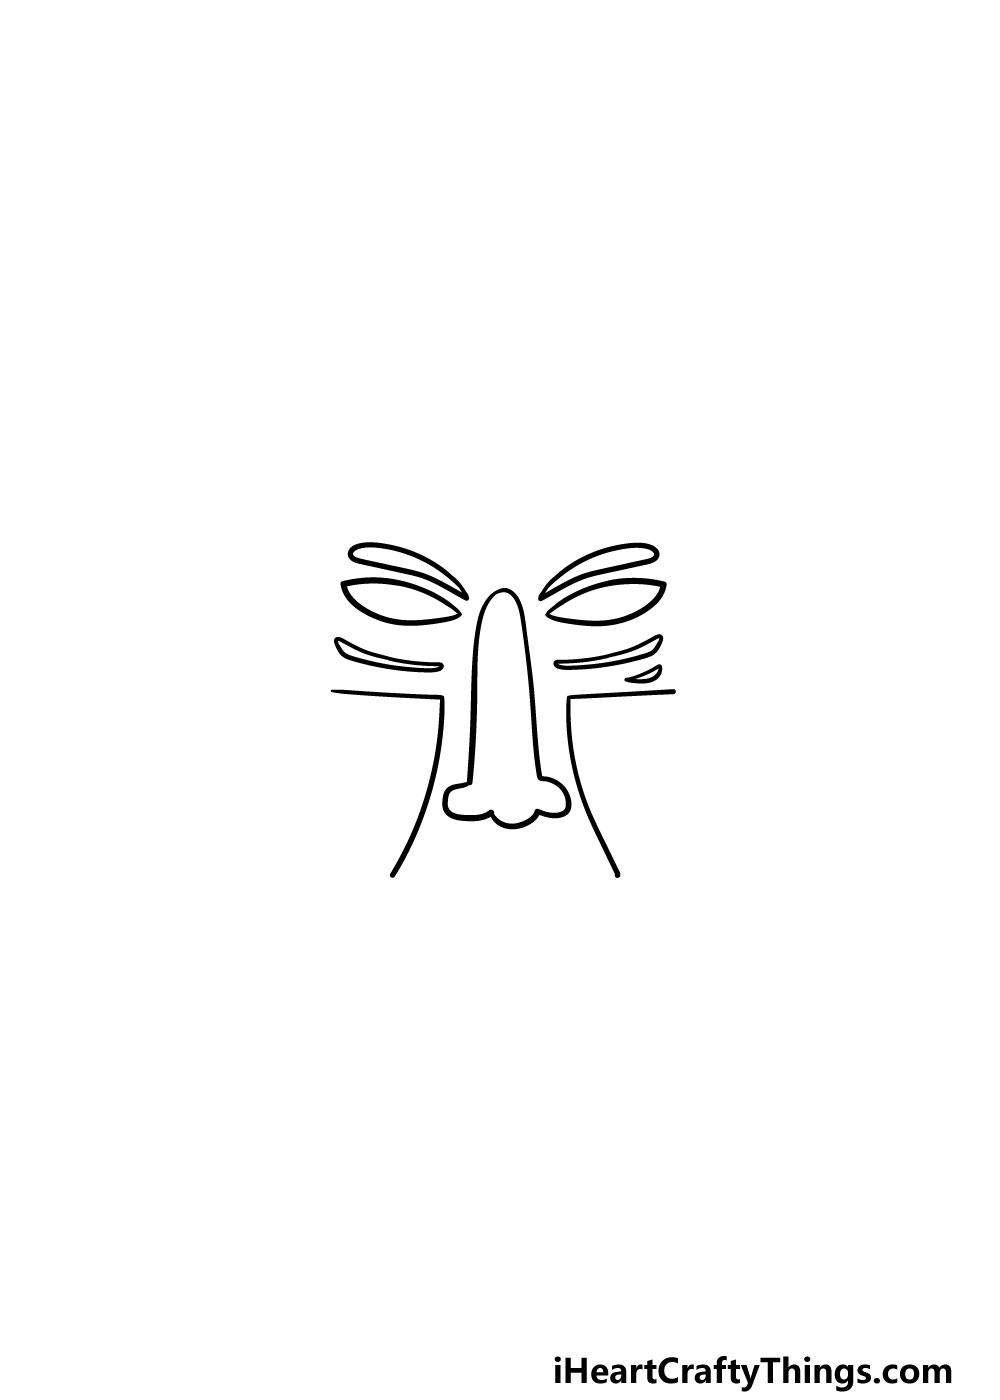
We will be working on the nose and some other aspects in this step of your mask drawing. The nose will be drawn with a long, rounded shape that begins from between the eyes. Then, at the base of it there will be three rounded shapes for the tip and the nostrils.
Then, at the sides of the face you will be drawing some sharp lines that look a bit like triangles without one side.
The side of the ‘triangle that doesn’t have a line will be filled by the sides of the outline of the mask, and that’s what we’ll add in the next step.
Step 3 – Now, draw the outline of the mask
In this third step of our guide on how to draw a mask, we will be working on the outline of the mask as a whole.
For this outline, it will be wide and rounded at the top and then get thinner as it goes down.
As we mentioned in the previous step of the guide, the sides of the mask will finish off the sides of the triangle-like shapes that you drew as decoration previously.
Step 4 – Next, draw the mouth of the mask
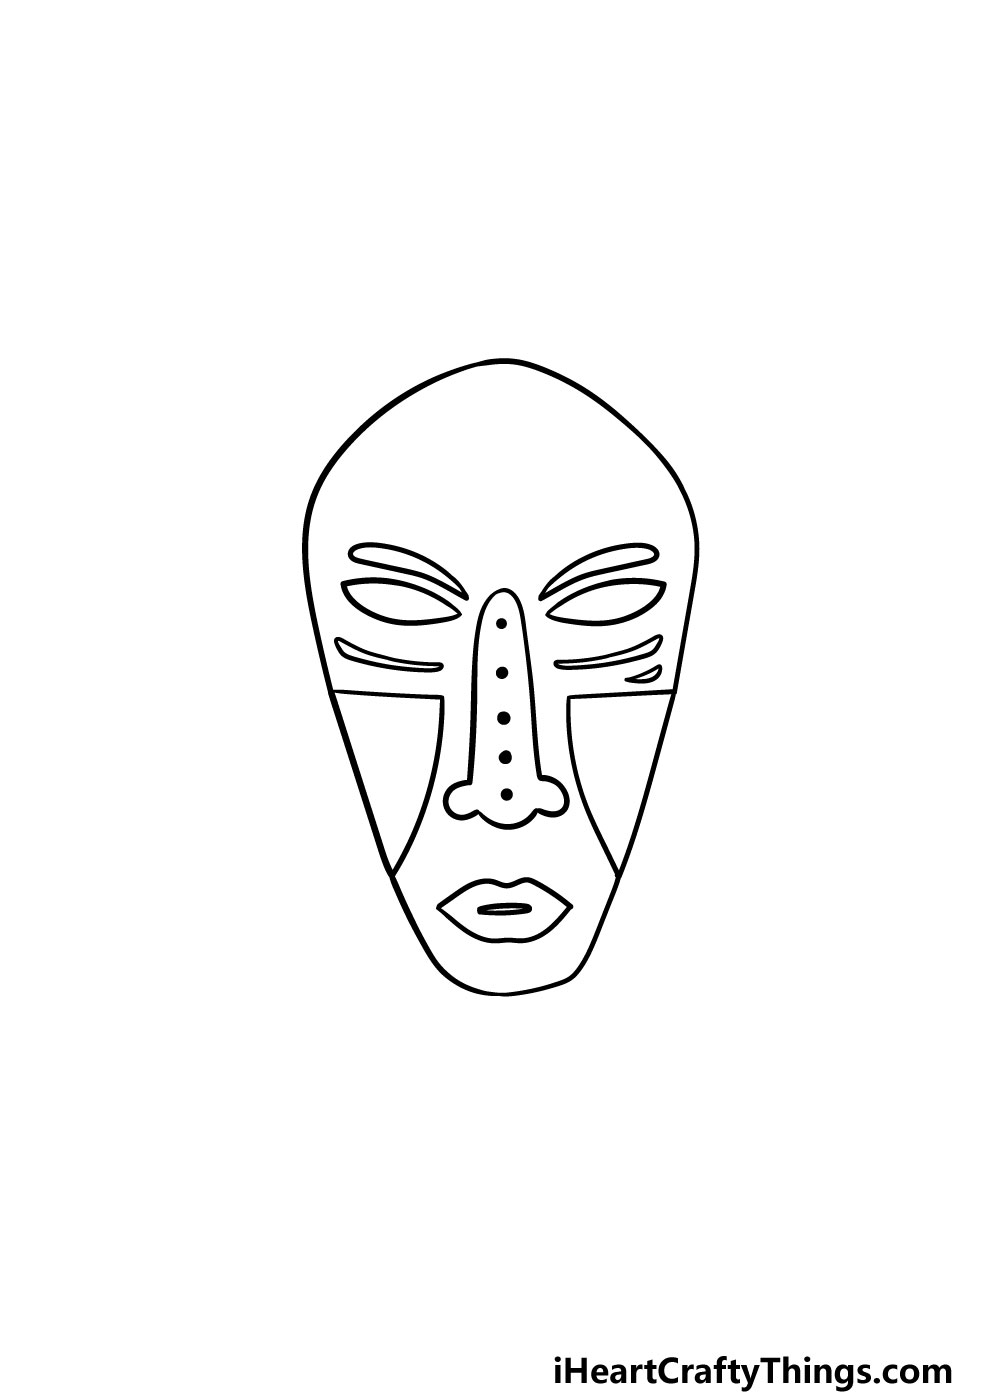
Your mask drawing is looking great already! For this next part, we will be drawing the mouth of the mask.
This mouth will have a pretty typical human mouth shape, except it will be a bit more stylized than a human mouth would be. Then, once you have this mouth outline, you can draw a very thin oval shape within it to make it look as if it were open a bit.
With this part added, the main parts of the mask are present, and in the next step we will add some final decoration details before we add some great colors to this drawing!
Step 5 – Now, you can finish off the final details of your mask drawing
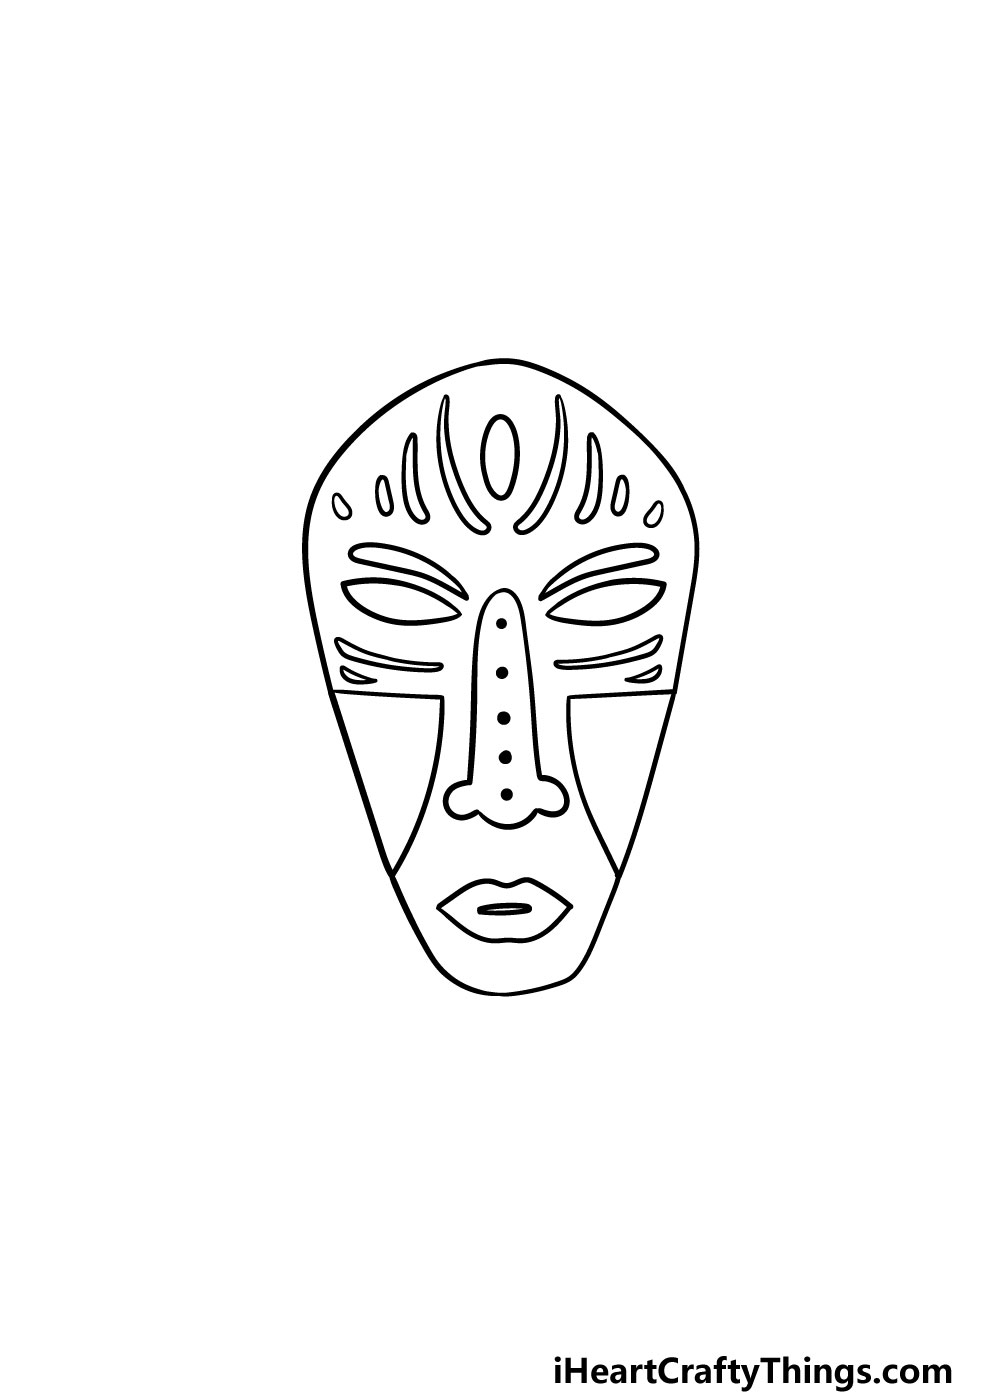
It’s almost time for some coloring fun in the final step, but first we have a few small decoration details to add in this step of our guide on how to draw a mask!
This will also be a step where you can add some details of your own to personalize the drawing even more.
First, you can start by drawing an oval shape into the forehead of the mask. Then, you can draw some thin, sharp and curved shapes leading away from this oval, and they will get smaller as they move outward.
That will do it for the details in this guide, but before you move on you could add some details of your own!
You could change up the design of the mask a bit, or if you’re feeling extra creative you could take what you have learned here and draw some of your own masks hanging next to it.
It would be really cool to have a wall full of hanging masks, so what other designs or details can you think of to add to this picture?
Step 6 – Finish off your mask drawing with some color
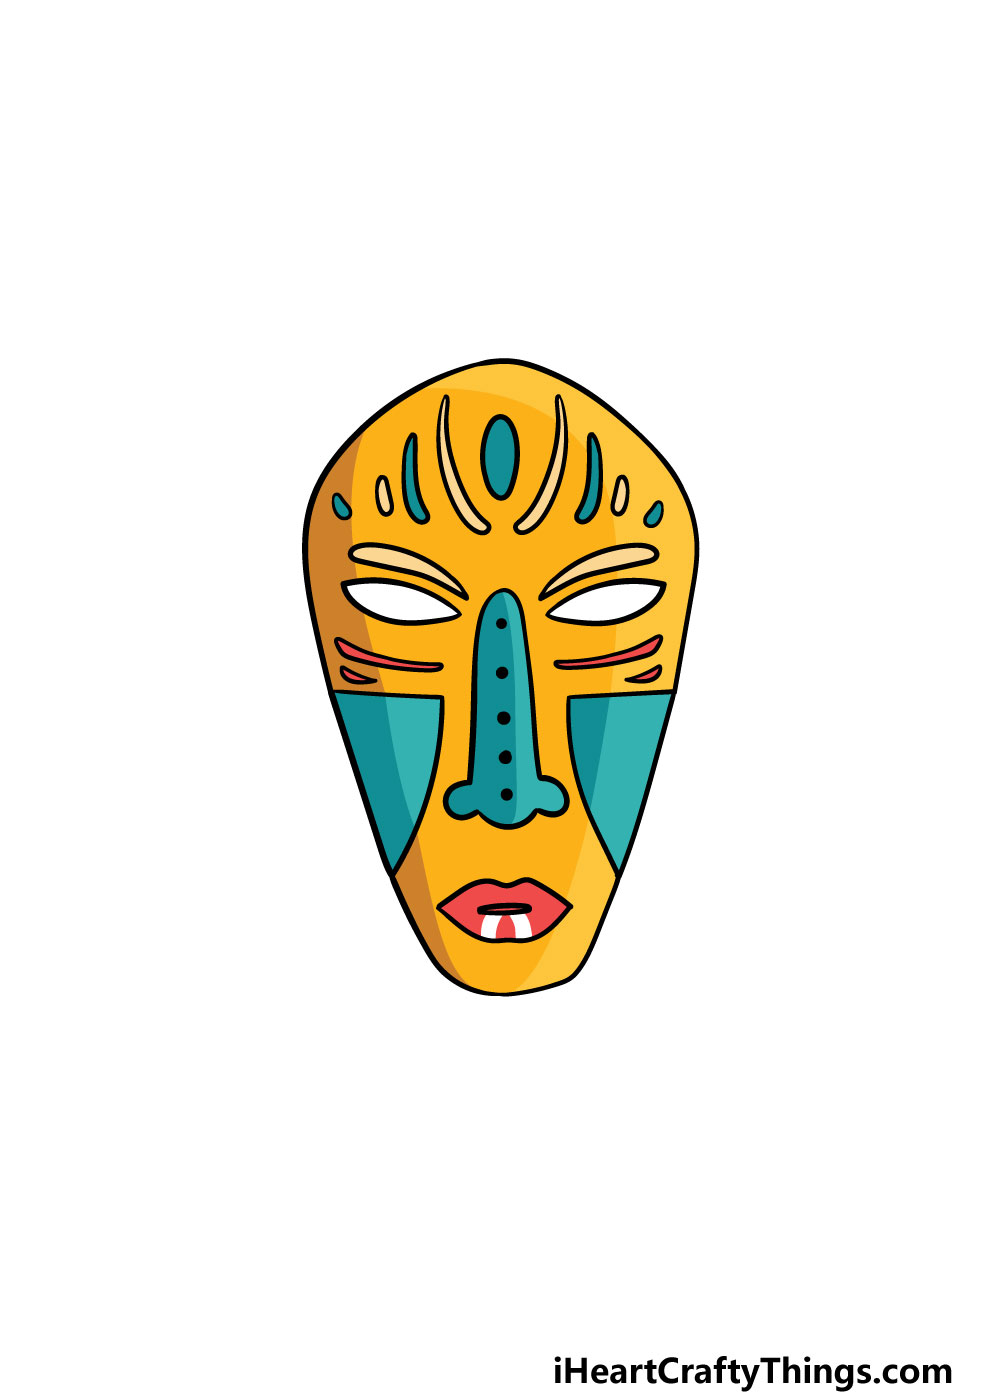
That brings you to the final step of your mask drawing. You’ve worked hard drawing this mask, so now you get to have some relaxing coloring fun with your artwork.
In our reference image, we used yellow, blue and red as the main colors of the mask. This was what we chose for it, but you should feel free to use any colors of your own to fill it in!
Masks can come in any colors or patterns that you can think of, so you have a great chance to use all of your favorite colors to finish off this mask drawing.
Once you have chosen your colors, you can also utilize your favorite art tools and mediums to bring the colors to life!
Using these mediums, you could make your mask bright and vibrant, muted and subdued or a combination of the two.
Whatever you choose will look great and we cant wait to see how you bring this mask drawing to life!
5 Tips To Make Your Mask Drawing Even Better!
Find out how to make this mask drawing even more impressive with these tips!
A great way to make this mask sketch even better is by changing some of the details. We showed you how to create just one design here, and you could create many more with some simple changes.
These could be the facial elements, some patterns or maybe extras such as earrings. That would be perfect for creating your very own unique mask design!
If you enjoyed creating your own mask design, then you could have even more fun with it. Why not draw as many masks as you can fit on the page?
Each one could have its own design! It would require a bit of time and patience, but it would be worth it when you make this drawing of a mask even more impressive.
You also have a few options for the way that you show this mask. It could be hanging on a wall with other masks, or you could draw a fun character wearing it!
If you were to do this, you could make the character as realistic or as cartoony as you like. You can also take it a step further by adding a background setting to create a fun and interesting scene.
Next, we think you should try and use some awesome colors for this mask drawing. We spoke a bit about some colors you could use in the guide, but it would be fun to also experiment with art mediums.
Mixing paints, colored pens, markers and other tools can create a really vibrant set of colors for the drawing.
We have one more fun idea for you to try! You could draw this mask on a big piece of cardboard and then color it.
Then, carefully cut out the mask, and then get an adult to help you poke some holes in the sides.
You can then thread some string or elastic through it, and now you can actually wear your creation! You’d be sure to cause all kinds of fun reactions when wearing it.
Your Mask Drawing is Complete!
You have now reached the end of this guide on how to draw a mask! Hopefully this guide was not only very informative for you to use but that it was also lots of fun for you as well!
Breaking down a new drawing into smaller, more manageable steps is always the best way to take on a new art challenge, so that is what we tried to do for you.
Now that you have mastered this guide, you can take it even further with your own details. We mentioned a few ideas like drawing more masks, a background or your own pattern details, but what else can you think of to finish off your amazing artwork?
We have many more drawing guides for you to enjoy on our website, so be sure to visit us there! Be sure to check in often, as we upload new guides all the time.
Once your mask drawing is complete, we hope that you will share it on our Facebook and Pinterest pages for us to enjoy!