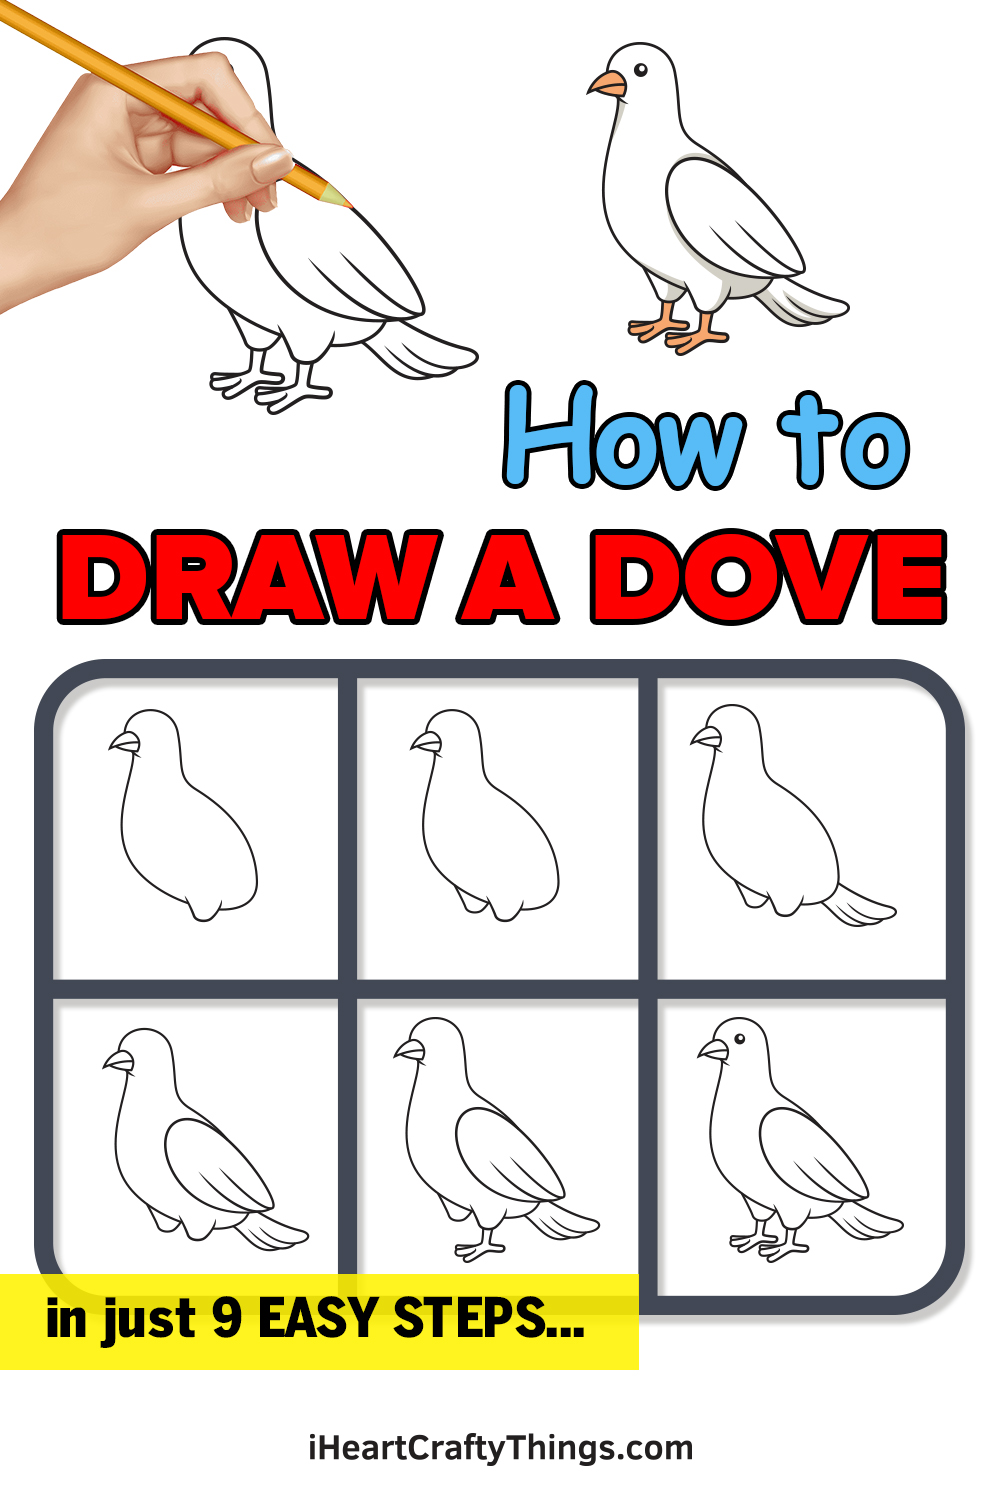
You’re about to learn how to draw a dove in the easiest way possible! It’s going to be so much fun to recreate this beautiful bird.
Doves are not just lovely creatures but also symbolic ones. They represent peace and civility in many cultures and are also sometimes used at weddings.
Because of the different meanings ascribed to doves, you may want to learn how to draw one, only to run into some difficulties. That’s why I wanted to make this guide!
By going through these steps together, you will see just how simple it can be when you have it broken down into smaller steps.
Then, you can use the drawing you end up with as the start of your own design as you add your own details and background elements. It all starts with the first step, so let’s take it together!
Learn How To Make Your Dove Drawing By Watching This
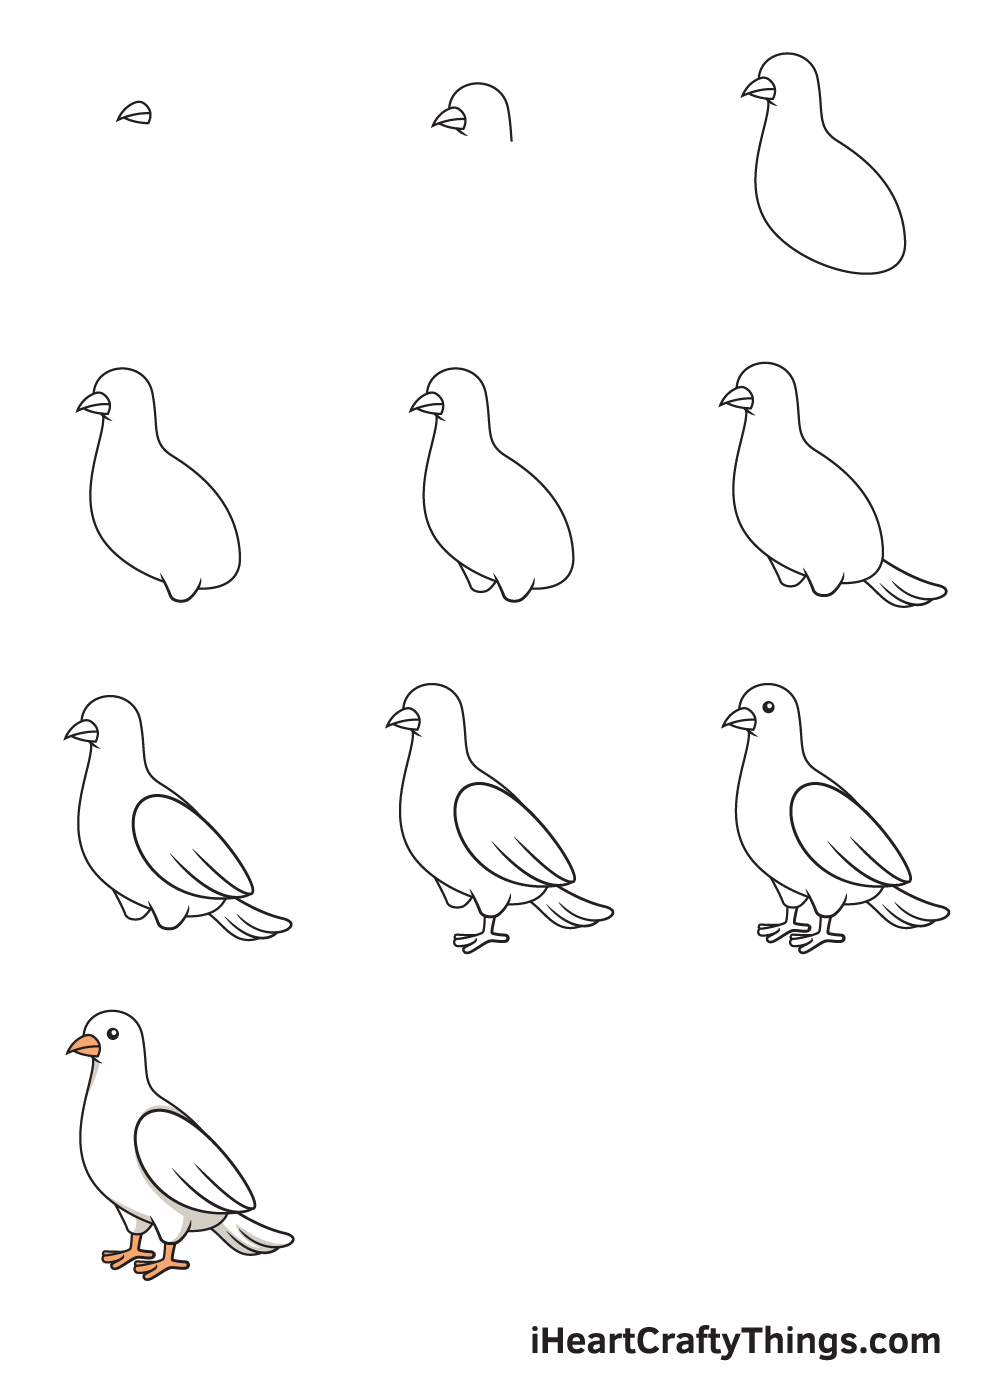
How to Draw a Dove – Let’s get started!
Step 1

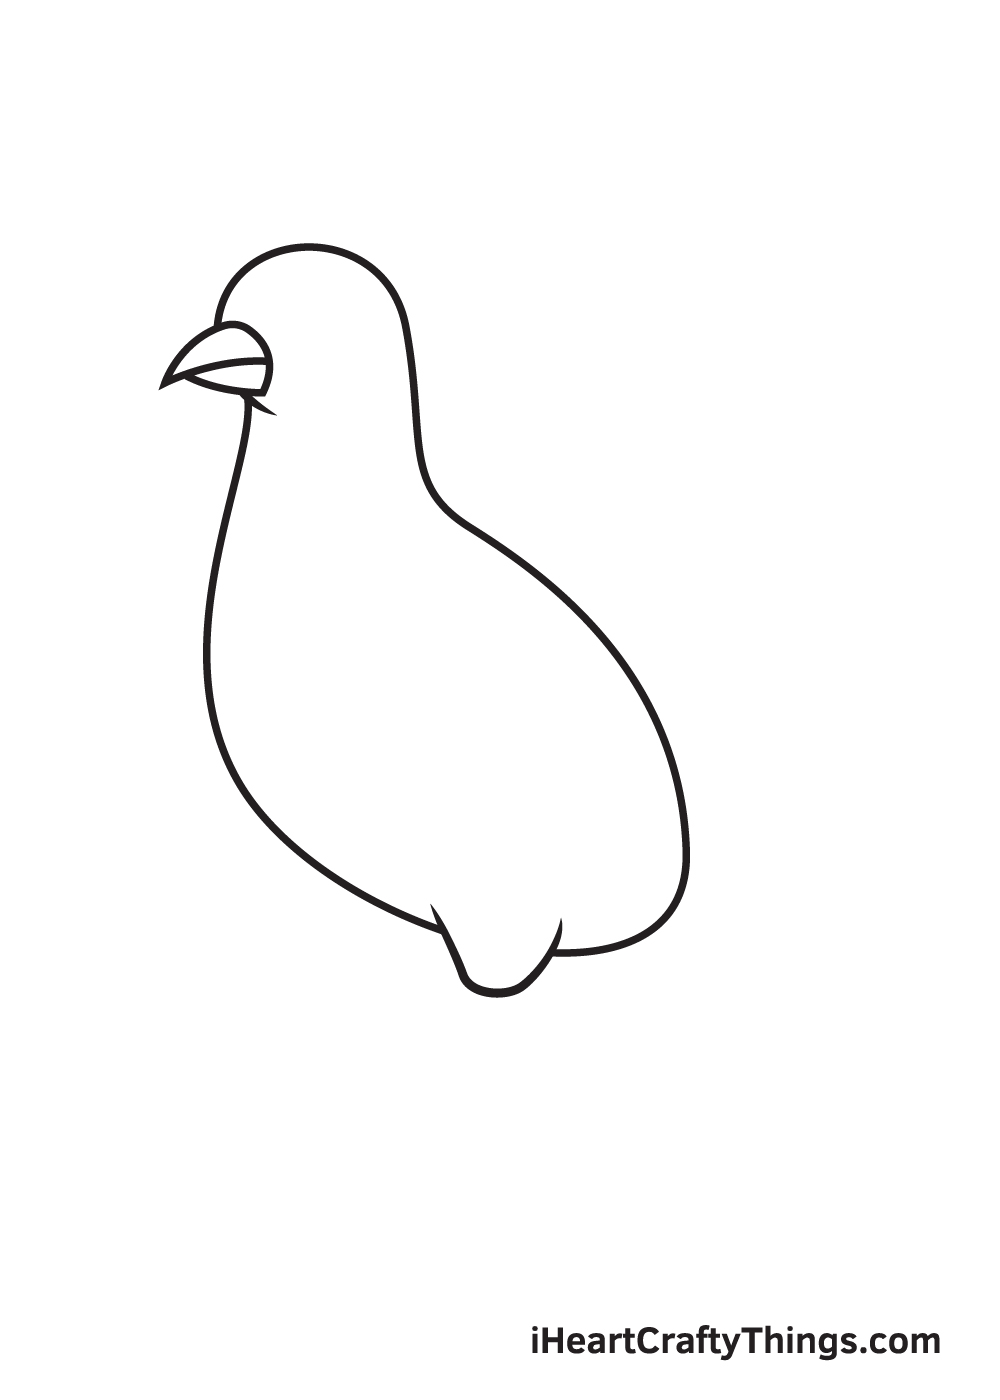
Start by drawing a sideways uneven triangular shape to form the upper beak. Draw a similar figure right underneath the upper beak to create the lower beak.
Remember, the upper peak should be bigger and more pointed than the lower beak, as shown in the illustration above.
Keep in mind that the beak should be located on the upper left side of your paper. To ensure this, create reference lines by drawing an intersecting horizontal and vertical line across your paper.
This guideline will divide your paper into four rectangular spaces. The space on the upper left corner is where you should draw the beak.
Step 2 – Create an Outline of the Dove’s Head
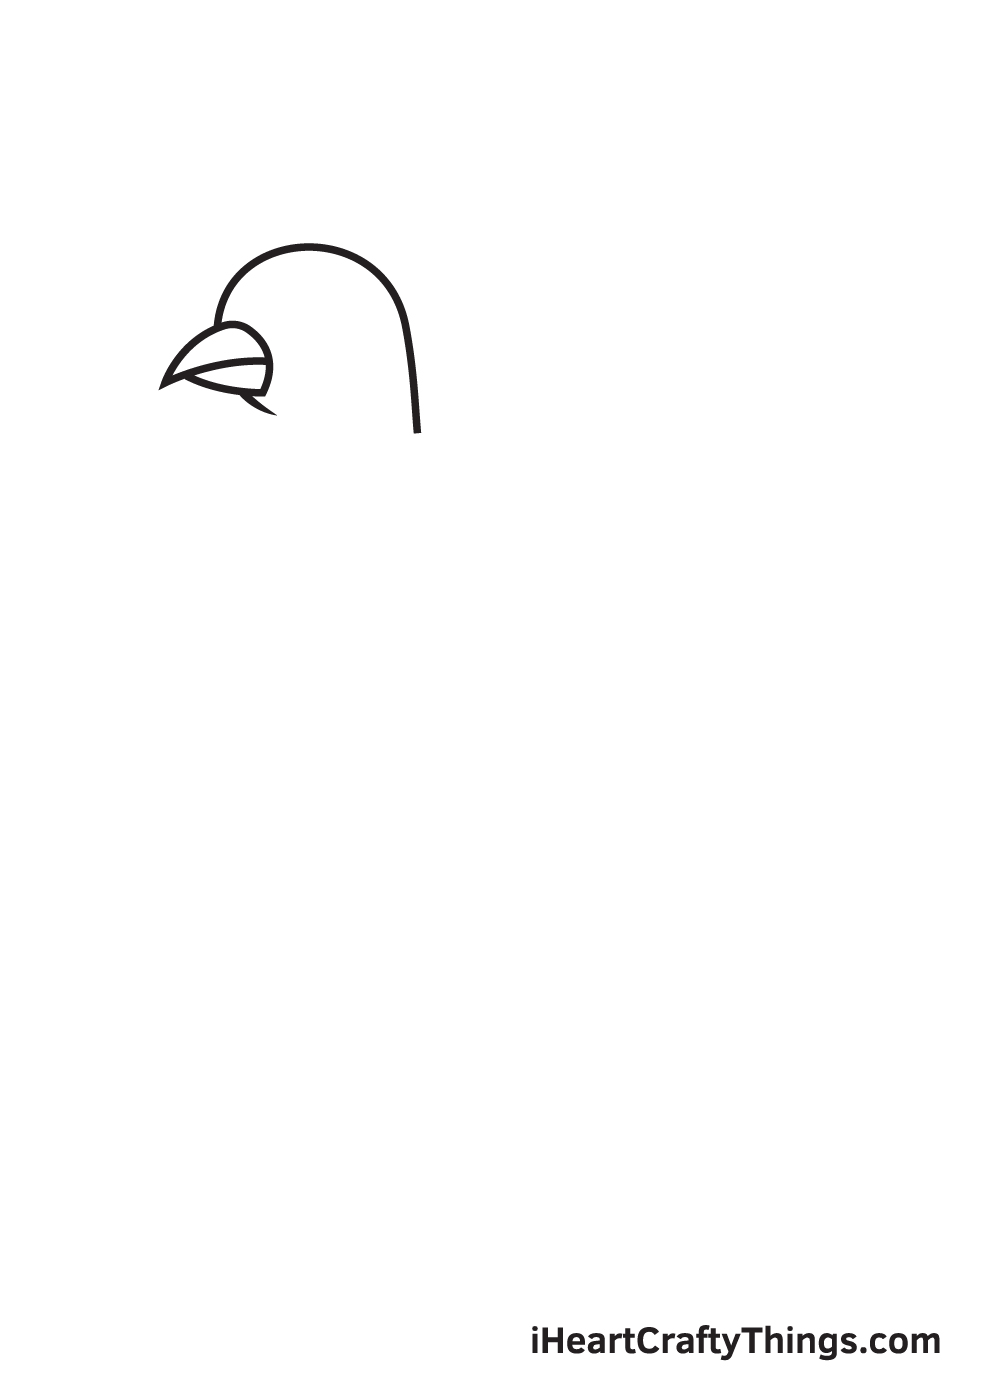
Draw a curved shape surrounding the beak, which we drew in the previous step. This outlines the head of the dove. When drawn correctly, the figure should look quite similar to a hook.
Since the dove is facing sideways, the beak should be on the left edge of the dove’s head.
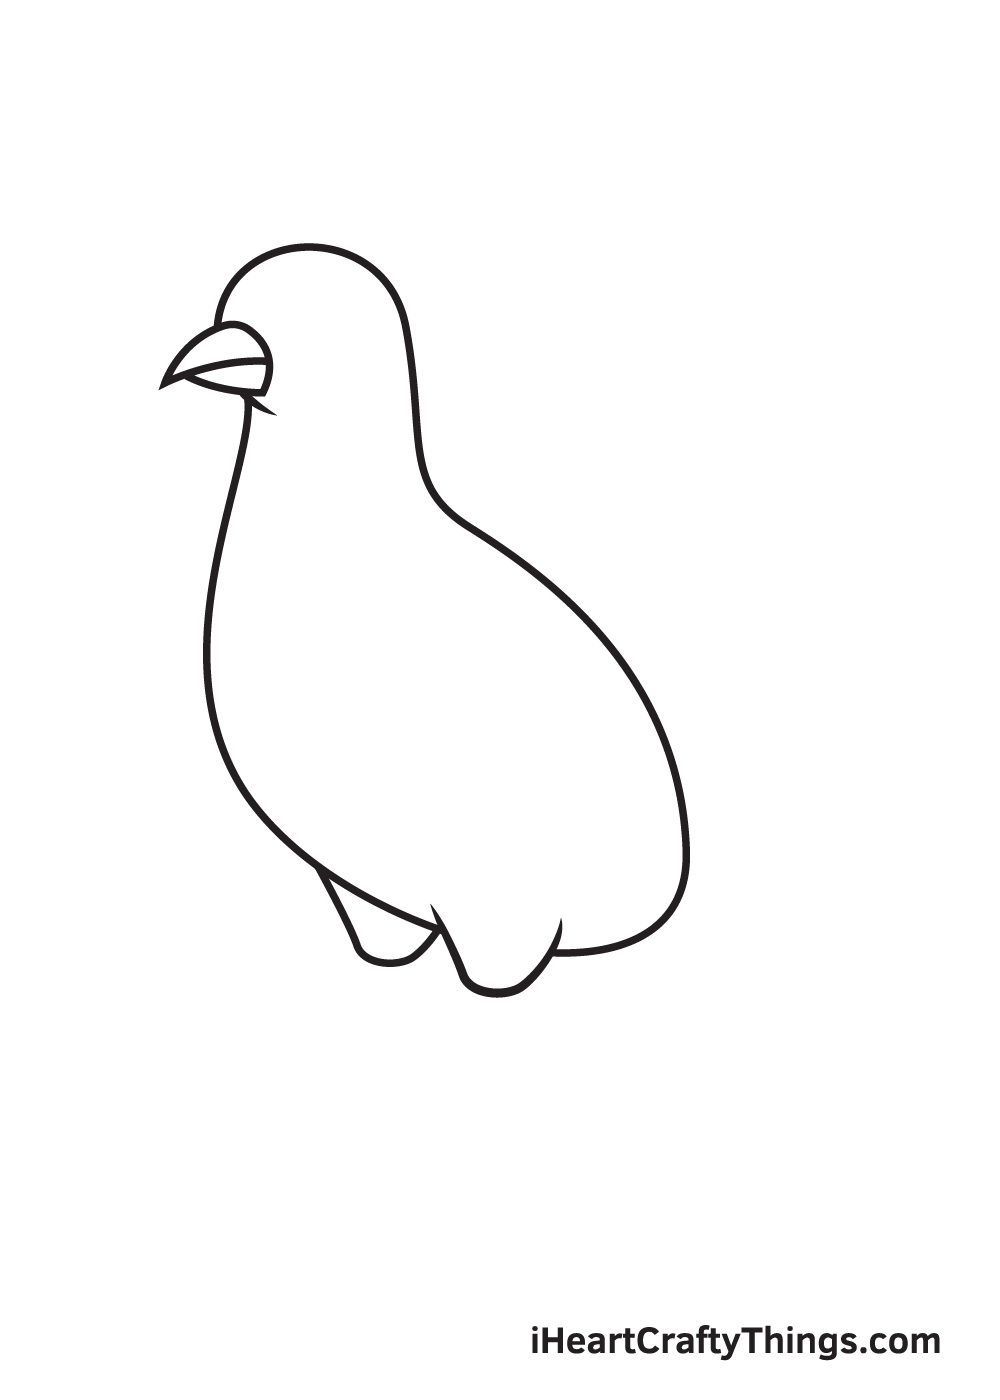
Step 3 – Rough Sketch the Body of the Dove
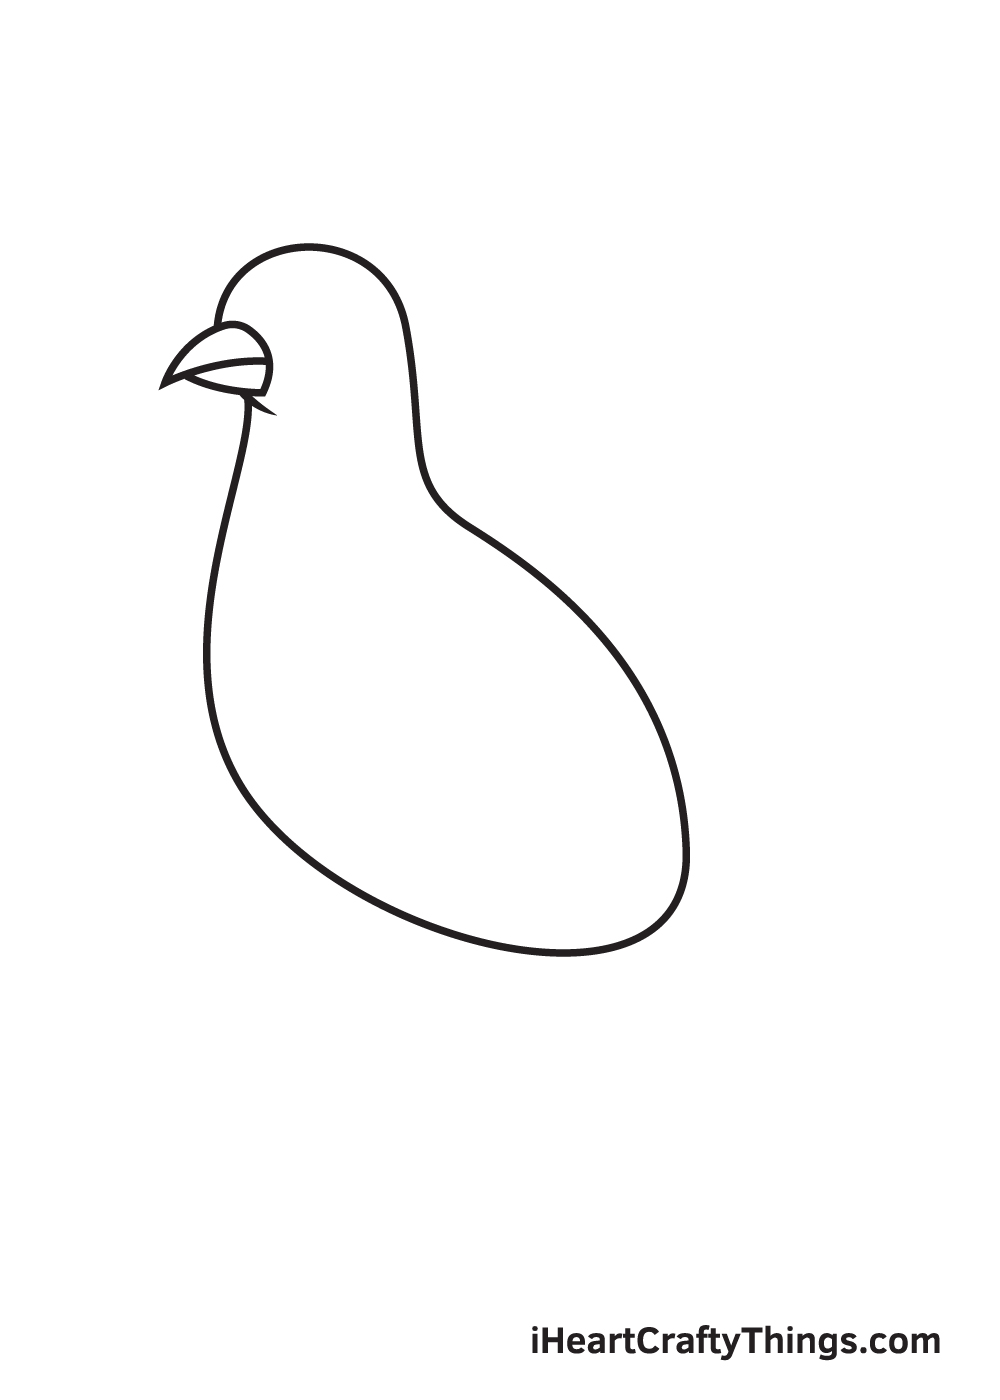
Extend the lines of the figure of the head by drawing an uneven oval shape directly connected to the head. This creates an outline of the dove’s body.
Remember, use light strokes when drawing an outline. Avoid pressing down too hard with your pencil so you can easily remove any parts of the outline you no longer need later on.
Step 4 – Next, Draw the Right Leg of the Dove
Draw a wide U-shaped curve on the front part of the bottom of the dove’s body. Bear in mind that the U-shaped curve should have diagonal sides and a flat bottom. This forms the right leg of the dove.
Don’t forget to erase the part of the outline that overlaps within the leg. This helps keep the structure of the dove more refined and most importantly, keeps your drawing neat and tidy.
Step 5 – Now, Complete Both Legs of the Dove
Repeat the previous step on the opposite side of the lower body of the dove.
This forms the dove’s left leg, which is located on the back since the dove is facing to the side.
Step 6 – Afterwards, Structure the Dove’s Tail
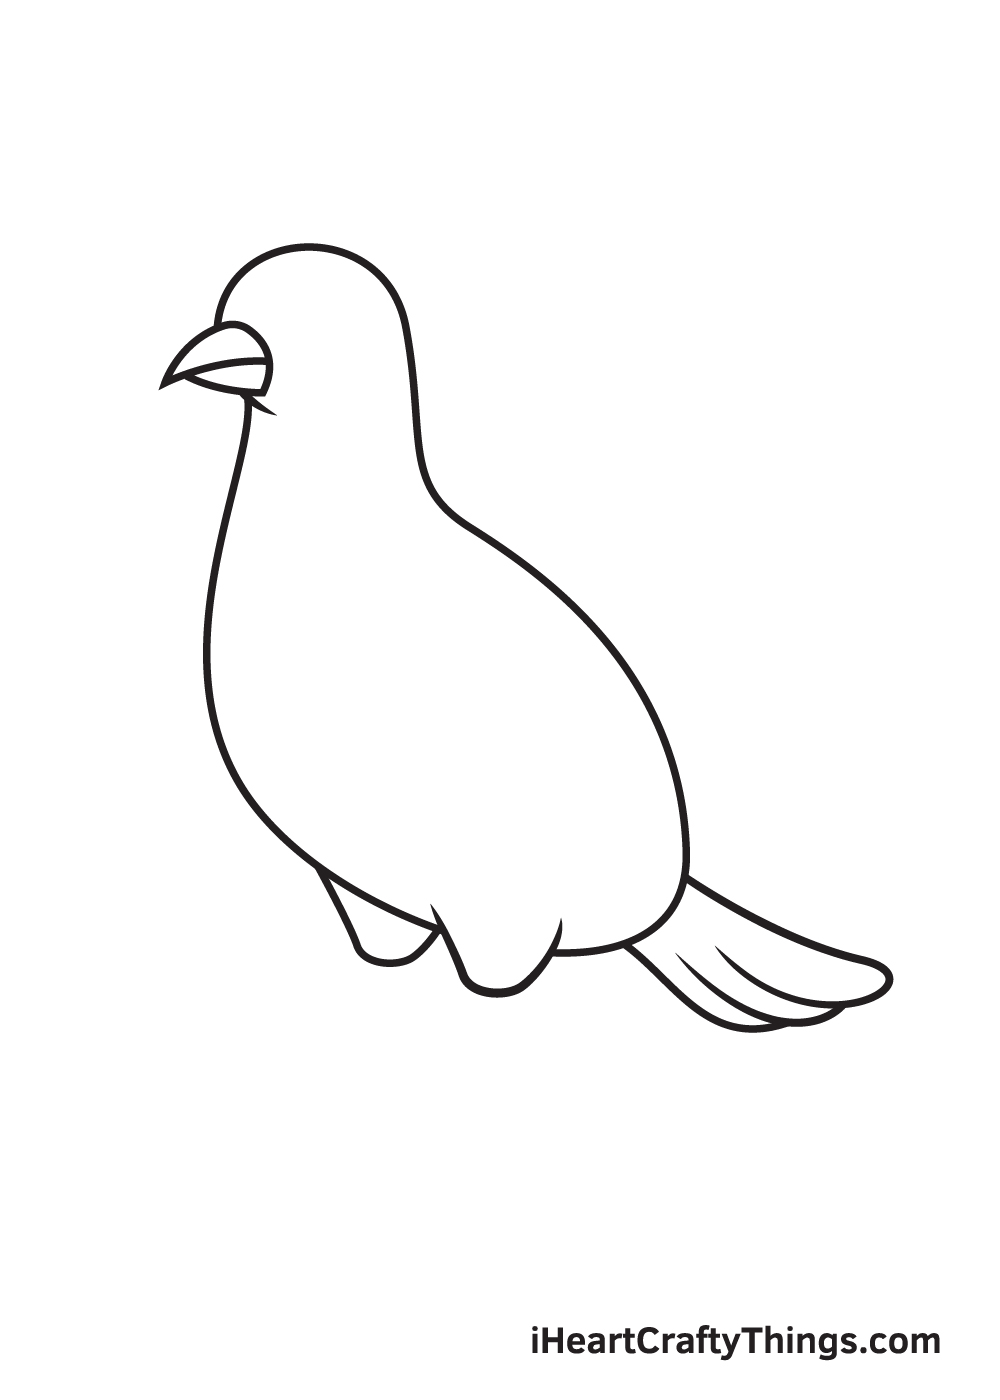
Draw three connected elongated figures with curved tips to create the feathers.
These feathers must be clumped together forming a rectangular shape on the bottom back of the dove.
Step 7 – Next, Create the Wings of the Dove
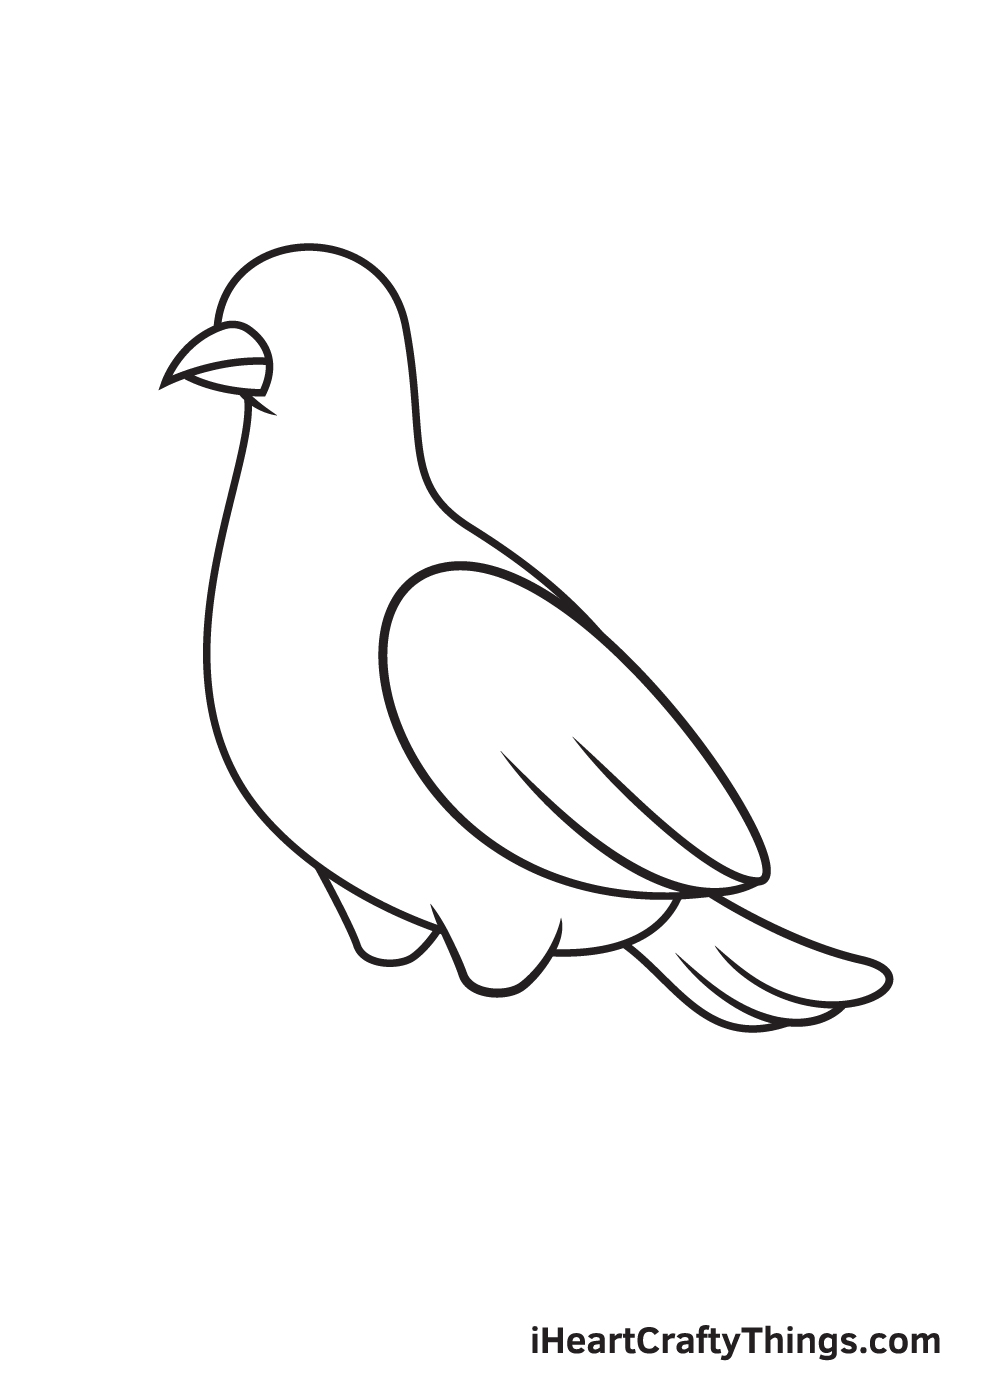
Draw an oval shape with a slightly pointed bottom on the side of the dove’s body. Then, draw slanted lines on the bottom part of the wing to create the illusion of feathers.
This also adds texture on the wing, making it look fluffy and realistic.
Don’t forget to erase any lines from the dove’s body that overlaps within its wing!
Step 8 – Then, Draw the Right Foot of the Dove
Underneath the right leg of the dove, draw a foot with four claws.
This forms the dove’s right foot, as shown in the illustration above.
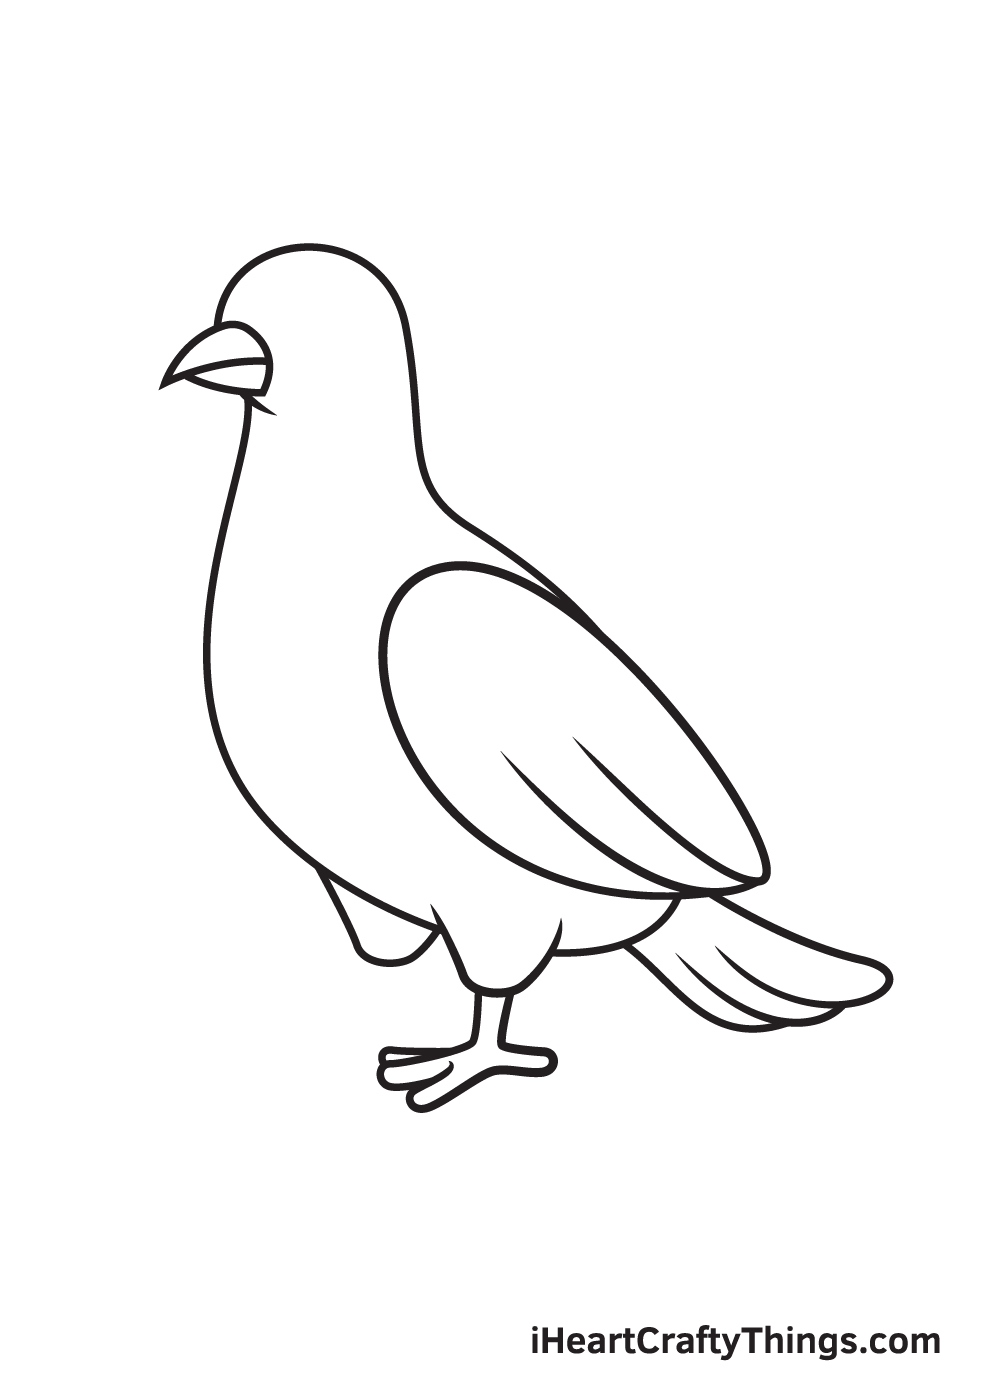
Step 9 – Now, Draw the Dove’s Left Foot and Eye

Repeat the previous step underneath the opposite leg to create the left foot with claws. At this point, both legs of the dove are now complete.
Afterwards, draw a circle on the upper part of the dove’s head, beside the beak. This outlines the eye of the dove.
Then, draw a smaller circle inside the eye to create the pupil. Lastly, add shade to the entire eyes while leaving out the pupil unshaded.
After finishing this step, your dove drawing should now be finalized. All it’s missing is a splash of colors to make your dove colorful!
Now that we’ve successfully drawn a dove, it’s finally time for the most exciting part. In this final step, we’ll be choosing the colors and coloring the dove.
This is the part when you can showcase your artistic skills, especially your ability to mix and match various colors.
Though the doves we often see are white in color, there are many colorful doves in stunning colors like yellow, pink, green, orange and more! This gives you a lot of color options to choose from when coloring the dove.
Feel free to color the dove with any colors you like! You can also use more than one color to create a one-of-a-kind, multi-colored dove!
Have fun playing with colors and watch as the dove ultimately comes to life!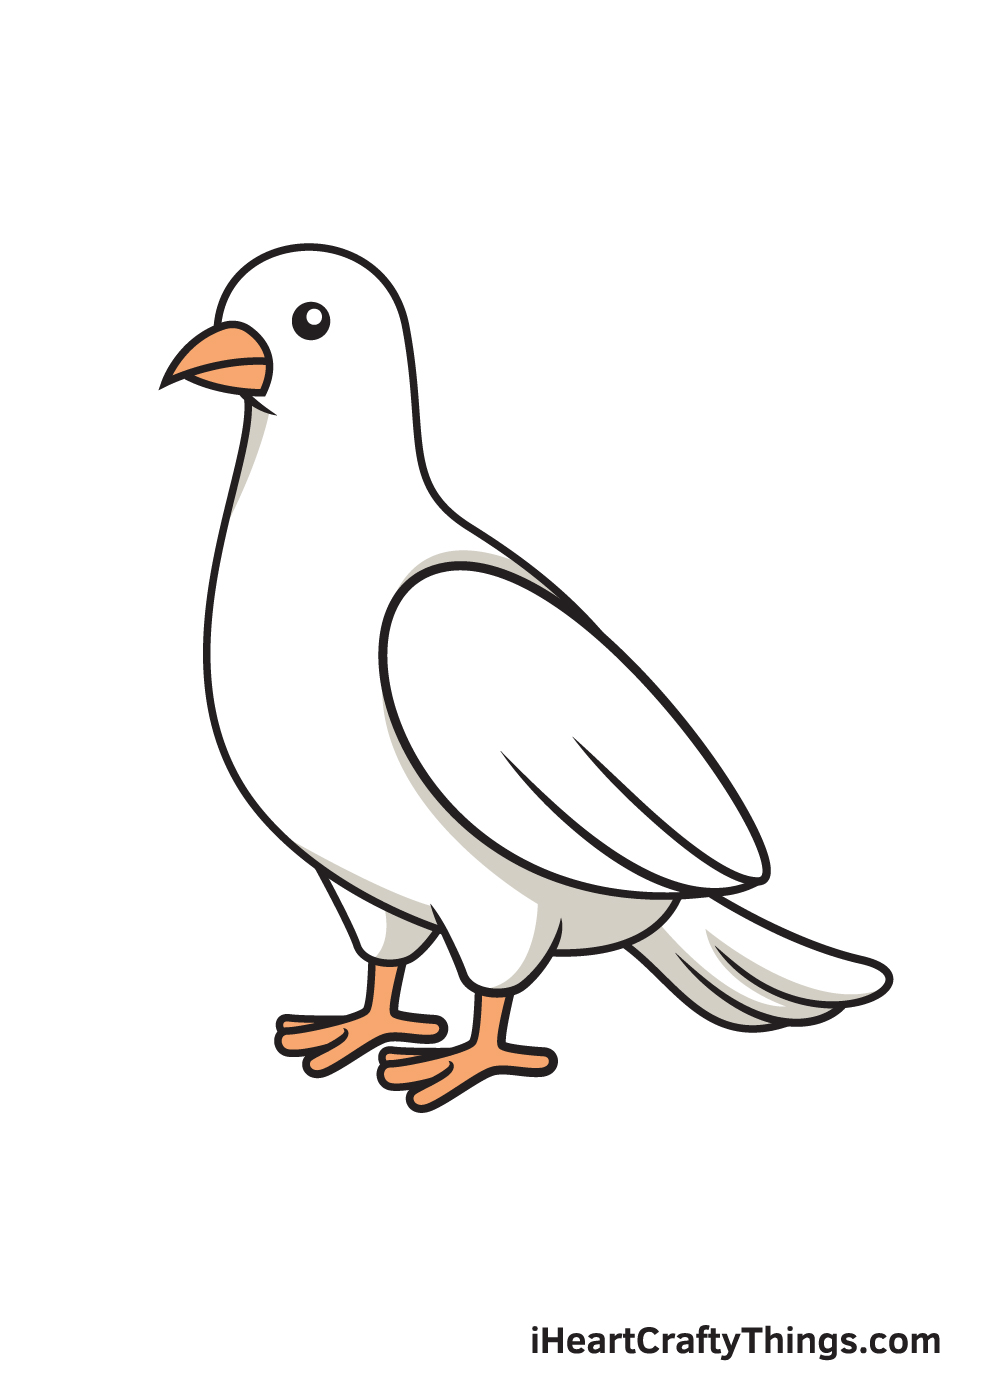
Bonus: Add Some Inspirational Aspects To This Dove Drawing
It won’t be long until we add some colors to finish off this dove drawing, but before we get to that part we thought it might be nice to add some thematic elements to this picture.
Doves are beautiful birds on their own, but they have also become a metaphorical symbol of peace and serenity. This is something we touch on in a section near the end of the guide, but we had a few ideas to explore here.
When it comes to peace, we often portray it with light, as it can represent the feeling of dawn breaking and night ending. For that reason, we think it would be great to add some shafts of light to this drawing of a dove.
Using your favorite art mediums to add some light yellows, oranges and reds could be great to create some shafts of light. Adding a bay leaf to the claw of the dove would also finish off the image nicely.
Then, you could also incorporate some text to the image. We think it would look lovely to have a parchment beneath the dove which you could then add some text to.
It could be a quote or a bible verse that brings you peace and joy, and then it would do the same for anyone who sees this image. There are really so many ways you could make it more thematic.
If you wanted a more dramatic image, you may also want to portray the dove with its wings extended to make it look even more impressive. These are a few things you could try, but the theme will mean something different to everyone!
What are some ways you would like to portray the themes of peace in this picture?
Do this to take your dove drawing to the next level
Find out how to make your peaceful dove sketch even better with these tips!
In this dove drawing we created together, the dove is presented without any extra objects or details. This looks good, but you could also add some extras to enhance it even further!
For example, doves are often seen as a symbolic image of peace. When this is the case, they will often be holding a bay leaf.
You could add one inside its beak to finish off this effect! That is just one example of how you could make this drawing more interesting, but you could add any other objects you can think of.
Doves are beautiful birds, and they will often be found in packs of other doves. Now that you have finished this drawing of a dove, you could add some more for this one to hang out with!
Simply follow the steps of the guide again, and then you can change the poses of the new doves. These changes could be simple, but they would still be effective.
How many doves would you like to add?
Once you have added as many doves as you like, you could then have some fun coloring them in. We showed you one example of how to color this dove sketch, but there are so many ways to do it!
They may not be colorful birds, but you can still get some color variations by using different art tools and details. Why not try mixing a few different mediums to make the colors look even better?
When you have completed your rendition of this dove drawing, you can then take it even further with a background. This is something that could be added whether or not you decided to go with any of the previous suggestions.
Doves can be found in a wide variety of locations, so you would have many different options to choose from. It could be sitting in a yard by a birdbath or maybe on a grand cathedral!
What setting would you like to create?
Your Dove Drawing is Complete!
We hope you have fun with this step-by-step dove drawing. If you had a good time drawing a dove, then you’ll surely enjoy drawing a hummingbird, a peacock, and other species of birds!
Go ahead and check out our catalog to explore many more exciting drawing tutorials like this.
Once you’ve finished drawing and coloring a dove, make sure to show off your masterpiece. Take a picture of your colored drawing and post it on various social media channels.
And while you’re at it, don’t forget to like our Facebook page too!
We’re excited to see your beautiful dove drawing!
Here Is A Dove Drawing For Kids To Inspire You!
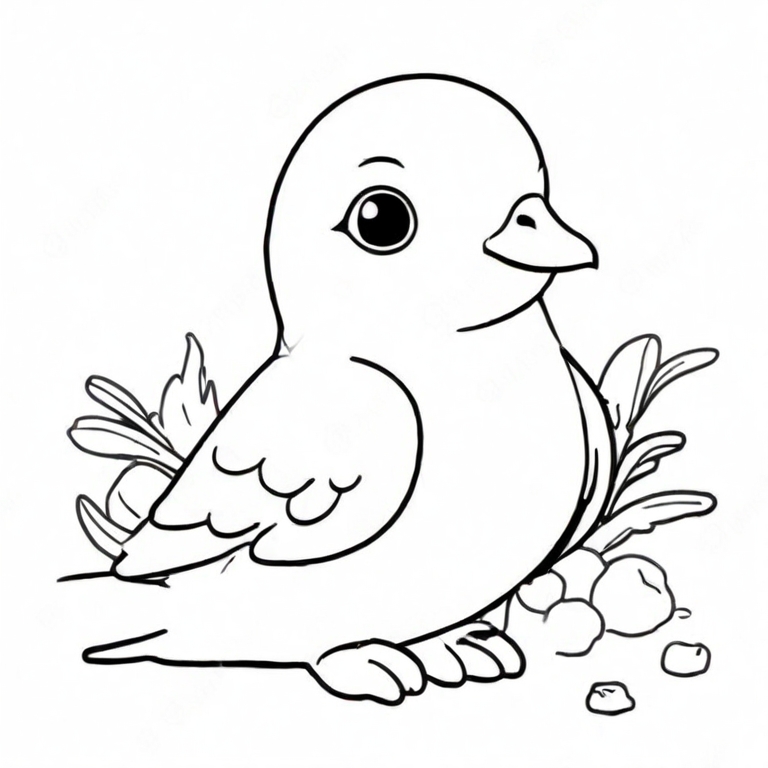
A dove is often seen as a symbol of peace and love, and now you can create one of your own. After the guide, you have an idea of what it takes to create a lovely dove.
For anyone that needs a bit more inspiration, we asked our artist Freddy to make this dove drawing for kids for some added help. This dove is really cute, and shows you how easy it can be to draw.
Freddy didn’t use any over the top details, and he kept the drawing simple yet effective. When you draw your own dove sketch, you could also add a few more feather texture details.
Sometimes, doves will be depicted with a bay leaf in their beaks as a sign of peace, and that would be a lovely detail to add to your version of this dove!