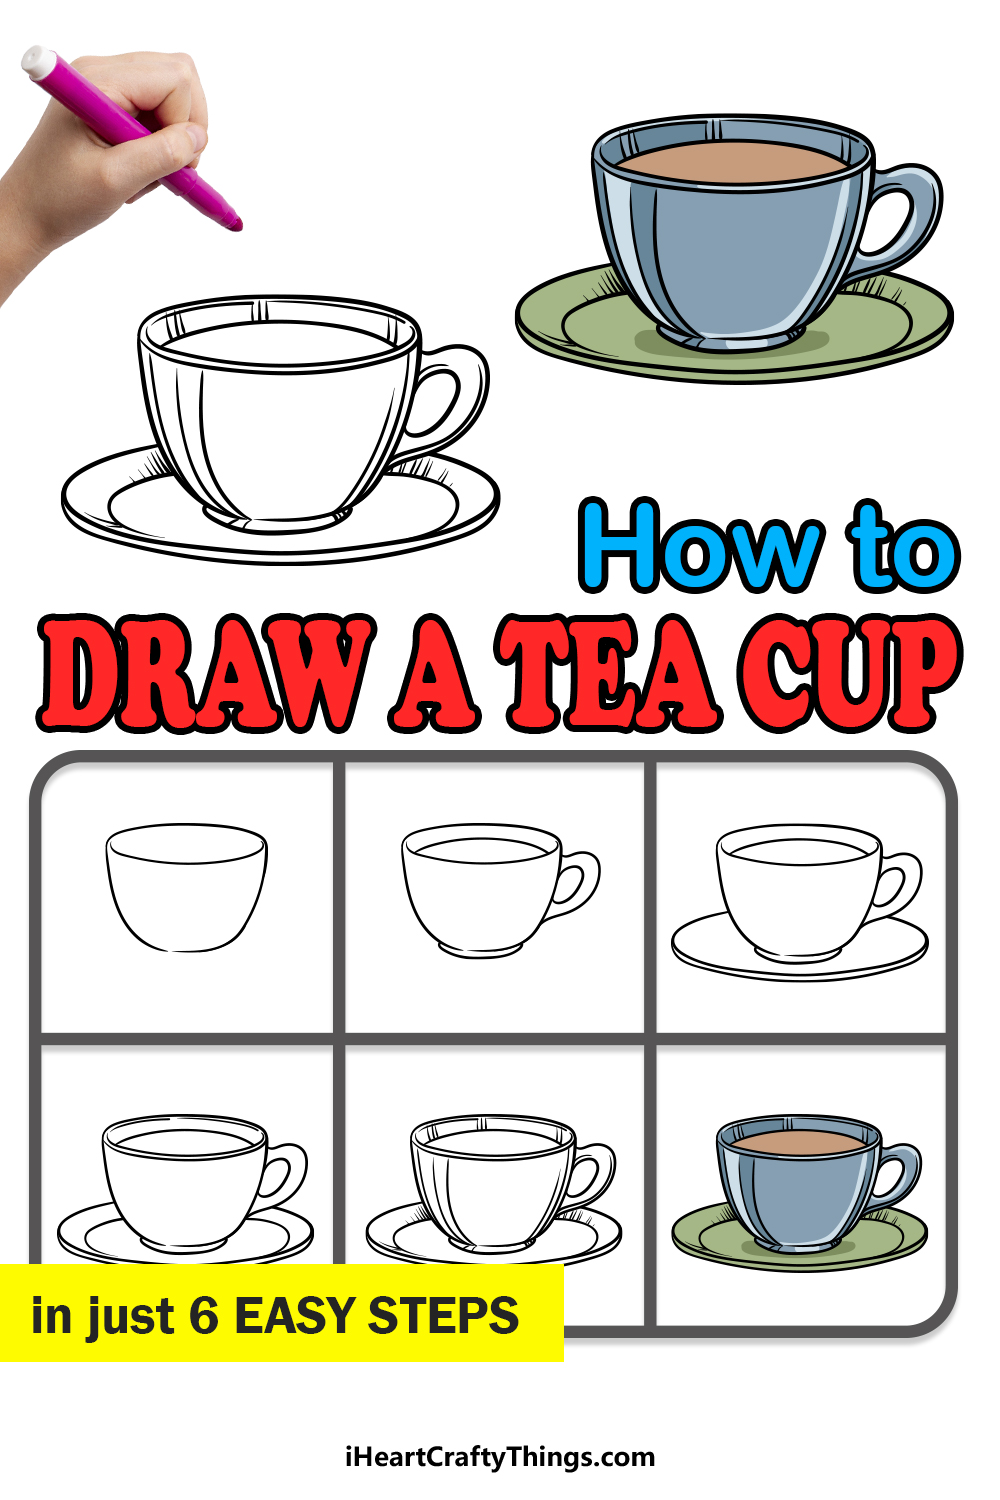
There are few things as relaxing as sitting down with friends or loved ones to enjoy a refreshing cup of tea!
Often, tea lovers will have a special favorite teacup or one that holds either great value or personal history tied to it. Learning how to draw a teacup can be a great way to create your ideal teacup or recreate your favorite real-life one!
If you are a tea lover that would like to design some pretty teacups, then this guide will be ideal for you.
So grab a nice cup of tea and settle down to enjoy this step-by-step guide on how to draw a teacup in just 6 easy steps!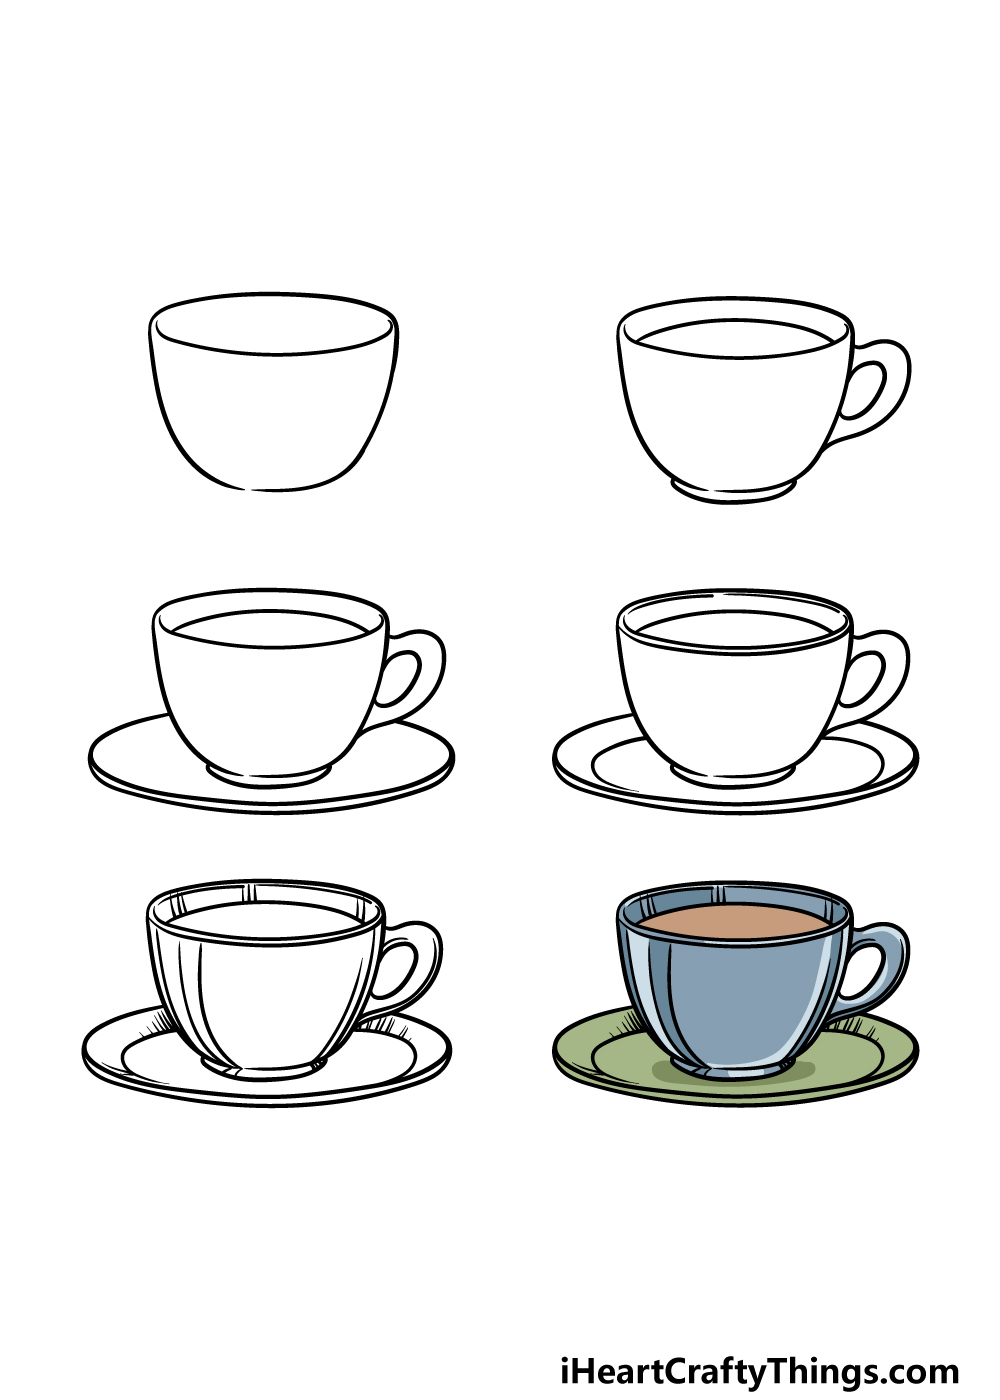
How to Draw A Teacup – Let’s Get Started!
Step 1
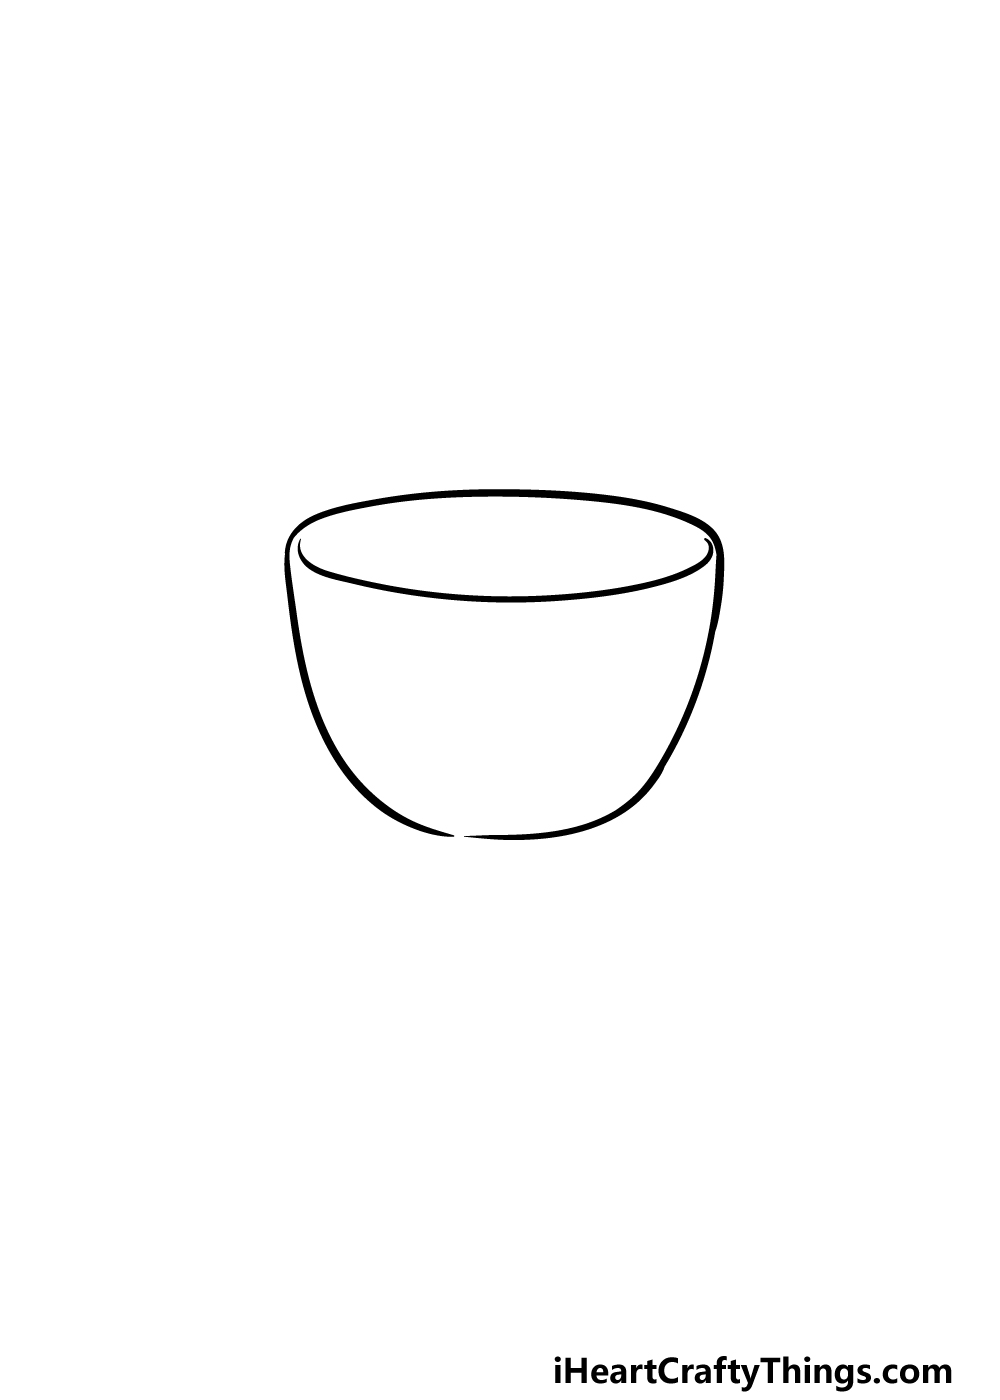
We will be starting this guide on how to draw a teacup by drawing the body for the teacup.
Getting the shape of this cup looking right can actually be harder than you might think, so this is a step that you will want to take slowly as you follow the reference image closely.
The sides and top of the cup will be drawn with a single curved line.
This line may be easier to draw if you use a pencil first, as then you don’t have to worry about getting it right the first time, which can make it less frustrating!
Once you have drawn this outline, draw another curved line inside near the top of the cup for the rim. This curved line won’t quite touch the sides of the cup, though! Once you’re happy with it, we shall proceed to step 2.
Step 2 – Next, draw the handle and some smaller details
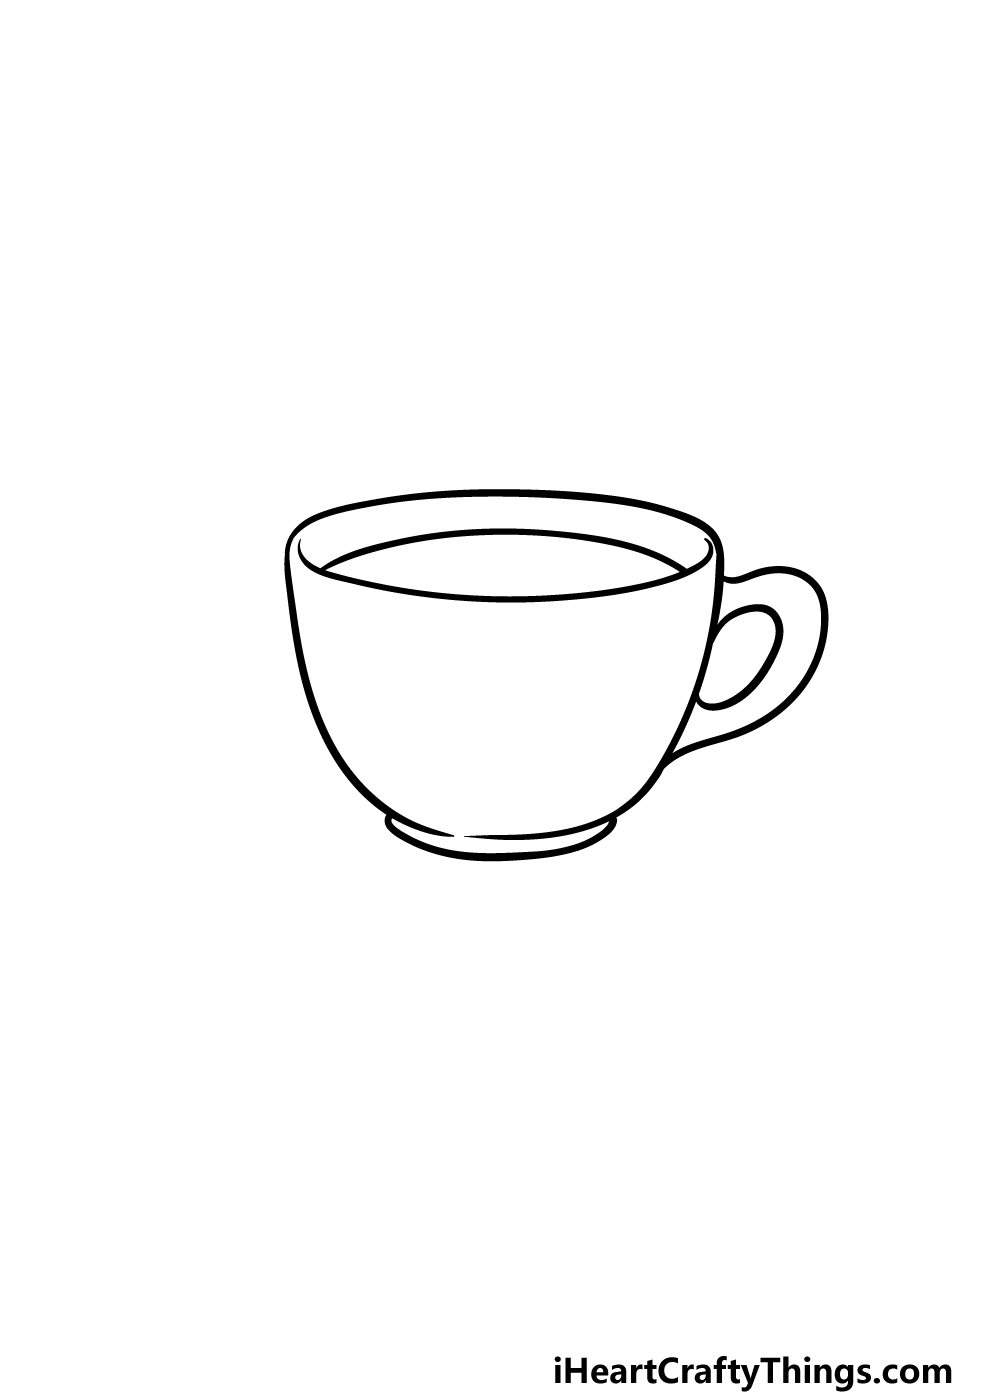
Next, you will be drawing the handle for your teacup drawing in this step. Start this by drawing a thin and long oval shape onto the right-hand side of the cup. Then draw a curved line around it for the outer edge of the handle.
Once you have drawn the handle, you can add another curved line inverted to the line of the rim that you did in the first step.
The only way to make a teacup better is to have some tea in it, and this line will represent that there is indeed tea in this teacup.
Then, before you move on you can draw another curved line on the base of the cup for the small rim there.
Step 3 – Draw a saucer for the teacup next
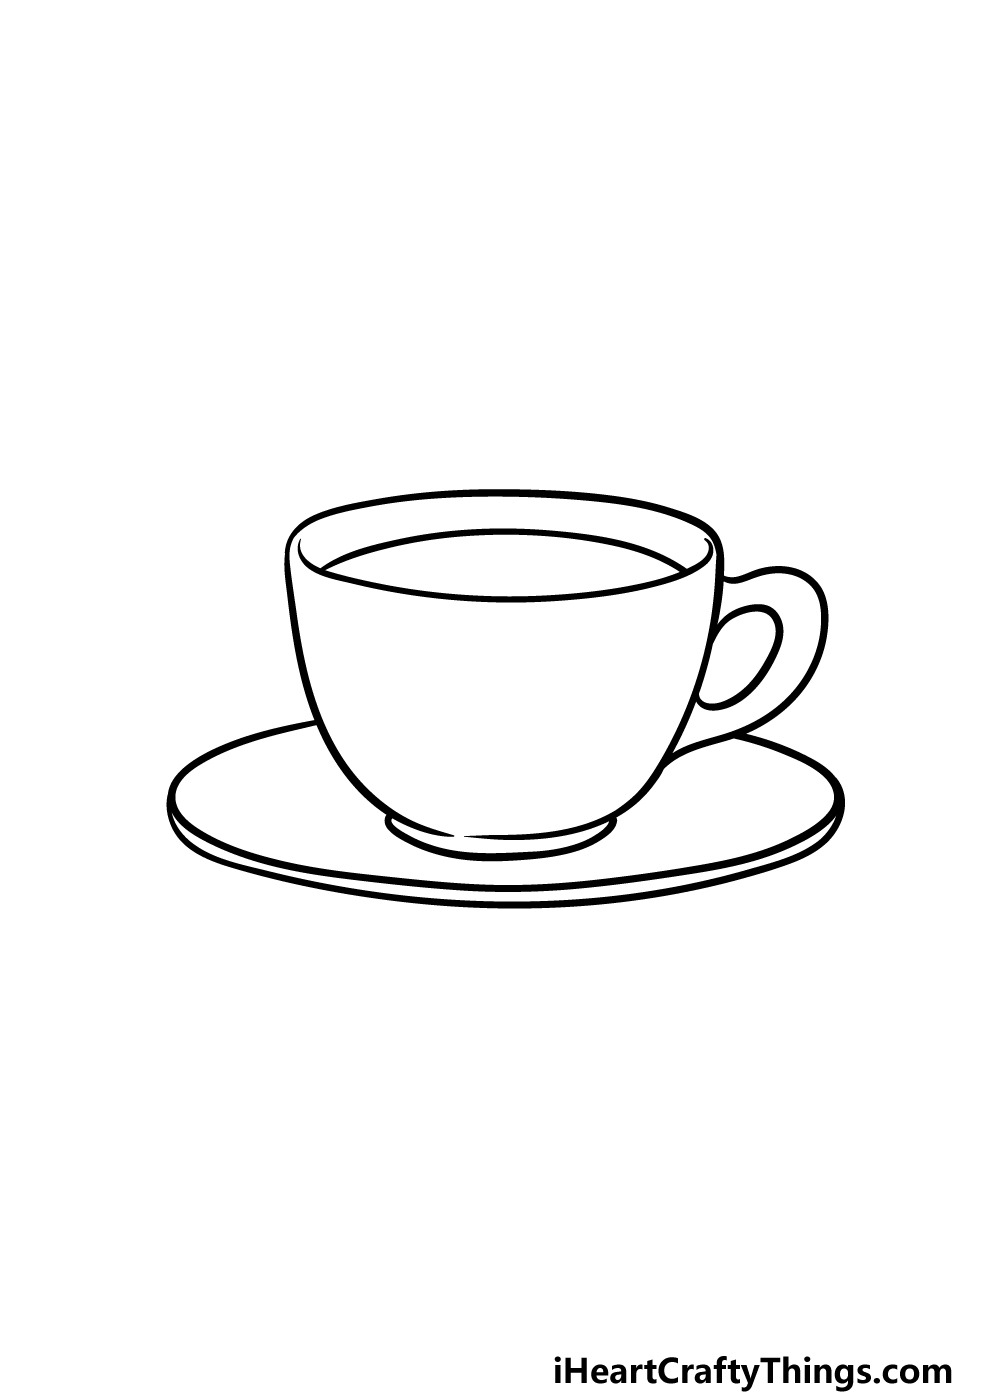
Every good teacup has a matching saucer, and that is what we will draw in this step of our guide on how to draw a teacup.
Start by drawing a rounded line starting on one side of the cup, looping under it and arriving at the opposite side on the handle.
Once you have drawn that, carefully add another line to the base of the saucer, as this will serve as the bottom rim for it. That’s all you need to do for now, so let’s proceed!
Step 4 – Now, draw some more rims for the teacup
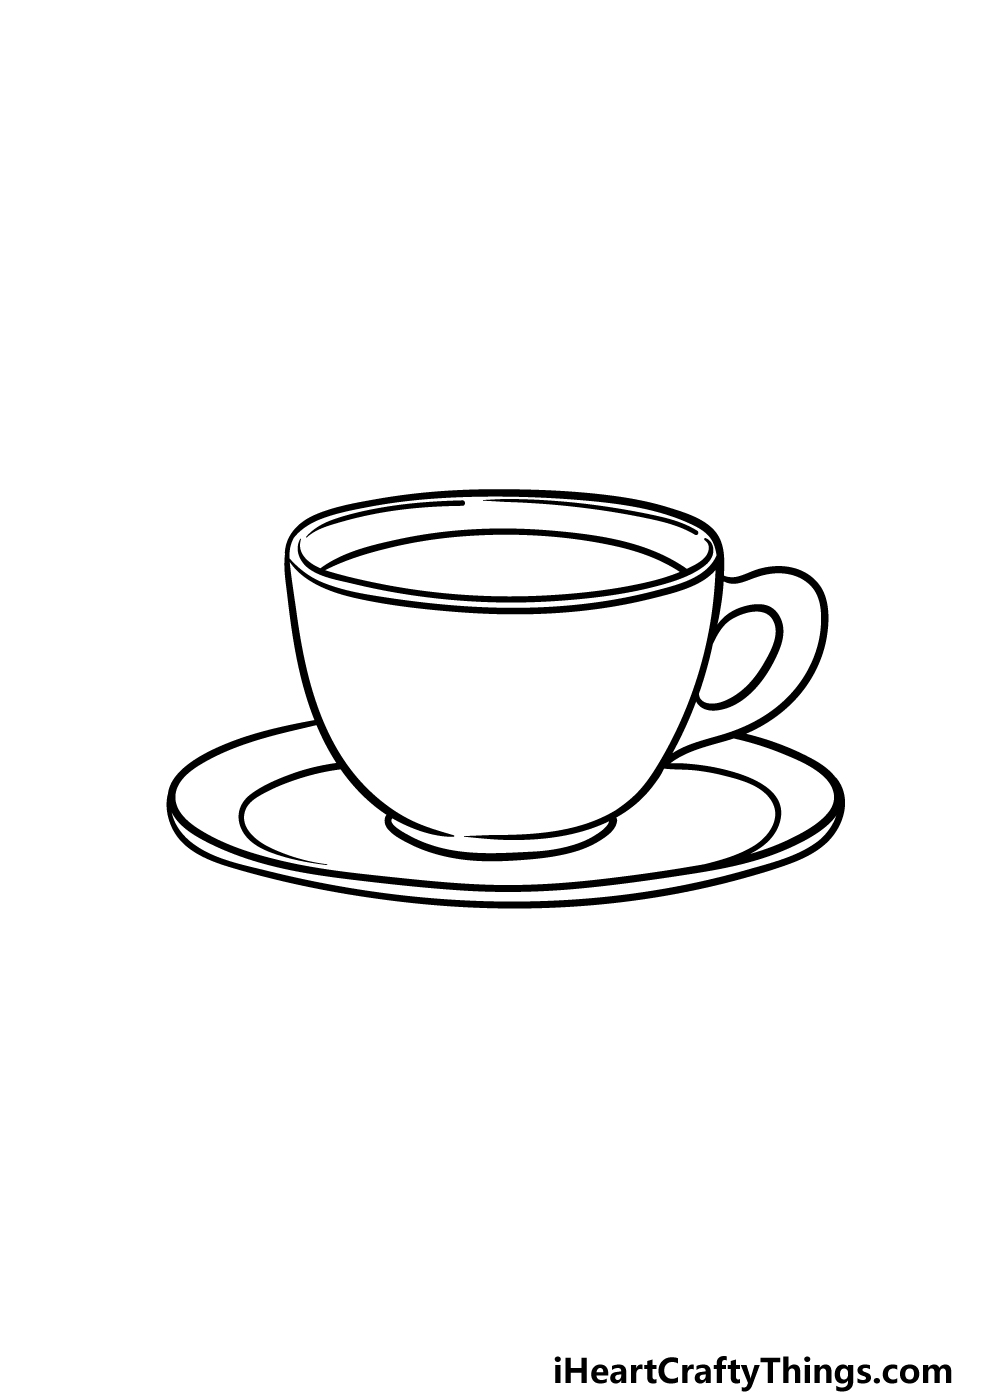
Before you start to add some final details to your teacup drawing, we will first add some more rim details for it.
To do this for the top of the cup, we will first add a line running along the perimeter of the upper rim for the cup that you drew earlier.
Then, we will add some more lines on the upper inner interior. This may sound a bit confusing, but the reference image will guide you in how it should look.
Finally, we will be drawing some more rounded lines onto the saucer, starting from one side near the bottom of the cup to the other. Then it’s time for some final details in the next part.
Step 5 – Finish off your teacup drawing
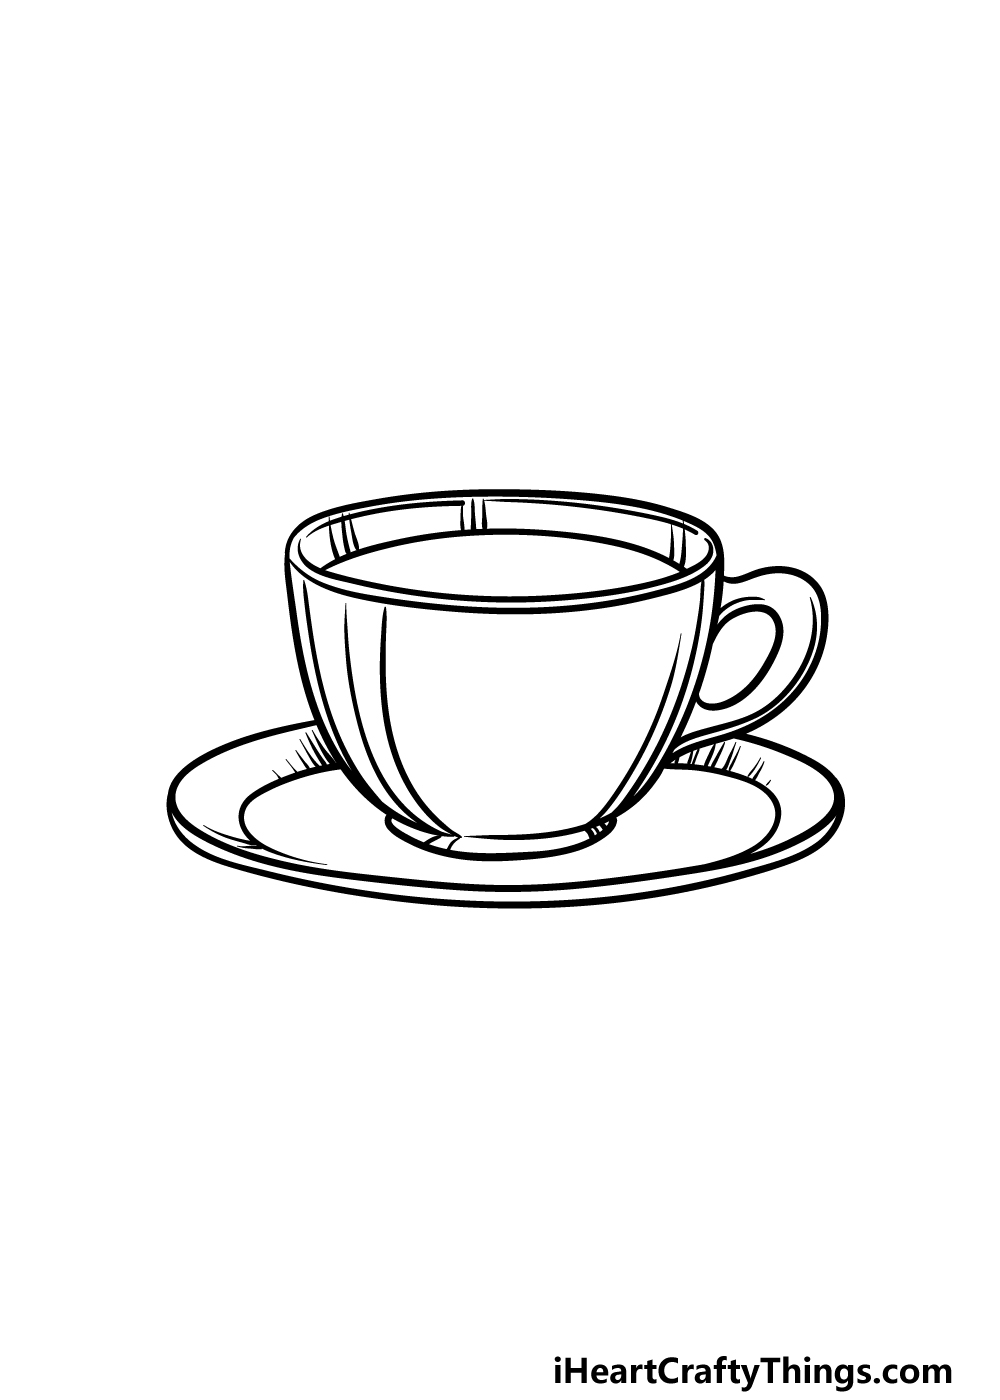
It will almost be time to color in this pretty picture, but first we shall add some final details in this fifth step of our guide on how to draw a teacup.
The details that we will draw will mostly be used to add some texture and shininess to the image. First, add some curved lines onto the body of the teacup.
Then, we will add some smaller lines coming up from the line for the tea up to the rim.
Once you have drawn these, we will then finish off by drawing some line details onto the saucer for further texture.
Then you’re ready to move on! Before you do, you could add some of your own details.
These could be some pattern details on the cup, or you could draw what kind of delicacy you would like to enjoy with this tea. What else can you think of to finish off this drawing?
Step 6 – Finish off your teacup drawing with some color
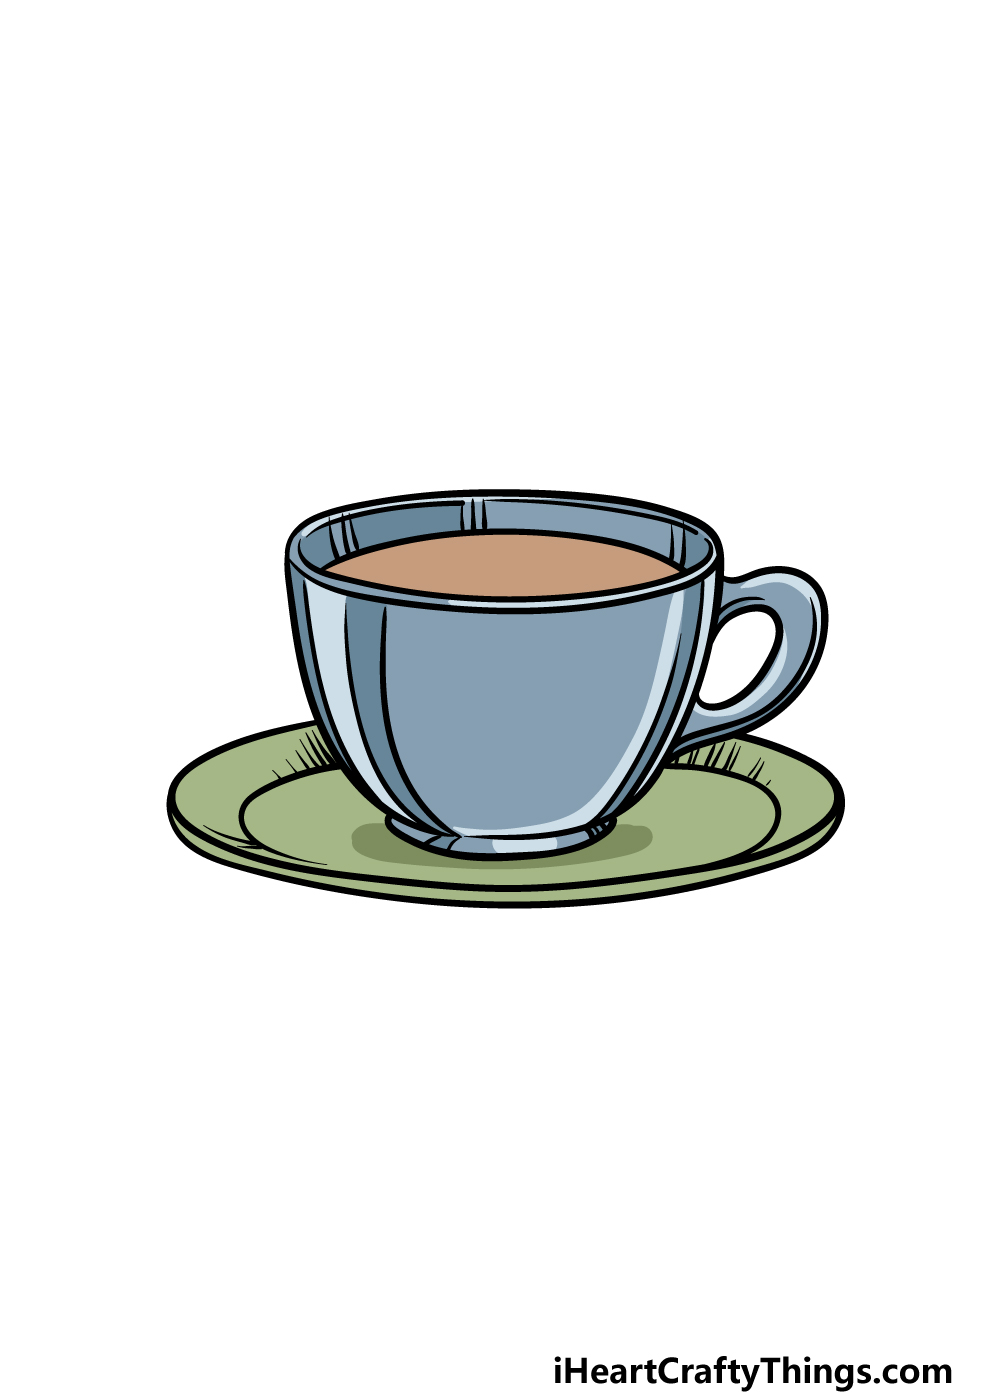
This is the final step of your teacup drawing, and in this one we will finish off with some amazing colors.
We used blues for the cup, greens for the saucer and of course some browns for the tea itself.
This drawing is all about creating your ideal teacup, so while these colors are a suggestion, you should definitely feel free to use any colors that you love for it!
You could also experiment with different art mediums to finish it off. Some watercolors would give it a nice delicate look, but it is one of many mediums that would look fantastic.
Which of your favorite colors and art mediums will you use?
Here’s how you can make your teacup drawing even better…
Sip a warm beverage as we share some tips on how to make your teacup sketch even greater!
We kept the design of this teacup drawing nice and simple, but you could add some of your own decorations to the design.
With teacups, a popular style is to have some floral patterns on the cup and saucer.
This would be a great addition to your drawing! What other styles and designs could you use for the cup?
If you or a family member has teacups, then you could use them for inspiration.
A teacup will also often be a part of a set, and that’s something you could create for this drawing of a teacup. The set could include more teacups, a teapot and maybe something like a sugar bowl.
This is another case where you could look at a real tea set for inspiration, but don’t be shy about adding some unique items!
If you don’t have a tea set handy, you could find pictures of some pretty sets online.
Many people love a nice cup of tea, but it can also be great to enjoy them with a snack. Different countries have different traditional foods that are enjoyed with tea, but there are a few common ones.
Some examples would be to have a plate of cookies or biscuits. You might also enjoy a muffin or a cupcake with some tea.
These are just a few ideas, but by adding some food to the image you can show us what you would like to enjoy with this tea!
Once you have added all of your own personal touches to this teacup sketch, be sure to finish off with some pretty colors!
We showed you one way to color it in, but the colors you choose are just a part of the process.
We think it would be fun to gather all of your favorite art tools and mediums in order to make the colors look more interesting. Don’t be afraid to mix various mediums as well!
Your Teacup Drawing is Complete!
That brings us to the conclusion of this guide on how to draw a teacup.
Whether you were designing a unique cup or making it look like a favorite teacup in real life, we hope that this guide made it fun and easy to achieve your vision!
Remember that you can also change up any details and elements that you like, and you can also get creative with your favorite colors and mediums. We hope to see how you complete this picture!
We also have many more free drawing guides on our website waiting for you to enjoy them. We upload new ones often, so make sure to keep logging in to find your new guide!
As we mentioned, we would love to see your finished teacup drawing! Please share it on our Facebook and Pinterest pages for us to admire when it’s done.