Nature is full of many beautiful and incredible flowers to behold, and they can come in an almost infinite variety of colors, shapes and sizes.
Different people have their favorites, and the lily flower is one of the most popular of all of them.
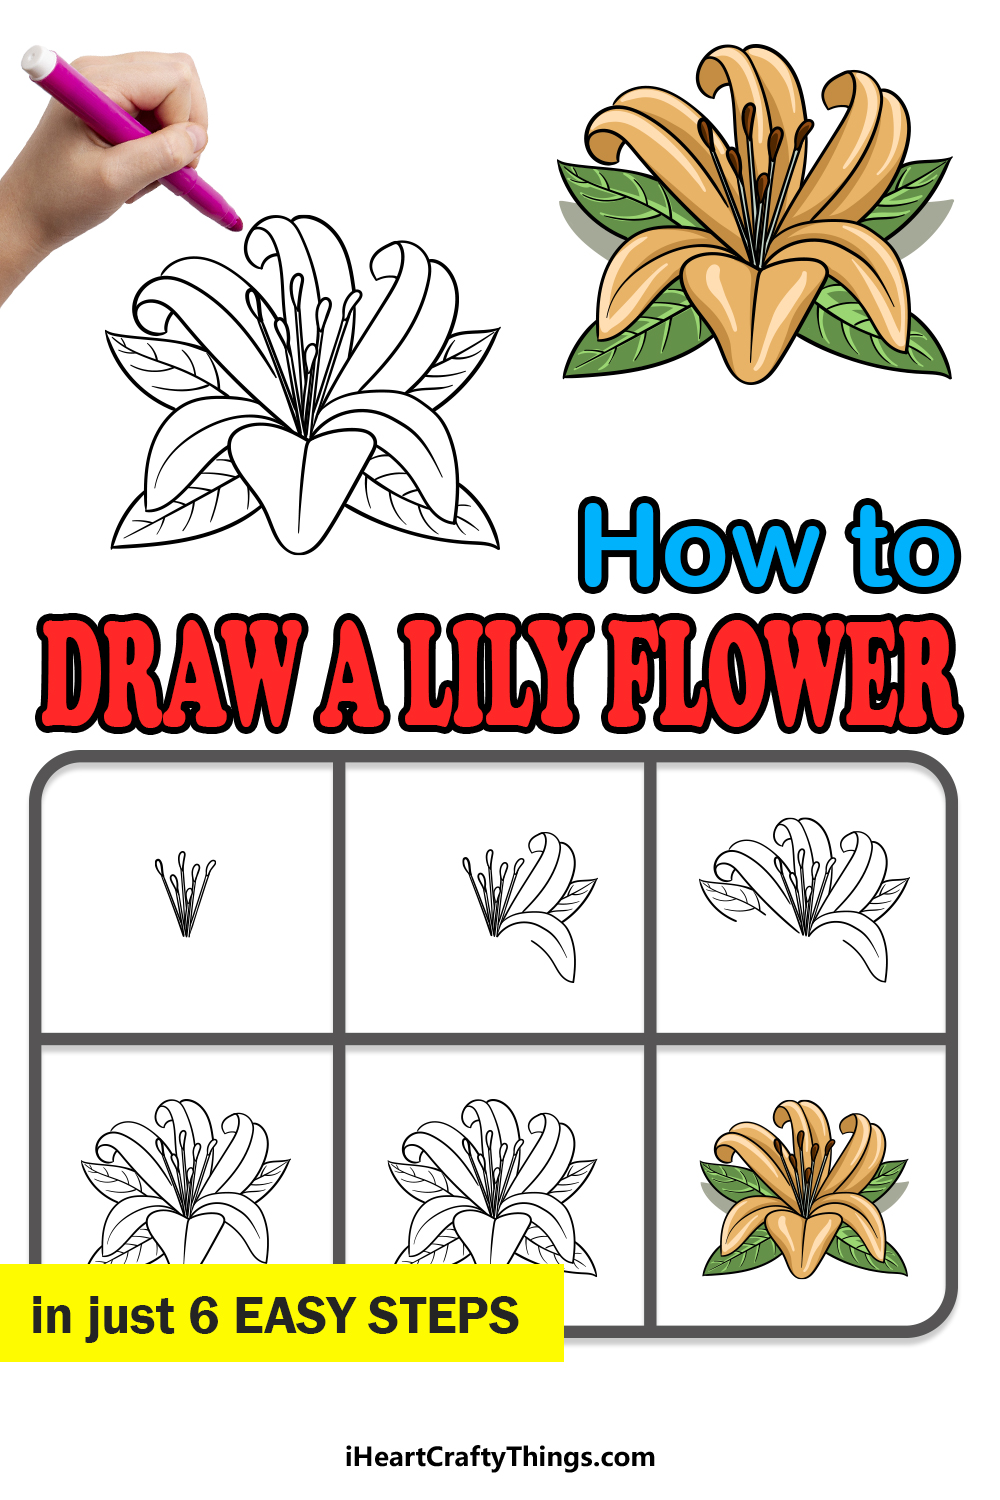
It’s one of the most beautiful and elegant flowers of them all, and learning how to draw a lily flower can be just as fun as admiring a real one!
Drawing flowers can sometimes be harder than expected though, so you’ll want to read all the way through to the end of the guide.
We hope you enjoy recreating this classic and beloved flower in our step-by-step guide on how to draw a lily flower!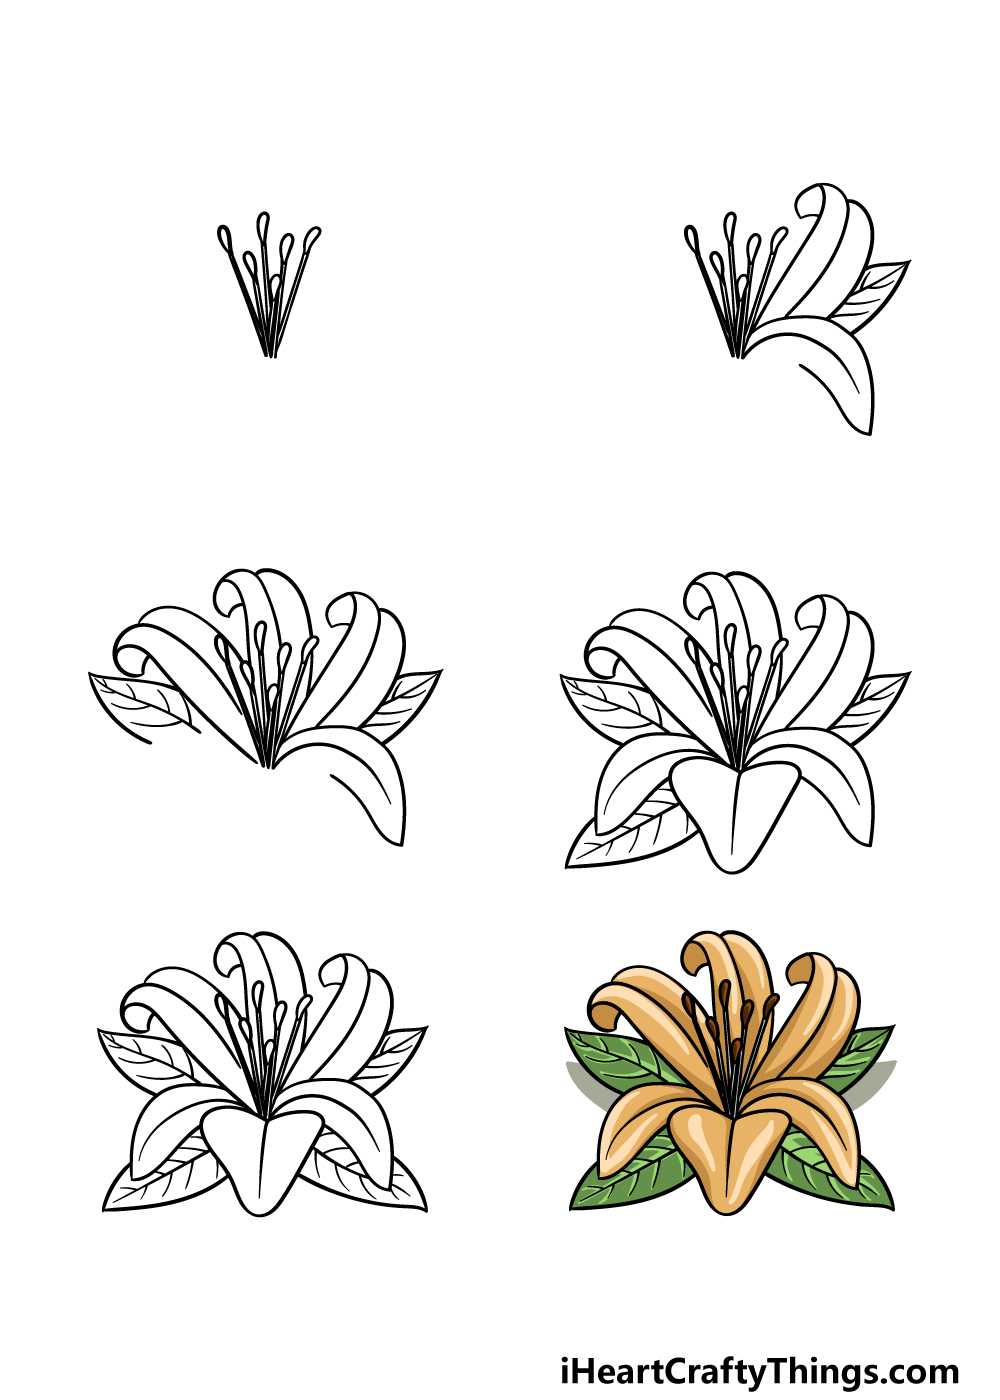
How to Draw A Lily Flower – Let’s Get Started!
Step 1

To begin this guide on how to draw a lily flower, we will start with the part of the flower known as the stamen.
These are some long, thin stalks that extend out from the center of the flower with pollen at the ends of them.
To do this, you may want to use a ruler to draw the stalks as they can get a bit fiddly to draw. We will be drawing six of these stamen, and they will all be of varying lengths.
You could replicate the lengths that we used in our reference image, but you could also change up the lengths if you wish!
Once you have drawn these stalks, you can then finish off by drawing the pollen at the ends of them by adding some rounded shapes.
Step 2 – Next, draw the petals of the flower
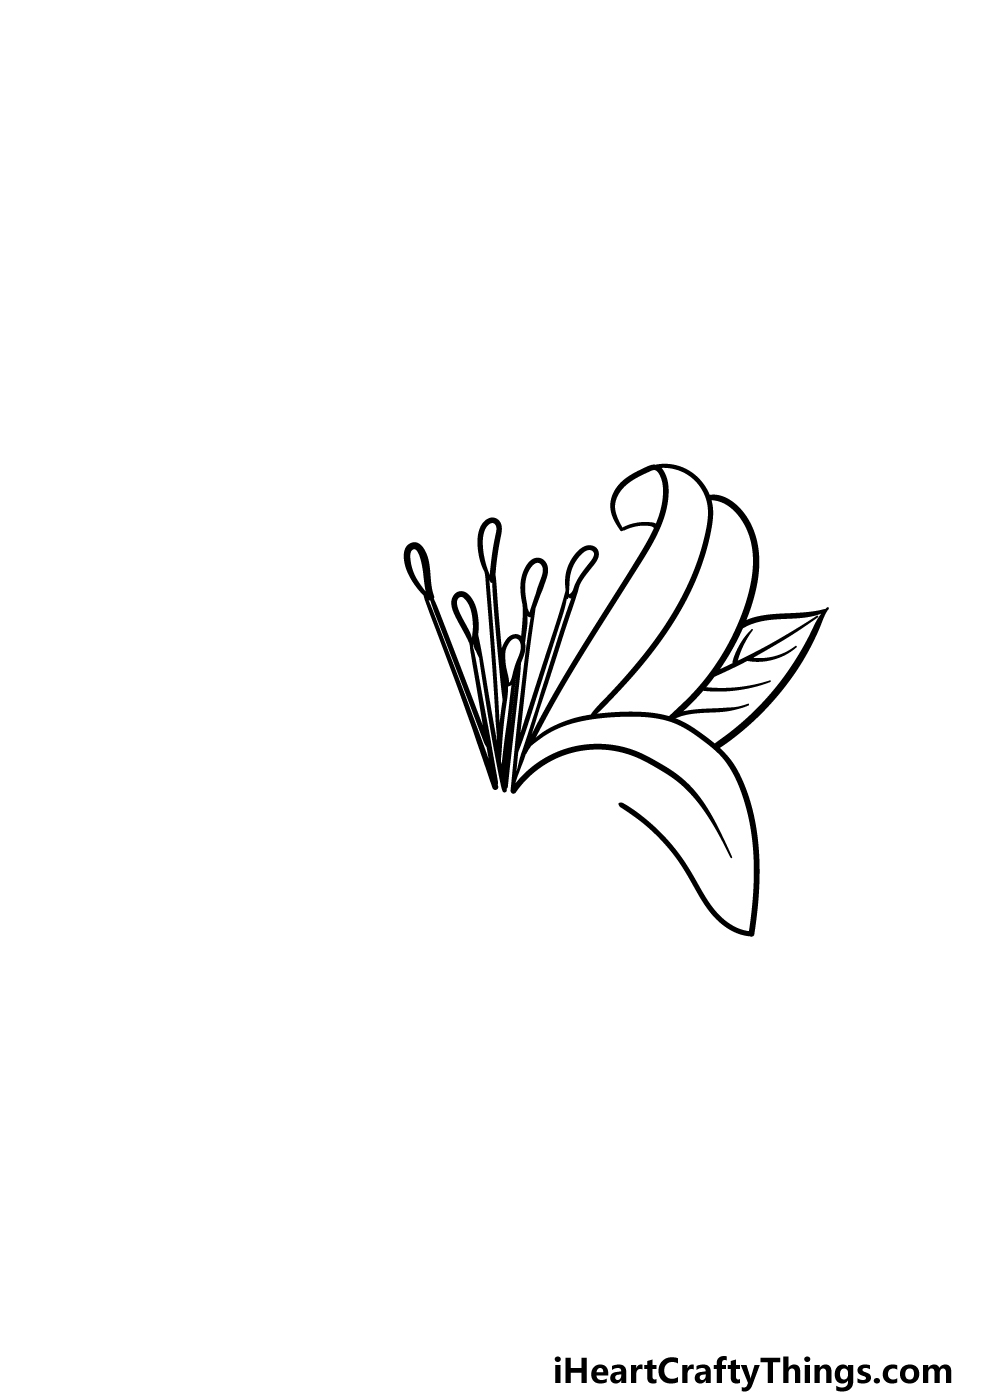
You have the central stamen of your lily flower drawing done now, so in this second step we shall start on the various petals for it. For now, we will focus on the petals and leaf on the right-hand side.
The petals of a lily are quite thin and curved, and you can draw the first one coming out from the center of the flower and curving downward.
Then you can add a curved line inside of that petal for some more detail.
There will then be another petal above that, and that will curve over to the back of the flower. Then, between them you can use another curved line for a leaf.
Then you can finish off the leaf with some vein details before it’s time for step 3!
Step 3 – Draw some more petals and leaves
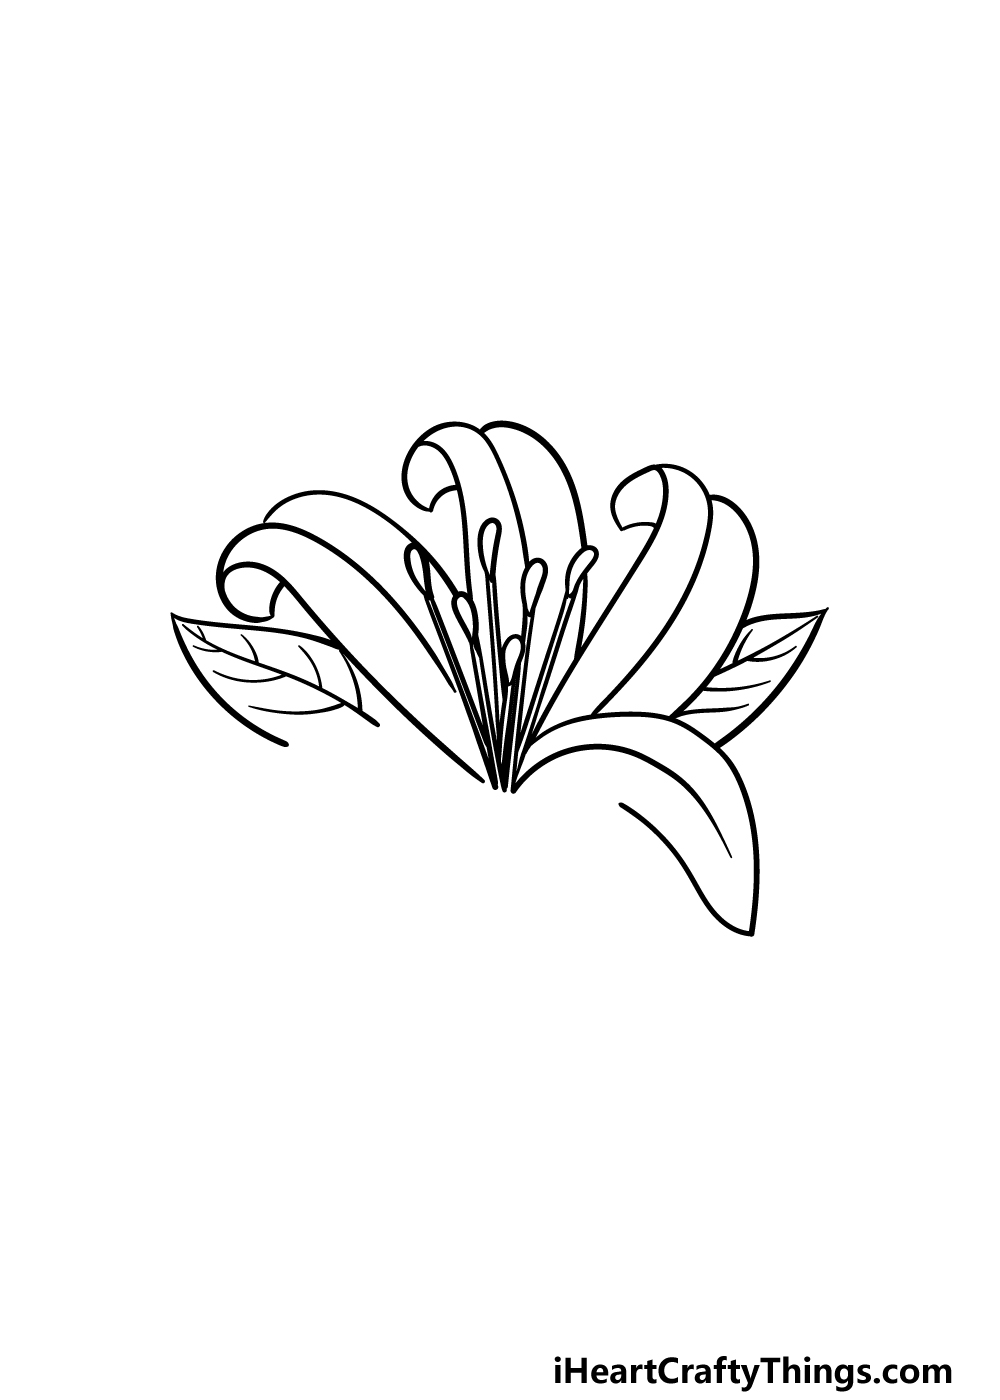
In this third step of our guide on how to draw a lily flower, we will be adding more petals and leaves to the flower.
You can draw another of the ling petals in the center of the flower, and it will also flap to the back of the flower as shown in the reference image.
Then, we will be adding another petal beside that, and it will look very similar to the previous one.
Finally, add another leaf to close off this third part. There will be a space left at the bottom of it as we will have petals and leaves in front of it later.
Step 4 – Now, draw the front of the flower
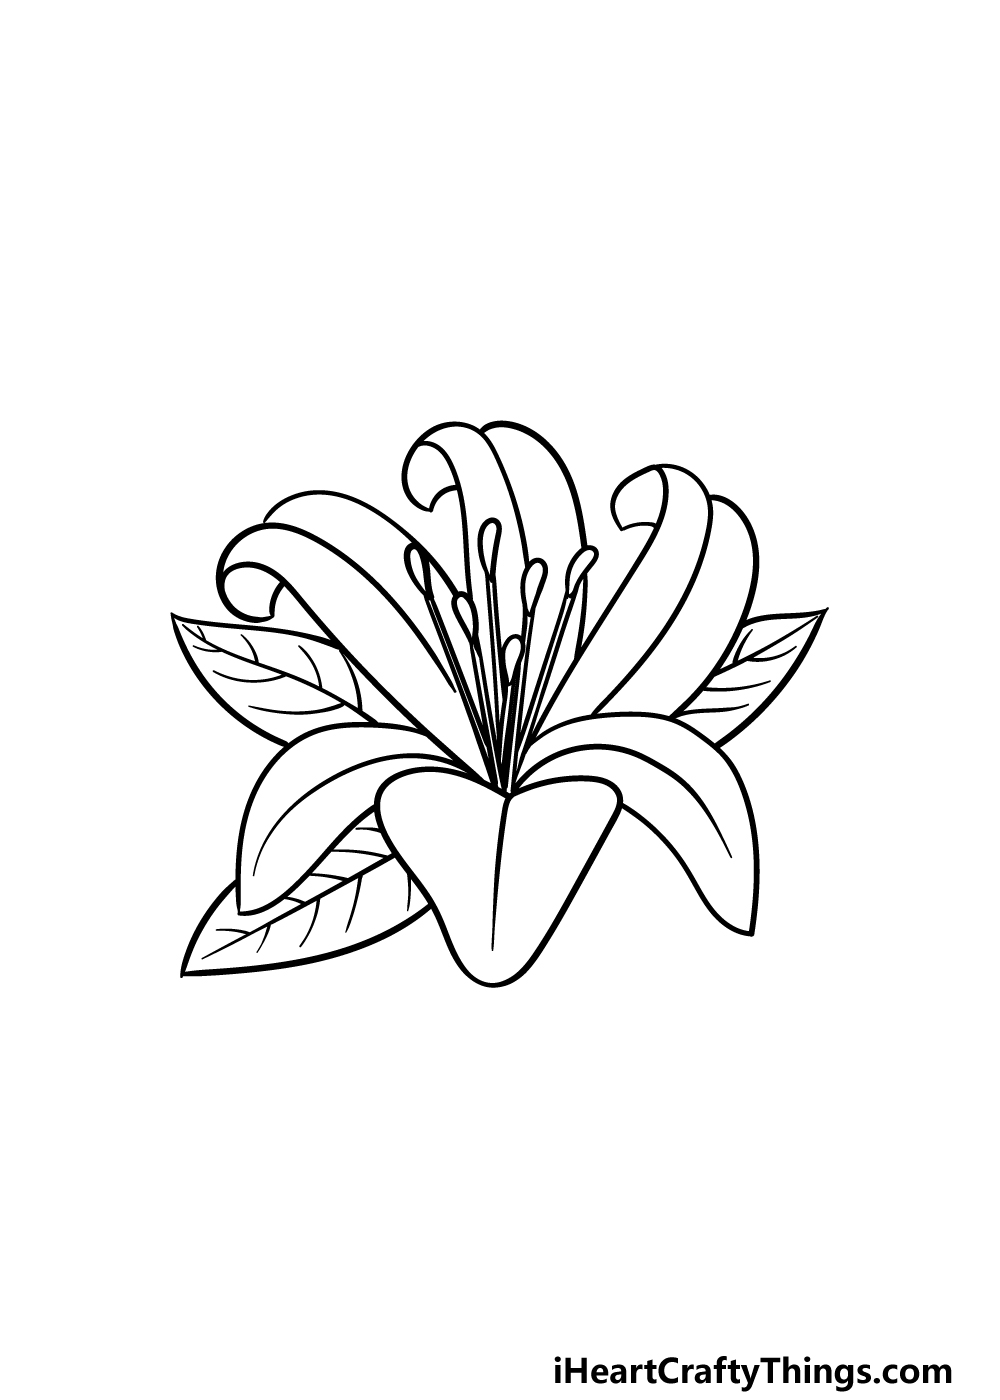
It will be time to add some petals and leaves to the front of the lily flower drawing in this step. First, we will be drawing one on the left-hand side flopping down.
There will also be another leaf, but before we draw that we shall first add another petal to the front center of the flower.
This one will be thicker and flatter than the previous ones, and it will also have a line down the center of it.
Once that is done, we can move on to some final details in the next step!
Step 5 – Finish off your lily flower drawing
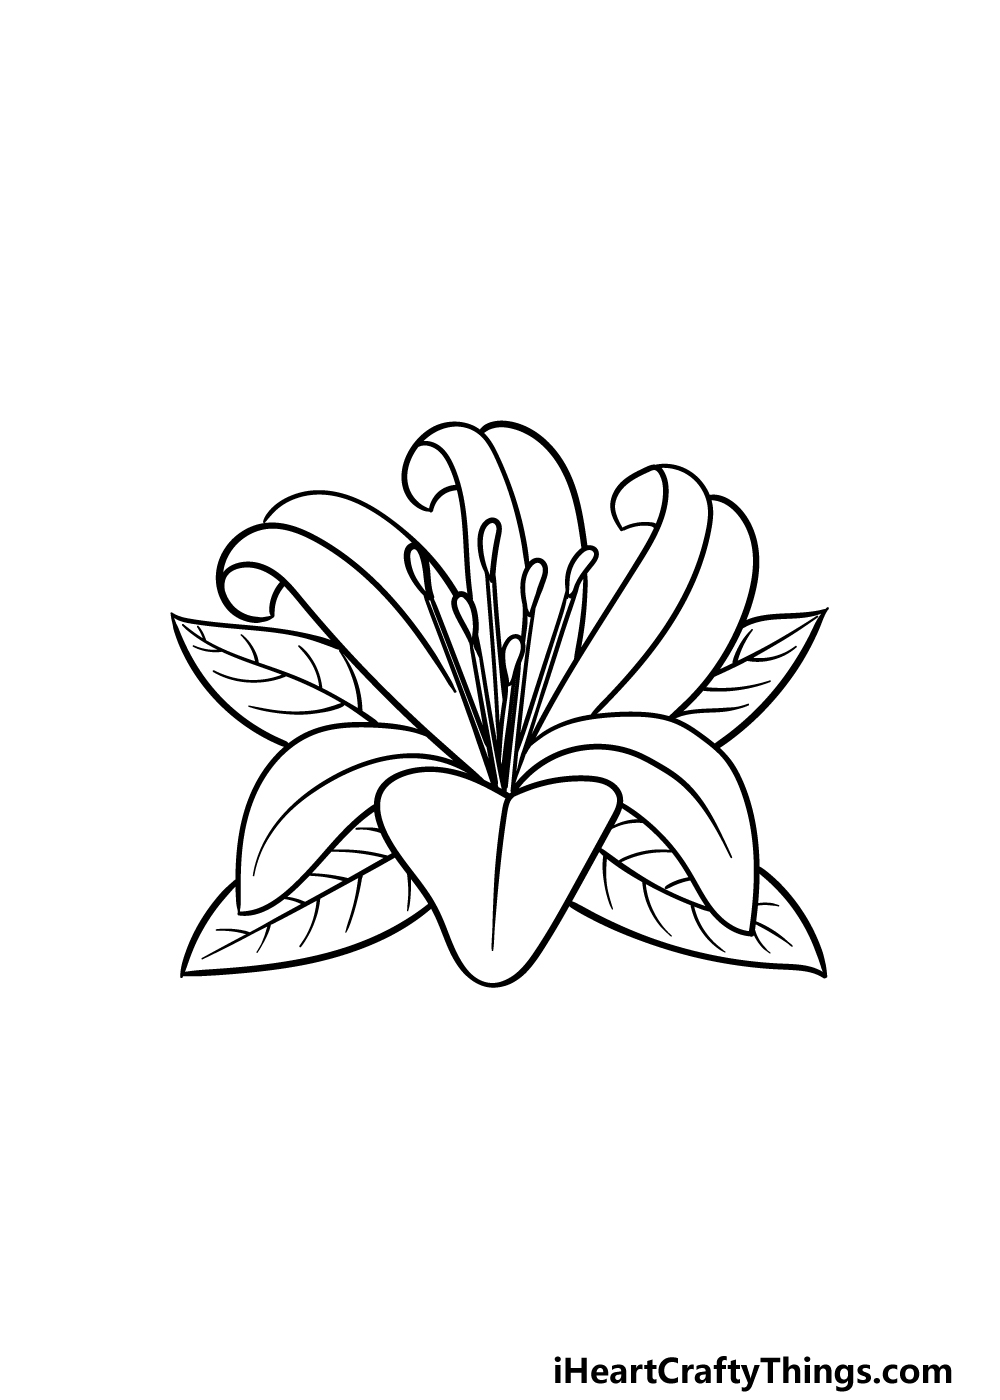
In this step of our guide on how to draw a lily flower, we will finish off with some final details. First, finish off by drawing one more leaf on the right-hand side of the lily flower.
Once you have drawn that leaf, you have finished all of the details in this guide!
Before you move on, now is your chance to show off how creative you can be by drawing your own cool details and elements.
You could draw some more lilies to go with this one, draw some more of your favorite flowers or draw some animals and other elements to go with it!
These are just a few of the ideas that you could try, but the sky is the limit!
Step 6 – Finish off your lily flower drawing with some color
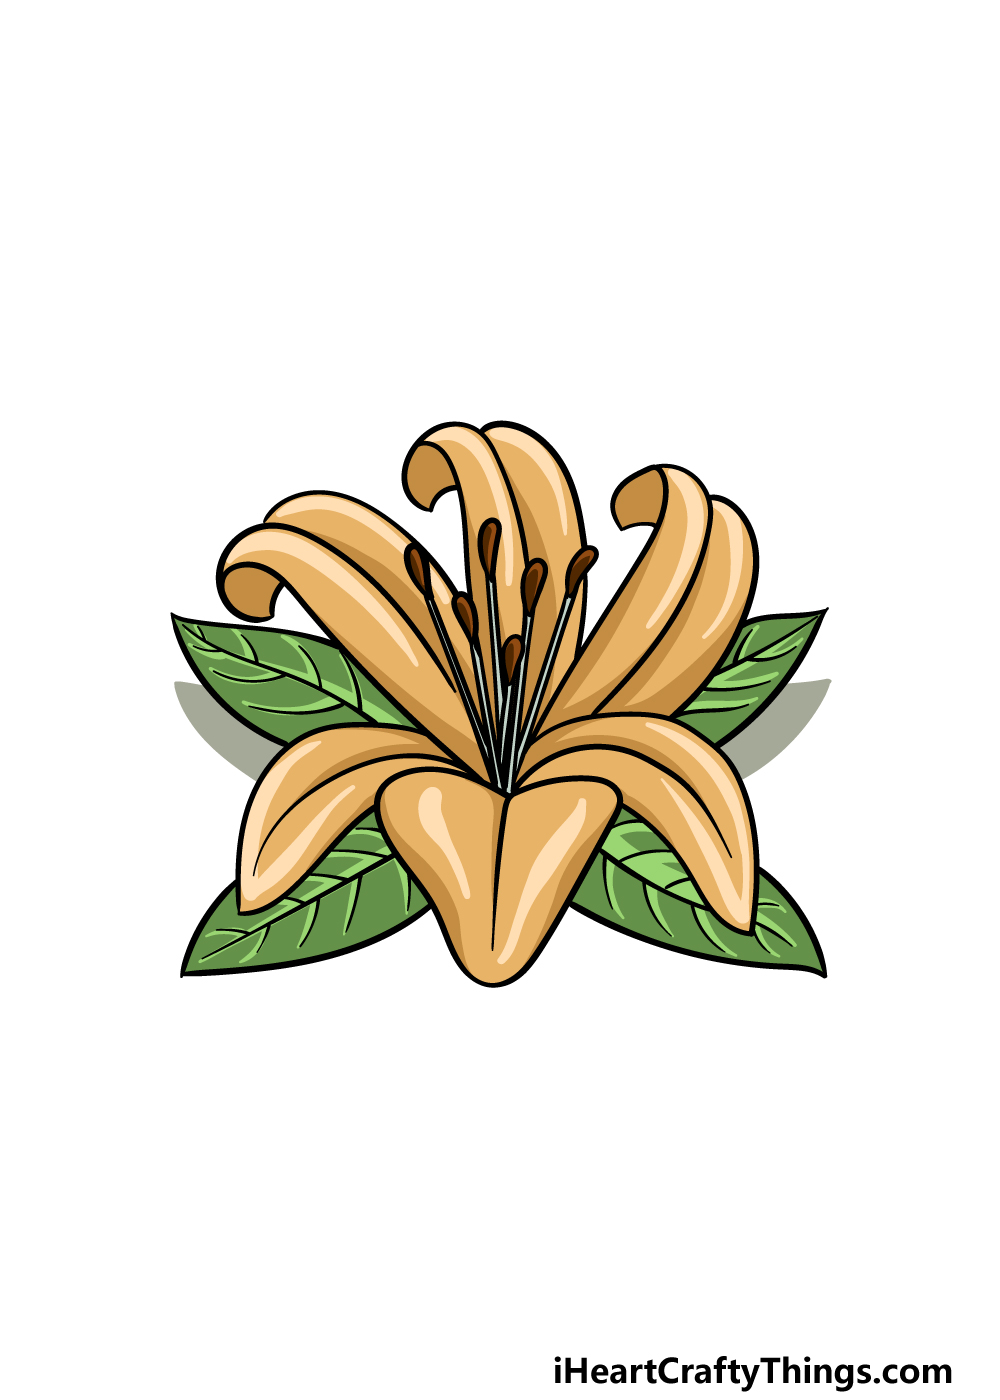
This is the final part of your lily flower drawing, and this is where you can finish it off with some amazing colors!
A lily flower can come in many different colors and shades, and in our reference image we showed you just one way to color it in. This is just a suggestion, and you should go ahead and use any colors that you love to finish it off!
Once you know which colors you would like, then it’s just a matter of choosing which art mediums and tools you will use to complete it.
There are mediums like acrylic and colored pens that are nice and bright, but you could also go for more subdued ones like colored pencils and watercolors.
We will be looking forward to seeing what colors and mediums you use to finish off your artwork!
Here’s how you can make your lily flower drawing even better…
Make this pretty lily flower sketch even better with the help of these 4 tips.
When you see a lily flower floating in the wild, they will often be joined by other lilies. Now that you know how to do this drawing of a lily flower, you could add some more to this artwork!
They could be scattered all around this one, and it will create a beautifully elegant scene. Little changes can be made to the details to make each lily flower unique.
How many lilies would you like to add?
Adding other lily flowers is one way of populating this artwork. If there are other flowers you like, then you could also add them to create a floral arrangement.
You could go for other kinds of lilies or go for a bolder flower such as a rose. These are just a few of the beautiful flowers you could have in this image.
What are some flowers you would like to add to this arrangement to make it even prettier?
Another way that you could add some life to this lily flower drawing would be by adding some small animals and wildlife to the picture.
One example of this would be to draw a cute frog sitting on or near the lily flower.
Or, you could go for other small animals such as birds or fish. These little creatures would help to bring some life and vibrancy to the picture no matter how many flowers you do or do not include.
Finally, once you are happy with the scene you are creating in this lily flower sketch, you could make it even more defined by adding some background details.
We already spoke about adding more flowers or animals, but you could also add some water details, plants and even a landscape. If there is a pretty place in nature that you love, you could use it as a model for this drawing.
What sort of larger setting would you like to create for this image?
Your Lily Flower Drawing is Complete!
That will finish all of the details and colors in this guide! By breaking it down into some smaller more convenient steps, our aim was to make this an easy and fun drawing for you to take on. Hopefully we succeeded in this goal for you!
We also ran through a few ideas that you could go with to finish off the image. These ideas included adding some more flowers and objects, but this is your chance to show off your creativity!
When you’re ready for more drawing challenges, be sure to check out our website for more awesome drawing guides. Be sure to visit often because we keep uploading guides for you to enjoy!
We would love to see how you finished off this lily flower drawing, so please be sure to share it on our Facebook and Pinterest pages so we can enjoy your creativity!