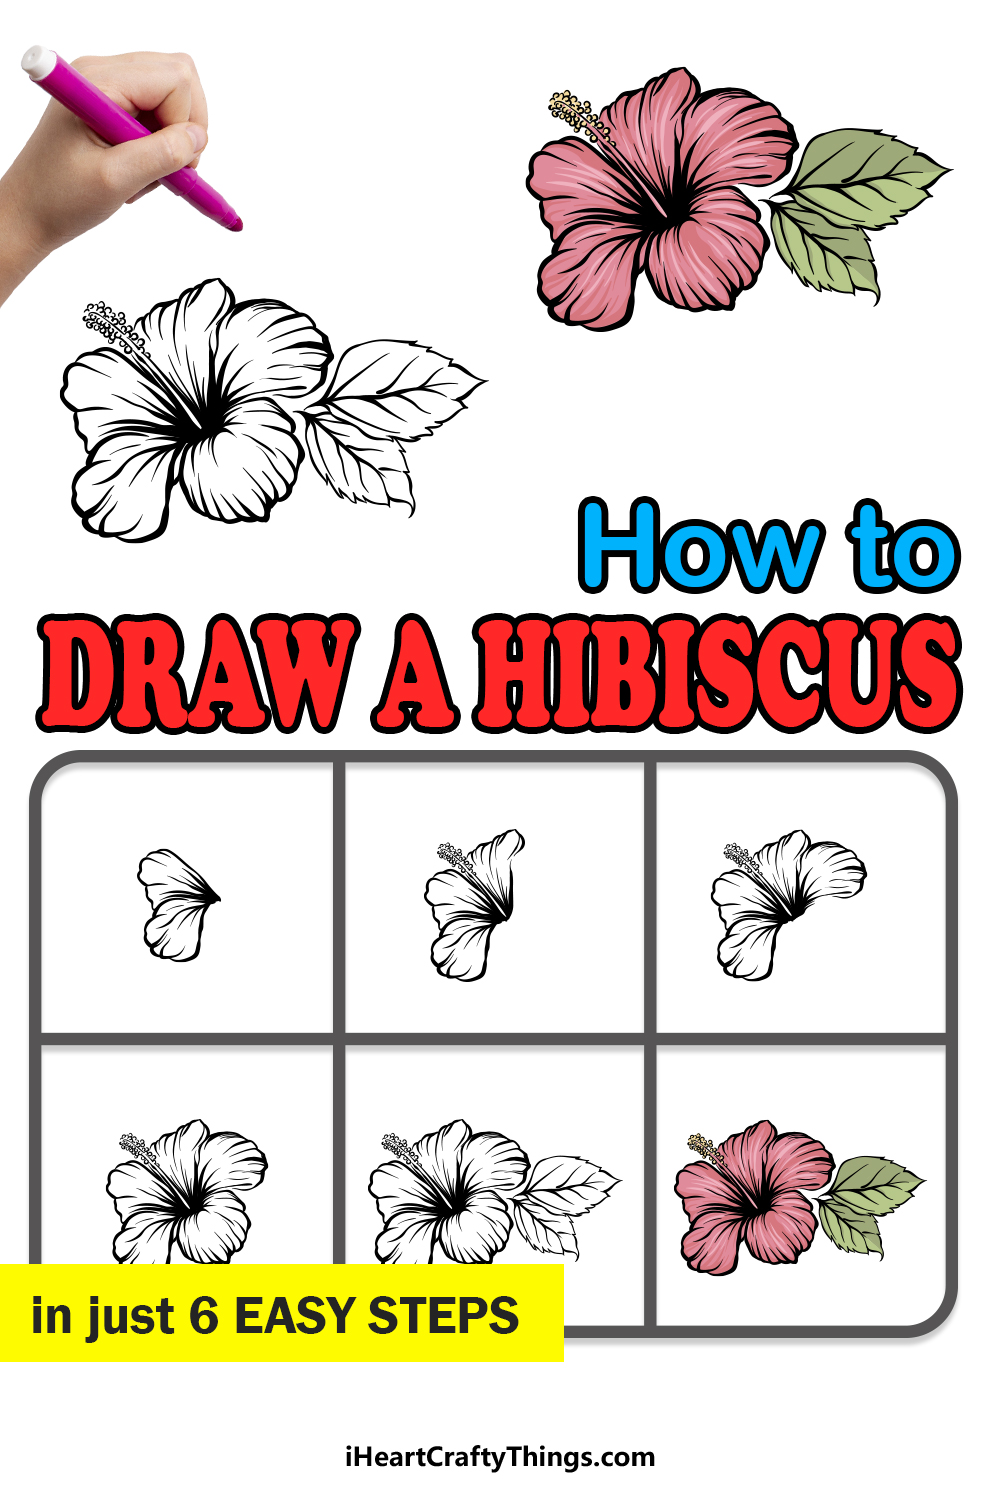
Learning how to draw a hibiscus is a great way to bring some more beauty into your day! Find out how to recreate this gorgeous flower by following along with me.
The hibiscus is one of my favorite flowers, as they have such delicate, elegant beauty. I also love their soft pink coloring, and so I can see why it’s so popular to depict them in art.
Drawing them can be harder than you expect, though. To make it simpler, I have broken it down for you so that you can break it down to make it more manageable.
Once you have followed along, you will be creating floral artwork in no time at all! Then you can incorporate other details and elements as well.
It’s a great way to show off your creativity, and it all starts with the first step.
Create A Gorgeous Hibiscus Drawing By Watching This Guide
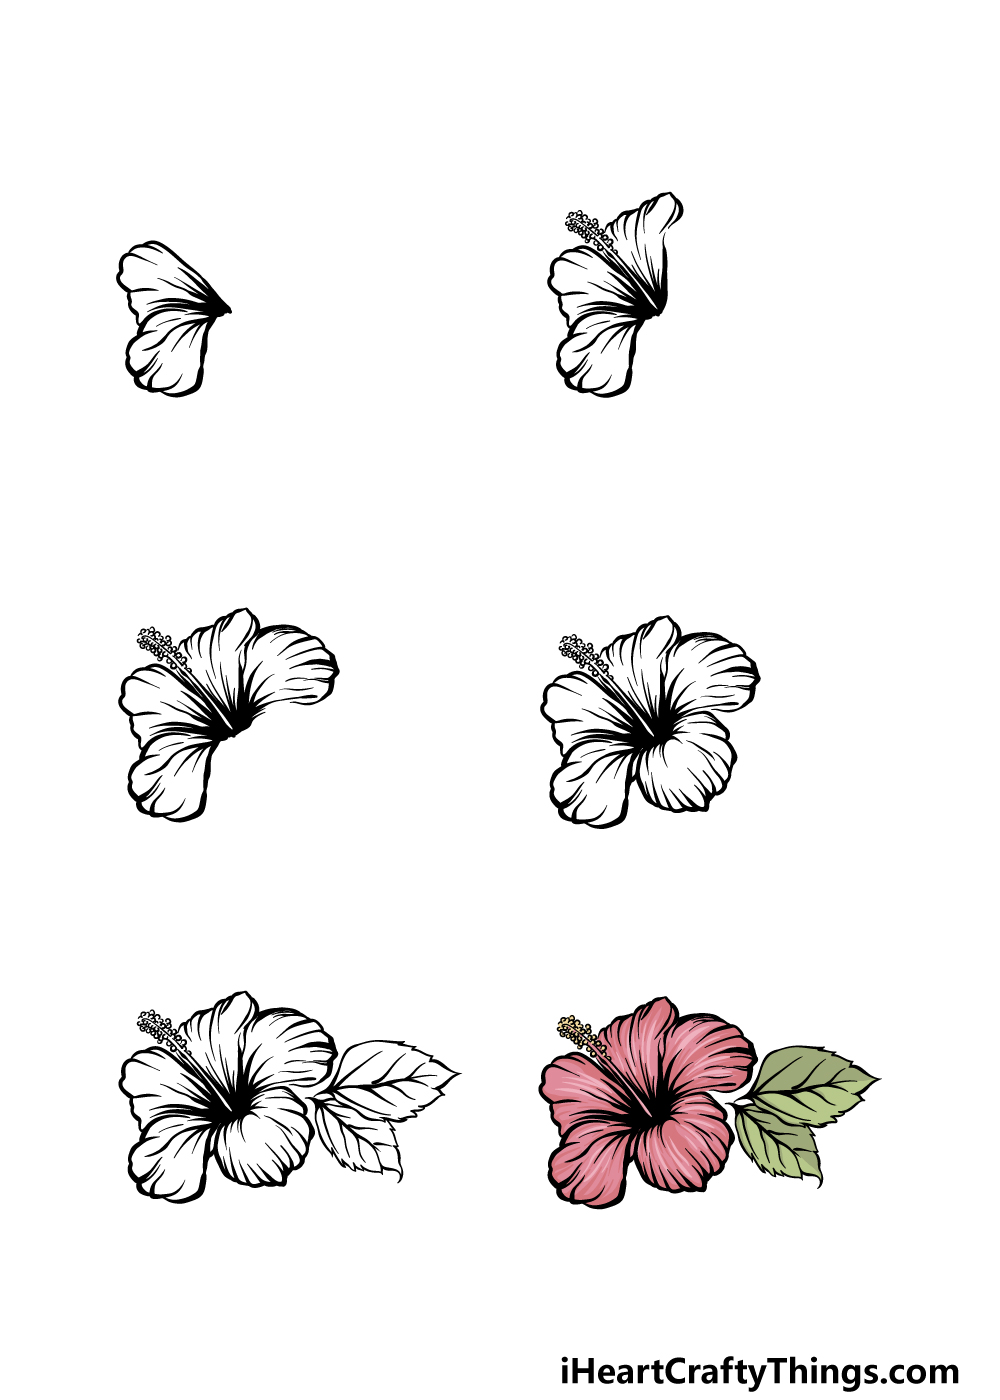
How to Draw A Hibiscus – Let’s Get Started!
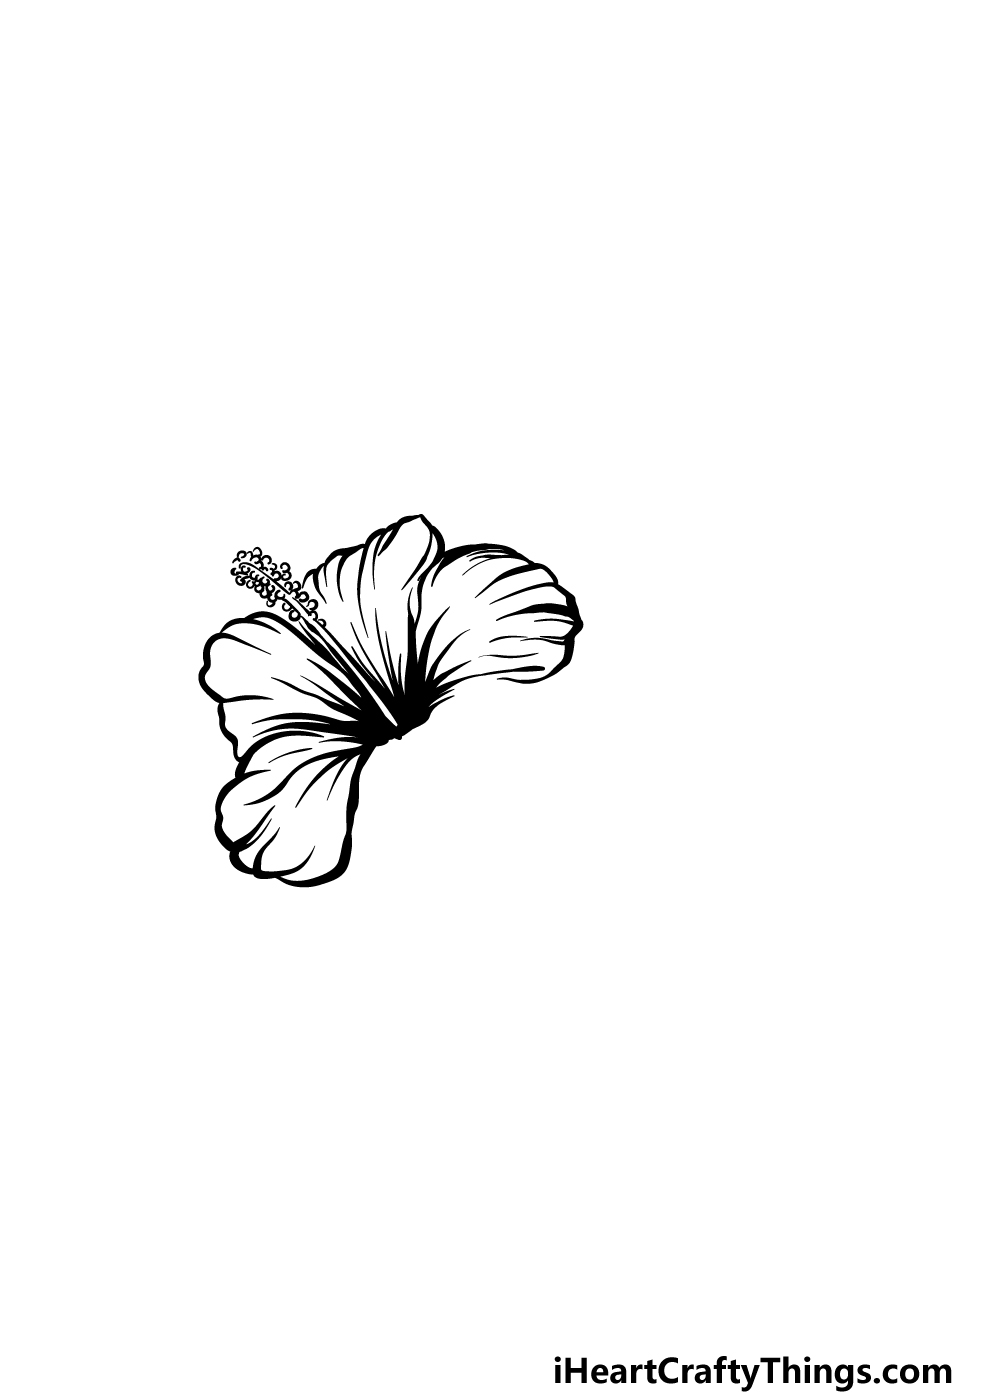
Step 1
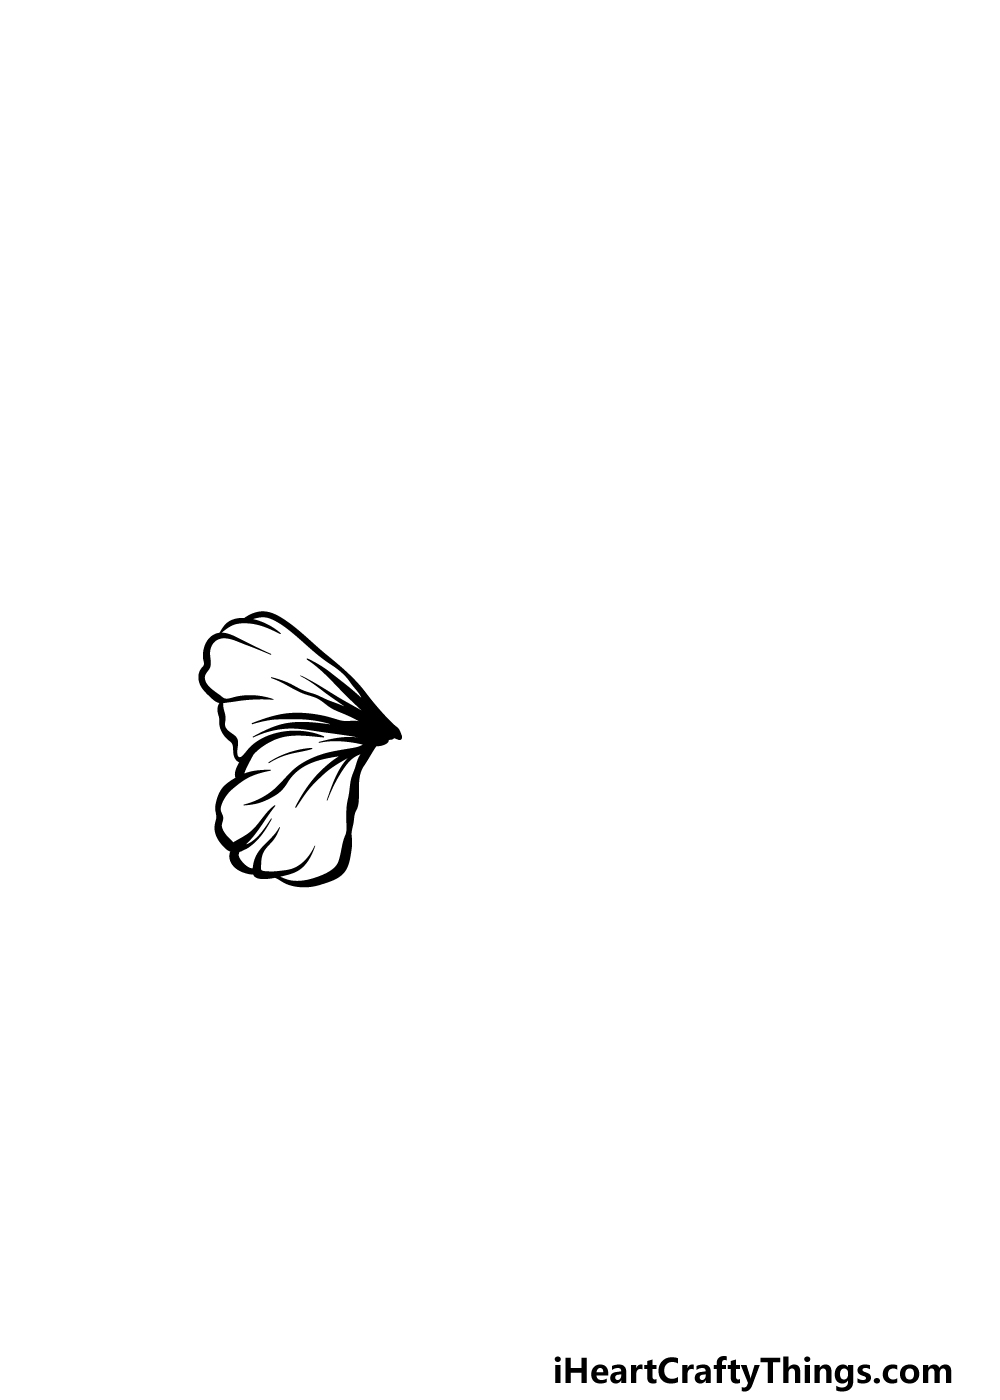
This is the first step of our guide on how to draw a hibiscus, and we will start by drawing two petals for the flower.
At the center of the flower, there will be lots of solid black with the lines of the petals extending out into the petal. With that in mind, you can draw the rounded petals that connect to this central shape.
The petals will have fairly bumpy edges to them for that extra detailing.
Once you have drawn these two petals and their thick line detailing, you will be ready to move on to step 2 where we will build more onto the flower.
Step 2 – Next, draw another petal and the stamen
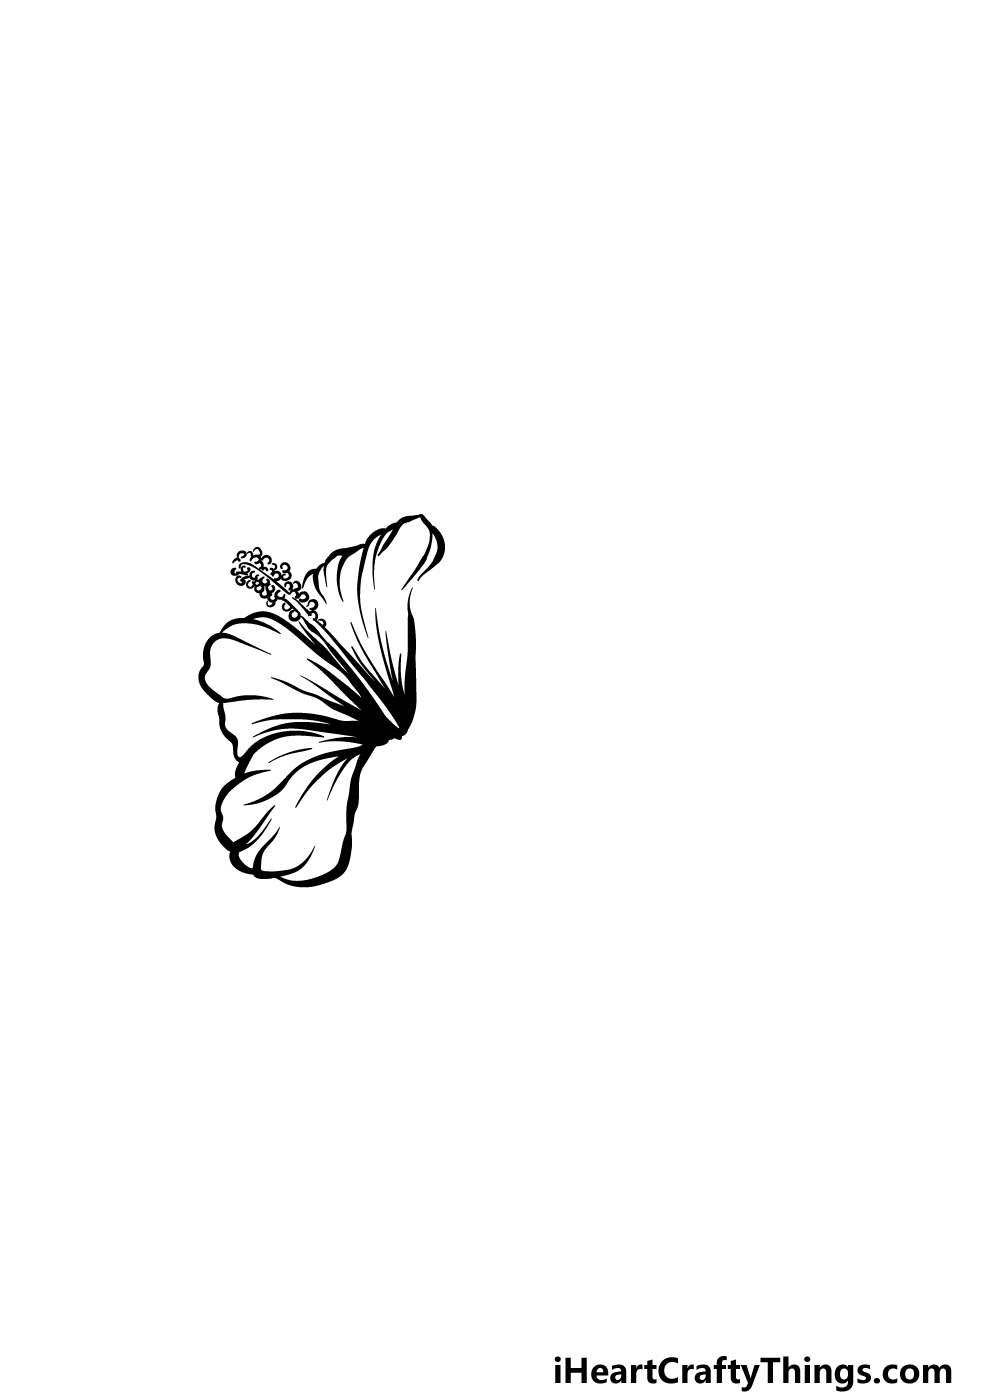
In this second part of your hibiscus drawing, we will be adding not only another petal onto the flower, but also the stamen poking out from the center of the flower.
The stamen is a thin stalk that holds pollen, and it can be drawn with two curved lines running close to one another.
Then, you can draw lots of little small round shapes onto the end of it for that pollen that we mentioned earlier. Once this stamen is drawn, you can then add another large petal onto the top section of the hibiscus.
This petal will be like the ones that you drew previously, and will have those same thick line details on it.
Step 3 – Draw another petal for the hibiscus
We will be adding another petal to your flower in this step of our guide on how to draw a hibiscus.
You’ve been doing a great job with drawing these petals in the last few steps, and now all you need is to draw another one for the flower.
This one will be on the top right-hand side of the flower, and once it is drawn we will have just one more to add, so let’s proceed!
Step 4 – Now, draw the final petal for the flower
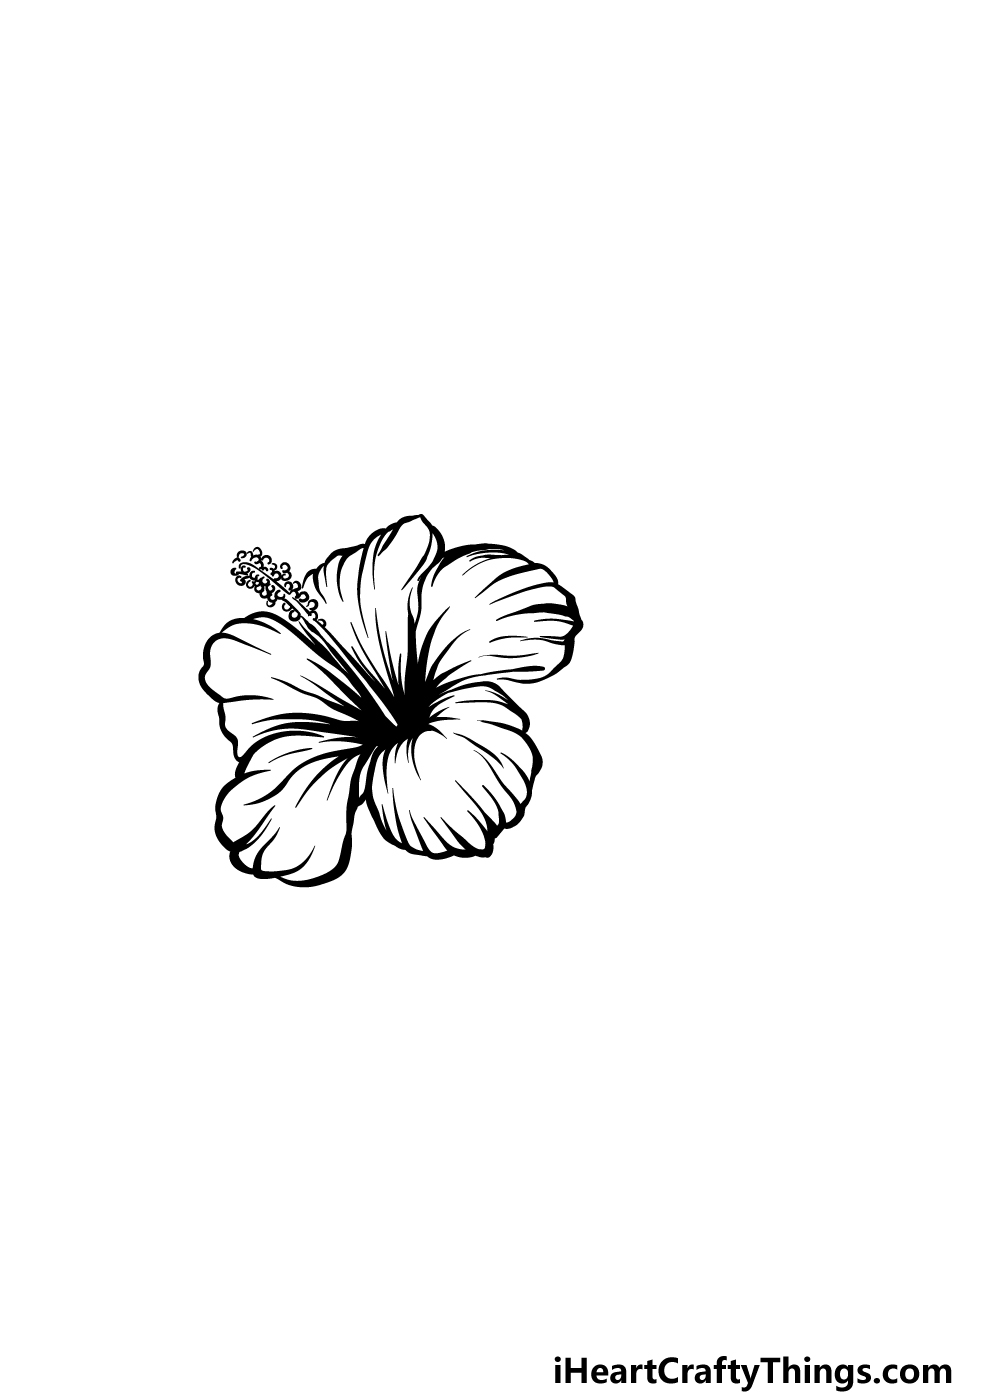
Before we add the final details to your hibiscus, we have just one more petal to add.
This petal will fill in the space near the bottom of the flower that you left in the previous step, and will have the same line work and detailing of the previous parts.
Then in the final step we will be finishing off with the final details and elements.
Step 5 – Finish off your hibiscus drawing
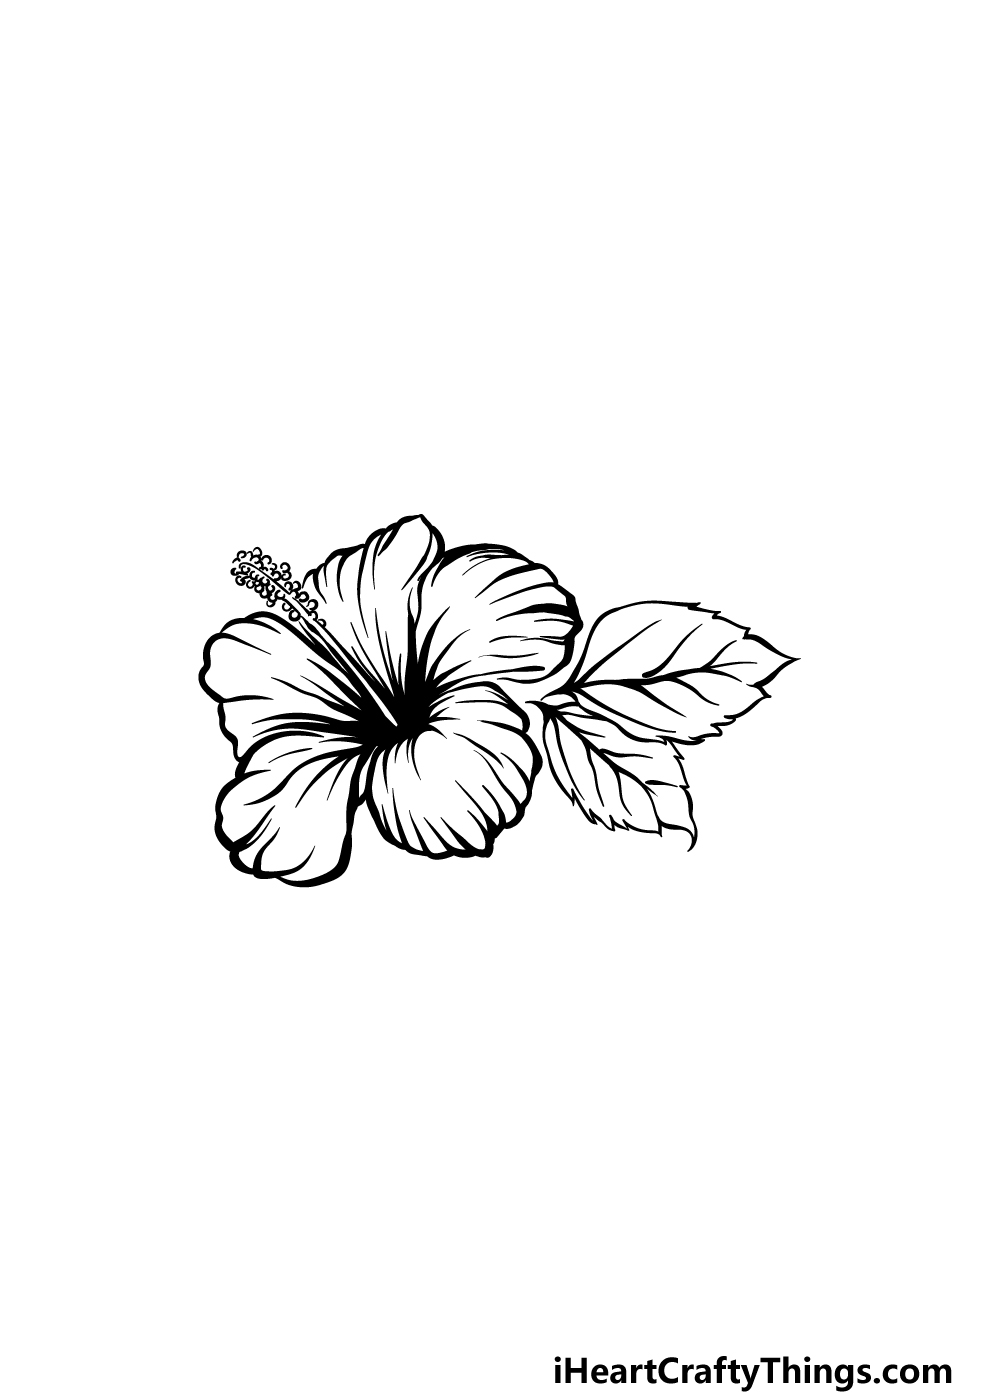
You’re almost ready to complete your flower in the final step, but first we have some details to add in this step of our guide on how to draw a hibiscus.
You can finish off by drawing some leaves on the right-hand side of the flower. These leaves will have some rounded edges with some jagged lines for the outlines.
Once you have replicated these leaves, you have finished all of the details! Before you move on, you can also add some elements of your own.
There are loads of great ideas that you could go for, such as drawing these flowers in a garden with some more of your favorite flowers.
This is just one idea that you could try out, but you can have fun getting creative and customizing your drawing as you like!
It will be great to see the creative ways which you will finish off this beautiful picture, so have fun and let your imagination run wild!
Step 6 – Finish off your hibiscus drawing with some color
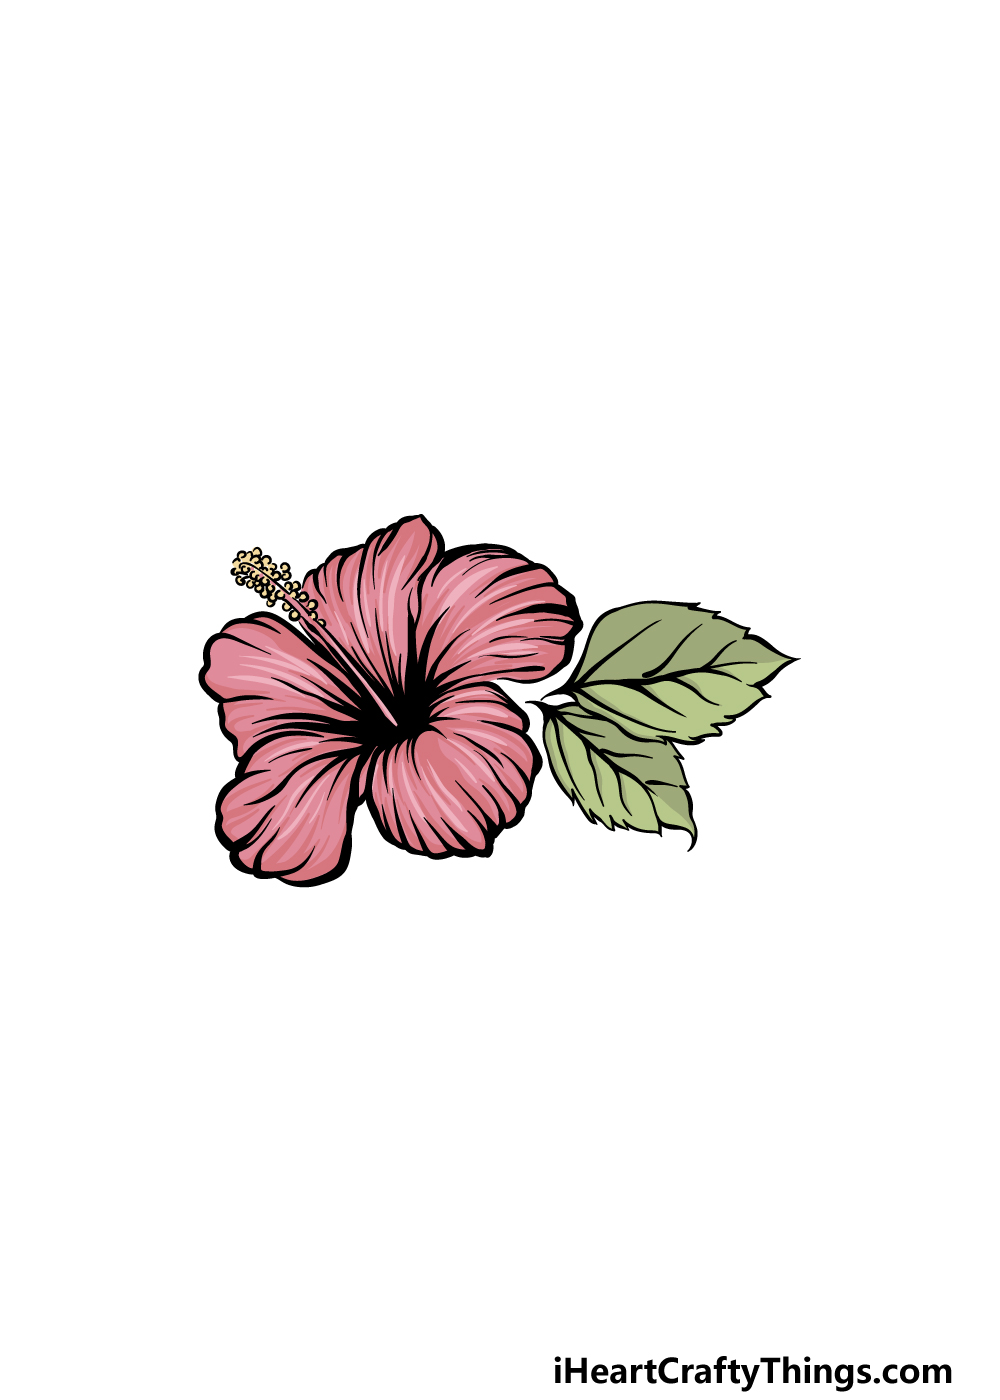
The final step of your hibiscus drawing will be all about finishing off with some amazing colors!
In our reference image, we used a beautiful red shade for the petals of the flower along with some greens for the leaves.
These are the colors that we chose for our hibiscus, but this is your drawing and the colors you use are up to you!
You could use some similar colors to ours, but there are loads of other colors you could also go for instead! Picking your colors is just half the fun, though.
There is also a lot of fun to be had with choosing the art mediums and tools to complete the colors.
There are options such as acrylic paints and colored pens for some bright and vibrant colors.
On the other hand, you have mediums such as colored pencils and watercolor paints to create a more subdued look.
It’s completely up to you, so what colors and mediums do you think would best suit your beautiful hibiscus drawing?
Here’s how you can make your hibiscus drawing even better…
Make this gorgeous hibiscus sketch look even more stunning with these ideas to try!
This drawing of a hibiscus looks amazing with just the one flower, but it would only look even more incredible if you were to add some more.
Now that you know how to draw a hibiscus, you could add as many more to this drawing as you wish. By changing the angle or direction, each flower could be unique as well.
How many hibiscus flowers would you like to have in this picture?
If you want to create a beautiful bouquet, you don’t have to stick to just the hibiscus flower. In fact, you could add any other plants and flowers that you love.
If you need some help drawing your favorites, you could use real life ones you’ve grown or look up some online.
Adding more flowers will not only make the drawing more vibrant but will also allow you to add some amazing colors.
Now the question is which of your favorite flowers would you like to add?
Small details can make a picture look even more amazing, and there are loads of small ones you could add to this hibiscus drawing. One example would be to add some insects or other small creatures.
It may sound like a small thing but having some bees buzzing around the flower can make it feel so much more alive. This is one example, but you could add any other loving creatures you love to the scene.
Once you have added all the flowers and extra details you could want for this hibiscus sketch, you could show where it is growing by adding a background.
This could be as simple as drawing a yard with other plants and flowers. Or, you could draw a lush forest or maybe a botanical garden.
These are just a few of the many locations you could use as a background, but you could create any kind of setting you can imagine! Where would you set this artwork?
Your hibiscus Drawing is Complete!
We hope that you had a wonderful time working with us on this guide on how to draw a hibiscus!
This is a beautiful flower, and by following this guide we hope that it was a lot of fun and easy to recreate this drawing.
Once you have completed this guide and finished off the final details there is a lot that you can do to have fun with as you finish it off.
We mentioned some ideas such as drawing more flowers, but you could also incorporate this design into a pretty pattern.
These kinds of details along with the colors and mediums you pick can give you a lot of freedom with personalizing your artwork!
If you enjoyed this guide, the good news is that there is a lot more drawing fun in store for you on our website. We also upload new guides all the time, so be sure to check in often!
We would be thrilled to see your beautiful hibiscus drawing when it’s done, so please do share it on our Facebook and Pinterest pages!