A suit can fit a wide variety of different occasions. It can be worn to weddings, funerals and to work every day.
It has also come to represent a certain lifestyle and has been associated with everything from TV lawyers to government agents and spies.
While we’ve all seen many suits in real life and on our TV and movie screens, it can be difficult to learn how to draw a suit.
It’s difficult only if you don’t know the right steps, so luckily you’re on the right guide to learn these steps!
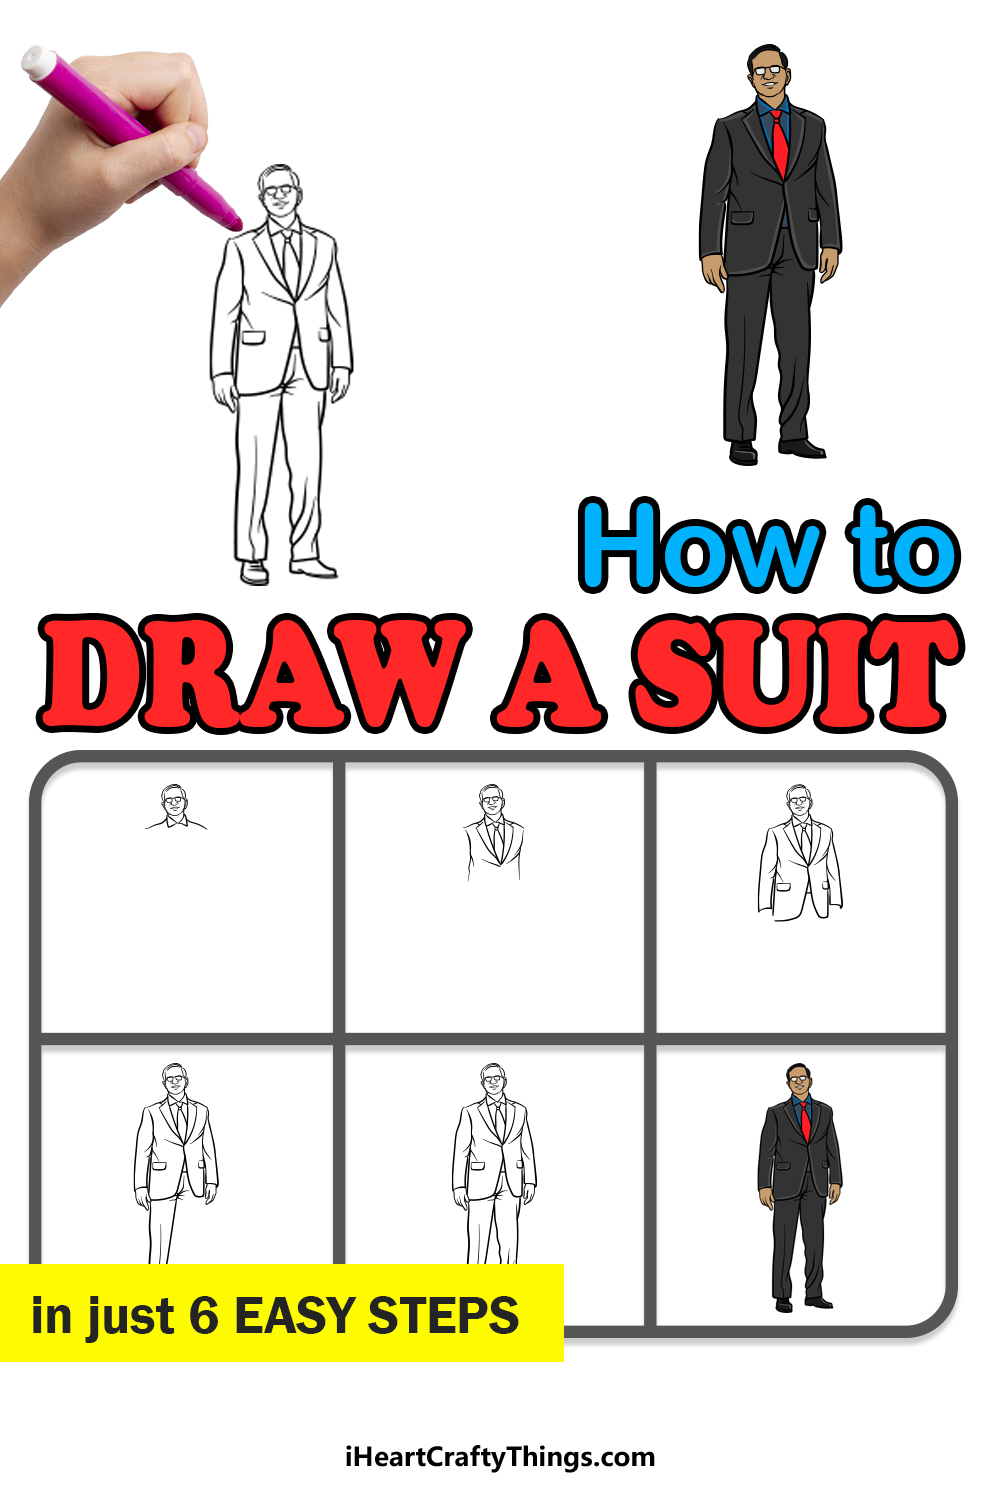
Our step-by-step guide on how to draw a suit will show you how to create this drawing with style!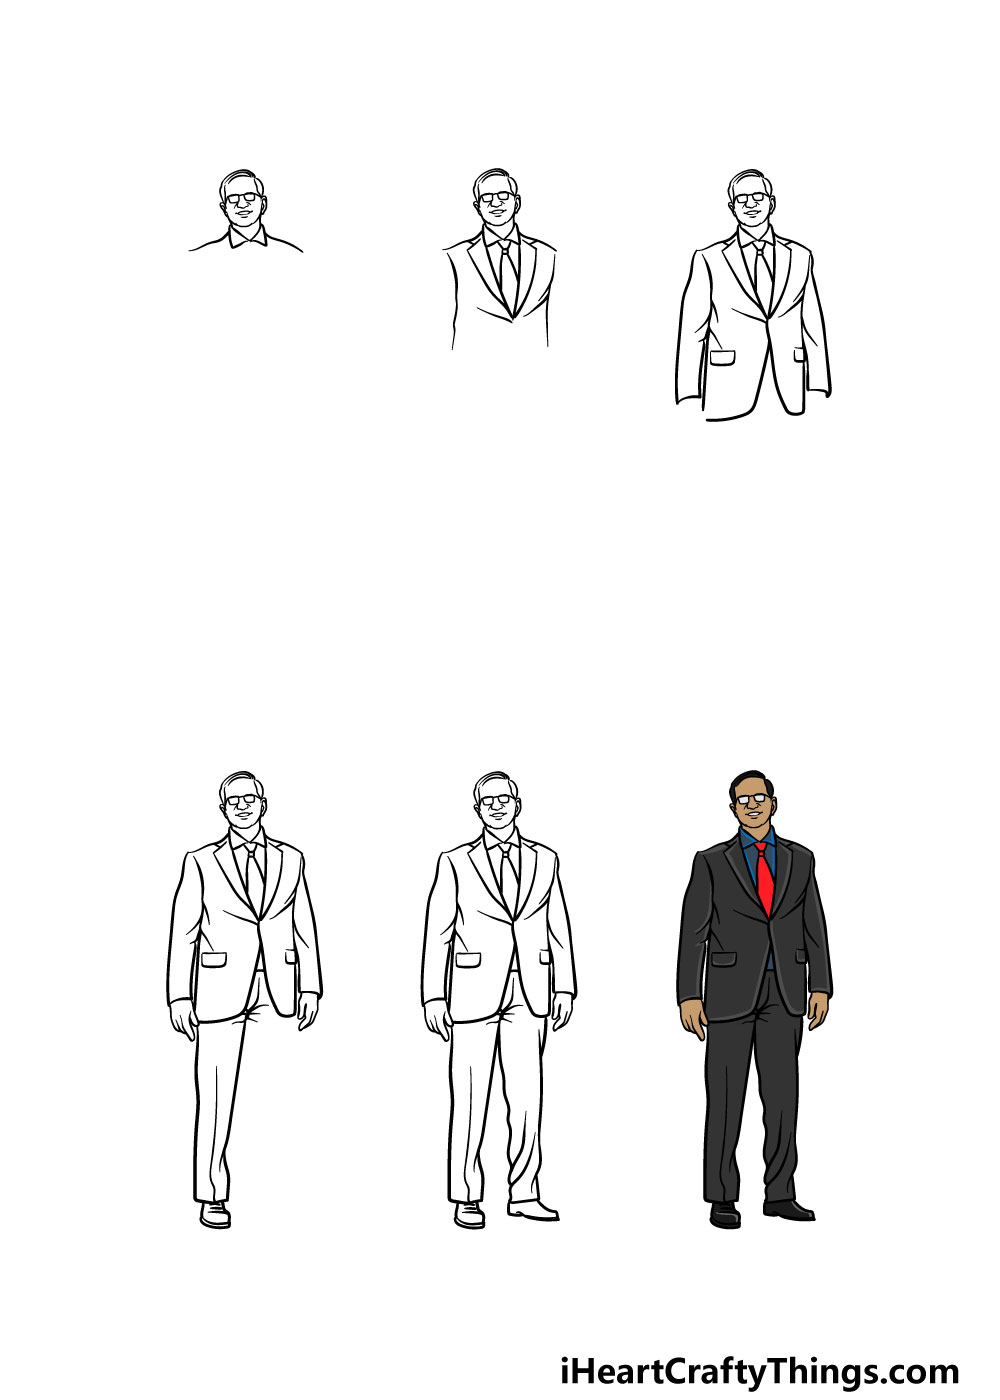
How to Draw A Suit – Let’s get Started!
Step 1
This first step of our guide on how to draw a suit will show you a plan that you can use as you add your pen lines.
You can use a pencil to replicate the lines that we show in grey to guide you as you add each part in the next few steps.
Once you have done this, then you can use your pen to go over the lines of the head and the collar as shown in the reference image. You will also be adding some smaller details as you use your pen to draw.
Step 2 – Draw the chest of the suit

Now that you have the head and collar of your soldier drawing, you can next add the chest in this step.
Following our reference image, you can draw the opening and flaps of the suit at his chest. Then, using some straight lines you can extend his tie down from his collar.
Finally, you can draw the sides of his chest using some more straight lines.
Step 3 – Now, you can draw the arms and bottom of the jacket

For this step of our guide on how to draw a suit, we will be adding the arms and bottom of the jacket.
First, you should start by drawing the rest of his jacket. You can extend the divide of the jacket down from where it’s buttoned at his chest. Then, you can draw the sides of it along with some pockets on the sides.
Once you have the chest of his jacket completed, then you can add the arms extending down from the shoulders.
That’s all there is to it for this step, and once you’re happy with how it looks then you’re ready for the next step!
Step 4 – Next, draw the hands and first leg of the suit
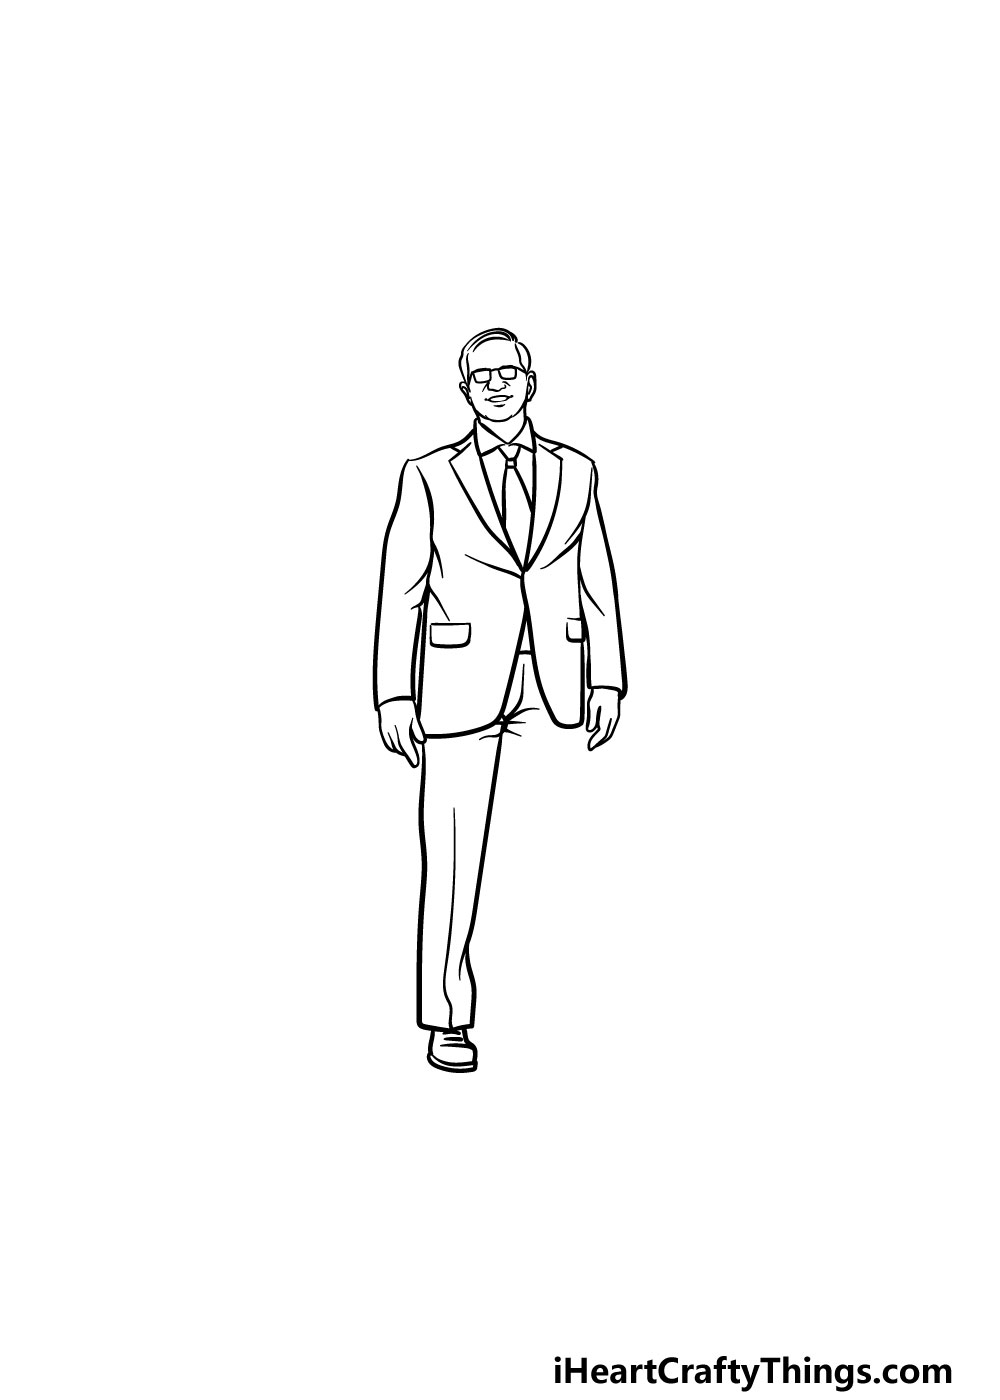
Your suit drawing is already looking great! For this part, we will be adding the hands and first leg for the drawing.
You can start with the hands that will go at the ends of his sleeves and will hang relaxed at his side.
Then, you can use some straighter lines coming down from his wait to make the leg on the left.
You can then finish off this leg by adding the shoe at the bottom, and then with a line going down the center near the bottom.
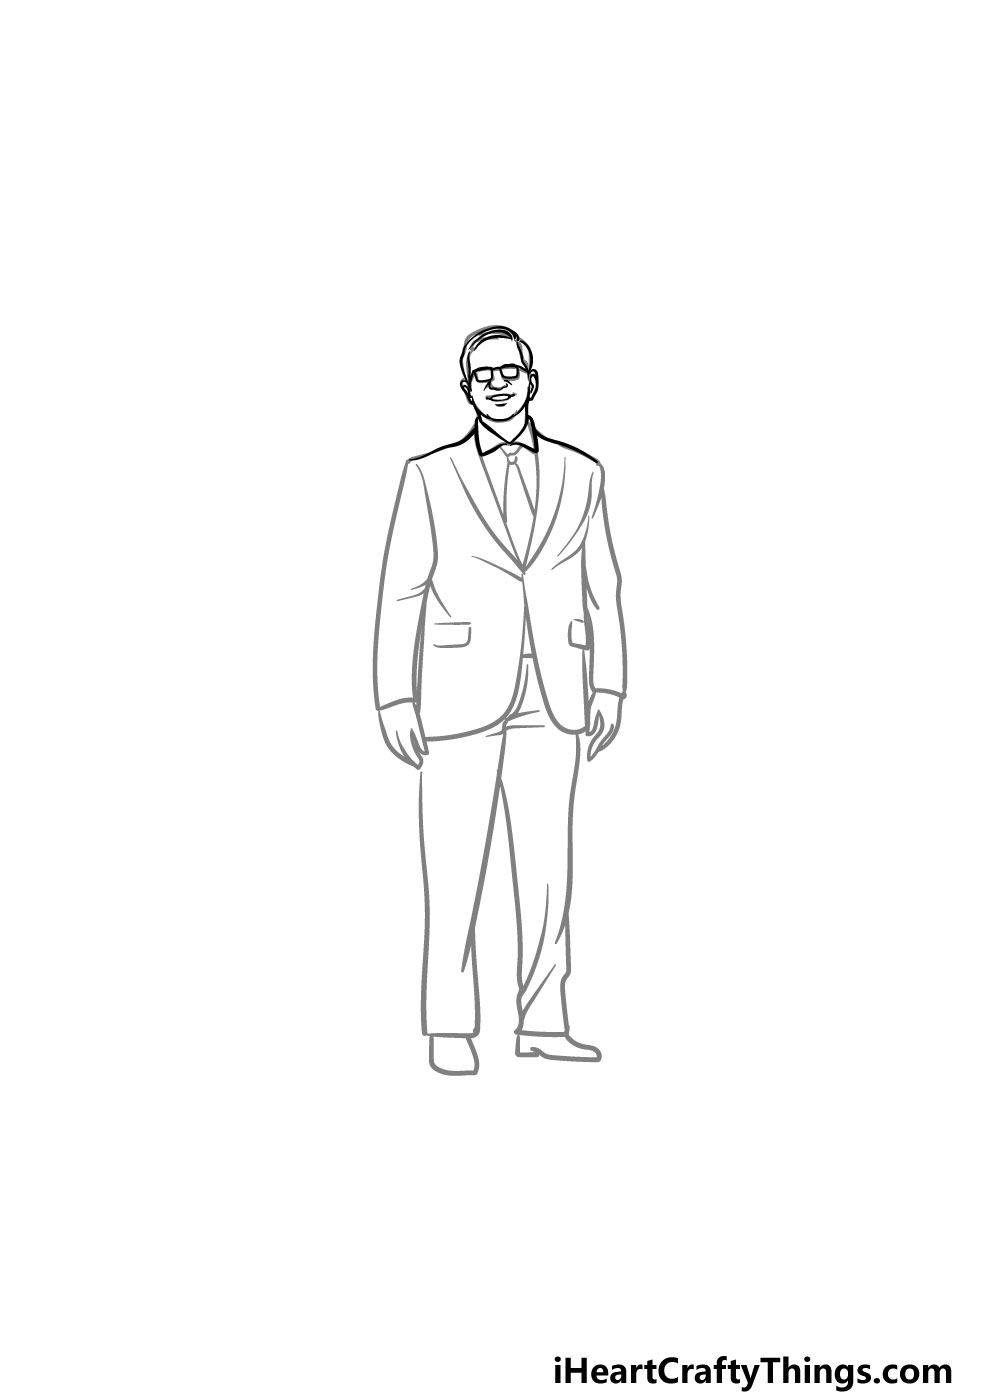
Step 5 – Now, you can add the other leg and final details
It’s almost time to color in your drawing in the final step, but first we have a few final details to add in this step of our guide on how to draw a suit.
The main aspect to add in this step is to draw his remaining leg.
This leg will look very similar to the one that you drew in the previous step. However, the foot will be at a bit of a different angle and will point to the right.
That will finish off all of the details in this guide! At this point, you can also erase any of the remaining pencil lines if you haven’t done so already.
Before you move on, you should also feel free to add any remaining details that you may want for the picture!
You could draw a background to show what kind of setting this man is in. You could also add some accessories for him such as a briefcase or even some spy gadgets to show he’s a government spy!
What creative details will you use to finish off this awesome suit drawing of yours?
Step 6 – Finish off your suit drawing with some color

This final step of your suit drawing is the one where you get to take over and show us how creative you can be!
For our reference image, we used black for the suit along with a bright red for the tie and dark blue for the shirt.
This is just one way that you could go about it, however, and you should let yourself get creative and have fun with it!
Suits can come in many different colors and styles, so you could even draw some pattern details onto the suit to further personalize it.
Choosing the colors is just part of the fun, however, and you can also have a great time experimenting with different art tools and mediums.
You could get brighter and more vibrant colors using acrylic paints and colored pens and markers.
For more muted tones, you could use some colored pencils, watercolors or crayons to finish it off. It’s up to you, and we can’t wait to see what incredible colors and mediums you use!
5 Tips To Make Your Suit Drawing Even Better!
Create some stylish artwork as we show you how to make this suit sketch even better!
For this suit drawing, we depicted a fairly standard style of suit for you. This is just one of many variations that suits can come in, however.
You could change some of the details of the suit to turn it into one of those styles. For example, you could change the tie to a bowtie and turn it into a tuxedo.
That’s just one other example, but what other suits could you depict?
Even if you stick to the style we showed for this drawing of a suit, you can still change some details. For example, maybe you could have his jacket be open to show more of his shirt and tie.
You could also add a corsage or a pattern to his tie for a few more details.
This suit sketch shows a common character, but you could also create your own. For example, maybe you could make it look like you are the one wearing the suit!
You could also change the person into a famous character known for wearing suits. For instance, you could make the character look like James Bond.
Can you think of other characters famous for wearing suits?
Suits come in many different colors, and that means that you can customize this one in a few ways. You could use any colors you like, but you can also change the patterns.
Some suits have patterns such as pinstripes on them, and that would be a great way to enhance this design.
You can also place this character in a background setting that would be appropriate for his attire. This could include anything from a business office to a fancy dinner party.
If you went with our earlier suggestion and turned this character into a spy, then you could create all kinds of cool scenarios!
What sorts of settings do you think this stylish character could find himself in? You can really get imaginative with your ideas!
Your Suit Drawing is Complete!
With that, you have completed this guide on how to draw a suit! As we mentioned earlier, a suit is something we’re all familiar with, but that doesn’t make it easier to draw from memory!
We hope that by using this guide that you found it to be easier and more enjoyable!
Now you can take over and show us how creative you can be with your own details, design choices and background details. Be sure to have fun being creative with it and see what you come up with!
This guide is one of many that we have for you to enjoy on our website! Be sure to visit us often, as we upload new guides often for you to have some drawing fun with!
Once your suit drawing is complete, we would be thrilled if you would share it on our Facebook and Pinterest pages for us to admire!