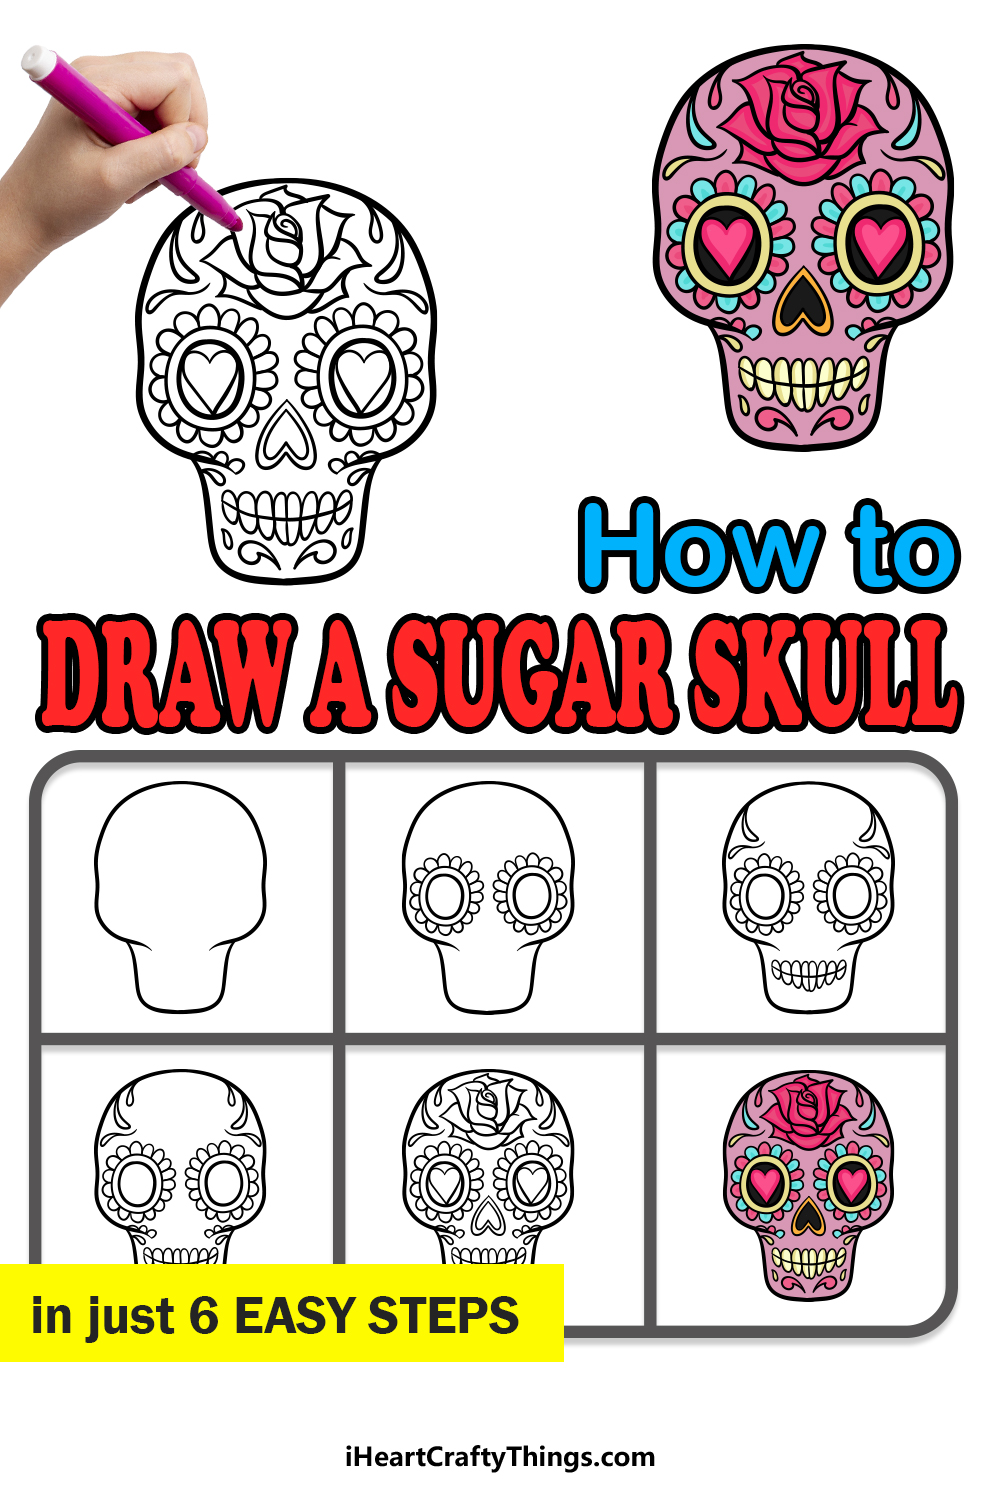
Celebrate a unique cultural occasion with this guide on how to draw a sugar skull! You will be able to make some incredible designs by following this simple tutorial for kids.
The Day of the Dead is a traditional Mexican occasion where festivals are held to honor the ancestors of the people celebrating. A lot of the imagery is based around death and skulls, but there are lots of colors and decorations that make it a joyful occasion.
Sugar skulls are a distinctive aspect of the decorations you may see during the Day of the Dead, and they come in so many different colors, designs and forms.
This guide will show you exactly how to make one of these incredible skulls, and once you have finished it you could even make some unique sugar skull creations of your own!
Watch And Learn How To Make Your Sugar Skull Drawing
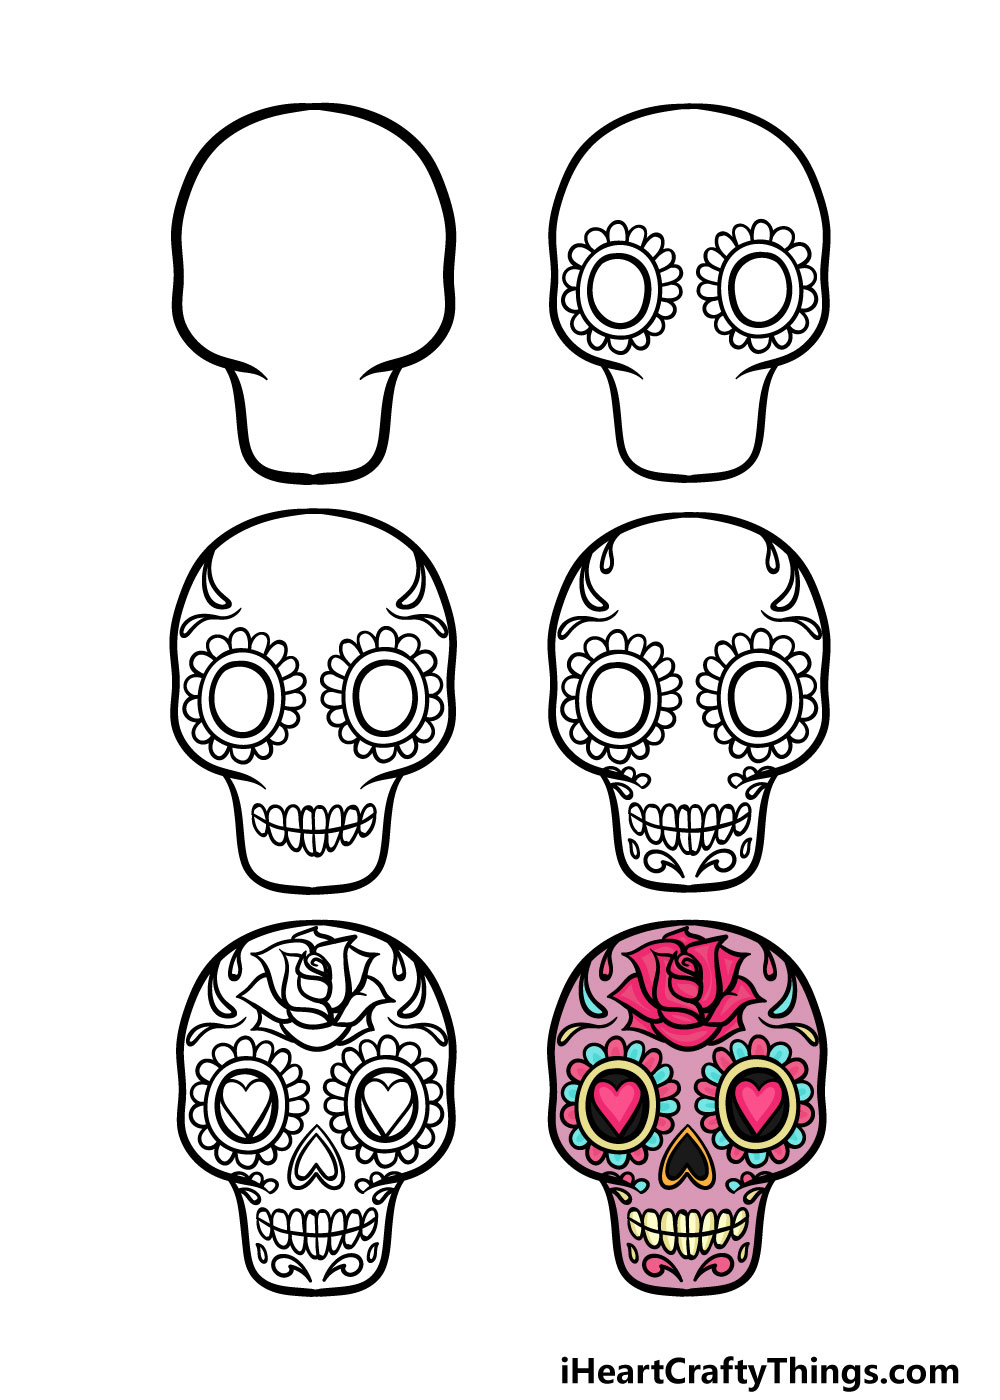
How to Draw A Sugar Skull – Let’s Get Started!
Step 1
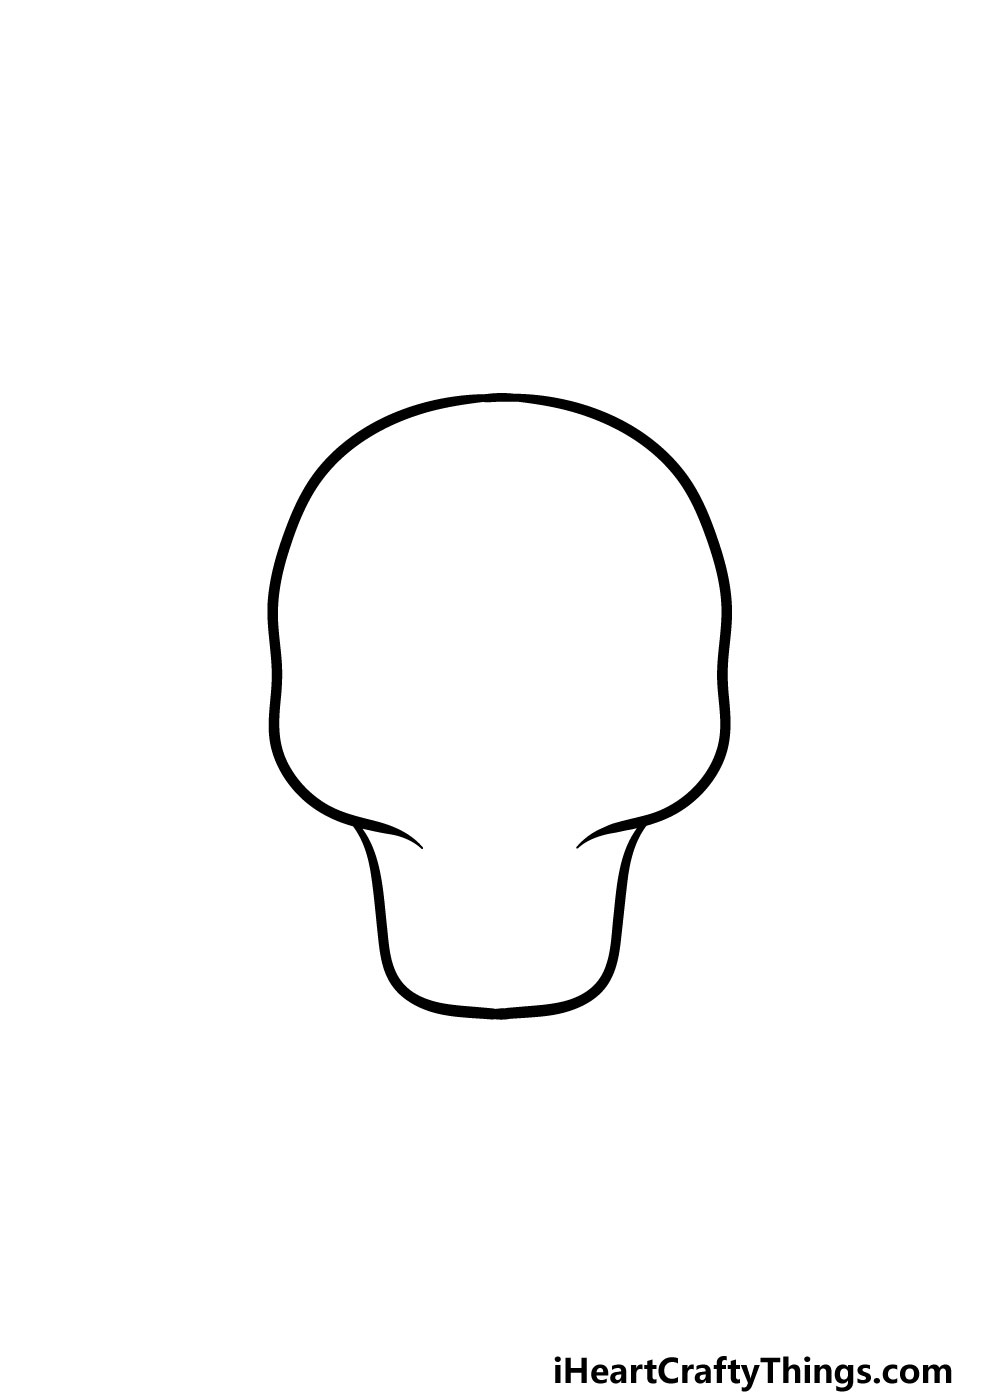
In this first step of our guide on how to draw a sugar skull, we will start with the outline of the skull. The top of the skull will be quite rounded, and it will extend down to the two cheekbones.
The jaw of the skull will be drawn with a rounded square shape underneath the cheekbones. That’s all there is to it for this step, and we can proceed on to step 2.
Step 2 – Draw the eye pattern for the sugar skull
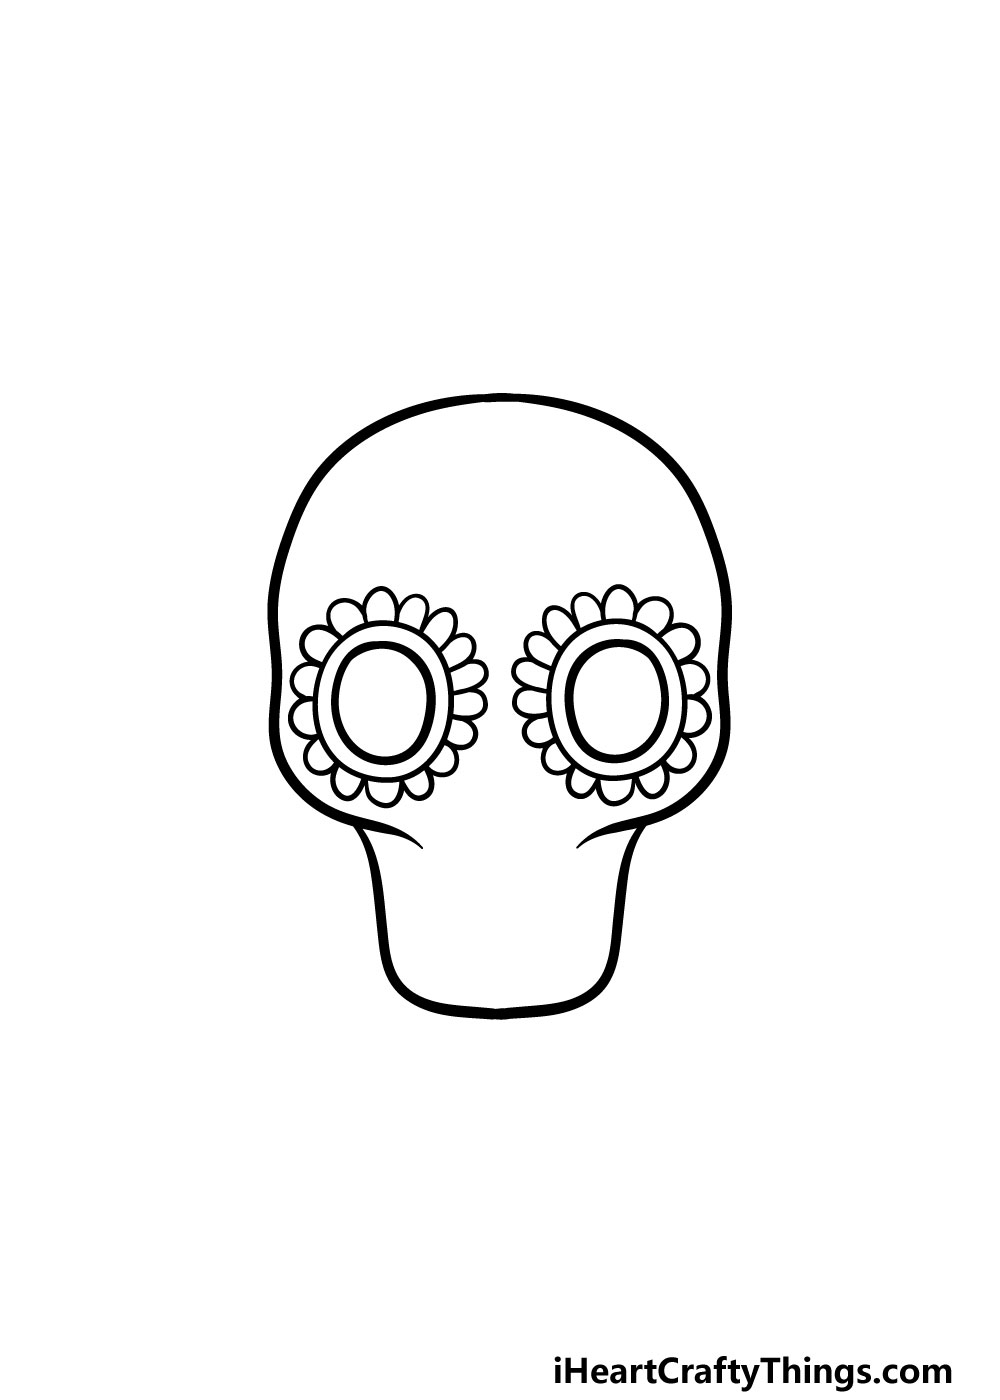
Sugar skulls are characterized by their bright and colorful pattern designs, and we will start that pattern for this part of your sugar skull drawing.
You can start by drawing a vertical oval shape for each eye, and these should be fairly large. Then, draw another one closely around that one.
Finally, draw a series of small, oval shapes around the outer oval to form a pattern that looks like petals. This will make a pretty floral shape for the eyes of the skull!
Step 3 – Keep adding to the pattern of the skull
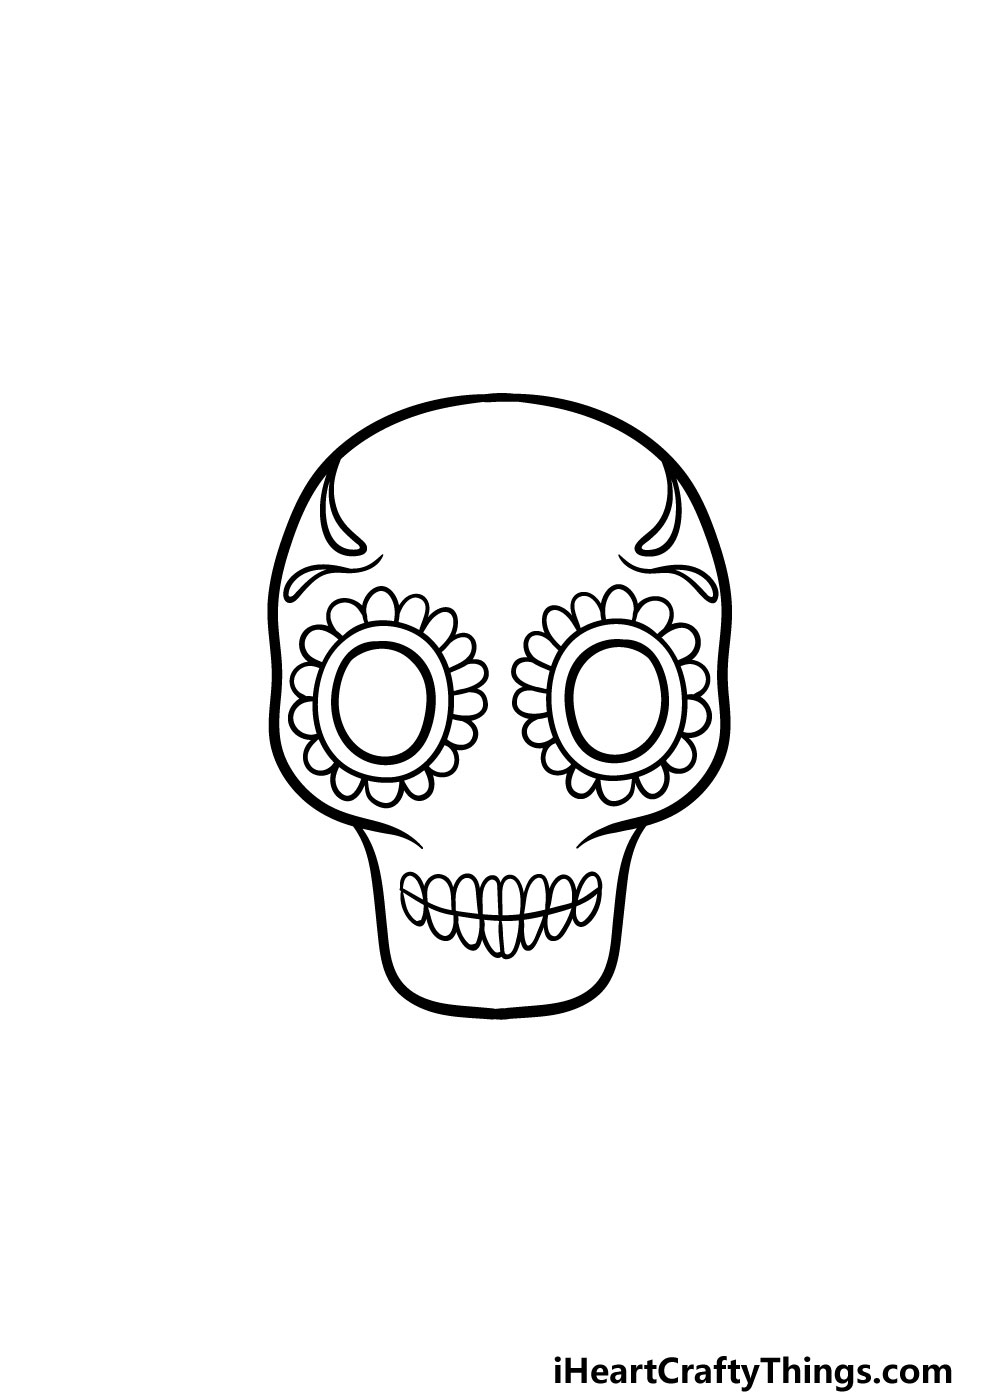
Now that you have the eyes of your sugar skull drawn, we can keep extending the pattern for it. In this step of our guide on how to draw a sugar skull, we will be drawing some patterns above the eyes, as well as the teeth for the skull.
The patterns above the eye will be long and curved, as shown in the reference image.
Then, for the teeth you can draw two rows of small rounded rectangles. Some will be slightly longer than others, and you can use the reference picture as your guide for how long each one should be.
Step 4 – Keep decorating the sugar skull
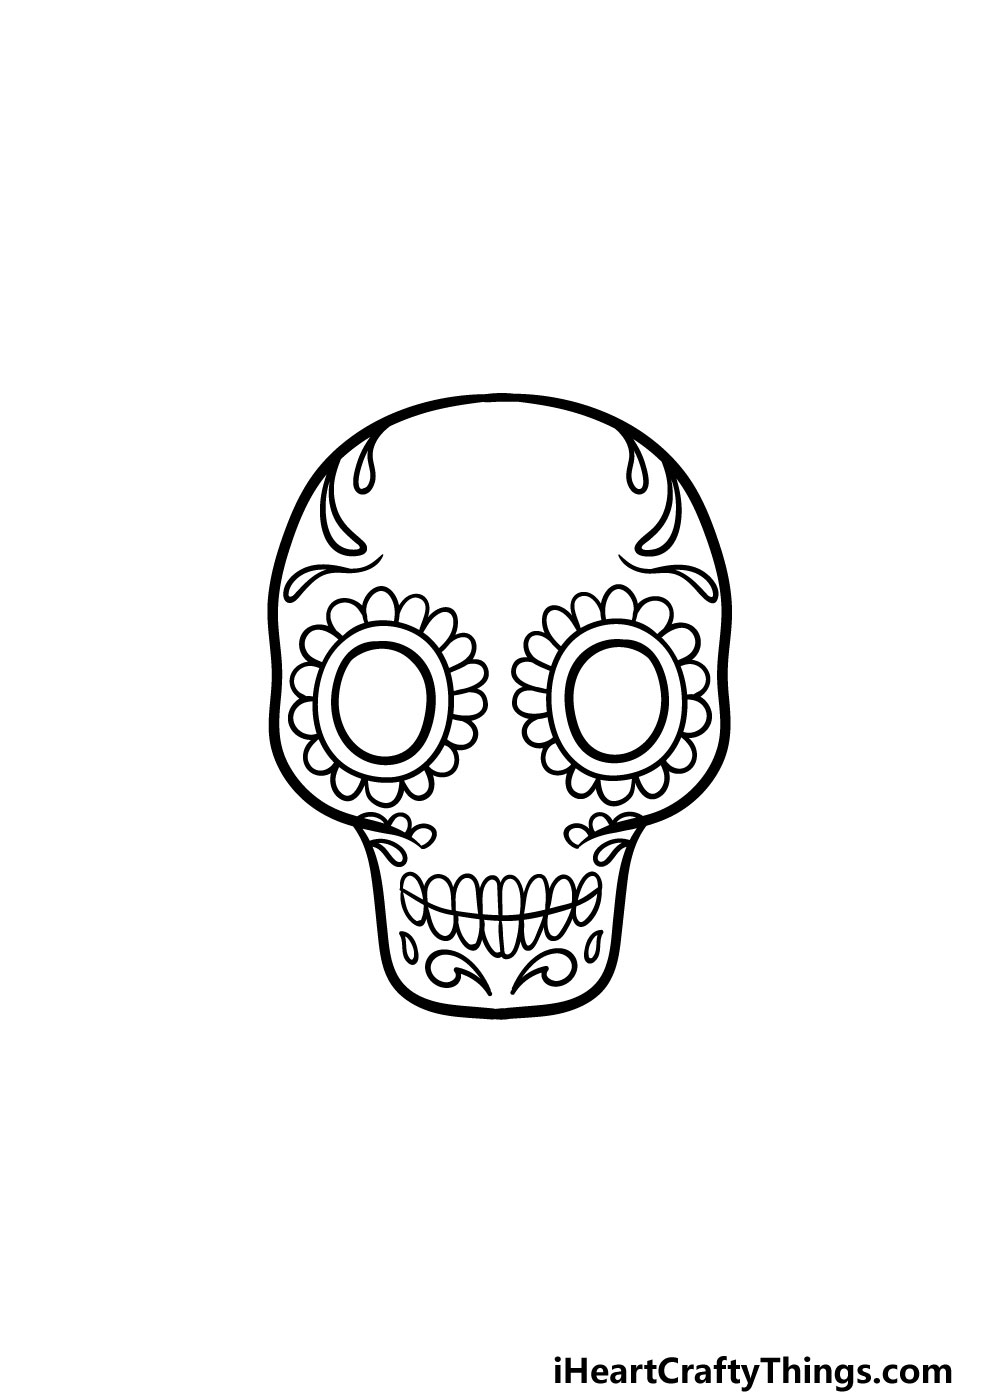
Your sugar skull drawing is looking great already! We shall continue adding to the pattern design in this step. For this part, we will be extending the patterns that you have started in the previous steps.
First, you can draw some more rounded teardrop shapes near the top of the skull. Then, we will be adding some more of these shapes to the cheekbones, and then we will finish off with some more shapes near the chin.
With these drawn, we will finish off the details in the next steps!
Step 5 – Now, you can add some final details for your sugar skull drawing
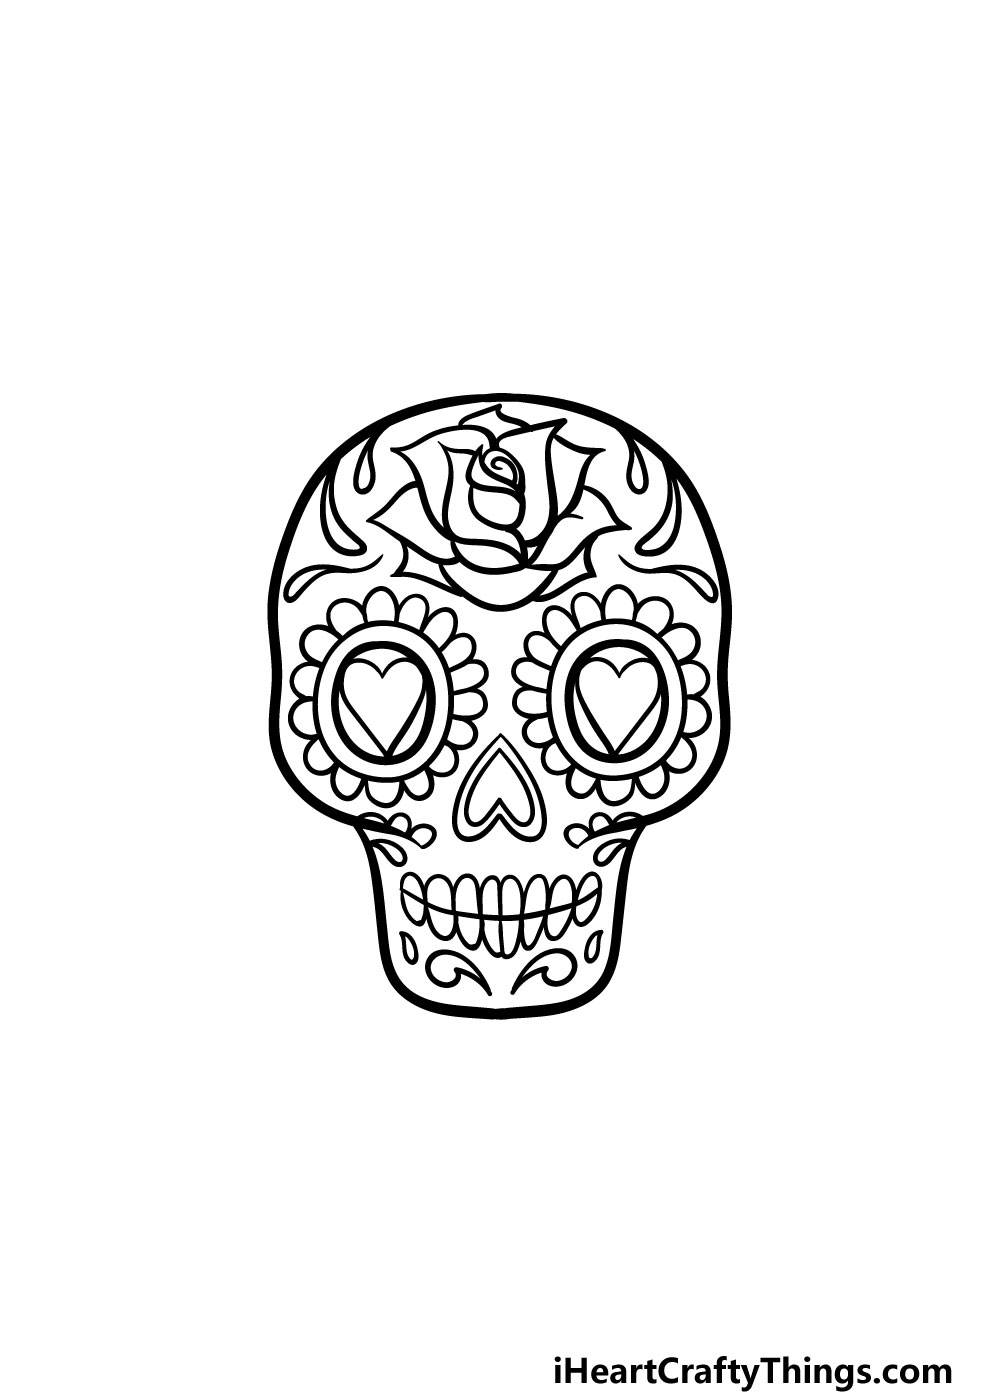
As we mentioned in the previous step of our guide on how to draw a sugar skull, in this fifth part we will finish off the decoration elements of the skull. The biggest part of this step will be drawing a rose shape in the forehead of the skull.
This rose can be a bit tricky to draw, so you will find it much easier if you follow the reference image closely as you draw.
You may also want to use a pencil first and then go over with a pen when you’re happy with it.
The last elements we will be adding will be some pretty heart shapes. Two of these will go inside each eye, as shown in the reference image. Then, you can finish off with some upside-down hearts for the nose.
That will finish off the details in this guide, but you don’t have to move on yet! You can also add some design elements of your own, or perhaps draw a cool background for your sugar skull drawing.
What fun extra details can you think of for this awesome drawing of yours?
Step 6 – Finish off your sugar skull drawing with some color
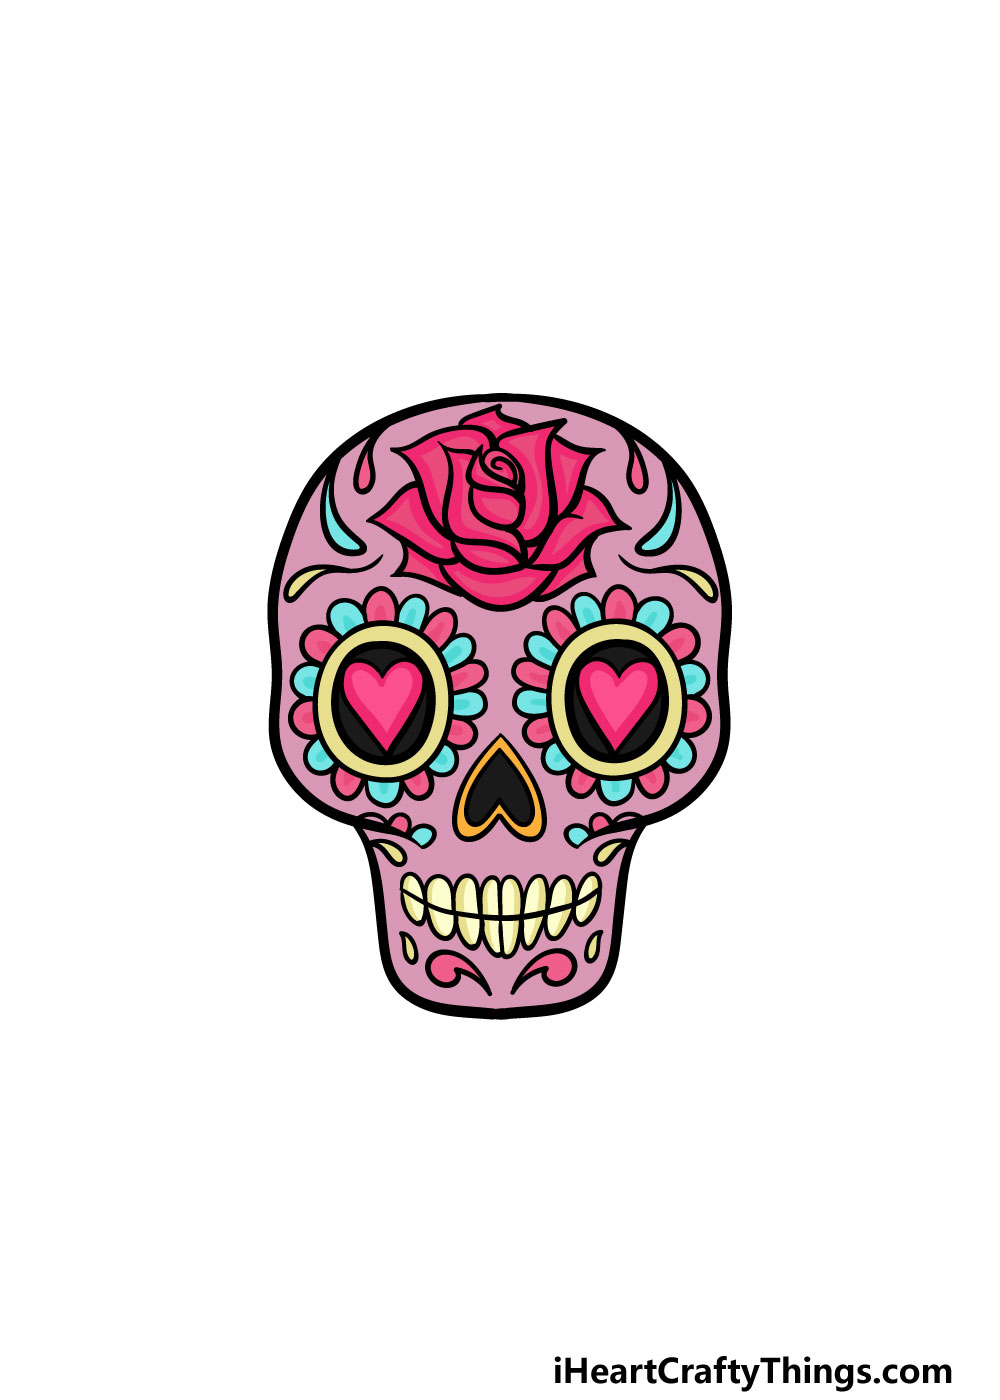
You have arrived at the final step of this guide on how to draw a sugar skull! You did an amazing job drawing the skull and all the decorations, and now you get to have even more fun as you color in your picture.
In our reference image, we used some pink, purple, red and blue as a few of the shades that finish off this picture.
That is just one color scheme out of many that you could go for, however, and this is the step where you get to show off how creative you can be!
Sugar skulls can come in many different patterns and color schemes, so that gives you a lot of freedom with how you can color in your picture.
Once you know which colors you would like for it, you can also have fun picking the art mediums you use to bring them to life!
Whether you go for some bright and vibrant colors or keep it more muted, we can’t wait to see what you choose for your picture.
Do this to take your sugar skull drawing to the next level
Find out how you can make your sugar skull sketch even more stunning with these tips!
We created a beautiful design for this sugar skull drawing that we love! If you’ve ever seen real sugar skulls, you will know that they come in many different beautiful designs.
That means that you could change this design to create your very own unique sugar skull! You could do this by drawing all sorts of different patterns and shapes onto the sugar skull.
You could even change the shape and design of the skull itself before changing the decoration. What are some ideas you have for the decoration of this sugar skull?
Once you have finished the design of your drawing of a sugar skull, you can also add some background details. When sugar skulls are used, they will often be featured with many other decorations and objects.
You could use some of these for your drawing! If you need some inspiration, you can look up some sugar skulls and Day of the Dead celebrations online to get some ideas.
Creating a background setting is one way of doing it, but you could also fill the background with colors and patterns.
If you were to do this, you could even recreate or incorporate the pattern you use for the sugar skull for the background.
This can add a lot to the drawing, and you can really experiment with different styles and ideas. Do you think you would prefer this approach over a more traditional background?
If there’s one thing you can say about sugar skulls, it’s that they have lots of amazing colors! That brings us to the final tip for your sugar skull sketch.
We think that you should really have fun experimenting with different colors, art tools, techniques and mediums. This could include different types of paint or maybe some colored pens and markers.
These mediums can be used on their own, or you can mix various mediums in order to create a wonderful artwork.
Your Sugar Skull Drawing is Complete!
You have reached the end of this guide on how to draw a sugar skull! We created this guide to make this drawing challenge not only much easier for you but more fun as well.
We hope that you had a great time working on it as you learned how to do this amazing drawing!
Now that you have mastered this design you can make your own variations as well. You could personalize this one with some background elements or even change up the patterns entirely for your very own sugar skull! Be sure to get creative with it and see what happens.
Your drawing journey doesn’t have to stop here, as your next fun drawing challenge awaits you on our website!
We have tons of guides for you to enjoy there and we upload new ones frequently. Be sure to visit often to never miss out!
Once you have finished your sugar skull drawing, we would love to see it! Please be sure to share your artwork on our Facebook and Pinterest pages for us to admire.