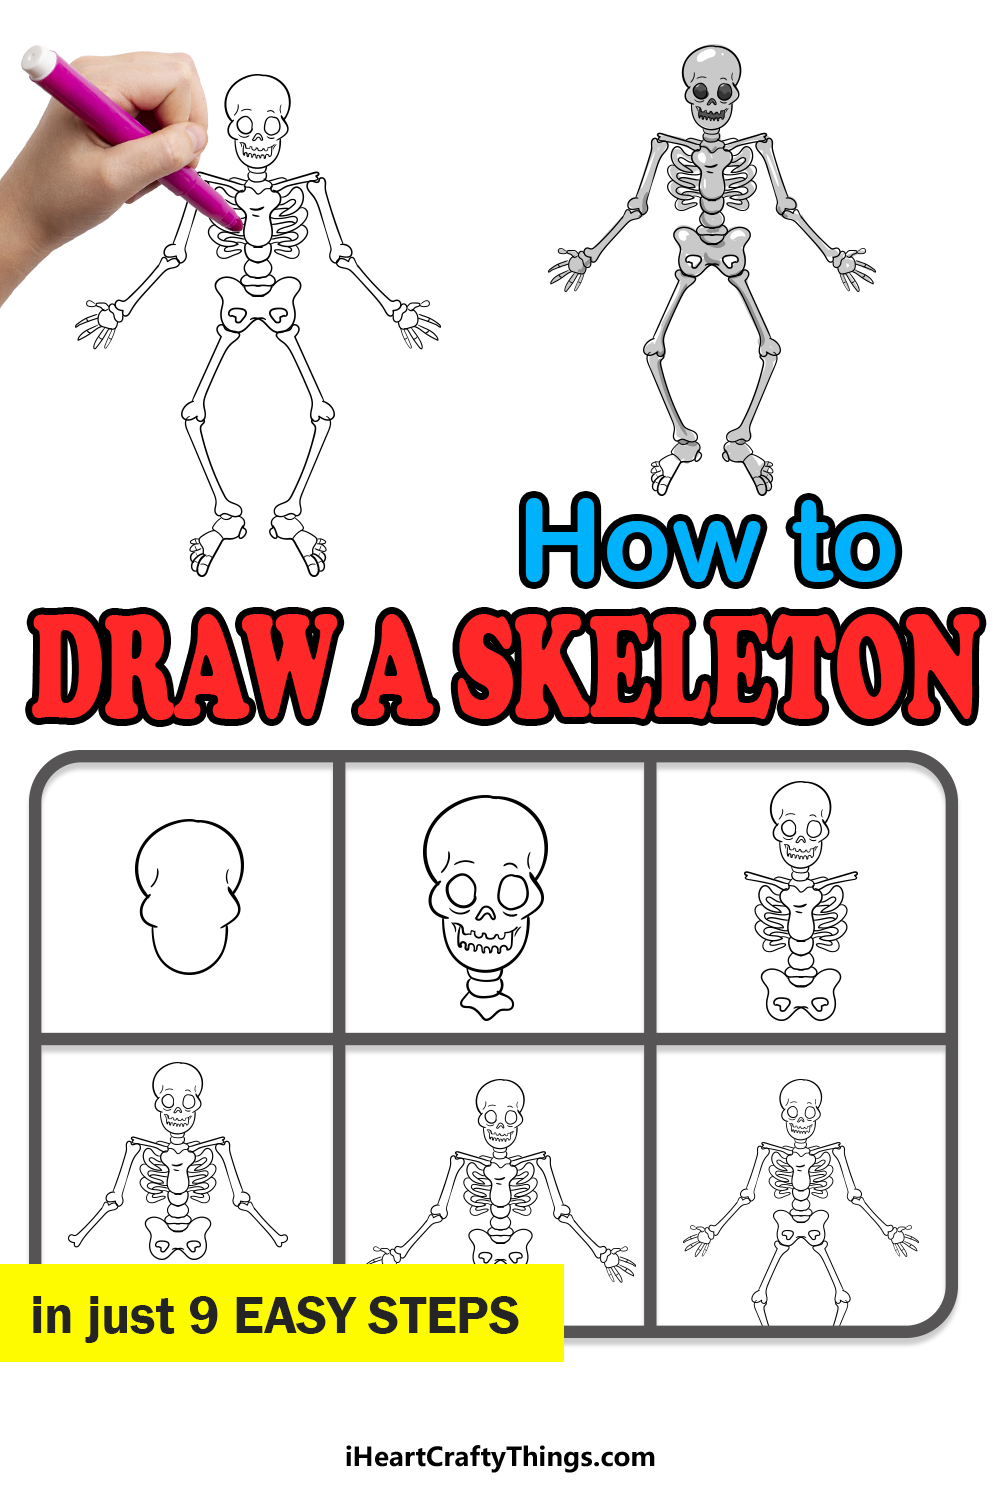
This tutorial on how to draw a skeleton for kids makes it so fun and easy to do! All ages and skill levels can take on this design and easily complete it for themselves.
There are no bones about it; skeletons are complex things! The human skeleton has 206 bones after all. Each one needs to come together in the right way to make a recognizable skeleton and that’s where the challenge lies.
I’ve broken it down into a few easy steps that show you how to start with the skull shape and then add things like the ribcage, pelvis bones, arms, legs and other details.
It’s certainly a challenge, so I advise you to take your time with it and slowly follow along with the steps. Whether you want to make a Halloween scene or use this drawing for educational purposes this guide will be perfect for you!
You won’t believe how easy it can be when you have it broken down, so join me for this creative journey.
Watch And See How To Make Your Own Skeleton Drawing
How to Draw A Skeleton – Let’s get Started!
Step 1

Let’s take it from the top for this guide on how to draw a skeleton!
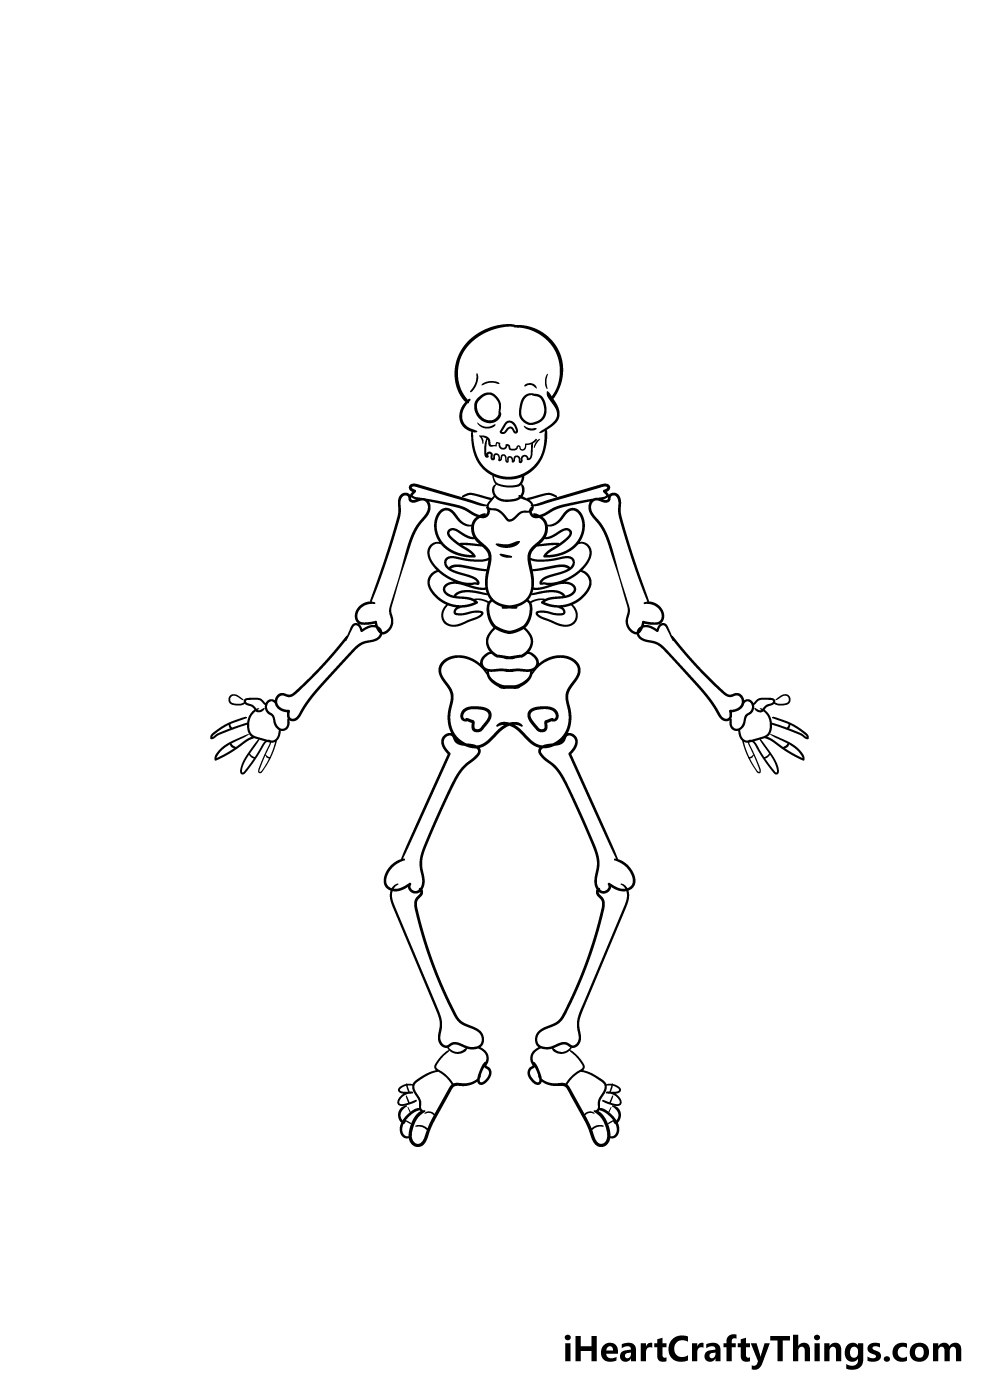
We will begin with the skull, and it’s worth noting that for this guide you may want to refer very closely to our reference images as you draw.
Some of these elements can be tricky, but if you take it slow then I know you can do it!
The skull has a rounded top as you can see in our reference picture. There will then be two sharp lines coming out for the cheekbones, and then you can draw another rounded line for the jaw beneath it.
Step 2 – Next, draw the eyes, nose and mouth
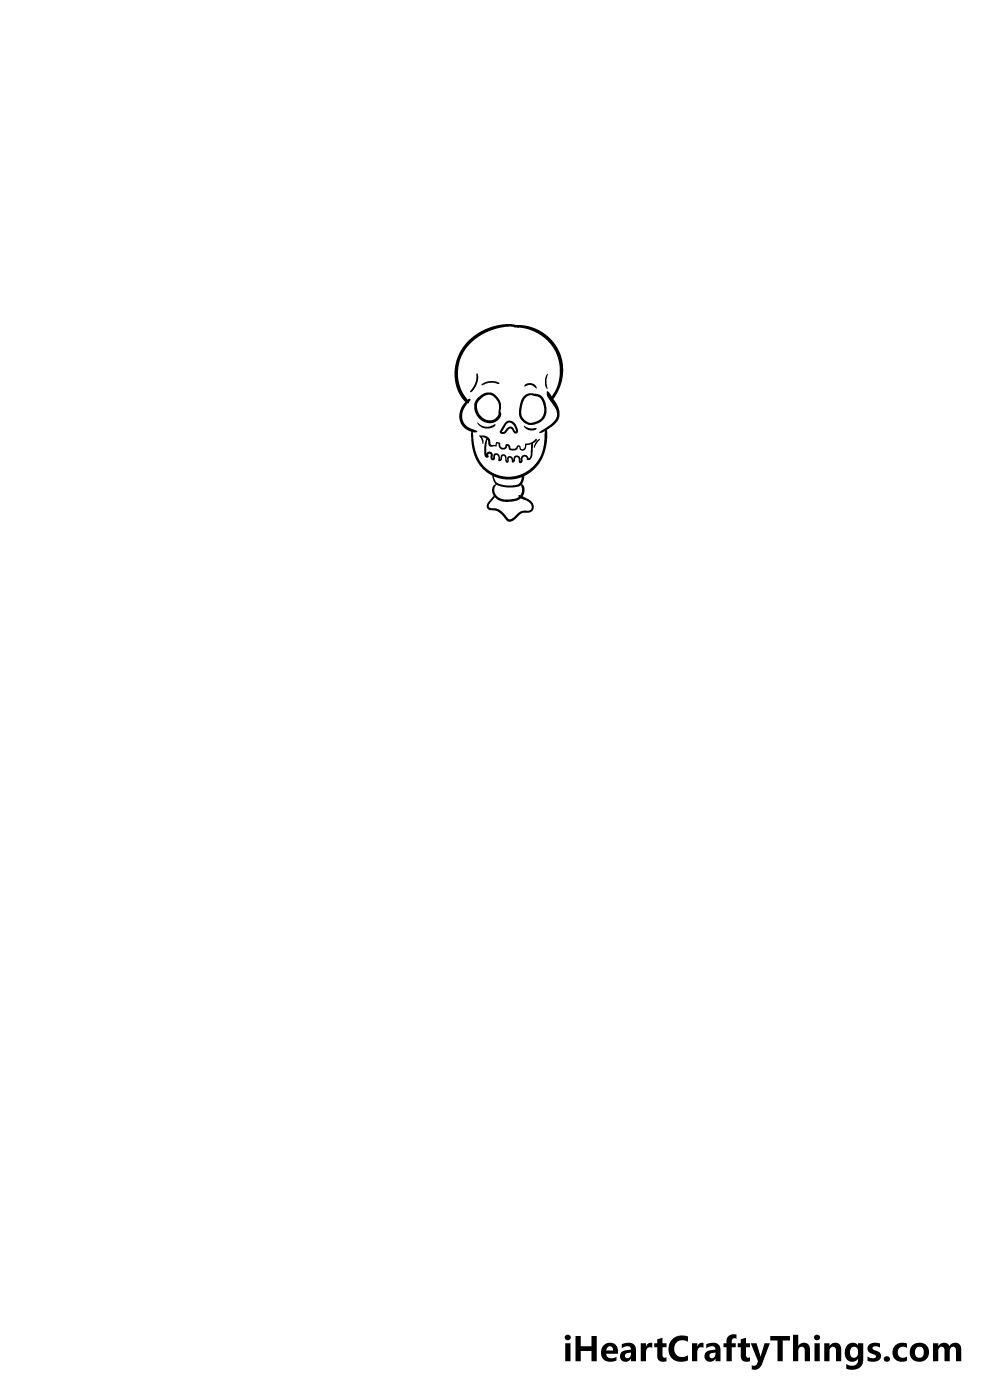
We shall focus a bit more on the skull for this part of your skeleton drawing. First, draw some circles to form the eye sockets of the skull.
Then, you can use a small curved boomerang shape for the nose beneath the eyes. Next, use some small, curvy shapes to form the toothy mouth beneath these.
Finally, you can draw the segmented neckbones beneath the skull as they appear in the picture for your skeleton drawing.
Step 3 – Now, draw the chest and ribcage
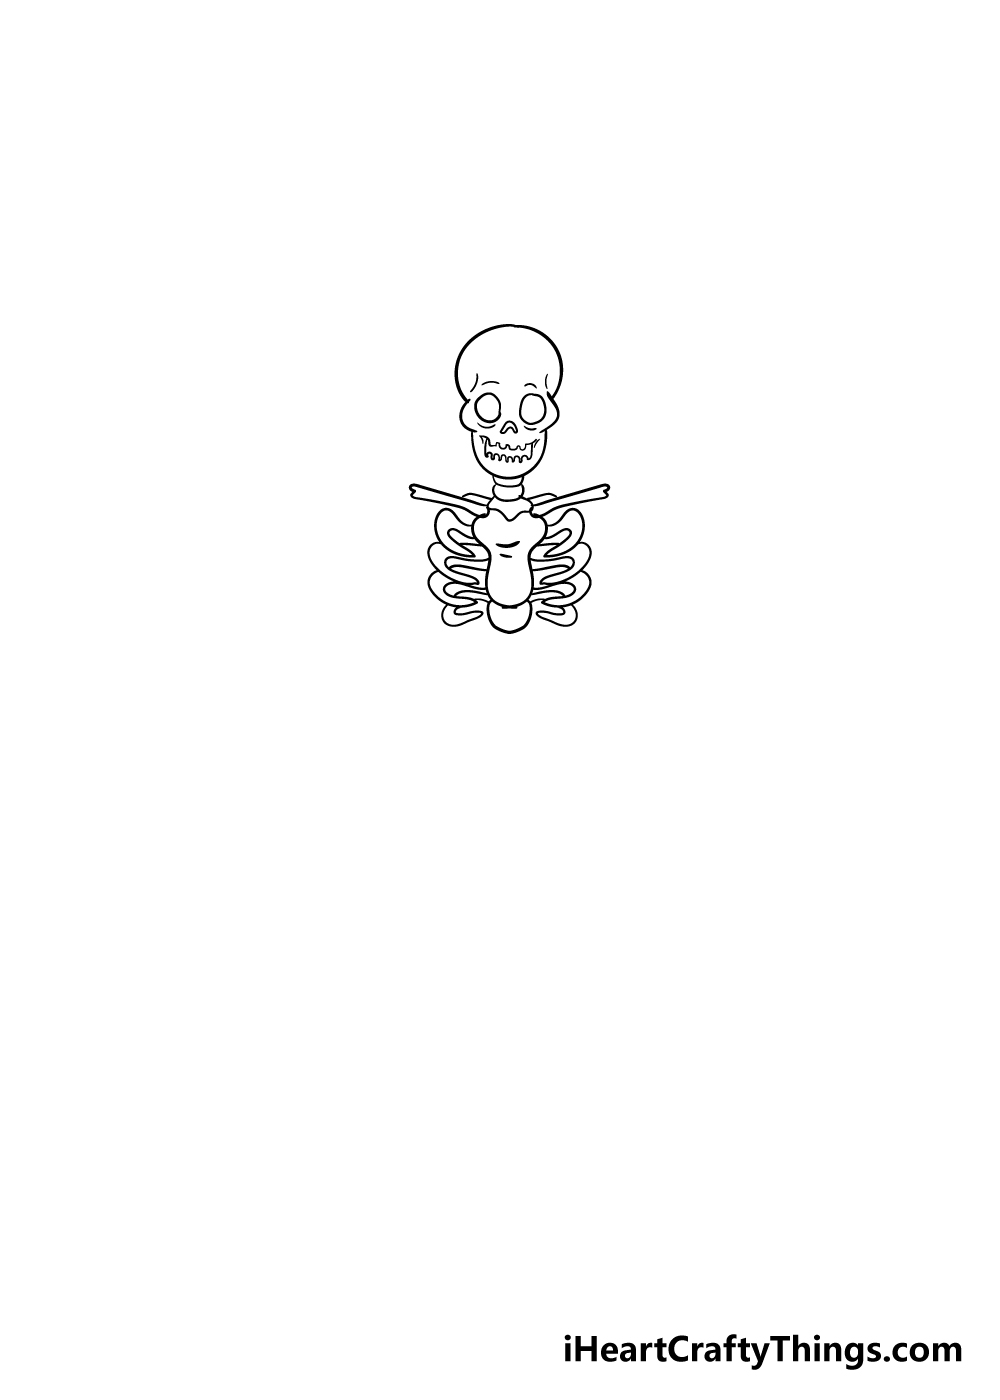
This next step of our guide on how to draw a skeleton looks tricky, but it’s not too hard if you take it step by step.
First, draw some thin, straight bones coming out from under the neck to create some shoulder bones. Next, you’ll want to create the central chest bone, which looks like a fat ‘Y’ shape.
Once you have that, you can then carefully draw each rib, which comes out from this central bone, and then rounds off back towards the center.
It may sound complicated, but when you look closely at the reference picture it’s easier than it looks! There should be four ribs on each side, and the picture will show you how big or small each should be.
Step 4 – Next, draw the hips of your skeleton
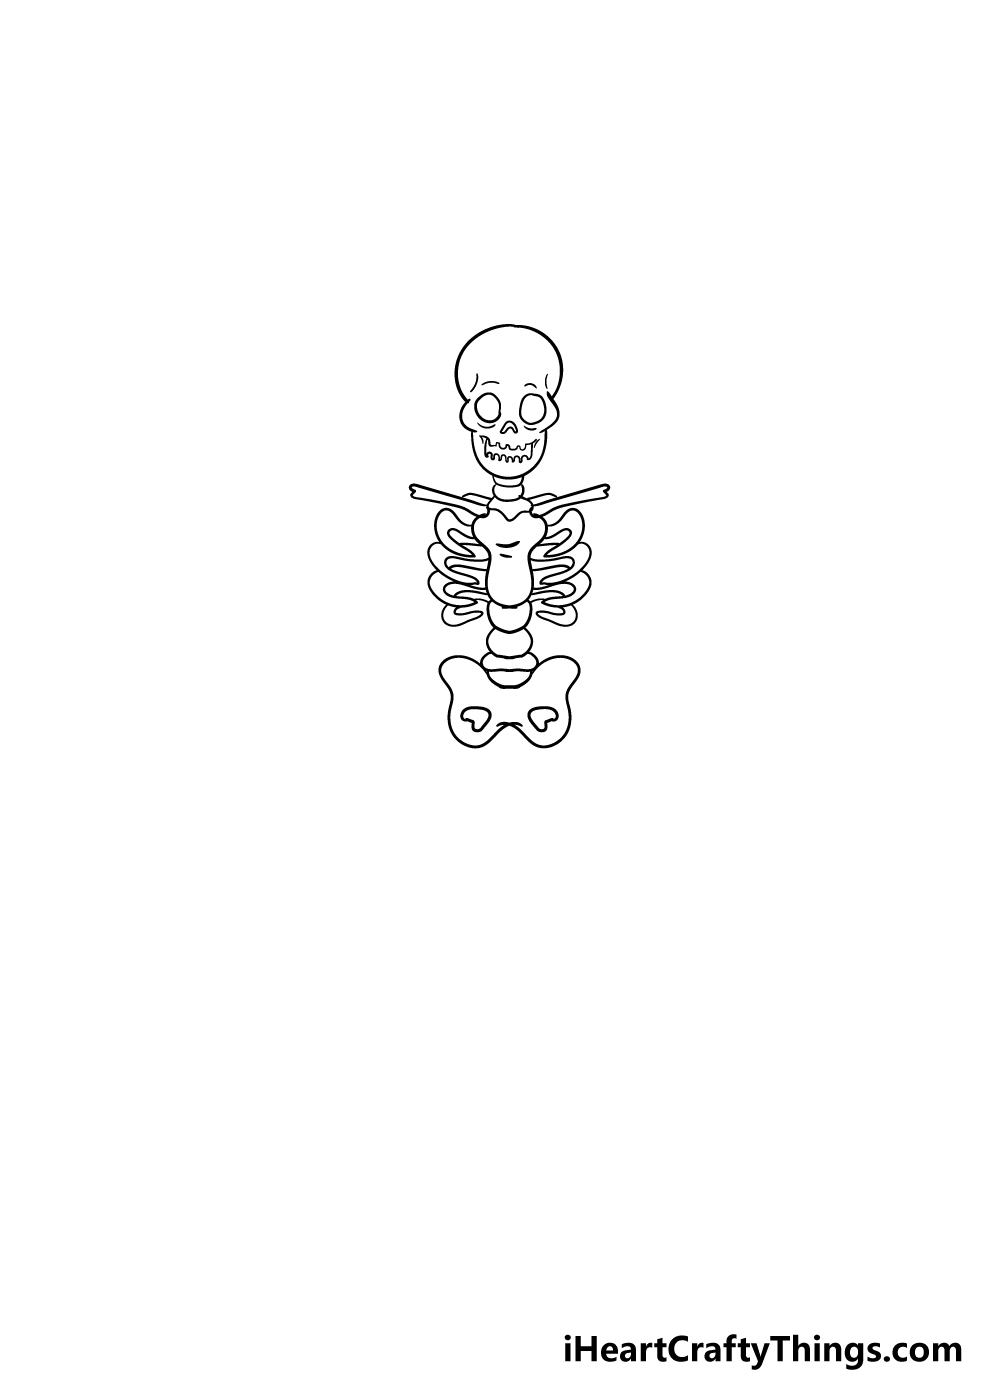
We have the head, shoulders and chest of your skeleton drawing, so for now we shall move lower to the hips. First, extend the spine a bit by drawing a few small segments to it.
Then, you can draw the hip bone which has somewhat of a butterfly shape to it with some circles for holes near the bottom.
Step 5 – Let’s add some arm bones
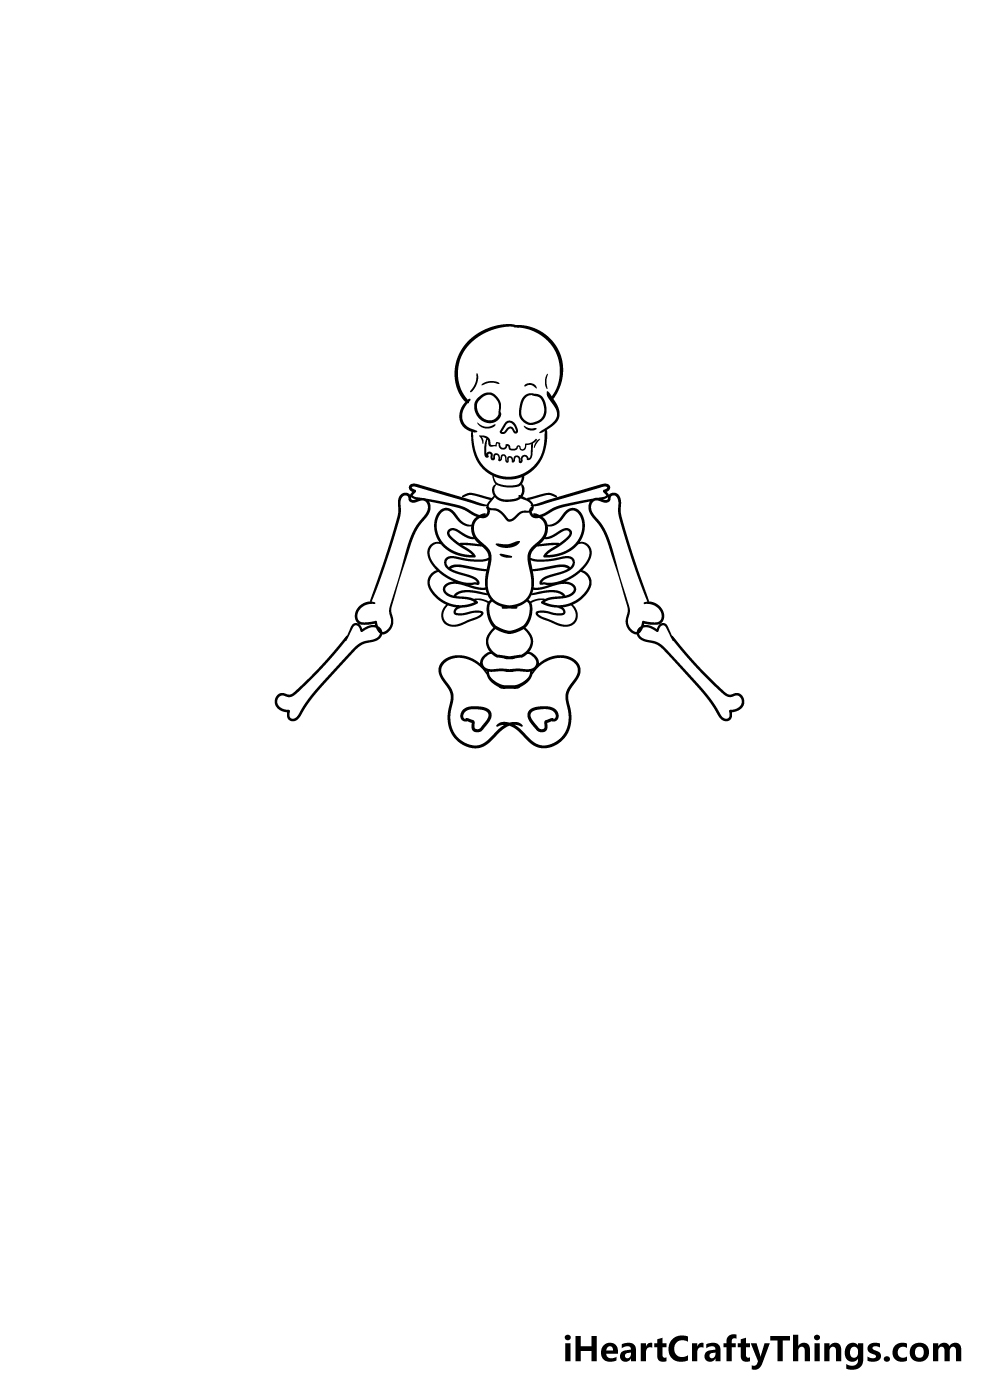
It’s time to head up again as we draw some arms in this fifth step of our guide on how to draw a skeleton.
The arms are made with one larger bone on top, and a slightly smaller, thinner one underneath it.
Step 6 – Next, draw the hands
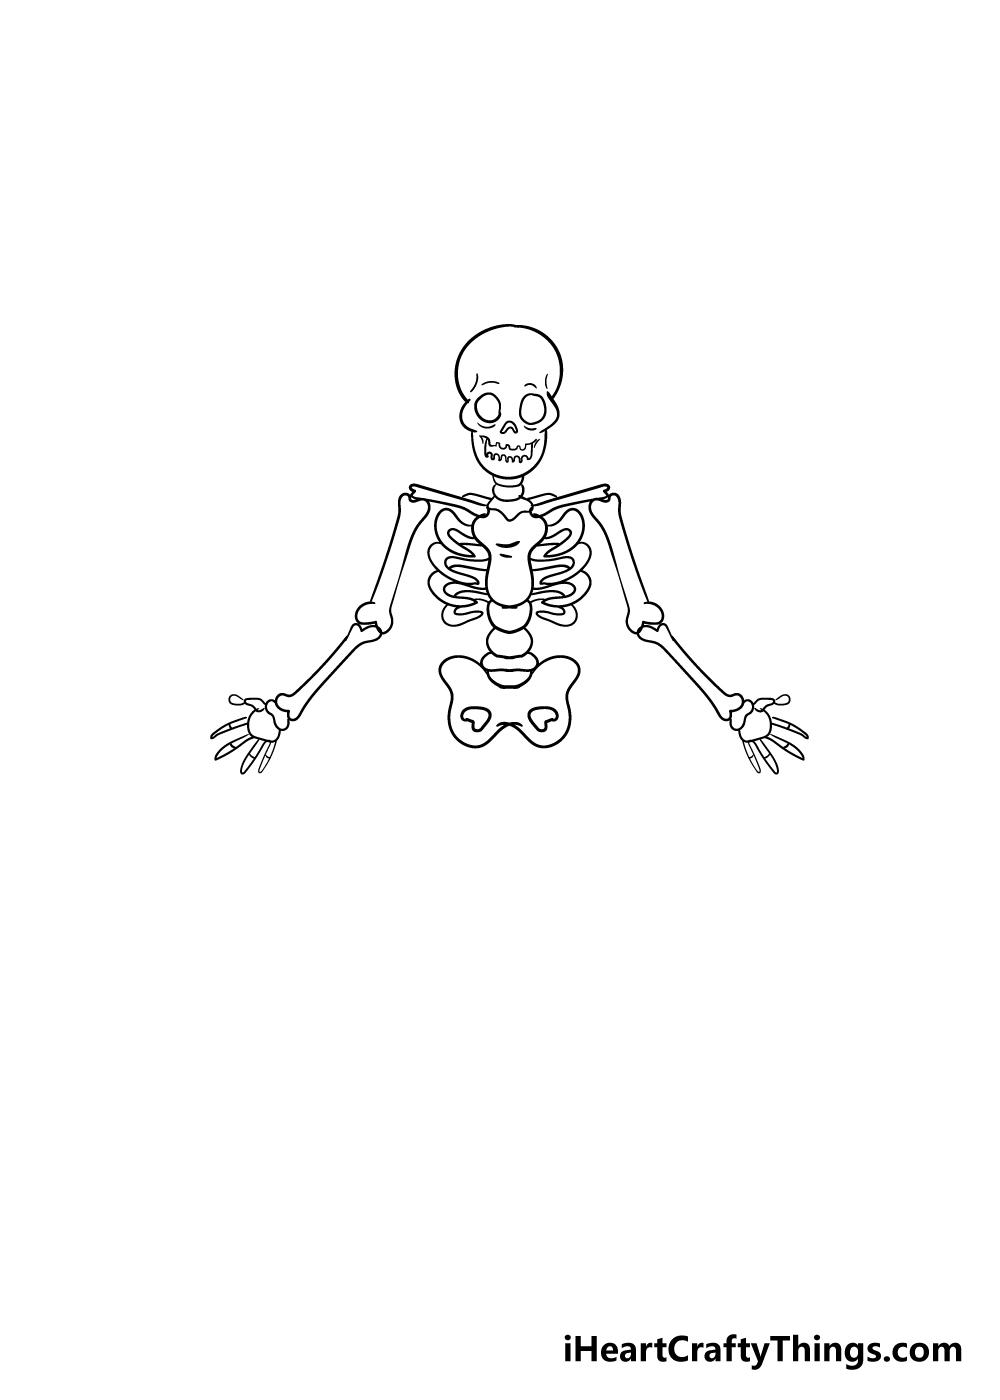
Now that you have your arm bones, you can draw some hands for your skeleton drawing.
The hands are made up of a single rounded shape for the wrists, and then you can add the segmented fingers and thumbs to them.
Step 7 – Draw some leg bones
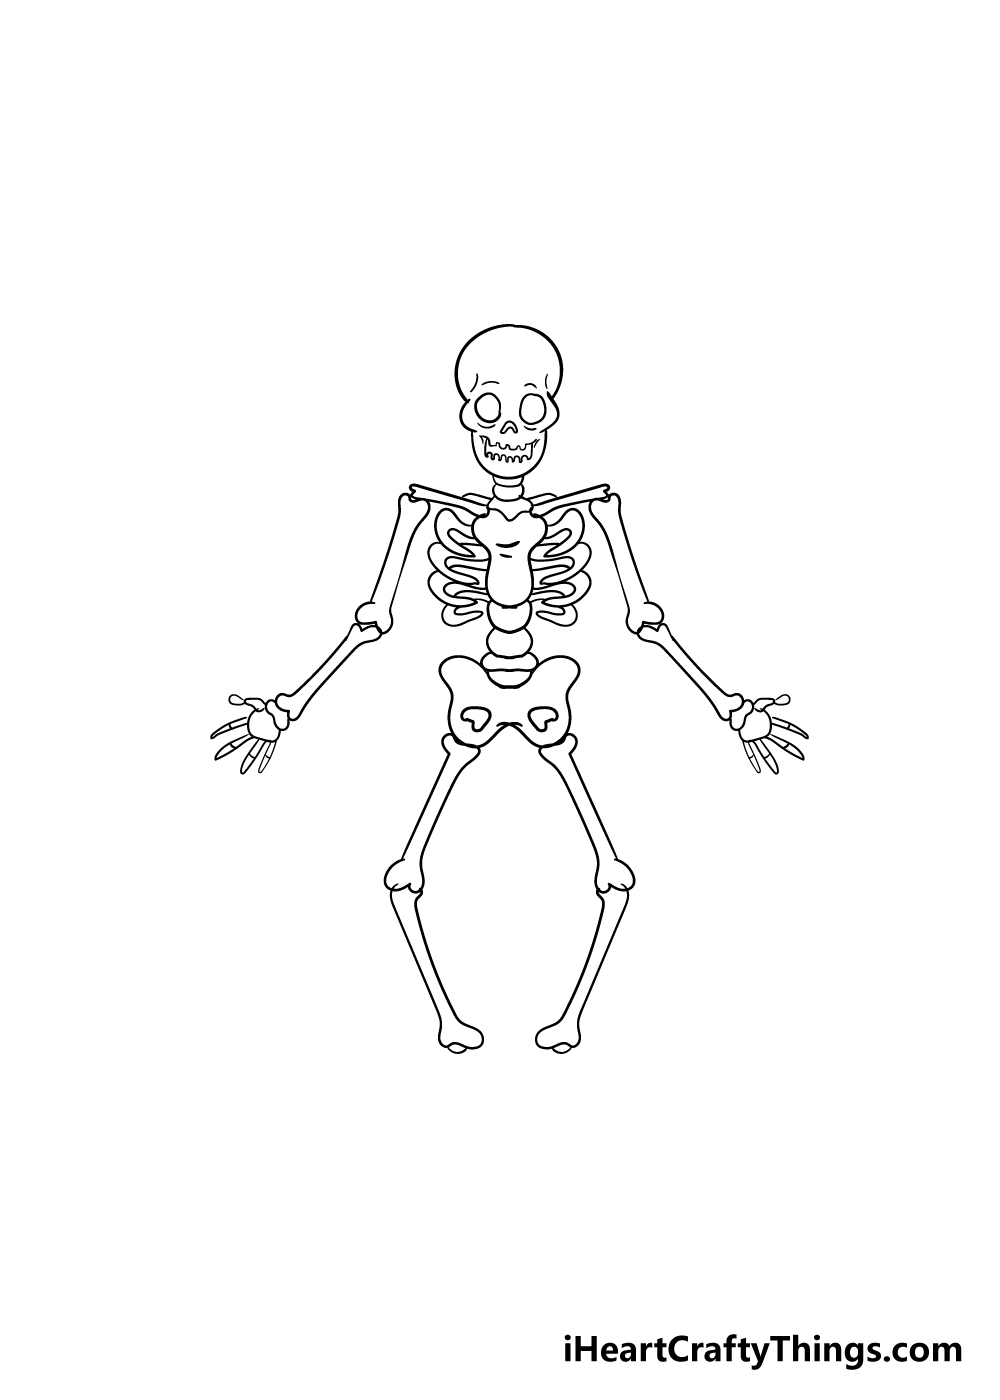
The leg bones will be drawn similarly to the arm bones from step 5.
The main difference will be that they will be longer than the arms, and that they will of course come from the bottom of the hipbone as well.
Step 8 – Finish off the drawing with some feet
You’re almost ready to move on to the ninth and final step of this guide on how to draw a skeleton!
Before we do, let’s add some feet for your skeleton. These will be segmented much like the hands were.
They are made up of two main, larger sections and then have some toes at the end.
Once those are drawn, you have almost finished your skeleton drawing! Before you move on, maybe you could draw a fun background to go with your skeleton!
One idea could have him dancing in a graveyard setting, but what other backgrounds can you think of for this drawing?
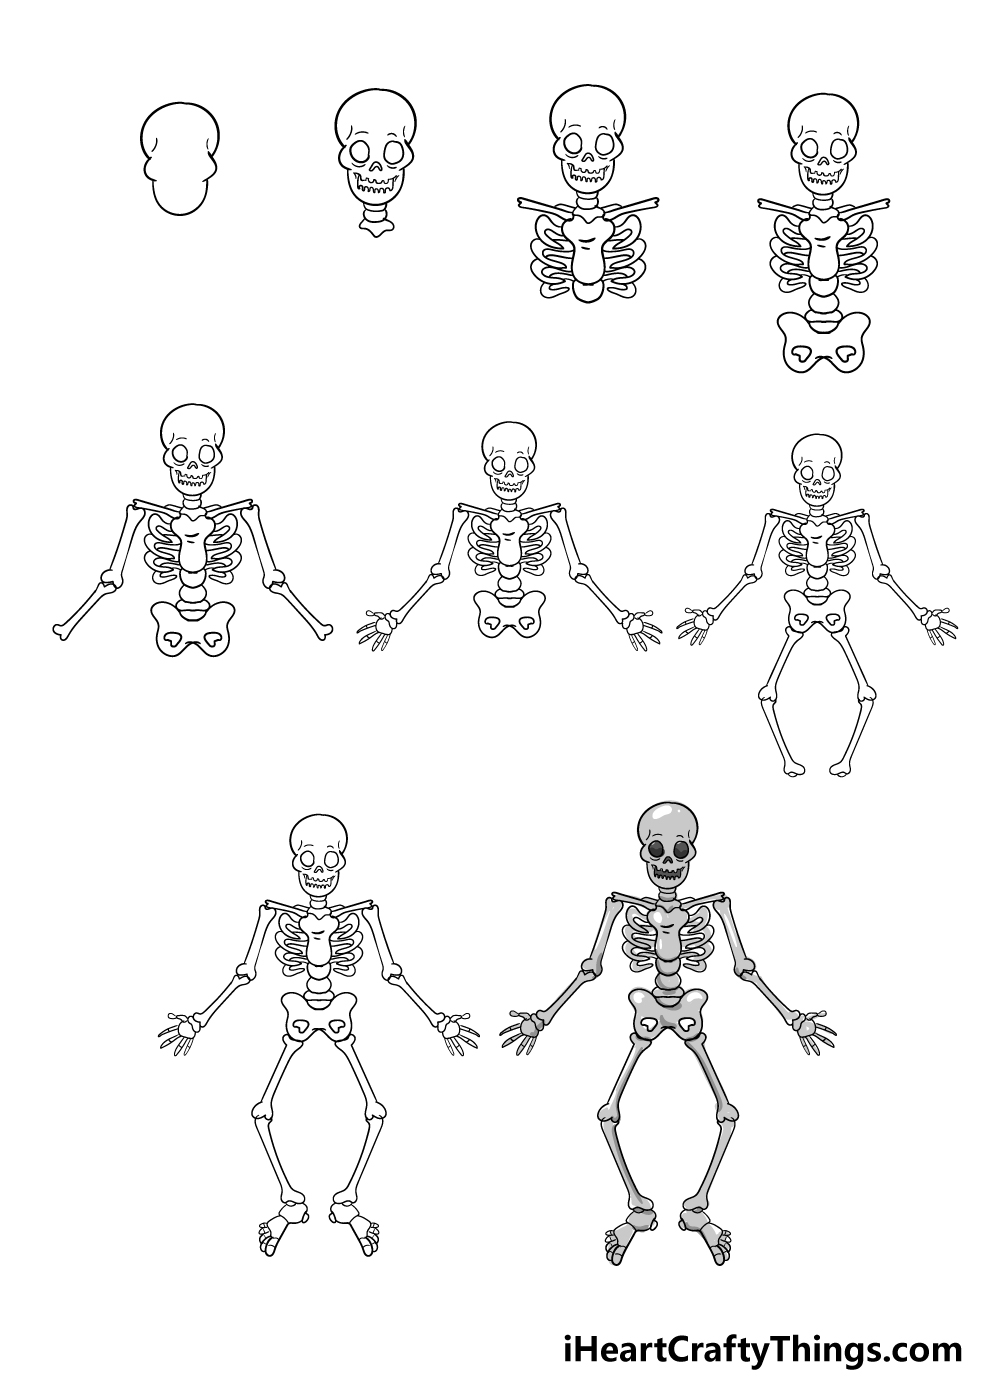
Step 9 – Now finish off your skeleton with some color
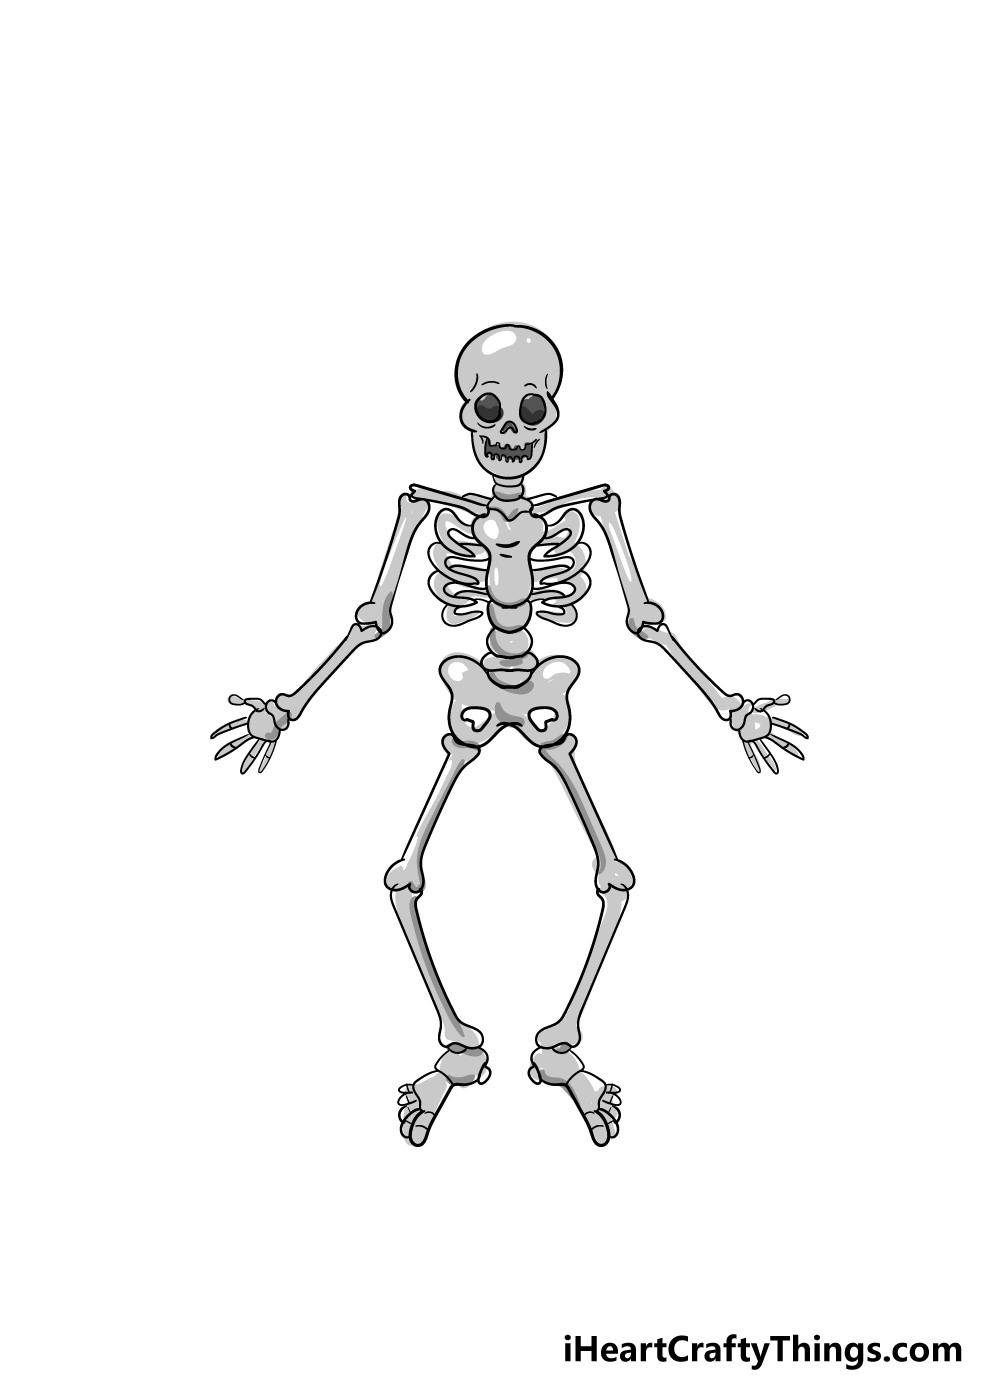
Now that your skeleton is completely drawn, you can have some fun coloring it in! We used a simple grey color scheme for our image, but you should really feel free to use your imagination for this image.
If you’re feeling extra ambitious, maybe you could try to use a different color for each bone of the skeleton!
If you drew a background or extra elements, you can also color that in. which art mediums will you use for your picture?
I would use watercolors for a more muted, spooky feeling, but it would look great with some brighter mediums as well!
3 More tips to make your skeleton drawing easy!
Make your skeleton drawing even easier with these 3 fun and helpful tips!
Even when drawn in a cartoon style, creating a skeleton drawing can be quite a challenge! When using this guide, you may want to supplement it with some additional references.
You will be able to find many diagrams and drawings of skeletons online that you can use to help.
Using these to help can help make this easy to draw skeleton even easier!
You can even find small models of skeletons at some stores so you can get an even better sense of the structure.
If you’re having a hard time drawing some of the bones, you could make it easier by adding some clothing to it. For example, you may be struggling with the ribs especially.
If that is the case, you could have it wearing a fancy jacket or a T-shirt. Or, you could add a hat, some gloves or pants.
It would all depend on which parts of the drawing you may be struggling most with. There are many items of clothing or even accessories and objects you could add to cover whichever parts of this skeleton drawing you’re having a hard time with.
If you want to make your skeleton sketch even easier, then you may want to try and draw it on the biggest page you can. Also, try and blow up the images from the guide as big as possible on the largest screen you have.
Making it bigger means that the details won’t have to be as small and fiddly. This can make drawing the more intricate parts so much easier to do!
When drawing, you may also want to start off with a light pencil. Using this pencil, you can slowly build up the details of the drawing and use basic shapes to get the proportions looking right.
Then, when you’re happy with it you can use your pen to draw the final lines. Preparation is key whenever you’re taking on a challenging drawing, so the more you do the better!
How To Make This Skeleton Drawing Even Spookier!
You have finished this guide on how to draw a skeleton, and you did an amazing job! As we mentioned in the introduction, skeletons are often associated with spookiness and horror.
For that reason, we thought it would be fun to go over a few ways to make this drawing even spookier. One easy way would be to add some more skeletons.
Having one dancing skeleton around you would be scary enough, but imagine if there were many of them! Now that you have completed the guide once, you should find it easy to draw some more.
How many you add would depend on you, but the more the merrier. You could also add some speech bubbles that would show what the skeleton is saying.
It could be as simple as “boo!” or even just “Oooooooo!” but it can add a lot of character to the image. Where do you think a living skeleton would live?
You can show off what you think by drawing a background setting for your picture. We immediately think of graveyards and scary haunted houses, but these are just a few examples.
Maybe you can think of something more creative. For example, maybe this skeleton could be a teacher in front of a class of skeleton students.
This is one silly idea, but it shows you how you can easily make a scene with a few simple details. It could also be wearing some clothing or posing with some props.
These ideas are here to get your imagination started, but now you can show off your creativity! We will be very interested to see what you come up with when finishing this skeleton drawing.
Your Skeleton Drawing is Complete
You have reached the end of our step-by-step guide on how to draw a skeleton!
There were some tricky elements to this drawing, so you should be very proud that you finished up with such an incredible drawing.
Even when a drawing is complicated, it can be made so much easier when you have it broken down into steps. We hope that this guide was helpful and fun for you to use!
Now that you can draw this skeleton, how will you finish it off? Will you have it in a spooky setting or make it bright and colorful with your favorite colors and art mediums?
There’s no limit to the fun ways you can complete this image, and we can’t wait to see what you do!
Our website is the place to be if you would like even more step-by-step drawing guides like this one! Be sure to check out our site often, as we upload new ones frequently.
We would love to see your spooky skeleton drawing, so once it’s finished please share it on our Facebook and Pinterest pages so we can see how it turned out!
Here Is A Cute Skeleton Drawing To Inspire You!
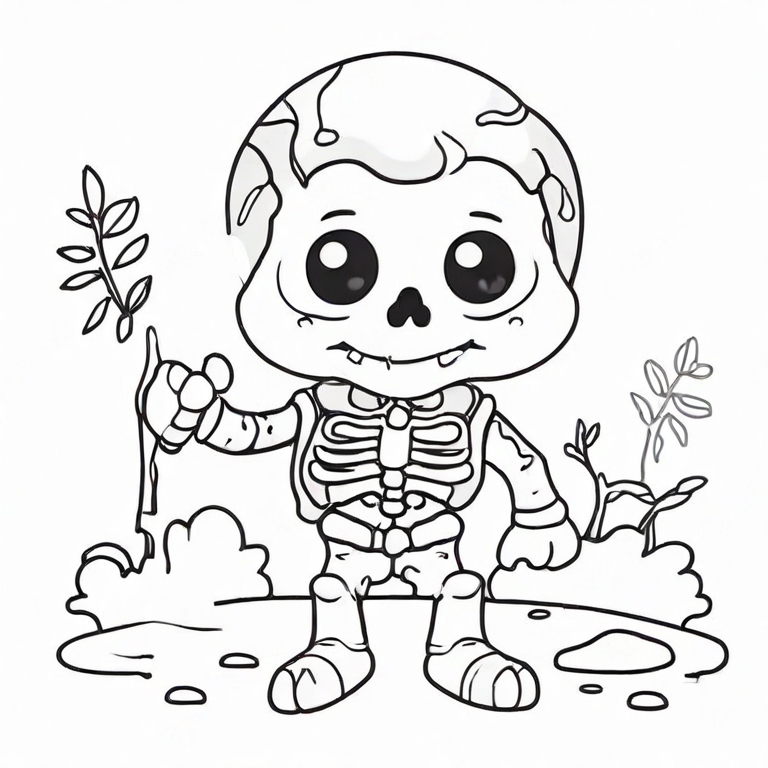
Our artist Amanda has created something very interesting with this drawing. It is a cute skeleton drawing for kids, and it is an interesting take on the subject of a skeleton.
She has made something that is normally considered creepy and scary and made it cute! Even though it is very cartoony, it still packs a lot of details, such as in areas such as the ribs.
There are also some great details around the skeleton as well. These details make the picture even more interesting, and they allow you to add some amazing colors.
This picture gives off a Halloween feel, so you could also add some other spooky details such as bats, gravestones or other ghouls and monsters.
What else would you like to add to this picture to make it even more spooky and fun than it already is?