When it comes to insects, it’s hard to find any as beautiful as the butterfly.
These stunning creatures manage to impress not only with the intricate patterns on their wings but also by the amazing colors they show off.
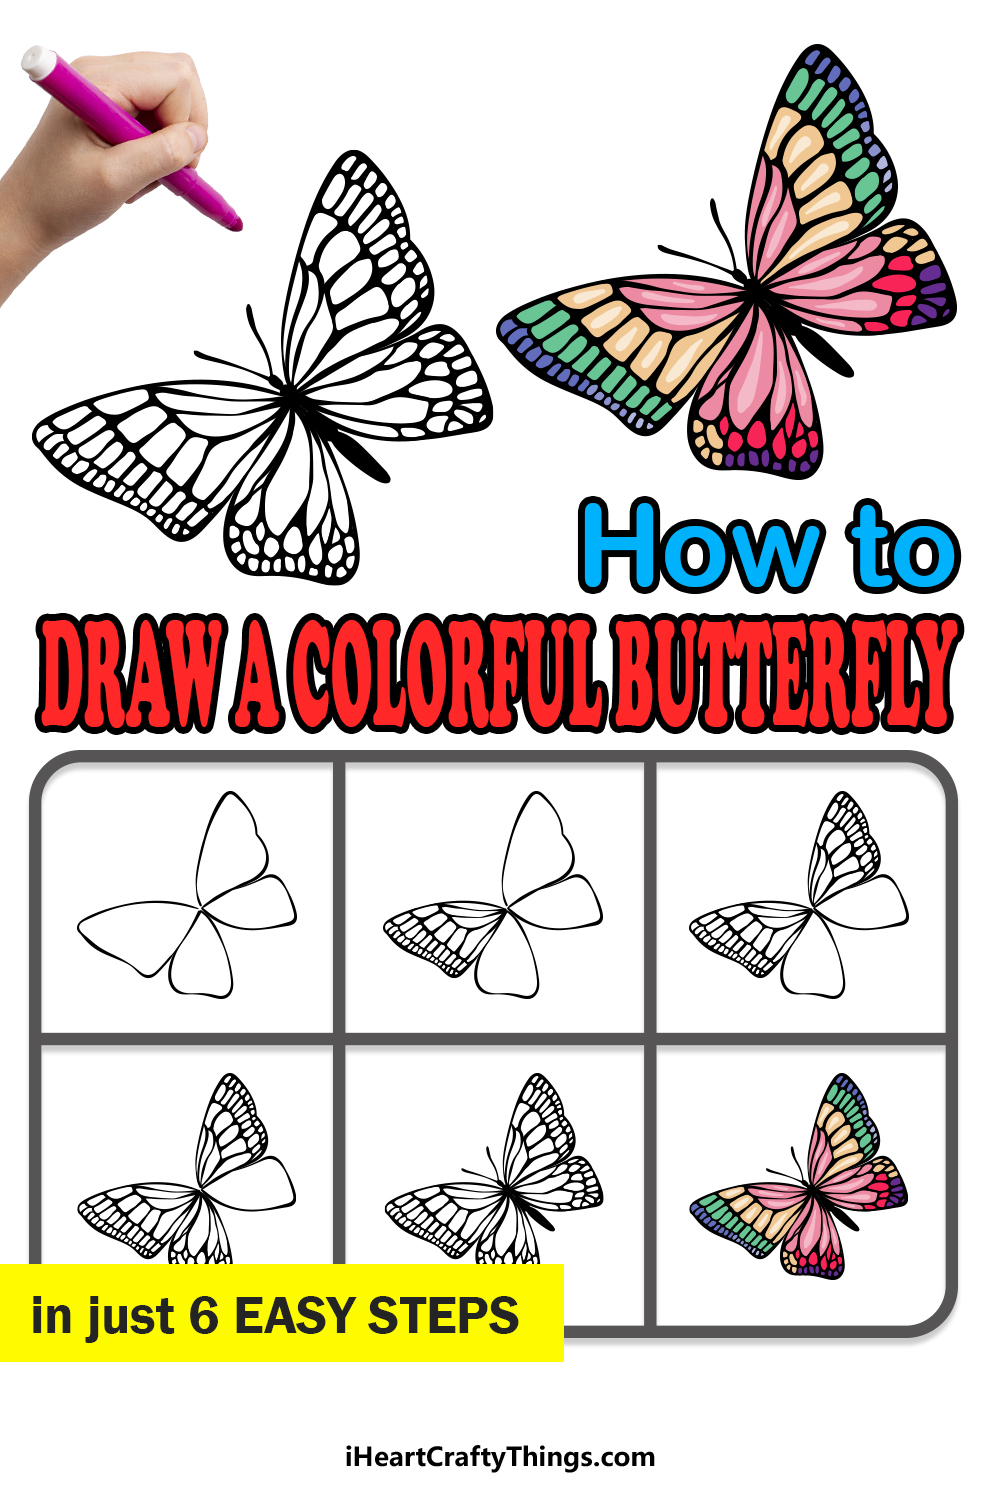
For this reason, they are a popular subject for artists to depict. It can be quite tricky to master, however, so learning how to draw a colorful butterfly can be a bit of a challenge!
Luckily, it is a challenge that we are here to help make easier, so you’ll want to see this guide all the way to the end!
We hope that this step-by-step guide on how to draw a colorful butterfly will be a fun and helpful experience for you to take on!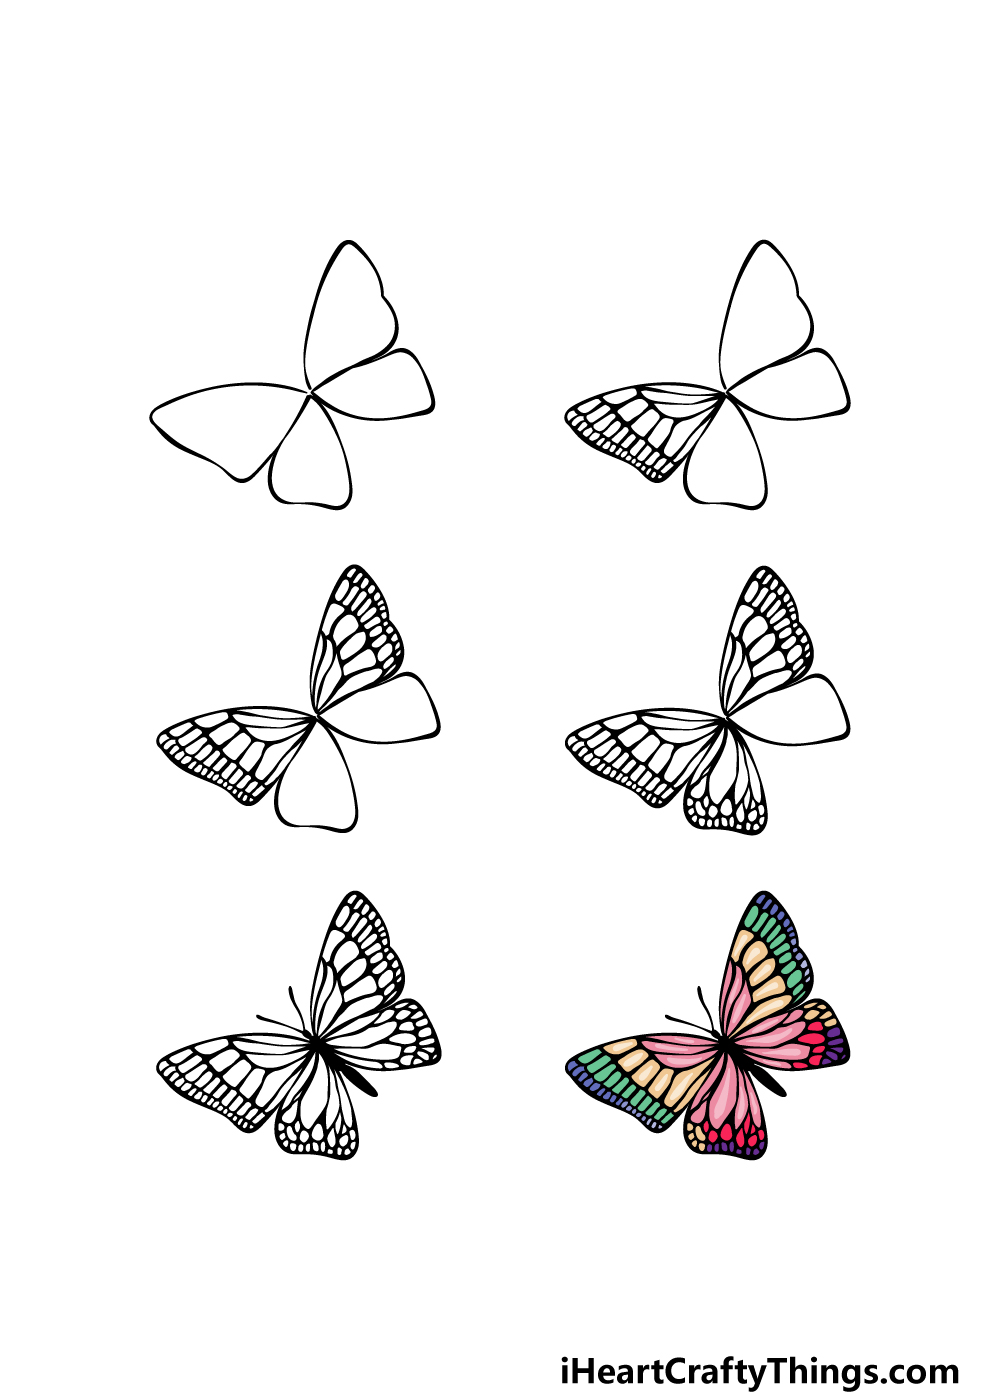
How to Draw A Colorful Butterfly – Let’s Get Started!
Step 1
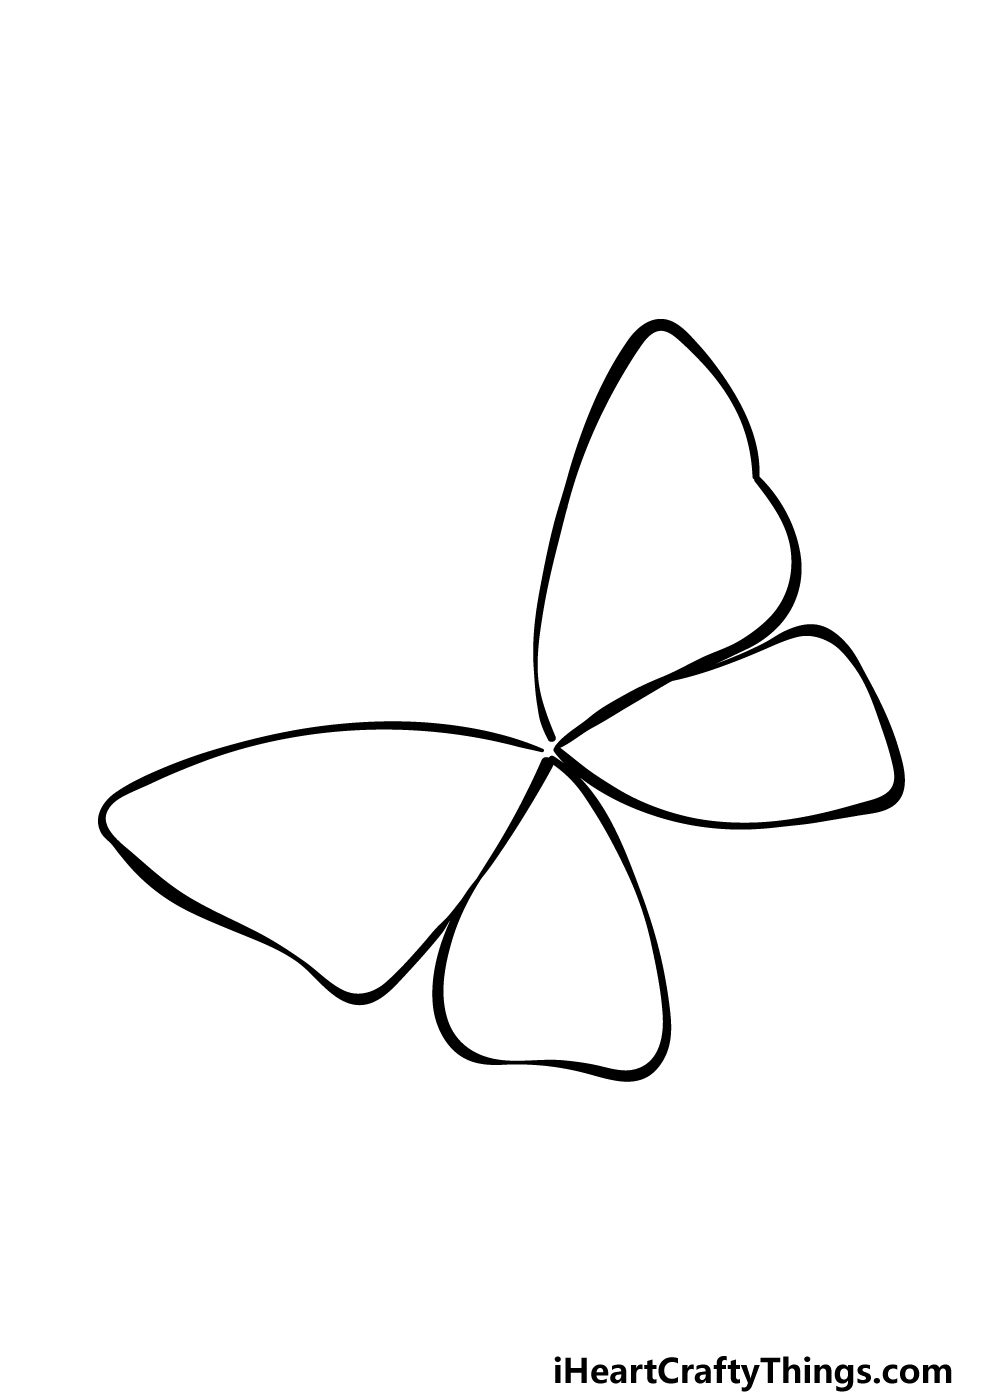
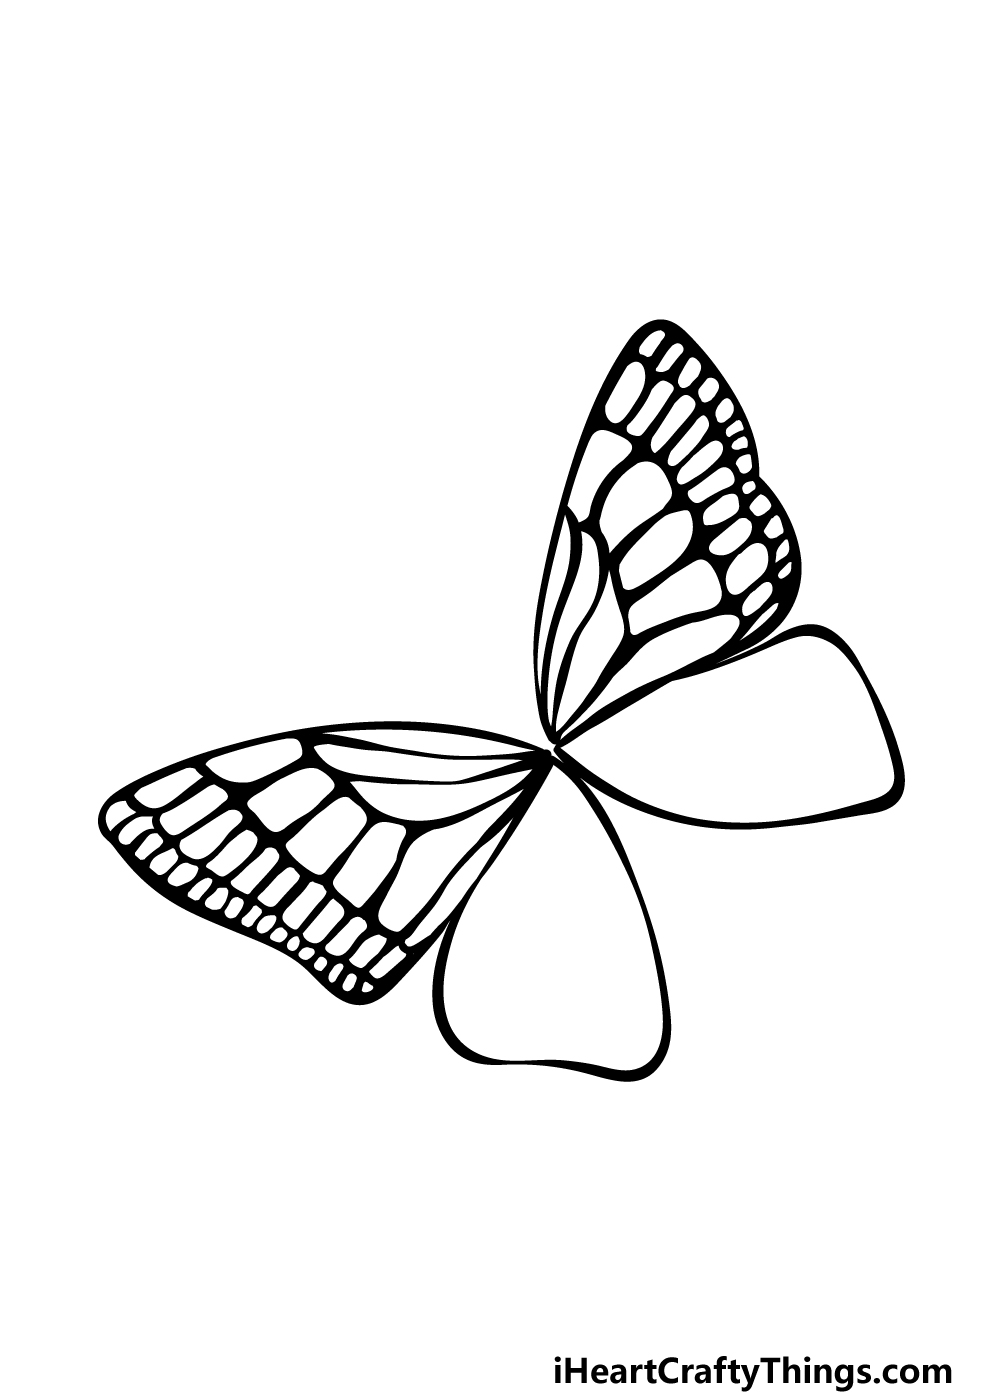
For this first step of our guide on how to draw a colorful butterfly, we will begin with the main attraction: the wings of the butterfly.
More specifically, we will start with the outlines for the wings so that you can add details to them later on in the guide.
The wings are separated into four different sections, with the two top ones being much larger than the two back ones. They all connect at the body of the butterfly, but that will be added later.
Try your best to draw the wing shapes and positions as closely as you can to our reference picture, and then we can proceed to step 2!
Step 2 – Now, draw some pattern details for the first wing portion
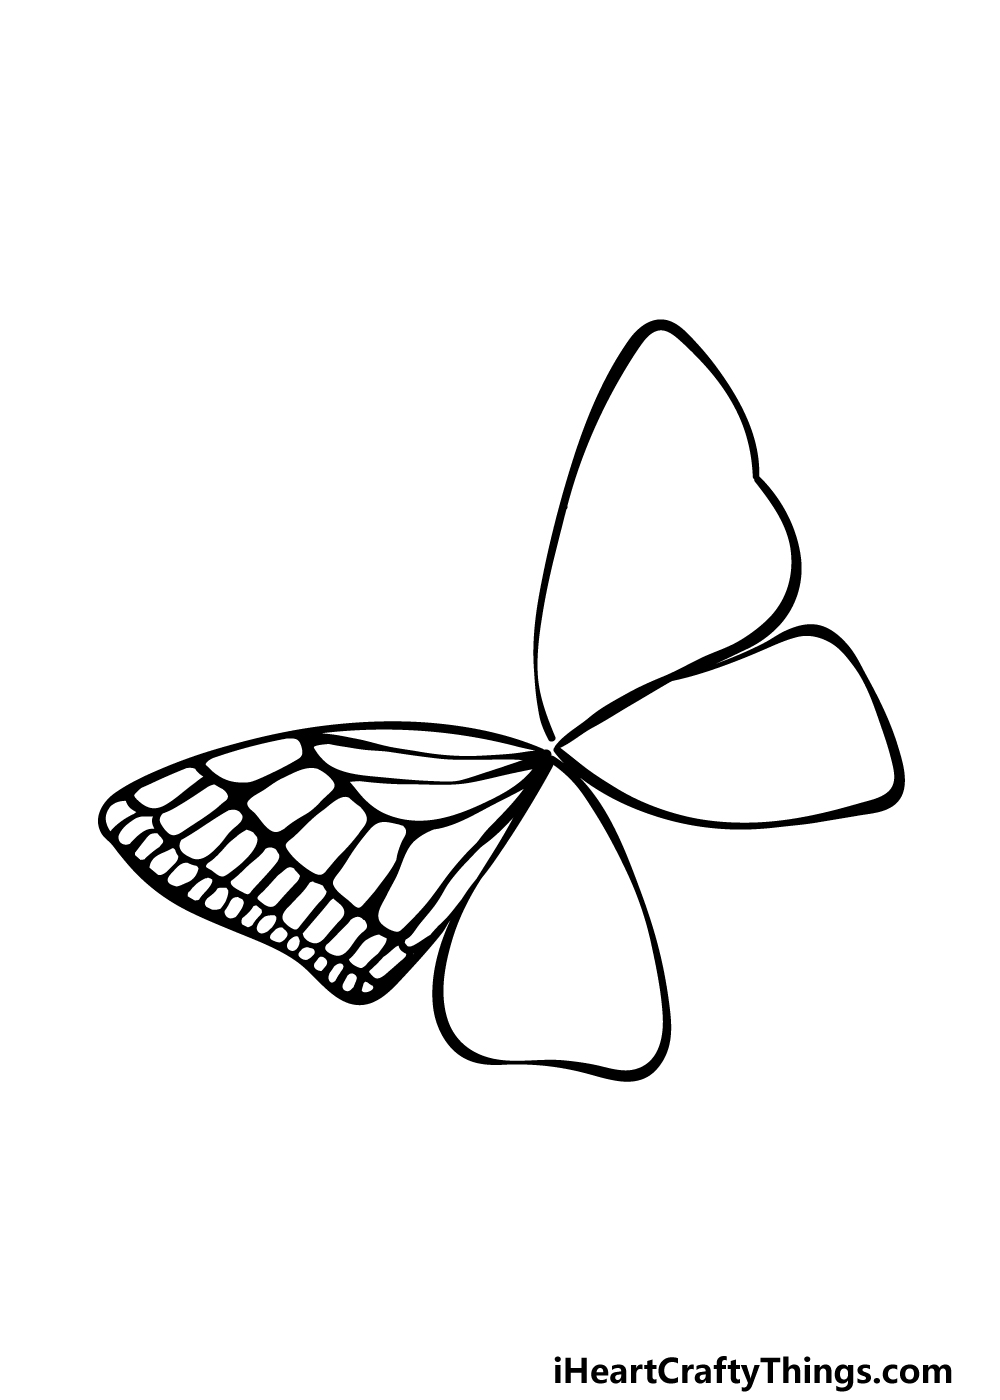
With the outlines of the wings for this colorful butterfly drawing done, we can now start to add some pattern details to the wing sections.
For now, we will be focusing on the wing section on the upper left.
We will use some curved lines extending from the inner edge of the wing to start this pattern, and then these will extend into some rounded square shapes.
The squared shapes will vary in size, so you can use the reference image to guide you as you design these shapes.
Once you’re happy with how this pattern looks, we can move on to step 3!
Step 3 – Draw some pattern details for the next section of the wings
In this third step of our guide on how to draw a colorful butterfly, we will be adding the pattern details to the front right-hand section of the wings.
When drawing this next section of the pattern, try your best to have it be as close to a mirror image of the other side of the butterfly’s wing as you can.
As long as you replicate the pattern exactly as it appears in our example then you should have no problems getting it looking close to the pattern on the other side!
When you have drawn this next wing section, we can add some more in the fourth step.
Step 4 – Next, draw the pattern for the back left-hand wing portion
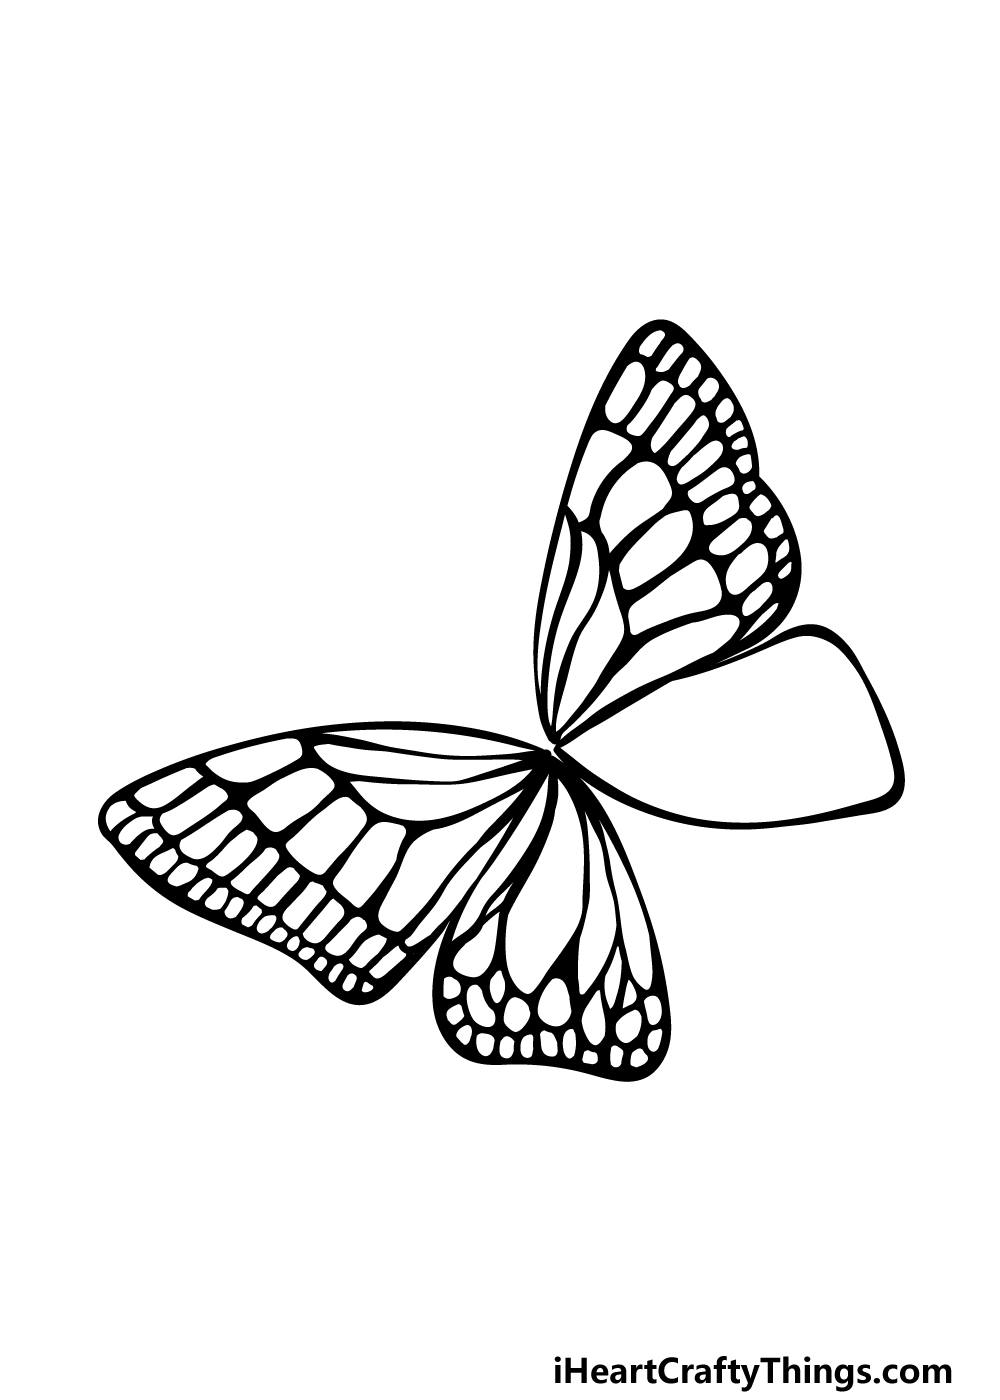
Now we will move on to the next wing section as we start this fourth step of your colorful butterfly drawing.
The pattern will be quite similar in structure to how the pattern on the other wings looked, but due to the drastically different shape of the wing section the pattern will be spaced differently.
Some curved lines will extend from the portion of the wing that is attached to the body of the colorful butterfly, and these will turn into some more small rounded square and round shapes.
There will just be a few final details and elements to add before this image is complete, so when you’re ready we shall take care of those in the next step.
Step 5 – Add the final details to your colorful butterfly drawing
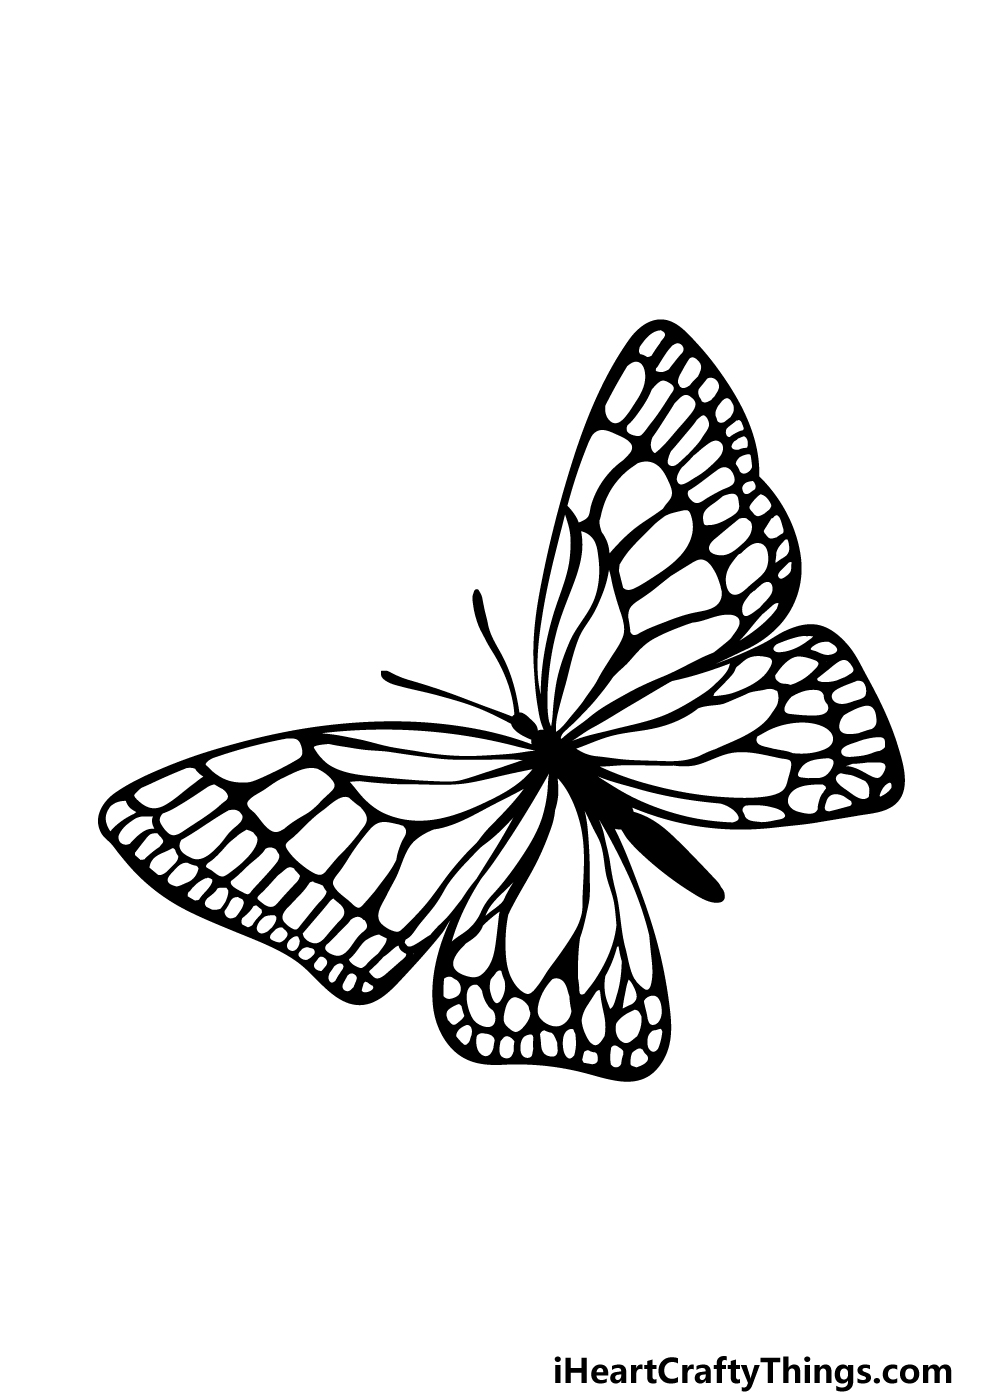
Before you add some beautiful colors to your creation in the final step of this guide on how to draw a colorful butterfly, we will first finish off the final touches.
First, we will be adding the pattern details to the final section of the wings.
To do this, you should once again do your best to mirror the pattern as it appears on the section on the opposite end of the butterfly.
Then, to finish off we will be adding the body of the butterfly. This will be a solid, thin black shape between the wing sections, and there will be a small black circle at the left-hand side of it.
This head will also have some curved feelers poking off of it, and then it’s time for some coloring fun!
Step 6 – Finish off your colorful butterfly drawing with color
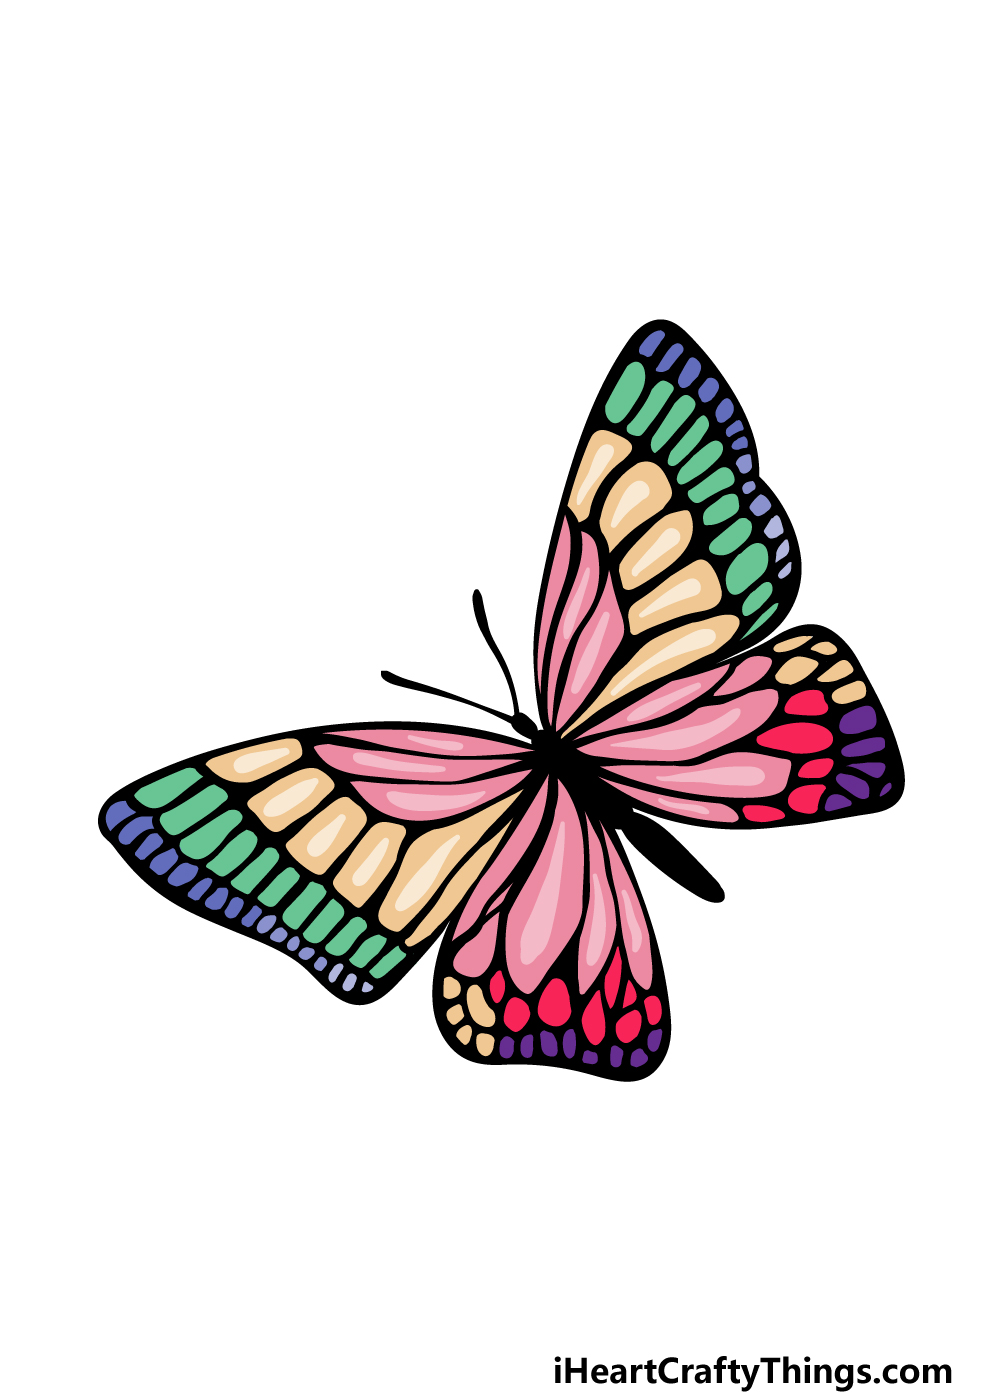
This is the final step of your colorful butterfly drawing, and in it you can let your creativity run wild as you add some beautiful colors!
In our reference image, we showed you some of the colors that you could use to finish off this image. We tried to keep the colors nice and bright, as this really helps the picture to pop off the page.
This image is all about expressing your creativity, so you should definitely go ahead and use any of your favorite colors and art mediums to bring this butterfly to colorful life!
How will you use color to finish this incredible drawing?
Do this to take your colorful butterfly drawing to the next level
Make your colorful butterfly sketch even more amazing with these fun tips!
Seeing a butterfly in the wild is always a lovely sight, and this is emphasized even more when you get to see a group of butterflies together!
This would be a great way to make this drawing of a colorful butterfly even better.
Now that you know how to draw a butterfly, you could add as many more as you like to finish this one off. The page could be filled with butterflies or you could simply add one or two more.
How many butterflies do you think would make this drawing complete?
Another way that you could make this artwork even better would be by adding other insects or flowers apart from butterflies. You would have literally millions of options here!
Maybe you could add some colorful ladybugs, some hardworking ants or maybe even some buzzing bees. These are just three examples, but you could add any other insects and small creatures you love.
Adding these would also be a great way to add even more colors to the picture!
Speaking of color, you could also make this colorful butterfly sketch even more unique by changing up the colors that you use. We showed you just a few colors you could use in our example.
Much like the almost unlimited selection of insects you could add, you also have a massive range of colors you could play around with! What colors and art mediums will you try?
Finally, you can finish off this colorful butterfly drawing with a background. This would be a great addition whether you added our other suggestions, some of your own or none at all.
Butterflies can be found in all manner of places, so there are tons of possibilities. It could be flying in a beautiful garden for a classic setting.
Or, you could create a composition by having the butterfly sitting on a teacup. These are just a few suggestions, but you can really let your creativity flow here!
Your Colorful Butterfly Drawing is Complete!
That takes care of all 6 steps of this guide on how to draw a colorful butterfly! We hope that this guide gave you everything you could need to create some amazingly colorful butterfly artworks.
Drawing pictures with this much detail can be a bit tricky, but as long as you follow all of the steps then you’ll definitely be able to do it.
When you have mastered this guide, you could even create more variations with entirely unique patterns on the wings and even add elements such as a background.
We would love to see the beautiful butterflies you create!
For more inspiration, i recommend you check out my collection of butterfly coloring pages.
We also have many more guides waiting for you on our website. There is a huge selection with more on the way soon, so be sure to keep checking in to never miss out!
As we mentioned, we would also love to see how your colorful butterfly drawing turned out! You can show off your creation by sharing it on our Facebook and Pinterest pages for us to admire.
Here Is An Easy Butterfly Drawing To Inspire You!
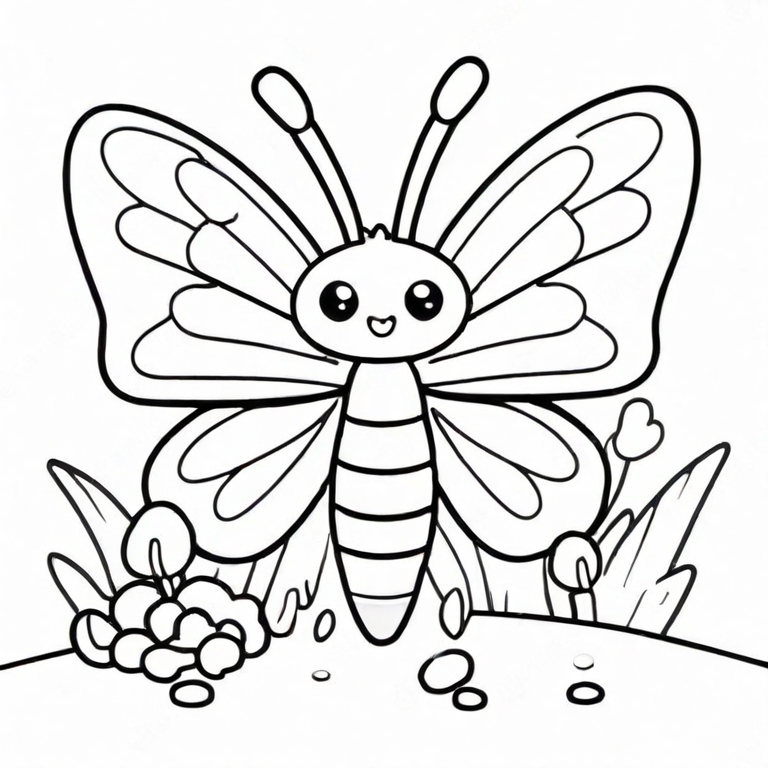
Butterflies are so beautiful with their colorful wings that have intricate designs on them. This easy butterfly drawing for kids was hopefully a lot of fun to work on!
If you still need some extra inspiration, then we have this example for you, drawn by our artist Amanda.
She made such a lovely depiction of a butterfly for this page, and it has a lot of detail to admire.
The wings of the butterfly were a focus for Amanda, and you can see this with the intricate pattern on them.
When you make your own easy butterfly sketch, you could also improvise to make your own unique wing designs.
While Amanda focused on the butterfly, she also made a simple background setting beneath the butterfly, and this is something else that you could change and add to if you want a more unique image.