There are few things as relaxing and enjoyable as surveying a beautiful landscape! The next best thing is to create a visual reminder of the beautiful view you got to enjoy.
You could take a photo, but it can be immensely more satisfying to create a representation of it yourself.
This can become quite tricky which leads to frustration, and this means that learning how to draw a simple landscape is a task that many give up on.
The good news is that it can be made much easier, and this is just the tutorial to help with it!
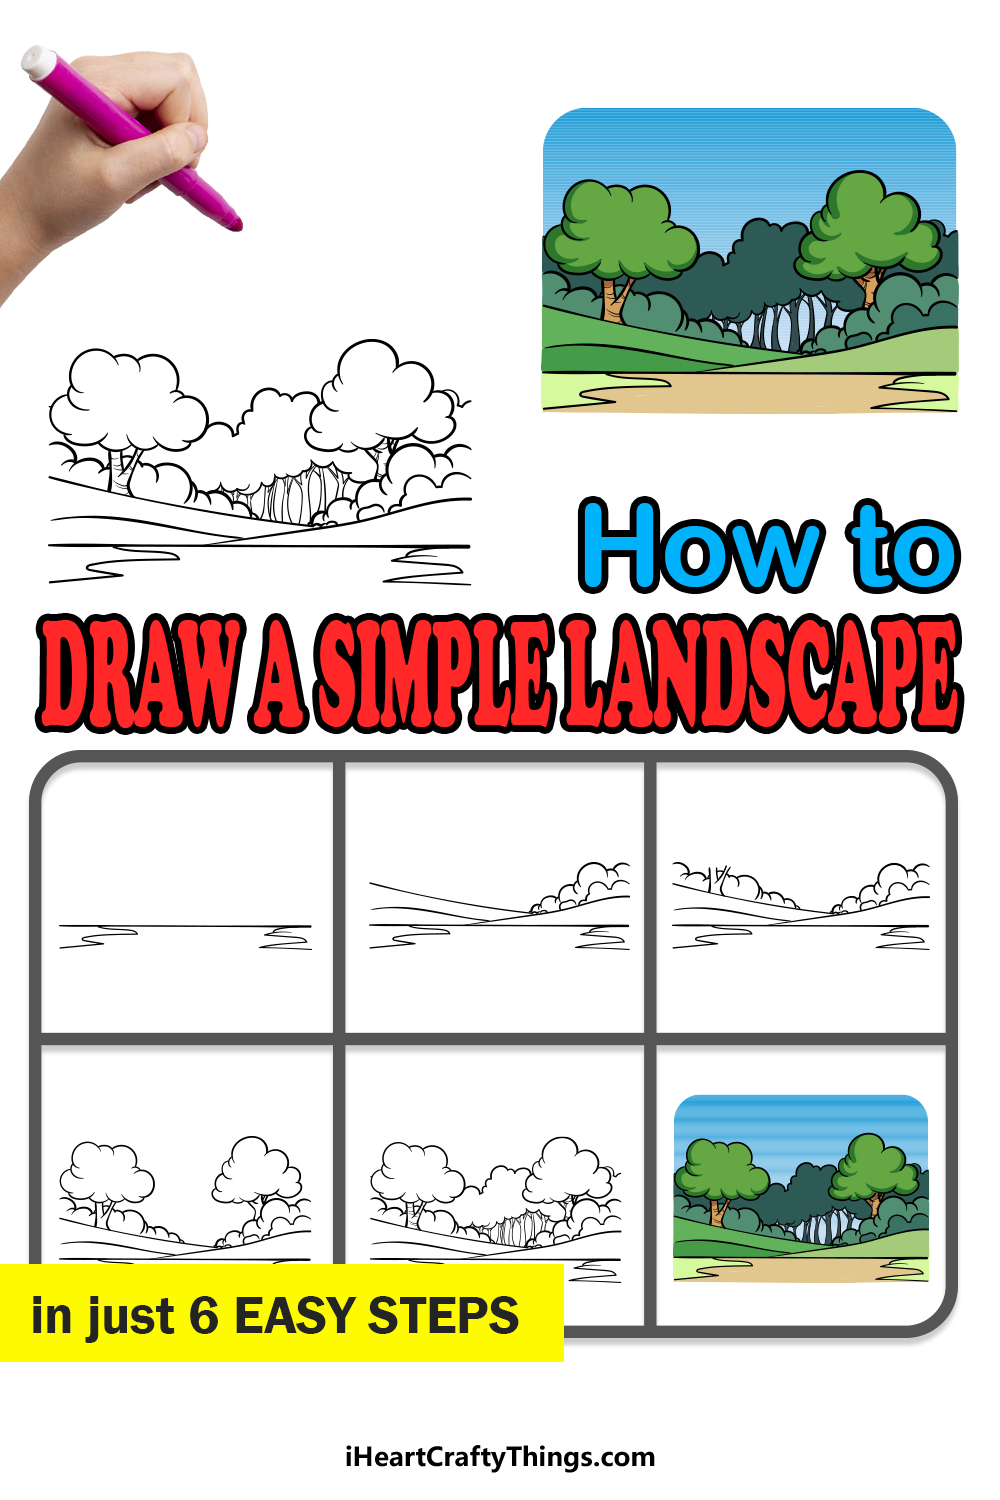
This step-by-step guide on how to draw a simple landscape in just 6 easy steps will show you how you can recreate your favorite beautiful view!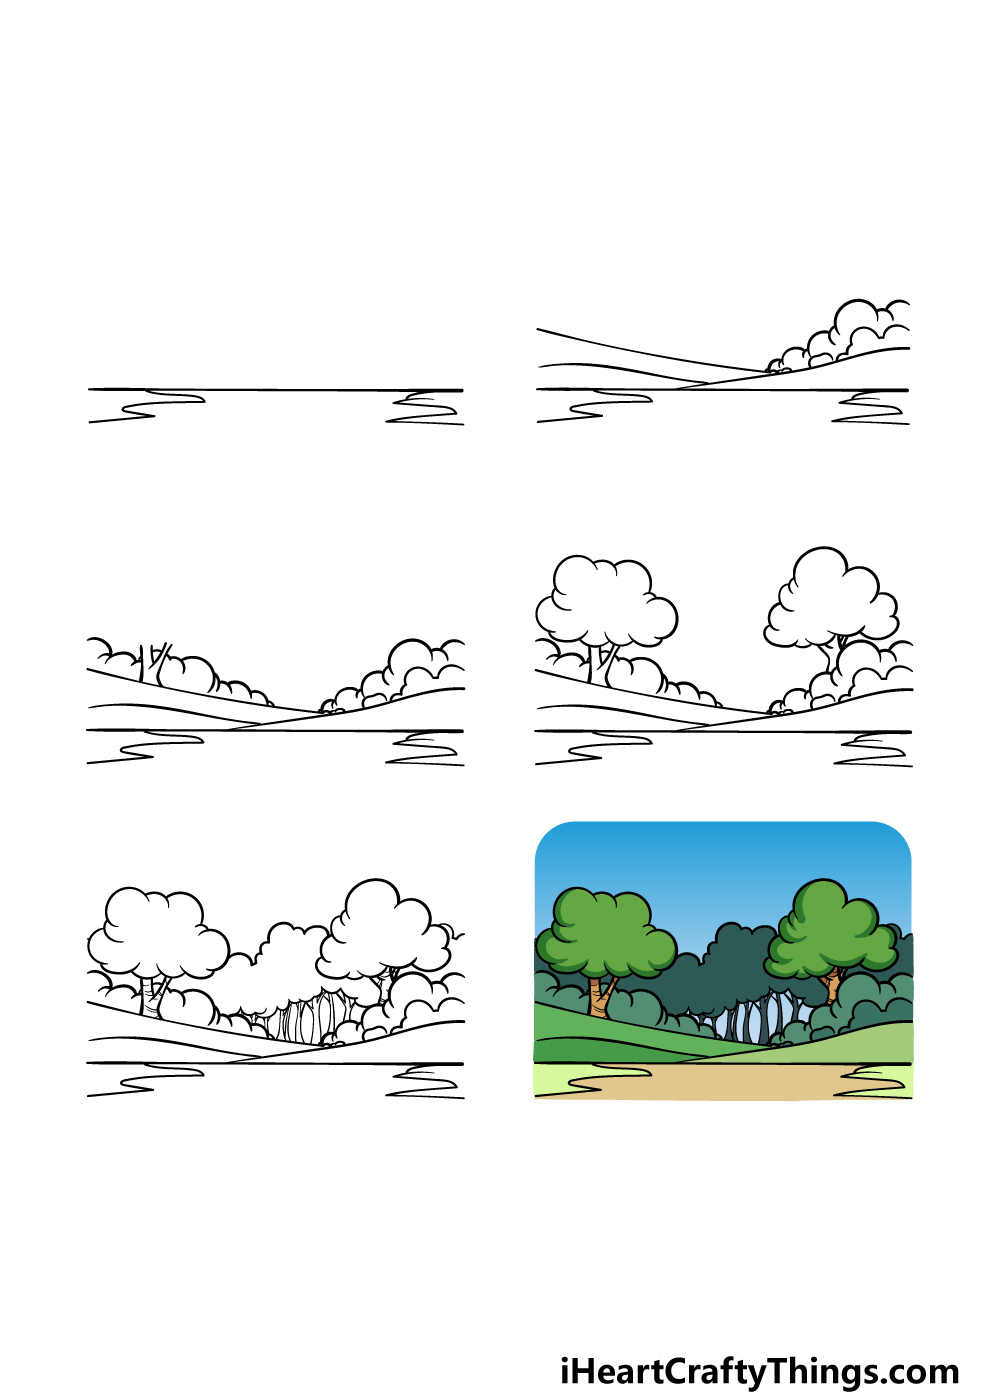
How to Draw A Simple Landscape – Let’s Get Started!
Step 1

We shall start things nice and simple in this first step of our guide on how to draw a simple landscape!
Drawing landscapes can actually be quite challenging, but as with any drawing challenge it can be made much simpler when you break it down.
With that in mind, you can start off by drawing a straight line horizontally across the page.
This will serve as the ground of the forest that you are depicting.
Once it is drawn, you can then draw some wavy lines coming down from it for some pathways that we will finish off in later steps of the guide.
With these lines drawn, you will be ready for step 2 of the guide!
Step 2 – Now, draw some more of the landscape

In this second part of your simple landscape drawing, we will be adding some more layers to the landscape!
To do this, we will be drawing some more layers of curved lines over one another to create the appearance of depth.
On the right-hand side of these hills, you can then add a shape made up of many rounded lines for some bushes.
Then, it will be time for the third step of the guide!
Step 3 – Draw some more bushes and tree trunks
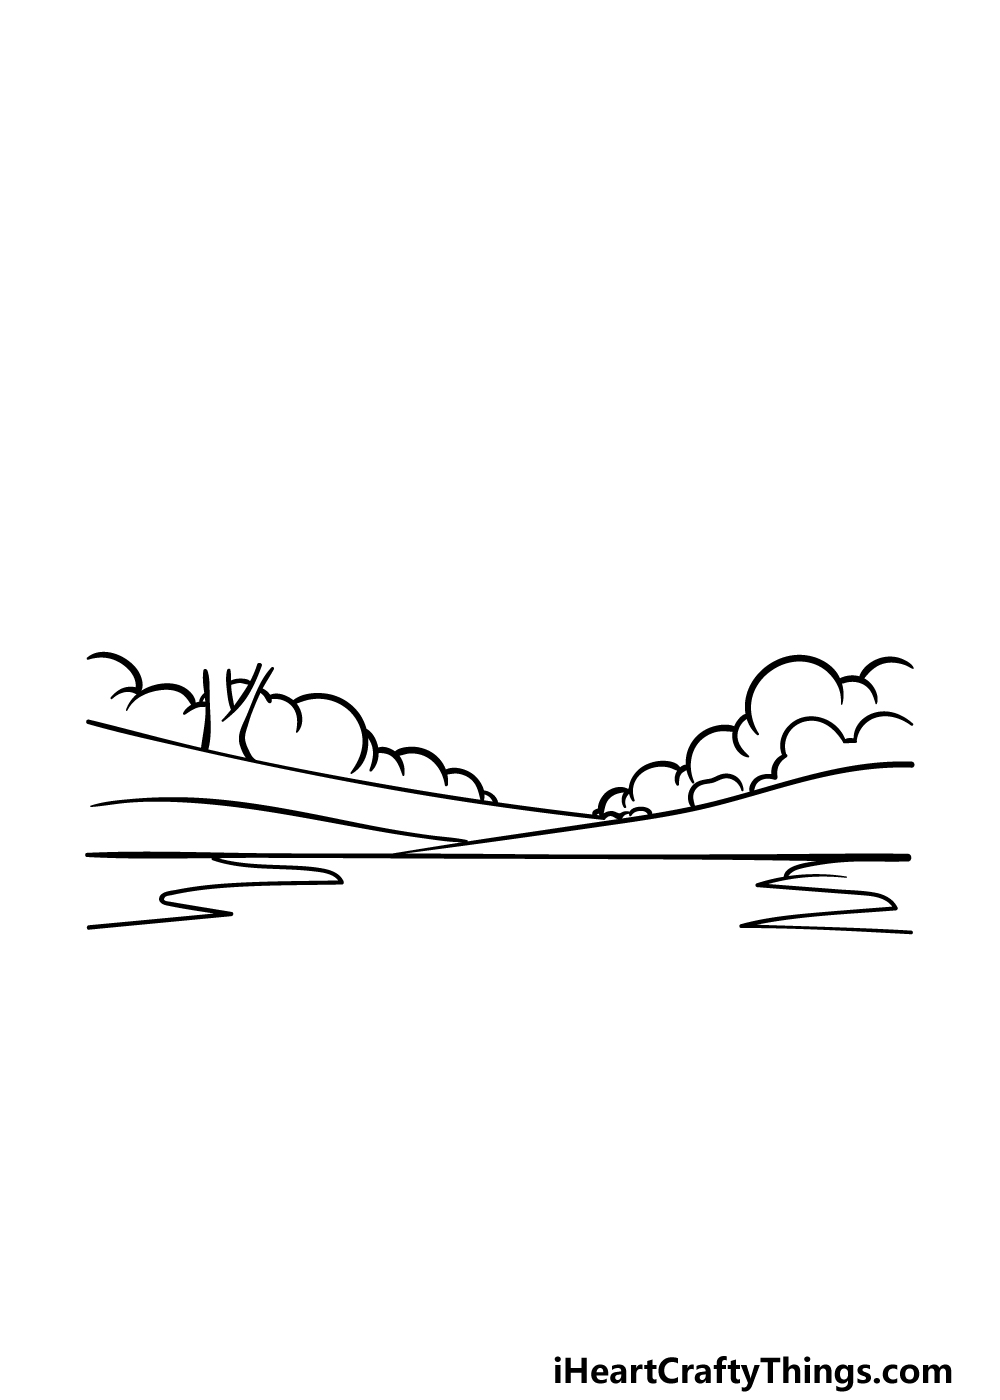
Now we will be adding some more bushes and tree trunks for this third step of our guide on how to draw a simple landscape!
On the left-hand side of the hills, you can add some more bushes. These will look very similar to the ones that you drew on the other side.
The main difference is that these ones will have a tree trunk extending in front of them
You can draw this trunk using some curved lines that fork in the middle. There will be no leaves on the tree yet, but rest assured that we will add that very soon in the next step!
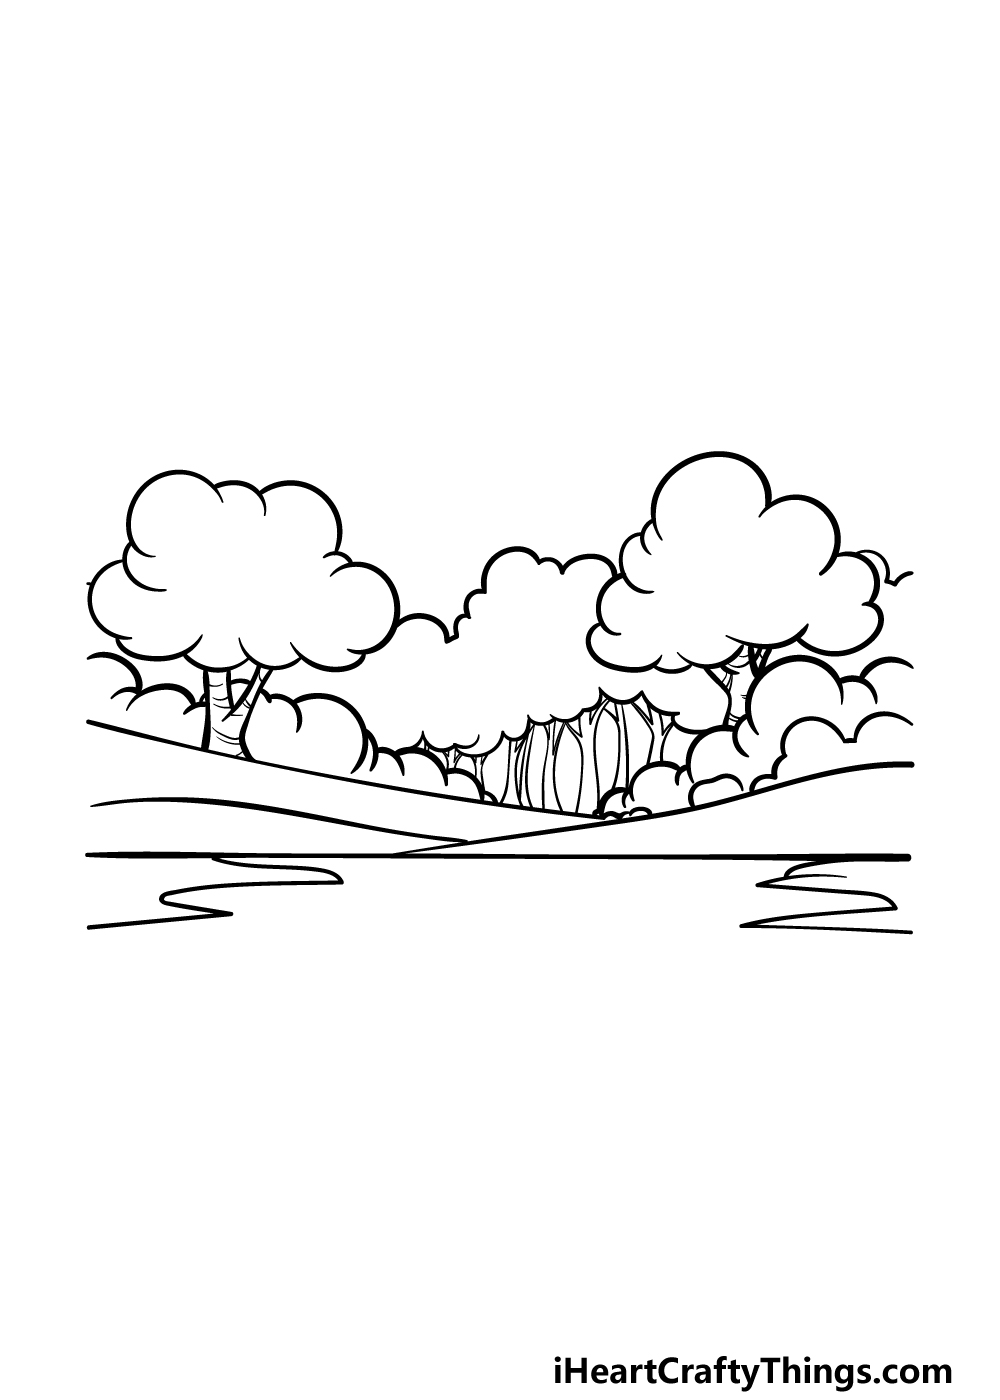
Step 4 – Next, draw the tops of the trees
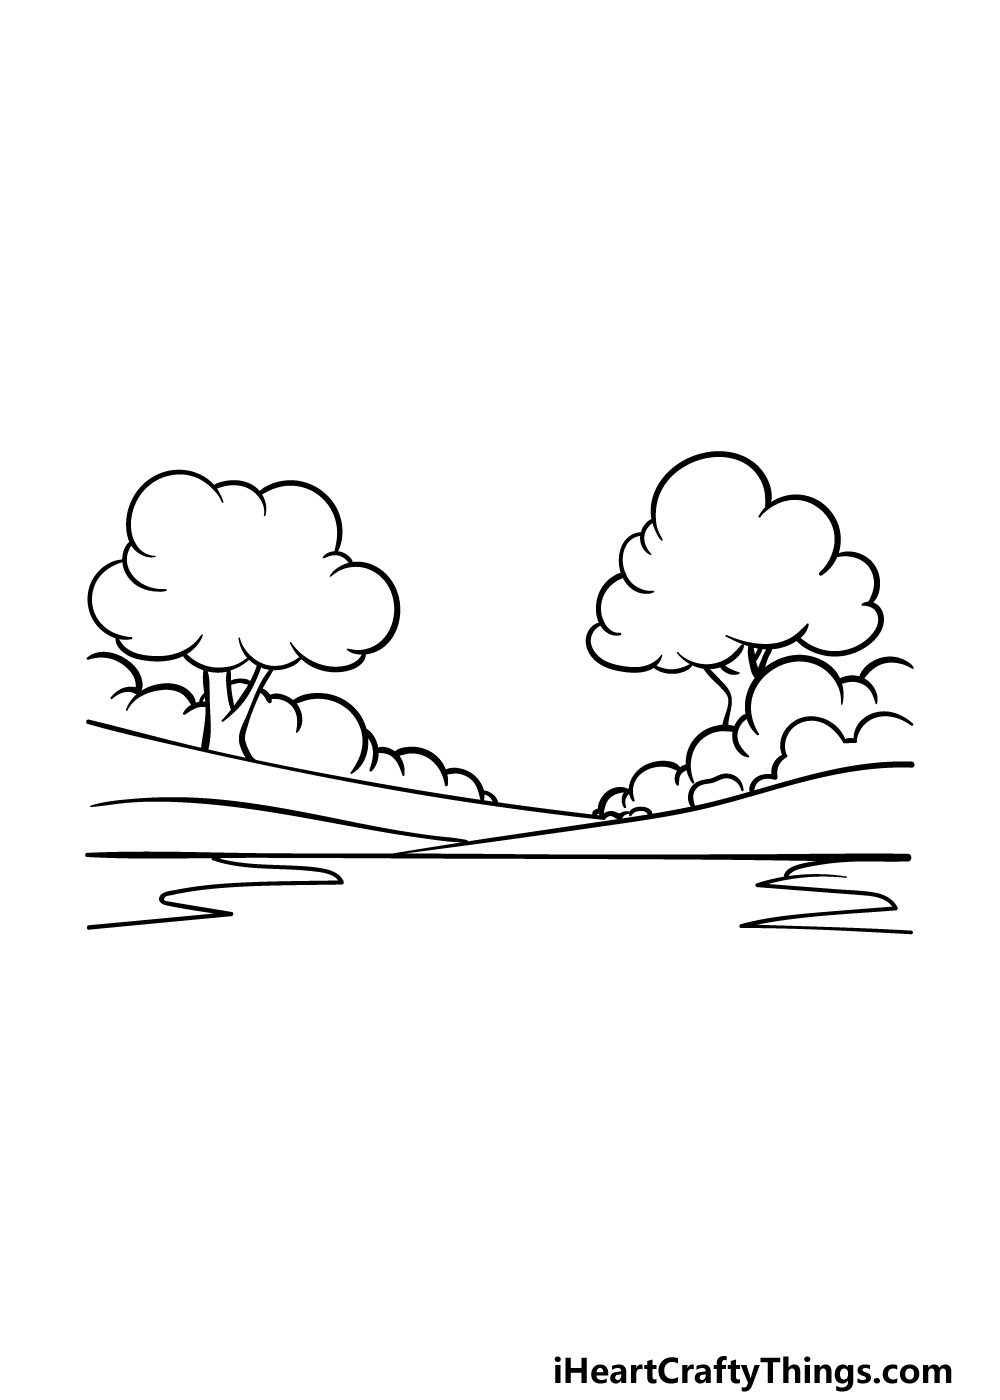
You began drawing the trunks of the larger trees in the previous step of your simple landscape drawing, and in this one we will be drawing the leafy tops of the trees.
These can be drawn using some large curved and rounded lines atop the tree trunks. The bigger and thicker these look, the better!
There will be an empty space left near the back of the image, but we will fill that empty space along with any final details and additions in the next step of the guide.
Step 5 – Add the final details to your simple landscape drawing
Soon you will be able to add some color to the picture in the final step of this guide on how to draw a simple landscape! Before that, we have just a few final aspects and details to add.
We will be drawing some more trees to the empty portion at the back of the scene, and you can do this by drawing some more rounded, bumpy lines for the outline of the tree canopy.
Once that is drawn, you can extend some slightly curved lines down from the canopy for the small trunks of the trees.
Then you have finished this design! You could also add some details of your own to the image to personalize it even further.
Some examples would be to add weather effects such as clouds or even humans and animals exploring this forest. What other ideas can you think of to finish up this scene before the final step?
Bonus: Try These Ideas To Make Your Simple Landscape Drawing Even Better!
We didn’t want to make things too complicated when compiling this drawing, as we wanted to live up to the name and keep things simple. This was done to make it easier, but it also leaves it open to your own ideas!
That’s why before we head to the final step, we wanted to go over a few ideas for ways you could make this drawing more complex with your own details.
Adding any details will also allow you to make your drawing more unique! For starters, let’s look at the trees. To make the drawing easier, we kept the canopies of the trees to simple rounded shapes.
This makes it much easier, but it would also be nice to make them look more distinct. You could do this by tightening up the shapes a bit and make them look more like they’re made up of individual leaves.
This could be done by drawing the leaves individually, or it could be done with many strokes of whatever you decide to use for the colors of this part.
Adding texture to the trunks of the trees would also add a lot of character to the drawing. Once the trees look as you want them, you could then add additional elements such as animals, humans or even buildings.
Can you imagine having a quiet cabin in this landscape that you could live in? If you can imagine that, then you should add one in to show what your ideal cabin would look like!
Changing the weather of the image could also drastically change the look of the image, so that could be fun to try out. We gave you a few ideas, but how else could you change the look of this simple landscape?
Step 6 – Finish off your simple landscape drawing with color

Your simple landscape drawing is already looking amazing!
The best way to make it look even better would be to add some beautiful colors, and that is exactly what we will do in this final step of the guide.
Perhaps more than any other step in this guide, this is where you can really let loose with your creativity!
In our example image, we showed you just one of the ways that you could go about coloring this amazing simple landscape.
These colors are just a suggestion, however! As mentioned, you may want to use some unique colors of your own.
You could also play around with some great art mediums like acrylic paints or watercolors, so let your creativity flow and see what happens!
3 More tips to make your simple landscape drawing easy!
Take a trip with these tips we have for your simple landscape sketch!
Even though this drawing of a simple landscape was left simple by design, there are still a few elements and details that can be simplified and even removed.
Before making these changes, we would recommend trying the drawing as it is.
If you find there are certain elements and parts that you are struggling with specifically, then you could focus on those as you remove or change them.
For example, you may be having a hard time with how we drew the leafy canopies of the trees. If that is the case, then these could be made to be a different shape that you find easier.
It could also just be that you prefer this new shape or take on the details!
Even when creating something seemingly simple like this simple landscape drawing, you can make it so much easier if you prepare it properly.
The best tool for this would be a pencil, as this makes it so that you don’t need to worry about mistakes. You can also use a ruler, even though there are not any straight lines in the picture.
Using your pencil and ruler, you can draw some rough guides for the horizon and positioning of the various elements.
Then, you can use your darker mediums to create more and more layers of details.
Finally, getting inspiration from nature is a great way to make your simple landscape sketch look even better. This could also help to make certain elements easier.
For example, let’s again focus on the trees. If the trees are the part of the drawing you’re having the most trouble with, then you could find some real trees outside.
Chances are there will be some trees near where you live, but if you can’t use real trees around you then you could look up some images online.
These photos will help you to not only draw the trees as they appear in our guide but also create some fun variations!
Your Simple Landscape Drawing is Complete!
Now that you have completed this guide on how to draw a simple landscape, you have learned how to create a classic subject of art!
Drawing landscapes can be a tricky prospect to take on, and we hope that this guide made it fun and easy for you to master.
Whenever you take on a new drawing, it can always be made easier when you have some simple steps to follow, and that’s what we wanted to do for you in the guide.
Finishing this design is just the start, as you can also keep things going by adding your own awesome extra details and ideas!
You can also use the steps you went through in this guide and apply it to your favorite real-life view to replicate it.
Then, you can check out our website for more amazing drawing guides to enjoy! We have a huge selection that we update all the time, so be sure to keep checking in to never miss out.
The final step of your simple landscape drawing is a fun one! Now that you are finished you can show off your amazing artwork by sharing it on our Facebook and Pinterest pages!