Monarchies may not play as big of a role in society as they used to, but they are still very active in certain countries and nations.
In days gone by, kings and queens were by far the most important and revered people in the societies they ruled over.
These days, we see stories about royal families in TV, film, literature and more. Learning how to draw a king is a great way to love out some of that royal magic!
We have a great portrayal of a king that we will be working on, so be sure to read to the end of the tutorial!
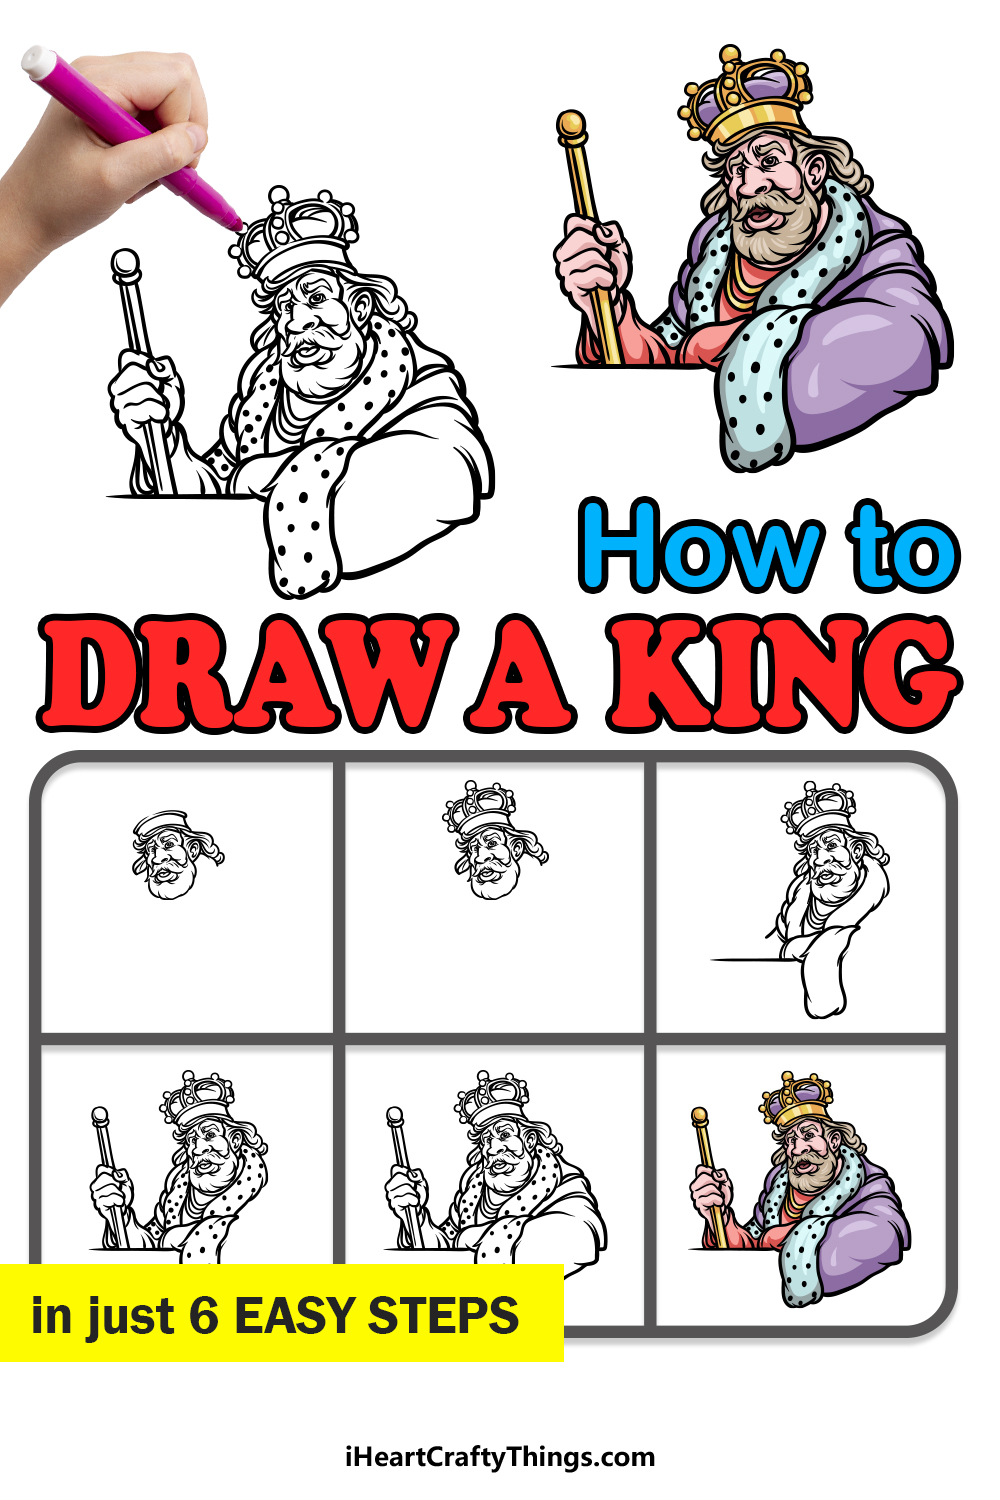
Our step-by-step guide on how to draw a king will show you how to draw this cool picture of a typical monarch in just 6 steps!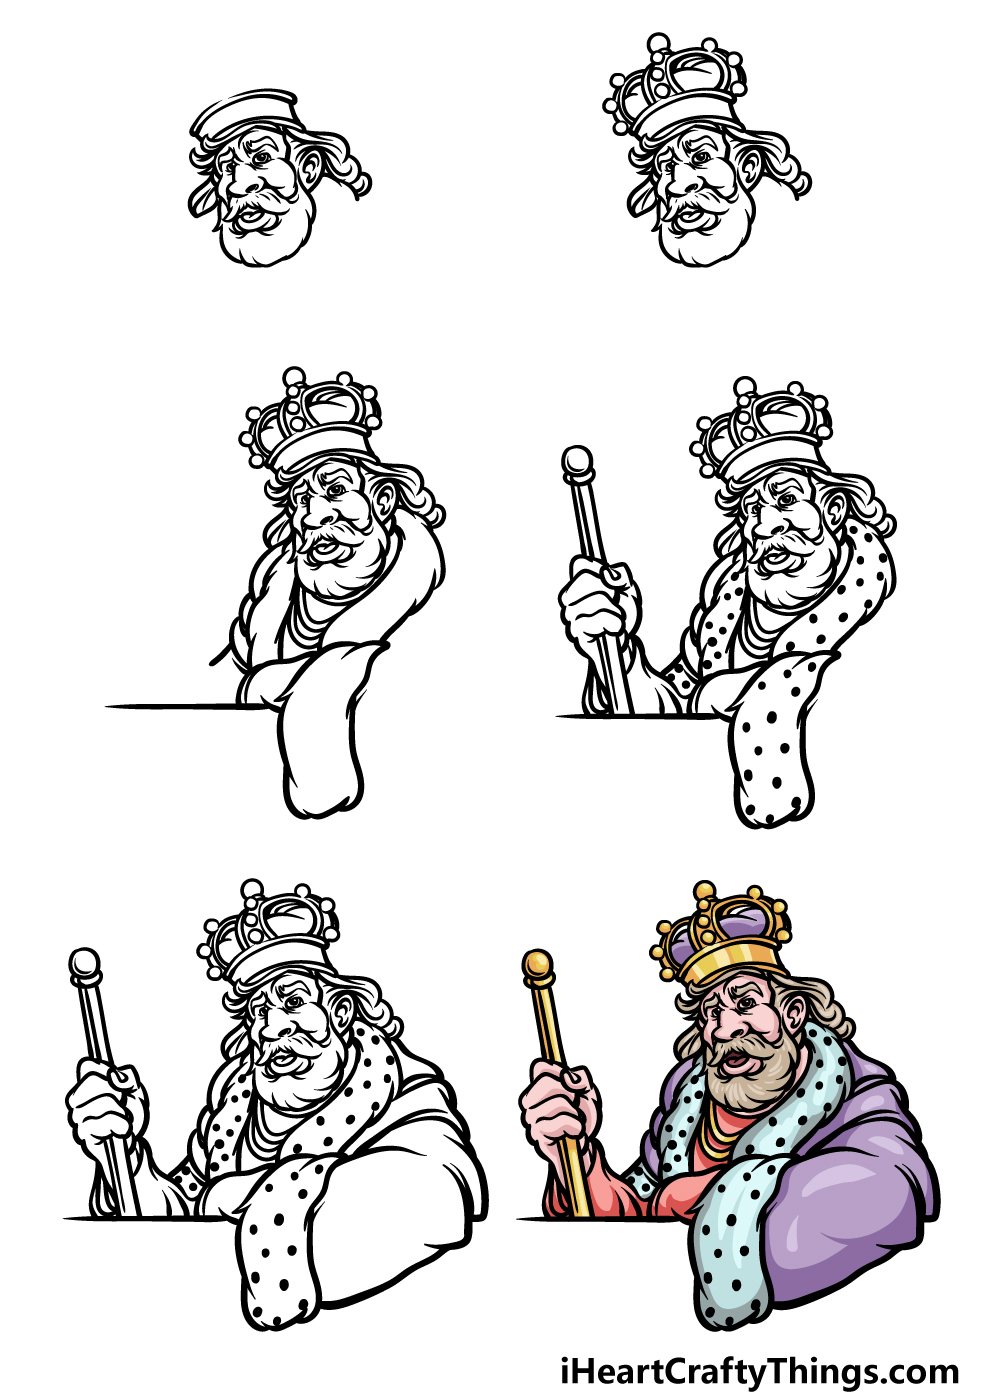
How to Draw A King – Let’s Get Started!
Step 1
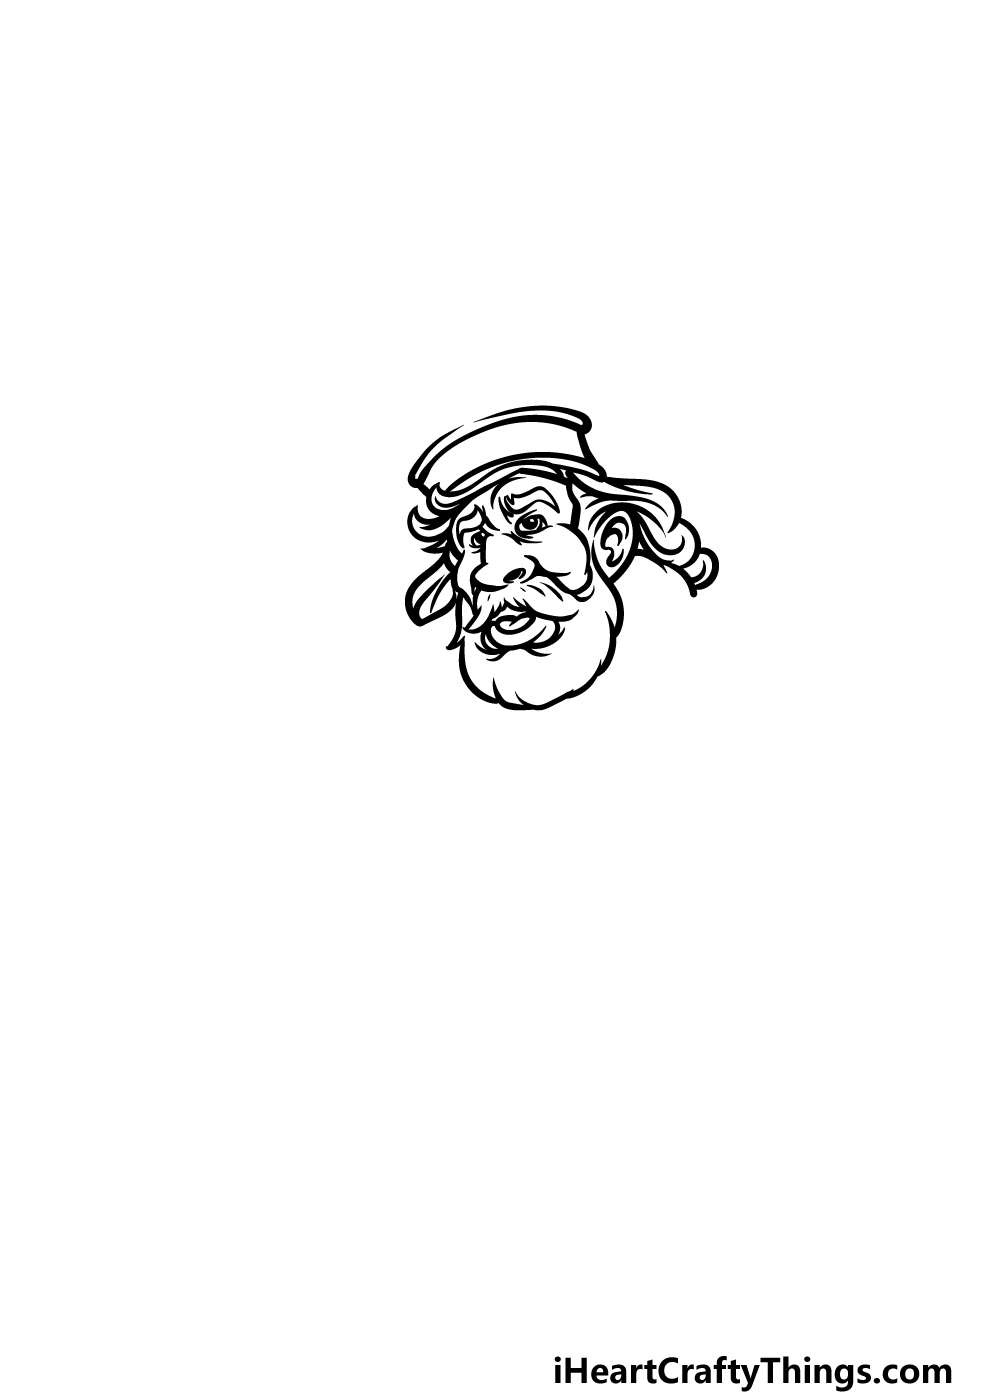
We will start with the head and face of this ruler for the first step of our guide on how to draw a king. We worked a lot of detail into this portrayal even though it is a more cartoony interpretation of a king.
You can start by using some curved lines for the bridge of his nose with some dots for his nostrils.
Then, we will add a mustache beneath the nose along with some more curved lines for his slightly open mouth.
We will then add a thick beard for the lower half of his face and some more rounded lines for his cheekbones.
Next we shall draw some small eyes and eyebrows above his nose. The final aspect we will be adding will be some hair which you can draw with some curved lines.
The start of his crown will go on top of his head with some slightly rounded lines, and then we can proceed.
Step 2 – Now, draw the rest of his crown
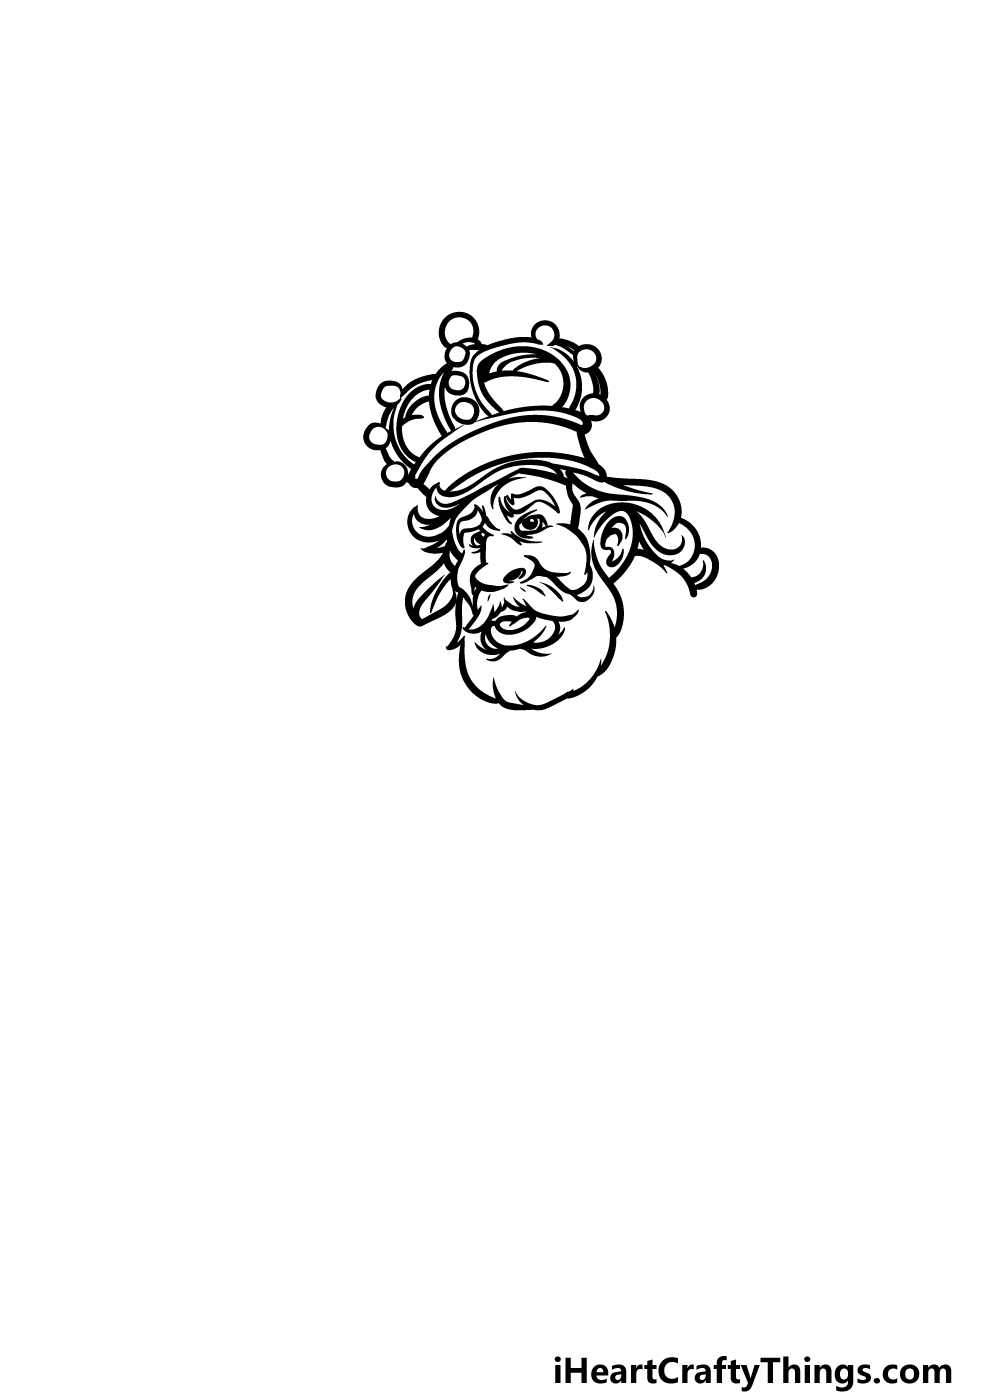
Every great king needs a crown, so we shall finish drawing his one in this second step of your king drawing!
Use some curved lines to draw the golden sections of the crown that form some thin arches. Each of these arches will have some small circles on them for some extra decoration.
Then, below these arches we will draw some more curved lines to form the soft, velvety portion between the gold sections.
Finish off with another circle on top, and then we can move on to step 3.
Step 3 – Next, start drawing his robe and arms
Now we can start to draw the royal robe in this step of our guide on how to draw a king.
This robe can be started with some curved lines with small points in them for the fluffy lapel of his robe going around his shoulders and down his chest.
We will use these same lines for the equally fluffy opening of his arm sleeve. You can also draw a straight, horizontal line for the table he is leaning on.
We will add more detail to these clothing elements as we move on to the next steps!
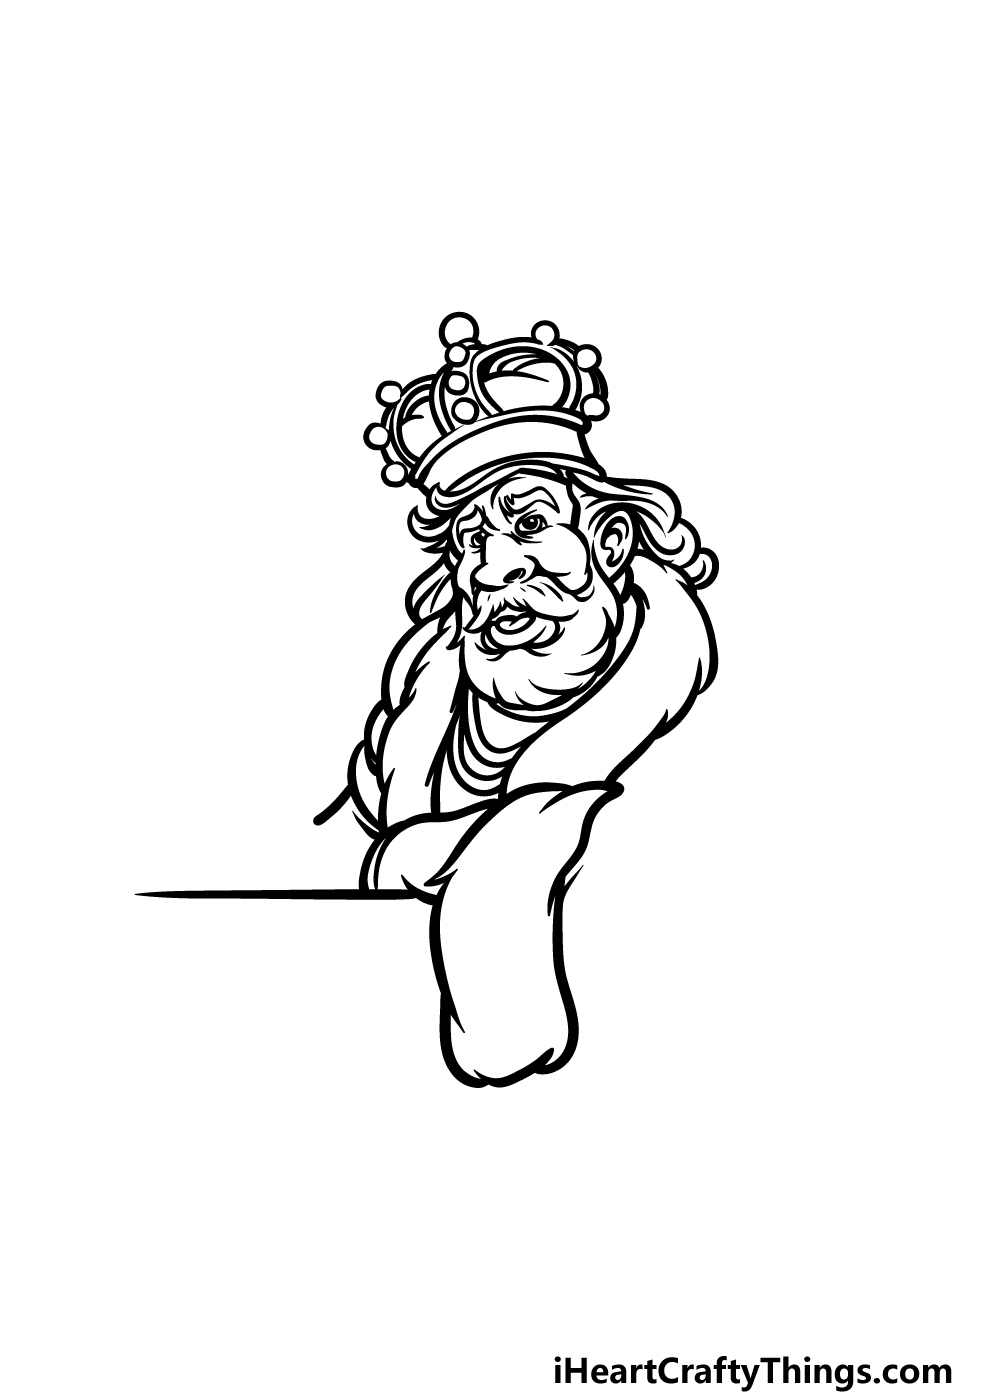
Step 4 – Add some details to his robe and draw his other hand

For this step of your king drawing, we will add some details to the clothing that you drew in the previous step, and then we will add his other hand.
For now, add some thick, black dots along the furry lapel and sleeves of his robe. Then, draw his closed hand poking out of another sleeve.
Finally for this step, you can use some straight lines to draw the royal scepter that he is clutching in this hand.
It will have a round shape on top, and then we can move on to the final details in the next step.
Step 5 – Add the final touches for your king drawing
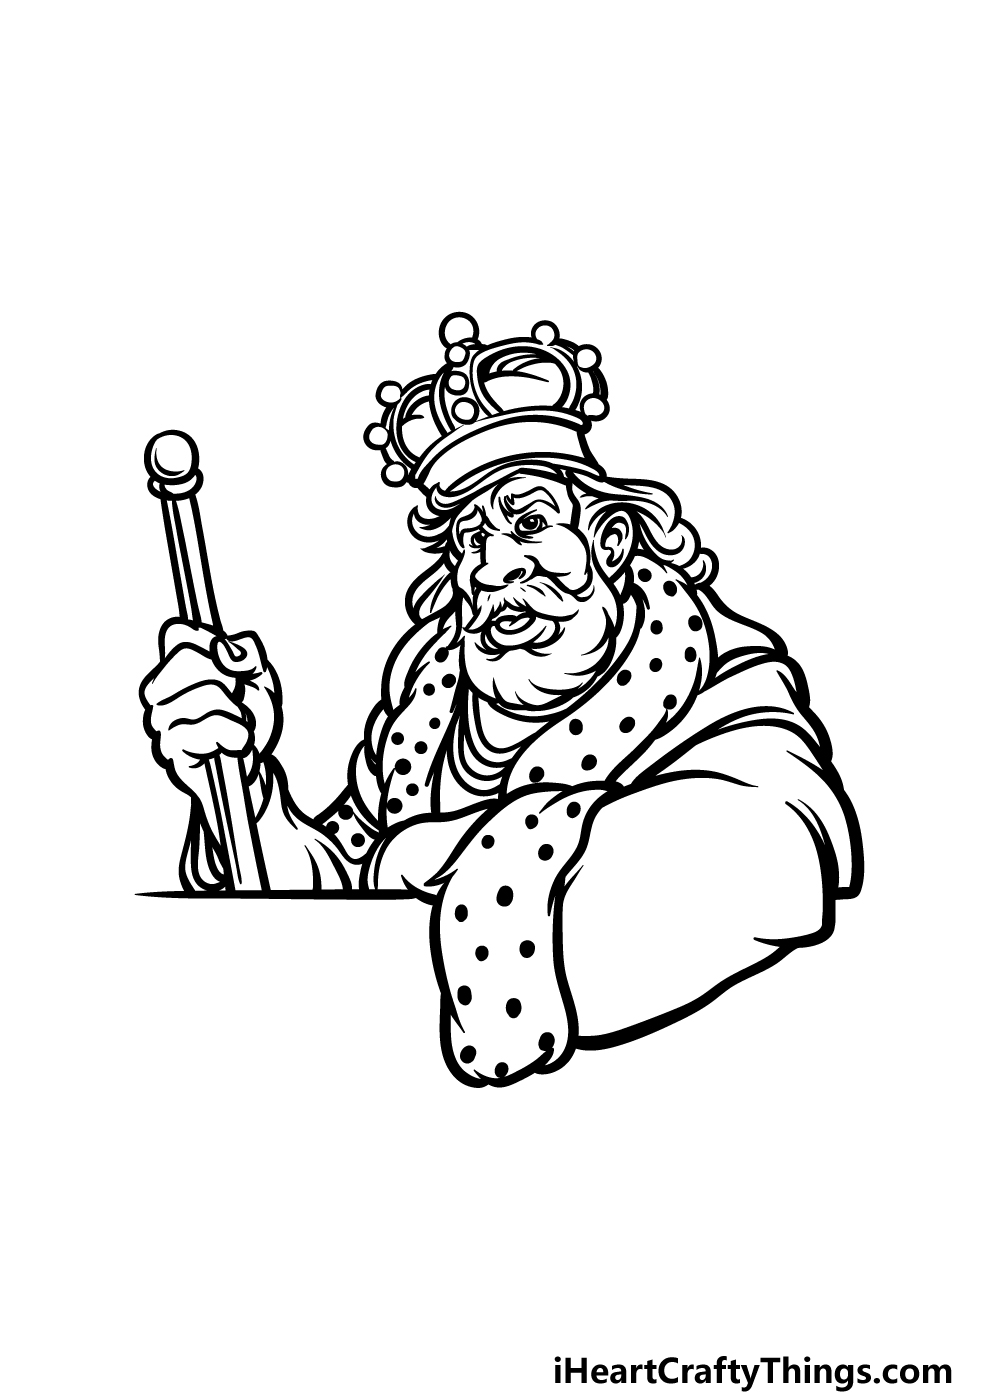
You have almost finished all the details for this picture, but we have a few more lines to add in this step of our guide on how to draw a king.
Using lots of curved lines, you can finish off by drawing the rest of the sleeve over the arm on the right.
Once this sleeve has been drawn, you will be ready for the final step of the guide! Before moving on, you can also add some details of your own.
Perhaps you could add an opulent background behind him to finish off the royal feeling of this image.
You could even draw a queen or some other royal family members beside him, so have fun getting creative with it!
Step 6 – Finish off your king drawing with some color
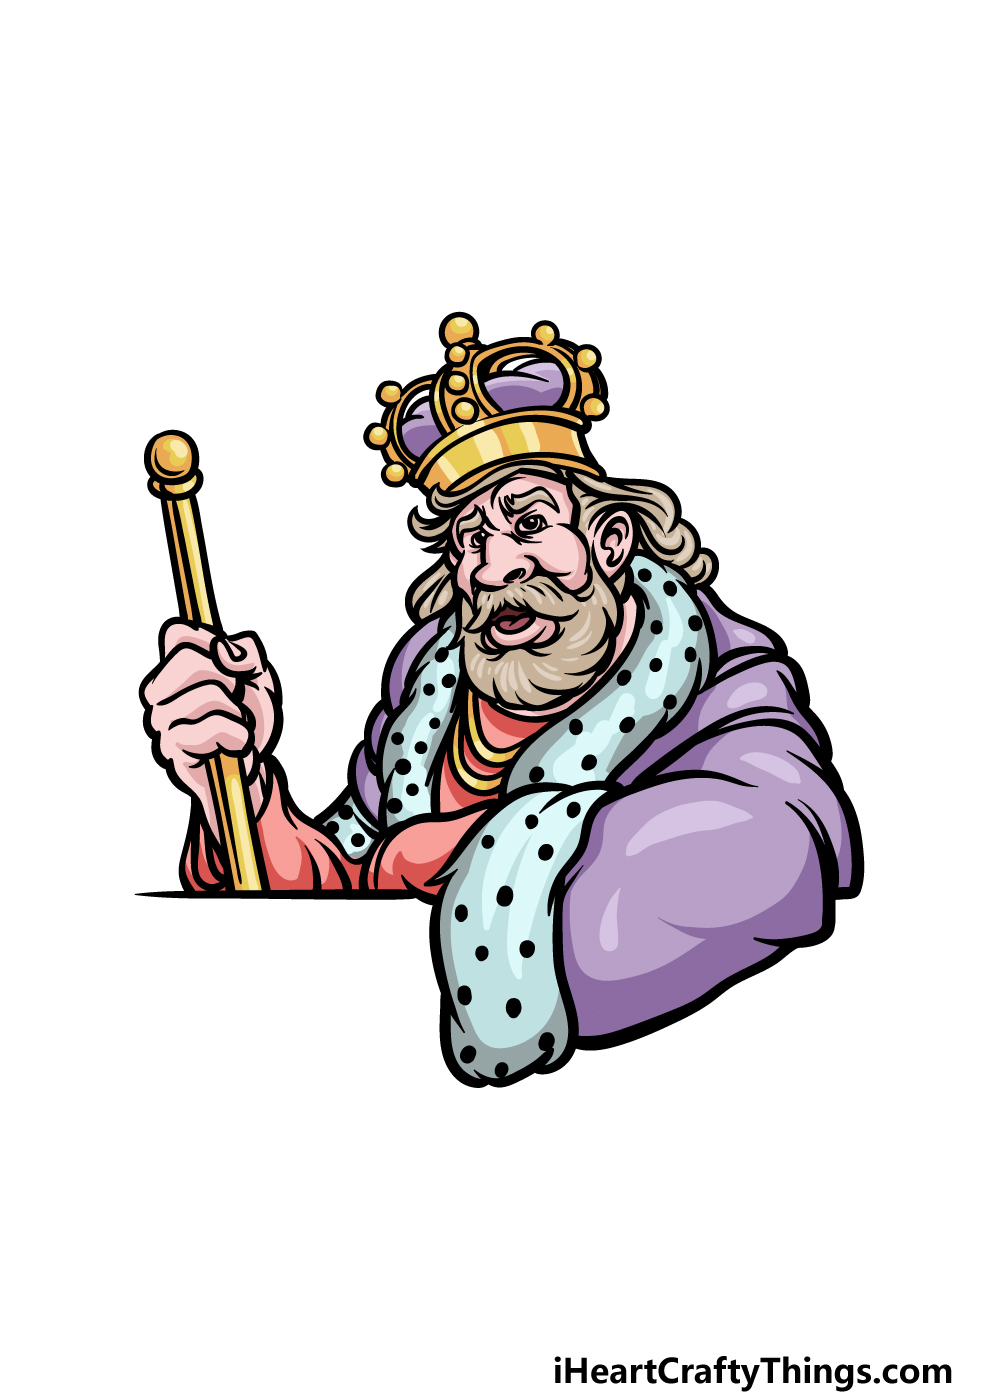
Now it’s time to finish off this king drawing with some color! Members of the royal family often display colors associated with sovereignty such as reds and purples, and we made sure to incorporate colors like this into our example.
You could use similar colors for your own depiction, or you could change up the placement and switch them around a bit.
You could also go for entirely unique colors if you would like! Once you know what colors you would like, you can also have some fun choosing the art tools and mediums you want to use to achieve them.
We will be interested to see what colors and mediums you choose to finish off your incredible king drawing!
Here’s how you can make your king drawing even better…
Have a royally fun time as we show you how to make your king sketch even better!
For this king drawing we worked on, we kept the focus on the king himself. Now that you have finished it, you could add some more details around him!
You could start with the surface he is leaning on. That could be a fancy table with all sorts of jewels and precious objects on it.
That is a place to start, but what else could you add to the background of this scene?
We love the details of the royal robe shown off in this drawing of a king. While we do love the design, you could also change it up a bit!
This could be as simple as changing a few of the smaller details of his outfit, or you could give him a total makeover. If you were to do this, you could take inspiration from real kings and royalty or come up with your own designs.
What would you deck this king out with?
A king can never have too many jewels, and adding some more to this one would be a great idea! They could go onto his crown, his scepter or even onto the jewelry he is wearing.
These are a few ideas, but you could make this king as rich as you please. It could be fun to stick crafts like beads and stickers over the jewels to make them stand out even more!
What other fun ideas do you have for the jewels?
A king needs a royal family, so you could add some more characters to this king sketch. You could draw them in the same style as this king, or you might want to simplify it a bit.
You could add a queen and maybe some princes and princesses for a few ideas! Doing this would allow you to create a wonderfully royal family portrait.
What other characters would you like to add to this picture you have created with us?
Your King Drawing is Complete!
All six steps of our guide on how to draw a king are now complete, and you have a great picture to show for it!
We hope that this tutorial was helpful in showing you how to draw this king while also providing a lot of fun in the process.
Following these steps and trying your best are surefire ways to conquer this drawing challenge in no time!
Once you have completed the drawing, you can still continue adding your own touches and flair by adding details, elements, color choices and creative mediums of your own.
This is your chance to really show off what you can do!
There is more fun to be had on our website, and you can find your next drawing guide there today! We have more on the way soon, so definitely keep checking in.
We would love to see how your king drawing turns out, so please share it on our Facebook and Pinterest pages for us to see!