


Christianity is one of the most prevalent religions around the world. There are many different branches and sects related to this religion, but one thing they all share in common is that Jesus Christ is probably the most important figure in the faith.
At Easter, the sacrifice of Jesus being crucified is commemorated, and it is one of the most sacred celebrations in the faith.
Learning how to draw Jesus on the cross is a great way to pay homage to this momentous event from biblical history.
In this step-by-step guide on how to draw Jesus on the cross, we will go over how you can do just that without getting frustrated by the details and difficulties of such a drawing.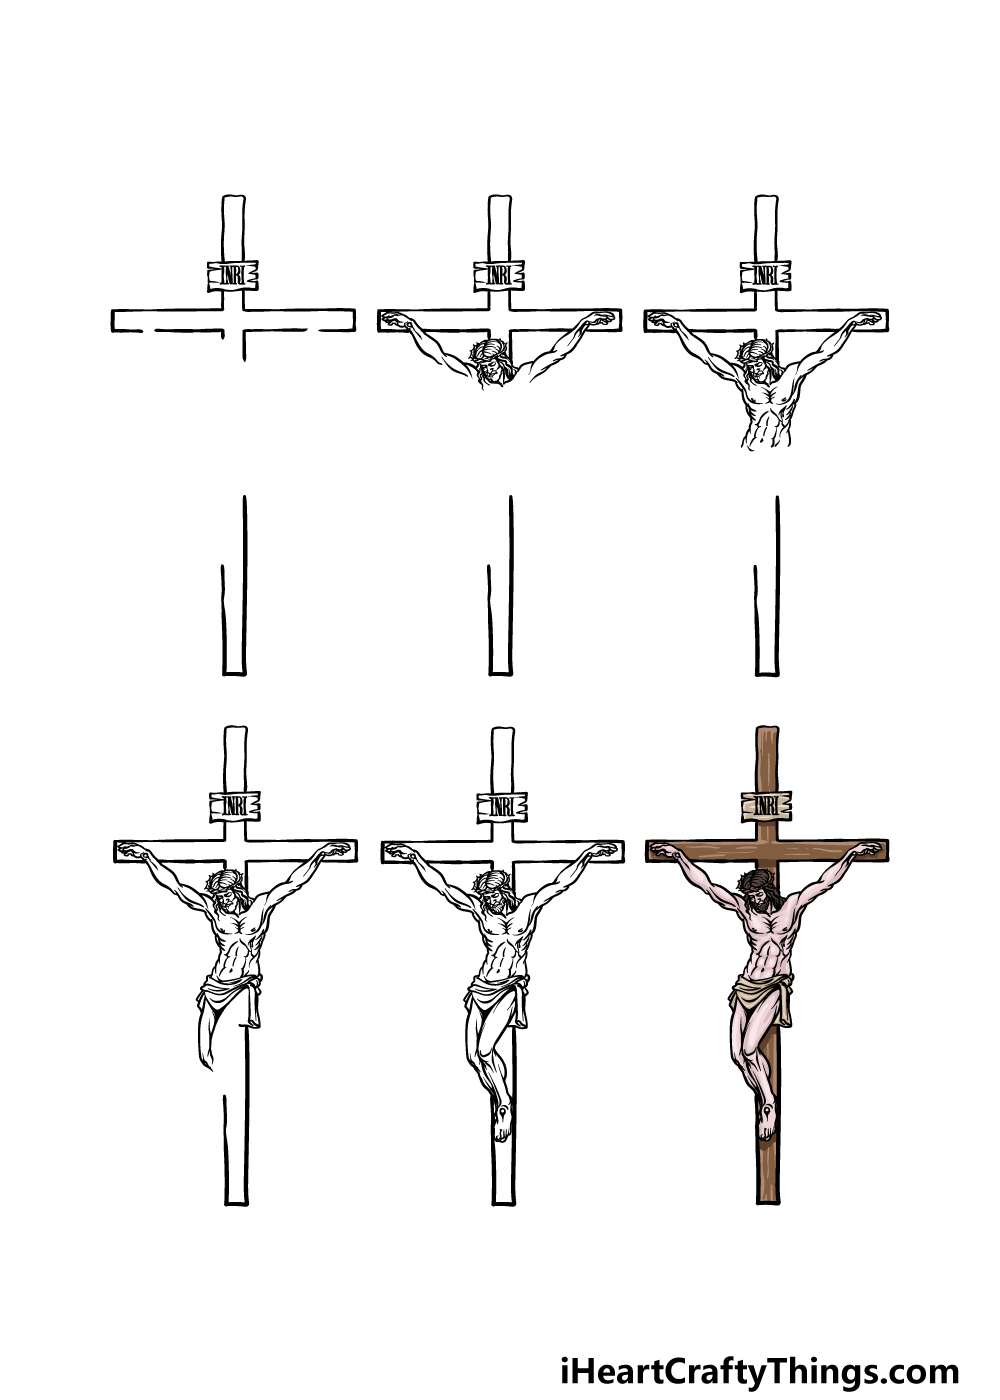
How to Draw Jesus On The Cross – Let’s Get Started!
Step 1
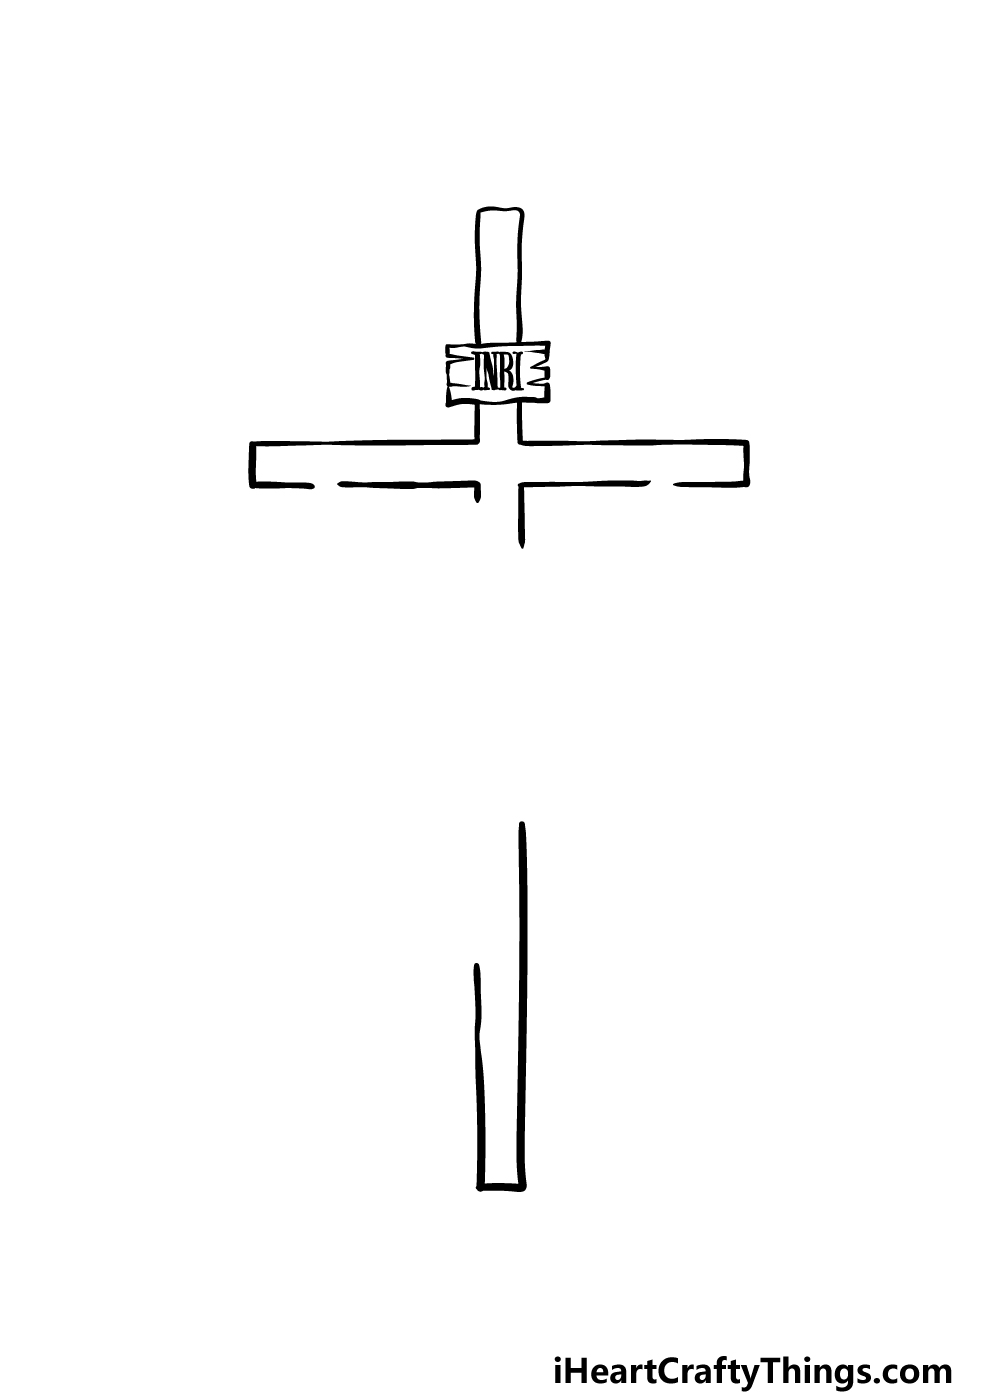
To get this guide on how to draw Jesus on the cross started, we will be starting with the cross itself.
To draw the cross, you could use a ruler to draw the lines, but we would actually recommend trying to draw it freehand.
The reason we would recommend this is that it looks a bit more like it’s made of wood if the lines aren’t perfectly straight.
However you end up drawing the lines, you can draw most of the cross now. Be sure to refer to the reference image and leave some spaces where we did, as we will be drawing Jesus into those spaces soon.
We will also be drawing a banner with INRI written on it near the top of the cross.
Step 2 – Draw the head and arms for Jesus
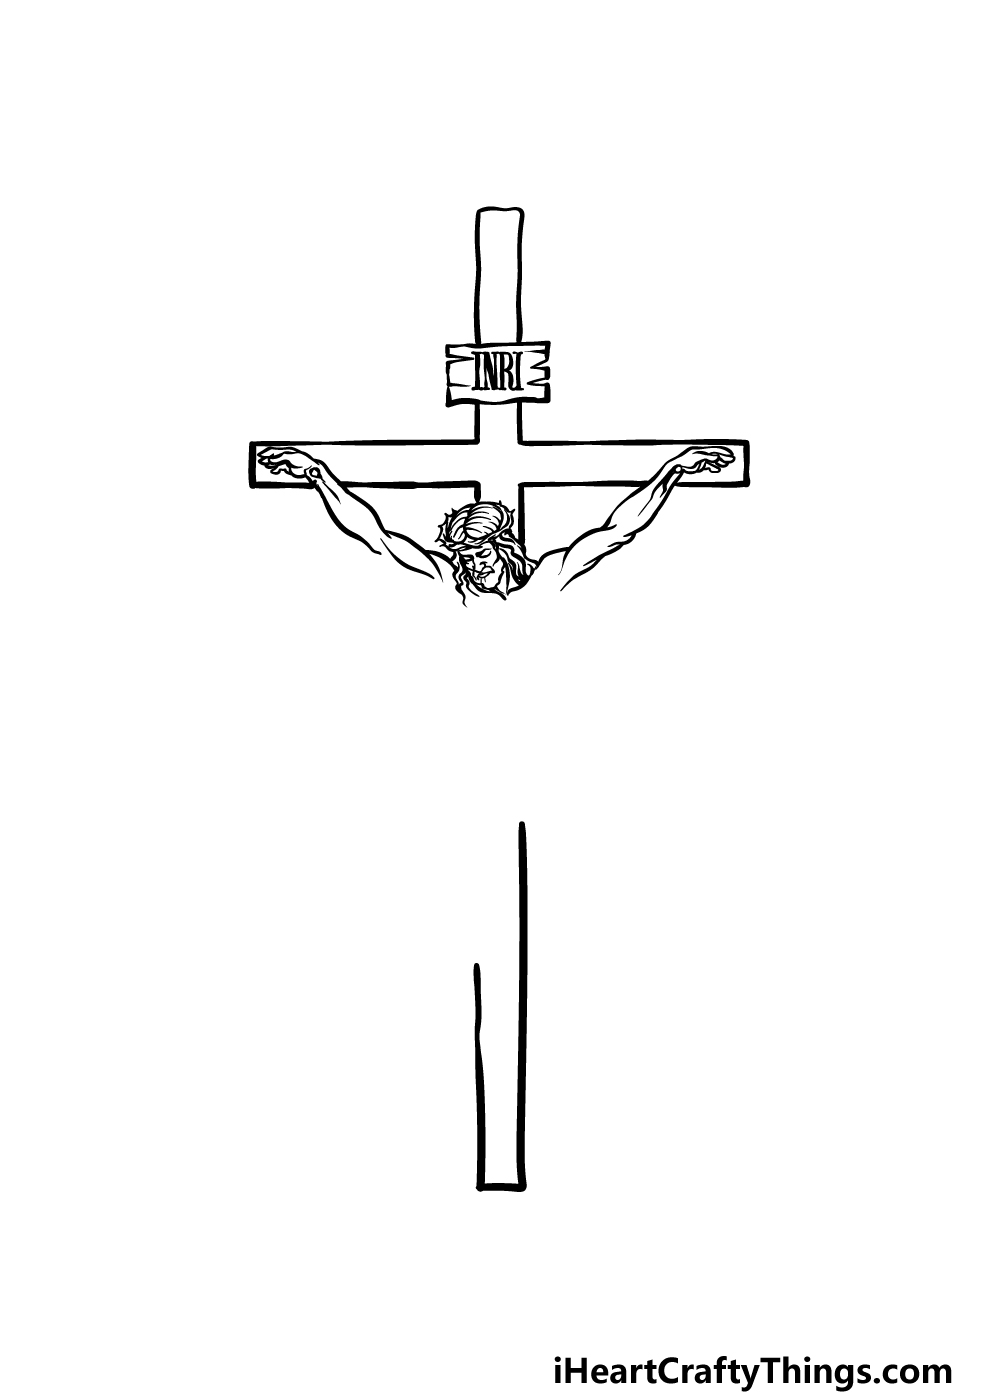
We will be starting the head and arms of Jesus in this step of your Jesus on the cross drawing.
These will be some of the more difficult aspects of this drawing, as drawing realistic features and proportions can be a bit challenging.
To make things easier, you could draw some basic shapes using a light pencil and then add some detail on top of them.
We will be drawing his long hair with some wavy lines, and his crown of thorns will also be around his head. His bearded face will be slightly downcast, and then we will draw the arms that he is hanging from.
They will also be nailed to the arms of the cross, as shown in the reference image.
Step 3 – Next, draw his chest in this step
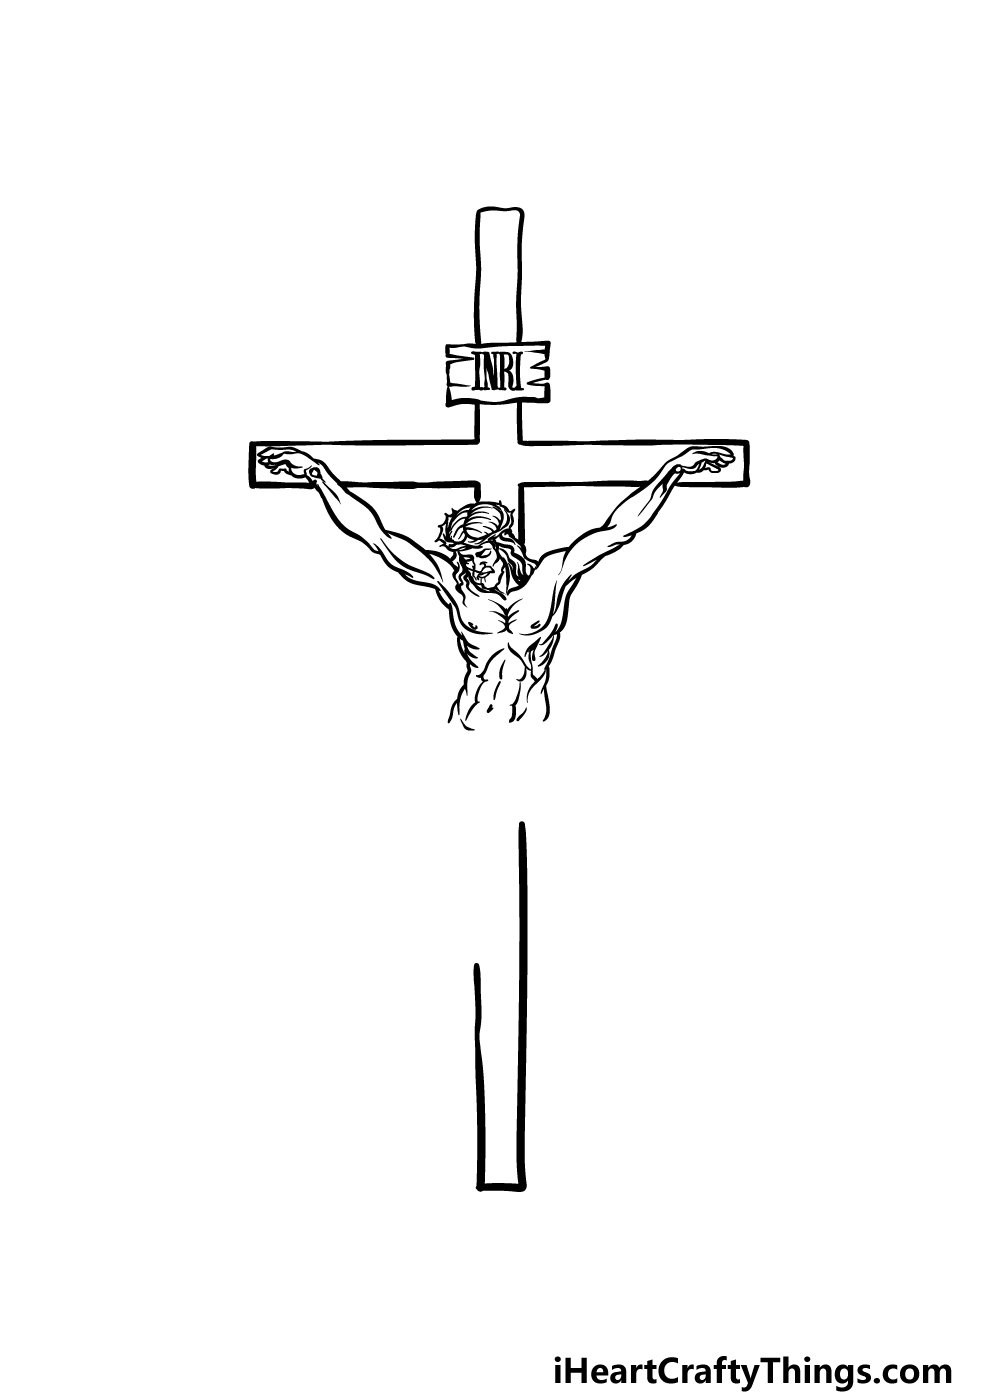
For this third step of our guide on how to draw Jesus on the cross, we will be adding his chest.
The chest will be quite detailed, and these details will be drawn with lots of curved lines to show his muscle and bone structure.
This part of the body can also be quite difficult to get right, so try your best to replicate the picture as it appears in our reference image.
The chest will connect naturally to the base of the arms and shoulders, and in the next step we shall draw his waist and the rags that he is wearing.
Step 4 – Now, draw the start of his waist and legs
As we mentioned in the previous step of your Jesus on the cross drawing, we will be starting on the waist and legs in this part. To start this, we will first draw the rags that he is wearing.
These rags will be drawing with some more curved lines connecting to one another in order to create the look of the fabric.
Then, we shall draw the tops of his legs with similar lines that we used for his chest and arms. These lines will again help to create the musculature and form of the legs.
Once these are drawn, we shall finish the legs in the next part.
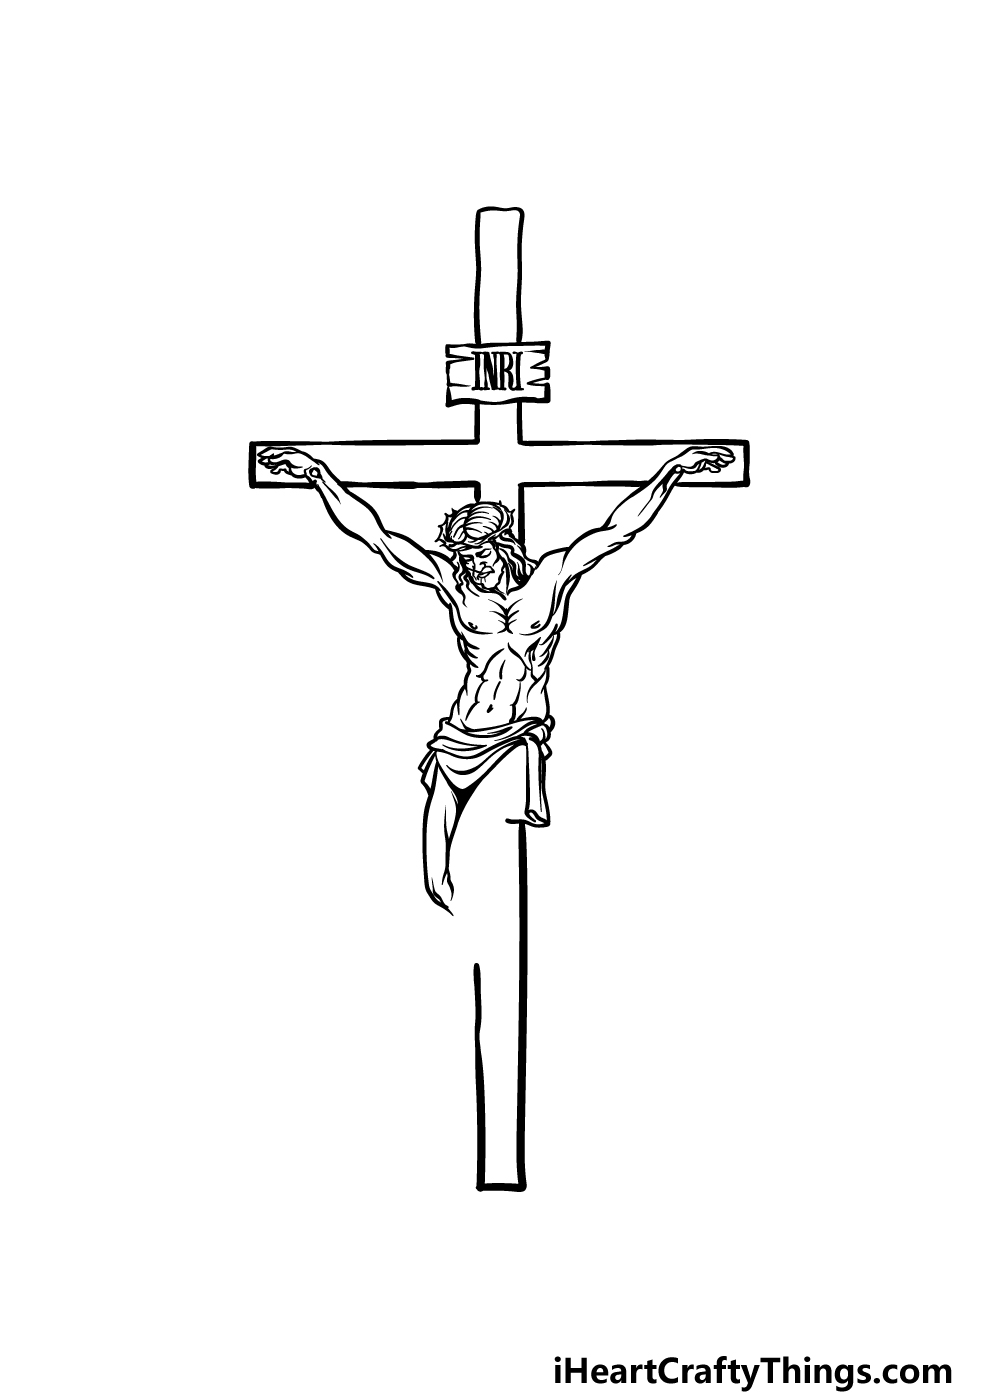
Step 5 – Add some final details to your Jesus on the cross drawing
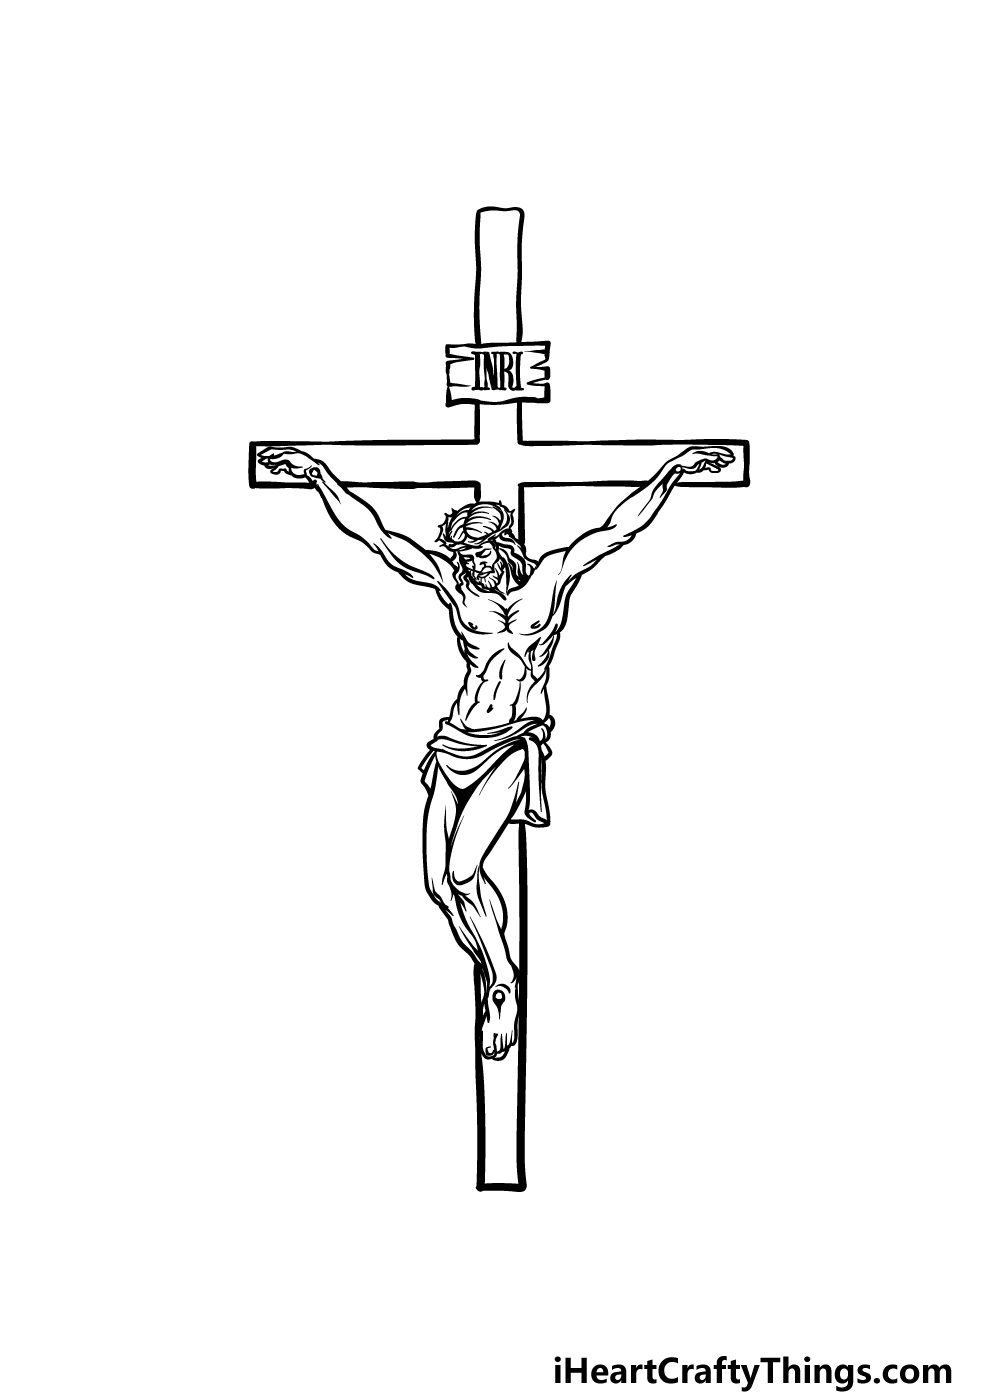
This step of our guide on how to draw Jesus on the cross will see you finishing off the final details and elements to have you ready for the final step.
To do this, we will be extending the legs down from the parts that you drew in the previous step.
The legs will be quite close together, and his foot will also be nailed to the cross, as shown in the image.
Once these details are drawn, you will have finished this really powerful picture. In the next part, we will finish it off with some color.
Step 6 – Finish off your Jesus on the cross drawing with some color
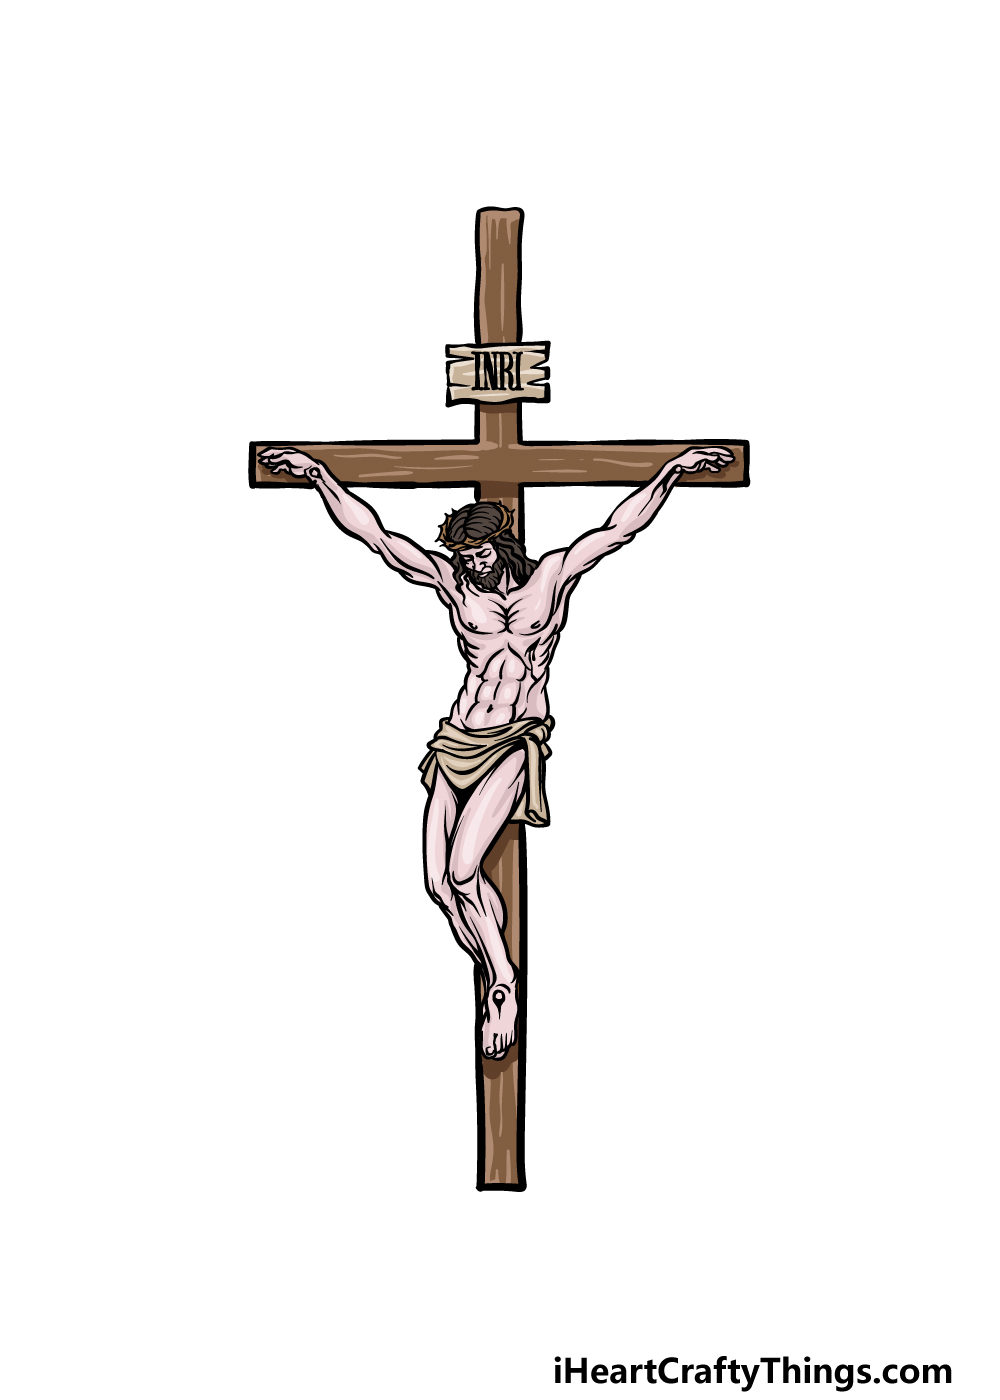
Now it’s time to complete this Jesus on the cross drawing by adding some colors to it. In our reference image, we kept the colors a bit darker and more muted to suit the somber tone of the scene.
If you like this approach to the colors, you could achieve similar results by using lighter mediums such as watercolors and colored pencils to get softer tones.
It would also be quite striking to use brighter colors to focus on the more hopeful message of this event, so it really depends on what sort of mood you would like for it.
Which colors and art mediums do you think would best suit this important picture?
3 More tips to make your Jesus on the cross drawing easy!
Make this special drawing easier to do as we show you 3 helpful tips!
This easy to draw Jesus on the cross can still present some challenges due to the high level of detail. You could make it easier by simplifying and even removing some of these details.
For instance, you could remove some of the line details on Jesus himself in order to create a simplified, stylized image. Changes like these don’t make the image any worse, just different!
If it has the benefit of making it easier for you then even better. There are many other details you could also simplify to make this Jesus on the cross drawing easy to do.
If you still find yourself struggling with this Jesus on the cross sketch, you can use your pencil to prepare more and make it so much easier. When drawing a human body, you can use basic shapes to replicate the proportions of each body section.
For instance, you can use an oval for the head and then longer rounded shapes for the body and limbs.
Once you have drawn these with your pencil, you can then start adding some finer details as you build up the picture.
Don’t forget to erase your pencil lines once the pen ink is dry!
Another way to make your Jesus on the cross easier to do is by looking at some reference matarel. The crucifixion has been well represented throughout art history, so you would have many different artworks to consult.
This doesn’t mean you’re copying them, but it can just help to make the image look closer to what you picture in your mind. Then, you can add your own details and elements to make it unique to you.
Once you are happy with it, you can also add some additional background details to build up the scene even more. This is another area where you can get some inspiration from classic artworks.
You may be surprised how much using a reference can help!
Your Jesus On The Cross Drawing is Complete!
As we mentioned in the introduction to this guide on how to draw Jesus on the cross, this biblical event is a very important part of the Christian faith.
While tragic, it also serves as a symbol of redemption and hope for mankind, and that is why it is celebrated. We hope that you enjoyed commemorating this important event as you worked on this drawing.
Now that you have completed all of the steps in this guide, there are lots of ways that you could take it even further.
You could draw a background or use some unique colors and art mediums to really put your own spin on this picture. Perhaps you could even incorporate it into a card to give someone at Easter time.
Once you have completed this picture, you can find more drawing guides on our website. We upload new ones often, so you’ll want to keep visiting!
We would really appreciate it if you would share your finished Jesus on the cross drawing on our Facebook and Pinterest pages so we can admire your artwork!