The mighty oak tree is one of the most majestic and magnificent trees to be found in nature. From a humble beginning as a tiny acorn, these trees can last for many years, growing to immense sizes.
They are one of the most recognizable of all tree species, and many people like to learn how to draw an oak tree so that they can create some artwork featuring this awesome tree.
If you love this incredible tree yourself and would also like to create some incredible oak tree pictures, then be sure to read all the way through this tutorial!
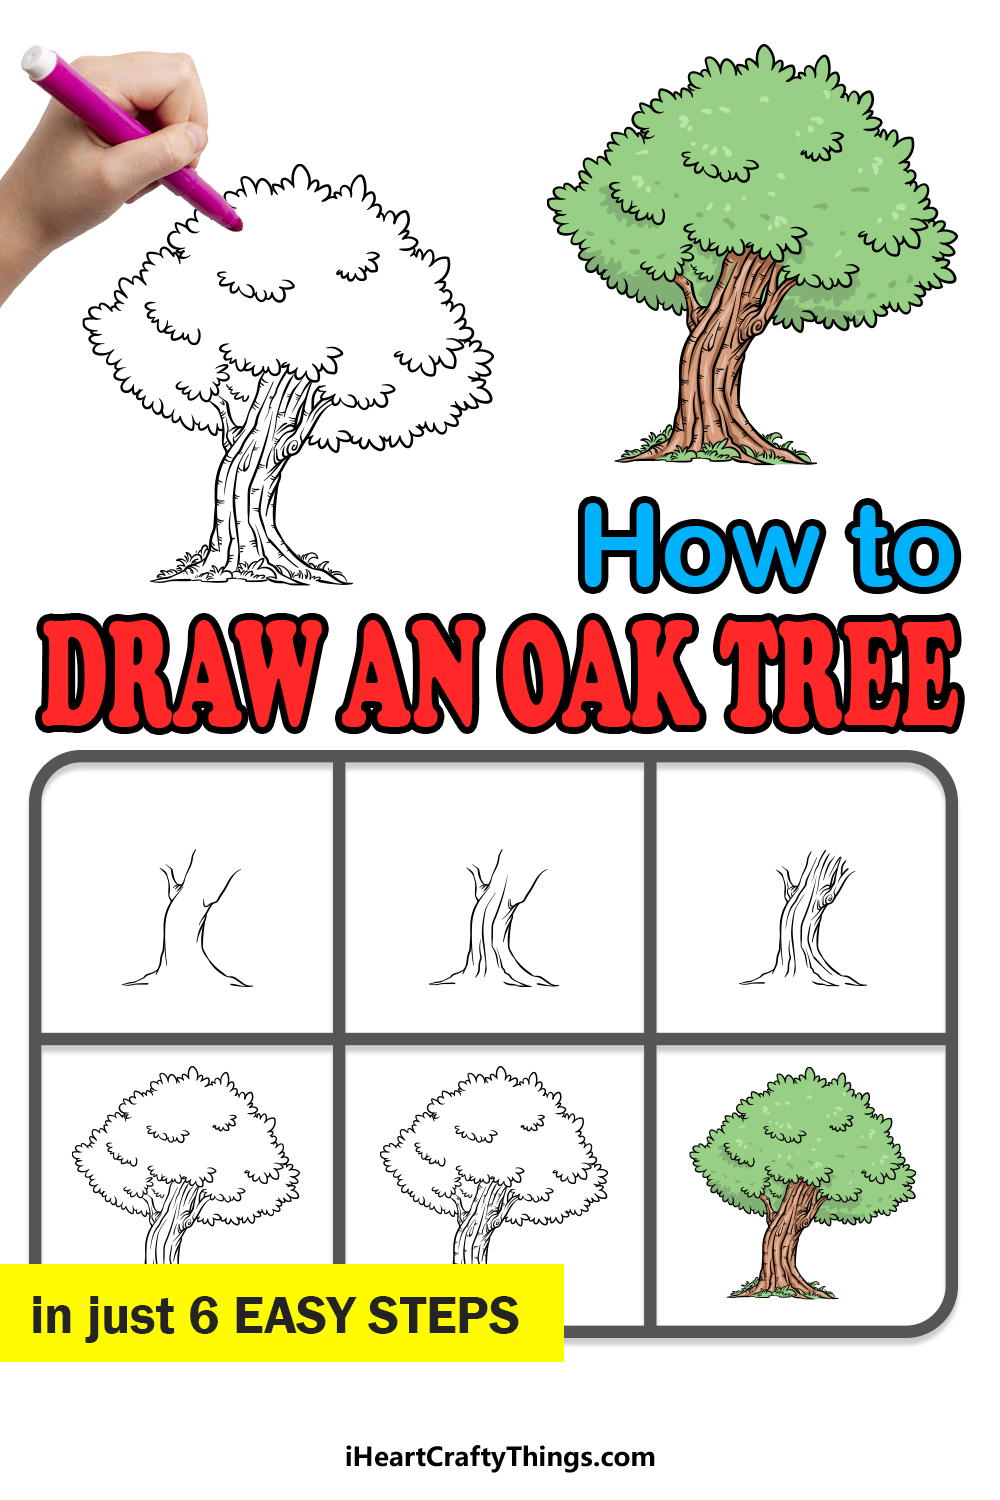
Our step-by-step guide on how to draw an oak tree will show you how to recreate this majestic titan of nature.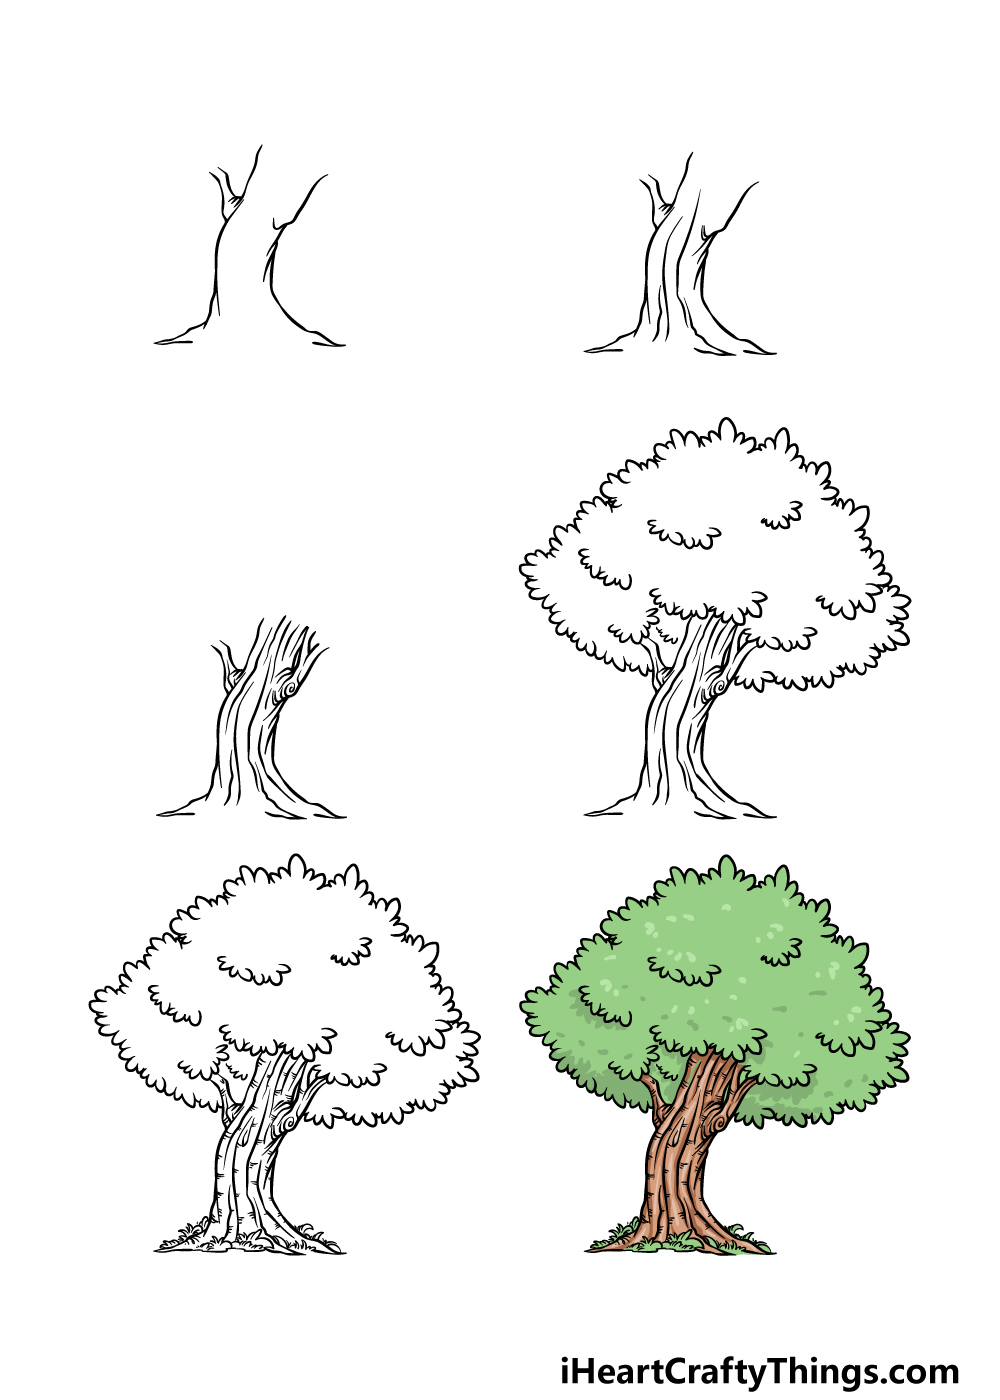
How to Draw An Oak Tree – Let’s Get Started!
Step 1
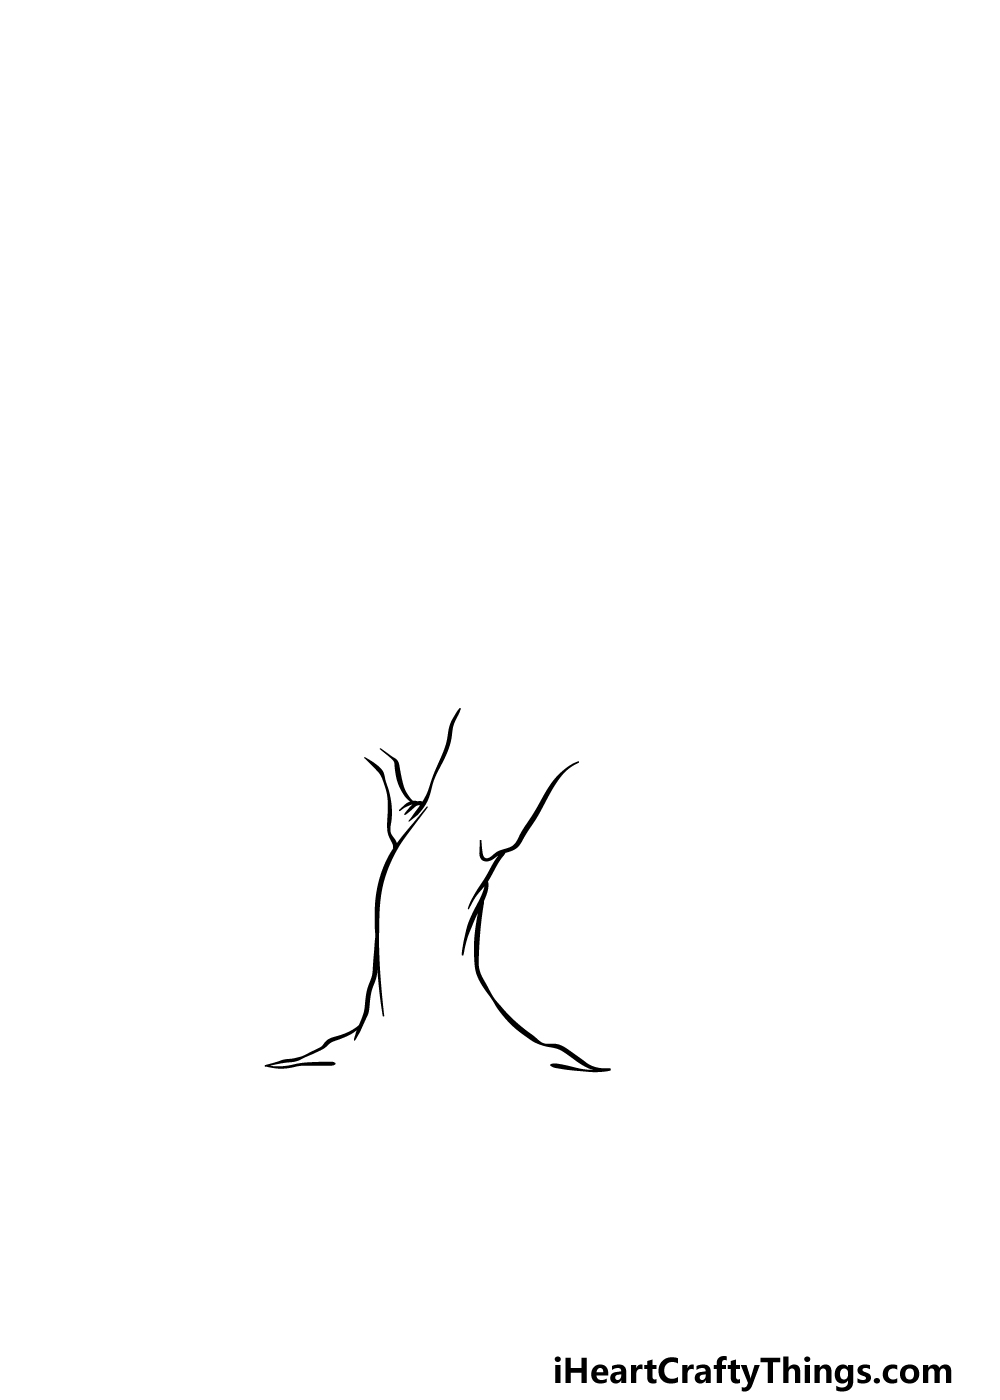
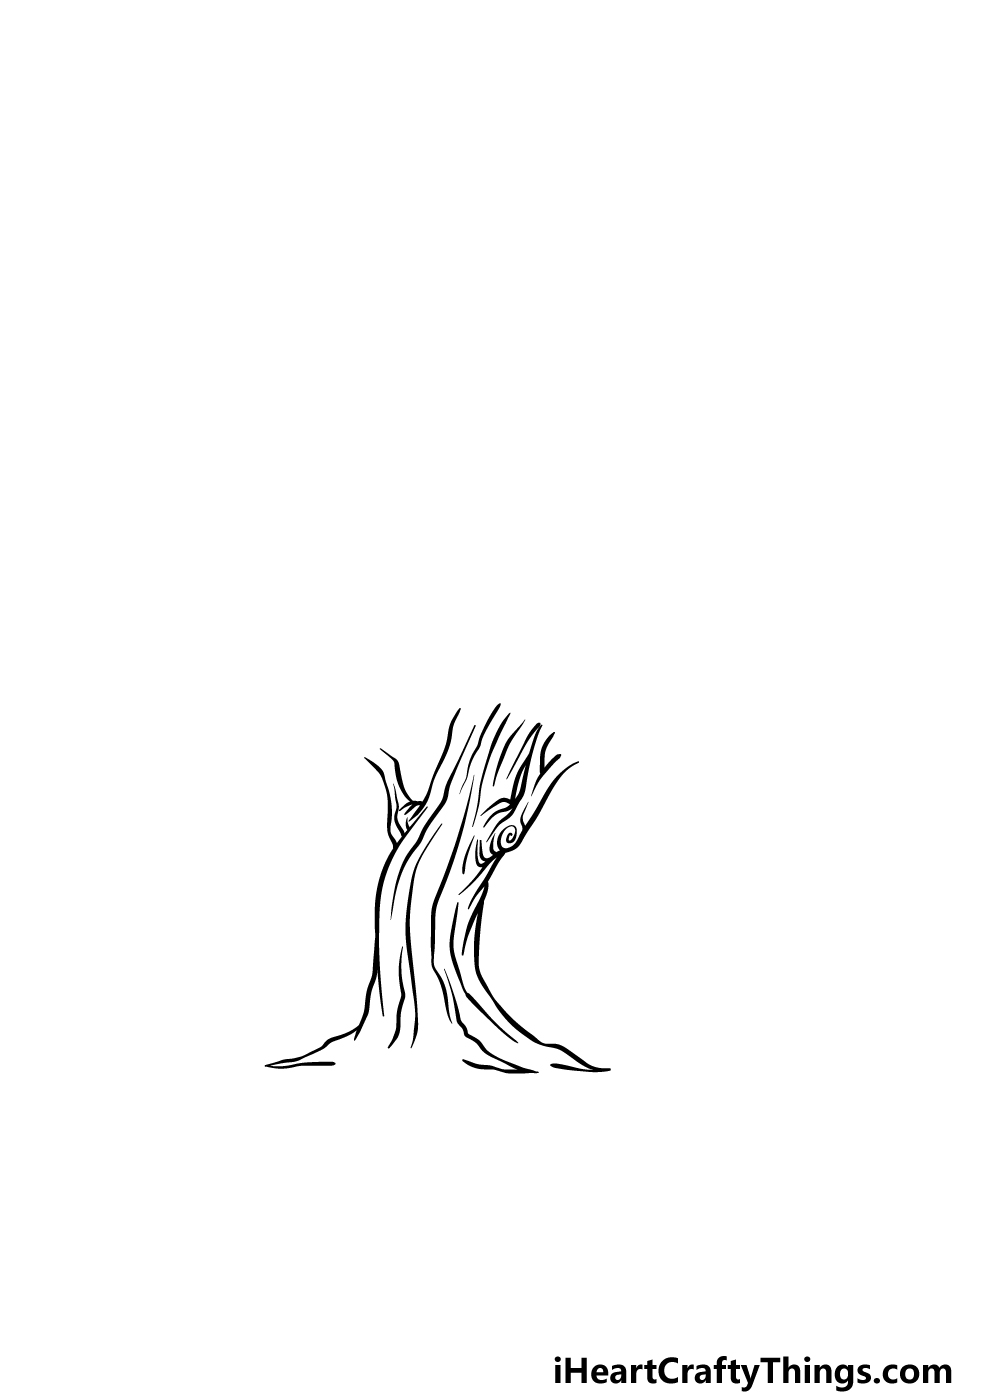
In this guide on how to draw an oak tree, we will be starting with the outline for the trunk of the tree.
The trunk of an oak tree is thick and wide, and this one that we will be drawing will also be bent to the side a little bit.
To draw this outline, we will be using several curved lines that connect to one another to form the trunk bending a bit.
Additionally, we will also start drawing the first branch, and this one will go on the left-hand side of the trunk.
Finally for this step, you can also start drawing the roots at the base of the oak tree. There will be a large space left over at the bottom, but we will fill that in with detail soon.
Step 2 – Draw some details for the oak tree
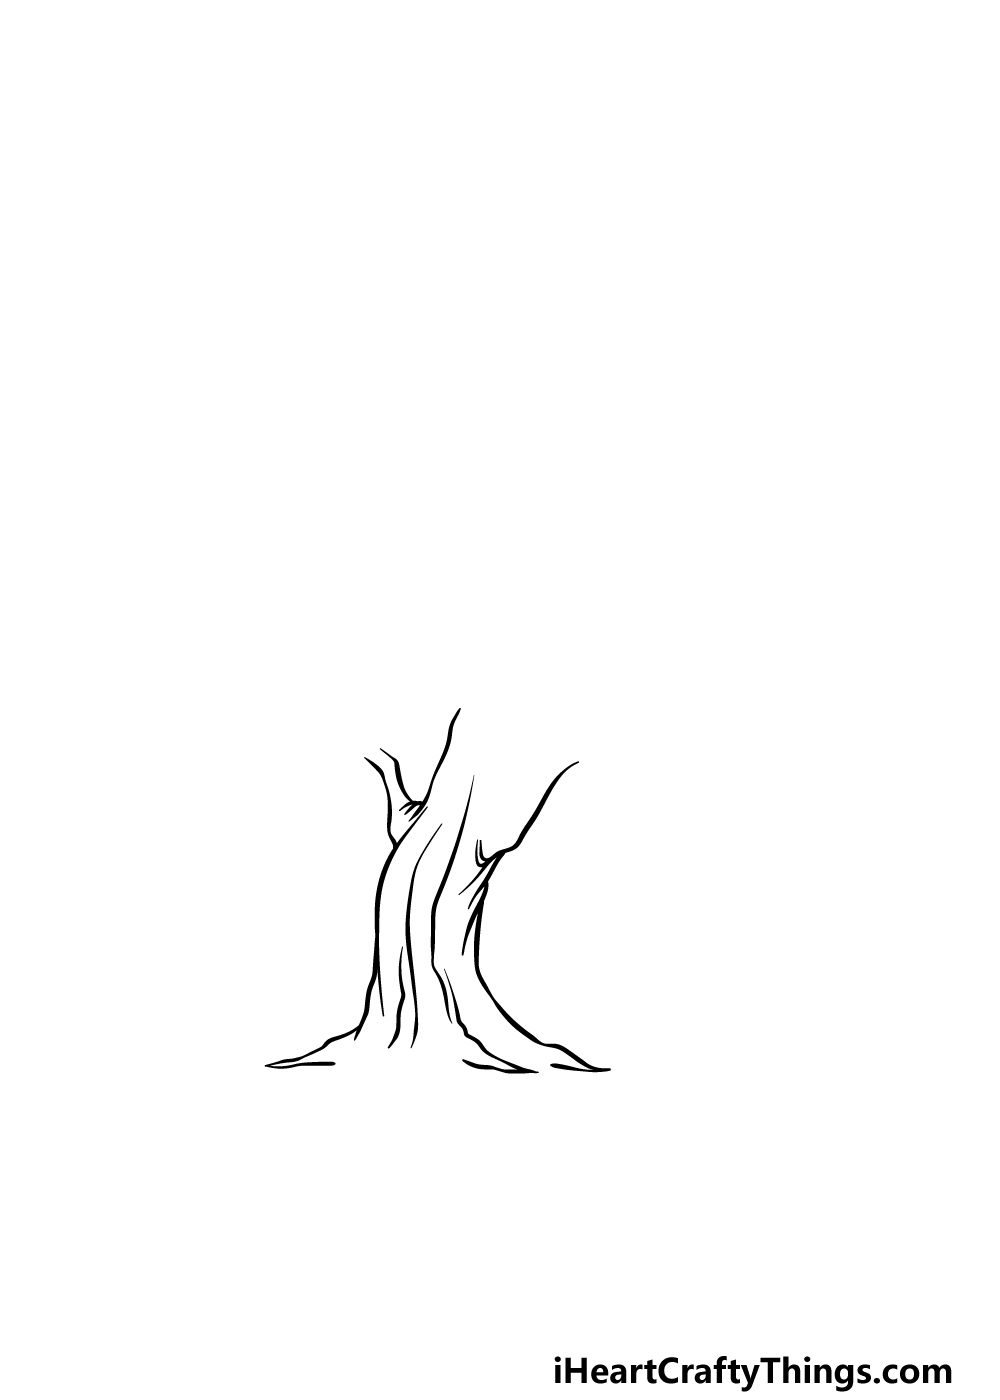
When you look at the finished drawing that we are working towards, you will notice that there will be quite a lot of detail in this oak tree drawing.
These many details can make things seem a bit intimidating and complicated, but we will make sure it’s not too frustrating as we will be taking it slowly.
With this in mind, we shall start adding the first bark details in this step.
To do this, we will be drawing some slightly curved lines coming down the center of the tree, and they will bend into one of the roots at the middle of the tree base.
Then you will be ready to move on to step 3!
Step 3 – Next, draw even more wood details for your oak tree
We will continue adding some wooden line details in this step of our guide on how to draw an oak tree. These details will be focused primarily near the top of the tree trunk that you have drawn so far.
On the right-hand side of the trunk, another branch will be poking up. Where this branch connects to the tree, we will be adding a twisty, spiraled line to show the knobbly start of this branch.
The reference image will show you what we mean by this, and you can copy the lines as they appear there.
Step 4 – Now, draw the leafy top of the oak tree
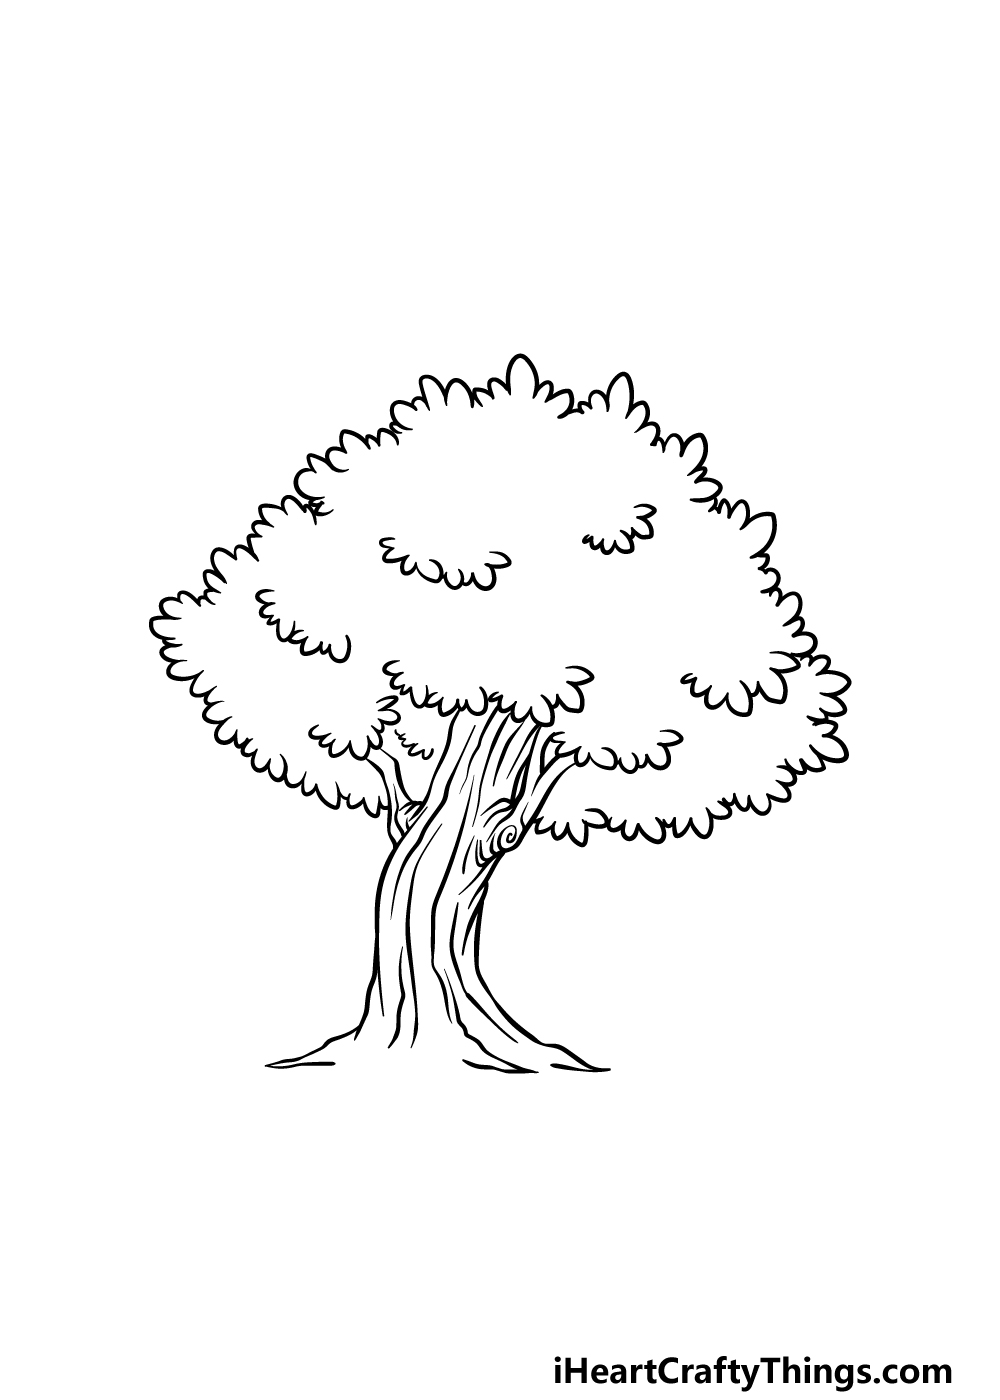
This wouldn’t be much of an oak tree drawing without a big head of leaves at the top of it! For that reason, we will be drawing that leafy top in this step.
The outline for the top of the tree will be made up of lots of small, rounded lines connecting to one another.
You can add similar rounded lines inside the outline of the treetop where the branches would be poking into the leaves.
You can also add some more of these lines dotted throughout the interior of the treetop outline to make it look like there are lots of leaves in the treetop.
Then we will be ready to add some final details in the next step!
Step 5 – Add some final details to your oak tree drawing
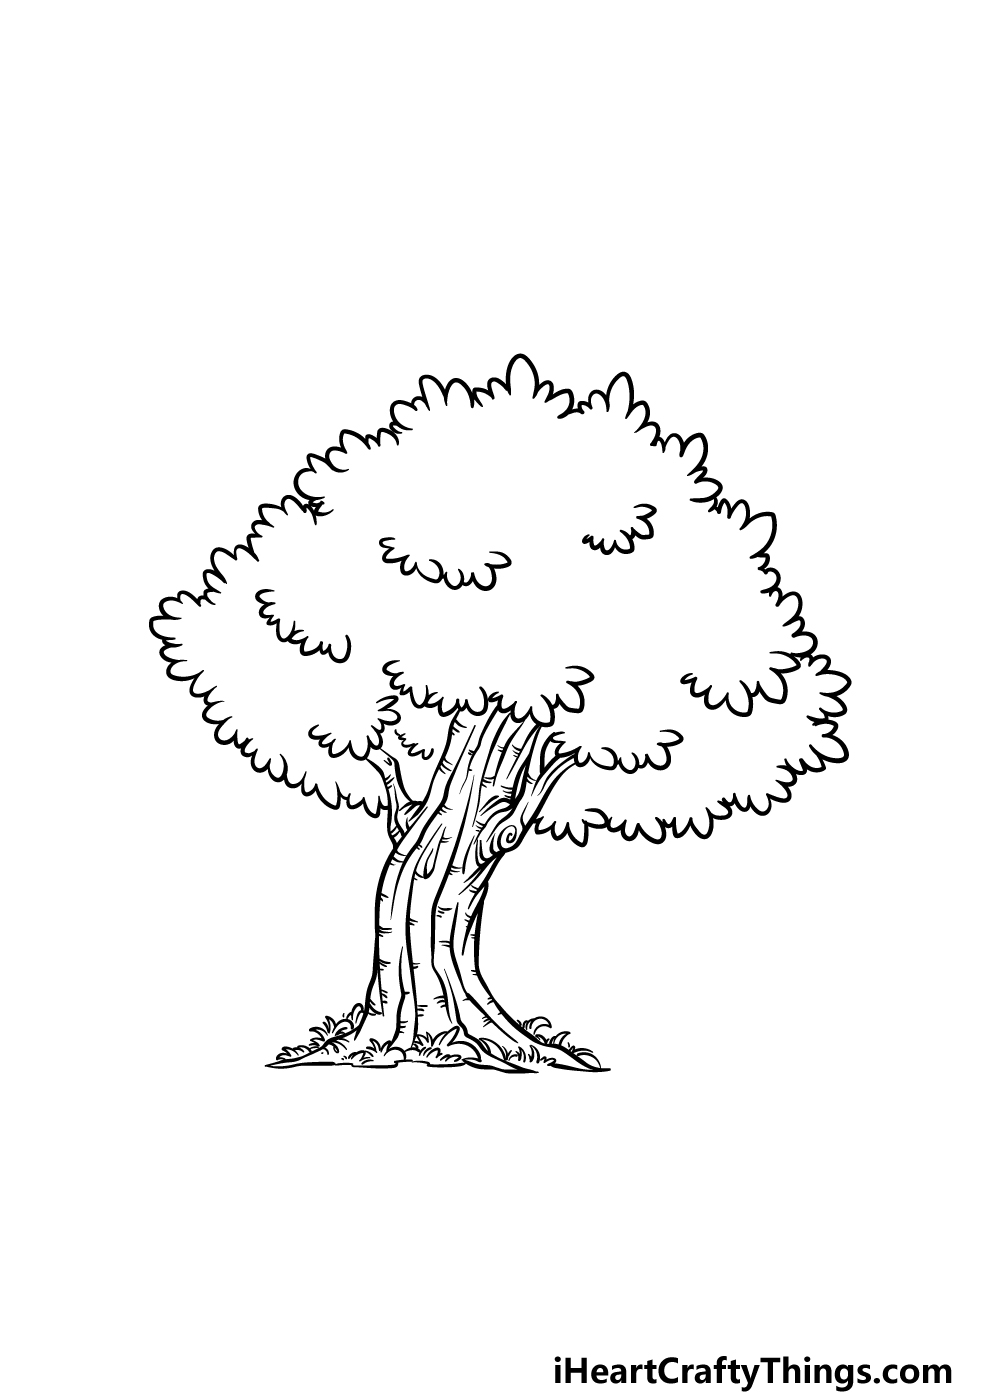
You can finish off some final details and touches in this next step of our guide on how to draw an oak tree.
We will be adding lots of little lines onto the trunk of the tree to make it look a bit more aged and weathered.
You can also finish off the base of the trunk by drawing some lines for the bottoms of the roots and also by adding some little clumps of grass.
These are the details we would use to finish it off, but you could also add some of your own!
Perhaps there could be a lovely park background with a family and some squirrels enjoying the shade of the oak tree. What ideas can you think of to add to this image?
Step 6 – Finish off your oak tree drawing with some color
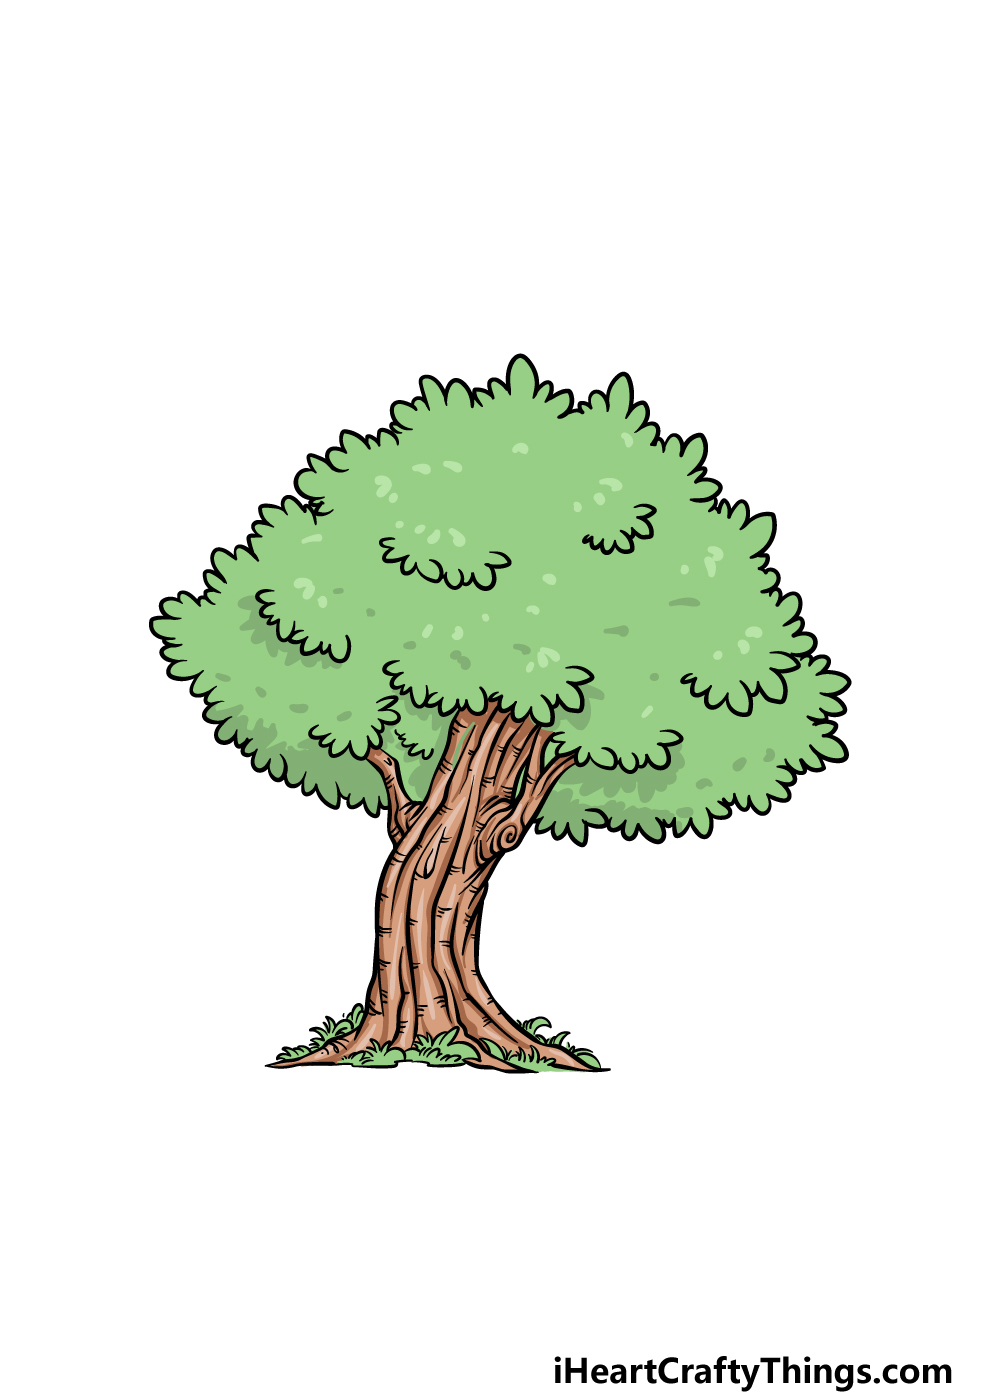
This is the final step of your oak tree drawing, and in it we shall be finishing off by using some color.
For our example, we used various shades of brown for the trunk while using shades of bright greens for the treetop. By adding little dots of darker green, you can also create the look of more leaf density.
You could use watercolors and colored pencils for a more muted look to the colors, but it would look great to also use brighter mediums like acrylic paints or colored markers.
It all depends on what you prefer, so have fun experimenting with colors and mediums!
3 More tips to make your oak tree drawing easy!
Make this oak tree sketch easier to draw with these 3 fun and easy tips!
This drawing of an oak tree that we created in this guide has some great details. Details can make a drawing more intimidating and difficult, so you could try and remove or change some of them.
For example, you could go for a more exaggerated and cartoony style in order to remove the smaller details while making it still look natural.
Or, you may actually like getting into the smaller details, and if that is so then you could make it look more realistic so you can add in those details.
Basically, you should adapt the drawing to any style that you like or are comfortable with!
Another way to make this oak tree drawing easy would be to incorporate it into a larger scene. While this will result in more to draw, it can also make it easier in a few ways.
One is that you can use certain objects to obscure portions of the oak tree that you’re struggling to draw. For example, maybe you don’t like drawing the leafy top of the tree.
If that is the case, then you could add a simple treehouse to the tree so you don’t need to draw as much of that leafy area.
Or, there could be something else obscuring the trunk and covering those tricky texture details!
Finally, one of the best ways that you could make this oak tree sketch easier would be by referring to a real oak tree to help you.
If you have an oak tree in your yard or maybe live by a park that has one, then you’re all set! Try to look at the real oak tree from a few different angles and use this to help you as you draw.
If you don’t have access to a real oak tree, then you could look up pictures online and use them along with our guide images to make it easier to draw!
Your Oak Tree Drawing is Complete!
You have completed all six steps of this guide on how to draw an oak tree, and now you have a beautiful picture of one of nature’s most majestic trees!
We hope that this guide showed you that you can create a lovely detailed picture without getting frustrated or caught up in the details.
We spoke about some ideas for how you could take this drawing even further, but now you have a chance to show off your creativity!
What kinds of extra details, colors and art mediums can you think of to add to this image?
Our website is full of amazing drawing guides like this one for you to enjoy! They feature other trees, flowers, objects and even famous fictional characters, to name a few. We update the list of guides often, so keep checking in!
Once your oak tree drawing is finished and colored, please let us see it by sharing it on our Facebook and Pinterest pages.