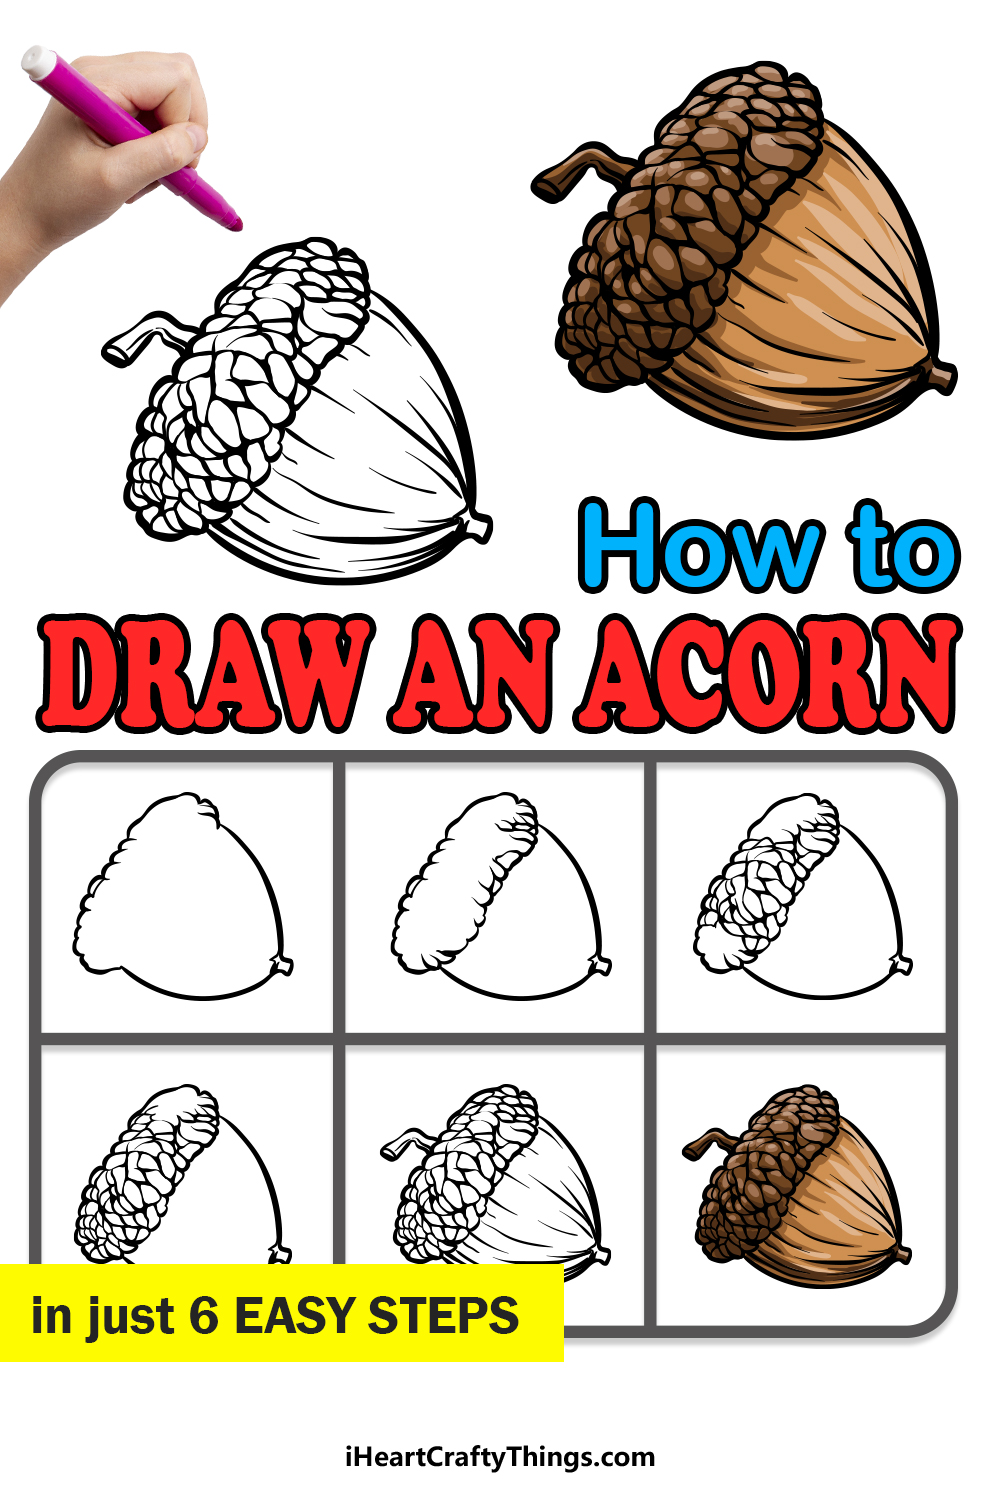
In nature, there are lots of great little plants and details to admire when you go outside. One of the most recognizable of these details that you can find in nature is the humble acorn.
Acorns grow on oak trees, and each one holds a seed that can potentially grow into another mighty oak.
They have possibly the most distinctive and recognizable structure of any nut or seed in nature, and this makes them popular to feature in artwork. To do so, one must first learn how to draw an acorn!
If you would like to create some great images featuring the acorn, then look no further than this tutorial!
Our step-by-step guide on how to draw an acorn in 6 steps will show you all the tips and tricks you need to draw this wonderful little nut.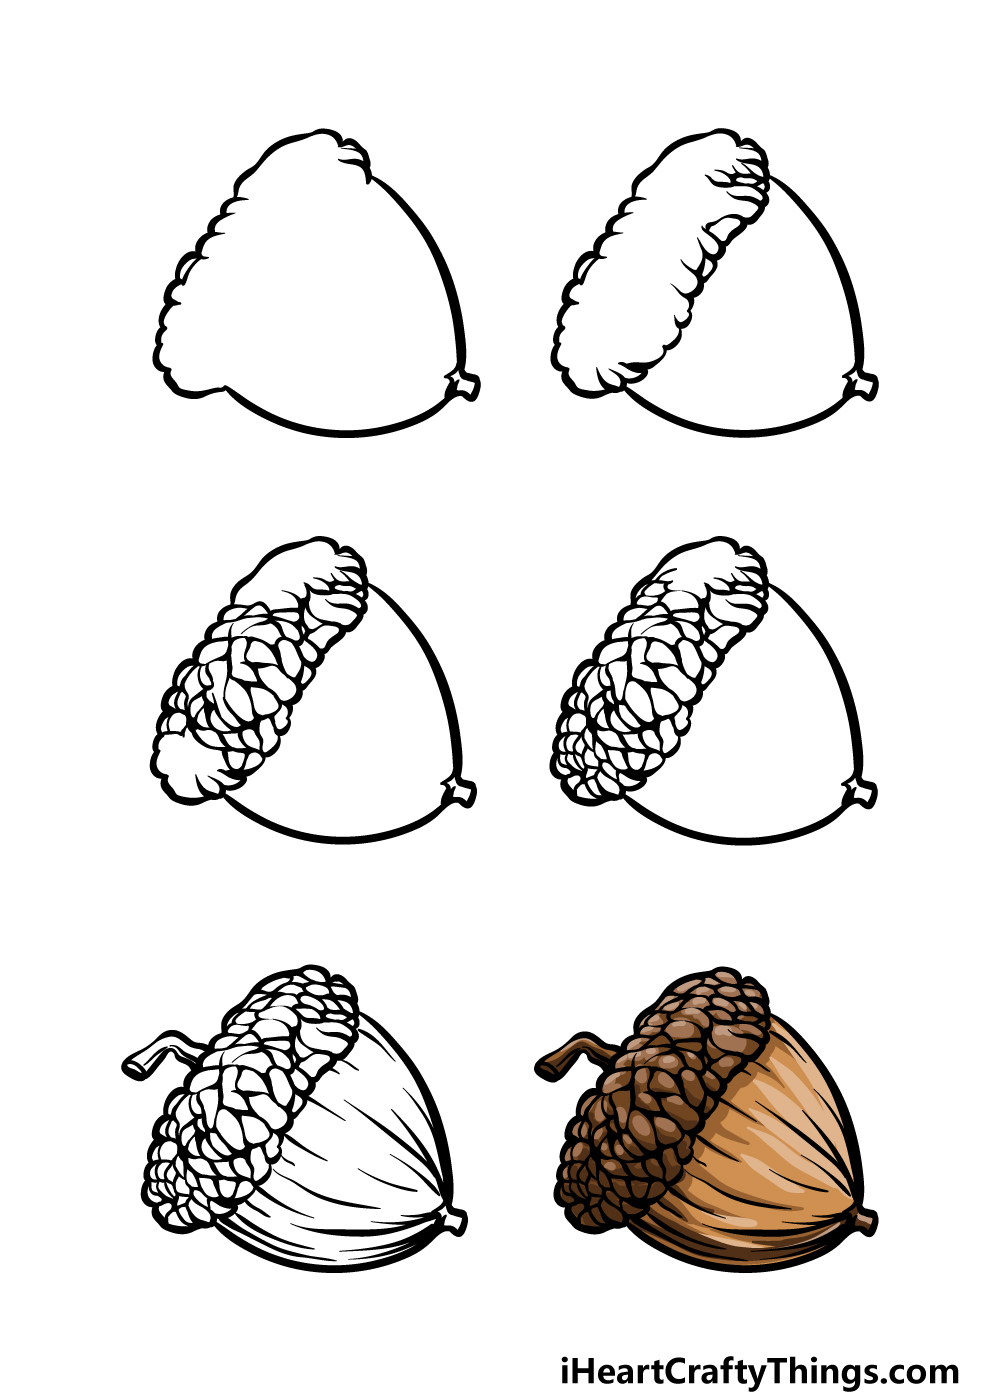
How to Draw An Acorn – Let’s Get Started!
Step 1
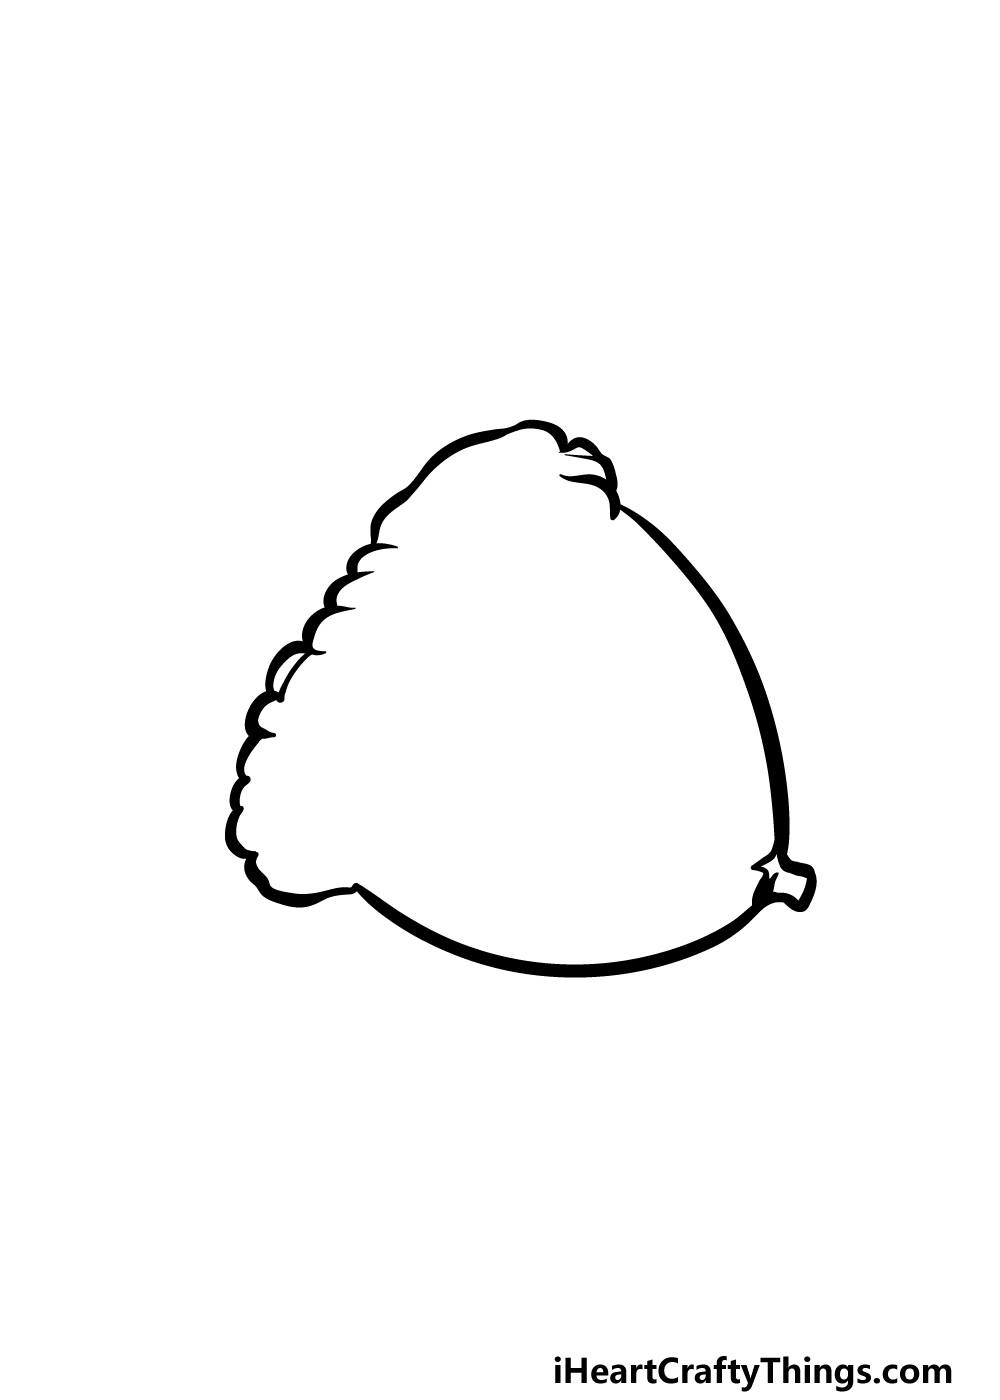
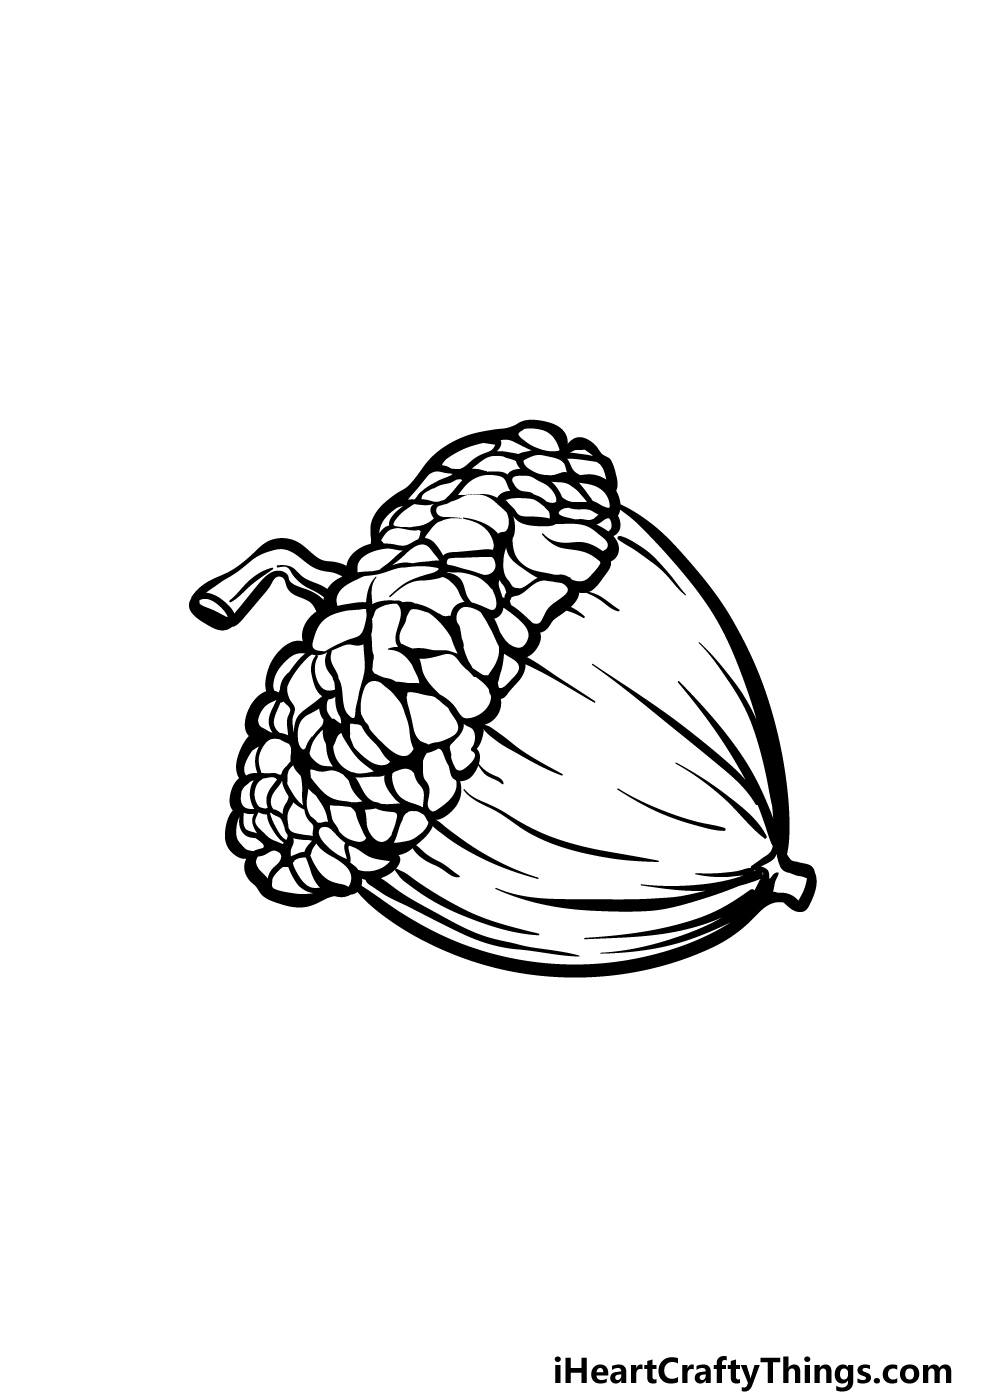
As we get this guide on how to draw an acorn started, we will begin with the general outline of the acorn.
First, we will be drawing the bottom half of the acorn, and we will do this by drawing two curved lines that meet at a fairly sharp point at the tip of it. This tip of the acorn will have a small, square section poking off of it.
Once you have drawn this bottom half of the acorn, we will then draw the outline for the top. This top section almost looks a bit like a little hat sitting atop the acorn, and we will draw this outline by using a curved, bumpy line.
The interior of the acorn will be blank with no details, but in the next steps we will start to add some more details and definition.
Step 2 – Next, draw the rest of the outline for the top of the acorn

In this second step of your acorn drawing, we will be finishing off the outline for the little ‘hat’ of the acorn. The outline will extend inward into the interior of the acorn to form the rim of it.
This rim will be drawn with lots of smaller curved lines connecting to one another, as shown in the reference image.
By using these smaller curved lines, we will create a rougher look for the texture of this part of the acorn.
Once you are happy with how this outline is looking, we shall move on to the next part of the guide.
Step 3 – Draw some texture for the acorn’s cap
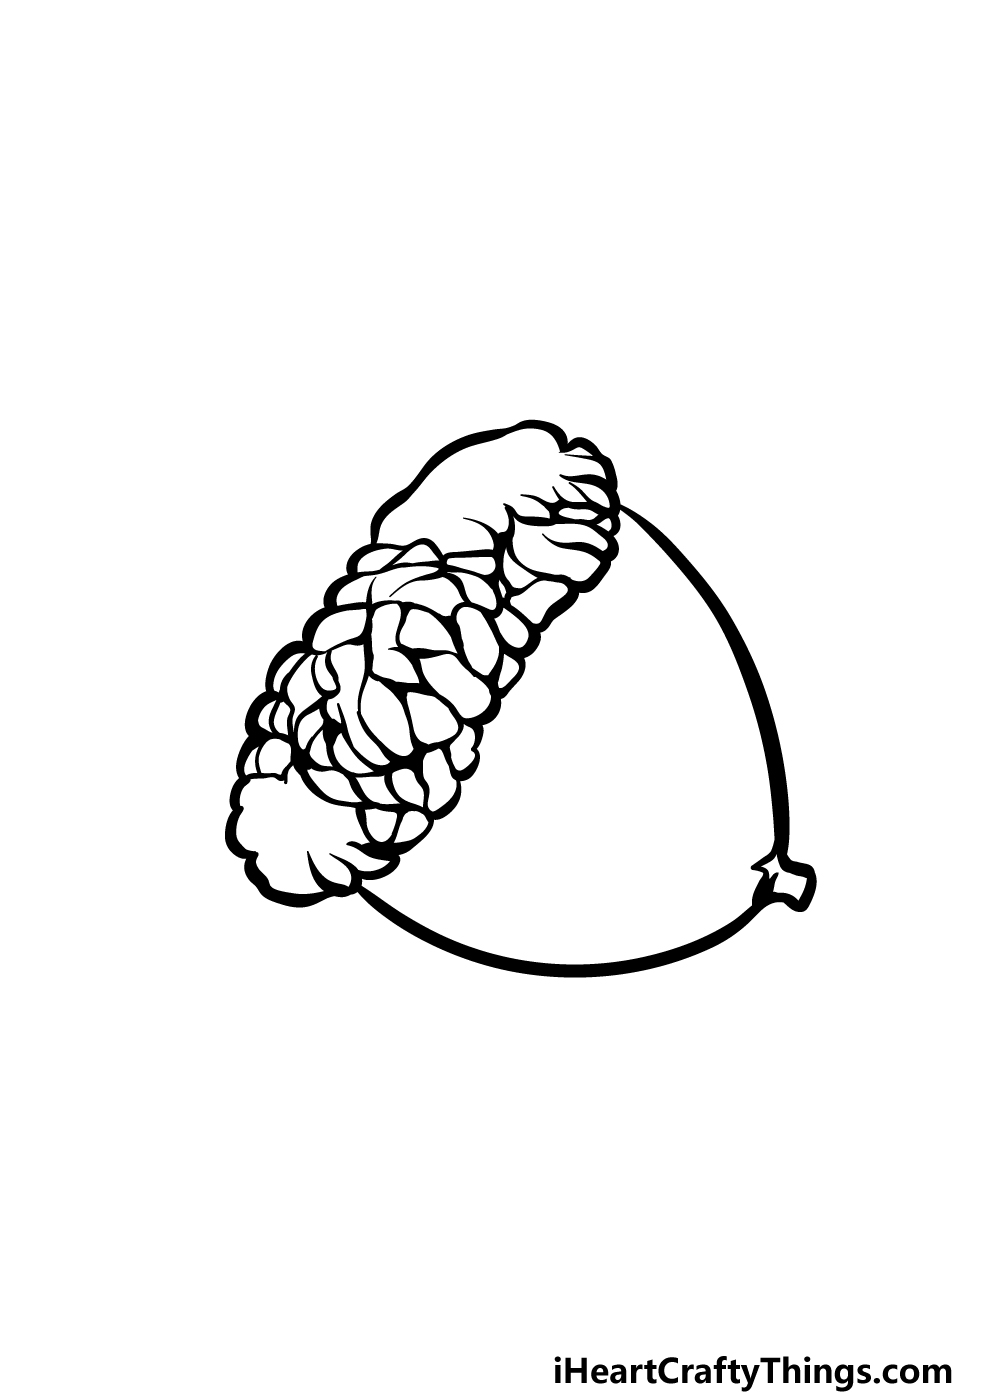
Next, we will be adding some texture for the little cap of the acorn in this third step of our guide on how to draw an acorn.
We mentioned in the previous part that this section of the acorn is quite rough, so we will be illustrating that aspect now.
We will be achieving this look by drawing a lot of small, angular shapes connecting to one another in an almost mosaic pattern.
We will only be drawing texture for one section of the acorn, but we will fill in the blank sections in the next few steps.
Step 4 – Now, draw some more texture for the top of the acorn

This fourth step of your acorn drawing will see you adding some more of that rough texture for the top of the acorn.
To do this, simply keep continuing what you started in the previous step and draw more of those small shapes connecting to one another.
This portion of texturing will go on the left-hand side of the acorn, and these shapes will be a bit smaller and closer together to make it look a bit denser.
When you have drawn this section, we will finish off the final bits of texture while adding some final details in the next part.
Step 5 – Finish off your acorn drawing
Now it is time to finish off all of the final details and touches in this step of our guide on how to draw an acorn.
These final details will get you ready for the final step where you can finish off with some color! First, we will finish off by drawing the rest of the texture detailing for the cap of the acorn.
Then, once that is finished you can add some long, slightly curved lines onto the bottom section of the acorn to give it some more texture to that area as well.
Finally, we will finish off the drawing by adding the small, bent stalk on top of the acorn. There are also some fun ways that you could further personalize this drawing.
You could draw a background to finish it off nicely, and this background could include a hungry squirrel or maybe an oak tree in the background to show what this acorn may become.
What will you choose for your image?
Step 6 – Finish off your acorn drawing with some color

When it came to coloring in our version of this acorn drawing, we decided to keep the colors darker and more realistic.
To do this, we used various shades of light and dark brown instead of keeping to just one or two shades of brown.
This helps to give a more dynamic look to the image, and if you like this style then you can try to use similar colors to the ones we used.
You could also use completely different colors if you prefer, so let your creativity flow as you finish it off!
4 More Ways To Make Your Acorn Drawing Unique
Make your acorn sketch even greater with these fun ideas to try!
We all know that acorns grow on trees, and this is a way that you could add to this drawing of an acorn. What we mean is that you could make it look like this acorn is still on the tree.
This could be done by changing the angle of the acorn. Then, you could draw it still attached to the branch. Doing this would also allow you to add leaves and more acorns in the background.
How much of the tree would you like to add if you were to do this?
Another way you could show this acorn in its natural habitat would be by showing it on the ground. This way, you could make it look like the acorn has just fallen from a tree.
Beneath it, you could draw some dirt or grass to make it look like a natural area. You could even add little plants such as flowers around it to make the image even prettier!
Squirrels love acorns, and adding one to this acorn drawing would be a great way to make it instantly cuter! If you were to add a squirrel, you could draw it in a realistic style or make it look more cartoony.
It would depend on what your preferences for this image are, but either approach would look great! Either way, you could look up images of squirrels online to help you as you draw.
Another fun way of making this acorn sketch more unique would be by turning it into a cartoon character. There are some simple yet effective ways in which you could do this!
You could just draw a face on the acorn, or you could go further and give it some arms and legs as well. Doing this would allow you to put it in some fun poses or situations.
How would you pose this cartoon acorn if you were to go with this idea for your own drawing?
Your Acorn Drawing is Complete!
Hopefully you had a wonderfully fun time working with us on this guide on how to draw an acorn!
Even though acorns are so recognizable, it can still be quite tricky to get it looking accurate, so that’s what we aimed to help with in this guide.
We also wanted to leave it a bit open for you so that you can add some of your own details and ideas. We mentioned drawing a background or choosing some unique colors, but how will you finish it off?
When you’re ready to try your hand at drawing something new, we have an ever-growing collection of drawing guides for you to enjoy on our website!
You can also show off your creative skills by sharing your acorn drawing on our Facebook and Pinterest pages so that we may admire it!