


Most of the time, hats can be considered as a simple clothing accessory or a fashionable statement. Often, hats can also be a recognizable symbol of a job or sect of people.
If you see a helmet, you think of the military, and a hard hat will probably make you think of construction.
Similarly, a chef’s hat definitely stands out and lets you know that you’re dealing with a master of fine cuisine. There’s no hat quite like it, and this can make it fun to learn how to draw a chef’s hat.
This is the guide for you if you would like to know how it is done!
So grab your favorite snack and settle in to enjoy our step-by-step guide on how to draw a chef’s hat.
How to Draw A Chef’s Hat – Let’s Get Started!
Step 1

As we mentioned in the opening of this guide on how to draw a chef’s hat, this is a rather distinctive and instantly recognizable hat.
There are lots of smaller details to it that can make it a bit tricky to draw, but this guide will help make it easier by breaking it down into smaller parts.
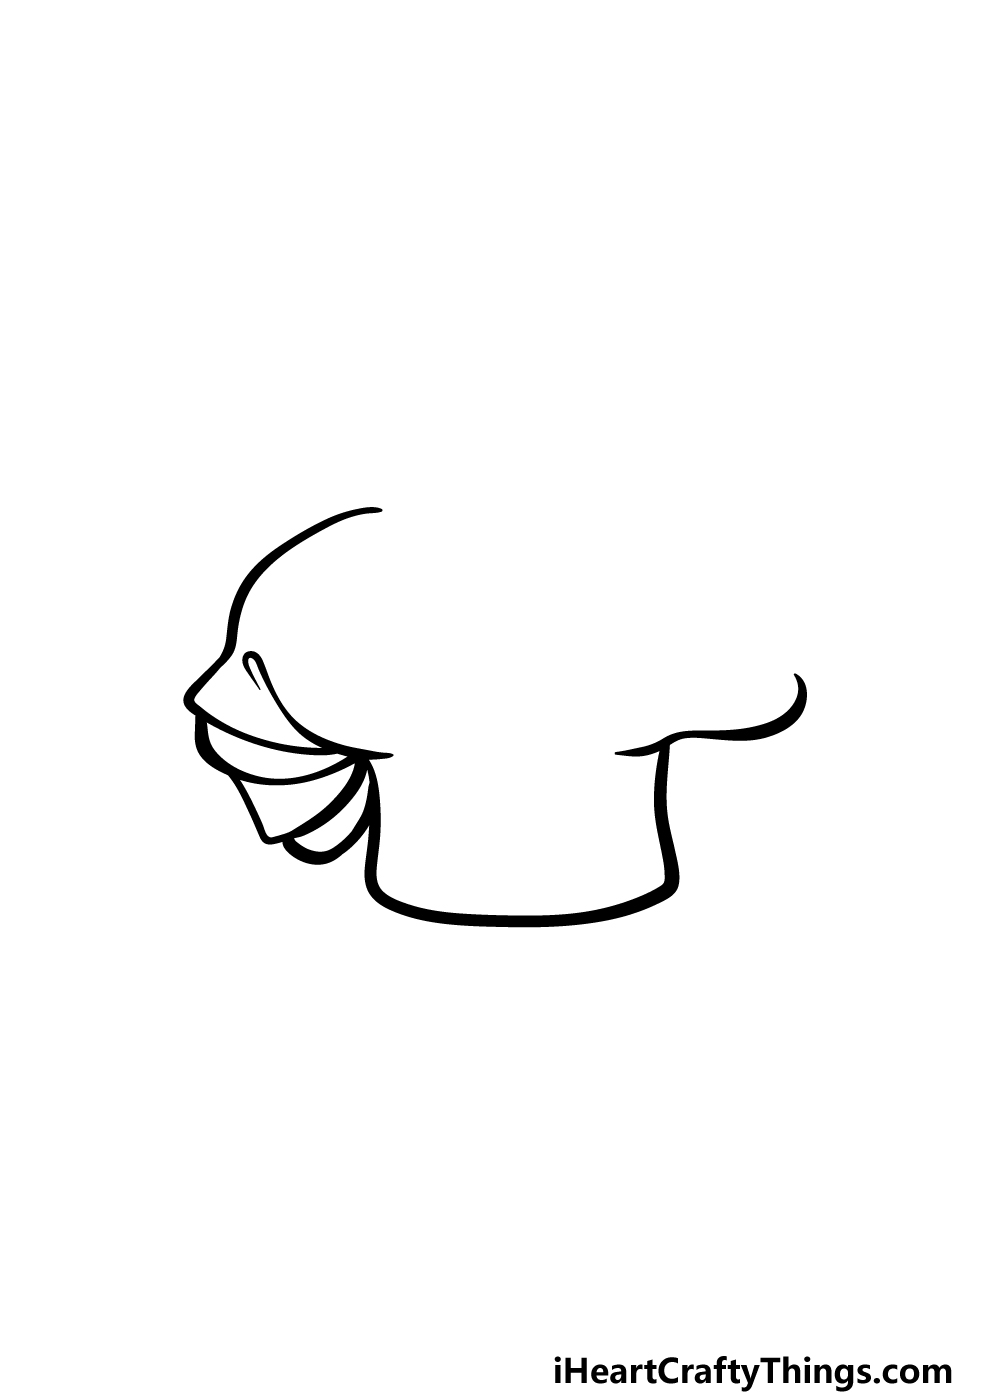
To get this guide started, we shall begin with the base of the hat. To draw this, we will start with a slightly rounded square shape for the hat’s base.
This is the part of the chef’s hat that will sit on top of and around the head.
Next, you can draw a slightly curved line going up on the left-hand side of the hat. Finally, we will be drawing a wavier line on the right-hand side of the hat to finish off this step.
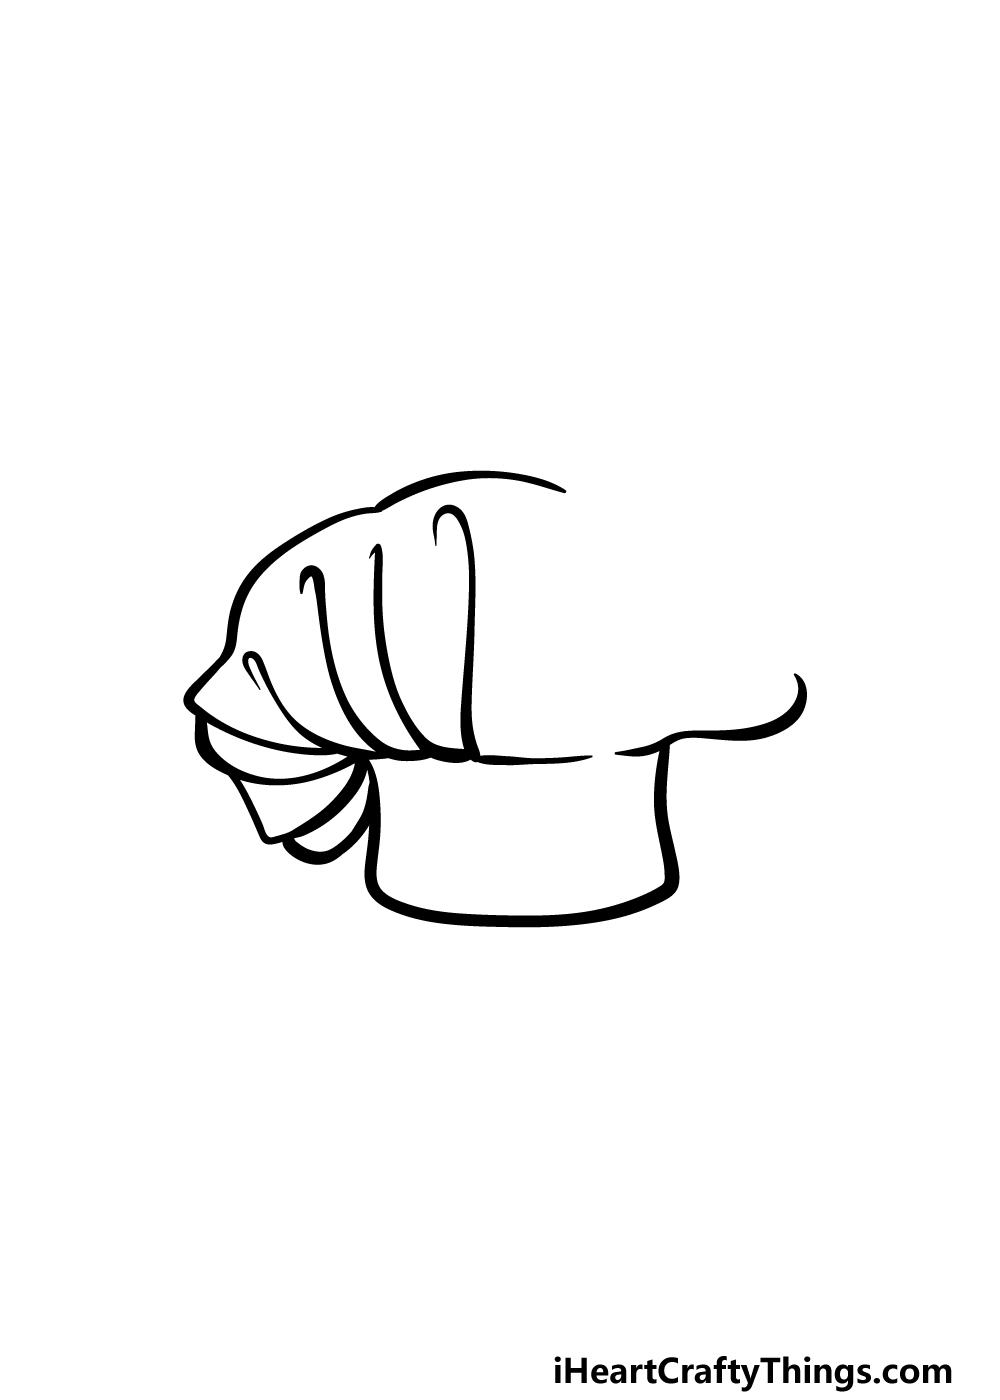
Step 2 – Next, draw some more of the top of the hat
The top of a chef’s hat is quite unique, as it has many sections that fold out from each other.
We will start drawing these little sections now, and as these can be a bit tricky to get right we shall take it in stages for your chef’s hat drawing.
You can draw the first of these sections by drawing a curved line underneath the one that you drew sticking up from the left-hand side of the hat previously.
Then, draw some more of these curved lines connecting to one another until they lead to a longer curved line extending over the top of the hat.
This can be a bit of a challenge to get right, so as you draw you should try to copy our reference image closely.
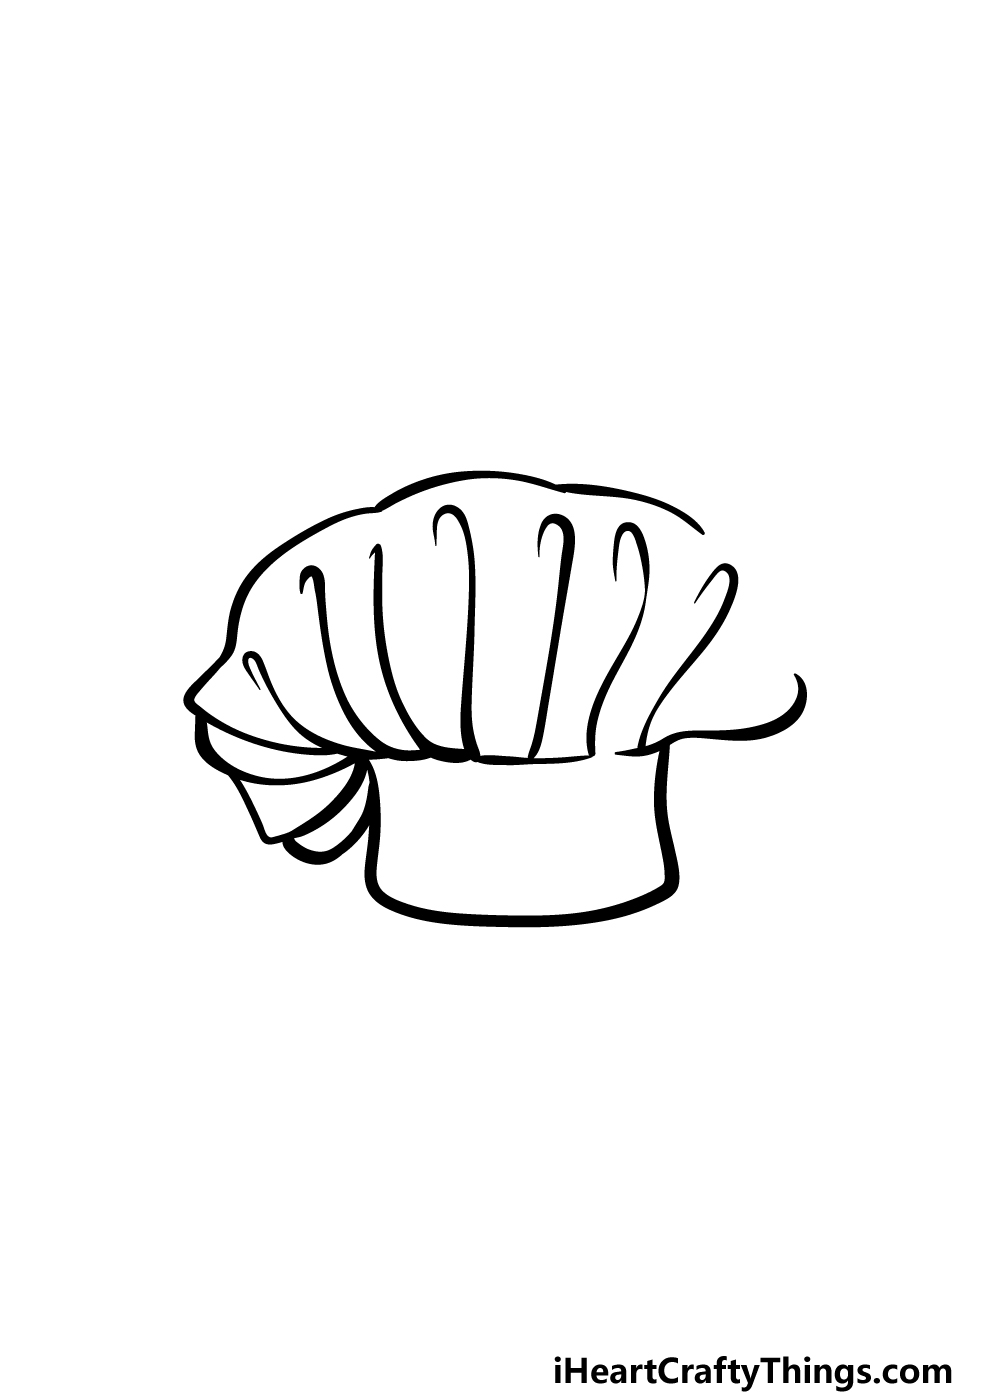
Step 3 – Draw some more sections for the chef’s hat
This third part of our guide on how to draw a chef’s hat will see you adding more of these folding sections to the hat.
These sections will be going on the front of the hat, and they will be longer and more spread out than the ones on the side.
Each of these curved lines will connect at the base to form a line at the top of the band for the hat. Once you’re happy with how it looks we can move on to step 4!
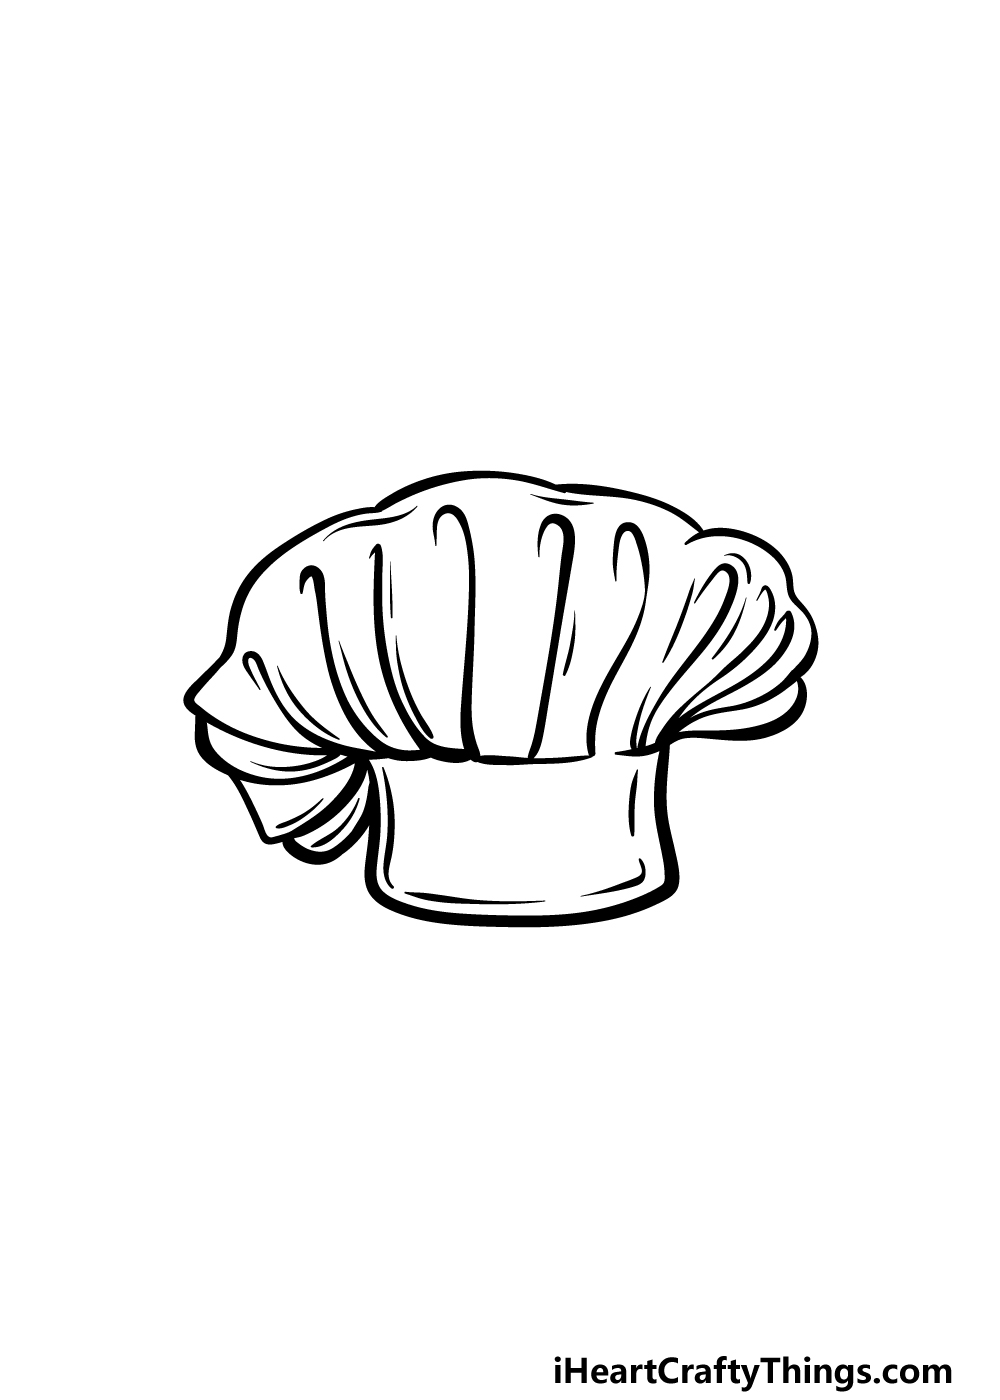
Step 4 – Now, draw some more of these wavy sections
We shall be adding some more sections to the hat in this step while also adding some more to the top of the hat.
To do this, simply keep drawing more of those wavy lines that you have been using in order to add more sections to the front of the hat.
Once that is done, you can also extend the line at the very top of the chef’s hat a bit further right.
Then there will just be a small empty space left over, and we will finish that off in the next step, along with some final touches.
Step 5 – Finish off your chef’s hat drawing
In this step of our guide on how to draw a chef’s hat, we will be finishing off the final details and structure of the hat so that you will be ready for the final step.
We mentioned the empty space left at the end of the previous step, and as promised we will fill it in now.
You can do this by using some more curved lines to create the final sections of the hat. These lines will again be a bit closer together than the ones in the center of the hat were.
Once these are drawn, you can finish off with some final line details throughout the chef’s hat. You could also add some touches of your own!
One idea would be to draw a chef wearing the hat, and you could even use your own head and face as a model. How will you finish off this image?
Step 6 – Finish off your chef’s hat drawing with some color
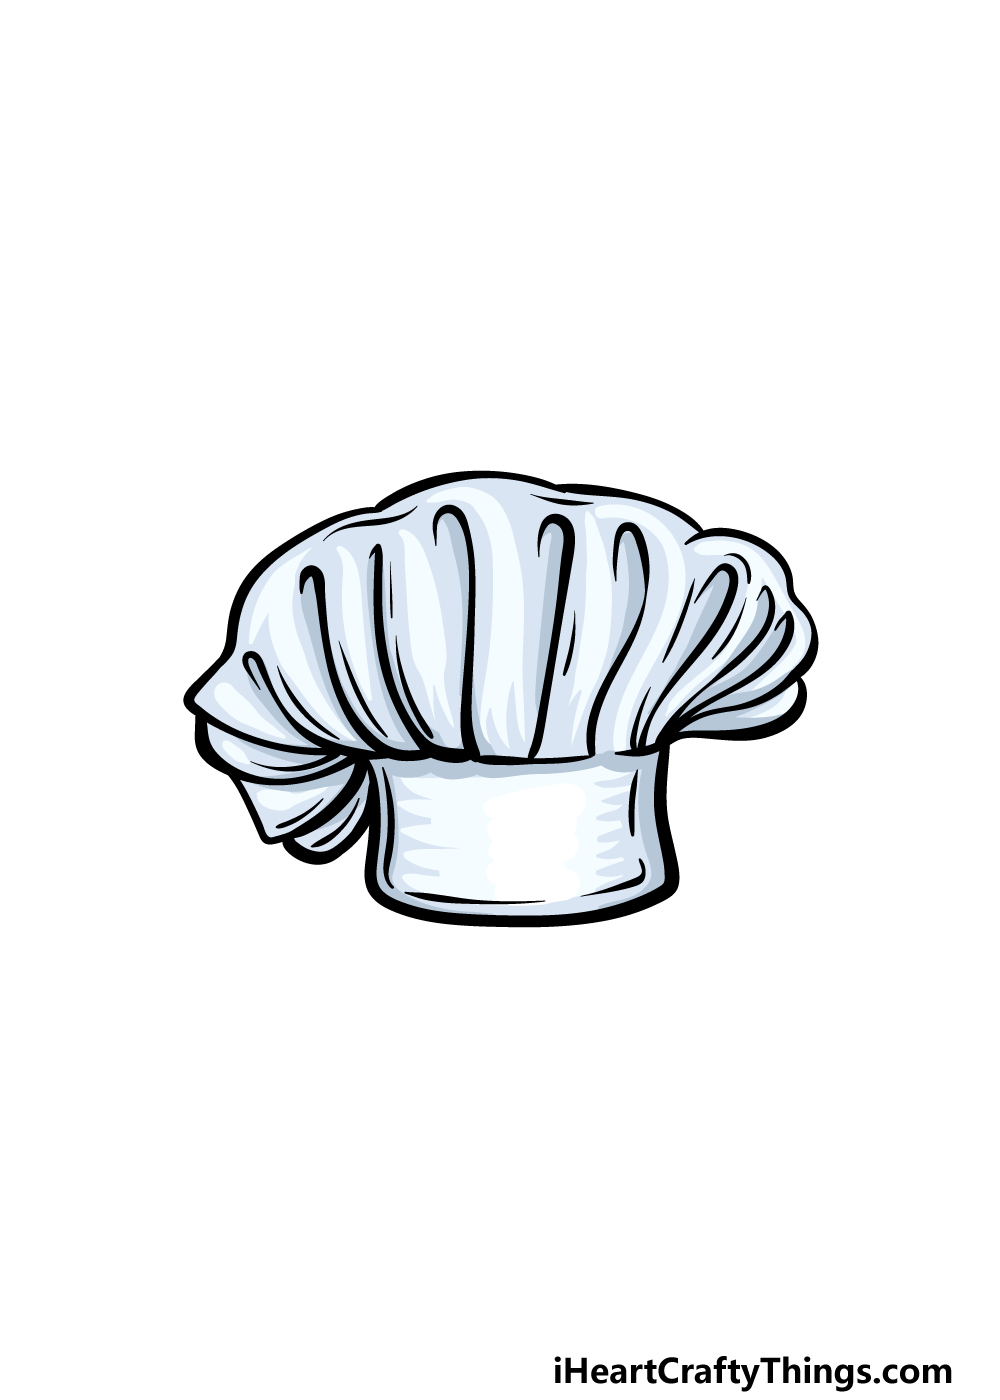
We will be keeping the colors quite light and subtle in this final step of your chef’s hat drawing.
We used some shades of light blue in the details and creases of the hat to give it some more definition.
For these kinds of softer colors, watercolors can be a great medium to use as they won’t overpower the lines of the drawing.
Don’t forget to also color in any background or additional elements that you may have added! Once you have chosen the shades you will use, which art mediums will you use to achieve the colors?
4 More Ways To Make Your Chef’s Hat Drawing Unique
Whip up a tasty chef’s hat sketch with these 4 great tips!
We created a standard design for this chef’s hat drawing we created here. There are many different chef’s hat variations you could also go for instead once you have finished this design.
If you know of some of these hats already, then you would be good to go when changing this design! If you want to try out some different designs, then you could try and look some up online.
It could be fun to show several different chef’s hat designs on one page!
A chef’s hat is just one of many items of clothing and tools that a chef would use. You could show some of these objects in your drawing of a chef’s hat!
For example, maybe you could have the hat sitting on a table with these objects. These could include utensils, crockery, pots and maybe some ingredients.
If you need some inspiration, you may even want to look at the kitchen in your own house! What are some items that you could add to this culinary ensemble?
Since we’re talking about some background details, we would encourage you to build it even further!
We spoke about creating a table with objects for this chef’s hat sketch, but you could make the background even more involved.
This could be a busy kitchen setting or a calm home scene featuring this chef’s hat. This would depend on the kind of feeling you would like to create for this picture, so what background would you like?
Finally, it would finish off this chef’s hat drawing nicely if you were to add a character to the image. You could draw a classic cartoon chef wearing the hat, but that is just one option!
You could draw a famous chef in an art style you enjoy, or you could base the character on someone you know personally.
Whatever you go for, you could combine this tip with any other suggestions we presented here.
Your Chef’s Hat Drawing is Complete!
You have completed this guide on how to draw a chef’s hat, and you have recreated this iconic piece of headwear with your awesome drawing!
By following the steps in this guide and replicating the lines we added in our reference pictures you’ll definitely be able to master this drawing in no time.
Then, once you have mastered it you can then take over and show off your creativity as you add some touches of your own. We will look forward to seeing what you come up with!
When you’re ready to take on your next drawing challenge, be sure to visit our website for more incredible drawing guides.
There’s something for everyone to enjoy, and we will be bringing out new guides frequently!
We’re very keen to see how you finish this chef’s hat drawing, so please share your artwork on our Facebook and Pinterest pages for us to admire!