The human body is something you would assume would be easy to draw. We each have one and see countless other human bodies in our lives, so it should be easy!
But artists who have tried to draw them will tell you that it can be incredibly difficult to draw any part of the body.
Human bodies are covered in specific muscles, skin, and bone structure, and if any of those elements are off it can wreck your whole image.
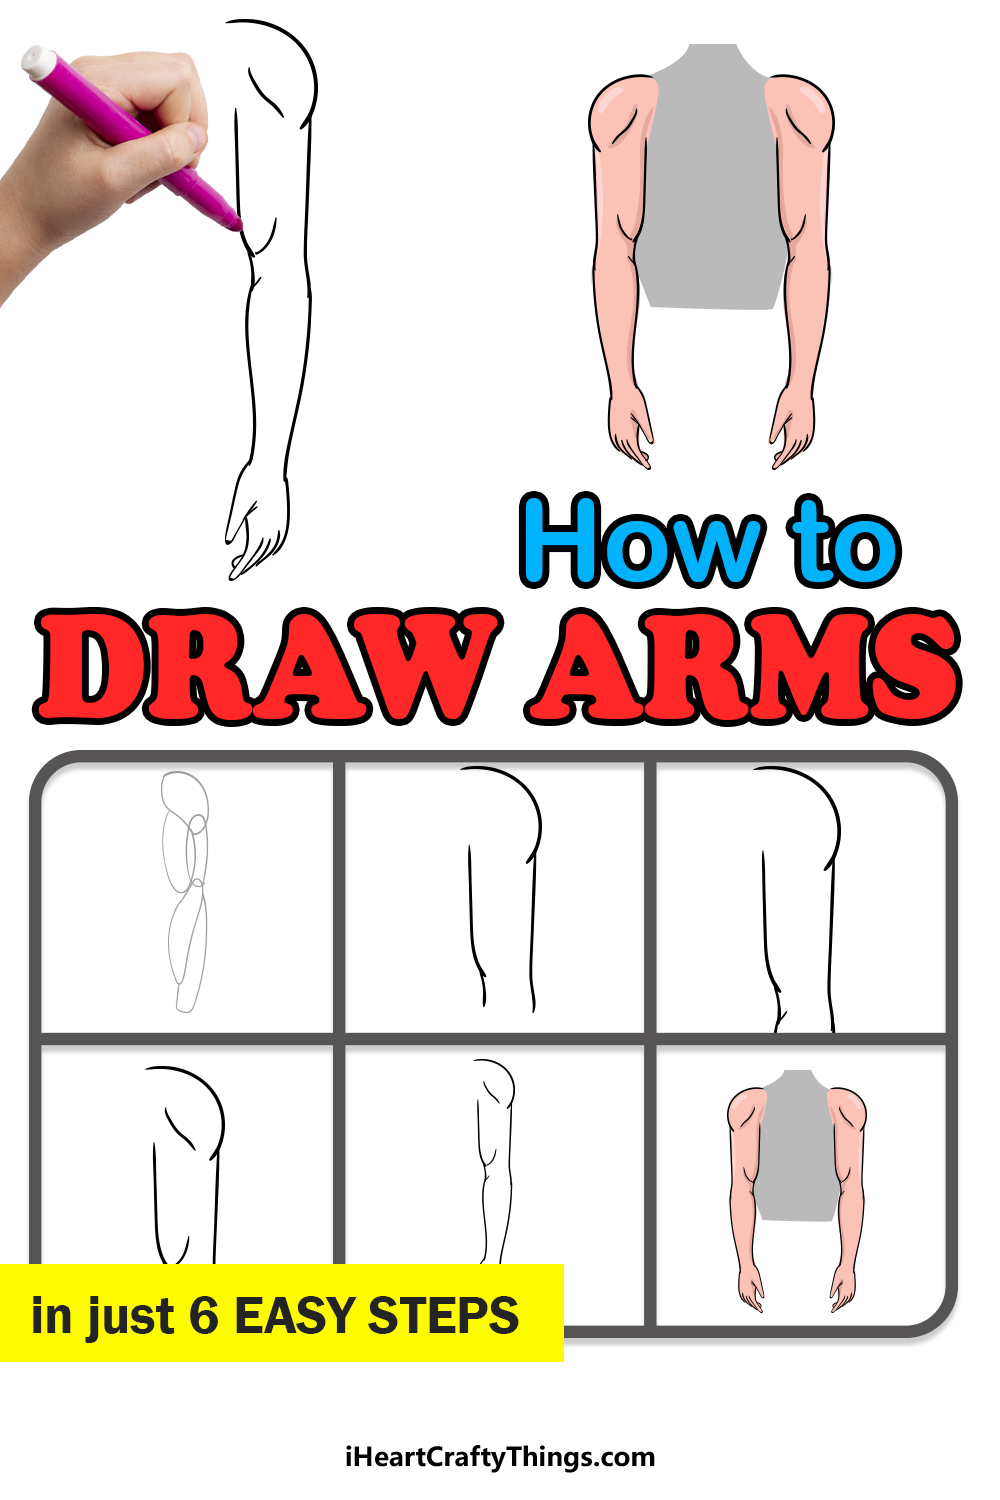
This step-by-step guide on how to draw arms will show you that if you know what to do then this challenge can be made much easier!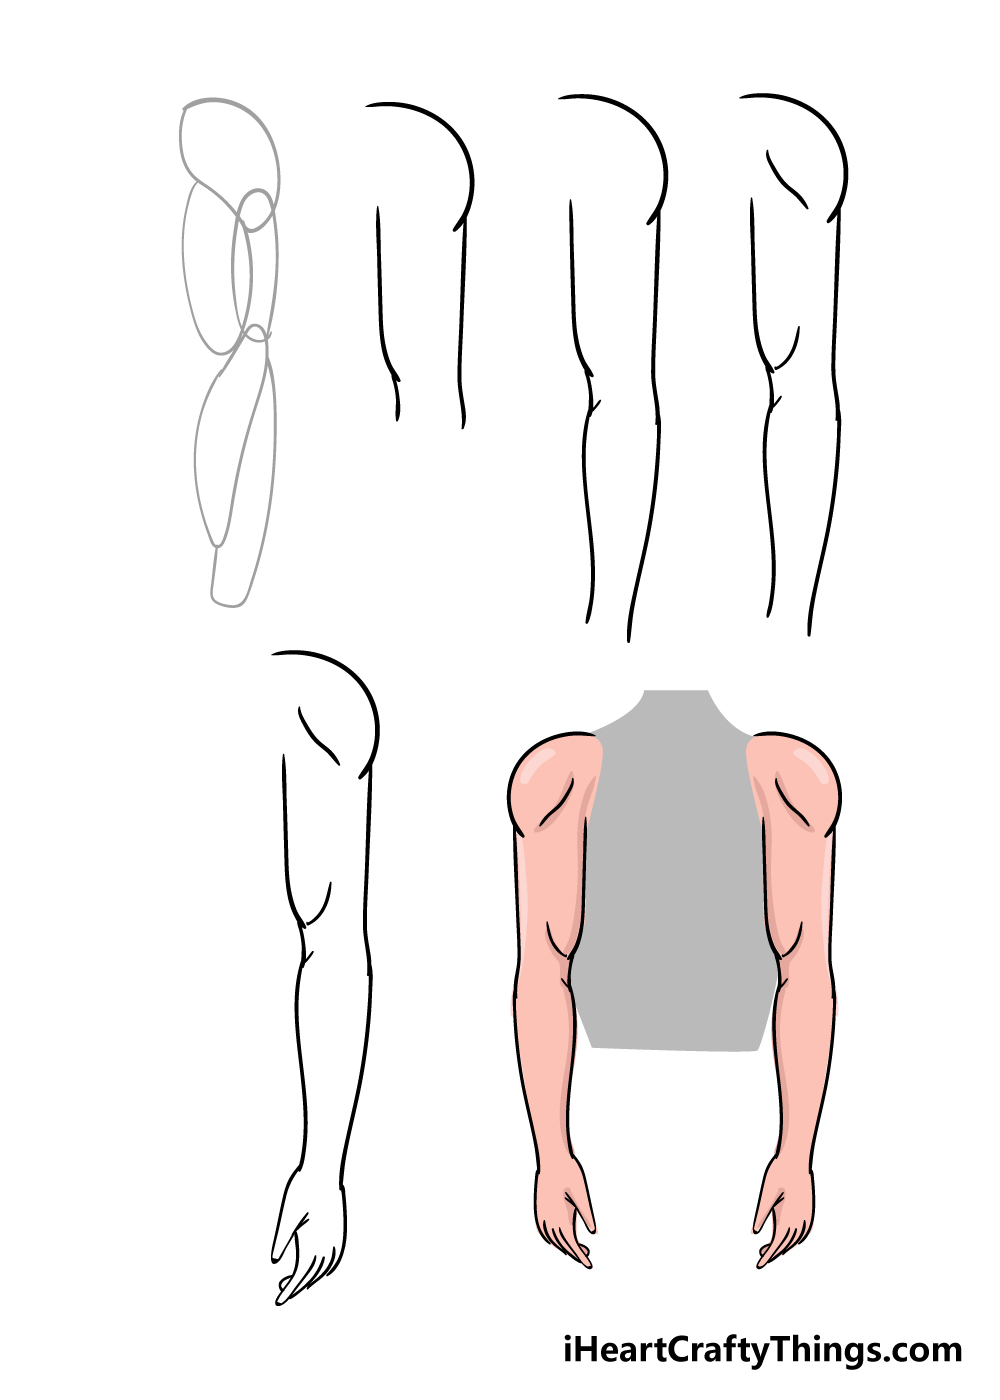
How to Draw Arms – Let’s get Started!
Step 1
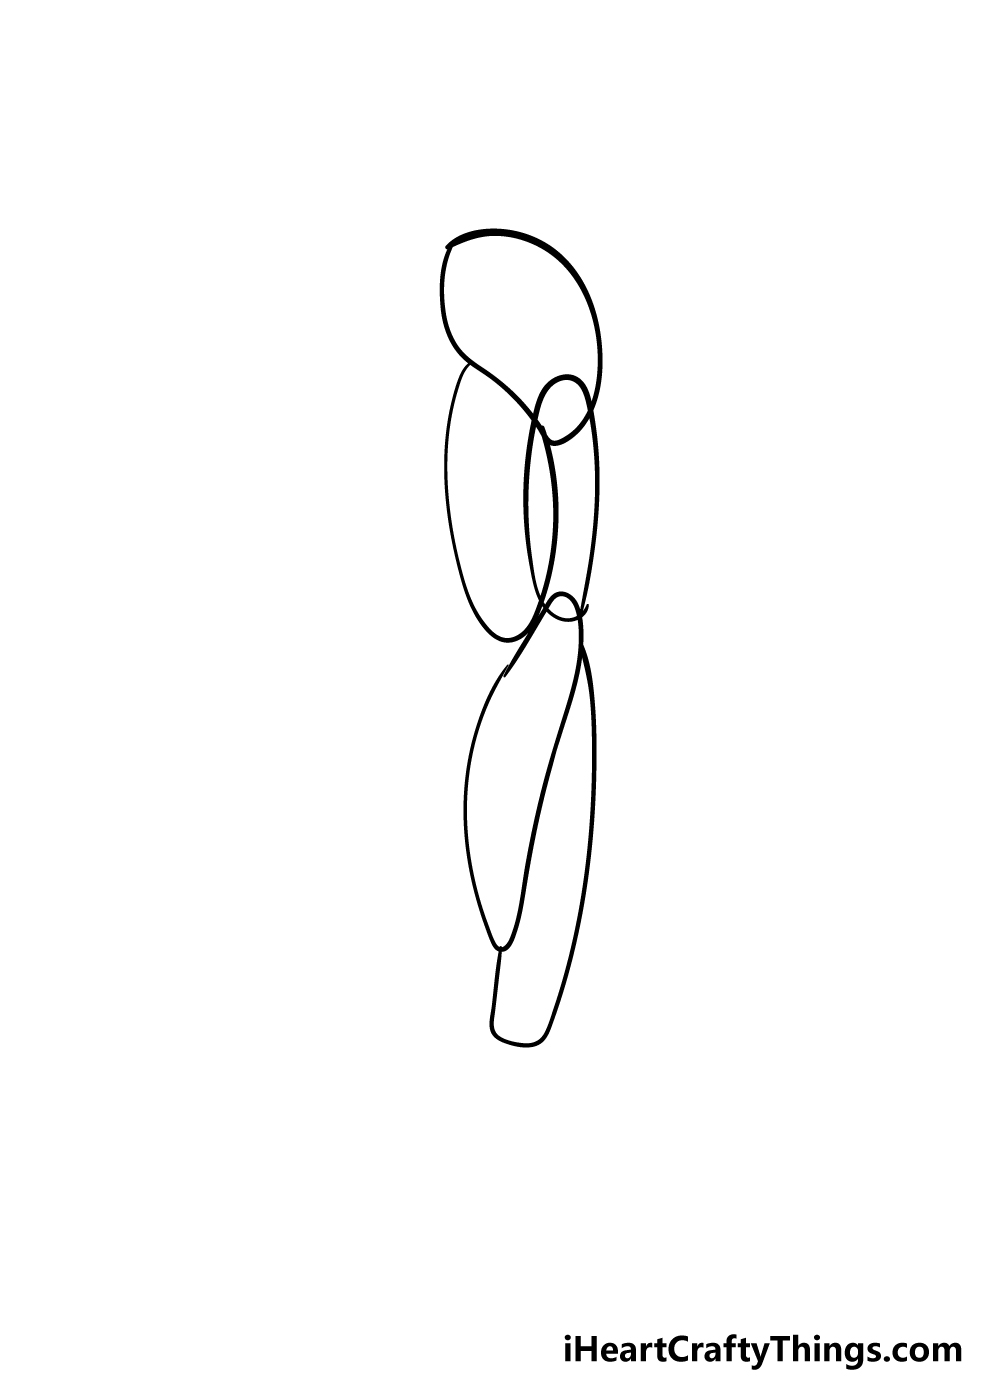
The best way to draw any part of the human body is to break it down into simple shapes. For this first step of our guide on how to draw arms, you will need a light pencil.
We will be using a pencil for now because these shapes won’t make it to the final image but will help you draw the muscles correctly.
Referring to the reference image closely, you can build up a series of rounded and oval shapes to represent the musculature of the arm.
Once you have it looking as it does in the image, you can start drawing the outline of the arm in the next step.
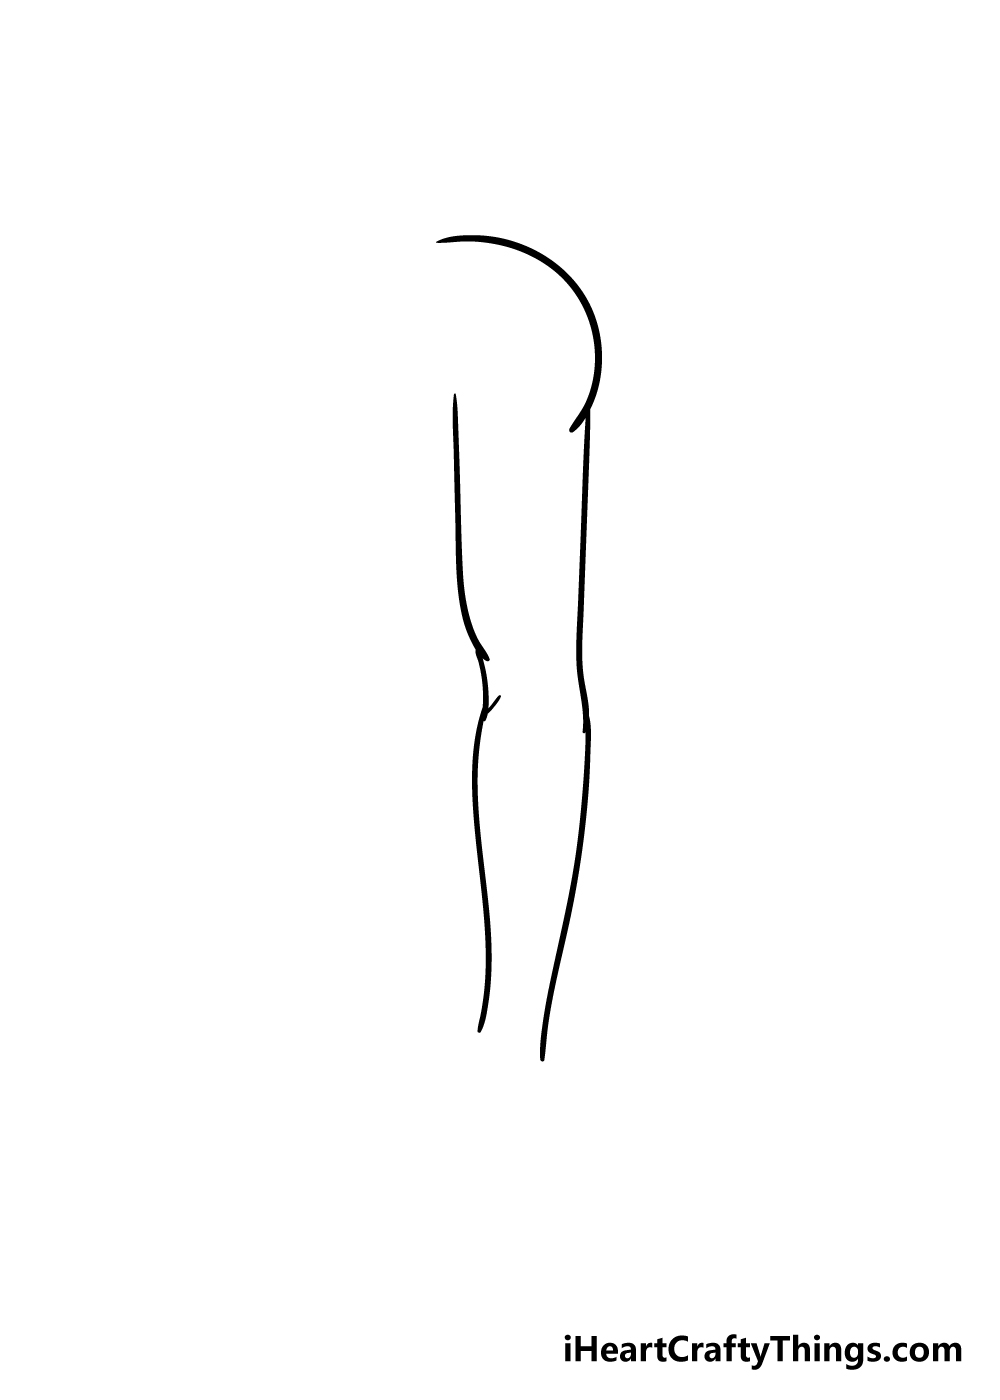
Step 2 – Start the shoulder and bicep of your arm
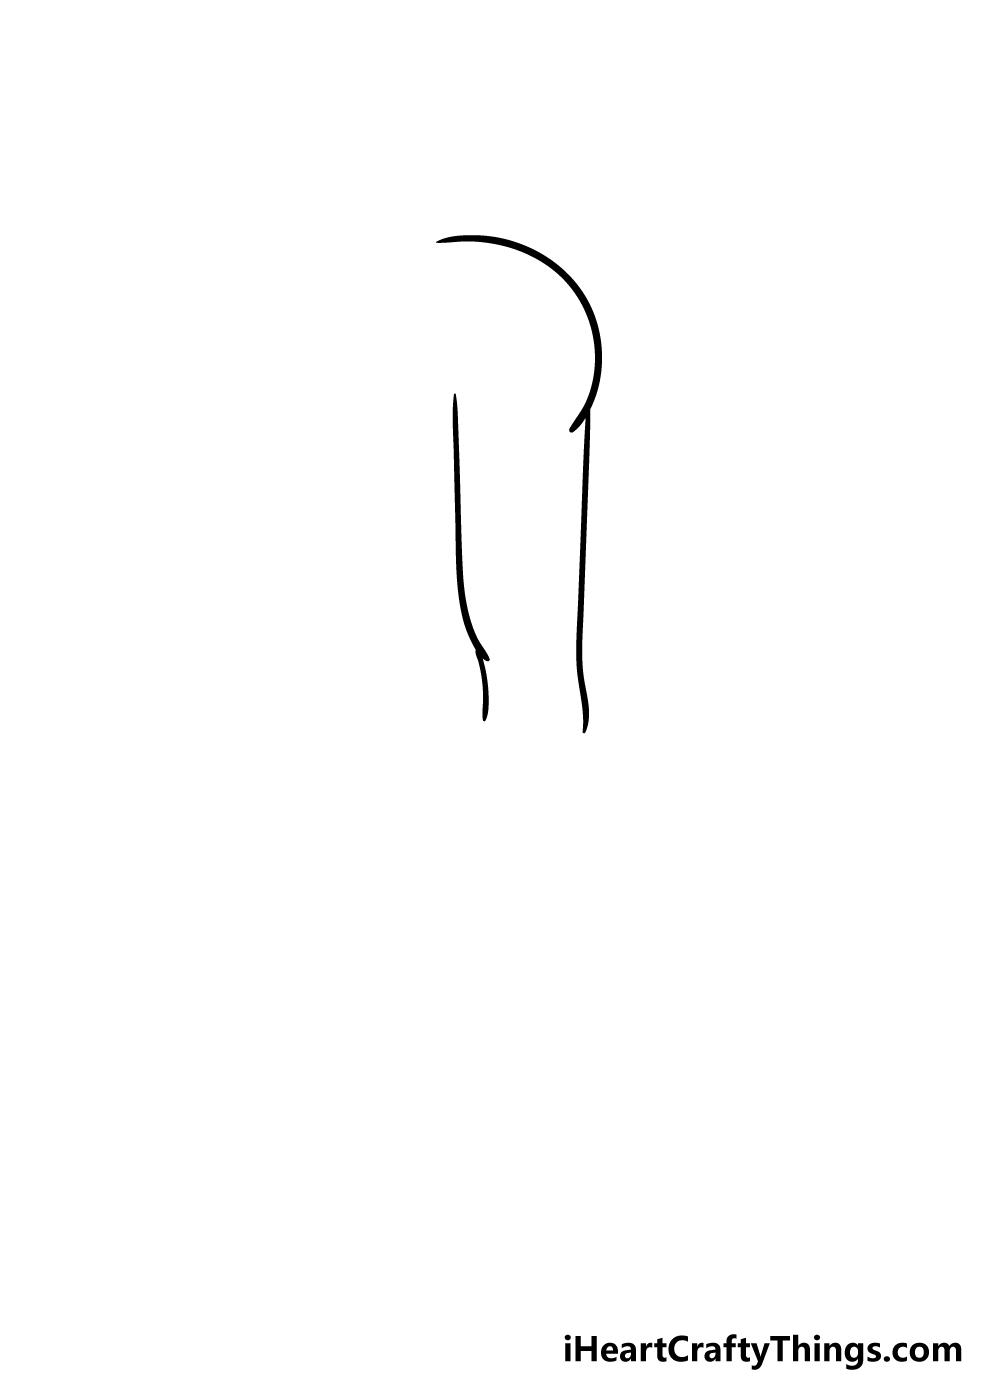
We will be using the shapes you drew in the previous part of your arms drawing to draw the shoulder and bicep of the first arm.
You could start using a pen for this stage, however I would actually recommend using a pencil until the arms are both drawn so that all the lines will go together properly in the final image.
With that part of the arm drawn, we shall move on to step 3.
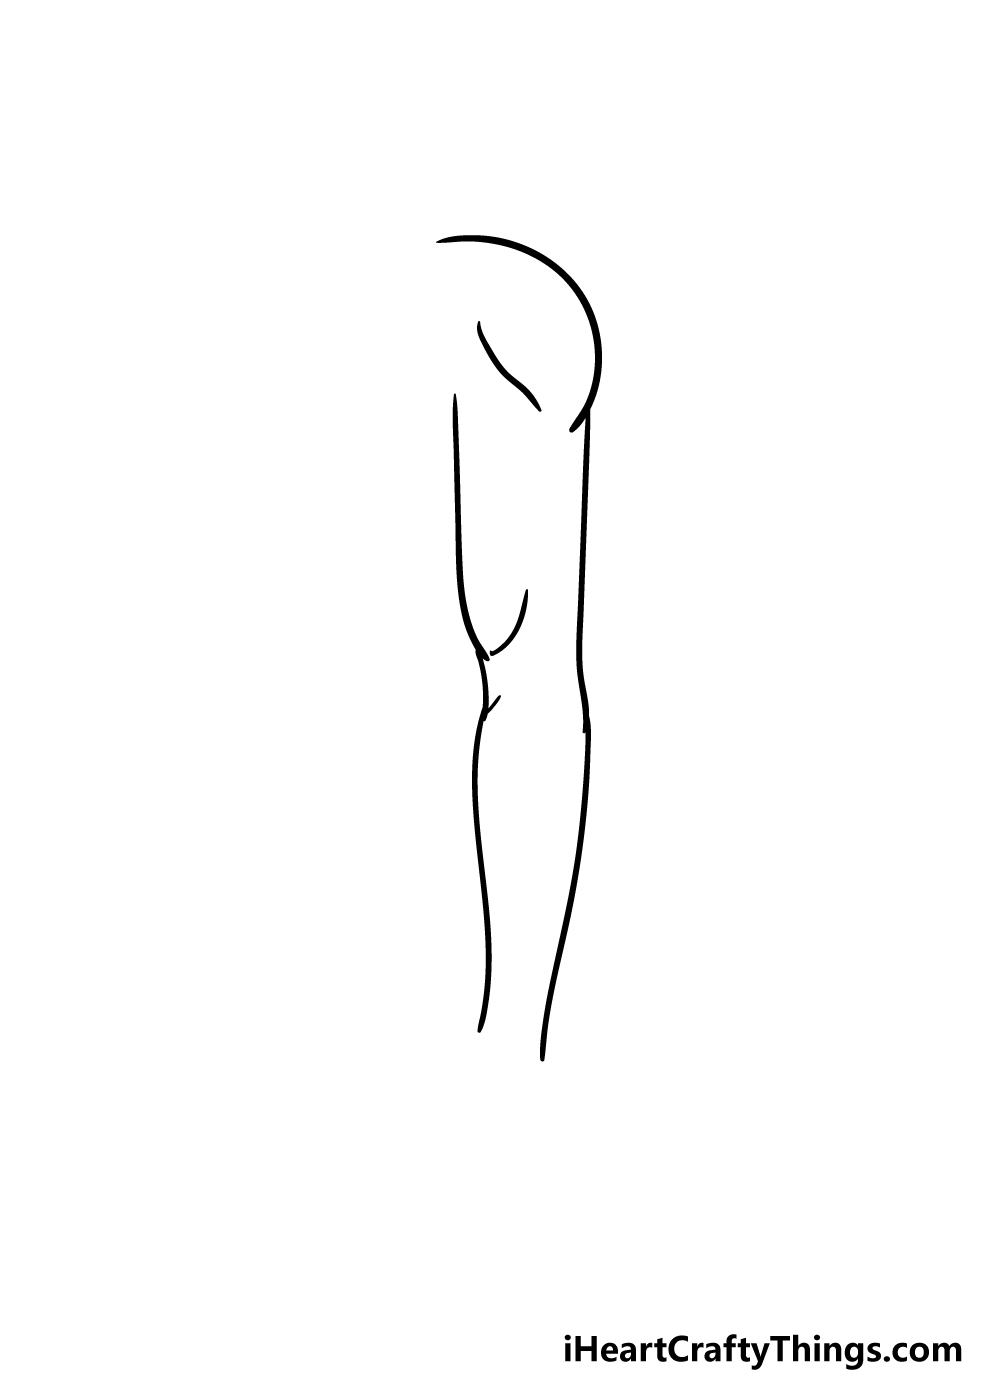
Step 3 – Draw the forearm in this next step
You can continue drawing more of the arm using your guiding shapes from step one of this guide on how to draw arms.
The forearm will be thicker where it connects to the bicep and elbow but then get thinner as it goes down towards the wrist.
This step should be a bit easier, especially when you have your guiding shapes to aid you!
Step 4 – Next, Draw some muscle definition to your arm
This part of your arms drawing is a bit simpler to do, as we will only be adding a few small details.
Using some curved lines, you can draw under the shoulder and by the bicep to create some muscle definition.
This is the stage where it would be recommended to start using a pen if you haven’t already.
We will be erasing the lines from step 1 in the next step, so that will be made much easier if these muscle details can’t be erased along with them.
Step 5 – Draw the hand and erase your line
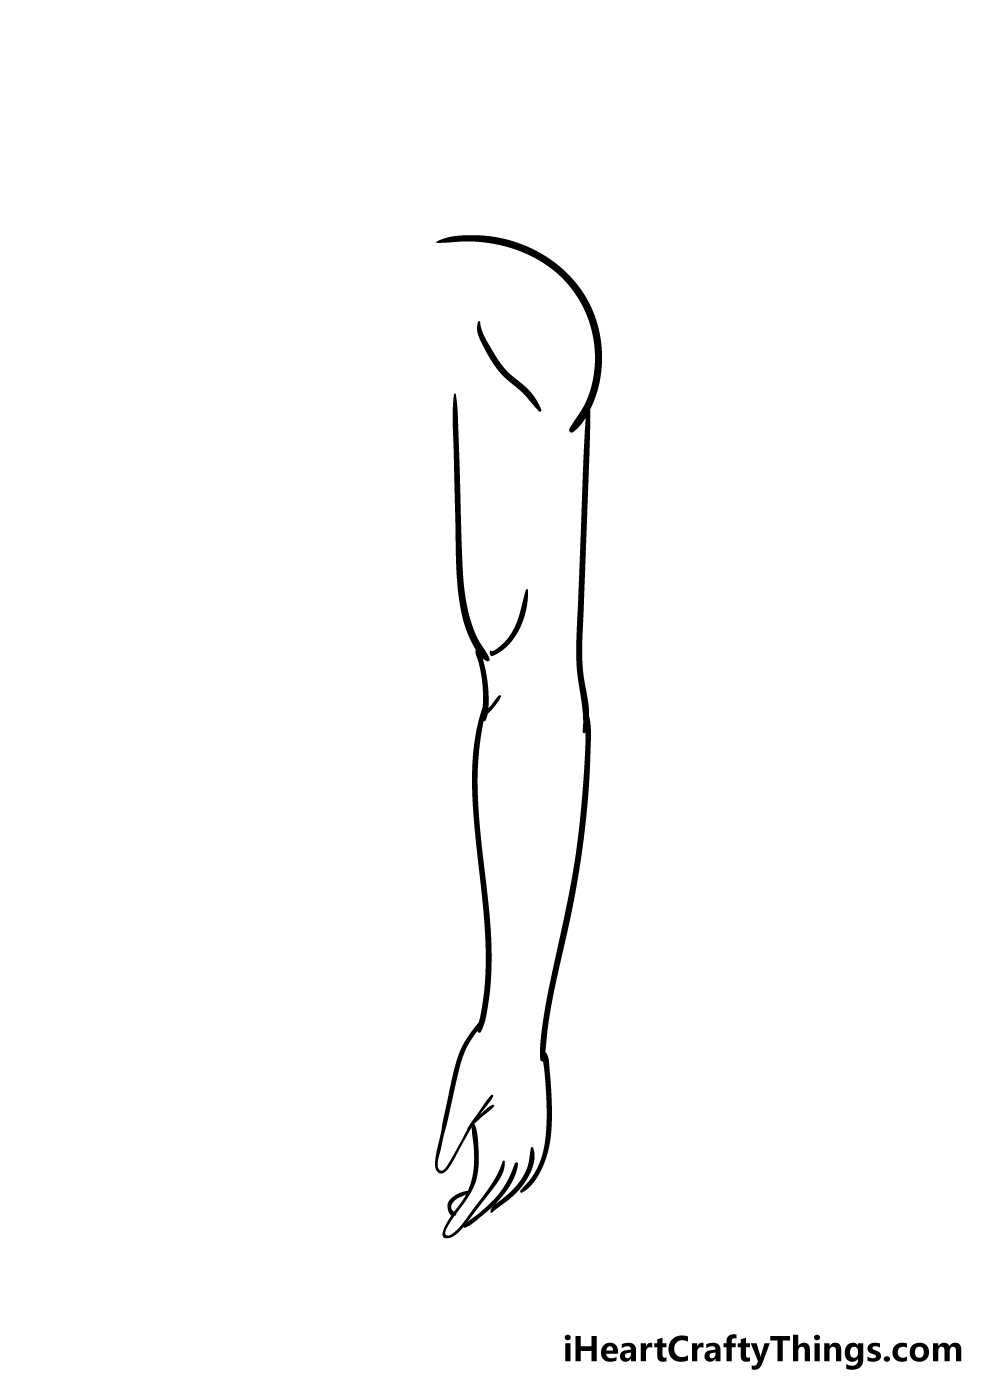
Getting to step 5 means you’ve made some great progress on your arms drawing already! In this step, we will be finishing off this ar while also drawing the other one.
Before you do that, however, let’s finish this arm.
First, draw in a hand for this arm. The reference picture shows a simple hand design that you can replicate for your drawing.
Once that is drawn and you’ve added any final details, it’s time to get out your pen.
You can go over any lines that will show up in the final image with your pen or a dark pencil. Once that is done, simply go back and erase the lines of the shapes from step 1.
Be sure to let the ink dry before you start erasing, however!
If you would like to draw a second arm to go along with this one, then you could do so with this very guide! You can draw in a chest as it appears in the reference image.
Then, you could download each previous step and then reverse each image to start over just on the other side. You’ve done it once before, so this time should be a breeze for you!
Step 6 – Finish off your arms drawing with some color
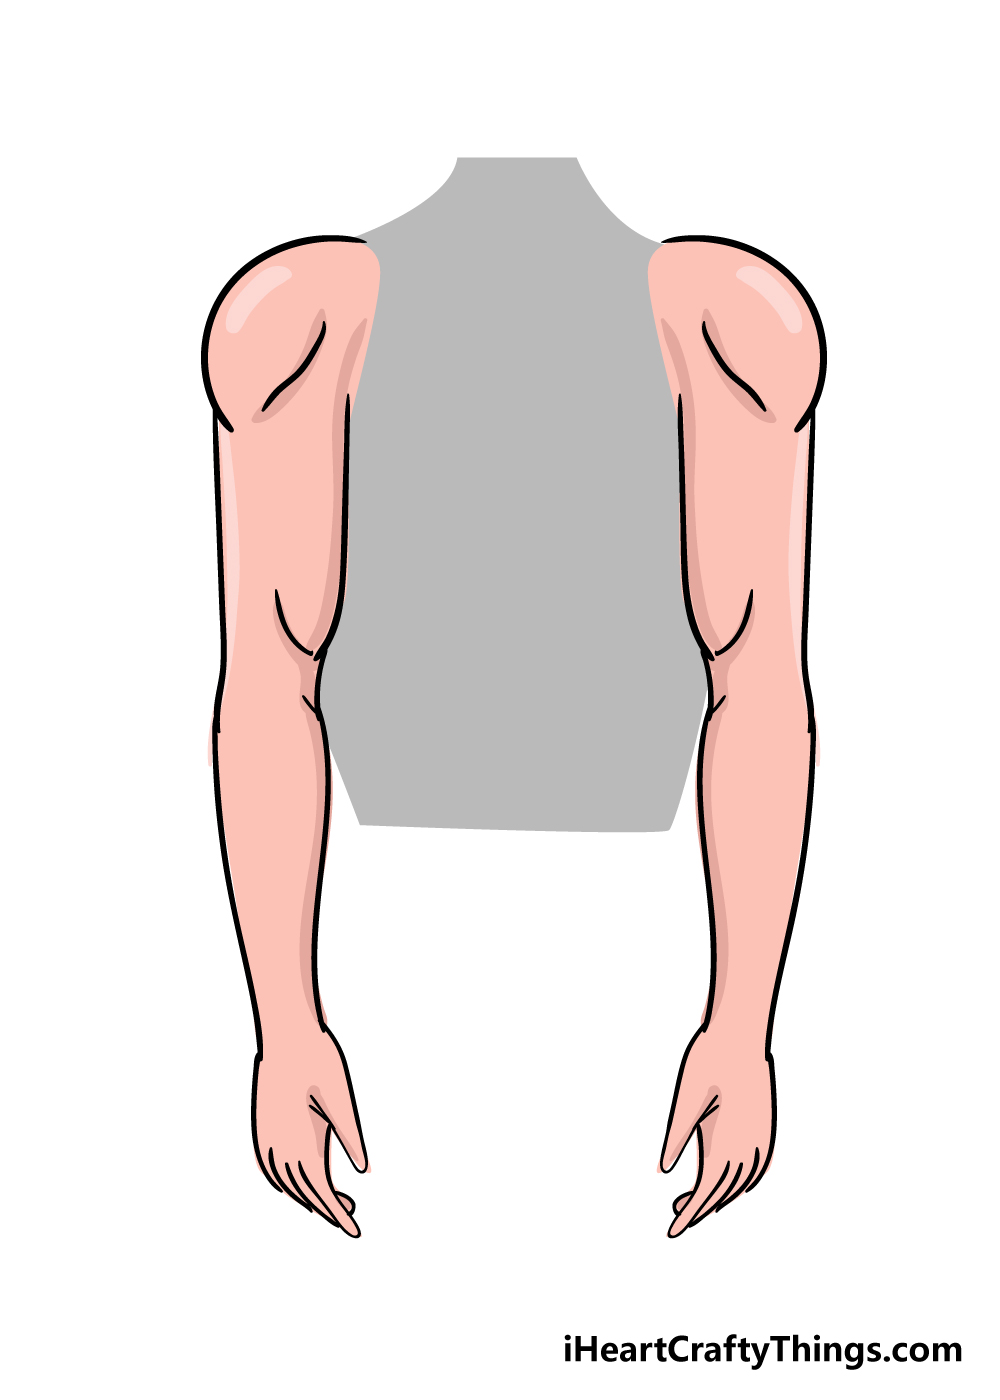
The last step of this guide on how to draw arms is a fun one! You’ve done the hard work of drawing some arms, so now you get to kick back and have some fun coloring it in.
There are many different ways that you could go about coloring your image. You could draw a line somewhere on each arm to make it look like a shirt sleeve that you can color in.
If you’re feeling extra creative, then you could design some awesome tattoos on the arms that would let you use any colors that you love! The possibilities for you to stretch your creativity are endless.
Once you know what colors you would like to use, which art mediums will you use to finish off your arms drawing?
We will look forward to seeing how you express your color creativity to finish your image.
Do this to take your arms drawing to the next level
Let us give you a hand as we make this arms sketch even better with some tips!
In this arms drawing we created together, we kept the arms bare so you could see the muscle structures easier. Now that you know how to draw them, you could cover the arms in some clothing if you wanted!
Doing this would be a great way to personalize the drawing even more. The clothing could involve a long-sleeved shirt or maybe even a fuzzy Christmas sweater.
You could use some clothes from your own closest as inspiration if you would like to give this person a fashion makeover!
Once you have decided how you would like to outfit this drawing of arms, you could take it even further by drawing more of the character. Adding a head to the body would be a great place to start!
If you added a sweater to the arms, for example, you could match this with a warm beanie that the person is wearing. It can be as easy as that to start creating a themed outfit!
If you leave the arms bare, there are other ways you can add some decorations to them. One of the best ways to do this would be by adding some tattoos onto the arms.
Tattoos are a wonderful form of expression, and they could also be used for that purpose for your arms sketch! Tattoos can also come in designs ranging from simple lines to elaborate images, so you would have many options.
When you have chosen with extras you would like to add to your arms drawing, you can finish it all off with a background. This is another idea where you would have so many options to choose from!
Once again, it could also be themed to the outfit you have created here. Sticking with our example of a sweater and beanie, you could add a snowy background to create a chilly portrait for your character.
What other background settings could you use?
Your Arms Drawing is Complete!
You have successfully finished your arms drawing now that you have reached the end of this guide!
Drawing arms is no easy task, so you should be extra proud of completing this guide.
Anyone will tell you that drawing the human body can present any amount of challenges, so we hope that this guide made it fun and easy for you to learn.
Now that you have finished your arms drawing, it’s up to you to bring it to life in a way that you love!
There are many options, from adding clothing, tattoos, using fun color mediums or even by drawing a lovely background! How will you personalize your incredible arms drawing?
There is more drawing fun in store for you on our website, so be sure to check in often to make sure that you never miss a new guide!
We upload more awesome step-by-step guides very often, so there’s a guide for everyone to enjoy!
We would be thrilled to see how you finished off your arms drawing, so please do share your arms drawing on our Facebook and Pinterest pages! We can’t wait to enjoy your incredible creativity.