Every week, millions of families around the world venture out to buy groceries.
It’s usually seen as a bit of a boring chore, but it would certainly be made much more interesting if the various products were cute little characters!
That is essentially what the Shopkins line of toys aims to show, as they take everyday grocery items and show how cute they can be.
There are many different kinds, and learning how to draw Shopkins is a great way to create your own unique variation.
By the end of this tutorial, you will know exactly how that can be done!
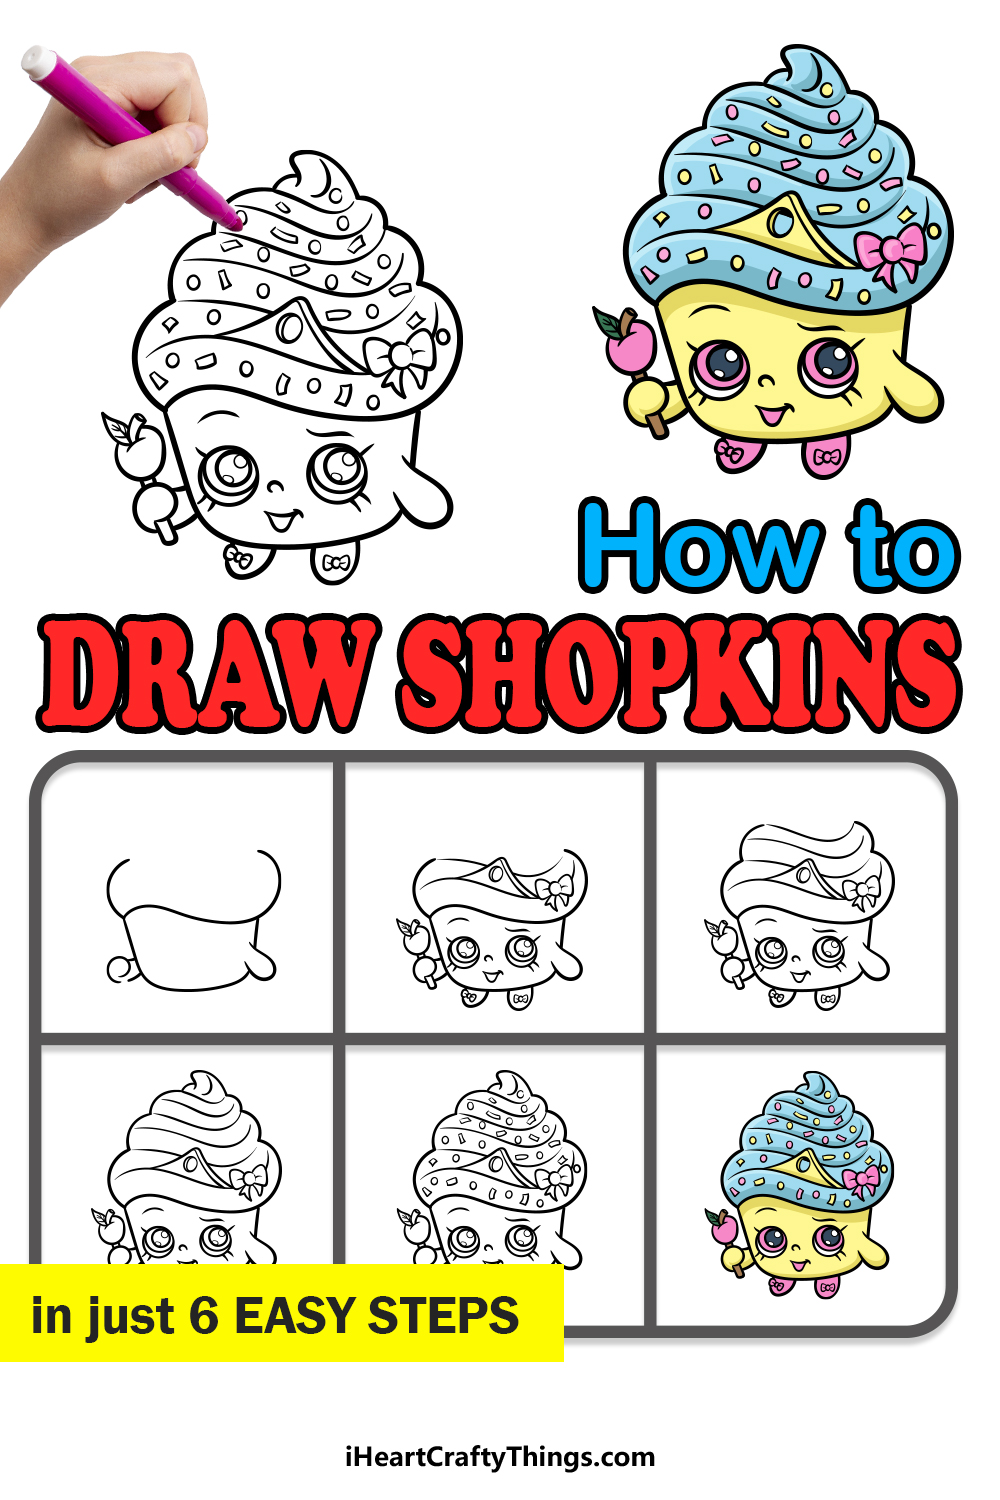
Our step-by-step guide on how to draw Shopkins in just 6 steps will show you everything you need to know about drawing one of these adorable products.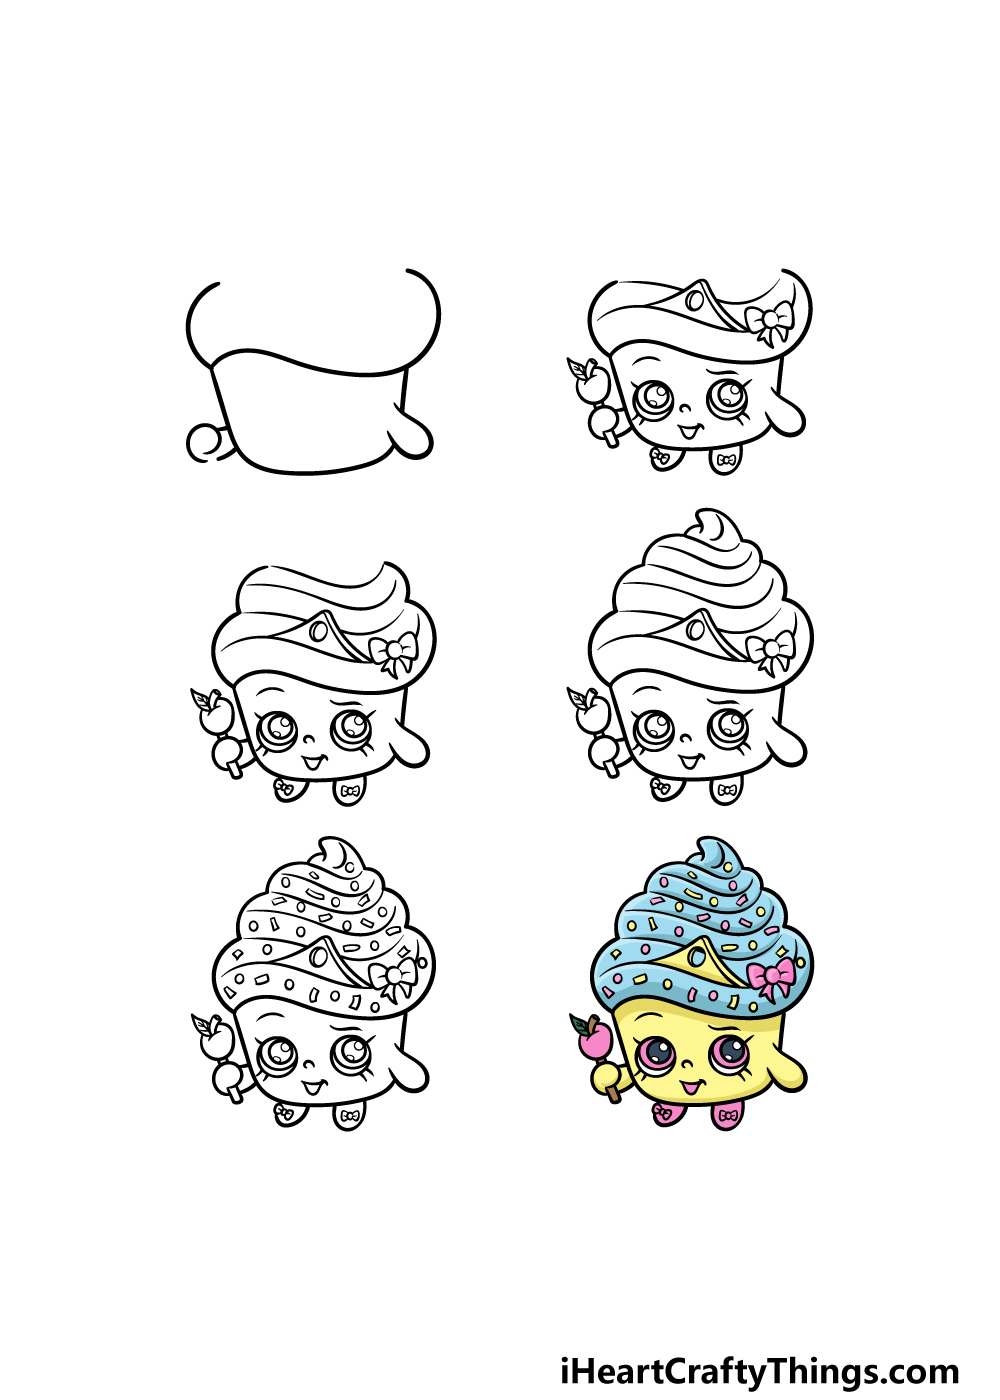
How to Draw Shopkins – Let’s Get Started!
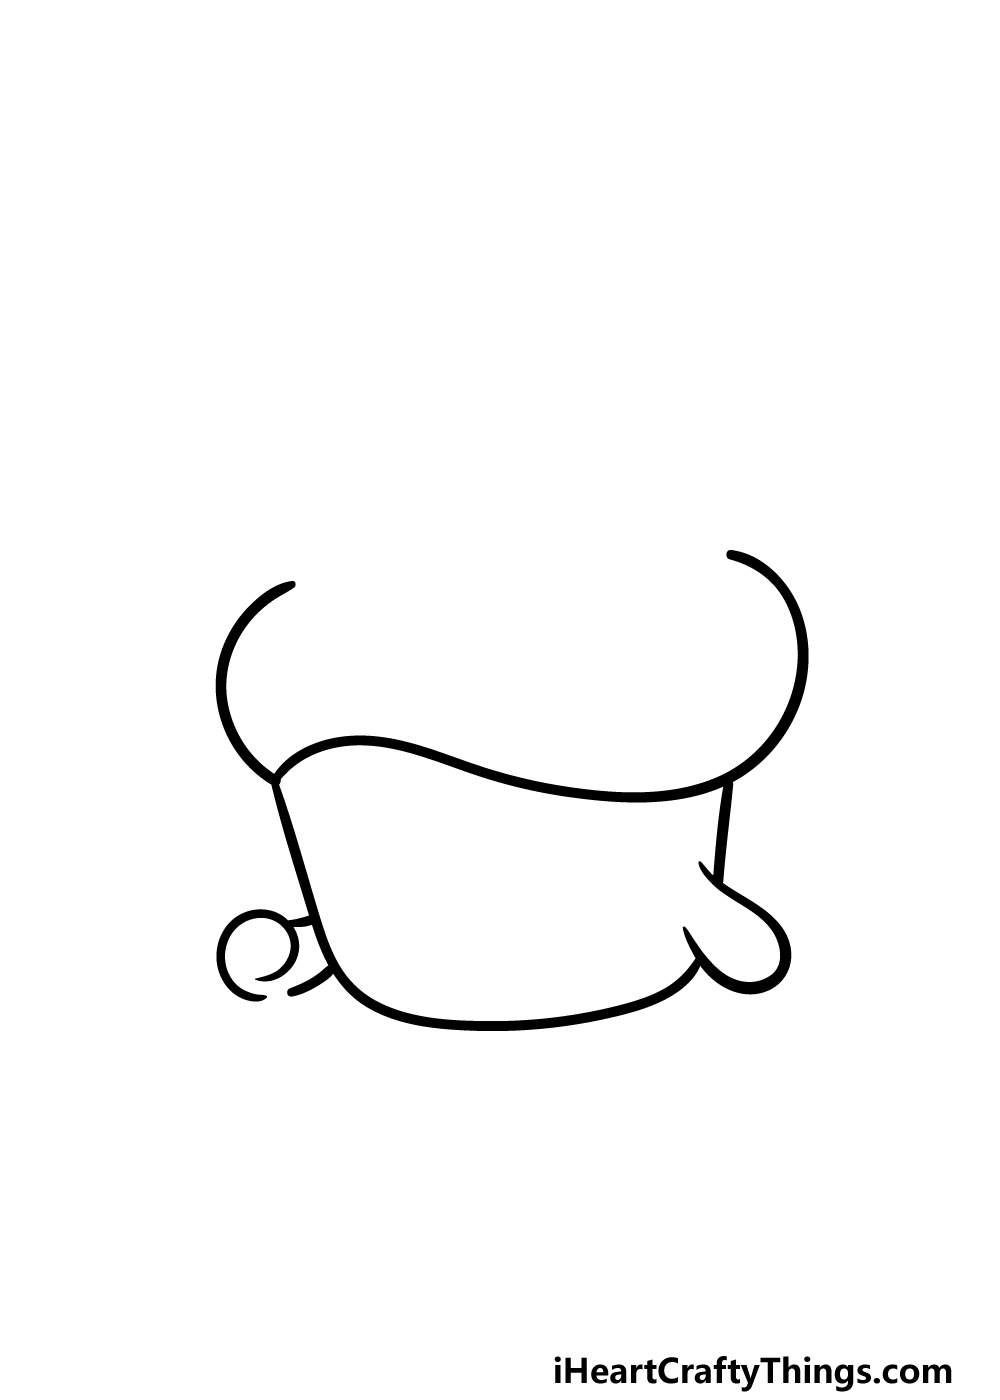
Step 1
During this guide on how to draw Shopkins, we will be depicting a little cupcake character.
This is just one possibility to go for, however, and you could take what you learn in this guide to design many other product characters of your own afterward.
First, we will draw the ‘body’ of this cupcake. To do this, use a curved line that has some sharp sides going up to form a rounded square shape.
Then, we will use some wavy lines on top of this shape for the icing sitting on top of the cupcake. The top of this icing will be blank for now, but we will fill it in soon.
Then, draw some thin, rounded shapes coming off of the sides for the little arms of this Shopkin.
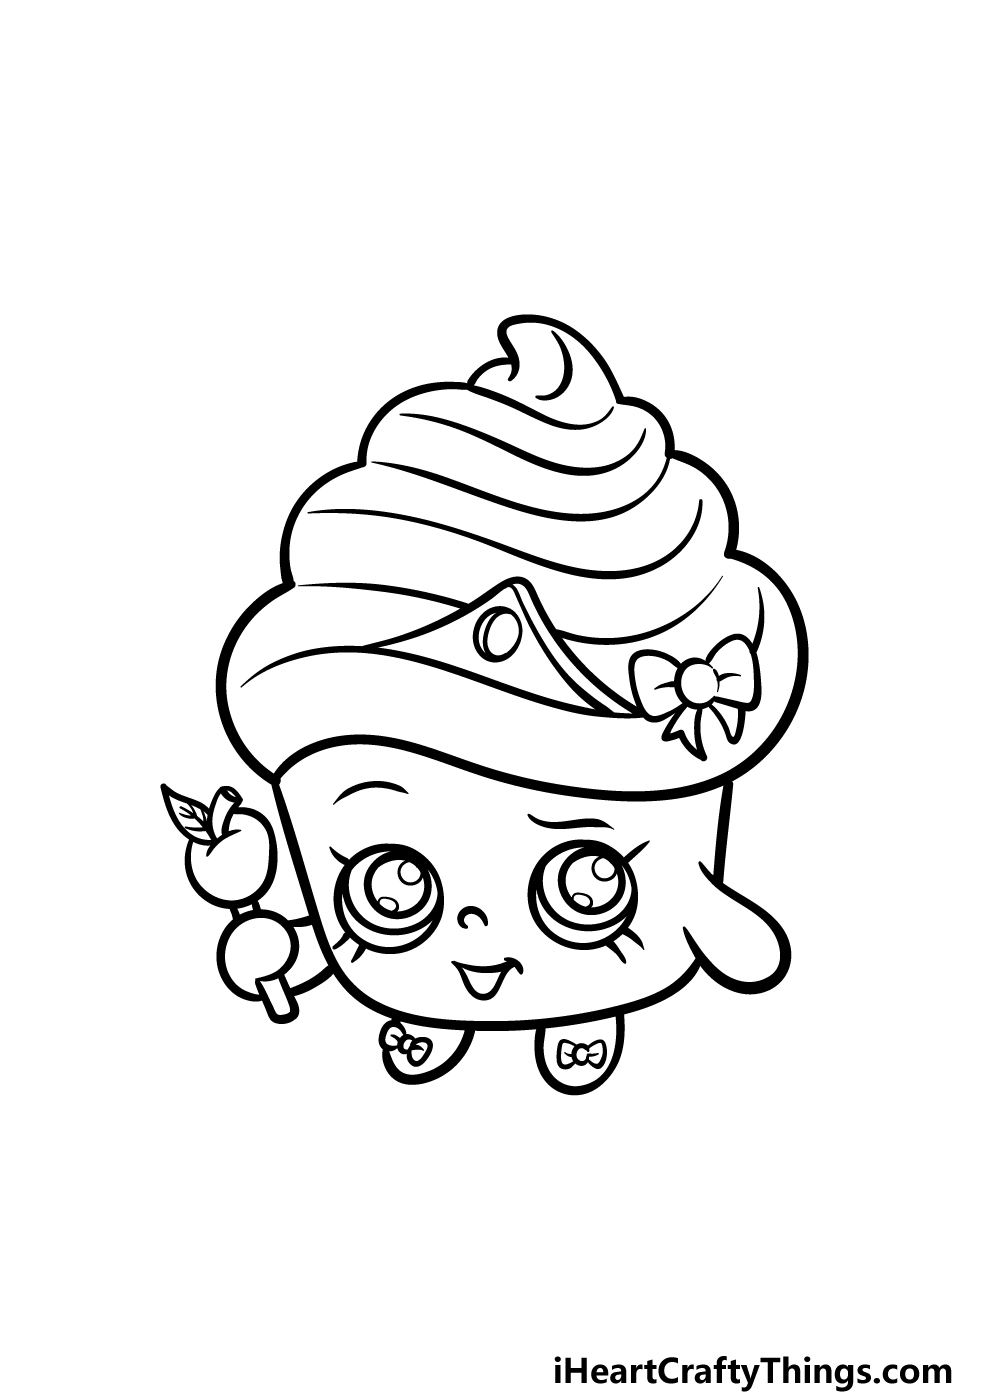
Step 2 – Now, draw the face and other details for the Shopkin
To continue this Shopkins drawing, we will be drawing the face and some other details onto it in this second step. For the eyes, draw two relatively large circles inside of the body of the cupcake.
Then, draw some smaller circle shapes inside of these eye outlines and add some eyelashes around the outside. You can then use some small, simple lines for the nose, eyebrows and mouth.
Then, draw two small, stubby legs coming off the bottom of the Shopkin and draw little bows onto them. She will also be holding a small staff that has an apple at the end of it.
Finish off by drawing some curvy lines inside of her icing and then add a triangular, rounded shape poking out alongside another bow.
Step 3 – Draw some more of the icing on this Shopkin

For this third step of our guide on how to draw Shopkins, we will be adding some more of the icing sitting on top of it. Draw some more curved lines for the side of the icing.
They should move inward as you draw, as this will make the pile of icing get thinner the higher up you get.
Then, add some more wavy lines across the interior for some texture details. Then, we can move on to step 4 of the guide to keep adding to this image.
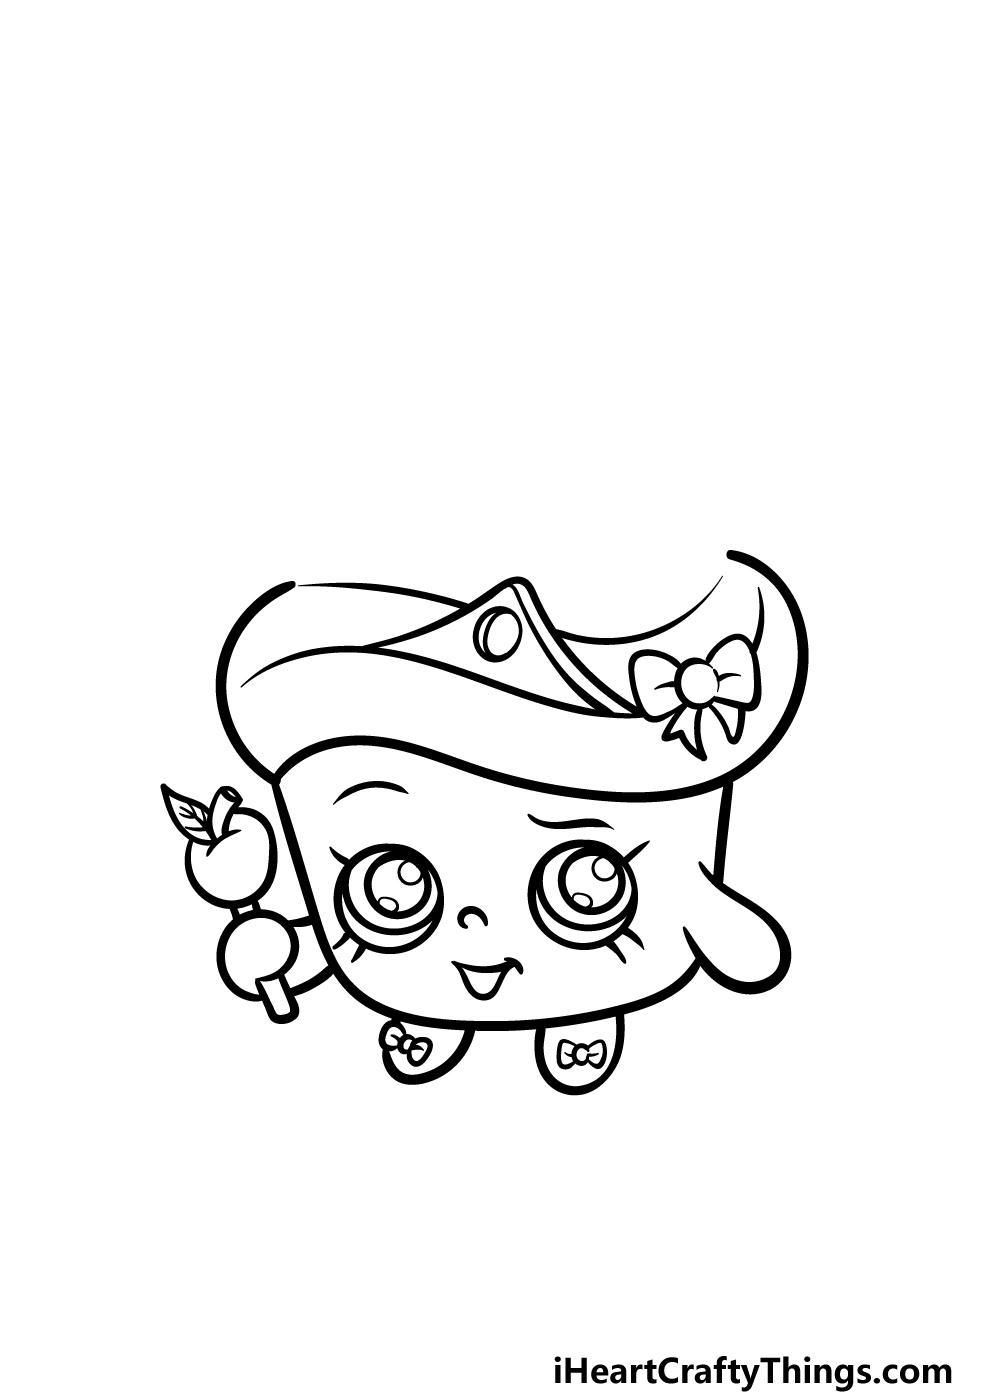
Step 4 – Next, finish off the tip of the icing pile
Now you’re ready to finish off the outline for this Shopkins drawing as you complete the outline. To do this, we will mainly be focusing on the top of the icing that’s on the cupcake.
Use some curved lines for the sides, and once again make them get a bit thinner as you move towards the tip. The tip of the icing will be pointy yet a bit rounded.
Then, add some more of those wavy texture lines across this final area of the icing.
Now that you have completely finished the outline for this Shopkins drawing, you will be ready for some final touches in the next step of the guide.
Step 5 – Add the final details to your Shopkins drawing
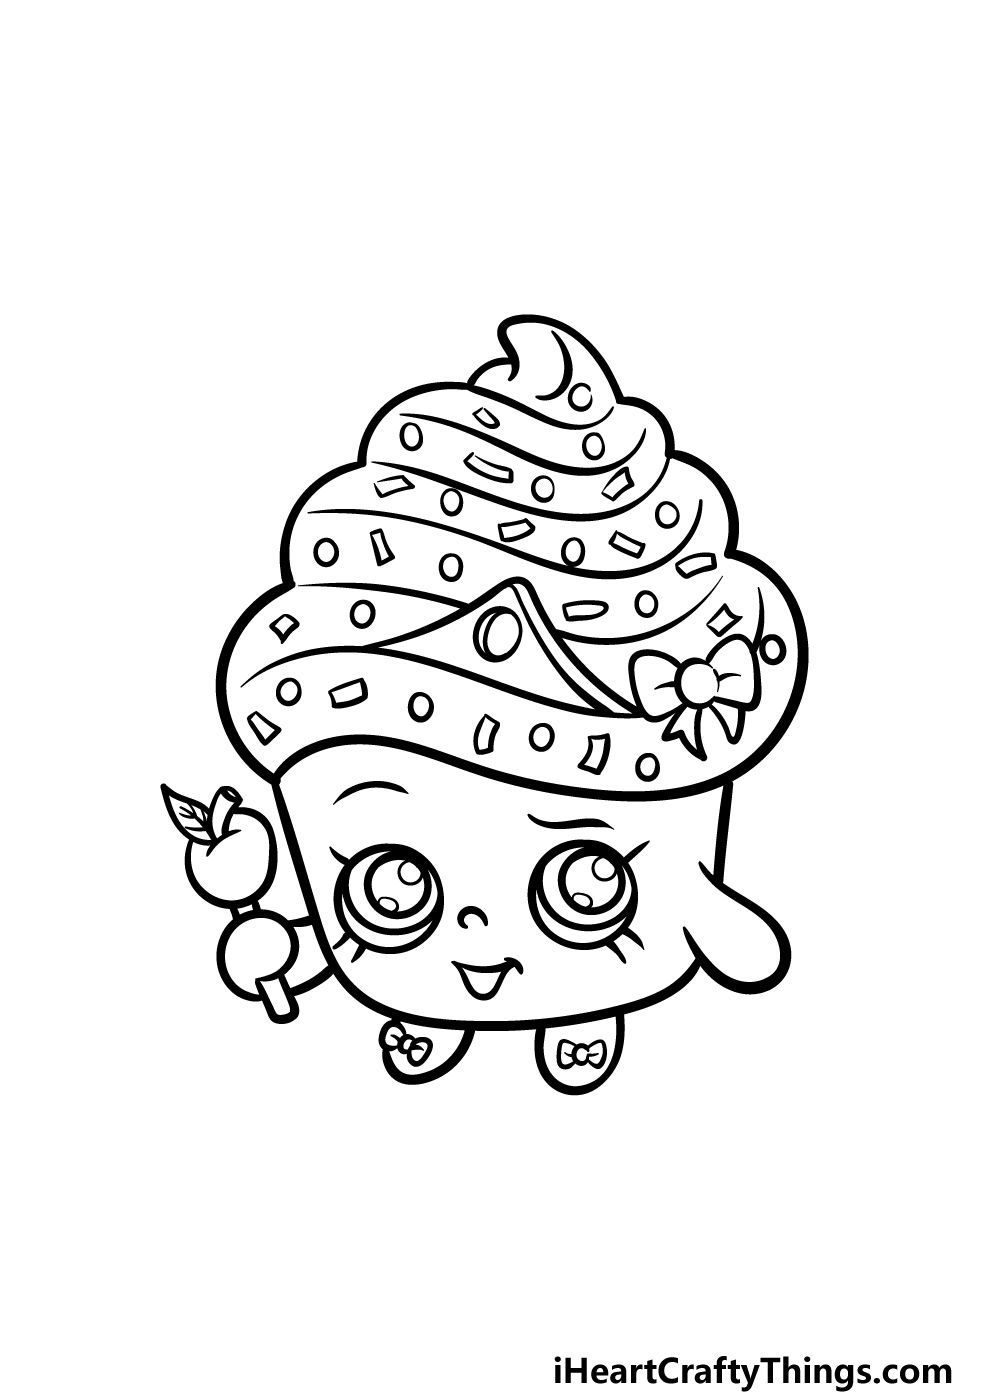
Before you reach the final step of this guide on how to draw Shopkins, we will first finish off some final touches to really bring this image to life.
To do this, we will be drawing some fun sprinkle shapes all around the icing on this cupcake.
These cupcakes will take on a few different shapes. We used some small circle and rectangle shapes for these sprinkles, but you could also use some additional shapes of your own!
There are other ways you could add to this image as well. You could add some background details, add some extra touches or even change up the design completely to create a new Shopkins design!
How will you finish up this design before the final step?
Step 6 – Finish off your Shopkins drawing with color
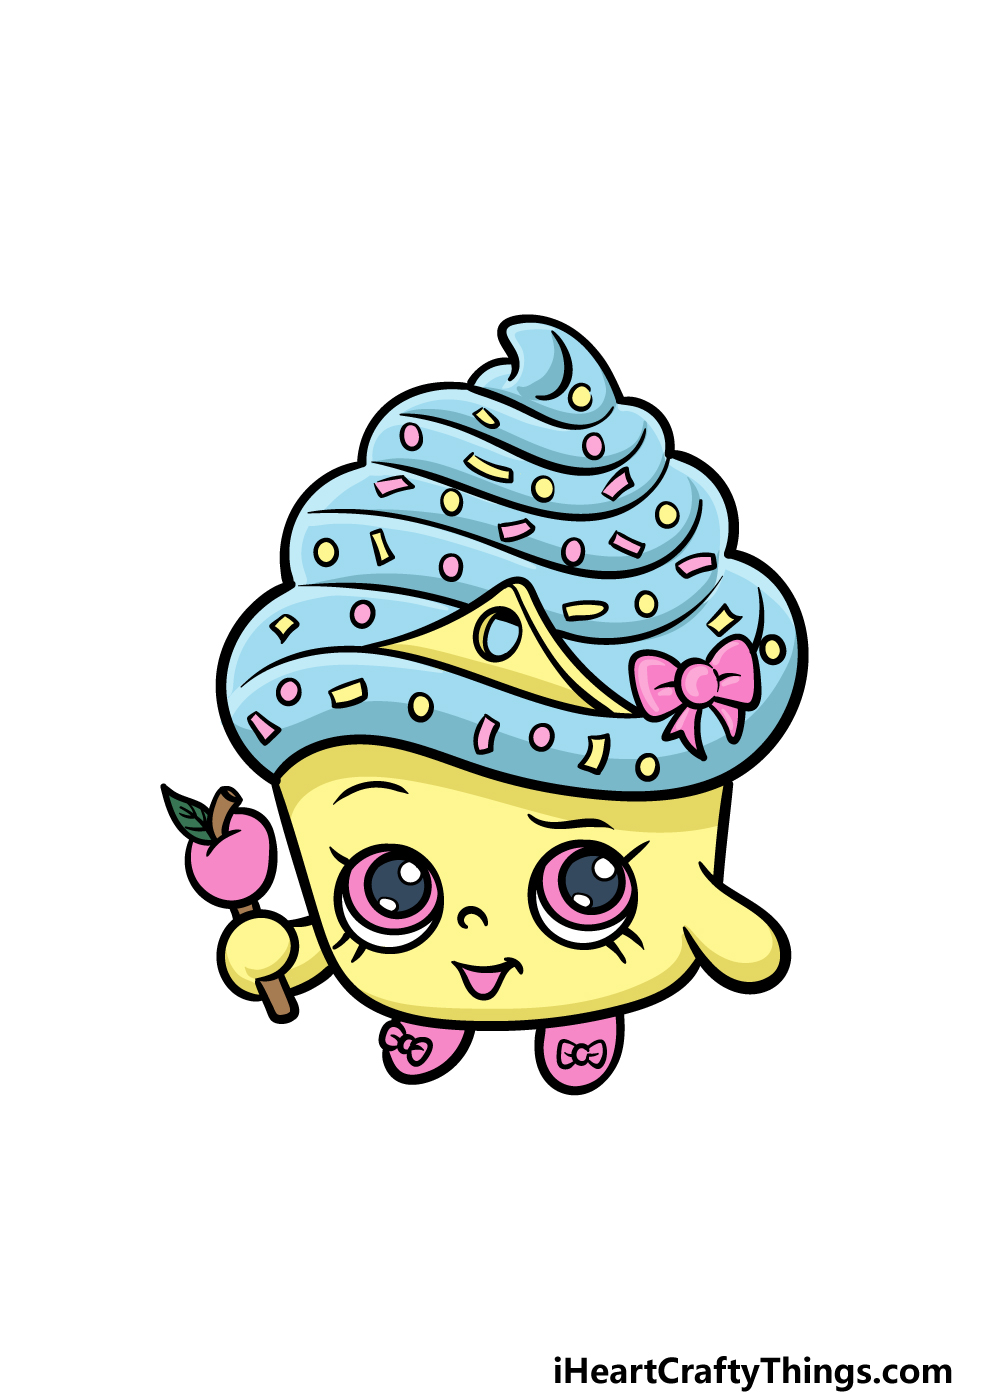
In this final step of this Shopkins drawing, we showed you just one of the infinite ways that you could color your creation.
In our example, we went with some yellow for the body of the Shopkin with blue for the icing. We then worked in some pinks for some of the sprinkles and accessories for this Shopkin.
You could go for these colors as well if you like them, but you could also use unique colors of your own choosing!
Another fun idea would be to incorporate crafts like beads and small stickers to really make this image pop. How do you think you will finish off this image?
Do this to take your Shopkins drawing to the next level
Make this adorable Shopkins sketch even better with these fun ideas!
This drawing of a Shopkins shows one with lots of great colors in the design. Blue and yellow are the main colors used, and these do look great.
You may happen to like other colors more, though, so you should feel free to use any of your favorite colors for this Shopkins.
Whether they are bright and bold or muted and subtle, they will look great!
Try to use a variety of art mediums if you can while you add your colors, too. What color scheme would you like to use for your drawing?
You can also use some fun and creative art and craft tools to enhance your drawing. For example, you will see that this Shopkins has some sprinkles on it.
Instead of coloring these with a pen or paint brush, you could stick on some beads or stickers over the sprinkles. These would make them have more impact and texture.
Glitter would also be a great addition to add some sparkle!
There are many different Shopkins characters in the range that are all based on different products. You could add some more of your favorites to this Shopkins drawing!
These could be based on existing Shopkins characters, but you could also design some brand-new ones of your own.
There is no limit to the number of different characters you add to this Shopkins party.
Have you got some characters in mind for this gathering?
Finally, you could bring it all together with a background to finish off your Shopkins sketch. There are so many fun backgrounds you could go for, and you can get really creative with it.
You could go for a simple setting such as a shop or a supermarket to fit the theme. Or, you could go for something more creative and unexpected.
There are so many possibilities, so maybe you could sketch out a few ideas to consider before committing to your final background idea.
Your Shopkins Drawing is Complete!
The Shopkins line of toys is a fun and creative take on a very mundane aspect of everyday life, and we hope that you had fun capturing that magic during this guide on how to draw Shopkins!
In this guide, we hoped to show you how fun and easy drawing these cute characters can be when you know what to do.
Now you can keep it going by adding your own details and elements! This could also be a fun opportunity to design a brand new Shopkins character.
What product do you think would make a great addition to the Shopkins lineup? It will be interesting to see the creative ways that you finish off this picture!
You can also go and visit our website when you’re ready for more awesome drawing guides to enjoy. We upload new ones often, so be sure to keep visiting us there!
If you’d like to show off your amazing Shopkins drawing, you can do so by sharing it on our Facebook and Pinterest pages. We can’t wait to see it!