There are different plants and flowers that will gain an association to various places, customs or other aspects.
When you see a shamrock, there’s almost certainly going to be an association with Ireland and events like St Patrick’s Day.
They’re also associated with luck, as finding a four-leaf clover is said to bring good luck to anyone that possesses one.
There are many cool designs and pictures you can feature this plant in, and learning how to draw a shamrock is a great way to get started with this.
If you’d like to know how it can be done easily while allowing for lots of fun, then this will be the tutorial for you!
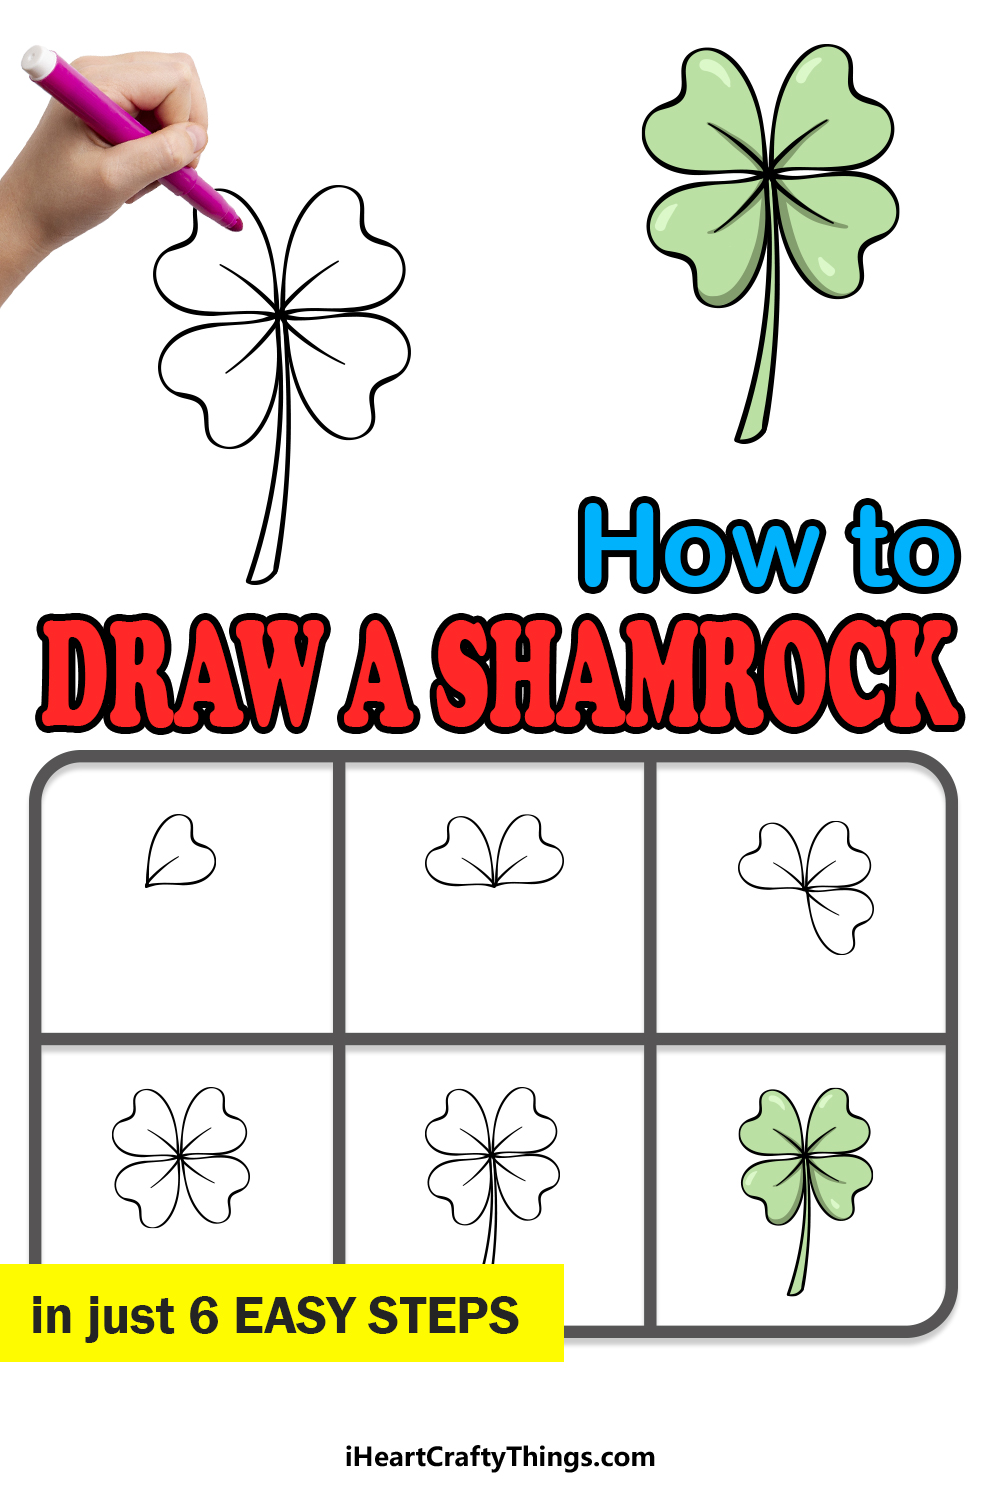
Our step by step guide on how to draw a shamrock in just 6 easy steps will show you just how it’s done so you can create your very own shamrock-themed designs.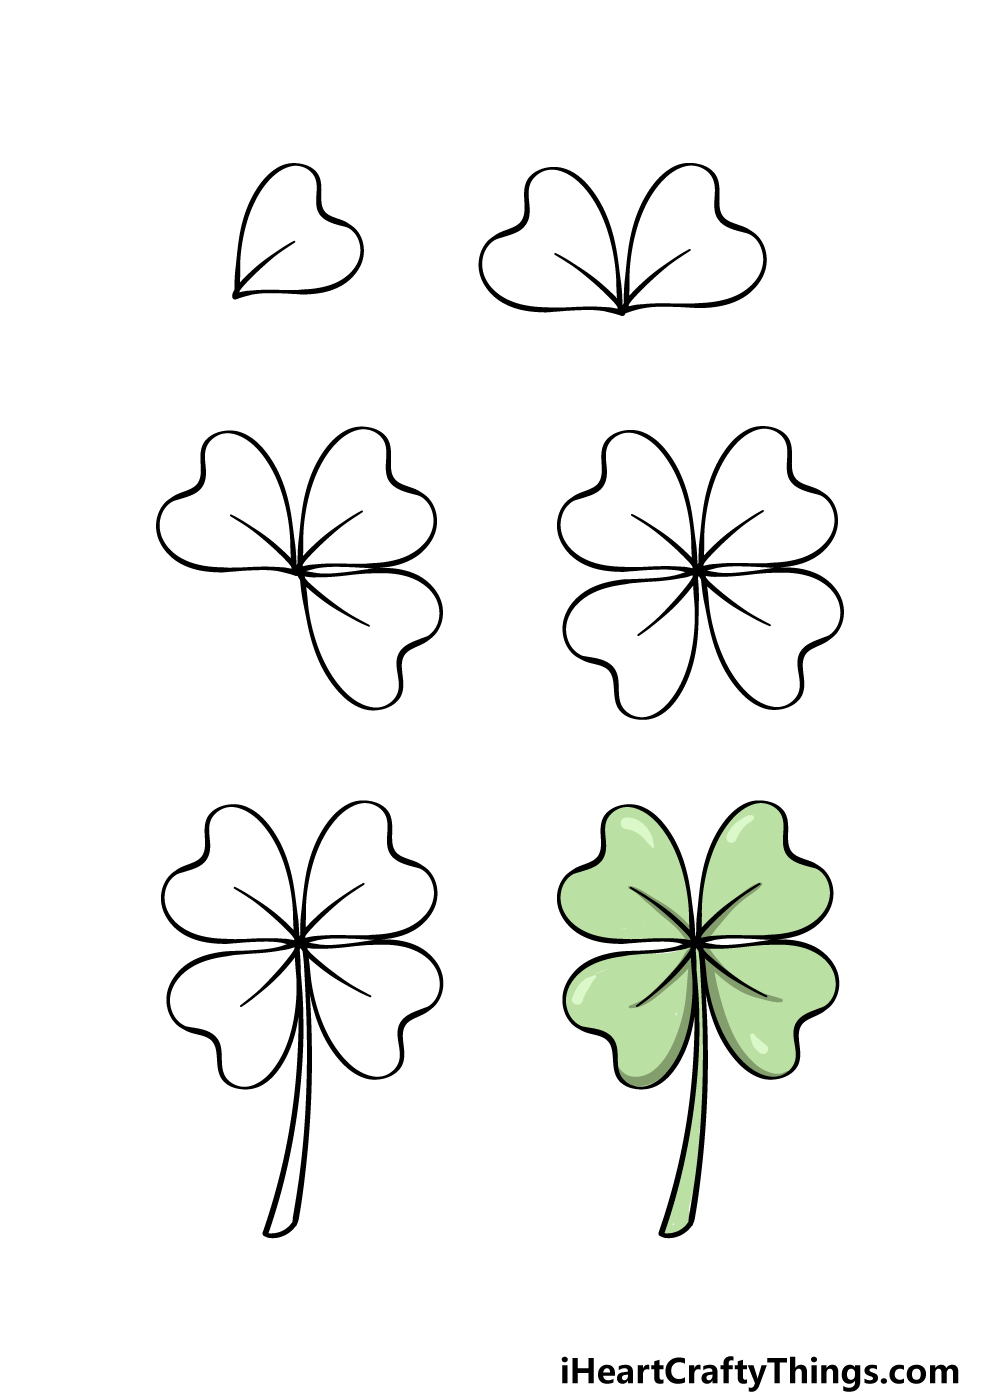
How to Draw A Shamrock – Let’s Get Started!
Step 1

When it comes to this plant, perhaps its most famous feature is its leaves. The number of these leaves can vary, but the most common number to find is a three-leaf clover.
A four-leaf clover is a more coveted find, however, and that’s what we shall be creating in this guide on how to draw a shamrock.
When creating this drawing, the main thing you will need to get the hang of is drawing these leaves.
We will be starting with the top right-hand leaf of the clover, and as shown in the reference image it will have an almost heart-shaped design to it.
Once you have drawn this outline in the way it appears in our reference image, you can then finish off the leaf by adding a line extending from the bottom tip and upwards.
With the first leaf drawn, we can then move on to step 2 of the guide.
Step 2 – Now, draw the second leaf of the shamrock

You did a great job drawing the first leaf of your shamrock drawing in the first step, but we certainly won’t be stopping there!
In this second step of the guide, we will be drawing the second of four leaves, and to do this you will essentially be replicating what you did in the previous step.
While this second leaf will be drawn practically identically to the first, it will be on the top left-hand side instead.
That means it will have a heart-shaped outline, and then it will have that same line extending in from the tip.
Step 3 – Draw the third leaf of the shamrock
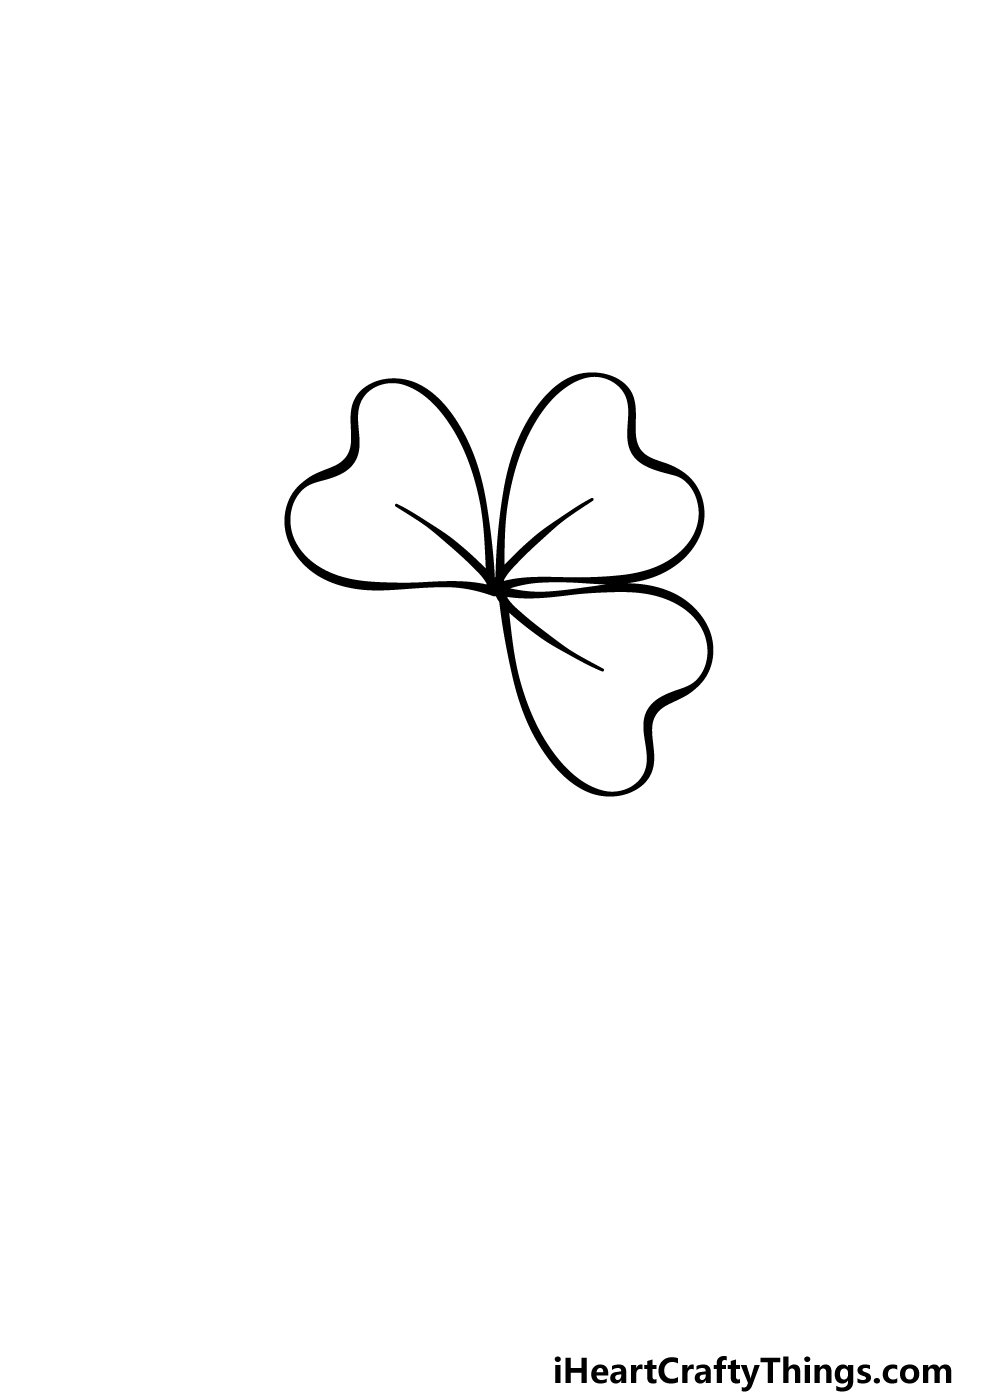
Now you’re ready to add the third leaf in this guide on how to draw a shamrock, and you should have no problem with it at this point!
This third leaf will go on the bottom right-hand side of the shamrock, and once again it will look pretty much identical to the other leaves you’ve drawn so far.
While we are depicting a four-leaf shamrock in this guide, you could leave out the next step if you would like to make it look as if one of the leaves was plucked off.
If you would like to do that, then you can skip to step 5. Otherwise, it will be time for step 4 of the guide, so let’s proceed!
Step 4 – Next, draw the final leaf of the shamrock
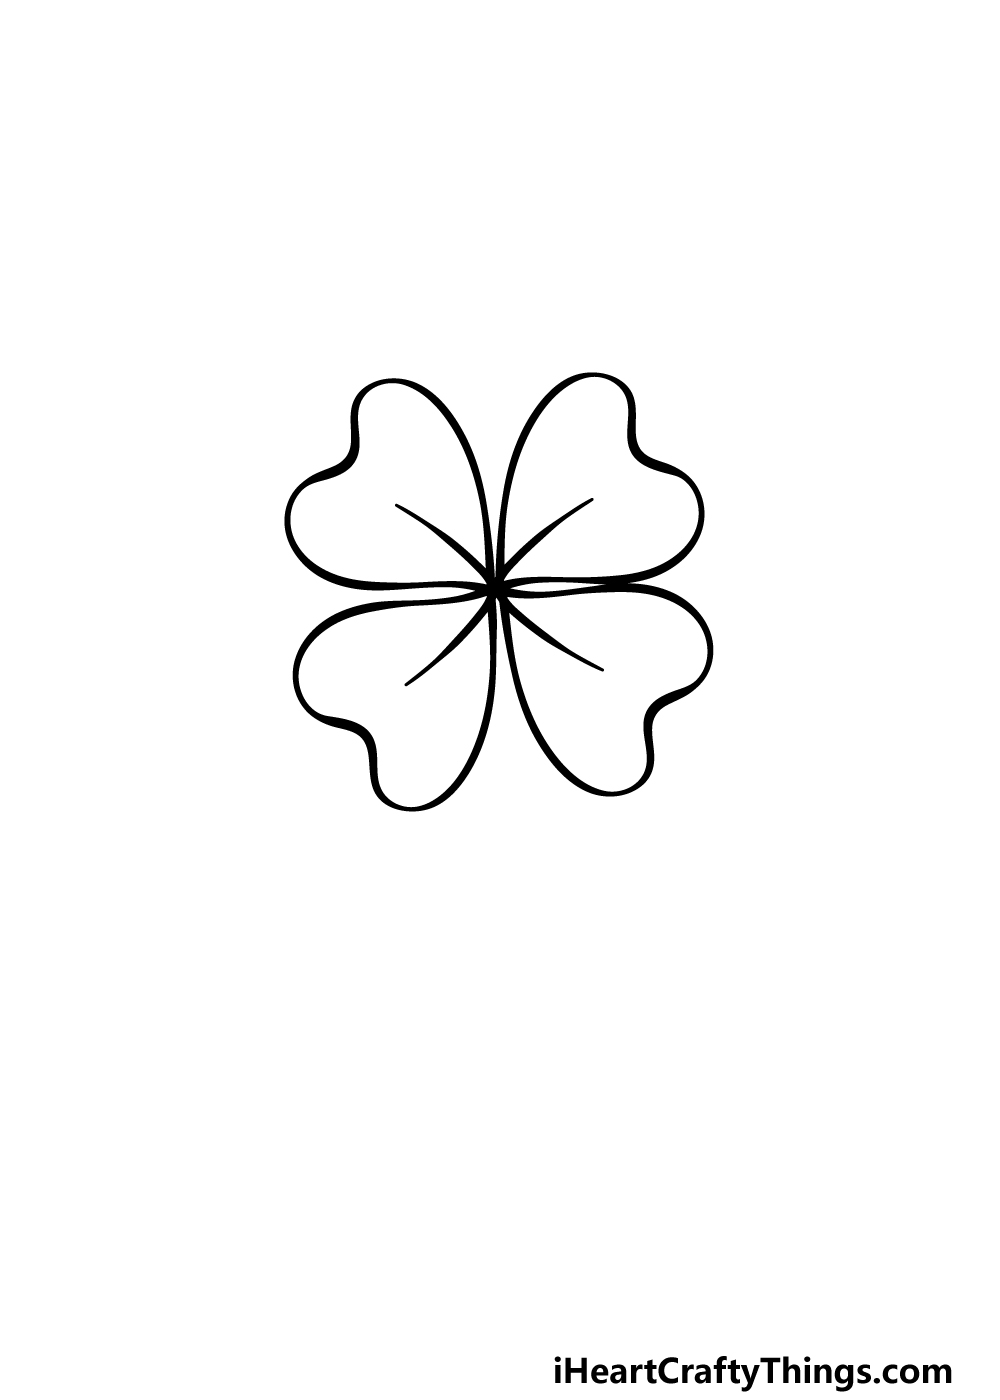
You’re almost ready to add the final elements of your shamrock drawing, but first we have one last leaf to draw.
As you may imagine, this leaf will slot into the final empty space of the shamrock, and it will also look just like the other ones did.
That will do it for the ‘body’ of the shamrock, and then in the next step we can go about adding the final details and elements.
Step 5 – Add the final details to your shamrock drawing
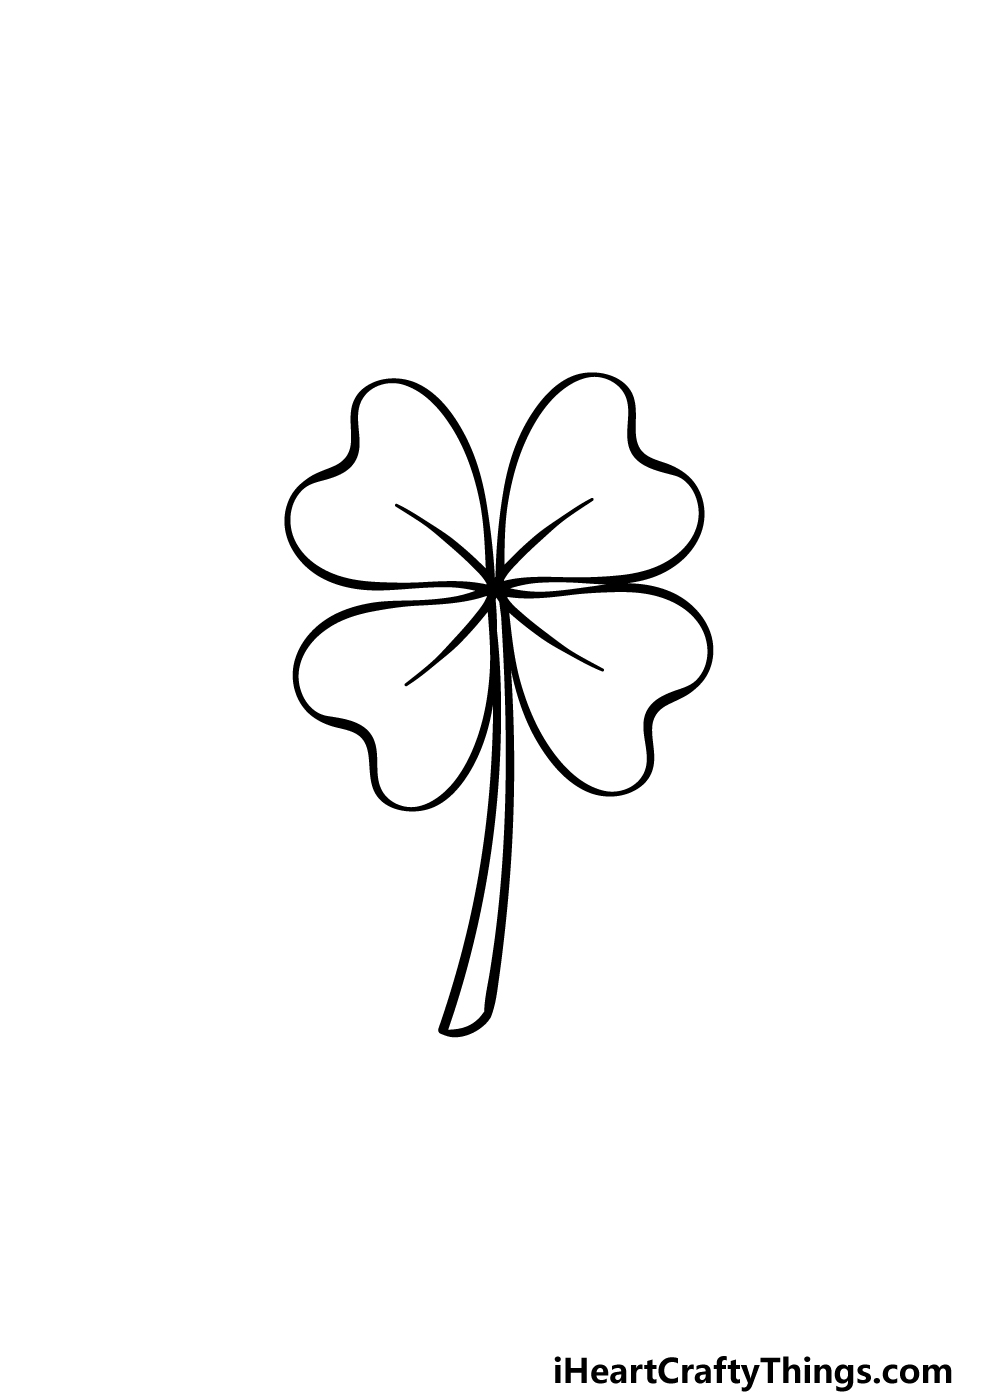
With all of the leaves drawn, we can now add the final touches in this step of our guide on how to draw a shamrock.
Once these have been drawn, you will also have an opportunity to add some extra details of your own!
First, we will be drawing the stalk of the shamrock. This will extend down from between the two bottom leaves, and it will be thin at the base while getting ever so slightly thicker as it extends.
Once this stem is drawn, it’s up to you to add any additions of your own!
There is a lot that you could do, and these could include drawing a background or maybe drawing something like a ladybug on one of the leaves. What would you add to finish this drawing off?
Step 6 – Finish off your shamrock drawing with color
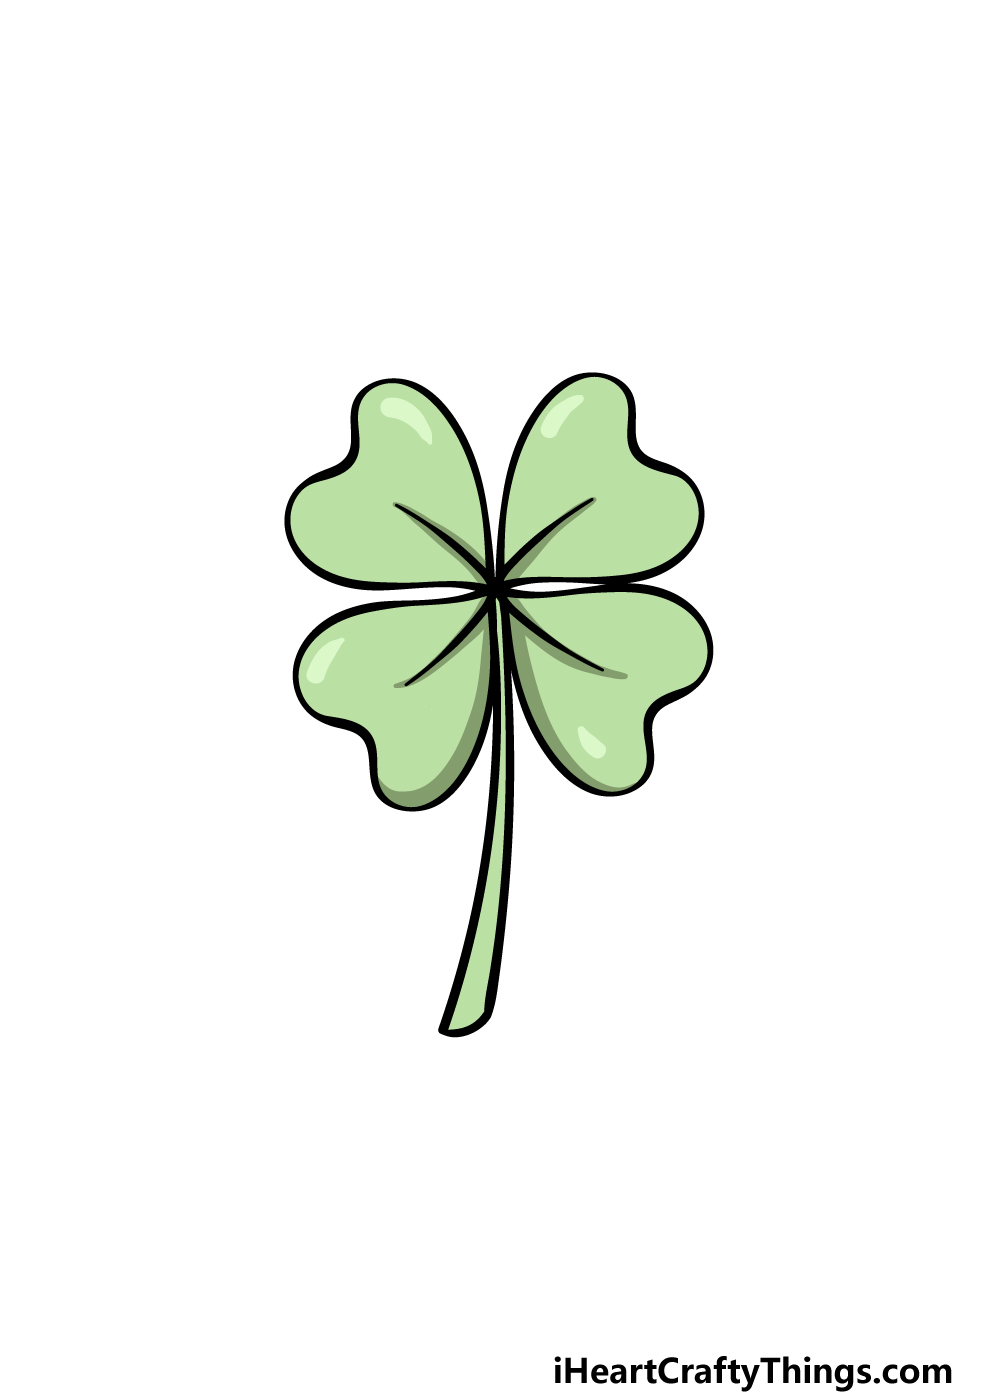
Now you have arrived at the final step of this shamrock drawing, and in it we shall finish off with some color.
These plants are almost always green in color, so that is what we went for in our reference image.
Instead of using one shade of green for the entire drawing, we incorporated some lighter shades to create some variety and light details.
Even if you stick to only greens for your drawing, there are many different shades to choose from!
You could also incorporate some browns to make it look more weathered, but you could also go for a more stylish look by using bright and vibrant colors.
You can also have some fun experimenting with various art tools and mediums, so what do you think you will choose to finish it off?
Do this to take your shamrock drawing to the next level
You won’t need luck to make your shamrock sketch even better when you have these tips!
A shamrock is traditionally seen to be lucky, but having more than one can make you even luckier! That would also be a great look for this shamrock drawing we have worked on here.
Now that you have finished the guide, you have everything you need to add some more shamrocks to the page. You could even fill the entire page with shamrocks for extra luck!
Some of the shamrocks could also have some smaller variations and details to set them apart. How many would you like to have on the page?
Shamrocks are also often associated with St Patrick’s Day and all the symbols that come with that holiday.
That means that rainbows or leprechauns would be right at home in this drawing of a shamrock!
There are tons of arrangements you could create with this shamrock as the main feature. Any additional elements that you add can also be drawn in any style you like.
What are some other traditional Irish symbols you could add to this picture?
By removing the stem of this shamrock sketch, you could also incorporate it into a pattern. For example, you could draw rows of the shamrock shape in order to create a pattern.
Then you could add text and other pictures on top of it in order to make a greeting card or poster. These are just a few ways to use this shamrock for a pattern, but how else could you go about it?
You might prefer a more literal setting for this shamrock drawing, and that brings us to the final point! For example, you could add a background setting for this shamrock to be a part of.
It could be growing in a field of clovers, and that would be a great excuse to add many more shamrocks to the scene.
It could also be held by a hand to make it look like someone is about to make a wish!
Your Shamrock Drawing is Complete!
By following all of the steps in this guide on how to draw a shamrock, you shouldn’t need any luck when learning to draw this iconic plant!
These steps were designed to show you how fun and easy drawing this plant can be, so we hope that it succeeded in those regards.
Now that you have completed all of the steps, remember that you can keep the fun going by adding some more details and elements of your own.
Then, you can visit our website for more incredible drawing guides to enjoy! We upload new ones often, so keep checking in to never miss out.
We would be thrilled to see how this shamrock drawing came out, so please share it on our Facebook and Pinterest pages for us to enjoy!