A bulldog may not be the prettiest dog in the world, but what they lack in looks they make up for in charm and personality!
These dogs may look tough and angry with their stocky bodies and grumpy faces, but they are very friendly and have many fans around the world!
Even though they may not look like supermodels, many people love them not just in spite of but because of their looks, and it can be fun to learn how to draw a bulldog.
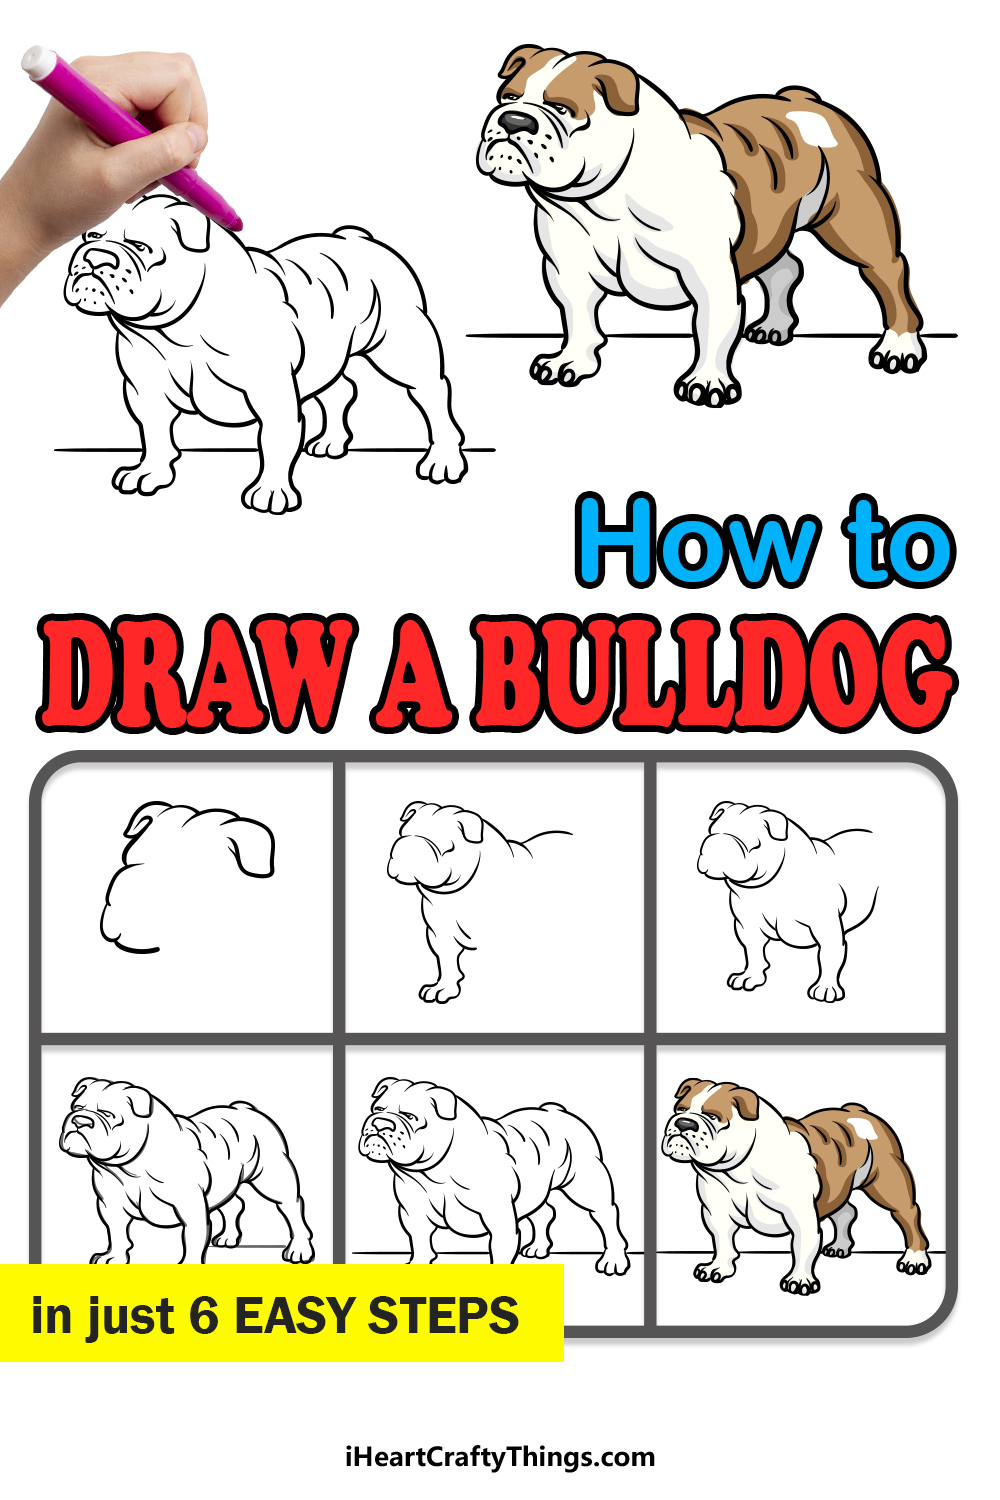
This step-by-step guide on how to draw a bulldog in 6 steps will have you creating your own lovable bulldogs in no time!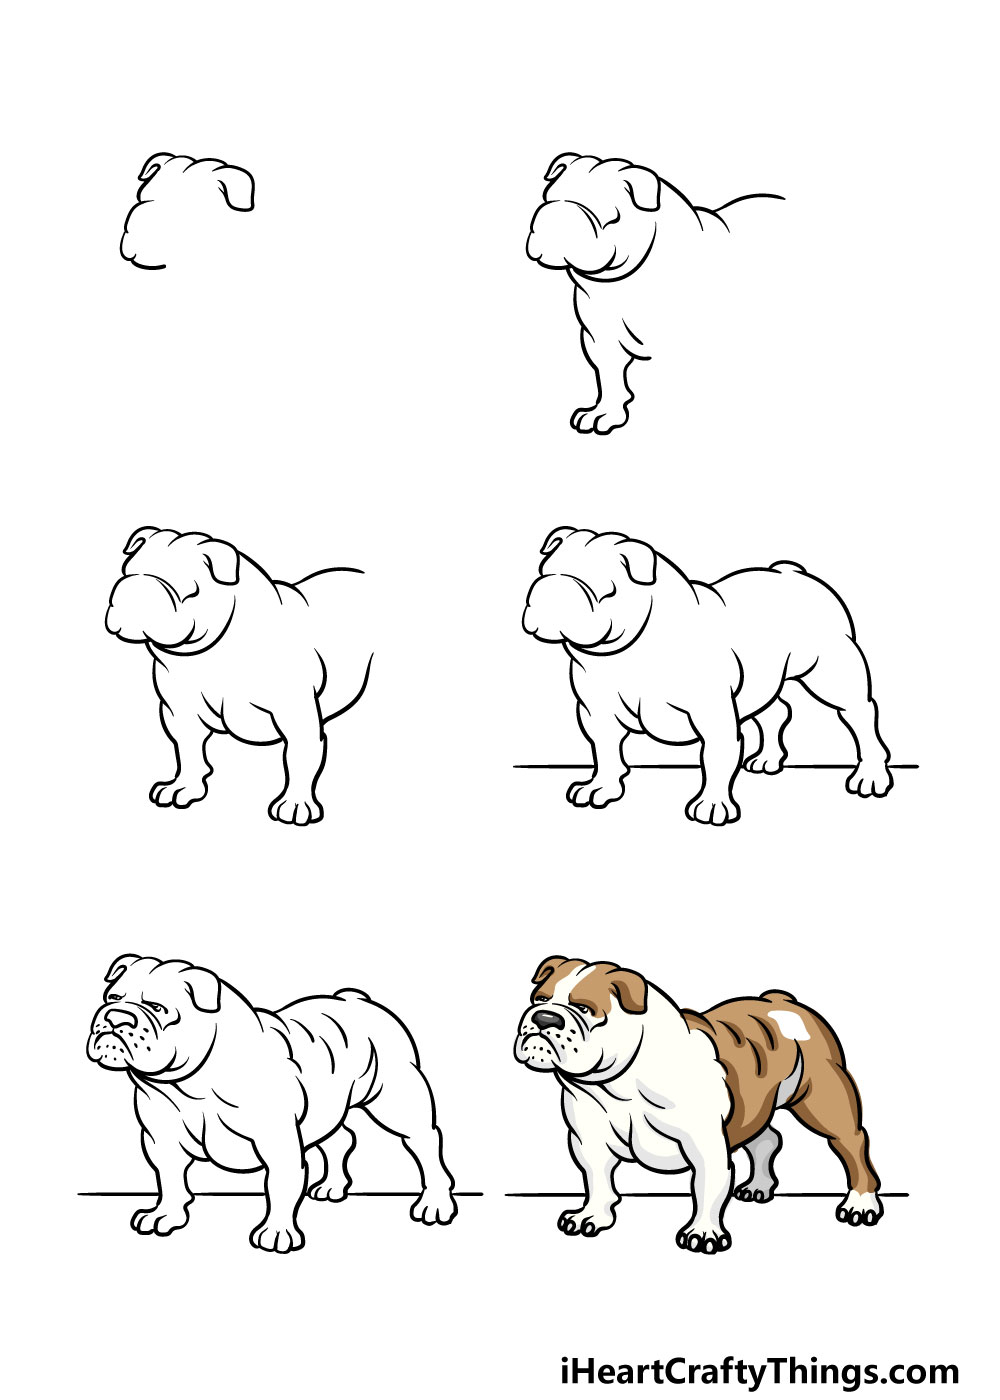
How to Draw A Bulldog – Let’s Get Started!
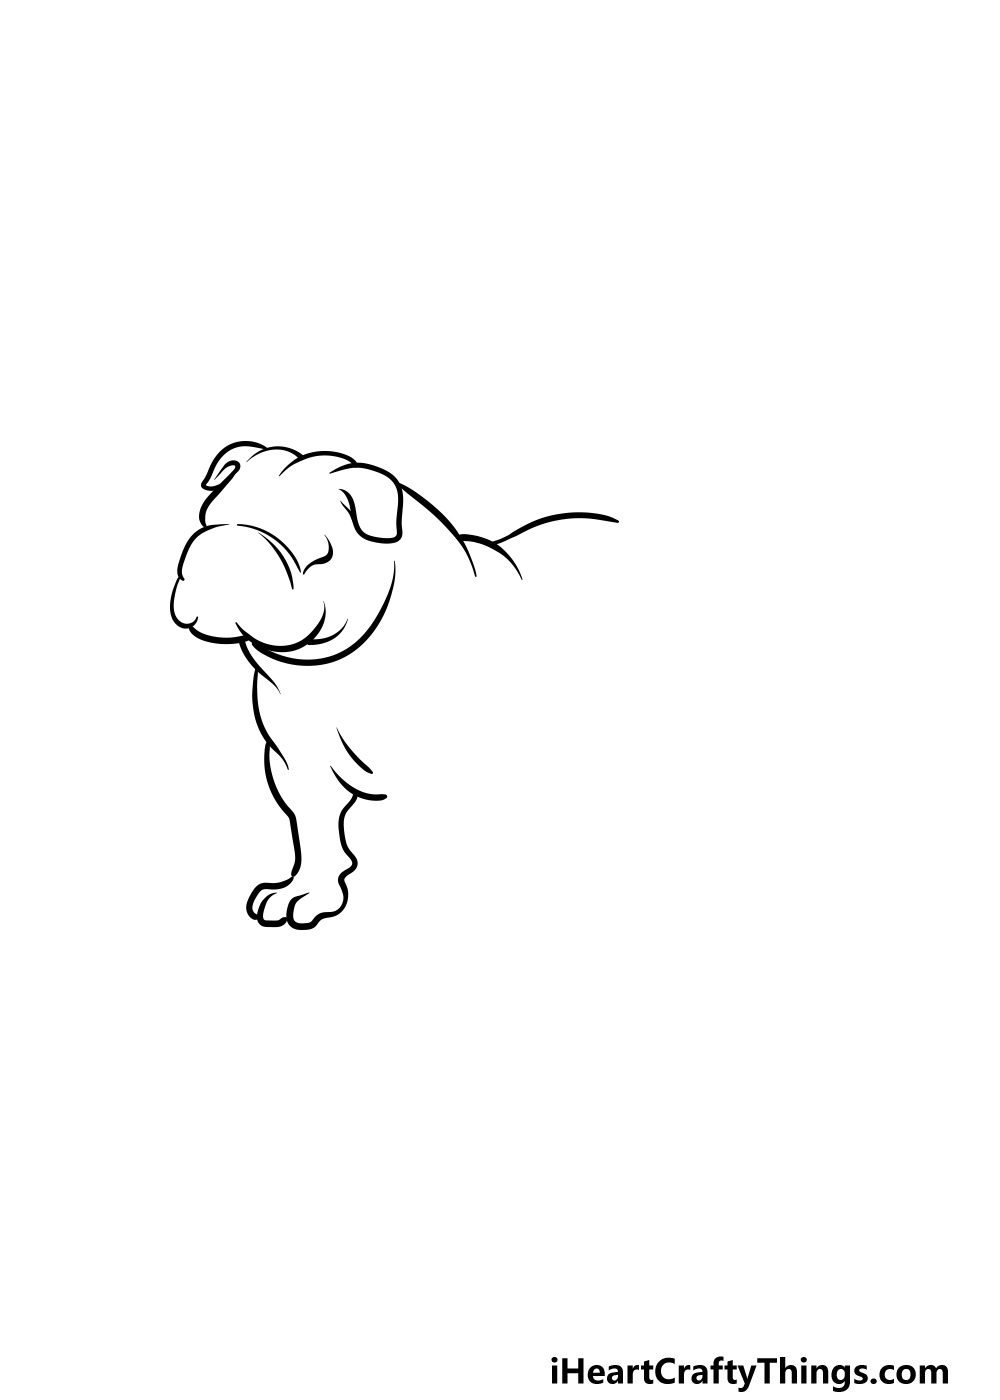
Step 1

In this first step of our guide on how to draw a bulldog, we will be using a pencil to draw the outline of the bulldog.
The reason we will be using a pencil for this step is so that you can erase any mistakes as you work on the details.
Once you’re happy with how the pencil lines look, we will go over them with a pen for some finer details in the next few steps. Be sure to closely follow the reference image as you draw!
Once you’re finished with the pencil lines, you can start to use your pen to go over the facial details of the bulldog. Once you’ve done that, you’re ready for step 2!
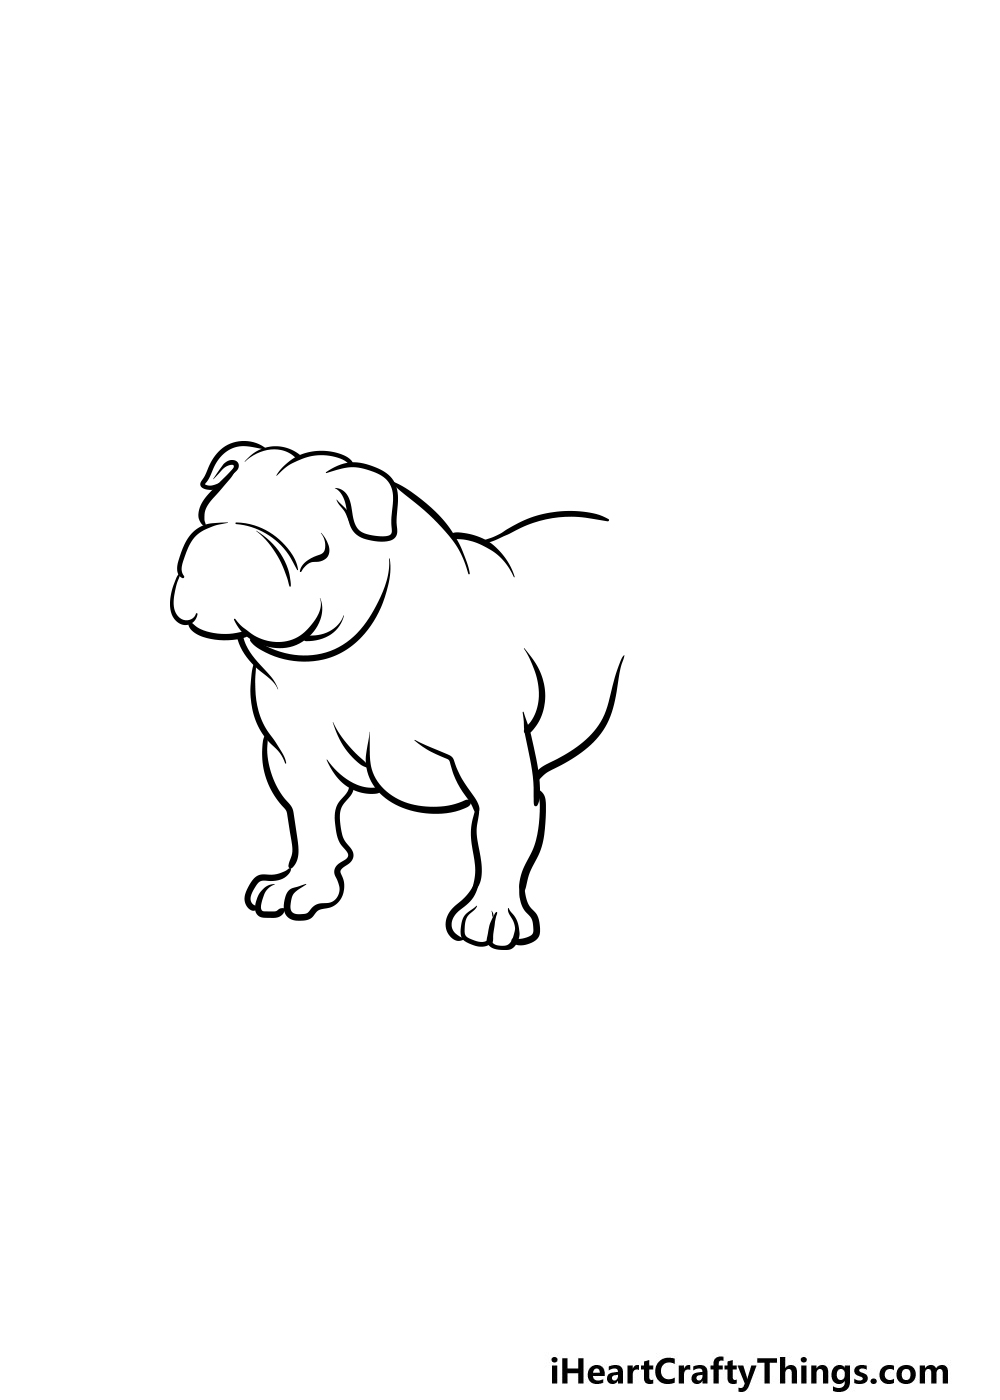
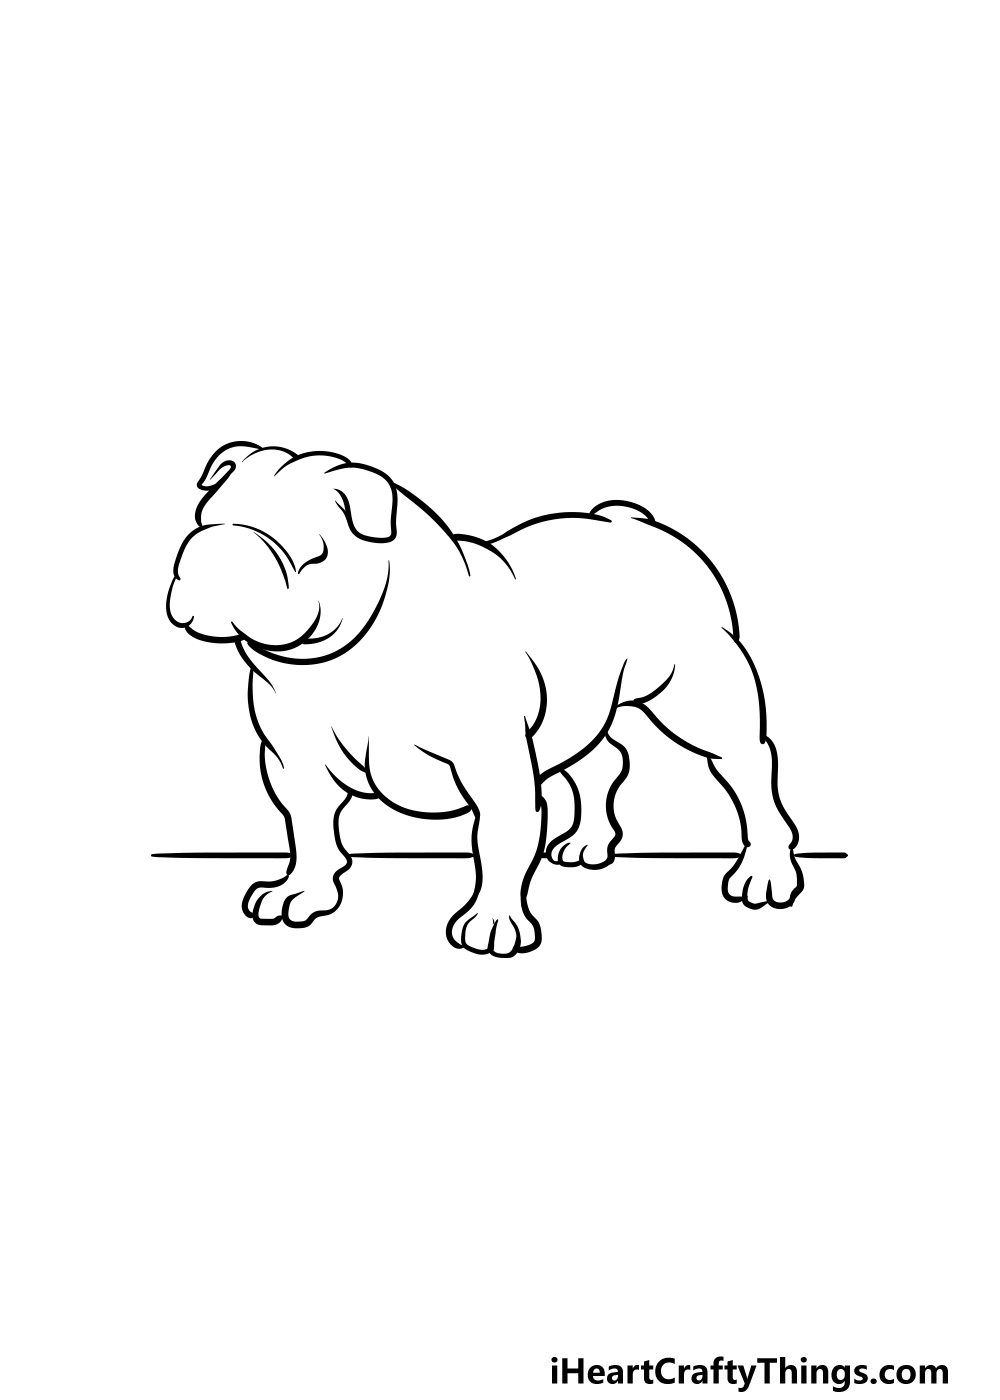
Step 2 – Next, draw the body outline of the bulldog
You have the pencil body outline and pen face of your bulldog drawing, and in this second step you can use your pen to work on the body outline of the bulldog.
As you draw over these pencil lines you can also add more refined details to the body as you draw. For now, you can focus on the back of the bulldog as well as some of the limbs of the bulldog.
Step 3 – Now, draw some details for the remaining limbs and belly
In this part of our guide on how to draw a bulldog, we will be focusing on adding some pen lines to the remaining limbs for your bulldog.
You can also add some lines for the chest and belly of the dog. As with the previous steps, you can add more fine details to the various elements as you draw.
Once you’ve finished this step, the outline will be complete and we can focus on the inner details for the next few steps.
Step 4 – Start adding some details to the bulldog
As we mentioned in step 3, we will be focusing on some inner details for the last few steps of your bulldog drawing.
For this step, while following the reference image you can add some curved lines to the sides of the bulldog’s body for some muscular details.
While you can replicate the lines as they appear in the reference image, you can also add some details of your own!
These lines that we’re adding may seem simple but they will make a big difference to the overall image!
Step 5 – Now, add the final details and erase the pencil lines
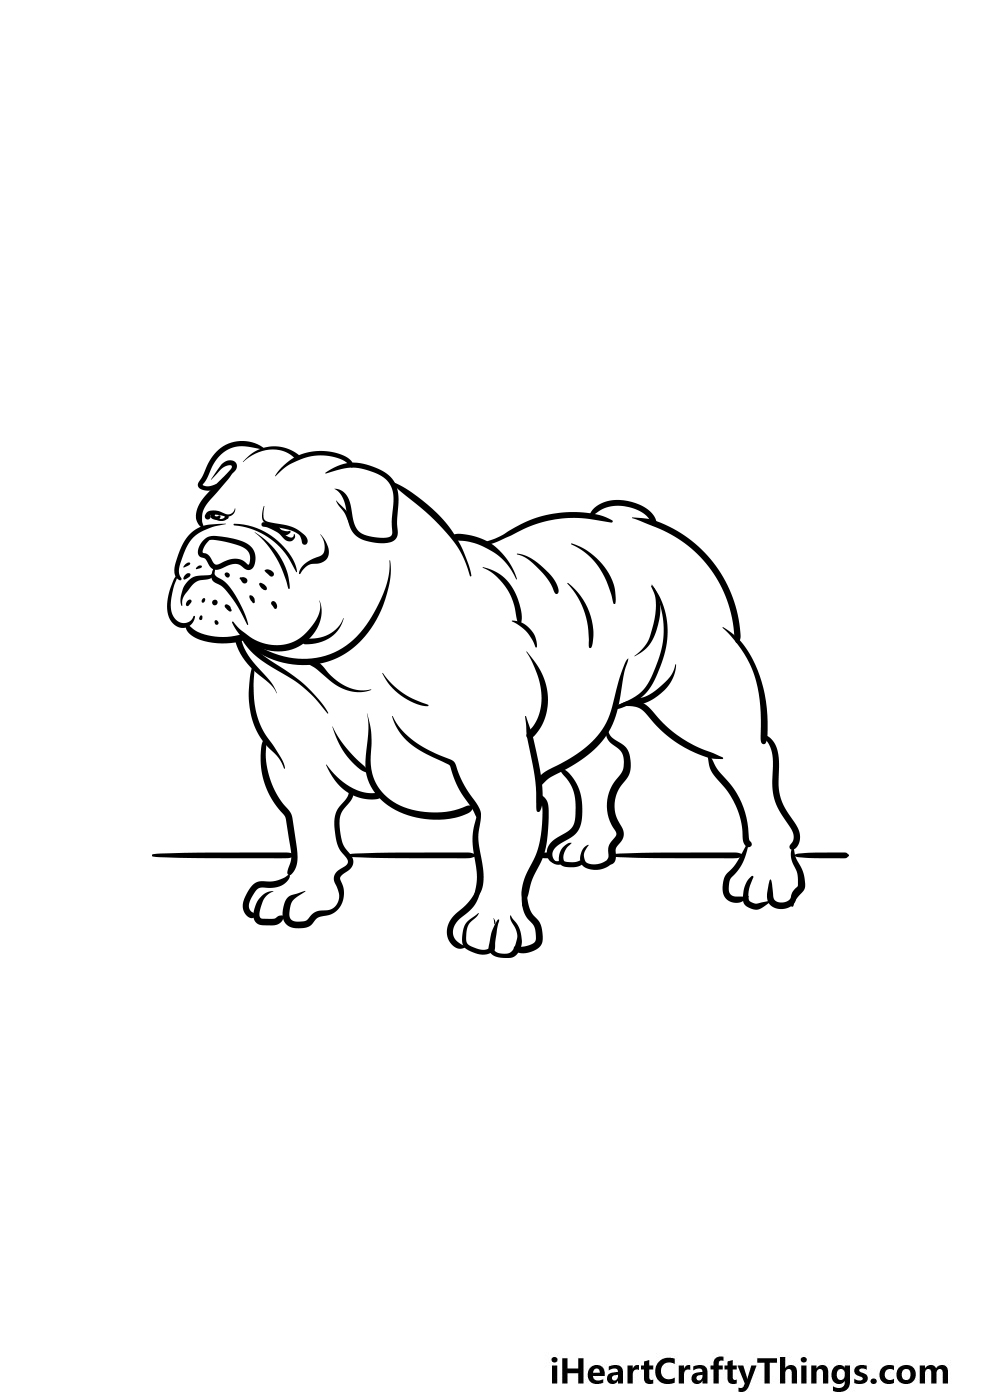
Before you move on to coloring in your picture, we have a few final details to add in this guide on how to draw a bulldog.
The main details that we have in our reference image are some dots on the cheeks of the bulldog for some whisker detail.
Once you have these final details drawn, you can also start to erase all of the pencil lines that you drew in the first step.
Before you do this, make sure that you wait a while for all of the pen ink to dry, as if you erase too soon it can potentially smudge the ink.
Before you move on to the final step of the guide, you can also add some details and elements of your own to put your own spin on it.
A great idea is to add a background, as this is the best way to show what kind of environment this bulldog is in!
You could also keep it more stylistic by drawing some color shapes and patterns for the background.
How will you finish off your bulldog drawing before coloring it in?
Step 6 – Finish off your bulldog drawing with some color
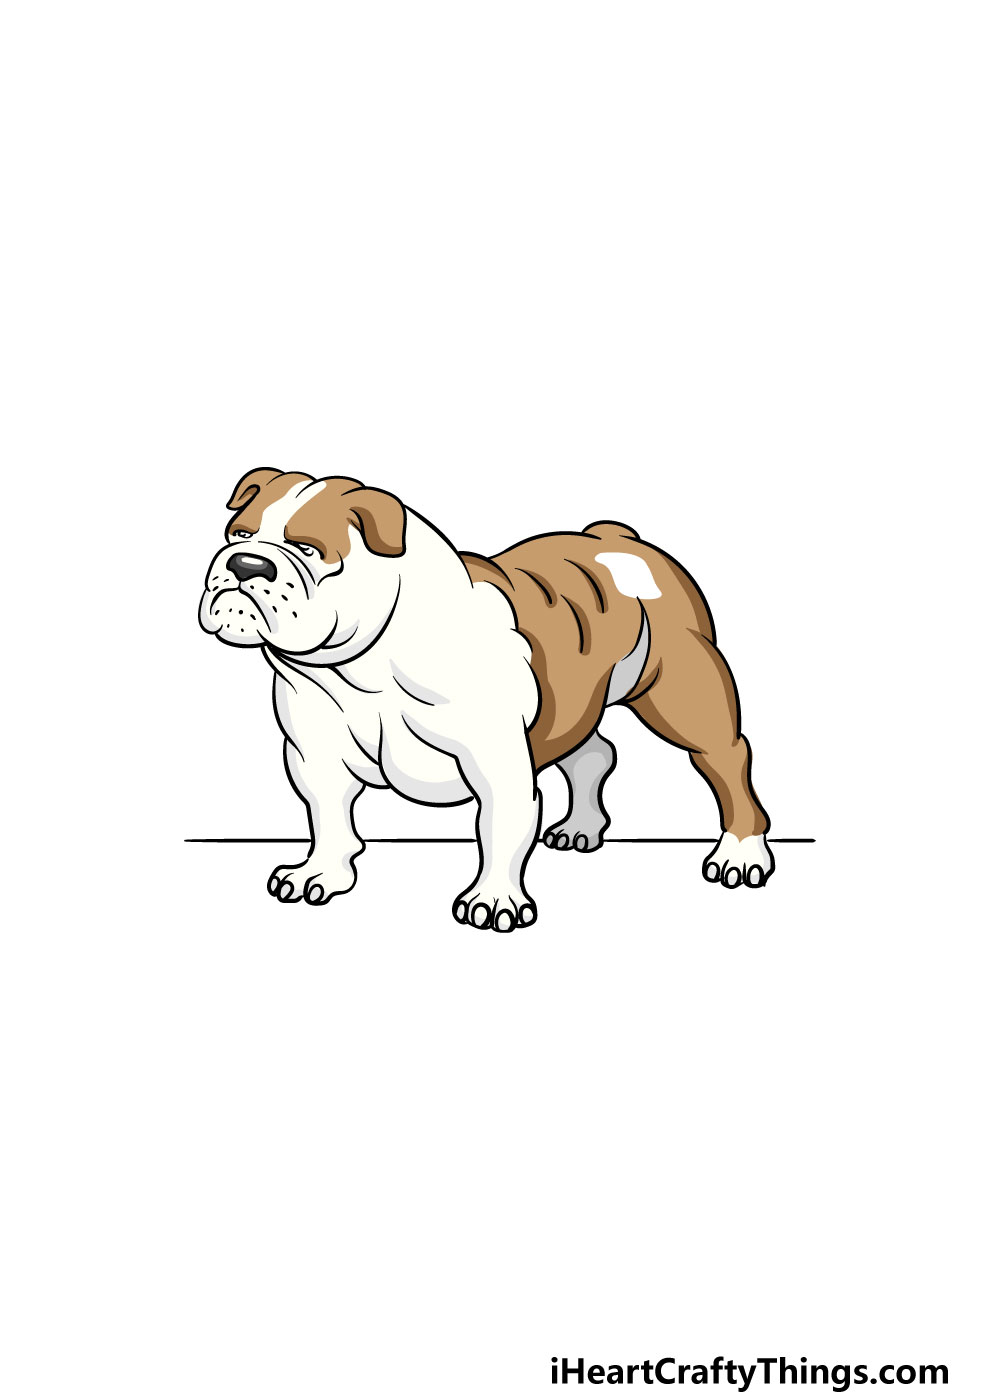
This final step of your bulldog drawing is a fun one, as you get to bring it to life with some beautiful colors!
For our example image, we used some browns, whites and greys to color it in. this is just one of many ways that you could color in this bulldog, so you should feel free to get creative with it!
Bulldogs can come in many different color variations, so you should feel free to use any color combinations that you like.
If you drew a background or any extra elements and details then you can also inject some color into the picture by coloring those in.
Once you know how you would like to color in your image, you can then play around with different art mediums depending on the kind of look you like.
For more solid and bright colors you could use acrylic paints or colored pens and markers. For a softer, more muted look you could use some watercolor paints or colored pencils.
Anything you use will look great, and we can’t wait to see what you come up with!
5 Tips To Make Your Bulldog Drawing Even Better!
Find out how you can make your bulldog sketch even greater with these tips!
Right now, the focus of this drawing of a bulldog is entirely on the dog itself. You could add some objects for it to interact with though!
Some examples could be a chew toy or maybe a ball that it may want to chase. Or, maybe it could be as simple as a food or water bowl that the bulldog can be posed with.
Another way you could add to the drawing would be by adding some dog friends for this bulldog. The species of dogs you choose would be up to you!
You could add another bulldog seeing as you know how to draw one now. Or, you could draw any other of your favorite dog breeds.
What kind of dog would you add as a friend for this bulldog?
You could also add a human friend for this bulldog to interact with. If you were to do this, maybe it would be a fun touch to base the character on yourself or someone you know!
Then, it would be a matter of deciding whether to draw the human realistically or in a more cartoony style. Who would be hanging out with this dog?
The bulldog drawing we created in this guide is in a fairly standard pose. You could make the image more exciting by having it in a more dynamic pose, such as running.
To do this, you may want to look up some pictures online of a real bulldog in the pose of your choice. Then, you would be able to adapt this guide to create this new pose.
Finally, we would recommend adding a background for this bulldog sketch. This could be set in a number of different places!
For example, the bulldog could be in a simple house or a yard setting. Or, you could have a dog park or maybe have the bulldog enjoying a day at the beach.
What other settings can you think of?
Your Bulldog Drawing is Complete!
That brings us to the end of this guide on how to draw a bulldog! We hope that this guide made it much easier than you expected to bring this grumpy guy to life!
Whenever you take on a new drawing it is always easier and more fun when you break it down into steps and take it slow!
Finishing this drawing is just part of the fun, as now you can take over and add your own details.
Whether you draw extra elements, a cool background or experiment with some art mediums we know that you will do an incredible job!
When you’re ready for more, you can visit us on our website where we have tons of awesome drawing guides for you to enjoy.
We would also love to see your finished bulldog drawing, so please feel free to share it on our Facebook and Pinterest pages for us to admire.