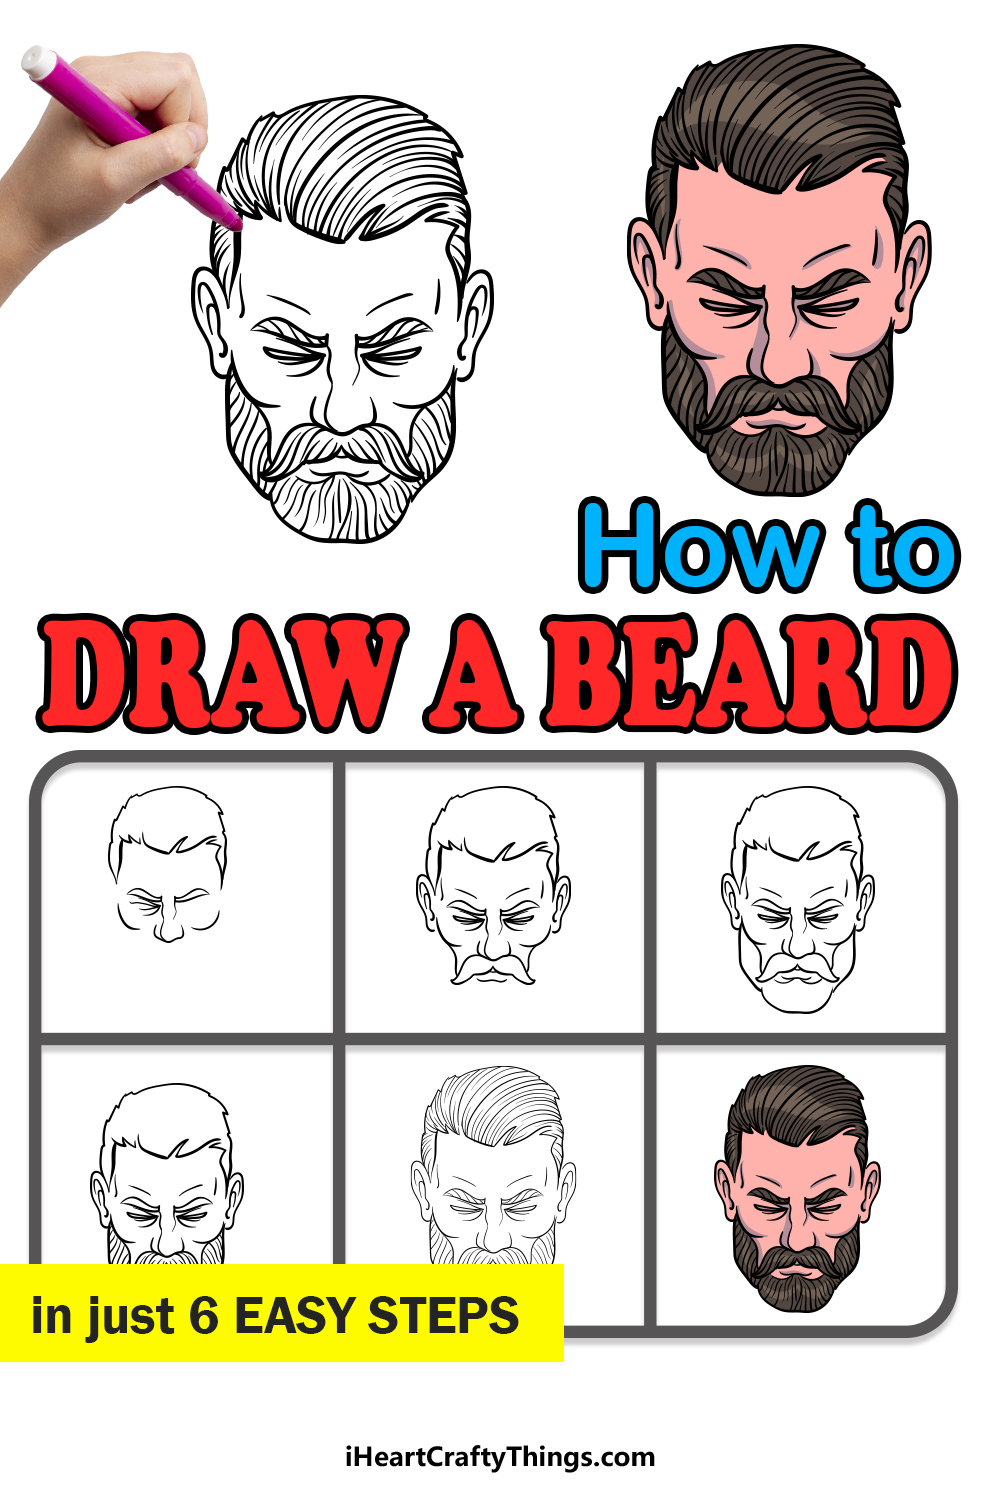
We all see many beards in our lives, and you might even have one yourself! Despite seeing beards everywhere, when you actually try to draw one it can be a lot more difficult than expected.
That can make learning how to draw a beard a frustrating experience.
The good news is that with the guide you’re about to do, you’ll find that it can be much easier than you might have expected! You’ll definitely want to read all the way to the end to see how it’s done.
With this step-by-step guide on how to draw a beard you’ll be creating impressive beard drawings in no time!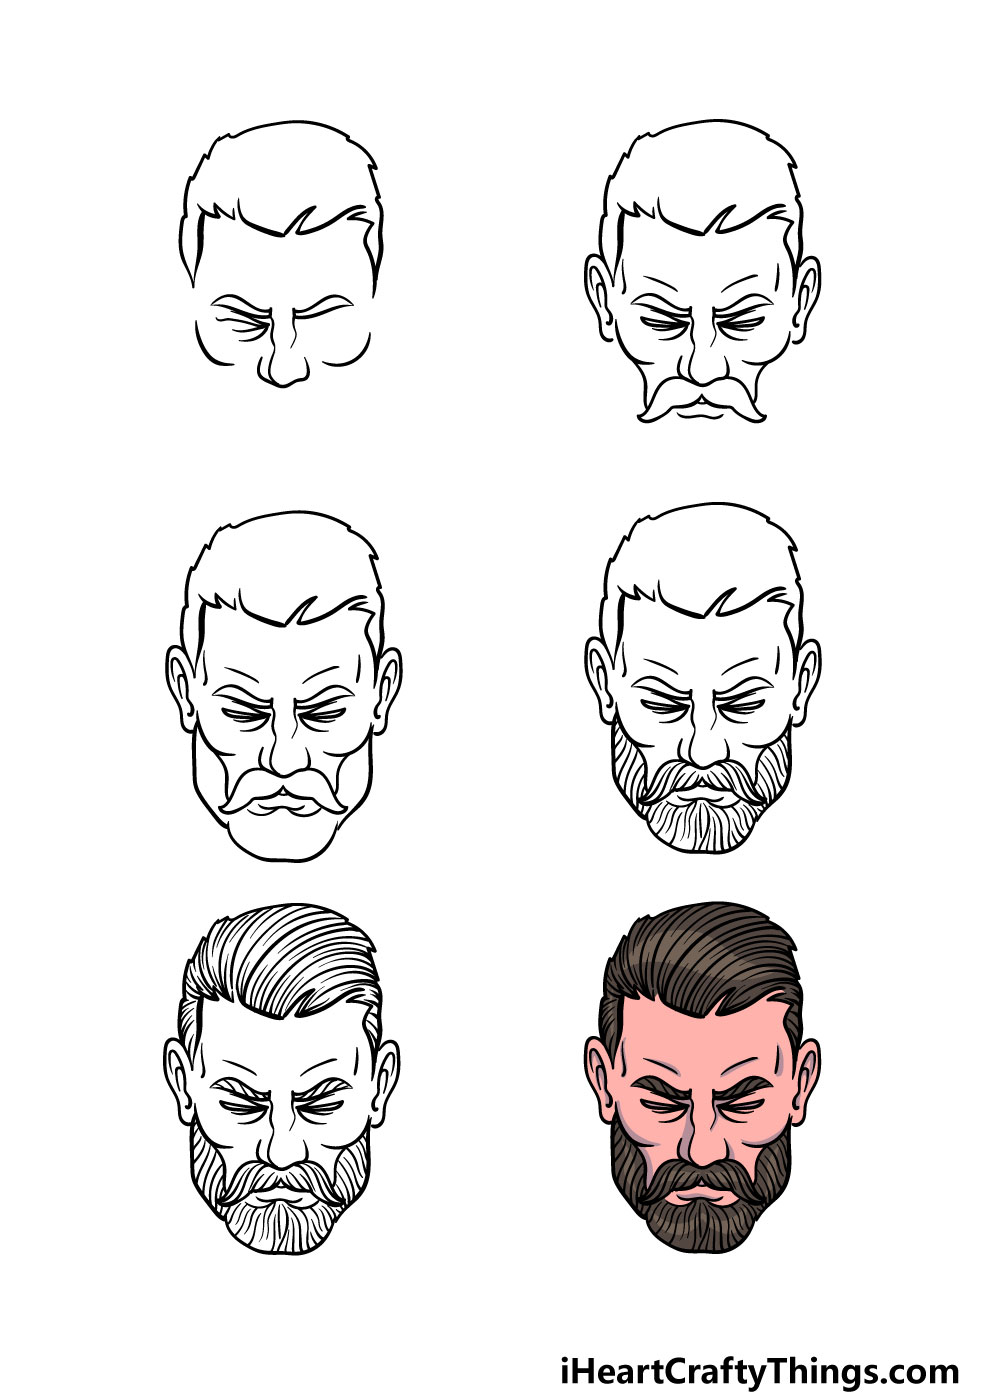
How to Draw A Beard – Let’s Get Started!
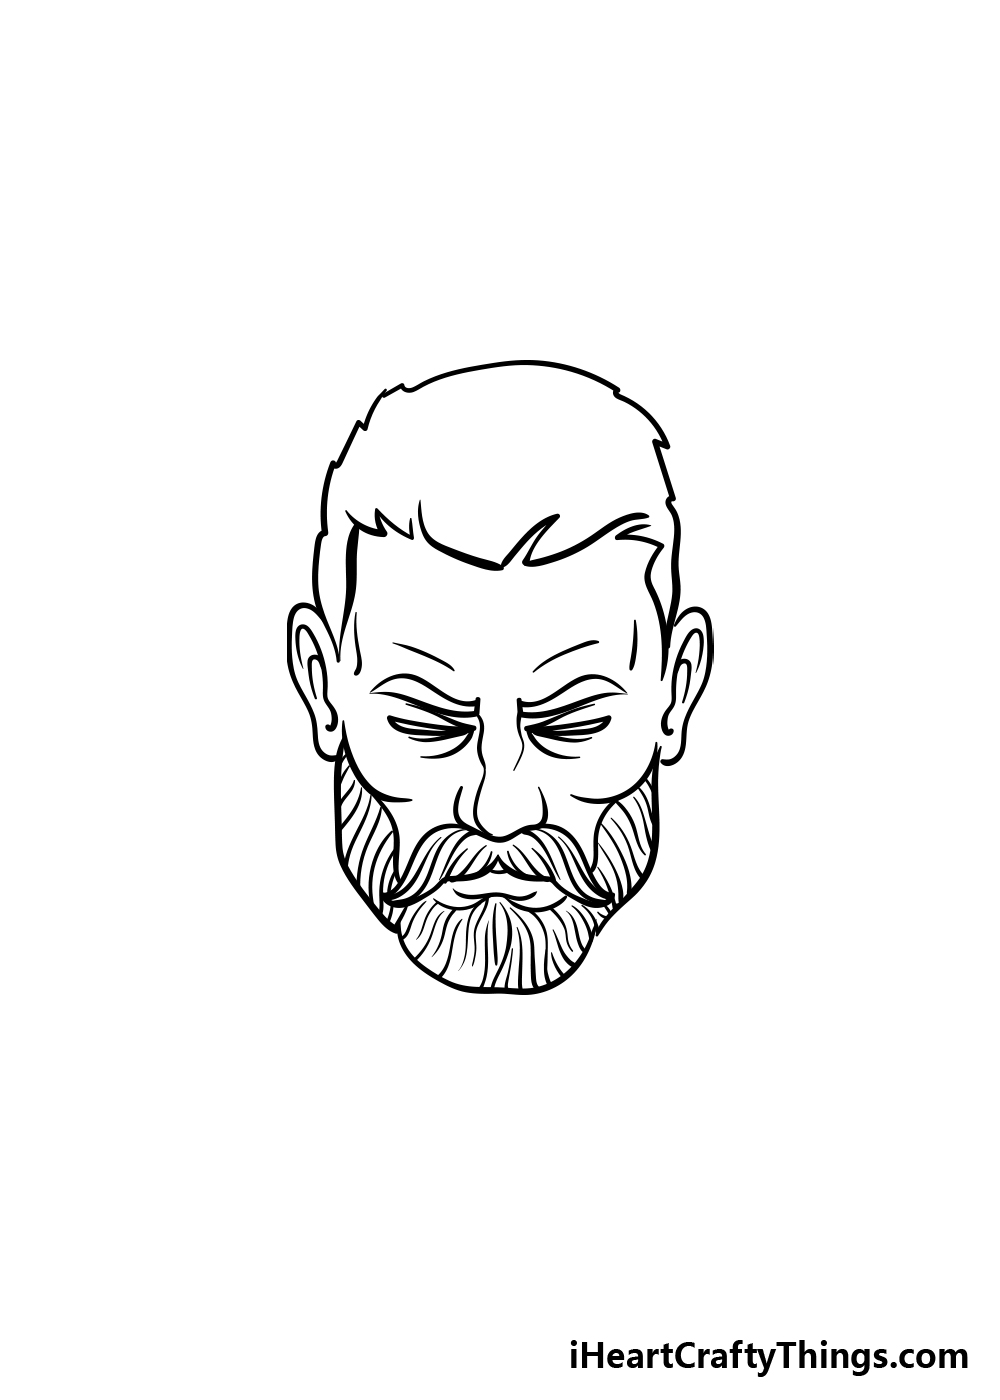
Step 1

For this first step of our guide on how to draw a beard, you will be drawing an outline with a pencil that you will use as a guide for later steps.
In our reference image, all lines that will be drawn with a pencil will be shown with a lighter grey, whereas lines that will be drawn with a pen will be drawn in black.
First, you can draw the pencil outline, which will mainly comprise the head and ears outline of the drawing.
Then, you can draw the hair outline on top of this pencil guide, and then you can also draw the eyebrow and nose details as shown in our reference image.
Some curved lines will also work for some cheekbone details beside the nose. Then, you can also add some lines for the closed eye of the face.
Once you have these details drawn, you’re ready for the next step!
Step 2 – Start adding more facial detail
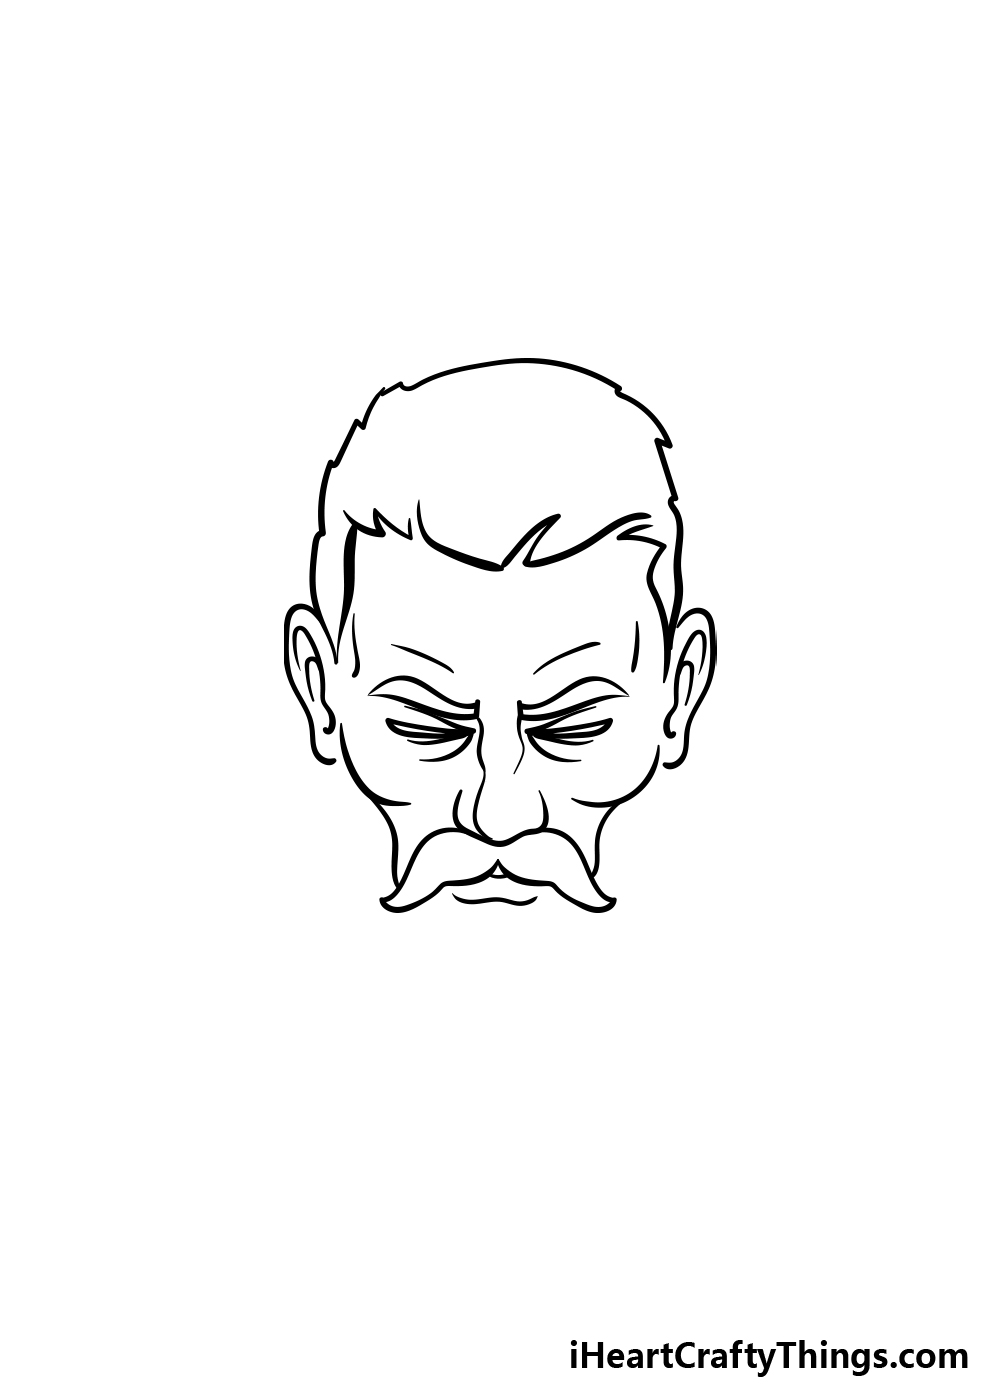
Now that you have the face pencil outline drawn and the first facial details, you can keep adding on to it for this next part of your beard drawing.
To get this step started, you can draw some more details for the ears to have them looking like our reference image.
Then, you can add a rounded mustache under the nose, and then you can draw the mouth underneath the mustache. You can also draw the other closed eye as it appears in our reference image.
Step 3 – Now, draw the jaw of your beard drawing
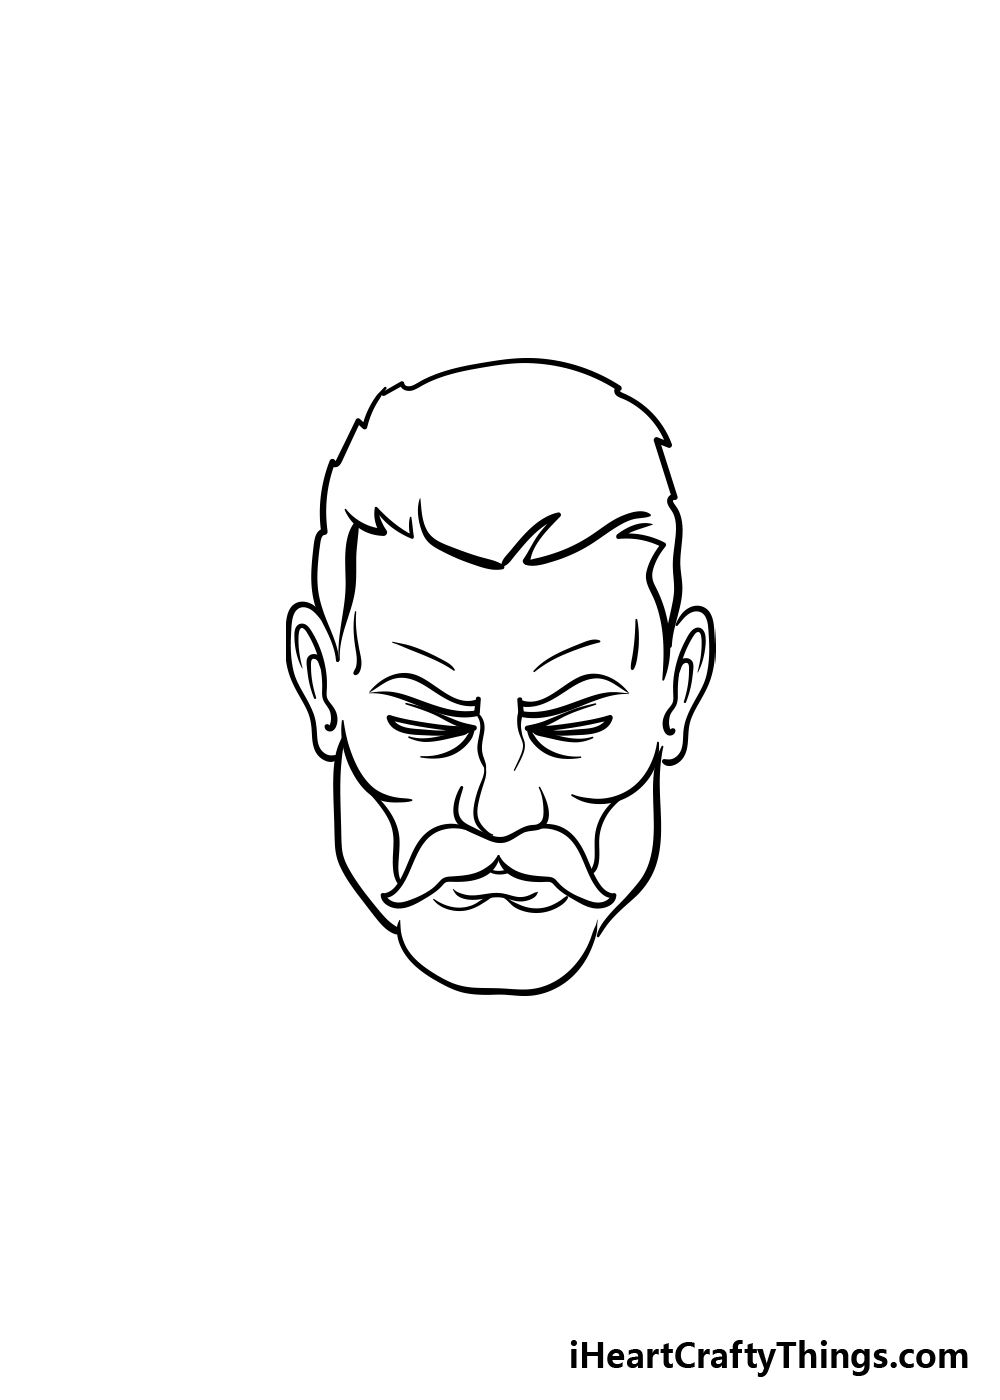
You have the top half of the face drawn, and for the next few steps you can start drawing the beard itself.
To do this, you will be drawing the beard outline as it appears in the reference image. You can use some sharply curved lines at the side for the jaw, and you can extend each line down from the ears.
Then, there will be another curved line at the bottom for the chin of your beard drawing. Now that you have the outline done, you will be adding some more details in the next few steps.
Step 4 – Add some details to the beard
You can start adding some details to the inner portion of the beard in this part of your beard drawing.
This step may look complicated, but if you take it slowly and follow the guide then you will definitely be able to do it!
You can add some curvy lines to the mustache and throughout the beard. The lines in the beard will be longer than the ones in the mustache.
Step 5 – Now, finish off the final details and also erase your pencil lines
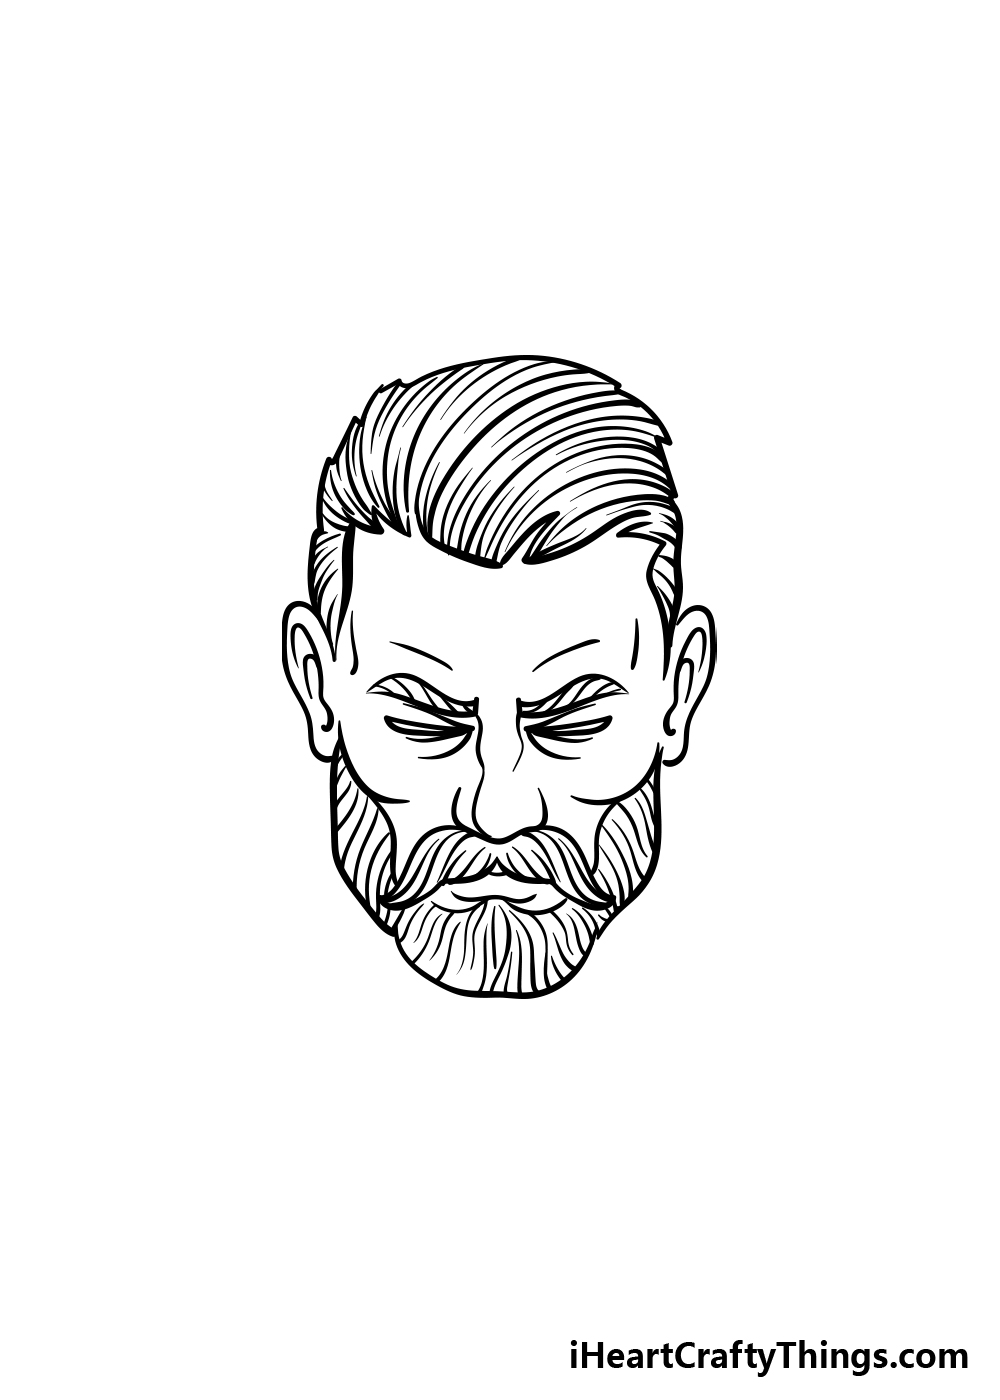
In this step of our guide on how to draw a beard, you will be adding the final details as well as erasing the pencil lines from the first step.
First, you can add more curved lines to the hair, and some of these will extend from the bottom of the hair to the top.
Some will only extend around halfway up the hair, and while you can follow the lines exactly you can also change it up a bit for your drawing!
Once you have these final details, you can start to erase the pencil lines from the first step. When you start erasing, you’ll want to make sure that the pen ink is dry before you erase. If you erase too soon then it may smudge the pen ink!
Before you move on to the final step, you can also add some of your own details.
You could draw the neck and shoulders of the man in the picture as one idea, but how do you think you’ll finish off this drawing before the final step?
Step 6 – Finish off your beard drawing with some color
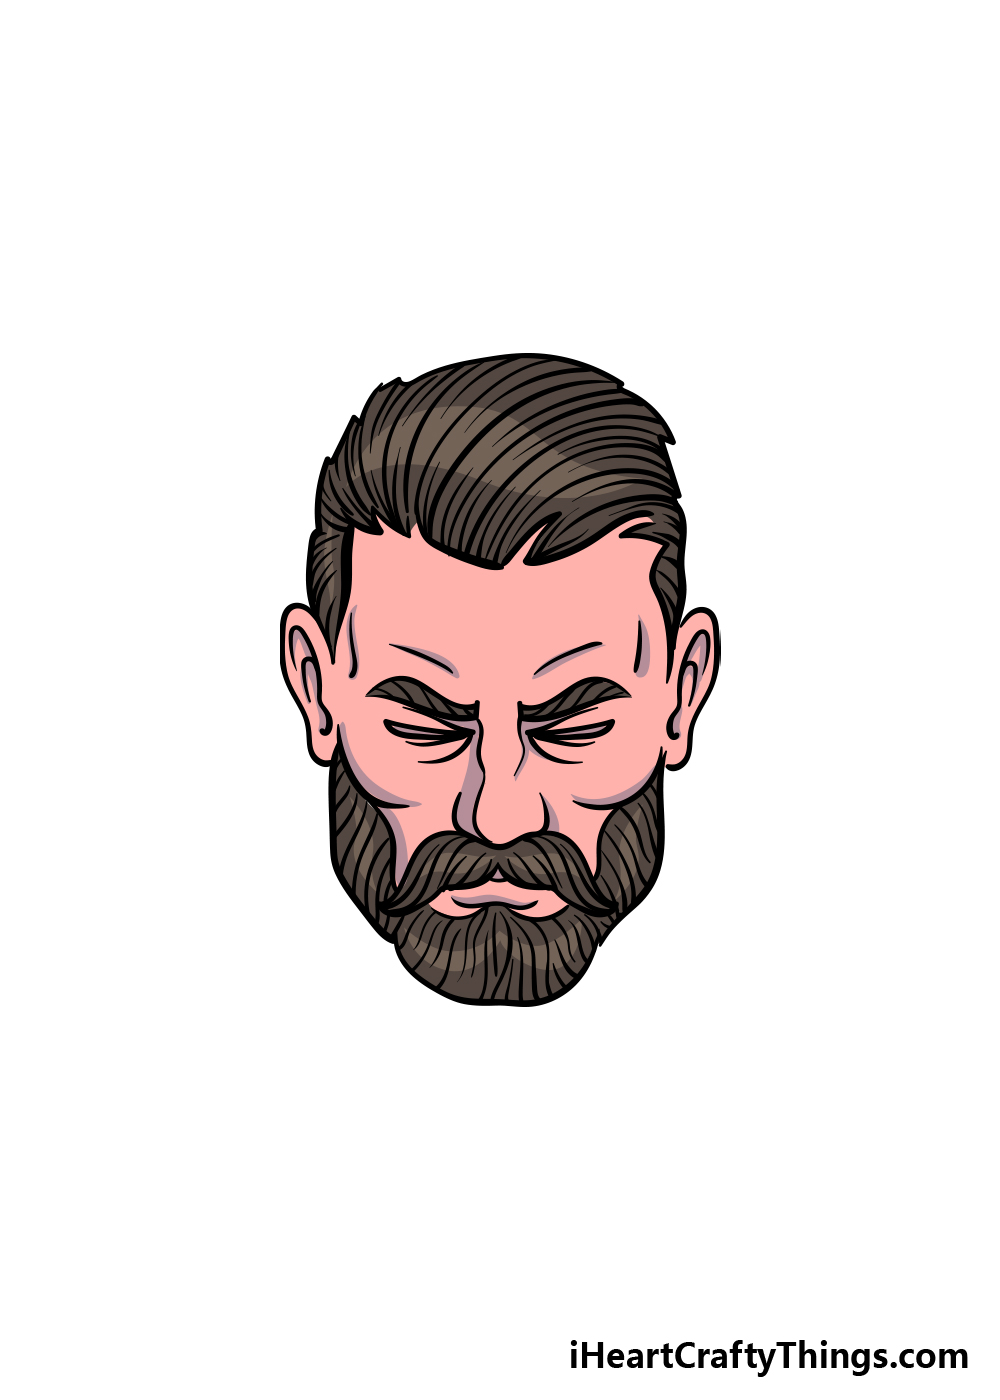
The sixth and final step of your beard drawing will see you adding some colors to your picture. As you can see in our reference image, we used a dark brown for the beard and the hair of the man.
This is just one idea out of many that you could use, however! For an extra fun detail, you could use the color of your own hair to color this in for a personal touch.
You could even use some more stylistic colors to color it in such as blues, greens and reds.
There are no wrong answers and you should really let your creativity flow! Once you know which colors you will use for your image, you can also have some fun deciding which art mediums you will use to finish it off.
Some watercolor paint would be great for a softer look to your image, but if you want a more vibrant look then you could use some acrylic paints and colored pens.
There are so many ways that you can color this in, so which colors and mediums will you use to finish it off?
5 Tips To Make Your Beard Drawing Even Better!
Make your beard sketch look even better with the help of these 5 tips.
This drawing of a beard that we created in this guide is fairly short and trimmed, but you could change the length if you wish to customize it.
This could be done by making it longer or even a bit shorter.
You would be able to maintain the style and the design while changing the length, so it would be easy to do while changing the look of the drawing quite a bit!
Next, if you want to take it a bit further then you could also change the style of the beard. Instead of the sharper look of this beard, you could make it look a bit wilder and more unruly.
Or, you could again go in the opposite direction and make it so short that it’s practically stubble.
Many people also like to style their beards, and you could do the same for this beard drawing. There are many famous beard styles, and you’ve probably seen some before.
If not, you could look up some pictures online of various beard styles. These could include larger mustaches and portions that have been shaved off.
Which style would you choose?
Once you’re happy with how the beard looks, you could then change the facial expression of the character in the picture. At the moment, his facial expression is neutral.
You could change this by making him look happier, angrier or any other emotion you like.
If you need some help with this, try to look in a mirror and make some facial expressions that you could use for the character.
Finally, you could take this beard sketch even further by adding a body and a background for the drawing. By adding a body, you could create some cool poses!
This is something you could do whether you changed the design or kept it as is. Once you have added a body, all that remains is to choose a background for your image.
Your Beard Drawing is Complete!
That brings you to the end of this guide on how to draw a beard in 6 steps! There were a lot of small and intricate details to this image, so it may have looked like a tough drawing to do.
Hopefully by using this guide you found it to be much easier than you expected!
Now you get to take over and add your own details, backgrounds, colors and art mediums. We can’t wait to see what you do!
When you’re ready for more drawing fun, you can visit our website for more awesome drawing guides. We also upload new guides all the time, so be sure to visit us there often!
We would also love to see your beard drawing when it’s done, so please feel free to share it on our Facebook and Pinterest pages for us to see!